# Table of Contents
- [Quick Start | Locksmith](#quick-start-locksmith)
- [A Locksmith Overview | Locksmith](#a-locksmith-overview-locksmith)
- [Creating locks | Locksmith](#creating-locks-locksmith)
- [Unknown](#unknown)
- [Unknown](#unknown)
- [Creating keys | Locksmith](#creating-keys-locksmith)
- [Removing Locksmith | Locksmith](#removing-locksmith-locksmith)
- [Approving customer registrations | Locksmith](#approving-customer-registrations-locksmith)
- [Creating restricted wholesale products | Locksmith](#creating-restricted-wholesale-products-locksmith)
- [Compatibility with other apps and Shopify features | Locksmith](#compatibility-with-other-apps-and-shopify-features-locksmith)
- [Selling digital content on Shopify | Locksmith](#selling-digital-content-on-shopify-locksmith)
- [Hiding product prices and/or the add to cart button | Locksmith](#hiding-product-prices-and-or-the-add-to-cart-button-locksmith)
- [Locksmith Glossary & Reference | Locksmith](#locksmith-glossary-reference-locksmith)
- [FAQ: I see blank spaces in my collections and/or searches when locking | Locksmith](#faq-i-see-blank-spaces-in-my-collections-and-or-searches-when-locking-locksmith)
- [What should I do if my site is loading slowly? | Locksmith](#what-should-i-do-if-my-site-is-loading-slowly-locksmith)
- [More developer docs... | Locksmith](#more-developer-docs-locksmith)
- [I'm the administrator of my site and I cannot access pages because of Locksmith locks. | Locksmith](#i-m-the-administrator-of-my-site-and-i-cannot-access-pages-because-of-locksmith-locks-locksmith)
- [Contact us | Locksmith](#contact-us-locksmith)
- [Can Locksmith hide content from my in-store search? | Locksmith](#can-locksmith-hide-content-from-my-in-store-search-locksmith)
- [Privacy policy | Locksmith](#privacy-policy-locksmith)
- [Data Processing Agreement | Locksmith](#data-processing-agreement-locksmith)
- [Locksmith Storefront API | Locksmith](#locksmith-storefront-api-locksmith)
- [Locksmith variables | Locksmith](#locksmith-variables-locksmith)
- [Usage agreement | Locksmith](#usage-agreement-locksmith)
- [Data policy | Locksmith](#data-policy-locksmith)
- [About key conditions | Locksmith](#about-key-conditions-locksmith)
- [Visitor location keys | Locksmith](#visitor-location-keys-locksmith)
- [Why aren't my locks working? | Locksmith](#why-aren-t-my-locks-working-locksmith)
- [Locksmith Admin API | Locksmith](#locksmith-admin-api-locksmith)
- [Locksmith is not working with my page builder app | Locksmith](#locksmith-is-not-working-with-my-page-builder-app-locksmith)
- [Unsupported functionality | Locksmith](#unsupported-functionality-locksmith)
- [Locksmith's pricing policy: Pay what feels good | Locksmith](#locksmith-s-pricing-policy-pay-what-feels-good-locksmith)
- [Customer account keys | Locksmith](#customer-account-keys-locksmith)
- [Secret link keys | Locksmith](#secret-link-keys-locksmith)
- [Requests from Locksmith | Locksmith](#requests-from-locksmith-locksmith)
- [Shopify's New Customer Accounts and Locksmith | Locksmith](#shopify-s-new-customer-accounts-and-locksmith-locksmith)
- [More about keys... | Locksmith](#more-about-keys-locksmith)
- [Combining key conditions | Locksmith](#combining-key-conditions-locksmith)
- [Passcode keys | Locksmith](#passcode-keys-locksmith)
- [Easy Appointment Booking | Locksmith](#easy-appointment-booking-locksmith)
- [Excluding content from locks | Locksmith](#excluding-content-from-locks-locksmith)
- [Inverting conditions in Locksmith | Locksmith](#inverting-conditions-in-locksmith-locksmith)
- [Manual mode | Locksmith](#manual-mode-locksmith)
- [Using the "Force open other locks" setting | Locksmith](#using-the-force-open-other-locks-setting-locksmith)
- [IP address keys | Locksmith](#ip-address-keys-locksmith)
- [Limiting the scope of variant locks using the product tag key condition | Locksmith](#limiting-the-scope-of-variant-locks-using-the-product-tag-key-condition-locksmith)
- ["Has purchased..." key | Locksmith](#-has-purchased-key-locksmith)
- [Custom Liquid key-condition basics | Locksmith](#custom-liquid-key-condition-basics-locksmith)
- [Newsletter keys | Locksmith](#newsletter-keys-locksmith)
- [Using the Admin API with Locks | Locksmith](#using-the-admin-api-with-locks-locksmith)
- [More FAQs... | Locksmith](#more-faqs-locksmith)
- [Can Locksmith protect shipping methods, billing methods, or discount codes? | Locksmith](#can-locksmith-protect-shipping-methods-billing-methods-or-discount-codes-locksmith)
- [My customers have to enter their e-mail address into the Mailchimp key every time they visit. | Locksmith](#my-customers-have-to-enter-their-e-mail-address-into-the-mailchimp-key-every-time-they-visit-locksmith)
- [I'm having trouble using Locksmith with a site speed optimization app. | Locksmith](#i-m-having-trouble-using-locksmith-with-a-site-speed-optimization-app-locksmith)
- [Why are my customers seeing a reCAPTCHA when logging in? | Locksmith](#why-are-my-customers-seeing-a-recaptcha-when-logging-in-locksmith)
- [Can Locksmith lock Shopify's public JSON API for my online store? | Locksmith](#can-locksmith-lock-shopify-s-public-json-api-for-my-online-store-locksmith)
- [The app isn't loading. What do I do? | Locksmith](#the-app-isn-t-loading-what-do-i-do-locksmith)
- [I switched themes, and Locksmith isn't working | Locksmith](#i-switched-themes-and-locksmith-isn-t-working-locksmith)
- [My infinite scrolling doesn't show all of my products. | Locksmith](#my-infinite-scrolling-doesn-t-show-all-of-my-products-locksmith)
- [My passcode or newsletter prompt is not updating on my store when I change it. | Locksmith](#my-passcode-or-newsletter-prompt-is-not-updating-on-my-store-when-i-change-it-locksmith)
- [My featured collections on my home page only show one product. | Locksmith](#my-featured-collections-on-my-home-page-only-show-one-product-locksmith)
- [The thing I want to lock isn't showing up in the Locksmith search | Locksmith](#the-thing-i-want-to-lock-isn-t-showing-up-in-the-locksmith-search-locksmith)
- [How do I know which customers have used a certain key? | Locksmith](#how-do-i-know-which-customers-have-used-a-certain-key-locksmith)
- [Why is Locksmith adding information to my orders? | Locksmith](#why-is-locksmith-adding-information-to-my-orders-locksmith)
- [Locksmith isn't installing correctly! | Locksmith](#locksmith-isn-t-installing-correctly-locksmith)
- [I am getting an "already taken" error when trying to create a metafield definition for seo.hidden | Locksmith](#i-am-getting-an-already-taken-error-when-trying-to-create-a-metafield-definition-for-seo-hidden-locksmith)
- [Locksmith is not uninstalling correctly! | Locksmith](#locksmith-is-not-uninstalling-correctly-locksmith)
- [What order are different types of key conditions evaluated in? | Locksmith](#what-order-are-different-types-of-key-conditions-evaluated-in-locksmith)
- [How do I change where customers are redirected to after registration on Shopify | Locksmith](#how-do-i-change-where-customers-are-redirected-to-after-registration-on-shopify-locksmith)
- [Why isn't my passcode, secret link, newsletter, or location key working? | Locksmith](#why-isn-t-my-passcode-secret-link-newsletter-or-location-key-working-locksmith)
- [How does Locksmith affect search engines and SEO? | Locksmith](#how-does-locksmith-affect-search-engines-and-seo-locksmith)
- [How do I add a hero banner image to Locksmith's access messages | Locksmith](#how-do-i-add-a-hero-banner-image-to-locksmith-s-access-messages-locksmith)
- [More tutorials... | Locksmith](#more-tutorials-locksmith)
- [Customizing the registration form | Locksmith](#customizing-the-registration-form-locksmith)
- [Use Locksmith and PayWhirl together to grant access based on subscriptions | Locksmith](#use-locksmith-and-paywhirl-together-to-grant-access-based-on-subscriptions-locksmith)
- [Customizing the customer login page | Locksmith](#customizing-the-customer-login-page-locksmith)
- [Showing multiple prompts on the same page | Locksmith](#showing-multiple-prompts-on-the-same-page-locksmith)
- [Setting up multiple price tiers | Locksmith](#setting-up-multiple-price-tiers-locksmith)
- [Customizing messages | Locksmith](#customizing-messages-locksmith)
- [Customizing the email list signup form | Locksmith](#customizing-the-email-list-signup-form-locksmith)
- [Liquid locking basics | Locksmith](#liquid-locking-basics-locksmith)
- [Restricting checkout from the cart | Locksmith](#restricting-checkout-from-the-cart-locksmith)
- [Passcode-specific redirects | Locksmith](#passcode-specific-redirects-locksmith)
- [Earn recurring revenue on your exclusive content using ReCharge | Locksmith](#earn-recurring-revenue-on-your-exclusive-content-using-recharge-locksmith)
- [Restricting customers to a specific collection | Locksmith](#restricting-customers-to-a-specific-collection-locksmith)
- [Use Locksmith and Seal Subscriptions to grant access based on subscriptions | Locksmith](#use-locksmith-and-seal-subscriptions-to-grant-access-based-on-subscriptions-locksmith)
- [Use a Klaviyo list or segment as an access control list | Locksmith](#use-a-klaviyo-list-or-segment-as-an-access-control-list-locksmith)
- [Confirmation key condition | Locksmith](#confirmation-key-condition-locksmith)
- [Customizing the passcode form | Locksmith](#customizing-the-passcode-form-locksmith)
- [Protecting against bots | Locksmith](#protecting-against-bots-locksmith)
- [How to use a private browsing session | Locksmith](#how-to-use-a-private-browsing-session-locksmith)
- [Hiding out-of-stock products | Locksmith](#hiding-out-of-stock-products-locksmith)
- [Grow your subscriber lists with Klaviyo | Locksmith](#grow-your-subscriber-lists-with-klaviyo-locksmith)
- [Showing content only to specific Markets | Locksmith](#showing-content-only-to-specific-markets-locksmith)
- [Use Mailchimp to collect customer emails | Locksmith](#use-mailchimp-to-collect-customer-emails-locksmith)
- [Granting access to variants by visitor input | Locksmith](#granting-access-to-variants-by-visitor-input-locksmith)
- [Input lists | Locksmith](#input-lists-locksmith)
- [Locking products by tag | Locksmith](#locking-products-by-tag-locksmith)
- [Offering different variants by postal code | Locksmith](#offering-different-variants-by-postal-code-locksmith)
- [Making a product accessible exclusively from the direct product link | Locksmith](#making-a-product-accessible-exclusively-from-the-direct-product-link-locksmith)
- [Restricting access to payment methods with Locksmith | Locksmith](#restricting-access-to-payment-methods-with-locksmith-locksmith)
- [Limiting the scope of variant locks using the product tag key condition | Locksmith](#limiting-the-scope-of-variant-locks-using-the-product-tag-key-condition-locksmith)
- [Redirecting using Locksmith | Locksmith](#redirecting-using-locksmith-locksmith)
- [Locking products by vendor | Locksmith](#locking-products-by-vendor-locksmith)
- [Manual mode | Locksmith](#manual-mode-locksmith)
- [How do I hide my Shopify store's header and footer | Locksmith](#how-do-i-hide-my-shopify-store-s-header-and-footer-locksmith)
- [Locking variants | Locksmith](#locking-variants-locksmith)
- [Using date and time key conditions | Locksmith](#using-date-and-time-key-conditions-locksmith)
- [Locking multiple pages at once | Locksmith](#locking-multiple-pages-at-once-locksmith)
- [Disabling Locksmith for certain theme files | Locksmith](#disabling-locksmith-for-certain-theme-files-locksmith)
- [Importing customers in bulk | Locksmith](#importing-customers-in-bulk-locksmith)
- [Creating private team areas | Locksmith](#creating-private-team-areas-locksmith)
- [How to hide theme sections, blocks, and snippets | Locksmith](#how-to-hide-theme-sections-blocks-and-snippets-locksmith)
- [Locking blog posts | Locksmith](#locking-blog-posts-locksmith)
- [How to access your browser's dev tools | Locksmith](#how-to-access-your-browser-s-dev-tools-locksmith)
- [Locking the search results page in your store | Locksmith](#locking-the-search-results-page-in-your-store-locksmith)
- [Locking the customer registration form | Locksmith](#locking-the-customer-registration-form-locksmith)
- [Grant access for a limited time when using passcodes or secret links | Locksmith](#grant-access-for-a-limited-time-when-using-passcodes-or-secret-links-locksmith)
- [How to clear cache for a single website | Locksmith](#how-to-clear-cache-for-a-single-website-locksmith)
- [Testing Locksmith on unpublished themes | Locksmith](#testing-locksmith-on-unpublished-themes-locksmith)
- [Hiding products and other content from lists in your online store | Locksmith](#hiding-products-and-other-content-from-lists-in-your-online-store-locksmith)
- [Creating weekly schedules | Locksmith](#creating-weekly-schedules-locksmith)
- [Locking the home page | Locksmith](#locking-the-home-page-locksmith)
- [Handling JavaScript DOM errors caused by variant locks | Locksmith](#handling-javascript-dom-errors-caused-by-variant-locks-locksmith)
- [Restricting a product so that it can only be purchased by new customers | Locksmith](#restricting-a-product-so-that-it-can-only-be-purchased-by-new-customers-locksmith)
- [Adding translations to your Locksmith messages | Locksmith](#adding-translations-to-your-locksmith-messages-locksmith)
- [Hiding navigation links for locked resources | Locksmith](#hiding-navigation-links-for-locked-resources-locksmith)
- [Setting up checkout validation with Locksmith | Locksmith](#setting-up-checkout-validation-with-locksmith-locksmith)
- [Restricting the cart for mixed products and combinations of products | Locksmith](#restricting-the-cart-for-mixed-products-and-combinations-of-products-locksmith)
- [Automatically managing the seo.hidden metafield using Locksmith | Locksmith](#automatically-managing-the-seo-hidden-metafield-using-locksmith-locksmith)
- [Unknown](#unknown)
- [Unknown](#unknown)
- [Unknown](#unknown)
- [Unknown](#unknown)
- [Unknown](#unknown)
- [Unknown](#unknown)
- [Unknown](#unknown)
- [Unknown](#unknown)
- [Unknown](#unknown)
- [Unknown](#unknown)
- [Unknown](#unknown)
- [Unknown](#unknown)
- [Unknown](#unknown)
- [Unknown](#unknown)
- [Unknown](#unknown)
- [Unknown](#unknown)
- [Unknown](#unknown)
- [Unknown](#unknown)
- [Unknown](#unknown)
- [Unknown](#unknown)
- [Unknown](#unknown)
- [Unknown](#unknown)
- [Unknown](#unknown)
- [Unknown](#unknown)
- [Unknown](#unknown)
- [Unknown](#unknown)
- [Unknown](#unknown)
- [Unknown](#unknown)
- [Unknown](#unknown)
- [Unknown](#unknown)
- [Unknown](#unknown)
- [Unknown](#unknown)
- [Unknown](#unknown)
- [Unknown](#unknown)
- [Unknown](#unknown)
- [Unknown](#unknown)
- [Unknown](#unknown)
- [Unknown](#unknown)
- [Unknown](#unknown)
- [Unknown](#unknown)
- [Unknown](#unknown)
- [Unknown](#unknown)
- [Unknown](#unknown)
- [Unknown](#unknown)
- [Unknown](#unknown)
- [Unknown](#unknown)
- [Unknown](#unknown)
- [Unknown](#unknown)
- [Unknown](#unknown)
- [Unknown](#unknown)
- [Unknown](#unknown)
- [Unknown](#unknown)
- [Unknown](#unknown)
- [Unknown](#unknown)
- [Unknown](#unknown)
- [Unknown](#unknown)
- [Unknown](#unknown)
- [Unknown](#unknown)
- [Unknown](#unknown)
- [Unknown](#unknown)
- [Unknown](#unknown)
- [Unknown](#unknown)
- [Unknown](#unknown)
- [Unknown](#unknown)
- [Unknown](#unknown)
- [Unknown](#unknown)
- [Unknown](#unknown)
- [Unknown](#unknown)
- [Unknown](#unknown)
- [Unknown](#unknown)
- [Unknown](#unknown)
- [Unknown](#unknown)
- [Unknown](#unknown)
- [Unknown](#unknown)
- [Unknown](#unknown)
- [Unknown](#unknown)
- [Unknown](#unknown)
- [Unknown](#unknown)
- [Unknown](#unknown)
- [Unknown](#unknown)
- [Unknown](#unknown)
- [Unknown](#unknown)
- [Unknown](#unknown)
- [Unknown](#unknown)
- [Unknown](#unknown)
- [Unknown](#unknown)
- [Unknown](#unknown)
- [Unknown](#unknown)
- [Unknown](#unknown)
- [Unknown](#unknown)
- [Unknown](#unknown)
- [Unknown](#unknown)
- [Unknown](#unknown)
- [Unknown](#unknown)
- [Unknown](#unknown)
- [Unknown](#unknown)
- [Unknown](#unknown)
- [Unknown](#unknown)
- [Unknown](#unknown)
- [Unknown](#unknown)
- [Unknown](#unknown)
- [Unknown](#unknown)
- [Unknown](#unknown)
- [Unknown](#unknown)
- [Unknown](#unknown)
- [Unknown](#unknown)
- [Unknown](#unknown)
- [Unknown](#unknown)
- [Unknown](#unknown)
- [Unknown](#unknown)
- [Unknown](#unknown)
- [Unknown](#unknown)
- [Unknown](#unknown)
- [Unknown](#unknown)
- [Unknown](#unknown)
- [Unknown](#unknown)
- [Unknown](#unknown)
- [Unknown](#unknown)
---
# Quick Start | Locksmith
For the complete documentation index, see [llms.txt](https://www.locksmith.guide/llms.txt)
. This page is also available as [Markdown](https://www.locksmith.guide/readme.md)
.
Locksmith is a tool for merchants on Shopify to restrict access to the content in the "Online Store" sales channel of their Shopify store. It's a simple tool, and in some cases can be set up in only a few minutes.
###
[](https://www.locksmith.guide/#to-get-started-open-up-locksmith-from-your-apps-list)
To get started, open up Locksmith from your apps list.
You'll be presented with the main page. The "Add new lock" section will be your first stop:

For a more detailed overview of what Locksmith is and how the app works, see our guide linked below:
[A Locksmith Overview](https://www.locksmith.guide/basics/overview)
###
[](https://www.locksmith.guide/#create-your-first-lock)
Create your first lock
To restrict access to something in your store, simply type in the name of a product, collection, page, variant, etc - you'll immediately start seeing search results. Alternatively, select a type from the dropdown to filter your search by resource type. Select the resource that you want, to place a lock on it:

**Note:** This input does not work with URLs.
**Tip:** A lock isn't limited to a single resource. After creating it, you can attach more resources of the same type (e.g. several products) from the **Protected resources** section of the lock editor, and give the lock a name to find it easily later. [More here](https://www.locksmith.guide/basics/creating-locks)
.
More information on (and help troubleshooting) lock creation here:
[Creating locks](https://www.locksmith.guide/basics/creating-locks)
###
[](https://www.locksmith.guide/#create-a-key)
Create a key
On the next page, press the "Add key" button to create a key:

Next, add at least one condition to your key. The most commonly-used key conditions will show up first, but **you can search or keep scrolling for more options.**

Simply select the condition that you want to use. Some conditions may ask you for some additional settings, you'll be prompted if appropriate.
**There are over 20 out-of-the-box key conditions**, and you can even create custom conditions! You can also combine key conditions in different ways to create unique access scenarios. For more information on that, and the complete list of key conditions, see the page here:
[Creating keys](https://www.locksmith.guide/basics/creating-keys)
**Note**: If you don't want to hide your product pages entirely, and instead only want to hide specific content on the product page, such as the prices or add-to-cart, we call this "manual locking", and it takes a couple extra steps beyond this guide. To get started with this, [check out our guide on that here](https://www.locksmith.guide/tutorials/hiding-prices)
.
###
[](https://www.locksmith.guide/#wait-for-locksmith-to-install-to-your-theme)
Wait for Locksmith to install to your theme
After you **save the lock**, Locksmith will usually take about 5-10 seconds to automatically update your theme. A green status bar will briefly show at the bottom of the page - once it is gone, the installation has finished.
You can now navigate to your locked content on your store front, and you should immediately see the restriction is now in place. Locksmith will automatically show the appropriate content, using the styling from your theme, on the page. The access denied content will correspond to the key condition that you used.
So, for example, if you chose a condition requiring a sign-in:

Or, if you chose a passcode-only entry method, you'll see a different prompt:

Each key condition type will have a slightly different landing page, the above two examples are not a complete list. The messages displayed on these pages can be customized as much as you need:
[Customizing messages](https://www.locksmith.guide/tutorials/more/customizing-messages)
**Important**: The Locksmith app only restricts content inside the "Online Store" sales channel. It won't work inside of other sales channels such as the Buy Button or the Wholesale sales channel.
[NextA Locksmith Overview](https://www.locksmith.guide/basics/overview)
Last updated 15 days ago
Was this helpful?
---
# A Locksmith Overview | Locksmith
For the complete documentation index, see [llms.txt](https://www.locksmith.guide/llms.txt)
. This page is also available as [Markdown](https://www.locksmith.guide/basics/overview.md)
.
Locksmith is a simple yet powerful tool to help you make sure the right people see the right things in your Shopify store. In the spirit of the name of our app - ✨ Locksmith ✨ - you'll be using "locks" to determine what content in your store is restricted and using "keys" to denote how, when, and who gets access.
###
[](https://www.locksmith.guide/basics/overview#locks)
Locks
Locks are created using the search bar within our Locksmith app. You can search for most resources in your store by name. More in-depth information on the in-app search bar here:
[Creating locks →](https://www.locksmith.guide/basics/creating-locks)
A **lock** restricts access to something on your shop. You can lock:
* Your entire shop
* Pages
* Products
* Collections
* Prices [more information here](https://www.locksmith.guide/tutorials/hiding-prices)
* The shopping cart (useful for preventing checkout until a condition is met)
* The login page
* The registration page (type 'register' into the Locksmith search bar)
* Product variants
A single lock can protect **multiple resources of the same type** — for example several products, or several collections — so one set of keys can cover a whole group at once. Manage a lock's resources from the **Protected resources** section of the lock editor, and give the lock an optional **name** (via the pencil icon in the header) to keep your lock list tidy. [More on creating locks →](https://www.locksmith.guide/basics/creating-locks)
For more advanced use cases, you can also create **custom Liquid locks** — these let you lock content based on any condition you can express in Liquid. Create one by clicking the _Start a Liquid Lock_ link above the Locksmith search bar.
####
[](https://www.locksmith.guide/basics/overview#lock-options)
Lock options
After selecting a resource and clicking Save, you'll see a set of options for that lock. The most commonly used ones are:
* **Is the lock currently active?** Toggle the lock on or off without deleting it.
* **Should it also protect the products in this collection?** Disabling this means only the collection page itself will be locked, not the individual product pages within it.
* **Should it hide the collection, and its products, from search results and other lists?**
* **Should it hide links to this resource from navigation?**
You'll see different options depending on what type of resource you've locked. There are also additional options available under the **Advanced** section, including manual locking mode [more on that here](https://www.locksmith.guide/keys/more/manual-mode)
.
###
[](https://www.locksmith.guide/basics/overview#keys)
Keys
A **key** permits access to the locked resource based on your criteria. Keys are created on the lock page using the "+ Add key" button.
Keys allow you to specify the exact conditions that give your customers access to the locked resource. There are over 20 built-in key conditions to choose from. You can also create your own **custom Liquid keys** by choosing _custom Liquid_ from the keys menu.
More information on creating keys here:
[Creating keys →](https://www.locksmith.guide/basics/creating-keys)
####
[](https://www.locksmith.guide/basics/overview#combining-conditions-or-versus-and)
Combining conditions: OR versus AND
Locksmith gives you the flexibility to add multiple keys and logically combine them to create unique access scenarios.
**OR** — Add another separate key to your lock by clicking _Add Another Key_. Keys connected by OR can individually open your lock, regardless of whether the other keys' conditions are met. A customer only needs to satisfy one condition to gain access.
You can tell you're looking at OR keys because there are **multiple key symbols**, each preceded by "Permit if the customer..." text.

**AND** — Add another condition to the _same_ key by clicking _\+ add key condition_ below an existing condition. When conditions are connected by AND, **all** of them must be met before access is granted.
You can tell you're looking at AND conditions because there is **only one key symbol**, with each condition inset beneath it.

[Combining key conditions →](https://www.locksmith.guide/keys/more/combining-key-conditions)
####
[](https://www.locksmith.guide/basics/overview#inverting-keys)
Inverting keys
All key conditions can be inverted — meaning Locksmith will check for the _opposite_ of the original condition. To invert a key, click the "invert" box in the upper right of the key.
For example, using inversion on a location key gives you: _Permit if the customer is_ _**not**_ _visiting from the United States._
[Inverting conditions in Locksmith →](https://www.locksmith.guide/keys/more/inverting-conditions-in-locksmith)
###
[](https://www.locksmith.guide/basics/overview#other-useful-settings)
Other useful settings
####
[](https://www.locksmith.guide/basics/overview#the-force-open-other-locks-setting)
The "force open other locks" setting
If you have several locks covering overlapping content (e.g. locked collections that share some of the same products), you may want to enable the **"force open other locks"** setting on a key. This tells Locksmith to grant access to all content covered by the current lock, even if other locks might otherwise apply.
[Using the "Force open other locks" setting →](https://www.locksmith.guide/keys/more/using-the-force-open-other-locks-setting)
####
[](https://www.locksmith.guide/basics/overview#cart-and-checkout-validation)
Cart and checkout validation
Locksmith also has a checkout validation feature, which lets you create a rule ensuring that products with a specific product tag can only be purchased by customers with a specific customer tag — without modifying the checkout UI itself.
[Setting up checkout validation with Locksmith →](https://www.locksmith.guide/tutorials/more/setting-up-checkout-validation-with-locksmith)
* * *
###
[](https://www.locksmith.guide/basics/overview#questions)
Questions?
Feel free to reach out at any time. You can contact us via email at [**team@uselocksmith.com**](mailto:team@uselocksmith.com)
.
[PreviousQuick Start](https://www.locksmith.guide/)
[NextCreating locks](https://www.locksmith.guide/basics/creating-locks)
Last updated 15 days ago
Was this helpful?
* [Locks](https://www.locksmith.guide/basics/overview#locks)
* [Keys](https://www.locksmith.guide/basics/overview#keys)
* [Other useful settings](https://www.locksmith.guide/basics/overview#other-useful-settings)
* [Questions?](https://www.locksmith.guide/basics/overview#questions)
Was this helpful?
---
# Creating locks | Locksmith
For the complete documentation index, see [llms.txt](https://www.locksmith.guide/llms.txt)
. This page is also available as [Markdown](https://www.locksmith.guide/basics/creating-locks.md)
.
Locks are how Locksmith controls access to content in your store. To create a lock, simply search for the resource you want to protect, select it, and then configure your access conditions (keys). A single lock can protect more than one resource — see [Protecting multiple resources with one lock](https://www.locksmith.guide/basics/creating-locks#protecting-multiple-resources-with-one-lock)
below. This guide walks you through everything you need to know to get started.
###
[](https://www.locksmith.guide/basics/creating-locks#what-is-searchable)
**What Is Searchable**
Use the search bar within Locksmith to find and lock any of the following resource types:
* **Products**
* **Collections**
* **Pages** — more info on Shopify pages here: [Pages](https://help.shopify.com/en/manual/online-store/os/pages)
* **Variants** — more info on Shopify product variants here: [Variants](https://help.shopify.com/en/manual/products/variants)
* **Blogs** — more info on Shopify blogs here: [Blogs](https://help.shopify.com/en/manual/online-store/os/blogs)
* **Blog posts** (also called articles) — articles must be tagged first; the tag is then searchable. More info on blog posts here: [Articles](https://help.shopify.com/en/manual/online-store/os/blogs/writing-blogs)
* **Product vendors**
To search, type the name of your resource into the search bar. Use specific terms. For example, "Long Sleeved T-shirt" rather than a broad term like "shirt".

###
[](https://www.locksmith.guide/basics/creating-locks#what-is-not-searchable)
What is not searchable
The following cannot be directly locked via search:
* **Product tags** — to lock products that share a tag, create an Automated Collection and lock that instead.
* **Third-party app pages —** sometimes, a liquid lock can handle this, using the canonical\_url object.
* **Any page outside of your Online Store**
* **Menus and menu links** — menu links aren't directly lockable, but links pointing to lockable resources (such as products or collections) can be hidden from unauthorized visitors. To enable this, turn on the "Hide any links to this \[resource\] in your shop's navigation menus" option under the lock's Settings.
###
[](https://www.locksmith.guide/basics/creating-locks#specifying-a-resource-type-when-searching)
Specifying a resource type when searching
If a search returns too many results, or returns an error, you can narrow things down by specifying the resource type using this syntax:
* `product:snowboard`
* `collection:snowboards`
* `page:about snowboards`
* `blog:life is snowboarding`
**Hint**: If you're searching for a resource, but not getting the result you're looking for, try updating Locksmith to re-sync. Head over to the Help page in the app, and click the Update Locksmith button.
###
[](https://www.locksmith.guide/basics/creating-locks#protecting-multiple-resources-with-one-lock)
Protecting multiple resources with one lock
A single lock can protect more than one resource at a time, as long as they're **the same type** — for example, several products, or several collections. This is handy when the same access rule should apply to a group of resources: you set up the keys once, on one lock, instead of recreating the same key over and over.
Once you've created a lock, scroll to the **Protected resources** section of the lock editor. Use the **Add \[resource\]** button to search for and attach more resources of the same type, and use the remove control on any chip to detach one. These changes are staged and take effect when you **Save** the lock, alongside any other settings you've changed.

The Protected resources section lists everything a lock protects. Use Add to attach more.
Clicking **Add \[resource\]** opens a picker where you can search your store and select another resource to attach:

The resource picker. Search, then select a resource to add it to the lock.
**Mixing types isn't supported.** A lock protects resources of a single type — a products lock holds products, a collections lock holds collections, and so on. To protect different kinds of resources, create a separate lock for each type.
**Don't see an "Add resource" button?** Multi-resource locks require Locksmith to have updated permissions on your store. If you installed Locksmith before this feature shipped, you may see a prompt to grant access — follow it, and the **Add \[resource\]** affordance will appear. Until then, each lock is limited to a single resource.
###
[](https://www.locksmith.guide/basics/creating-locks#naming-your-lock)
Naming your lock
Locks can be given an optional **name** to make them easier to find in your lock list. Click the pencil icon next to the lock's title in the editor header, type a name, and confirm with Enter (or the checkmark). A name is purely for your own organization — it doesn't change what the lock protects.
If you don't name a lock, Locksmith labels it automatically using its resources: the first resource's title, plus a "+ N more" suffix and a count badge (for example, "4 collections") when the lock protects several resources.
###
[](https://www.locksmith.guide/basics/creating-locks#locking-your-entire-store)
Locking your entire store
Click into the search bar and select "Entire store" from the dropdown.

####
[](https://www.locksmith.guide/basics/creating-locks#excluding-resources-from-the-store-lock)
Excluding resources from the store lock
The store lock settings page includes options to keep certain areas accessible to everyone:
* Allow access to the home page
* Allow access to policy pages
* Allow access to customer areas
For anything not covered by those options, see our guide on excluding content from locks:
[Excluding content from locks](https://www.locksmith.guide/keys/more/excluding-content-from-locks)
###
[](https://www.locksmith.guide/basics/creating-locks#locking-all-products-in-your-store)
Locking all products in your store
By default, Shopify stores feature an 'All' collection that automatically encompasses all products in the store. Locking this collection offers an efficient method to secure all products in your Shopify store simultaneously, without the need to lock the entire store.
This collection can be locked just like any other collection. Search for the collection title 'all', select 'Collection: All' from the list of results, and follow the steps to create your lock.

###
[](https://www.locksmith.guide/basics/creating-locks#a-note-about-liquid-locks)
A note about Liquid locks
For resources that aren't searchable through the standard search bar, Locksmith offers "Liquid locks" — a more flexible option that lets you target nonstandard resources or custom groups of pages.
To start a Liquid lock, click into the search bar and select "Start a Liquid Lock".

For more detail, see our guide on Liquid locking basics:
[Liquid locking basics](https://www.locksmith.guide/tutorials/more/liquid-locking-basics)
###
[](https://www.locksmith.guide/basics/creating-locks#troubleshooting)
Troubleshooting
_My resource isn't showing up in search_
If something isn't appearing in search results, try the following:
* Use fewer, more specific search terms.
* Search by name rather than pasting in a URL — URLs won't work in most cases.
* For variants, include the variant option in your search. For example: "Color" equals "blue".
* If you've recently created the resource, it may not yet be indexed — try updating Locksmith (see below).
_Updating Locksmith_
Updating Locksmith refreshes its index of your store's resources, which can resolve search issues.
1. Open the Locksmith app and navigate to the "Help" page.
2. Click on the "Update Locksmith" button. 
3. When the blue bar at the bottom of the screen disappears, the update is complete. This should only take a few seconds.
As always, if you have questions or issues **please feel free to get in touch with us** at team@uselocksmith.com.
[PreviousA Locksmith Overview](https://www.locksmith.guide/basics/overview)
[NextCreating keys](https://www.locksmith.guide/basics/creating-keys)
Last updated 15 days ago
Was this helpful?
* [What Is Searchable](https://www.locksmith.guide/basics/creating-locks#what-is-searchable)
* [What is not searchable](https://www.locksmith.guide/basics/creating-locks#what-is-not-searchable)
* [Specifying a resource type when searching](https://www.locksmith.guide/basics/creating-locks#specifying-a-resource-type-when-searching)
* [Protecting multiple resources with one lock](https://www.locksmith.guide/basics/creating-locks#protecting-multiple-resources-with-one-lock)
* [Naming your lock](https://www.locksmith.guide/basics/creating-locks#naming-your-lock)
* [Locking your entire store](https://www.locksmith.guide/basics/creating-locks#locking-your-entire-store)
* [Locking all products in your store](https://www.locksmith.guide/basics/creating-locks#locking-all-products-in-your-store)
* [A note about Liquid locks](https://www.locksmith.guide/basics/creating-locks#a-note-about-liquid-locks)
* [Troubleshooting](https://www.locksmith.guide/basics/creating-locks#troubleshooting)
Was this helpful?
---
# Unknown
\> For the complete documentation index, see \[llms.txt\](https://www.locksmith.guide/llms.txt). Markdown versions of documentation pages are available by appending \`.md\` to page URLs; this page is available as \[Markdown\](https://www.locksmith.guide/readme.md). # Quick Start Locksmith is a tool for merchants on Shopify to restrict access to the content in the "Online Store" sales channel of their Shopify store. It's a simple tool, and in some cases can be set up in only a few minutes. ### To get started, open up Locksmith from your apps list. You'll be presented with the main page. The "Add new lock" section will be your first stop:

For a more detailed overview of what Locksmith is and how the app works, see our guide linked below: {% content-ref url="/pages/-MUeGYwG3r9J1oH2nDz1" %} \[A Locksmith Overview\](/basics/overview.md) {% endcontent-ref %} ### Create your first lock To restrict access to something in your store, simply type in the name of a product, collection, page, variant, etc - you'll immediately start seeing search results. Alternatively, select a type from the dropdown to filter your search by resource type. Select the resource that you want, to place a lock on it: !\[\](/files/cGjKhTnh5LMSVDnK3Pi0) {% hint style="warning" %} \*\*Note:\*\* This input does not work with URLs. {% endhint %} {% hint style="info" %} \*\*Tip:\*\* A lock isn't limited to a single resource. After creating it, you can attach more resources of the same type (e.g. several products) from the \*\*Protected resources\*\* section of the lock editor, and give the lock a name to find it easily later. \[More here\](/basics/creating-locks.md). {% endhint %} More information on (and help troubleshooting) lock creation here: {% content-ref url="/pages/M9JRoxsNMqxR7taTbDTe" %} \[Creating locks\](/basics/creating-locks.md) {% endcontent-ref %} ### Create a key On the next page, press the "Add key" button to create a key:

Next, add at least one condition to your key. The most commonly-used key conditions will show up first, but \*\*you can search or keep scrolling for more options.\*\*

Simply select the condition that you want to use. Some conditions may ask you for some additional settings, you'll be prompted if appropriate. \*\*There are over 20 out-of-the-box key conditions\*\*, and you can even create custom conditions! You can also combine key conditions in different ways to create unique access scenarios. For more information on that, and the complete list of key conditions, see the page here: {% content-ref url="/pages/BbEIkISi5XdTtEe4SKt1" %} \[Creating keys\](/basics/creating-keys.md) {% endcontent-ref %} {% hint style="info" %} \*\*Note\*\*: If you don't want to hide your product pages entirely, and instead only want to hide specific content on the product page, such as the prices or add-to-cart, we call this "manual locking", and it takes a couple extra steps beyond this guide. To get started with this, \[check out our guide on that here\](/tutorials/hiding-prices.md). {% endhint %} ### Wait for Locksmith to install to your theme After you \*\*save the lock\*\*, Locksmith will usually take about 5-10 seconds to automatically update your theme. A green status bar will briefly show at the bottom of the page - once it is gone, the installation has finished. You can now navigate to your locked content on your store front, and you should immediately see the restriction is now in place. Locksmith will automatically show the appropriate content, using the styling from your theme, on the page. The access denied content will correspond to the key condition that you used. So, for example, if you chose a condition requiring a sign-in: !\[\](/files/H30RX2WLD6p0pQj037Zy) Or, if you chose a passcode-only entry method, you'll see a different prompt: !\[\](/files/1VxveccttLgAs0lgA3S4) Each key condition type will have a slightly different landing page, the above two examples are not a complete list. The messages displayed on these pages can be customized as much as you need: {% content-ref url="/pages/YN4tss8Ren6LqyAQ78LD" %} \[Customizing messages\](/tutorials/more/customizing-messages.md) {% endcontent-ref %} {% hint style="danger" %} \*\*Important\*\*: The Locksmith app only restricts content inside the "Online Store" sales channel. It won't work inside of other sales channels such as the Buy Button or the Wholesale sales channel. {% endhint %} --- # Agent Instructions This documentation is published with GitBook. GitBook is the documentation platform designed so that both humans and AI agents can read, navigate, and reason over technical content effectively. Learn more at gitbook.com. ## Querying This Documentation If you need additional information that is not directly available in this page, you can query the documentation dynamically by asking a question. Perform an HTTP GET request on the current page URL with the \`ask\` query parameter, and the optional \`goal\` query parameter: \`\`\` GET https://www.locksmith.guide/readme.md?ask=&goal= \`\`\` \`ask\` is the immediate question: it should be specific, self-contained, and written in natural language. \`goal\` is optional and describes the broader end goal you are ultimately trying to accomplish on behalf of the user. GitBook uses it to tailor the answer towards what is most useful for that goal. The response will contain a direct answer to the question and relevant excerpts and sources from the documentation. Use this mechanism when the answer is not explicitly present in the current page, you need clarification or additional context, or you want to retrieve related documentation sections.
---
# Unknown
\# Locksmith ## Locksmith - \[Quick Start\](https://www.locksmith.guide/readme.md): Basic guide to using the Locksmith app to restrict access to content in your Shopify Online Store - \[A Locksmith Overview\](https://www.locksmith.guide/basics/overview.md) - \[Creating locks\](https://www.locksmith.guide/basics/creating-locks.md): How to use Locksmith's in-app search bar to create a lock - \[Creating keys\](https://www.locksmith.guide/basics/creating-keys.md): Explore the types of key conditions that Locksmith makes available to you. - \[Compatibility with other apps and Shopify features\](https://www.locksmith.guide/basics/compatibility.md) - \[Removing Locksmith\](https://www.locksmith.guide/basics/removing-locksmith.md) - \[Locksmith Glossary & Reference\](https://www.locksmith.guide/basics/locksmith-glossary-and-reference.md) - \[Approving customer registrations\](https://www.locksmith.guide/tutorials/approving-customer-registrations.md): How to use the Locksmith app to approve customer registrations on your Shopify Online Store - \[Creating restricted wholesale products\](https://www.locksmith.guide/tutorials/locksmith-wholesale.md): How to use the Locksmith app to restrict access to wholesale products or wholesale-only content in your Shopify Online Store - \[Hiding product prices and/or the add to cart button\](https://www.locksmith.guide/tutorials/hiding-prices.md): How to use the Locksmith app to hide or "lock" specific page content on your Shopify Online Store - \[Selling digital content on Shopify\](https://www.locksmith.guide/tutorials/selling-digital-content-on-shopify.md): How to use the Locksmith app to sell digital content on Shopify - \[More tutorials...\](https://www.locksmith.guide/tutorials/more.md): Check the following or simply use the search bar in the header to quickly find the topic that you're looking for! - \[Setting up multiple price tiers\](https://www.locksmith.guide/tutorials/more/price-tiers.md): How to use the Locksmith app set up restricted prices levels on your Shopify Online Store - \[Customizing messages\](https://www.locksmith.guide/tutorials/more/customizing-messages.md) - \[Customizing the customer login page\](https://www.locksmith.guide/tutorials/more/customizing-the-customer-login-page.md): Customizing the login form shown on a page locked by Locksmith in your Shopify Online Shop - \[Customizing the registration form\](https://www.locksmith.guide/tutorials/more/customizing-the-registration-form.md) - \[Customizing the passcode form\](https://www.locksmith.guide/tutorials/more/customizing-the-passcode-form.md): Locksmith gives you flexibility in how you can customize the passcode form! - \[Customizing Locksmith’s "Access denied content" messages, and redirecting customers\](https://www.locksmith.guide/tutorials/more/customising-locksmiths-access-denied-content-messages-and-redirecting-customers.md) - \[Customizing the email list signup form\](https://www.locksmith.guide/tutorials/more/customizing-the-email-list-signup-form.md): An overview of the ways you can customize the the email list sign up prompt for our newsletter key conditions - \[Showing multiple prompts on the same page\](https://www.locksmith.guide/tutorials/more/showing-multiple-prompts-on-the-same-page.md): How to set up Locksmith to show more than one input form when using more than one condition type on the same page - \[Showing content only to specific Markets\](https://www.locksmith.guide/tutorials/more/shopify-markets.md): How to use the Locksmith app to restrict content in your different Markets on your Shopify: Online Store sales channel - \[Input lists\](https://www.locksmith.guide/tutorials/more/input-lists.md): How to use Locksmith's Input List feature to work with large numbers of inputs - \[Protecting against bots\](https://www.locksmith.guide/tutorials/more/protecting-against-bots.md): A strategy to protect your products from bots and unapproved resellers purchasing from your Shopify Online Store - \[Earn recurring revenue on your exclusive content using ReCharge\](https://www.locksmith.guide/tutorials/more/recharge.md) - \[Use Locksmith and PayWhirl together to grant access based on subscriptions\](https://www.locksmith.guide/tutorials/more/use-locksmith-and-paywhirl-together-to-grant-access-based-on-subscriptions.md) - \[Use Locksmith and Seal Subscriptions to grant access based on subscriptions\](https://www.locksmith.guide/tutorials/more/use-locksmith-and-seal-subscriptions-to-grant-access-based-on-subscriptions.md) - \[Liquid locking basics\](https://www.locksmith.guide/tutorials/more/liquid-locking-basics.md) - \[Restricting checkout from the cart\](https://www.locksmith.guide/tutorials/more/restricting-checkout-from-the-cart.md): How to use the Locksmith app to add checkout restrictions on your Shopify Online Store - \[Confirmation key condition\](https://www.locksmith.guide/tutorials/more/editing-the-confirmation-message.md): Ask for a simple confirmation before granting access to content in your Shopify Online Store sales channel. - \[Restricting customers to a specific collection\](https://www.locksmith.guide/tutorials/more/restricting-customers-to-a-specific-collection.md) - \[Passcode-specific redirects\](https://www.locksmith.guide/tutorials/more/passcode-specific-redirects.md) - \[Grow your subscriber lists with Klaviyo\](https://www.locksmith.guide/tutorials/more/klaviyo.md) - \[Use a Klaviyo list or segment as an access control list\](https://www.locksmith.guide/tutorials/more/use-a-klaviyo-list-or-segment-as-an-access-control-list.md): Locksmith allows you to use an already-existing Klaviyo list or segment to determine who gets access to your locked content. - \[Use Mailchimp to collect customer emails\](https://www.locksmith.guide/tutorials/more/mailchimp.md) - \[Hiding out-of-stock products\](https://www.locksmith.guide/tutorials/more/hiding-out-of-stock-products.md) - \[How to use a private browsing session\](https://www.locksmith.guide/tutorials/more/how-to-use-a-private-browsing-session.md) - \[Granting access to variants by visitor input\](https://www.locksmith.guide/tutorials/more/granting-access-to-variants-by-visitor-input.md) - \[Offering different variants by postal code\](https://www.locksmith.guide/tutorials/more/offering-different-variants-by-postal-code.md) - \[Locking products by tag\](https://www.locksmith.guide/tutorials/more/locking-products-by-tag.md) - \[Locking multiple pages at once\](https://www.locksmith.guide/tutorials/more/locking-multiple-pages-at-once.md) - \[Making a product accessible exclusively from the direct product link\](https://www.locksmith.guide/tutorials/more/making-a-product-accessible-exclusively-from-the-direct-product-link.md) - \[Creating private team areas\](https://www.locksmith.guide/tutorials/more/creating-private-team-areas.md) - \[Importing customers in bulk\](https://www.locksmith.guide/tutorials/more/importing-customers-in-bulk.md) - \[Disabling Locksmith for certain theme files\](https://www.locksmith.guide/tutorials/more/disabling-locksmith-for-certain-theme-files.md): How to tell Locksmith to completely ignore specific files in your theme - \[Adding translations to your Locksmith messages\](https://www.locksmith.guide/tutorials/more/adding-translations-to-your-locksmith-messages.md): This guide shows you how to use the translation filter built into Liquid to simplify translating your Locksmith messages - \[Redirecting using Locksmith\](https://www.locksmith.guide/tutorials/more/redirecting-using-locksmith.md): How to use the Locksmith app's redirecting features to make sure your customers arrive on the intended page - \[Locking variants\](https://www.locksmith.guide/tutorials/more/locking-variants.md) - \[Limiting the scope of variant locks using the product tag key condition\](https://www.locksmith.guide/tutorials/more/locking-variants/limiting-the-scope-of-variant-locks-using-the-product-tag-key-condition.md) - \[Handling JavaScript DOM errors caused by variant locks\](https://www.locksmith.guide/tutorials/more/locking-variants/javascript-dom-errors.md) - \[Locking the customer registration form\](https://www.locksmith.guide/tutorials/more/locking-the-customer-registration-form.md) - \[Locking the search results page in your store\](https://www.locksmith.guide/tutorials/more/locking-the-search-results-page-in-your-store.md) - \[How to clear cache for a single website\](https://www.locksmith.guide/tutorials/more/how-to-clear-cache-for-a-single-website.md) - \[Manual mode\](https://www.locksmith.guide/tutorials/more/manual-mode.md): Restricting access to only specific parts of a page in your Shopify Online Store - \[Grant access for a limited time when using passcodes or secret links\](https://www.locksmith.guide/tutorials/more/grant-access-for-a-limited-time-when-using-passcodes-or-secret-links.md): How to use Locksmith's 'timeout' feature to limit access time - \[Testing Locksmith on unpublished themes\](https://www.locksmith.guide/tutorials/more/testing-locksmith-on-unpublished-themes.md) - \[Locking blog posts\](https://www.locksmith.guide/tutorials/more/locking-blog-posts.md) - \[How to access your browser's dev tools\](https://www.locksmith.guide/tutorials/more/how-to-access-your-browsers-dev-tools.md) - \[Restricting the cart for mixed products and combinations of products\](https://www.locksmith.guide/tutorials/more/restricting-the-cart-for-mixed-products-and-combinations-of-products.md) - \[Locking products by vendor\](https://www.locksmith.guide/tutorials/more/locking-products-by-vendor.md) - \[How do I hide my Shopify store's header and footer\](https://www.locksmith.guide/tutorials/more/how-do-i-hide-my-shopify-stores-header-and-footer.md) - \[Hiding navigation links for locked resources\](https://www.locksmith.guide/tutorials/more/hiding-navigation-links-for-locked-resources.md): Use the Locksmith app to hide navigation links in your Shopify Online Store channel - \[Hiding products and other content from lists in your online store\](https://www.locksmith.guide/tutorials/more/hiding-products-and-other-content-from-lists-in-your-online-store.md): How to set up Locksmith locks to hide from collections, in-store searches, and any other lists and grids in your Shopify Online Store - \[Restricting a product so that it can only be purchased by new customers\](https://www.locksmith.guide/tutorials/more/restricting-a-product-so-that-it-can-only-be-purchased-by-new-customers.md): In this guide, we'll show you how to set up a product so that it can only be purchased by customers who haven't yet made a purchase. This is great for samples and first time free products. - \[Automatically managing the seo.hidden metafield using Locksmith\](https://www.locksmith.guide/tutorials/more/automatically-hide-from-sitemaps-and-manage-seo-metafield.md): How to set up your Locksmith locks to automatically manage the seo.hidden metafield for any content covered by them. - \[Locking the home page\](https://www.locksmith.guide/tutorials/more/locking-the-home-page.md): How to create a lock that covers the home page of your Online Store sales channel in Shopify - \[Setting up checkout validation with Locksmith\](https://www.locksmith.guide/tutorials/more/setting-up-checkout-validation-with-locksmith.md): Protect against bots, cart permalink exploits, and other unauthorized orders by requiring specific customer tags to purchase products with specific product tags. - \[Restricting access to payment methods with Locksmith\](https://www.locksmith.guide/tutorials/more/hiding-payment-methods-by-customer-tag.md): Control which payment methods are available at checkout based on customer tags, using Shopify's native payment customization functions. - \[How to hide theme sections, blocks, and snippets\](https://www.locksmith.guide/tutorials/more/how-to-hide-theme-sections-blocks-and-snippets.md): Create a theme hiding profile to lock specific parts of your Shopify themes according to your Locksmith lock conditions - \[Creating weekly schedules\](https://www.locksmith.guide/tutorials/more/creating-weekly-schedules.md): You can use Locksmith to make sure content in your Online Store channel is only available on specific days and hours. - \[Using date and time key conditions\](https://www.locksmith.guide/tutorials/more/using-date-and-time-key-conditions.md): Learn how to use Locksmith's "before" and "after" date and time key conditions, including when to combine them within a single key versus adding them as separate keys. - \[About key conditions\](https://www.locksmith.guide/keys/about-key-conditions.md) - \[Customer account keys\](https://www.locksmith.guide/keys/customer-account-keys.md) - \[Passcode keys\](https://www.locksmith.guide/keys/passcode-keys.md) - \[Secret link keys\](https://www.locksmith.guide/keys/secret-link-keys.md) - \[Visitor location keys\](https://www.locksmith.guide/keys/visitor-location-keys.md): How to restrict access to the content in your Shopify Online Store based on the location of the IP visitor's IP address - \[More about keys...\](https://www.locksmith.guide/keys/more.md): Check the following or simply use the search bar in the header to quickly find the topic that you're looking for! - \[Inverting conditions in Locksmith\](https://www.locksmith.guide/keys/more/inverting-conditions-in-locksmith.md) - \[Combining key conditions\](https://www.locksmith.guide/keys/more/combining-key-conditions.md) - \["Has purchased..." key\](https://www.locksmith.guide/keys/more/has-purchased.md): Granting access to content in your store only after the appropriate purchase has been made - \[Using the "Force open other locks" setting\](https://www.locksmith.guide/keys/more/using-the-force-open-other-locks-setting.md): How to deal with multiple overlapping locks preventing customers from accessing the content inside them - \[Custom Liquid key-condition basics\](https://www.locksmith.guide/keys/more/custom-liquid-key-condition-basics.md): How to create customer liquid key conditions in Locksmith - \[Manual mode\](https://www.locksmith.guide/keys/more/manual-mode.md) - \[Excluding content from locks\](https://www.locksmith.guide/keys/more/excluding-content-from-locks.md): How to use Locksmith's "always permit" key condition to make sure your some of your content doesn't become locked - \[IP address keys\](https://www.locksmith.guide/keys/more/ip-address-keys.md) - \[Newsletter keys\](https://www.locksmith.guide/keys/more/newsletter-keys.md): Use Locksmith to only grant access to customers that subscribe to your newsletter - \[Limiting the scope of variant locks using the product tag key condition\](https://www.locksmith.guide/keys/more/limiting-the-scope-of-variant-locks-using-the-product-tag-key-condition.md) - \[Why aren't my locks working?\](https://www.locksmith.guide/faqs/why-arent-my-locks-working.md) - \[FAQ: I see blank spaces in my collections and/or searches when locking\](https://www.locksmith.guide/faqs/faq-i-see-blank-spaces-in-my-collections-and-or-searches-when-locking.md): Some strategies to improve the appearance of your collections and searches when Locksmith is filtering out products - \[Can Locksmith hide content from my in-store search?\](https://www.locksmith.guide/faqs/can-locksmith-hide-content-from-my-in-store-search.md): How to adjust your lock settings to prevent your content from being found via your in-store search - \[Locksmith is not working with my page builder app\](https://www.locksmith.guide/faqs/locksmith-is-not-working-with-my-page-builder-app.md) - \[What should I do if my site is loading slowly?\](https://www.locksmith.guide/faqs/what-should-i-do-if-my-site-is-loading-slowly.md) - \[I'm the administrator of my site and I cannot access pages because of Locksmith locks.\](https://www.locksmith.guide/faqs/im-the-administrator-of-my-site-and-cannot-access.md) - \[More FAQs...\](https://www.locksmith.guide/faqs/more.md): Check the following or simply use the search bar in the header to quickly find the topic that you're looking for! - \[I'm having trouble using Locksmith with a site speed optimization app.\](https://www.locksmith.guide/faqs/more/site-speed-apps.md) - \[The app isn't loading. What do I do?\](https://www.locksmith.guide/faqs/more/app-not-loading.md) - \[Can Locksmith protect shipping methods, billing methods, or discount codes?\](https://www.locksmith.guide/faqs/more/can-locksmith-protect-shipping-methods-billing-methods-or-coupon-codes.md) - \[I switched themes, and Locksmith isn't working\](https://www.locksmith.guide/faqs/more/i-switched-themes-and-locksmith-isnt-working.md) - \[Why isn't my passcode, secret link, newsletter, or location key working?\](https://www.locksmith.guide/faqs/more/why-isnt-my-remote-key-condition-working.md) - \[Can Locksmith lock Shopify's public JSON API for my online store?\](https://www.locksmith.guide/faqs/more/can-locksmith-lock-shopifys-public-json-api-for-my-online-store.md) - \[Why are my customers seeing a reCAPTCHA when logging in?\](https://www.locksmith.guide/faqs/more/why-are-my-customers-seeing-a-recaptcha-when-logging-in.md) - \[My passcode or newsletter prompt is not updating on my store when I change it.\](https://www.locksmith.guide/faqs/more/passcode-prompt-issues.md) - \[My featured collections on my home page only show one product.\](https://www.locksmith.guide/faqs/more/my-featured-collections-on-my-home-page-only-show-one-product..md) - \[My infinite scrolling doesn't show all of my products.\](https://www.locksmith.guide/faqs/more/my-infinite-scrolling-doesnt-show-all-of-my-products..md) - \[My customers have to enter their e-mail address into the Mailchimp key every time they visit.\](https://www.locksmith.guide/faqs/more/my-customers-have-to-enter-their-e-mail-address-into-the-mailchimp-key-every-time-they-visit..md) - \[How do I know which customers have used a certain key?\](https://www.locksmith.guide/faqs/more/how-do-i-know-which-customers-have-used-a-certain-key.md): How to see which key was used, or how many times a passcode has been used to access your locked content. - \[Why is Locksmith adding information to my orders?\](https://www.locksmith.guide/faqs/more/why-is-locksmith-adding-information-to-my-orders.md) - \[Locksmith isn't installing correctly!\](https://www.locksmith.guide/faqs/more/locksmith-isnt-installing-correctly.md) - \[Locksmith is not uninstalling correctly!\](https://www.locksmith.guide/faqs/more/locksmith-is-not-uninstalling-correctly.md): What to do when you're having issues uninstalling Locksmith from your theme - \[How does Locksmith affect search engines and SEO?\](https://www.locksmith.guide/faqs/more/how-does-locksmith-affect-search-engines-and-seo.md): How Locksmith helps hide your locked products/content from Google and other search engines - \[How do I change where customers are redirected to after registration on Shopify\](https://www.locksmith.guide/faqs/more/how-do-i-change-where-customers-are-redirected-to-after-registration-on-shopify.md) - \[The thing I want to lock isn't showing up in the Locksmith search\](https://www.locksmith.guide/faqs/more/the-thing-i-want-to-lock-isnt-showing-up-in-the-locksmith-search.md) - \[I am getting an "already taken" error when trying to create a metafield definition for seo.hidden\](https://www.locksmith.guide/faqs/more/i-am-getting-an-already-taken-error-when-trying-to-create-a-metafield-definition-for-seo.hidden.md): How to get past this Shopify error when attempting to create the seo.hidden metafield definition for products - \[How do I add a hero banner image to Locksmith's access messages\](https://www.locksmith.guide/faqs/more/how-do-i-add-a-hero-banner-image-to-locksmiths-access-messages.md): This guide provides an example of how to add a banner image above your access message content in your Shopify online store. - \[What order are different types of key conditions evaluated in?\](https://www.locksmith.guide/faqs/more/what-order-are-key-conditions-evaluated-in.md) - \[Usage agreement\](https://www.locksmith.guide/policies/usage-agreement.md): The annotated edition! - \[Locksmith's pricing policy: Pay what feels good\](https://www.locksmith.guide/policies/pricing.md) - \[Privacy policy\](https://www.locksmith.guide/policies/privacy.md) - \[Data policy\](https://www.locksmith.guide/policies/data.md) - \[Data Processing Agreement\](https://www.locksmith.guide/policies/data-processing-agreement.md): Lightward Data Processing Addendum (Locksmith) - \[Contact us\](https://www.locksmith.guide/policies/contact.md): How to contact the Locksmith support team - \[Locksmith Admin API\](https://www.locksmith.guide/developer-tools/locksmith-admin-api.md) - \[Locksmith Storefront API\](https://www.locksmith.guide/developer-tools/locksmith-storefront-api.md) - \[Locksmith variables\](https://www.locksmith.guide/developer-tools/locksmith-variables.md) - \[Unsupported functionality\](https://www.locksmith.guide/developer-tools/unsupported-functionality.md): Here's a list of interesting ways to interact with Locksmith. None of these are officially supported. We can't troubleshoot your custom code. :) - \[Requests from Locksmith\](https://www.locksmith.guide/developer-tools/requests-from-locksmith.md) - \[More developer docs...\](https://www.locksmith.guide/more-developer-docs.md): Check the following or simply use the search bar in the header to quickly find the topic that you're looking for! - \[Using the Admin API with Locks\](https://www.locksmith.guide/more-developer-docs/using-the-admin-api-with-locks.md) - \[Easy Appointment Booking\](https://www.locksmith.guide/app-integrations/easy-appointment-booking.md): Use Locksmith to sell services with Easy Appointment Booking - \[Shopify's New Customer Accounts and Locksmith\](https://www.locksmith.guide/shopifys-new-customer-accounts-and-locksmith.md): Things to know about switching to New Customer Accounts in your Shopify store. --- # Agent Instructions This documentation is published with GitBook. GitBook is the documentation platform designed so that both humans and AI agents can read, navigate, and reason over technical content effectively. Learn more at gitbook.com. ## Querying This Documentation If you need additional information, you can query the documentation dynamically by asking a question. Perform an HTTP GET request on a page URL with the \`ask\` query parameter: \`\`\` GET https://www.locksmith.guide/readme.md?ask= \`\`\` The question should be specific, self-contained, and written in natural language. The response will contain a direct answer to the question and relevant excerpts and sources from the documentation. Use this mechanism when the answer is not explicitly present in the current page, you need clarification or additional context, or you want to retrieve related documentation sections.
---
# Creating keys | Locksmith
For the complete documentation index, see [llms.txt](https://www.locksmith.guide/llms.txt)
. This page is also available as [Markdown](https://www.locksmith.guide/basics/creating-keys.md)
.
Once you [create a lock](https://www.locksmith.guide/basics/creating-locks)
, you'll need to create _keys_ – simple statements that describe the conditions for access. For example, one might have a key that says "Permit if the customer is signed in". In this example, the _key condition_ is "if the customer is signed in".
Keys are added inside the "Keys" section on the lock page. Click "+ Add key" to see the full list of available key conditions.

Locksmith offers a wide range of key conditions, grouped below by type to help you find the right one.
[](https://www.locksmith.guide/basics/creating-keys#permit-if)
**Permit if...**
------------------------------------------------------------------------------------
####
[](https://www.locksmith.guide/basics/creating-keys#the-customer)
_The customer..._
These conditions require the visitor to be logged into a customer account. If they aren't already signed in, they'll be prompted to do so before access is granted.
* **is signed in** — grants access to any visitor with a customer account, once logged in.
* **is tagged with...** — grants access if the customer's account carries a specific tag. If your store's login form includes a registration link, that will be shown too.
* **has one of many email addresses** — grants access if the customer's email address matches one from a list you specify.
* **has an email address from an input list** — works the same way, but draws from an input list that has been synced with Locksmith. (For more on this, see [Input Lists](https://www.locksmith.guide/tutorials/more/input-lists)
.)
* **email contains...** — grants access if the customer's email address contains specific text you define — for example, "@mycompany.com".
* **has purchased...** — grants access if the customer's last 50 orders include a specific product, identified by SKU, title, or product tag.
* **has placed at least x orders** — grants access if the customer's lifetime order count meets a minimum number you set.
[Customer account keys](https://www.locksmith.guide/keys/customer-account-keys)
####
[](https://www.locksmith.guide/basics/creating-keys#the-visitor)
_The visitor..._
These conditions do not require a customer account, and apply to anyone visiting your store.
**Gives passcodes**
Locksmith supports three passcode conditions, covering single, multiple, and bulk use cases:
* **gives the passcode...** — prompts the visitor to enter a passcode matching the one you configure. If the passcode is incorrect, they'll be prompted again.
* **gives one of many passcodes...** — grants access if the visitor provides any passcode from a list you configure.
* **gives a passcode from an input list...** — works the same way, but draws passcodes from an input list, making it suitable for bulk use. ([Input Lists](https://www.locksmith.guide/tutorials/more/input-lists)
)
[Passcode keys](https://www.locksmith.guide/keys/passcode-keys)
**Follows secret links**
Locksmith supports two secret link conditions:
* **arrives via a secret link...** — generates a secret URL for the locked resource. Visitors arriving via that link are granted access; visitors using any other link will be denied.
* **arrives using a secret link code from an input list...** — works the same way, but draws secret codes from an input list, making it suitable for bulk use. ([Input Lists](https://www.locksmith.guide/tutorials/more/input-lists)
)
[Secret link keys](https://www.locksmith.guide/keys/secret-link-keys)
**Cart contents**
* **has a certain product in their cart** — grants access if a specific product is present in the visitor's current cart.
* **has a certain variant in their cart** — grants access if a specific product variant is present in the visitor's current cart.
* **has at least $x in their cart** — grants access if the subtotal of the visitor's current cart meets a minimum amount you set.
**Email subscriptions**
* **subscribes to your Mailchimp list** — connects to your Mailchimp account and grants access once a visitor provides their email address, adding it to your list.
* **subscribes to your Klaviyo list** — connects to your Klaviyo account and grants access once a visitor provides their email address.
* **if the customer is a member of a Klaviyo list or segment** — grants access only if the email address is _already_ on the list.
[Newsletter keys](https://www.locksmith.guide/keys/more/newsletter-keys)
**Other visitor conditions**
* **has a certain IP address** — grants access if the visitor's IP address matches an address or range you specify.
* **is visiting from a certain location (city, country, etc.)** — uses the visitor's IP address to estimate their location via [GeoIP by MaxMind](https://www.maxmind.com/en/geoip2-services-and-databases)
, granting access if it matches a location you define.
* **confirms the prompt** — grants access based solely on the visitor confirming a prompt that you configure.
* **is visiting a certain domain** — grants access if the visitor's domain matches a specific domain on your store. This is useful if your store has multiple domains scoped to different regions or audiences.
[IP address keys](https://www.locksmith.guide/keys/more/ip-address-keys)
[Visitor location keys](https://www.locksmith.guide/keys/visitor-location-keys)
[Confirmation key condition](https://www.locksmith.guide/tutorials/more/editing-the-confirmation-message)
[Showing content only to specific Markets](https://www.locksmith.guide/tutorials/more/shopify-markets)
####
[](https://www.locksmith.guide/basics/creating-keys#based-on-time)
_Based on time_
* **is visiting before a certain date and time** — grants access if the current time is before a date and time you specify.
* **is visiting after a certain date and time** — grants access if the current time is after a date and time you specify.
* **if it's during a weekly schedule** — configure different schedules for each day with multiple time periods.
[Using date and time key conditions](https://www.locksmith.guide/tutorials/more/using-date-and-time-key-conditions)
[Creating weekly schedules](https://www.locksmith.guide/tutorials/more/creating-weekly-schedules)
####
[](https://www.locksmith.guide/basics/creating-keys#special-conditions)
_Special conditions_
* **(always permit)** — forces a lock open, regardless of other conditions. This is most commonly used when you need to exclude certain content from another lock. For more detail, see: [Excluding Content from Locks](https://www.locksmith.guide/keys/more/excluding-content-from-locks)
.
* **(custom Liquid)** — allows you to write custom Liquid code that grants access when your condition evaluates to true. This is the most flexible key condition available, and is useful when no standard condition fits your needs. For more detail, see our guide on custom [Liquid Keys](https://www.locksmith.guide/keys/more/custom-liquid-key-condition-basics)
.
[](https://www.locksmith.guide/basics/creating-keys#copying-keys-between-locks)
Copying keys between locks
---------------------------------------------------------------------------------------------------------------
If you need to reuse a key setup across multiple locks, Locksmith includes a copy and paste feature for keys.
**Here’s how it works:**
1. **Find the key you want to copy.** On any existing lock, locate the key you'd like to reuse and click the copy icon to the right of the key name.

1. **Navigate to your new lock.** Open the lock where you'd like to apply that key.
2. **Paste the key.** Click the paste icon beside "Add key." Locksmith will automatically add the copied key to your new lock.

You can repeat this as many times as needed to reuse key configurations across multiple locks.
**Note:** If your keys include product- or time-specific conditions, be sure to update those details after pasting.
* * *
[](https://www.locksmith.guide/basics/creating-keys#related-articles)
Related articles
-------------------------------------------------------------------------------------------
More information on how to **combine key conditions together** is covered in our "Overview" guide here:
[Combining key conditions](https://www.locksmith.guide/keys/more/combining-key-conditions)
Remember that all key conditions can be **inverted!**
[Inverting conditions in Locksmith](https://www.locksmith.guide/keys/more/inverting-conditions-in-locksmith)
Having issues with **locks overlapping**? Perhaps the "Force open other locks" setting is for you:
[Using the "Force open other locks" setting](https://www.locksmith.guide/keys/more/using-the-force-open-other-locks-setting)
More information on customer account keys:
[Customer account keys](https://www.locksmith.guide/keys/customer-account-keys)
[PreviousCreating locks](https://www.locksmith.guide/basics/creating-locks)
[NextCompatibility with other apps and Shopify features](https://www.locksmith.guide/basics/compatibility)
Last updated 3 months ago
Was this helpful?
* [Permit if...](https://www.locksmith.guide/basics/creating-keys#permit-if)
* [Copying keys between locks](https://www.locksmith.guide/basics/creating-keys#copying-keys-between-locks)
* [Related articles](https://www.locksmith.guide/basics/creating-keys#related-articles)
Was this helpful?
---
# Removing Locksmith | Locksmith
For the complete documentation index, see [llms.txt](https://www.locksmith.guide/llms.txt)
. This page is also available as [Markdown](https://www.locksmith.guide/basics/removing-locksmith.md)
.
If you've been using Locksmith to protect your shop, uninstallation means two things:
1. Removing Locksmith from your theme
2. Removing Locksmith from your Shopify apps list
The order is important! **Locksmith is NOT able to clean up its code from your theme after you remove it from your apps list** (and neither can Locksmith staff), so it's critical to have Locksmith remove itself from your theme before removing the app from your list.
**Please note -** Before proceeding, please consider whether or not there has been any Locksmith code added to your theme manually in the past. This can happen if you are doing price hiding with Locksmith, or if you wrote in for support help and your theme needed to be adjusted. Any Locksmith code that was added manually to your theme needs to be manually removed from your theme! If this is you, **do not follow the rest of this guide** - simply disable Locksmith from the "Settings" tab in the app, for now. This will cause Locksmith to be dormant in your store. Then, contact us at [team@uselocksmith.com](mailto:team@uselocksmith.com) for help removing the code.
_Do not delete the app from your apps list before getting the code removed - deleting the app while the code is still in your theme can cause your pages to be inaccessible!_
[](https://www.locksmith.guide/basics/removing-locksmith#id-1.-removing-locksmith-from-your-theme)
1\. Removing Locksmith from your theme
----------------------------------------------------------------------------------------------------------------------------------------------
**Important**: If you've already deleted Locksmith from your apps list, you'll need to temporarily add the app back to your store and accept the permissions, which will give Locksmith the ability to edit your theme to remove its code. You can add the app back to your store from [our app store listing](https://apps.shopify.com/locksmith)
.
_You do_ _**not**_ _need to start a subscription to run Locksmith's code removal process._
1. To start, open the Locksmith app from within Shopify.
2. Click on the "Help" link under "Locksmith" from the Shopify admin navigation menu.
3. Click the red "Remove Locksmith" button.

After clicking this, you'll see a status bar at the bottom of the screen, which is Locksmith letting you know that it's syncing your settings with Shopify. **When this status bar goes away, the removal has completed** - it should only take a handful of seconds. Wait for this to complete before continuing.
[](https://www.locksmith.guide/basics/removing-locksmith#id-2.-removing-locksmith-from-your-shopify-apps-list)
2\. Removing Locksmith from your Shopify apps list
----------------------------------------------------------------------------------------------------------------------------------------------------------------------
Delete Locksmith from your apps list in the standard way. Namely, from your Shopify admin, go to Apps > App and Sales Channel Settings > Locksmith > Delete.
[More information from Shopify about deleting apps here](https://help.shopify.com/en/manual/apps/working-with-apps#uninstall-an-app)
.
**Note**: Deleting the Locksmith app from your apps list will automatically cancel your subscription, so at this point, no further action is necessary.
###
[](https://www.locksmith.guide/basics/removing-locksmith#cancelling-your-locksmith-subscription)
Cancelling your Locksmith subscription
**If you have decided to NOT delete the Locksmith app** from your apps lists, as outlined above, please make sure to cancel your subscription manually, to avoid being charged unexpectedly:

[PreviousCompatibility with other apps and Shopify features](https://www.locksmith.guide/basics/compatibility)
[NextLocksmith Glossary & Reference](https://www.locksmith.guide/basics/locksmith-glossary-and-reference)
Last updated 1 year ago
Was this helpful?
* [1\. Removing Locksmith from your theme](https://www.locksmith.guide/basics/removing-locksmith#id-1.-removing-locksmith-from-your-theme)
* [2\. Removing Locksmith from your Shopify apps list](https://www.locksmith.guide/basics/removing-locksmith#id-2.-removing-locksmith-from-your-shopify-apps-list)
* [Cancelling your Locksmith subscription](https://www.locksmith.guide/basics/removing-locksmith#cancelling-your-locksmith-subscription)
Was this helpful?
---
# Approving customer registrations | Locksmith
For the complete documentation index, see [llms.txt](https://www.locksmith.guide/llms.txt)
. This page is also available as [Markdown](https://www.locksmith.guide/tutorials/approving-customer-registrations.md)
.
You can use Locksmith to only grant access to your content to **registered customers that you approve**.
**Note**: Locksmith does not create a separate account system or customer database, you'll be using the default customer accounts feature that comes with all Shopify stores. Before using this guide, you'll want to make sure that accounts are enabled on your Shopify store. [Learn more about customer accounts in Shopify.](https://help.shopify.com/en/manual/customers/customer-accounts)
[](https://www.locksmith.guide/tutorials/approving-customer-registrations#step-1-creating-the-lock)
Step 1: Creating the lock
----------------------------------------------------------------------------------------------------------------------------------
To get started with this, you'll want to first create the lock that covers the content that you want to restrict. Since Locksmith gives you flexibility to decide what content you want to lock, you can apply this restriction to your entire store, or just to specific pages or collections in your store. Our full guide on locks contains all the information you need to create your lock, including how to create a lock to cover your entire store:
[Creating locks](https://www.locksmith.guide/basics/creating-locks)
If you are choosing a more granular approach, you will need to create multiple locks that span the different products, collections, and pages that you want to lock.
[](https://www.locksmith.guide/tutorials/approving-customer-registrations#step-2-creating-the-key)
Step 2: Creating the key
--------------------------------------------------------------------------------------------------------------------------------
Once the lock is created, you'll want to create the key next. When setting up an approval process, the simplest way to do it is to use the key condition labelled "**Permit if customer is tagged with...**". This means that only accounts that have the specific tag can gain access to the locked content. That will look like this:

**Note**: You can use whatever tag you prefer here! Using **approved** here is just an example, but will be referred to in the rest of the guide.
Using customer tags to grant access is the easiest way to approve accounts. However, you can technically use any customer data to grant access. More information on that here:
[Customer account keys](https://www.locksmith.guide/keys/customer-account-keys)
[](https://www.locksmith.guide/tutorials/approving-customer-registrations#step-3-choosing-how-customer-accounts-are-created)
Step 3: Choosing how customer accounts are created
------------------------------------------------------------------------------------------------------------------------------------------------------------------------------------
The above two steps outline how you use Locksmith to approve customer access to content. However, it's also important is to decide how the customer accounts are created to begin with.
You have some options:
1. Allow customers to create the accounts on their own
2. Create pre-approved customer accounts, and send email invitations.
###
[](https://www.locksmith.guide/tutorials/approving-customer-registrations#option-1-allow-customers-to-register-their-own-accounts-then-approve-as-appropriate)
Option 1: Allow customers to register their own accounts, then approve as appropriate.
This would be considered the default way, and doesn't require any extra steps. Customers will simply register their accounts as normal, using your default registration form, and you can choose the ones you want to "let through" to your locked content. You'll simply [use Shopify's "Customers" area](https://help.shopify.com/en/manual/customers/manage-customers#edit-a-customers-tags) to tag the customers appropriately.
####
[](https://www.locksmith.guide/tutorials/approving-customer-registrations#if-you-need-email-alerts-when-customers-sign-up)
If you need email alerts when customers sign up...
Shopify does NOT send registration notifications. If this is important to you try [this customer email alert task from Mechanic](https://tasks.mechanic.dev/customer-signup-email)
.
####
[](https://www.locksmith.guide/tutorials/approving-customer-registrations#if-you-need-to-collect-additional-information-from-customers-in-your-registration-form)
If you need to collect additional information from customers in your registration form...
[Customizing the registration form](https://www.locksmith.guide/tutorials/more/customizing-the-registration-form)
###
[](https://www.locksmith.guide/tutorials/approving-customer-registrations#option-2-create-pre-approved-customer-accounts-and-send-email-invitations)
Option 2: Create pre-approved customer accounts, and send email invitations.
If you already have the email addresses of those to whom you'd like to grant access, you can use Locksmith's customer import/creation tool to create their accounts. The customer import tool allows you to pre-tag any customer accounts that you create this way, so they'll automatically be granted access once they begin using your site.
A complete guide on the importing tools is here:
[Importing customers in bulk](https://www.locksmith.guide/tutorials/more/importing-customers-in-bulk)
Beyond entering the customers' email addresses, make sure to use the "Customer tags" field and enter "**approved**" as the tag, so that all of the customers imported this way are tagged. There are also some other options worth taking a look at:

####
[](https://www.locksmith.guide/tutorials/approving-customer-registrations#optional-lock-the-registration-page)
Optional: Lock the registration page
If you are using [**Legacy Customer Accounts**](https://help.shopify.com/en/manual/customers/customer-accounts)
**,** you also have the ability to place a lock on the registration form directly, so that customers cannot register their own accounts.
[Locking the customer registration form](https://www.locksmith.guide/tutorials/more/locking-the-customer-registration-form)
[PreviousLocksmith Glossary & Reference](https://www.locksmith.guide/basics/locksmith-glossary-and-reference)
[NextCreating restricted wholesale products](https://www.locksmith.guide/tutorials/locksmith-wholesale)
Last updated 10 months ago
Was this helpful?
* [Step 1: Creating the lock](https://www.locksmith.guide/tutorials/approving-customer-registrations#step-1-creating-the-lock)
* [Step 2: Creating the key](https://www.locksmith.guide/tutorials/approving-customer-registrations#step-2-creating-the-key)
* [Step 3: Choosing how customer accounts are created](https://www.locksmith.guide/tutorials/approving-customer-registrations#step-3-choosing-how-customer-accounts-are-created)
* [Option 1: Allow customers to register their own accounts, then approve as appropriate.](https://www.locksmith.guide/tutorials/approving-customer-registrations#option-1-allow-customers-to-register-their-own-accounts-then-approve-as-appropriate)
* [Option 2: Create pre-approved customer accounts, and send email invitations.](https://www.locksmith.guide/tutorials/approving-customer-registrations#option-2-create-pre-approved-customer-accounts-and-send-email-invitations)
Was this helpful?
---
# Creating restricted wholesale products | Locksmith
For the complete documentation index, see [llms.txt](https://www.locksmith.guide/llms.txt)
. This page is also available as [Markdown](https://www.locksmith.guide/tutorials/locksmith-wholesale.md)
.
Locksmith allows you to restrict access to any content in your Online store, so it is a great solution for those wanting to add wholesale products that can only be purchased by **select customers**. Plus, Locksmith works with whatever Shopify plan you're on!
[](https://www.locksmith.guide/tutorials/locksmith-wholesale#scenario-1-selling-wholesale-and-retail-in-the-same-store)
Scenario 1: Selling wholesale and retail in the same store
---------------------------------------------------------------------------------------------------------------------------------------------------------------------------------------
You can set up your store so that both sides of your business are run out of the same shop.
This is done by creating price tiers in your store. This requires that you create two versions of each of your products in the backend. This can be achieved by either duplicating products, or by using variant tiers.
In-depth setup instructions for this can be found here:
[Setting up multiple price tiers](https://www.locksmith.guide/tutorials/more/price-tiers)
[](https://www.locksmith.guide/tutorials/locksmith-wholesale#scenario-2-creating-a-wholesale-only-store)
Scenario 2: Creating a wholesale-only store
---------------------------------------------------------------------------------------------------------------------------------------------------------
If your store is going to _only_ be used for wholesale, and you don't need multiple price tiers in the same store, your setup will be more simple.
You can simply create a lock that covers your entire store:

For your key, you have options for how to grant access, but the recommended option here would be to simply use approved customer accounts:
[Approving customer registrations](https://www.locksmith.guide/tutorials/approving-customer-registrations)
Or, if you prefer not to use customer accounts, and want to grant access with a simple code, try passcodes:
[Passcode keys](https://www.locksmith.guide/keys/passcode-keys)
[PreviousApproving customer registrations](https://www.locksmith.guide/tutorials/approving-customer-registrations)
[NextHiding product prices and/or the add to cart button](https://www.locksmith.guide/tutorials/hiding-prices)
Last updated 2 years ago
Was this helpful?
* [Scenario 1: Selling wholesale and retail in the same store](https://www.locksmith.guide/tutorials/locksmith-wholesale#scenario-1-selling-wholesale-and-retail-in-the-same-store)
* [Scenario 2: Creating a wholesale-only store](https://www.locksmith.guide/tutorials/locksmith-wholesale#scenario-2-creating-a-wholesale-only-store)
Was this helpful?
---
# Compatibility with other apps and Shopify features | Locksmith
For the complete documentation index, see [llms.txt](https://www.locksmith.guide/llms.txt)
. This page is also available as [Markdown](https://www.locksmith.guide/basics/compatibility.md)
.
Locksmith works in and around the online storefront theme layer – an arena shared by many, many other apps. Locksmith's interoperability is excellent; its internal Liquid engine is very good at injecting its code in the right places, without causing issues for themes or apps. Because of this, **in the vast majority of cases, you won't need to worry about Locksmith's compatibility**.
Having said that, there are a few places where there are specific points of compatibility or incompatibility.
###
[](https://www.locksmith.guide/basics/compatibility#locksmith-and-the-shop-app)
Locksmith and the Shop App
We're pleased to announce that Locksmith is now compatible with the Shop app. Shopify has updated its policies to allow stores using Locksmith to remain eligible for the Shop app, provided all other Shop app eligibility requirements are met.
Shopify's policies prohibit the use of password control and age verification apps, such as Advanced Registration, B2B Login Access Management, Login to View Price, and MagicPass Wholesale, for stores wishing to use the Shop app. However, Locksmith is now explicitly listed as an exception to this rule.
When you use Locksmith to lock certain products, your store will still remain eligible to display on Shop, and your locked products will not be included in your Shop Store. This ensures that merchants can maintain the control Locksmith provides while remaining eligible for the Shop app.
By default, Locksmith removes locked products and collections from the Shop channel using a product metafield.
If you want a locked product or collection to stay visible on the Shop channel, open the lock's **Advanced settings** and enable **Allow \[this product / products in this collection\] on the Shop channel**.:

Locksmith can only manage visibility in the Shop app at the **product level**. Products locked by product and collection locks will automatically be removed from the Shop app. However, variants locked by variant locks will still be purchasable in the Shop app. It is therefore your responsibility to manage desired visibility for your variants in the Shop app.
For more details on Shop app eligibility requirements, including prohibited product types or other restrictions, please refer to Shopify's [Shop app eligibility requirements](https://help.shopify.com/en/manual/online-sales-channels/shop/eligibility/requirements)
. **Variant Locks and the Shop App**
Locksmith’s variant-level locks don’t automatically remove locked variants from the Shop app, as the app manages visibility at the product level. While Locksmith adds a metafield to exclude locked products or collections from the Shop app, Shopify doesn’t support sales channel visibility controls for individual variants.
If a product includes locked variants, the Shop app will flag it with a warning (“This product is hidden by a third-party app”) and prevent it from being listed.
**Workaround for Variant Visibility on the Shop App** To keep unlocked variants available while hiding locked ones, you can create duplicate products:
* One product with only unlocked variants, published to the Shop app.
* Another product with locked variants, excluded from the Shop app.
This solution offers greater control but may increase inventory management complexity. For guidance on using duplicate products, refer to our tutorial on [price tiers](https://www.locksmith.guide/tutorials/more/price-tiers#using-product-duplicates-1)
. You can also explore [inventory management tips](https://www.locksmith.guide/tutorials/more/price-tiers#inventory)
.
**Important: The Shop channel may be added to your store automatically**
Shopify automatically adds the Shop sales channel to any store that meets their Shop Merchant Guidelines — including stores that have Shopify Payments (or Shop Pay) enabled and a chargeback rate of less than 1% in the last six months. This means the Shop channel can appear in your Shopify admin without you installing it yourself, and your eligible products may become listed in the Shop app without any action on your part.
If you're using Locksmith to lock variants, be aware that the Shop channel being auto-added could expose those locked variants to purchases through the Shop app — since Locksmith's Shop app protection only works at the product level, not the variant level.
If you **don't** want your store or products listed on Shop, you have a few options:
* **Opt out of Sell with Shop:** In your Shopify admin, go to **Sales channels > Shop > Settings**, and change the **Sell with Shop** setting to "Link to online store" (this prevents direct purchases through Shop, though your products may still be discoverable).
* **Remove the Shop channel entirely:** In your Shopify admin, go to **Settings > Sales channels**, find Shop, and click **Uninstall**. Note that orders may still come through Shop even without the channel installed — see Shopify's documentation below for details.
* **Contact Shopify support** to request an account-level opt-out from the Shop App and/or Agentic Storefronts.
For full details on Shop eligibility and how auto-enrollment works, refer to Shopify's documentation:
* [Requirements for displaying your store in Shop](https://help.shopify.com/en/manual/online-sales-channels/shop/eligibility/requirements)
* [Setting up the Shop channel](https://help.shopify.com/en/manual/online-sales-channels/shop/setup)
* [Activating Shop Pay](https://help.shopify.com/en/manual/payments/shop-pay/activating-shop-pay)
[](https://www.locksmith.guide/basics/compatibility#officially-unsupported-apps)
Officially unsupported apps
-----------------------------------------------------------------------------------------------------------------
The following apps have known compatibility issues with Locksmith - although they _may_ work in some cases, with the correct settings.
* Any other **access control apps** that work in a similar way to Locksmith will almost certainly not work well alongside Locksmith, as they tend to inject code into the same areas of your theme.
* [Bold Custom Pricing: Wholesale](https://apps.shopify.com/customer-pricing)
- but only when using [Locksmith's variant locking](https://www.locksmith.guide/tutorials/more/locking-variants) and [manual locking](https://www.locksmith.guide/tutorials/more/manual-mode)
features.
* Any app that controls price at the variant level - but only when using [Locksmith's variant locking](https://www.locksmith.guide/tutorials/more/locking-variants) and [manual locking](https://www.locksmith.guide/tutorials/more/manual-mode)
features.
* Locksmith's [manual locking](https://www.locksmith.guide/tutorials/more/manual-mode)
feature, and many times full-page locks, can _**not**_ generally be used to hide content being displayed by other third-party apps, including prices, buttons, widgets etc.
* [Gempages](https://apps.shopify.com/gempages)
- while it is possible to use the apps together _in some cases_, there are still many compatibility issues between the two apps.
* [Weglot](https://apps.shopify.com/weglot)
- Locksmith's [location detection key condition](https://www.locksmith.guide/keys/visitor-location-keys)
is not compatible with Weglot, but you should otherwise be fine using both apps at the same time if not using location detection.
[](https://www.locksmith.guide/basics/compatibility#other-areas-of-incompatibility)
Other areas of incompatibility
-----------------------------------------------------------------------------------------------------------------------
* **Predictive searches** - Locksmith generally cannot remove products from searches that dynamically show search results as you type. This includes built-in theme searches, and most apps that add predictive searches to your theme. That being said, it is possible to manage the appearance of specific products in store searches using product metafields: [more information on that here](https://community.shopify.com/c/ecommerce-marketing/hiding-a-product-from-search-engine/td-p/484788)
.
* [The Checkout area](https://help.shopify.com/en/manual/checkout-settings)
- Apps are pretty heavily limited in their ability to make changes to the checkout area, for security reasons. This means that Locksmith cannot restrict access to payment methods, shipping methods, shipping addresses, or anything else that is shown during the checkout process. If you wish to use Locksmith to restrict customers ability to check out,
you now have two options:
1. **Use Locksmith on the cart page**, before checkout begins. This is the traditional approach—more on that [here](https://www.locksmith.guide/tutorials/more/protecting-against-bots)
.
2. **Use our checkout validation feature**, which allows you to set up a single rule: products with a specific tag can only be purchased by customers who have a specific customer tag. This can help block unauthorized purchases—_without_ modifying the checkout UI itself. Learn how to set that up [here](https://www.locksmith.guide/tutorials/more/setting-up-checkout-validation-with-locksmith)
.
* Protecting against bot/resellers - Locksmith can’t fully prevent purchases made by bots or resellers—especially when they’re using direct-to-checkout links, which bypass the Online Store entirely. Since Locksmith works within the Online Store channel, it can’t intervene at the checkout layer directly. However, we _do_ now offer a **checkout validation** feature, which can help you block unwanted purchases **after** a customer reaches checkout. This is a powerful way to add another layer of control over who gets to buy what. Learn how to set it up here: [Setting up checkout validation with Locksmith](https://www.locksmith.guide/tutorials/more/setting-up-checkout-validation-with-locksmith)
There are also other strategies you can use alongside Locksmith to reduce the risk of bot purchases. While these aren't built into Locksmith itself, we've outlined a helpful approach here: [Protecting against bots (without using Locksmith directly)](https://www.locksmith.guide/tutorials/more/protecting-against-bots)
* Locksmith cannot block RSS feeds from locked blogs.
* Locksmith can only hide products published to the **Online Store** sales channel, and absolutely cannot help with protecting, hiding, or restricting purchases on other channels.
* **Locksmith generally cannot hide elements or filter locked content in areas controlled by other third-party apps**, especially if those apps render their content outside the theme files where Locksmith injects its code.
* Locksmith is **not** compatible with [**headless or custom storefronts**](https://www.shopify.com/plus/solutions/headless-commerce)
(e.g. sites built with Next.js, Hydrogen, custom frontend frameworks). Locksmith relies on Shopify's Liquid rendering engine and only works within the Online Store sales channel. In fully custom storefronts, there is no theme for Locksmith to work with, and no way for it to insert or enforce access logic.
[PreviousCreating keys](https://www.locksmith.guide/basics/creating-keys)
[NextRemoving Locksmith](https://www.locksmith.guide/basics/removing-locksmith)
Last updated 7 days ago
Was this helpful?
* [Locksmith and the Shop App](https://www.locksmith.guide/basics/compatibility#locksmith-and-the-shop-app)
* [Officially unsupported apps](https://www.locksmith.guide/basics/compatibility#officially-unsupported-apps)
* [Other areas of incompatibility](https://www.locksmith.guide/basics/compatibility#other-areas-of-incompatibility)
Was this helpful?
---
# Selling digital content on Shopify | Locksmith
For the complete documentation index, see [llms.txt](https://www.locksmith.guide/llms.txt)
. This page is also available as [Markdown](https://www.locksmith.guide/tutorials/selling-digital-content-on-shopify.md)
.
If you have special content that you want to monetize, and it **lives in your Shopify store**, Locksmith allows you to sell access to it via in-store purchases.
**Note**: Selling digital content on Shopify might mean different things for different merchants. If you are simply wanting to sell _digital files that are sent to customers via email_, [see Shopify's guide on this here](https://help.shopify.com/en/manual/products/digital-service-product/selling-services-or-digital-products)
.
[](https://www.locksmith.guide/tutorials/selling-digital-content-on-shopify#step-1-create-your-restricted-content)
**Step 1: Create your restricted content**
------------------------------------------------------------------------------------------------------------------------------------------------------------------
Common choices for this are to add your restricted content to one of the following:
* [Shopify's built-in blogging engine for your store](https://help.shopify.com/en/manual/online-store/blogs)
. Keep in mind that you are not restricted to a single blog, so you can have a general access blog for your site news, etc, and still use a restricted blog for your digital content.
* [Pages - Shopify's built in webpages for your store](https://help.shopify.com/en/manual/online-store/themes/theme-structure/pages)
.
* Product page - You can build custom product templates that also house your restricted content and combine it with [Locksmith's manual locking](https://www.locksmith.guide/keys/more/manual-mode)
, so that the restricted portion only reveals itself _after the product has been purchased_. This option has a less straightforward setup, but is still available if desired. If this is you, the best place to start is by contacting us via email at **team@uselocksmith.com**.
Again, for best results, your content should live in your online store. However, there are some other options that might apply to you:
####
[](https://www.locksmith.guide/tutorials/selling-digital-content-on-shopify#secure-file-viewing-or-downloading)
Secure file viewing or downloading
This requires another provider, and we recommend Dropbox: [Get started with this on Dropbox' website](https://help.dropbox.com/files-folders/share/set-link-permissions)
.
####
[](https://www.locksmith.guide/tutorials/selling-digital-content-on-shopify#secure-video-viewing)
Secure video viewing
You can embed the videos to be viewed just like any of your other content. However, if you want to secure this process, you'll need to enlist the help of a third party video viewing service. We recommend private and unlisted videos on Vimeo, but keep in mind that making your videos private/unlisted on Vimeo **requires a paid Vimeo plan**! [Get started with this on Vimeo's website](https://vimeo.zendesk.com/hc/en-us/articles/224817847-Manage-your-video-s-privacy-settings)
.
####
[](https://www.locksmith.guide/tutorials/selling-digital-content-on-shopify#other-general-content-that-doesnt-live-in-shopify)
**Other general content that doesn't live in Shopify**
If your content must live elsewhere, consider using iframes to embed your content into a Shopify page, which you can then lock. This is more of an _advanced technique_ and would require someone familiar with code. Locksmith support won't be able to code this kind of thing for you. This is also **less secure** because the original source of the iframe can't be locked by Locksmith.
####
[](https://www.locksmith.guide/tutorials/selling-digital-content-on-shopify#undefined)
[](https://www.locksmith.guide/tutorials/selling-digital-content-on-shopify#step-2-create-your-access-product)
Step 2: Create your "access product"
--------------------------------------------------------------------------------------------------------------------------------------------------------
###
[](https://www.locksmith.guide/tutorials/selling-digital-content-on-shopify#requiring-a-simple-one-time-purchase)
Requiring a simple one time purchase
You'll need to have at least one product that is clearly marked as the product that customers will purchase, in order to gain access to the locked content. Something like this:

###
[](https://www.locksmith.guide/tutorials/selling-digital-content-on-shopify#requiring-a-recurring-subscription-charge-for-access)
Requiring a recurring subscription charge for access
You'll need to **use a third party app** to set up the subscription service. We recommend ReCharge or PayWhirl, and we have in-depth guides for those here:
[Earn recurring revenue on your exclusive content using ReCharge | Locksmithwww.locksmith.guide](https://www.locksmith.guide/tutorials/more/recharge)
[Use Locksmith and PayWhirl together to grant access based on subscriptions | Locksmithwww.locksmith.guide](https://www.locksmith.guide/tutorials/more/use-locksmith-and-paywhirl-together-to-grant-access-based-on-subscriptions)
[](https://www.locksmith.guide/tutorials/selling-digital-content-on-shopify#step-3-setting-up-the-lock)
Step 3: Setting up the lock
----------------------------------------------------------------------------------------------------------------------------------------
[Create a lock](https://www.locksmith.guide/basics/creating-locks)
on your subscription product (the one created in the previous step). For your key, use the condition labelled **"has purchased...**" to create a key condition that permits access if the customer has purchased the appropriate product:

**Note**: You can also specify a time window, using the option labelled "_Only look for orders in the last..._". With this, you could require - for example - that the customer has made the purchase within the last 365 days. This is a good way to limit the access period time, but you should still [use a recurring subscription app](https://www.locksmith.guide/tutorials/selling-digital-content-on-shopify#requiring-a-recurring-subscription-charge-for-access)
if you want an automatically recurring charge.
[](https://www.locksmith.guide/tutorials/selling-digital-content-on-shopify#step-4-making-sure-your-customers-are-signed-in-when-purchasing-your-access-product)
Step 4: Making sure your customers are signed in when purchasing your "access product"
------------------------------------------------------------------------------------------------------------------------------------------------------------------------------------------------------------------------------------------------------------
In order for Locksmith to register that a customer has actually purchased your "access product", it is important that you require that customers are actually signed in when the purchase is made.
You can do that with either of the following ways:
**Make customer accounts required for your entire store**: This means that everyone must be signed into your store when they check out. [More information from Shopify on doing this](https://help.shopify.com/en/manual/checkout-settings/customer-accounts#set-your-customer-account-preferences)
. This might be considered overkill for some merchants, so if that's the case, use the next option.
**Use Locksmith to require that a customer is signed in when purchasing your "access product"**: Pretty simple - just add a lock directly to the "access product" and use "Permit if customer is signed in" as the key condition. You can [edit the locked landing page for this product](https://www.locksmith.guide/tutorials/more/customizing-messages)
by editing the "Guest message content" message to let the customer know that they need to sign in before access. Or, if you prefer, you can even [employ manual locking](https://www.locksmith.guide/tutorials/hiding-prices)
if you just want to hide the add-to-cart button instead of the whole page.
[](https://www.locksmith.guide/tutorials/selling-digital-content-on-shopify#optional-directing-customers-to-your-content-after-purchase)
Optional: Directing customers to your content after purchase
----------------------------------------------------------------------------------------------------------------------------------------------------------------------------------------------------------
You may wish to direct customers to the content that they just purchased.
###
[](https://www.locksmith.guide/tutorials/selling-digital-content-on-shopify#in-order-confirmation-emails)
... in order confirmation emails
We can use some custom code to conditionally add a link to your locked content if the customer has purchased the right product.
To set this up: head to **Settings -> Notifications** in your Shopify admin, then select "**Customer notifications**" and click the link for "**Order confirmation**". To edit the code for this email, you'll need to click the "**Edit code**" button in the top right of the page. Insert this code and adjust as needed:
Feel free to add multiple copies of this code, if you need to send the customer to one of several pages.
###
[](https://www.locksmith.guide/tutorials/selling-digital-content-on-shopify#and-in-the-order-confirmation-page-after-checkout)
... and in the order confirmation page, after checkout
The code above can also be modified to suit the order confirmation screen that your customers see, right after completing an order.
To set this up, locate the "Additional content and scripts" box, near the end of the Settings -> Checkout area in your Shopify admin.
Use this code:
... adjusting the "Some Product" for your actual product title, and "/pages/some-locked-page" part for the address to your locked content.
Feel free to add multiple copies of this code, if you need to send the customer to one of several pages.
[](https://www.locksmith.guide/tutorials/selling-digital-content-on-shopify#use-case-defer-access-to-the-restricted-product-until-some-time-after-the-required-product-is-purcha)
Use Case: Defer access to the restricted product until some time after the required product is purchased.
------------------------------------------------------------------------------------------------------------------------------------------------------------------------------------------------------------------------------------------------------------------------------------------------
Let's say you want to grant access based on the purchase, but not immediately. You can grant access later using two conditions in your key. For example, this key will grant access 12 weeks (84 days) after the purchase of the Starter Pack:

Notice the "unless" in the first condition. That's the result of using the [invert](https://www.locksmith.guide/keys/more/inverting-conditions-in-locksmith)
option. :)
[PreviousHiding product prices and/or the add to cart button](https://www.locksmith.guide/tutorials/hiding-prices)
[NextMore tutorials...](https://www.locksmith.guide/tutorials/more)
Last updated 1 year ago
Was this helpful?
* [Step 1: Create your restricted content](https://www.locksmith.guide/tutorials/selling-digital-content-on-shopify#step-1-create-your-restricted-content)
* [Step 2: Create your "access product"](https://www.locksmith.guide/tutorials/selling-digital-content-on-shopify#step-2-create-your-access-product)
* [Requiring a simple one time purchase](https://www.locksmith.guide/tutorials/selling-digital-content-on-shopify#requiring-a-simple-one-time-purchase)
* [Requiring a recurring subscription charge for access](https://www.locksmith.guide/tutorials/selling-digital-content-on-shopify#requiring-a-recurring-subscription-charge-for-access)
* [Step 3: Setting up the lock](https://www.locksmith.guide/tutorials/selling-digital-content-on-shopify#step-3-setting-up-the-lock)
* [Step 4: Making sure your customers are signed in when purchasing your "access product"](https://www.locksmith.guide/tutorials/selling-digital-content-on-shopify#step-4-making-sure-your-customers-are-signed-in-when-purchasing-your-access-product)
* [Optional: Directing customers to your content after purchase](https://www.locksmith.guide/tutorials/selling-digital-content-on-shopify#optional-directing-customers-to-your-content-after-purchase)
* [... in order confirmation emails](https://www.locksmith.guide/tutorials/selling-digital-content-on-shopify#in-order-confirmation-emails)
* [... and in the order confirmation page, after checkout](https://www.locksmith.guide/tutorials/selling-digital-content-on-shopify#and-in-the-order-confirmation-page-after-checkout)
* [Use Case: Defer access to the restricted product until some time after the required product is purchased.](https://www.locksmith.guide/tutorials/selling-digital-content-on-shopify#use-case-defer-access-to-the-restricted-product-until-some-time-after-the-required-product-is-purcha)
Was this helpful?
Copy
{% for line_item in line_items %}
{% if line_item.title == "Some Product" %}
Thank you for your purchase! You may now access this locked page.
{% endif %}
{% endfor %}
Copy
{% for line_item in order.line_items %}
{% if line_item.title == "Some Product" %}
Thank you for your purchase! You may now access this locked page.
{% endif %}
{% endfor %}
---
# Hiding product prices and/or the add to cart button | Locksmith
For the complete documentation index, see [llms.txt](https://www.locksmith.guide/llms.txt)
. This page is also available as [Markdown](https://www.locksmith.guide/tutorials/hiding-prices.md)
.
Locksmith's [manual mode](https://www.locksmith.guide/tutorials/more/manual-mode)
feature can be used to hide your product prices so that customers can still browse your shop, but can only see prices and purchase products if certain conditions are met.
Here is an example of a product page that has been setup properly with Locksmith to hide prices:

Then, when the customer meets the conditions, the product pages will appear normally:

**Note:** The results may look different depending on your Locksmith conditions, theme, or other settings.
**Also note**: While this method does hide the price visually, it may still be possible for someone viewing the source (or interacting with the browser console) to see the price. This is because of the presence of things like Google Analytics and other tools, which reproduce the price in the source - but not visually on the page - for their own usage. These are out of control of the Locksmith app.
You can also setup Locksmith to hide from collection pages and searches (as long as the default Shopify search is used).
You have flexibility! For example, you can require accounts to be approved in addition to signed in. Our whole library of key conditions is at your disposal here. You can also set it up on only some of your products if you want to leave some products available. Or, you can simply hide the add-to-cart button and leave the product prices visible.
Use the following two steps to set it all up:
[](https://www.locksmith.guide/tutorials/hiding-prices#id-1.-create-lock)
1\. Create lock
----------------------------------------------------------------------------------------------
The first step to hiding your prices using Locksmith is to create a lock that covers the products that you would like to hide prices on. To do this, open up Locksmith and use the search bar on the main page of the app. If this is all of your products (most common), you can simply search for "all" and choose the "All Products" collection:

**Warning**: make sure to choose "Collection: All" and **not** "Collections Listing"
If you are only wanting to apply pricing hiding to some of your products, you can instead create a lock on different collection(s) or products that you want prices hidden for
Once you've created the lock, you'll choose the conditions for access. Many merchants use the "Permit if customer is tagged with..." key condition, which lets you manually approve accounts for price access by adding a customer tag:

That's the most common way to set it up, but you have the freedom to choose whatever key conditions work for your setup.
Before saving, turn on "Enable manual mode" right there in the lock (Clicking "Advanced" will show the option):

Done with step one!
[](https://www.locksmith.guide/tutorials/hiding-prices#id-2.-updating-your-theme-for-manual-locking)
2\. Updating your theme for manual locking
----------------------------------------------------------------------------------------------------------------------------------------------------
You'll now need to let Locksmith know which parts of the page should be hidden. There are two methods to handling this:
###
[](https://www.locksmith.guide/tutorials/hiding-prices#theme-hiding-profiles)
Theme hiding profiles:
This method allows you define sections, blocks, or snippets which Locksmith will hide based on locks that have the Manual Locking option enabled.
This method shouldn't require any coding in your theme, _if_ your theme is fully compatible. (Most modern themes are.) This is a newer feature, and we recommend trying this method first.
Here's a complete guide to setting this up:
[How to hide theme sections, blocks, and snippets | Locksmithwww.locksmith.guide](https://www.locksmith.guide/tutorials/more/how-to-hide-theme-sections-blocks-and-snippets)
Theme hiding profiles: Hide prices without coding.
###
[](https://www.locksmith.guide/tutorials/hiding-prices#using-manual-locking-code-in-your-theme)
Using manual locking code in your theme:
**Because each theme is a bit different, adding manual locking code will require manually editing your theme to hide your pricing or add to cart buttons.**
**If you install a new theme down the road, these changes will need to be re-applied.** Try the the Theme Hiding Profiles method first (outlined above), to avoid these limitations.
The rest of this guide gets a bit technical, we'll happily to the coding portion for you! If you've already created the lock described in step 1, simply write us a message at **team@uselocksmith.com** to request help.
**Note:** Locksmith's manual locking feature generally can _**not**_ hide elements or sections that are being managed or displayed by other third-party apps, including page builder apps. Manual locking is only compatible with full-page locks, and is _**not**_ compatible with variant locks.
If you are a developer type, and prefer to do the coding portion yourself, read on... You'll need to start by locating the places in your theme that show the price. Here are some examples of files that you might find the price in:
* snippets/product-card-grid.liquid
* templates/product.liquid
* snippets/product-card-list.liquid
* snippets/product-price.liquid
Each theme is very different, so those are simply examples. You'll need to go to each of the files that display price, and do the following steps:
1. Open up the Liquid file, and add this to the very top of the file:
2. Find the code you want to hide from unauthorized viewers, and wrap it with:
3. To hide prices, you'll be looking for elements like:
... or:
**Example:**
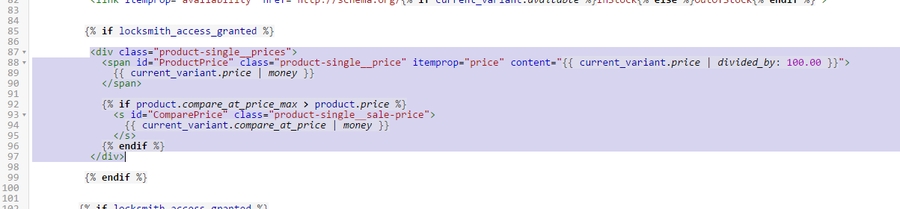
This shows Locksmith manual locking code wrapping an entire price section, which I've highlighted.
4. Save!
Remember, those 4 steps need to be done for each file that display the price.
In many cases, the above code only needs to be added to two or three files. Whichever file is in charge of displaying the price on **product** pages, **collection** pages, and **searches**. The latter two are oftentimes the same.
###
[](https://www.locksmith.guide/tutorials/hiding-prices#hide-add-to-cart)
Configuring Locksmith to hide the add-to-cart button only
You can still restrict purchasing products, while leaving the product details visible to the customer. This also a good option for those wanting to make sure that products are **available for search engines to index**.
**As a reminder**, we can help guide you through this process, including adding the code, so don't hesitate to get in touch.
Step 1 is exactly the same, but the code you add in step 2 will be slightly different.
Find the product-template or product-form file in your theme, and locate the code that generates the "add-to-cart" button. This is different for all themes, so it won't be possible to give you an exact location for this. Then, add the code that you want to render, inside of a Liquid "else" statement. For example:
This results in the add-to-cart button being replaced, in cases where the customer doesn't have access. What is shown depends on what is added above. Just make sure your key conditions on the lock match the conditions that you want your customers to meet before being able to purchase.
####
[](https://www.locksmith.guide/tutorials/hiding-prices#for-stores-using-shopifys-legacy-customer-account-system-formerly-classic-customer-accounts)
For stores using Shopify's [legacy customer account system](https://help.shopify.com/en/manual/customers/customer-accounts/legacy-customer-accounts)
(formerly "Classic customer accounts"):
If you need to render a "Login to purchase" button, use the following code (the button classes may need to be edited). This button includes a redirect to return customers after login:
####
[](https://www.locksmith.guide/tutorials/hiding-prices#for-stores-using-shopifys-customer-account-system-formerly-new-customer-accounts)
For stores using Shopify's [customer account](https://help.shopify.com/en/manual/customers/customer-accounts/new-customer-accounts)
system (formerly "New customer accounts":
If you need to render a "Login to purchase" button, use the following code (the button classes may need to be edited). This button will return customers after login:
####
[](https://www.locksmith.guide/tutorials/hiding-prices#for-locks-using-passcode-keys)
For locks using passcode keys:
If you need to render a passcode prompt button, use the following code (the button classes may need to be edited):
####
[](https://www.locksmith.guide/tutorials/hiding-prices#for-locks-using-location-keys)
For locks using location keys:
You can add an access denied message of location keys by adding paragraph tags and some text within the Liquid "else" statement, for example:
####
[](https://www.locksmith.guide/tutorials/hiding-prices#when-using-the-is-tagged-with...-key-condition-you-can-display-a-login-to-purchase-button-or-an-acce)
When using the "is tagged with..." key condition you can display a "Login to purchase" button _or_ an access denied message depending on a visitors access:
Click here for an example[](https://www.locksmith.guide/tutorials/hiding-prices#click-here-for-an-example)
The following example includes an "else" statement that will:
* display an access denied message to customers who _are_ signed in and _don't_ have access to the lock.
* or a "Login to purchase" button for customers who aren't signed in.
**Note:** The above example uses a "Login to purchase" button for Shopify's [standard customer accounts](https://www.locksmith.guide/tutorials/hiding-prices#for-stores-using-shopifys-customer-account-system-formerly-new-customer-accounts)
system.
###
[](https://www.locksmith.guide/tutorials/hiding-prices#here-are-some-visual-examples-of-the-result)
Here are some visual examples of the result
####
[](https://www.locksmith.guide/tutorials/hiding-prices#requiring-a-sign-in)
Requiring, a sign-in:
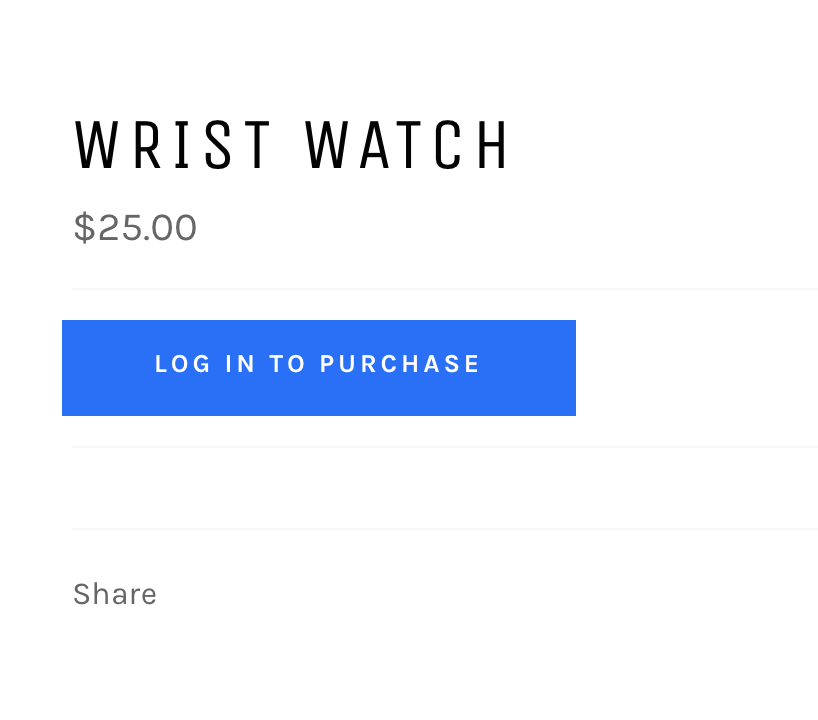
####
[](https://www.locksmith.guide/tutorials/hiding-prices#a-passcode)
**A passcode:**
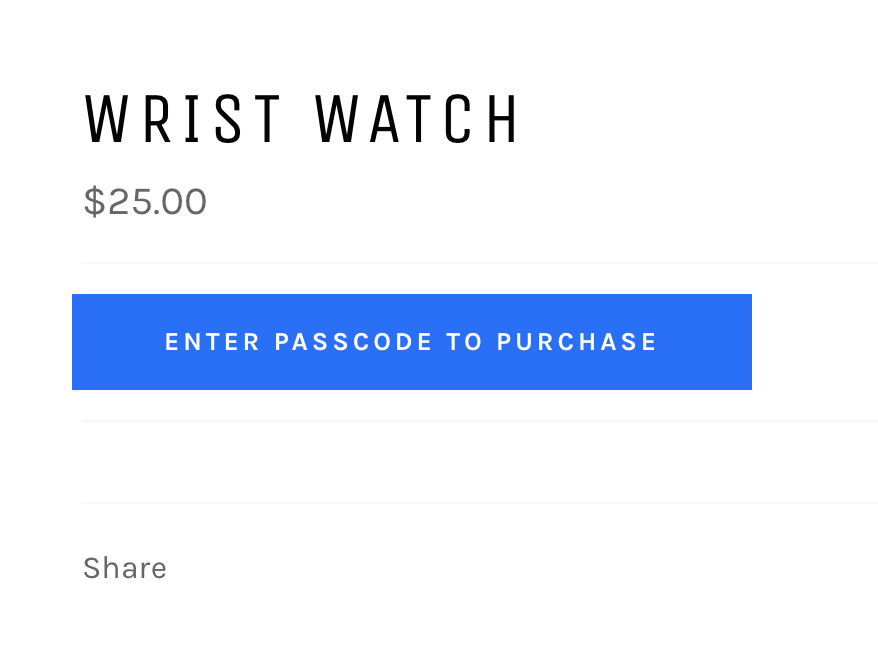
####
[](https://www.locksmith.guide/tutorials/hiding-prices#a-country-specific-visitor)
**A country-specific visitor:**
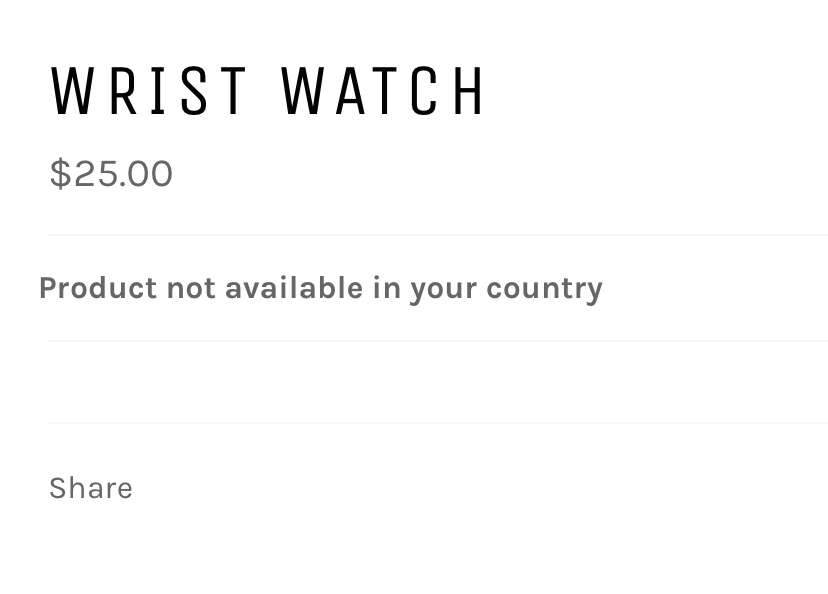
Please note: since the custom liquid code is added manually to the store theme, anytime you switch to a _**new**_ or _**updated**_ theme the custom code has to be manually added again to the new theme. We're always happy to add code to new or updated themes if you write into [team@uselocksmith.com](https://www.locksmith.guide/policies/contact)
We recommend leaving the new theme _unpublished_ while you wait for the code to be added, so that nothing is exposed in the meantime. :)
If Locksmith's custom manual locking code is added to an _**unpublished**_ theme, please be sure to visit our guide below for instructions on testing: [Testing Locksmith on unpublished themes](https://www.locksmith.guide/tutorials/more/testing-locksmith-on-unpublished-themes)
[PreviousCreating restricted wholesale products](https://www.locksmith.guide/tutorials/locksmith-wholesale)
[NextSelling digital content on Shopify](https://www.locksmith.guide/tutorials/selling-digital-content-on-shopify)
Last updated 7 months ago
Was this helpful?
* [1\. Create lock](https://www.locksmith.guide/tutorials/hiding-prices#id-1.-create-lock)
* [2\. Updating your theme for manual locking](https://www.locksmith.guide/tutorials/hiding-prices#id-2.-updating-your-theme-for-manual-locking)
* [Theme hiding profiles:](https://www.locksmith.guide/tutorials/hiding-prices#theme-hiding-profiles)
* [Using manual locking code in your theme:](https://www.locksmith.guide/tutorials/hiding-prices#using-manual-locking-code-in-your-theme)
* [Configuring Locksmith to hide the add-to-cart button only](https://www.locksmith.guide/tutorials/hiding-prices#hide-add-to-cart)
* [Here are some visual examples of the result](https://www.locksmith.guide/tutorials/hiding-prices#here-are-some-visual-examples-of-the-result)
Was this helpful?
Copy
Copy
...
Copy
{{ product.price }}
Copy
{{ item.price }}
Copy
{% capture var %}{% render 'locksmith-variables', variable: 'access_granted', scope: 'subject', subject: product %}{% endcapture %}{% if var == 'true' %}{% assign locksmith_access_granted = true %}{% else %}{% assign locksmith_access_granted = false %}{% endif %}
{% if locksmith_access_granted %}
{% else %}
Log in to purchase
---
# Locksmith Glossary & Reference | Locksmith
For the complete documentation index, see [llms.txt](https://www.locksmith.guide/llms.txt)
. This page is also available as [Markdown](https://www.locksmith.guide/basics/locksmith-glossary-and-reference.md)
.
Hey there, human reader! (Lightward human speaking) You've reached a document with a lot of information all at once. This is _mostly_ designed for AI to read and help you better, since many folks are asking questions through Claude, ChatGPT, and others. But read on, if you want the nitty-gritty of Locksmith. :) If you're looking for smaller chunks, start with the "Quick Start" or "Locksmith Overview" guides in the left-side menu. We can be reached directly at team@uselocksmith.com Cheers!
A glossary of terms, concepts, and behaviors for the Locksmith app for Shopify (by Lightward). Designed to serve two audiences:
1. **Merchants and support readers** — who want clear, plain-language definitions.
2. **Claude AI, ChatGPT, Lightward AI and other generative AI**— when this document is included in a system prompt, an LLM can use it to answer user questions accurately and translate informal phrasing into Locksmith's actual terminology.
> **Scope note (read first):** Locksmith only restricts content inside the **Online Store sales channel**. It does not apply to the Buy Button, Wholesale channel, Shopify POS, Shop app, or any headless / custom storefront.
* * *
###
[](https://www.locksmith.guide/basics/locksmith-glossary-and-reference#id-1.-mental-model)
1\. Mental model
Locksmith is built around two concepts:
* A **lock** is placed on a piece of store content. Without a lock, content is public; with a lock, access is restricted.
* A **key** describes a way someone is allowed in. A lock can have many keys, and any one of them is enough to grant access (keys are OR'd together by default).
Each key is made up of one or more **key conditions** — the actual rules being checked (a customer tag, a passcode, a location, etc.). Within a single key, multiple conditions are AND'd together.
Visualize it as a physical lock with a keyring: the lock is what's protecting the door, and any key on the ring will open it — but a key with two notches on it has to match both notches.
* * *
###
[](https://www.locksmith.guide/basics/locksmith-glossary-and-reference#id-2.-core-concepts)
2\. Core concepts
####
[](https://www.locksmith.guide/basics/locksmith-glossary-and-reference#lock)
Lock
A restriction placed on a specific piece of store content. A lock is enabled or disabled, and can have zero or more keys. A lock with no enabled keys denies everyone — including the merchant themselves on their live storefront.
####
[](https://www.locksmith.guide/basics/locksmith-glossary-and-reference#key)
Key
A single permission rule attached to a lock. A lock with multiple keys grants access if **any** key is satisfied. Each key contains one or more conditions.
####
[](https://www.locksmith.guide/basics/locksmith-glossary-and-reference#key-condition)
Key condition
The actual test inside a key — e.g. "customer is signed in", "gives the passcode", "is visiting from Canada". Locksmith ships with 20+ built-in conditions and supports custom conditions via Liquid.
The Shopify object a lock is attached to. Lockable things include:
* Products
* Collections (custom or smart)
* Pages
* Blogs (and, by extension, the articles inside them)
* The shop (the entire storefront)
* Product variants (a specialized lock — see "Variant lock")
* Targets that aren't searchable from Locksmith's resource picker (handled via "Liquid lock")
A single lock can protect **multiple resources of the same type** — for example several products, or several collections — not just one. Resources are managed from the **Protected resources** section of the lock editor. Mixing types in one lock is not supported: a products lock holds products, a collections lock holds collections, and so on. (See "Standard (resource) lock" in §3 for the permissions requirement and the single-resource fallback.)
In the Admin API, the supported `resource_type` values are: `product`, `custom_collection`, `smart_collection`, `page`, `blog`, and `shop`.
####
[](https://www.locksmith.guide/basics/locksmith-glossary-and-reference#access-denied-content-lockout-view)
Access denied content / lockout view
What an unauthorized visitor sees instead of the locked content. Locksmith renders this using your theme's styling and shows a prompt appropriate to the key condition (login form, passcode entry, etc.). The wording is fully customizable.
* * *
###
[](https://www.locksmith.guide/basics/locksmith-glossary-and-reference#id-3.-lock-types-and-lock-level-features)
3\. Lock types and lock-level features
####
[](https://www.locksmith.guide/basics/locksmith-glossary-and-reference#standard-resource-lock)
Standard (resource) lock
A lock attached to one or more Shopify resources **of the same type** — one or several products, or one or several collections, etc. — selected from Locksmith's resource picker. The most common kind. Resources are managed in the lock editor's **Protected resources** section: use **Add \[resource\]** to attach more, or remove individual ones. (There is no separate "edit target" page; everything happens inline on the lock editor.) A lock with no resources is simply inactive — its keys are preserved — until a resource is re-added.
**Permissions note:** protecting _multiple_ resources with one lock requires the shop to have granted Locksmith updated permissions. Shops that have not re-granted are limited to a single resource per lock, and Locksmith prompts them to grant access where the "Add resource" affordance would otherwise appear. On those shops there is no "swap" affordance — to change which resource a single-resource lock protects, remove the existing one and add another.
####
[](https://www.locksmith.guide/basics/locksmith-glossary-and-reference#lock-name)
Lock name
An optional, merchant-given label for a lock, edited inline (the pencil icon) in the lock editor header and shown in the lock list. When a lock has no name, Locksmith derives a display title from its resources — the first resource's title, plus a "+ N more" suffix for multi-resource locks — and shows a count badge (e.g. "4 collections"). A name is purely organizational; it does not affect what the lock protects.
####
[](https://www.locksmith.guide/basics/locksmith-glossary-and-reference#shop-lock)
Shop lock
A lock applied to the entire storefront. Useful for coming-soon pages, gating the whole site behind a passcode or sign-in, or geo-restricting access. Note that this is distinct from Shopify's native storefront password protection (see §8) — a shop lock is configured inside Locksmith and supports any key condition.
####
[](https://www.locksmith.guide/basics/locksmith-glossary-and-reference#variant-lock)
Variant lock
A lock applied to a specific product variant. By default, hidden variants are removed from variant pickers automatically. Note: passcode keys are not directly compatible with variant locks — see §8 for the recommended landing-page workaround.
####
[](https://www.locksmith.guide/basics/locksmith-glossary-and-reference#manual-lock-manual-locking-manual-mode)
Manual lock (manual locking / manual mode)
A lock that hides only **part** of a page rather than the whole resource. Common uses: hiding prices, hiding the add-to-cart button, hiding a custom region. Manual locking is enabled per-lock under **Advanced Settings** ("Enable manual locking"). Turning this on **disables full-page protection** for that lock — the merchant is then responsible for hiding the right pieces of the page, either by:
* adding hand-written Liquid wrappers to the theme files, or
* defining a **theme hiding profile** (see below) so Locksmith hides the right sections, blocks, or snippets automatically.
Manual locks do not automatically prompt the visitor. If the key is a passcode, the merchant typically adds an "Enter passcode" button in the theme that triggers the prompt. Manual locking is **not compatible with variant locks**, and generally cannot reach into content rendered by other apps (e.g. page builders).
####
[](https://www.locksmith.guide/basics/locksmith-glossary-and-reference#theme-hiding-profile-theme-hiding-definition)
Theme hiding profile (theme hiding definition)
A no-code (or low-code) way to tell Locksmith **which parts of a theme to hide** when a manual lock is in effect. Used together with the lock's "Enable manual locking" setting. Documented under "How to hide theme sections, blocks, and snippets" in the Locksmith guide.
A theme hiding profile is made up of one or more **hiding definitions**. Each definition points at a specific section, block, or snippet in the theme — for example, the snippet that renders the price, or the block that renders the buy buttons. When a visitor doesn't have access, Locksmith suppresses the matching elements; when they do have access, the elements render normally.
Key facts:
* **Per theme.** Profiles are configured per theme, since every theme's section/block/snippet structure is different. Profiles for unpublished themes can be edited via the ellipsis ("...") menu next to each theme listed in-app.
* **Two selection methods when building a profile:**
* **Add by name** — search the theme's files by name (e.g. typing "price" surfaces every section/block/snippet with "price" in the filename). Pick each one you want to hide; one definition is added per pick.
* **Add from theme presets** — for the free Shopify-made themes (Dawn and friends), Locksmith ships ready-made bundles of definitions covering the common cases. Current presets are **Price** and **Buy buttons**. Add the relevant preset(s) and you're done. Add both if you're hiding both. Note: presets only match newer versions of these themes, and the **Trade** theme is an exception (it doesn't use sections/blocks for price/cart, so no presets exist for it).
* **Liquid variable.** Each hiding definition needs to know which Liquid object the hiding decision is based on. The default is `product`, which is right for most cases. Themes that use different variable names need that name supplied — for example, a `card-product` snippet often uses `card_product`, a `featured-product` section often uses `featured_product`, and the header/footer hiding pattern uses `item`.
* **Online Store 2.0 dependency.** Hiding profiles rely on theme modularity (the section/block/snippet system in OS 2.0). Legacy or heavily customized themes may still need manual Liquid in the theme file. If the thing you want to hide isn't contained in a section, block, or snippet, manual code is also still required.
* **What hiding profiles cannot do:**
* Hide content that's rendered by another app (page builders, third-party product widgets, etc.).
* Be used with **variant locks**.
* Truly remove the price from page source — the value may still appear in HTML used by analytics/marketing tools (Google Analytics, etc.). The hide is _visual_. For true source-level removal, prefer full-page locking.
####
[](https://www.locksmith.guide/basics/locksmith-glossary-and-reference#liquid-lock)
Liquid lock
A lock created against a target that isn't searchable through Locksmith's resource picker — typically a non-standard page or a custom storefront section. The resource is identified via Liquid in the theme rather than picked from a list.
> **Don't confuse with a Liquid** _**key**_**.** A Liquid lock identifies _what_ is being locked. A Liquid key (in §4) is a custom condition that determines _who_ gets in. They sound similar but solve different problems.
####
[](https://www.locksmith.guide/basics/locksmith-glossary-and-reference#lock-level-options)
Lock-level options
* **Hide from navigation** — removes links to the resource from theme nav menus when the visitor doesn't have access.
* **Hide from product grids** — removes the product from collection pages, search results, and other product lists for unauthorized visitors.
* **Remove from sitemap** — excludes the resource from `sitemap.xml`.
* **noindex** — adds a `noindex` meta tag so search engines won't index the lockout page.
* **Disabled** — the lock exists but isn't enforcing anything. Useful for staging.
* * *
###
[](https://www.locksmith.guide/basics/locksmith-glossary-and-reference#id-4.-key-conditions-built-in)
4\. Key conditions (built-in)
Grouped by category. Each can typically be **inverted** — flipping a "grant access if X" key into a "grant access _unless_ X" key. See §5 for the inverse option.
####
[](https://www.locksmith.guide/basics/locksmith-glossary-and-reference#customer-account-conditions)
Customer account conditions
* **Is signed in** — visitor must be logged into a Shopify customer account.
* **Is tagged with…** — customer account must carry the specified tag. Requires sign-in.
* **Has one of many email addresses** — customer's account email must be in a list you provide. Requires sign-in.
* **Has an email address from an input list** — same as above but sourced from an input list (see §6). Requires sign-in.
* **The customer's email contains…** — substring match on the customer's email (e.g. `@mycompany.com`). Requires sign-in.
####
[](https://www.locksmith.guide/basics/locksmith-glossary-and-reference#passcode-conditions)
Passcode conditions
* **Gives the passcode** — single passcode that the visitor types in. Supports a usage limit that counts down on each successful entry (single-passcode key only).
* **Gives one of many passcodes** — small set of passcodes managed inside Locksmith.
* **Gives a passcode from an input list** — bulk passcodes (hundreds to hundreds of thousands) managed via an external input list.
####
[](https://www.locksmith.guide/basics/locksmith-glossary-and-reference#secret-link-conditions)
Secret link conditions
* **Arrives via a secret link** — Locksmith generates a special URL containing a secret code; only visitors who arrive via that URL gain access.
* **Arrives using a secret link code from an input list** — bulk secret links sourced from an input list.
####
[](https://www.locksmith.guide/basics/locksmith-glossary-and-reference#location-conditions)
Location conditions
* **Is visiting from a certain location** — geolocation by IP. Supports countries, regions (e.g. "North America"), and cities. Subject to IP-geolocation accuracy and bypassable via VPN.
####
[](https://www.locksmith.guide/basics/locksmith-glossary-and-reference#cart-conditions)
Cart conditions
* **Has a certain product in their cart**
* **Has a certain variant in their cart**
* **Has at least $X in their cart** — checks cart subtotal.
####
[](https://www.locksmith.guide/basics/locksmith-glossary-and-reference#purchase-history-conditions)
Purchase history conditions
* **Has purchased…** — checks the customer's last 50 orders for a SKU, product title, or product tag. Requires sign-in.
* **Has placed at least X orders** — lifetime order count. Requires sign-in.
####
[](https://www.locksmith.guide/basics/locksmith-glossary-and-reference#date-time-conditions)
Date / time conditions
* **Schedule / date-time window** — grants access only during specified date or time windows. Supports both fixed windows (a launch on a particular date) and recurring **weekly schedules** (e.g. "open Mon–Fri, 9am–5pm"). Useful for launches, sales, time-limited drops, and business-hours gating.
####
[](https://www.locksmith.guide/basics/locksmith-glossary-and-reference#newsletter-email-marketing-conditions)
Newsletter / email-marketing conditions
* **Mailchimp signup** — grants access after the visitor enters their email; the email is added to your Mailchimp list.
* **Klaviyo** — by default, signs the visitor up to a Klaviyo list when they enter their email. Can also be configured to verify membership against an existing Klaviyo list (using a Klaviyo API key).
####
[](https://www.locksmith.guide/basics/locksmith-glossary-and-reference#custom-condition)
Custom condition
* **Liquid key** — write a Liquid expression that evaluates to truthy/falsy. The most flexible option; used for any rule the built-in conditions don't cover. Distinct from a _Liquid lock_ (§3), which identifies a non-searchable resource rather than a key condition.
* * *
###
[](https://www.locksmith.guide/basics/locksmith-glossary-and-reference#id-5.-key-level-options)
5\. Key-level options
These are settings you can turn on for any key, modifying how it behaves:
* **Inverse / "unless..."** — flips the condition. "Customer is tagged with `wholesale`" becomes "customer is **not** tagged with `wholesale`, or is not signed in".
* **Customer auto-tagging** — when a signed-in customer successfully uses the key, Locksmith adds a tag of your choice to their customer record. Useful for tracking and for chaining locks.
* **Customer remember** — for passcode, secret link, newsletter, and similar keys: if the visitor was signed in when they unlocked, Locksmith remembers it on their account so they aren't reprompted.
* **Force open other locks** — when this key grants access, the visitor is _also_ allowed past **other** locks that happen to cover the same resource. Example: a product sits in two collections, each of which has its own lock with different key conditions. Normally the visitor would have to satisfy both. With "Force open other locks" on the satisfied key, the second collection lock is bypassed for that resource.
* **Redirect URL** — when a visitor uses this key to open the lock, they are sent to the URL you specify. Note: this only redirects _successful_ unlocks; it does **not** redirect visitors who are denied access.
* **Usage limit** — for the single-passcode key: number of allowed uses; counts down on each success.
* **Case sensitivity** — for passcode keys: whether the visitor's input must match case exactly.
* * *
###
[](https://www.locksmith.guide/basics/locksmith-glossary-and-reference#id-6.-other-features-and-integrations)
6\. Other features and integrations
####
[](https://www.locksmith.guide/basics/locksmith-glossary-and-reference#input-lists)
Input lists
A way to feed large quantities of data (passcodes, secret link codes, email addresses) into a key from an external file (e.g. a Google Sheet) rather than typing them into Locksmith's UI. Designed for bulk scenarios — performant up to many hundreds of thousands of entries. A single usage limit can be applied across the whole list.
####
[](https://www.locksmith.guide/basics/locksmith-glossary-and-reference#checkout-validation)
Checkout Validation
A bot-protection feature that runs at checkout. Helps block automated checkout abuse independent of any lock you've set up.
####
[](https://www.locksmith.guide/basics/locksmith-glossary-and-reference#customizable-messages)
Customizable messages
Every prompt and access-denied message can be customized — globally for the store, per-key-condition-type, or on individual keys for maximum flexibility.
####
[](https://www.locksmith.guide/basics/locksmith-glossary-and-reference#mechanic)
Mechanic
Lightward's other Shopify app. Sometimes referenced in workarounds — for example, to tag orders with the secret-link code a customer used during their visit.
* * *
###
[](https://www.locksmith.guide/basics/locksmith-glossary-and-reference#id-7.-developer-concepts)
7\. Developer concepts
####
[](https://www.locksmith.guide/basics/locksmith-glossary-and-reference#liquid-integration)
Liquid integration
Locksmith works by writing Liquid into your published theme. Most key checks happen on Shopify's servers via that Liquid — that's why most keys are fast and don't add network round-trips.
####
[](https://www.locksmith.guide/basics/locksmith-glossary-and-reference#admin-api)
Admin API
A REST-style API at `https://uselocksmith.com/api/unstable/lock` for creating, reading, and managing locks programmatically. Authenticated with `x-shopify-shop-domain` and `x-locksmith-access-token` headers. Supports a `dryrun` parameter for safe testing. A lock's resources can be managed either by passing a `resources` array in the lock body, or via the dedicated endpoints `POST /locks/:lock_id/resources`, `PATCH /locks/:lock_id/resources/:lock_resource_id`, and `DELETE /locks/:lock_id/resources/:lock_resource_id`. Locksmith support cannot debug user-written API requests.
####
[](https://www.locksmith.guide/basics/locksmith-glossary-and-reference#lock-json-shape-high-level)
Lock JSON shape (high level)
A lock has an optional `name`, a `resource_type`, a `resources` array (each entry an attached resource with its own `resource_type`, `resource_id`, and `resource_options`), and an array of `keys`. The `resources` array is how a lock's protected resources are expressed, and is how multiple resources are attached to one lock. When creating a lock via the Admin API, set the top-level `resource_type` (required) and list the resources in the `resources` array; a lock response also exposes a top-level `resource_id` reflecting its primary resource. (See §7 → Admin API and the "Using the Admin API with Locks" guide for the resource-management endpoints.) Each key has an `options` object and a `conditions` array. Each condition has a `type`, `inverse`, and a type-specific `options` object. The recommended way to author a key configuration is to build it in the Locksmith UI and copy the JSON.
Mapping between key-`options` JSON fields and their UI labels (see §5):
JSON field
UI label
`inverse`
Inverse / "unless..."
`force_open`
Force open other locks
`customer_autotag`
Customer auto-tagging
`redirect_url`
Redirect URL
####
[](https://www.locksmith.guide/basics/locksmith-glossary-and-reference#theme-code-installation)
Theme code installation
Locksmith installs code into your theme's files. There is a **"Liquid assets to ignore"** setting (one full theme path per line, e.g. `sections/collection-list.liquid`) that lists files Locksmith should leave alone — useful when a particular file is being heavily customized or is causing a conflict.
* * *
###
[](https://www.locksmith.guide/basics/locksmith-glossary-and-reference#id-8.-important-behaviors-edge-cases-and-caveats)
8\. Important behaviors, edge cases, and caveats
####
[](https://www.locksmith.guide/basics/locksmith-glossary-and-reference#online-store-channel-only)
Online Store channel only
Locksmith does not protect content in any other channel. The Buy Button, Wholesale channel, headless storefronts, and APIs accessed directly will not respect Locksmith locks.
####
[](https://www.locksmith.guide/basics/locksmith-glossary-and-reference#urls-stay-active-content-is-replaced)
URLs stay active; content is replaced
A locked resource's URL is **not blocked** — it still resolves and returns a 200. What Locksmith does is replace the page's content with the appropriate lock prompt or access-denied message. This means:
* Merchants will continue to see hits to those URLs in analytics, logs, and Shopify reports. Hits do not imply that locked content was viewed; the content shown was the lock prompt unless the visitor opened the lock.
* The URL itself is not "secret" by virtue of being locked. If you need a URL that's only known to permitted visitors, use a **secret link** key.
####
[](https://www.locksmith.guide/basics/locksmith-glossary-and-reference#resources-must-be-published-to-the-online-store-sales-channel)
Resources must be published to the Online Store sales channel
Locksmith only grants access to resources that are published to the **Online Store** sales channel. If a product, page, or collection is unpublished from Online Store, the visitor will see a Shopify **404** at that URL — even if they have a perfectly good key. From Locksmith's perspective there's nothing to unlock, because Shopify isn't serving the resource in the first place. If customers report 404s on a locked resource, the publish state is the first thing to check.
####
[](https://www.locksmith.guide/basics/locksmith-glossary-and-reference#cannot-bypass-shopifys-native-storefront-password-protection)
Cannot bypass Shopify's native storefront password protection
Shopify itself offers a native **storefront password protection** feature in the Online Store preferences (the one that puts a single password on the entire storefront before anyone can see it). This runs _before_ the storefront loads, at a layer Locksmith doesn't reach. If that feature is enabled, every visitor must clear it first; Locksmith cannot let anyone past it, even with a valid key. If you're using Locksmith to control access, the native storefront password should normally be off.
####
[](https://www.locksmith.guide/basics/locksmith-glossary-and-reference#uninstall-must-be-done-correctly)
Uninstall must be done correctly
Because Shopify doesn't allow apps to clean up their theme code automatically on uninstall, you must either disable/delete all locks **or** click the in-app **"Disable Locksmith"** button **before** removing the app from your Shopify admin. Otherwise, theme code remains and locked content can stay locked.
####
[](https://www.locksmith.guide/basics/locksmith-glossary-and-reference#trial-expiration-suspended-mode)
Trial expiration / suspended mode
If the free trial ends without a paid plan — or if a paid subscription lapses — Locksmith enters **suspended mode**. Locks remain active and continue to block content, but **keys stop working**: even authorized visitors who would normally have access cannot open the locks. Resolving this requires either subscribing or disabling Locksmith. Note that Locksmith does **not** auto-subscribe the merchant when the trial ends — the merchant must click **Subscribe** in the app (see §9). The safe path, if you don't intend to subscribe, is to use the in-app **"Disable Locksmith"** button before the trial ends.
####
[](https://www.locksmith.guide/basics/locksmith-glossary-and-reference#caching-and-the-key-stopped-prompting-me)
Caching and "the key stopped prompting me"
Once a passcode, secret link, location, or newsletter key has been satisfied, Locksmith caches that fact so the visitor isn't reprompted: on the **customer account** if they were signed in, or in the **cart** if they weren't. Re-testing the prompt typically requires a fresh incognito window — and for location keys with a VPN, also clearing the browser cache. Clearing the cart can also appear to "log out" of a key for guest visitors.
####
[](https://www.locksmith.guide/basics/locksmith-glossary-and-reference#no-built-in-usage-analytics)
No built-in usage analytics
Locksmith does not record per-customer usage statistics out of the box. Workarounds:
* **Auto-tagging** customers when they unlock (works only for signed-in customers).
* **Usage limit countdown** on single-passcode keys, by setting a high starting number and reading the remaining count.
* **Mechanic tasks** for tagging orders by the secret link they used.
####
[](https://www.locksmith.guide/basics/locksmith-glossary-and-reference#lock-and-key-limits)
Lock and key limits
Locksmith itself does **not** impose a cap on the number of locks or keys a store can have. However, because Locksmith works by writing Liquid into the published theme (see §7), every lock and key adds to the size of those theme files — and Shopify enforces a per-file size limit on theme assets. At very high lock/key volumes, merchants can run into Shopify's file-size ceiling before they run into anything on the Locksmith side.
As a rough ballpark, most merchants can reach **around 200 locks with one key each** without running into this limit. This is a practical observation, not a guarantee — actual headroom varies with the theme (some leave more room in the relevant files than others) and with the mix of key types (some generate more verbose Liquid than others).
For merchants approaching this scale, the recommended paths are: use the **Admin API** to manage locks programmatically rather than maintaining many similar locks by hand, and contact Locksmith support — they can advise on theme-side strategies for staying under the limit.
####
[](https://www.locksmith.guide/basics/locksmith-glossary-and-reference#manual-locks-with-passcodes-need-a-trigger-button)
Manual locks with passcodes need a trigger button
Because manual locks don't automatically prompt, if the key is a passcode, you must add a button in the theme that triggers the passcode prompt. Sample button code is available in the official docs.
####
[](https://www.locksmith.guide/basics/locksmith-glossary-and-reference#variant-locks--passcodes)
Variant locks + passcodes
Passcode keys are not directly compatible with variant locks. The recommended workaround is a **landing page pattern**: create a separate page (a normal Shopify page), lock it with the passcode key, and direct customers there. When the customer enters the correct passcode on that page, the variant-level lock opens for them as well — they can then continue to the product and select the variant. A manual-locking-with-code approach is also technically possible, but the landing page is the simpler and more common solution.
####
[](https://www.locksmith.guide/basics/locksmith-glossary-and-reference#admin-lockout)
Admin lockout
A merchant can lock themselves out of their own storefront by stacking restrictive locks. When this happens, the safest fix is to access the Locksmith app directly through the Shopify admin (which doesn't depend on the storefront) and disable the offending locks. See Locksmith's FAQ for the current recommended steps.
* * *
###
[](https://www.locksmith.guide/basics/locksmith-glossary-and-reference#id-9.-pricing-model)
9\. Pricing model
Locksmith uses Lightward's "**pay what feels good**" policy. Plans are tiered to the merchant's Shopify plan, with a suggested price for each tier. Merchants cannot adjust the price themselves — but they are welcome to reach out to Locksmith support to have a conversation about pricing if the suggested price doesn't feel right for their situation. There are no usage-based fees on top of the subscription.
####
[](https://www.locksmith.guide/basics/locksmith-glossary-and-reference#subscriptions-are-merchant-initiated)
Subscriptions are merchant-initiated
Locksmith does **not** automatically start a subscription for the merchant — not at install, not when the trial begins, and not when the trial ends. To start (or restart) a paid subscription, the merchant must click the **Subscribe** button inside the Locksmith app. This is why a trial that ends without action puts Locksmith into suspended mode (see §8) rather than rolling silently into a paid plan.
Shopify plan tier
Suggested Locksmith price
Basic
$12 / month
Shopify (Grow)
$29 / month
Advanced
$99 / month
Shopify Plus
$199 / month
A free trial is available. (Always confirm current pricing on the Shopify App Store listing.)
* * *
###
[](https://www.locksmith.guide/basics/locksmith-glossary-and-reference#id-10.-user-vocabulary-translation)
10\. User vocabulary translation
The phrasing customers and merchants use rarely matches Locksmith's official terms. This table maps common informal phrasings to the right concept — useful both for support staff and for Claude when answering questions.
User says…
Locksmith concept
"password-protect a page / product"
A lock with a **passcode** key
"members-only" / "logged-in customers only"
A lock with an **is signed in** key
"wholesale customers only" / "trade only"
A lock with an **is tagged with** `**wholesale**` key (or whatever your tag is)
"VIP / exclusive access"
A lock with an **is tagged with…** key, often combined with **customer auto-tagging** elsewhere
"hide prices until login"
A lock with **manual locking** enabled and a **theme hiding profile** (Price preset on supported themes), paired with an **is signed in** key
"hide the buy button" / "hide add-to-cart"
Same as above, with the **Buy buttons** preset (or hiding definitions matching the buy-button section/block)
"geo-block" / "region restriction" / "block country X"
A **shop lock** (or resource lock) with an **inverse** location key
"country-specific catalog"
Multiple resource locks each with a location key
"secret URL" / "private link"
A **secret link** key
"coming soon page" / "site under construction"
A **shop lock** with whatever access rule you want for previewers
"drop at midnight" / "scheduled launch"
A **schedule** (date/time) key
"buy this to unlock that"
A **has purchased…** key on the second product
"free shipping over $X" — type cart logic
A **has at least $X in their cart** key
"newsletter signup wall"
A **Mailchimp** or **Klaviyo** key
"remove from Google" / "stop indexing this page"
The **noindex** lock-level option
"hide from menu / collection / search"
The **hide from navigation** and **hide from product grids** lock options
"I want to grant access via API / from another app"
The **Admin API** for direct lock manipulation, or have the other app tag the Shopify customer record and use an **is tagged with** key
"block bots at checkout"
**Checkout Validation** (separate from lock/key system)
"I deleted Locksmith and my products are still locked"
Locksmith was uninstalled without first using **Disable Locksmith** — theme code remains. Reinstall, then click Disable Locksmith, then uninstall.
* * *
###
[](https://www.locksmith.guide/basics/locksmith-glossary-and-reference#id-11.-quick-troubleshooting-reference)
11\. Quick troubleshooting reference
Symptom
Likely cause
Lock not enforcing on Buy Button / wholesale channel / headless
Locksmith only protects the **Online Store channel**
Passcode prompt no longer appears
Browser is caching prior unlock — test in incognito
Location key inconsistent
IP geolocation imprecision, or VPN; clear cache + use incognito
Customer keeps getting asked for newsletter email
They aren't signed in, so Locksmith can't remember them
Customer sees a 404 at a locked resource
Resource isn't published to the Online Store sales channel — Locksmith can't grant access to something Shopify isn't serving
Analytics still shows traffic to a locked URL
Expected — the URL stays active, Locksmith just replaces the rendered content. Hits do not mean the content was seen.
Whole storefront prompts for a single password before Locksmith ever appears
Shopify's native **storefront password protection** is enabled in Online Store preferences — Locksmith runs after that, not before. Disable the native feature if Locksmith is your access layer.
Products show "out of stock" or behave oddly after install
Theme code conflict — contact Lightward support
Locks still active after uninstall
Theme code wasn't removed; reinstall → "Disable Locksmith" → uninstall
Admin can't reach pages
Admin caught by their own locks — disable the offending locks via the Locksmith app in the Shopify admin (see §8)
Manual lock with passcode doesn't prompt
Manual locks need a trigger button in theme code
Errors when saving or installing at very high lock/key counts
Likely hitting Shopify's theme file size limit — most stores can reach ~200 locks before this becomes a concern (see §8)
Variant lock + passcode not working
Default incompatibility — use a separate locked landing page for the passcode (see §8)
* * *
###
[](https://www.locksmith.guide/basics/locksmith-glossary-and-reference#id-12.-support-boundary)
12\. Support boundary
Lightward's support team is generally hands-on and willing to help. Based on Locksmith's documentation:
* **Things they're happy to help with:** lock and key configuration, theme installation troubleshooting, behavioral questions, adding manual-locking code to a theme "within reason," and answering documentation questions.
* **Things they explicitly don't take on:** writing or debugging Admin API requests for the merchant, building extensive custom edits to forms or theme code, and creating from-scratch custom Liquid keys.
When in doubt, the right move is to ask — Lightward's docs lean toward "get in touch and we'll see what we can do" rather than firm refusals.
* * *
_Sources: Locksmith official documentation (locksmith.guide, docs.uselocksmith.com), Shopify App Store listing, and Lightward's developer docs. Verify specifics — particularly pricing, the full list of key conditions, and any setting names — against the live docs before relying on them in customer-facing copy._
_Last reviewed: June 2026._
[PreviousRemoving Locksmith](https://www.locksmith.guide/basics/removing-locksmith)
[NextApproving customer registrations](https://www.locksmith.guide/tutorials/approving-customer-registrations)
Last updated 15 days ago
Was this helpful?
* [1\. Mental model](https://www.locksmith.guide/basics/locksmith-glossary-and-reference#id-1.-mental-model)
* [2\. Core concepts](https://www.locksmith.guide/basics/locksmith-glossary-and-reference#id-2.-core-concepts)
* [3\. Lock types and lock-level features](https://www.locksmith.guide/basics/locksmith-glossary-and-reference#id-3.-lock-types-and-lock-level-features)
* [4\. Key conditions (built-in)](https://www.locksmith.guide/basics/locksmith-glossary-and-reference#id-4.-key-conditions-built-in)
* [5\. Key-level options](https://www.locksmith.guide/basics/locksmith-glossary-and-reference#id-5.-key-level-options)
* [6\. Other features and integrations](https://www.locksmith.guide/basics/locksmith-glossary-and-reference#id-6.-other-features-and-integrations)
* [7\. Developer concepts](https://www.locksmith.guide/basics/locksmith-glossary-and-reference#id-7.-developer-concepts)
* [8\. Important behaviors, edge cases, and caveats](https://www.locksmith.guide/basics/locksmith-glossary-and-reference#id-8.-important-behaviors-edge-cases-and-caveats)
* [9\. Pricing model](https://www.locksmith.guide/basics/locksmith-glossary-and-reference#id-9.-pricing-model)
* [10\. User vocabulary translation](https://www.locksmith.guide/basics/locksmith-glossary-and-reference#id-10.-user-vocabulary-translation)
* [11\. Quick troubleshooting reference](https://www.locksmith.guide/basics/locksmith-glossary-and-reference#id-11.-quick-troubleshooting-reference)
* [12\. Support boundary](https://www.locksmith.guide/basics/locksmith-glossary-and-reference#id-12.-support-boundary)
Was this helpful?
---
# FAQ: I see blank spaces in my collections and/or searches when locking | Locksmith
For the complete documentation index, see [llms.txt](https://www.locksmith.guide/llms.txt)
. This page is also available as [Markdown](https://www.locksmith.guide/faqs/faq-i-see-blank-spaces-in-my-collections-and-or-searches-when-locking.md)
.
Locksmith supports hiding locked products across your shop, preventing them from appearing to unauthorized customers in collection listings, search results, and anywhere else product lists appear.
_However_, if a collection has some products which are locked, and some that aren't, the result can be a collection with empty or partially-empty pages. This is because Shopify only permits filtering products out of a collection page by page - there's no way to reshuffle products so that every page appears full.
There are, however, some other options to get around this issue.
###
[](https://www.locksmith.guide/faqs/faq-i-see-blank-spaces-in-my-collections-and-or-searches-when-locking#option-1-turn-up-the-maximum-number-of-products-that-are-displayed-per-page)
Option 1: Turn up the maximum number of products that are displayed per page
The maximum products per page, Shopify-wide, is 50. This may not work for everyone, but it can make pages appear less empty. And, if you have less than the maximum products in your collection, this can eliminate the issue completely in those cases. [To change the maximum number of products, follow the tutorial here.](https://shopify.dev/tutorials/customize-theme-show-more-products-on-collection-pages)
###
[](https://www.locksmith.guide/faqs/faq-i-see-blank-spaces-in-my-collections-and-or-searches-when-locking#option-2-dont-mix-locked-products-and-unlocked-products-in-the-same-collections)
Option 2: Don't mix locked products and unlocked products in the same collections
Simple enough. To make sure that each customer type gets pointed to the right collections, follow these steps.
1. Create versions of each collection that are geared toward each audience. For example, if you have a "Staff" collection that has some manager-only products, create one "Staff" collection with just non-manager products, and another "Staff" collection with all the manager-friendly products.
2. Next, add links to all versions to your shop's navigation menus. We'll take care of filtering the links themselves in the next step, but for now, make sure your shop's navigation gives your visitors a way to get to the collection that's right for them.
3. Finally, lock each collection, making sure to check the box labeled "Hide any links to this collection and its products in my shop's navigation menus". This will instruct Locksmith to only show a collection link to the visitor if they're qualified to open its lock.
###
[](https://www.locksmith.guide/faqs/faq-i-see-blank-spaces-in-my-collections-and-or-searches-when-locking#option-3-use-an-app-to-create-infinite-scroll-pages-on-your-store)
Option 3: Use an app to create "infinite scroll" pages on your store
We've seen that some infinite scroll features and apps can handle reordering, or "filtering down" the products on the collection page, removing the empty spots where the locked products would normally show.
###
[](https://www.locksmith.guide/faqs/faq-i-see-blank-spaces-in-my-collections-and-or-searches-when-locking#handling-the-all-collection)
Handling the "All" collection
Shopify generates a default collection called "All", located at the `/collections/all` url of your shop. Out of the box, this collection contains your entire product catalog.
Because this collection is subject to the same conditions that are described above, it may be useful to override this collection with one that _just_ contains the products in your shop that are public friendly.
To do that, simply create a new collection in your shop called "All", and manually specify the products (either individually or using conditions) that should be visible to the public. This will override the default collection, and visitors who open it will see normal, full collection pages, containing your public-friendly products.
###
[](https://www.locksmith.guide/faqs/faq-i-see-blank-spaces-in-my-collections-and-or-searches-when-locking#handling-frontpage-collections-and-other-theme-specific-product-areas)
Handling "Frontpage" collections, and other theme-specific product areas
Some themes include the ability to feature a collection of products on the frontpage, or elsewhere. Most themes don't support swapping collections based on the visitor, so it will require custom code to use audience-specific collections in these cases. This kind of thing would only work with specific key types such as customer tags or e-mail addresses.
**Feel free to get in touch if you have questions about any of this!** You can do that by just hitting the message icon on the bottom right of this screen ↘️
[PreviousWhy aren't my locks working?](https://www.locksmith.guide/faqs/why-arent-my-locks-working)
[NextCan Locksmith hide content from my in-store search?](https://www.locksmith.guide/faqs/can-locksmith-hide-content-from-my-in-store-search)
Last updated 2 years ago
Was this helpful?
* [Option 1: Turn up the maximum number of products that are displayed per page](https://www.locksmith.guide/faqs/faq-i-see-blank-spaces-in-my-collections-and-or-searches-when-locking#option-1-turn-up-the-maximum-number-of-products-that-are-displayed-per-page)
* [Option 2: Don't mix locked products and unlocked products in the same collections](https://www.locksmith.guide/faqs/faq-i-see-blank-spaces-in-my-collections-and-or-searches-when-locking#option-2-dont-mix-locked-products-and-unlocked-products-in-the-same-collections)
* [Option 3: Use an app to create "infinite scroll" pages on your store](https://www.locksmith.guide/faqs/faq-i-see-blank-spaces-in-my-collections-and-or-searches-when-locking#option-3-use-an-app-to-create-infinite-scroll-pages-on-your-store)
* [Handling the "All" collection](https://www.locksmith.guide/faqs/faq-i-see-blank-spaces-in-my-collections-and-or-searches-when-locking#handling-the-all-collection)
* [Handling "Frontpage" collections, and other theme-specific product areas](https://www.locksmith.guide/faqs/faq-i-see-blank-spaces-in-my-collections-and-or-searches-when-locking#handling-frontpage-collections-and-other-theme-specific-product-areas)
Was this helpful?
---
# What should I do if my site is loading slowly? | Locksmith
For the complete documentation index, see [llms.txt](https://www.locksmith.guide/llms.txt)
. This page is also available as [Markdown](https://www.locksmith.guide/faqs/what-should-i-do-if-my-site-is-loading-slowly.md)
.
If your online storefront is showing poor performance _after_ installing Locksmith or adjusting Locksmith settings, it's possible that an unintentionally aggressive Locksmith configuration is to blame.
Start by using the following troubleshooting steps:
[](https://www.locksmith.guide/faqs/what-should-i-do-if-my-site-is-loading-slowly#id-1.-temporarily-disable-locksmith)
1\. Temporarily disable Locksmith
-------------------------------------------------------------------------------------------------------------------------------------------------------------
This will help you figure out if Locksmith is actually causing your issue. If your site is still performing poorly after disabling Locksmith, it's probable that the issue lies elsewhere, and you will need to continue your search for the culprit outside of Locksmith.
Disabling Locksmith is done from with the **Disable Locksmith** button on the Settings page:

[](https://www.locksmith.guide/faqs/what-should-i-do-if-my-site-is-loading-slowly#id-2.-disable-specific-lock-settings)
2\. Disable specific lock settings
---------------------------------------------------------------------------------------------------------------------------------------------------------------
There are two lock settings known in Locksmith to _potentially_ cause speed issues in certain circumstances:

_The exact labels might differ slightly depending on if this is a product lock, collection lock, page lock etc._
When either option is enabled, it creates the possibility for Locksmith's suite of security checks to be run many times, slowing the rendering process of your storefront. Because of that, disabling these two settings **on all of your locks** will result in Locksmith removing its security checks from places where your storefront theme performs a "loop", e.g. the places where it cycles through lists of links/pages/collections/products/etc.
Keep in mind that it is typically safe to use either of these settings, but there are a few situations you'll want to look for if you are seeing speed issues.
**Note**: If you only have a few locks, it might be simple to troubleshoot on your own, keep reading. However, if you have quite a few locks, please feel free to skip straight to contacting us at **team@uselocksmith.com** for help!
###
[](https://www.locksmith.guide/faqs/what-should-i-do-if-my-site-is-loading-slowly#the-hide-from-navigation-setting)
The 'hide from navigation' setting
If you have this setting enabled, even on just one of your locks, AND you have a large navigation menu (25+ links, including sub-menus), this is very likely the culprit. Because of this, **it is not recommended to try to use this setting with large navigation menus**.
Try disabling this setting (on all locks) and then check if your site is loading better.
###
[](https://www.locksmith.guide/faqs/what-should-i-do-if-my-site-is-loading-slowly#the-hide-from-searches-and-collections-setting)
The 'hide from searches and collections' setting
It is more rare that this setting will slow down your site. However, with certain themes, there may be unexpected loops in product or collection templates where Locksmith inserts its checks.
If you see Locksmith _only_ loading slowly on collections or search results pages, that could be the signal that this setting is the issue.
**Hint**: If you're not sure which setting is causing the issue, you may want to try only disabling only one of the two above settings at a time (for all locks)_._ Failing that, disable the second setting (again, for all locks)_._ This strategy would help you isolate the problem to one of the two settings.
[](https://www.locksmith.guide/faqs/what-should-i-do-if-my-site-is-loading-slowly#id-3.-if-you-have-any-developers-working-with-you)
3\. If you have any developers working with you...
--------------------------------------------------------------------------------------------------------------------------------------------------------------------------------------------
Enlist their help to find the specific assets in your storefront theme which contains Locksmith code that might be unnecessarily running too many times. It's simple to tell Locksmith to ignore specific files in your theme, and this fact can be used to your advantage here.
To do this use the Settings > Advanced > "Liquid ignore list" field:

Using this settings will mean that Locksmith will strip itself out of that asset.
[](https://www.locksmith.guide/faqs/what-should-i-do-if-my-site-is-loading-slowly#contact-us-for-help)
Contact us for help!
--------------------------------------------------------------------------------------------------------------------------------
If the above strategies do not provide anything useful, please do not hesitate to contact us via email at **team@uselocksmith.com**, and we'd be happy to help you troubleshoot this.
[PreviousLocksmith is not working with my page builder app](https://www.locksmith.guide/faqs/locksmith-is-not-working-with-my-page-builder-app)
[NextI'm the administrator of my site and I cannot access pages because of Locksmith locks.](https://www.locksmith.guide/faqs/im-the-administrator-of-my-site-and-cannot-access)
Last updated 10 months ago
Was this helpful?
* [1\. Temporarily disable Locksmith](https://www.locksmith.guide/faqs/what-should-i-do-if-my-site-is-loading-slowly#id-1.-temporarily-disable-locksmith)
* [2\. Disable specific lock settings](https://www.locksmith.guide/faqs/what-should-i-do-if-my-site-is-loading-slowly#id-2.-disable-specific-lock-settings)
* [The 'hide from navigation' setting](https://www.locksmith.guide/faqs/what-should-i-do-if-my-site-is-loading-slowly#the-hide-from-navigation-setting)
* [The 'hide from searches and collections' setting](https://www.locksmith.guide/faqs/what-should-i-do-if-my-site-is-loading-slowly#the-hide-from-searches-and-collections-setting)
* [3\. If you have any developers working with you...](https://www.locksmith.guide/faqs/what-should-i-do-if-my-site-is-loading-slowly#id-3.-if-you-have-any-developers-working-with-you)
* [Contact us for help!](https://www.locksmith.guide/faqs/what-should-i-do-if-my-site-is-loading-slowly#contact-us-for-help)
Was this helpful?
---
# More developer docs... | Locksmith
For the complete documentation index, see [llms.txt](https://www.locksmith.guide/llms.txt)
. This page is also available as [Markdown](https://www.locksmith.guide/more-developer-docs.md)
.
[Using the Admin API with Locks](https://www.locksmith.guide/more-developer-docs/using-the-admin-api-with-locks)
[PreviousRequests from Locksmith](https://www.locksmith.guide/developer-tools/requests-from-locksmith)
[NextUsing the Admin API with Locks](https://www.locksmith.guide/more-developer-docs/using-the-admin-api-with-locks)
Was this helpful?
Was this helpful?
---
# I'm the administrator of my site and I cannot access pages because of Locksmith locks. | Locksmith
For the complete documentation index, see [llms.txt](https://www.locksmith.guide/llms.txt)
. This page is also available as [Markdown](https://www.locksmith.guide/faqs/im-the-administrator-of-my-site-and-cannot-access.md)
.
Locksmith locks your customer facing website so that it can only be accessed under certain circumstances. Some merchants set up more nuanced conditions and Locksmith can get in the way as you navigate your own website.
_Note: Using this guide requires that customer accounts are enabled in your store, and that you have a customer account for your own store._
###
[](https://www.locksmith.guide/faqs/im-the-administrator-of-my-site-and-cannot-access#to-let-locksmith-know-to-let-your-customer-account-through-set-up-the-following-lock)
To let Locksmith know to let your customer account through, set up the following lock:
Click the "Start a Liquid lock" on the main page of Locksmith.

Next enter this into the "Liquid condition area":
That will look like this:

Press **Create lock** to continue. For your key, use the following..
Select "if (always permit)" from the list of key condition types.

You can simply type "always" to filter the list.
It should end up saying "Permit...always", like so:

That's it, for your lock setup. Make sure to save the lock!
###
[](https://www.locksmith.guide/faqs/im-the-administrator-of-my-site-and-cannot-access#create-a-customer-account-for-your-store)
Create a "customer" account for your store:
Now, if you haven't already, create a _customer_ account for your store, and go into your "Customers" area and add "admin" as a tag to your own customer account. You can now access any content in your store while signed in with this account.
Remember this is just a way to test what your customers are seeing, so this means you need to **sign in with your customer account** to gain access to locked content. If customer accounts are not enabled on your store, you won't be able to use this method.
**Note:** Locksmith won't lock down your website during [theme edit mode](https://help.shopify.com/en/manual/online-store/themes/customizing-themes/edit)
, so you always have the option to view your store that way.
**As always, feel free to contact us via email at team@uselocksmith.com if you have any questions.**
[PreviousWhat should I do if my site is loading slowly?](https://www.locksmith.guide/faqs/what-should-i-do-if-my-site-is-loading-slowly)
[NextMore FAQs...](https://www.locksmith.guide/faqs/more)
Last updated 1 year ago
Was this helpful?
* [To let Locksmith know to let your customer account through, set up the following lock:](https://www.locksmith.guide/faqs/im-the-administrator-of-my-site-and-cannot-access#to-let-locksmith-know-to-let-your-customer-account-through-set-up-the-following-lock)
* [Create a "customer" account for your store:](https://www.locksmith.guide/faqs/im-the-administrator-of-my-site-and-cannot-access#create-a-customer-account-for-your-store)
Was this helpful?
Copy
customer.tags contains "admin"
---
# Contact us | Locksmith
For the complete documentation index, see [llms.txt](https://www.locksmith.guide/llms.txt)
. This page is also available as [Markdown](https://www.locksmith.guide/policies/contact.md)
.
###
[](https://www.locksmith.guide/policies/contact#we-can-be-reached-via-email)
We can be reached **via email:**
Copy
team@uselocksmith.com
[Press here to open up a new message in your default messaging app](mailto:team@uselocksmith.com)
.
We do all of our support communication through email and we always strive to answer messages within 24 hours - usually sooner!
[PreviousData Processing Agreement](https://www.locksmith.guide/policies/data-processing-agreement)
[NextLocksmith Admin API](https://www.locksmith.guide/developer-tools/locksmith-admin-api)
Last updated 1 year ago
Was this helpful?
Was this helpful?
---
# Can Locksmith hide content from my in-store search? | Locksmith
For the complete documentation index, see [llms.txt](https://www.locksmith.guide/llms.txt)
. This page is also available as [Markdown](https://www.locksmith.guide/faqs/can-locksmith-hide-content-from-my-in-store-search.md)
.
Locksmith includes a checkbox inside of the "Settings" area, on lock pages, that will remove products and other resources from searches - but only from the default and static searches in your store.
**Note**: Locksmith can NOT remove products from display **in other apps**, nor can it remove products from **dynamic (shows results as you type) searches**. In these cases, see suggestions below...
You'll find the hide-from-lists setting on each of your lock pages, like so:

[](https://www.locksmith.guide/faqs/can-locksmith-hide-content-from-my-in-store-search#suggestions-for-third-party-or-dynamic-searches)
Suggestions for third-party or dynamic searches
--------------------------------------------------------------------------------------------------------------------------------------------------------------------------------------------
Using the above Locksmith setting to 'hide from search results' will _not_ remove the search results when a third party or dynamic search is enabled in your store, so we have some suggestions for alternatives.
###
[](https://www.locksmith.guide/faqs/can-locksmith-hide-content-from-my-in-store-search#dynamic-searches-show-results-as-you-type-enabled-from-within-the-theme-settings)
**Dynamic searches(show results as you type) enabled from within the theme settings**
The only option here, if you want to make sure that your locked content is never displayed inside of your in-store search, is to disable the dynamic loading of the products. Each theme is different, but this is typically done within the "search" settings for the theme.
Once you open the Theme Editor, you can find it under your "Search" settings. On the Debut theme, for example, go to:
* Theme Settings > Search > Enable product suggestions (turn OFF)
###
[](https://www.locksmith.guide/faqs/can-locksmith-hide-content-from-my-in-store-search#third-party-searches)
**Third party searches**:
Locksmith won’t be able to hide your products from a search in this case, since the third party app is completely responsible for displaying search results when enabled. Suggestions:
* Many third party apps have their own ways to prevent products from showing up in them. Check the settings for the app that you're using! At the very least, they should allow you to remove certain products entirely from appearing in searches, using a specific product tag.
[](https://www.locksmith.guide/faqs/can-locksmith-hide-content-from-my-in-store-search#the-hide-from-sitemaps...-setting)
The "Hide from sitemaps..." setting
------------------------------------------------------------------------------------------------------------------------------------------------------------------
For _product_ and _collection_ locks, Locksmith also gives you the option to hide from sitemaps:

Behind the scenes, this setting uses [Shopify's "seo" metafield](https://shopify.dev/docs/apps/marketing/seo#step-2-hide-a-resource-from-search-engines-and-sitemaps)
, which removes products from any _in-store_ searches, but also works to remove products from search engines like Google.
**Note**: When enabled, his setting will remove products completely from in-store searches. In other words, **even visitors that have access to the content via Locksmith** _**won't**_ **see the products appear in searches.** Because of that, this setting may not work for everyone, but is still available as an option.
On collection locks, as long as the '_protect products in this collection_' option is enabled, the setting will also be applied to each product in the collection.
[](https://www.locksmith.guide/faqs/can-locksmith-hide-content-from-my-in-store-search#related-topics)
Related topics
--------------------------------------------------------------------------------------------------------------------------
[How does Locksmith affect search engines and SEO?](https://www.locksmith.guide/faqs/more/how-does-locksmith-affect-search-engines-and-seo)
[Automatically managing the seo.hidden metafield using Locksmith](https://www.locksmith.guide/tutorials/more/automatically-hide-from-sitemaps-and-manage-seo-metafield)
[PreviousFAQ: I see blank spaces in my collections and/or searches when locking](https://www.locksmith.guide/faqs/faq-i-see-blank-spaces-in-my-collections-and-or-searches-when-locking)
[NextLocksmith is not working with my page builder app](https://www.locksmith.guide/faqs/locksmith-is-not-working-with-my-page-builder-app)
Last updated 11 months ago
Was this helpful?
* [Suggestions for third-party or dynamic searches](https://www.locksmith.guide/faqs/can-locksmith-hide-content-from-my-in-store-search#suggestions-for-third-party-or-dynamic-searches)
* [Dynamic searches(show results as you type) enabled from within the theme settings](https://www.locksmith.guide/faqs/can-locksmith-hide-content-from-my-in-store-search#dynamic-searches-show-results-as-you-type-enabled-from-within-the-theme-settings)
* [Third party searches:](https://www.locksmith.guide/faqs/can-locksmith-hide-content-from-my-in-store-search#third-party-searches)
* [The "Hide from sitemaps..." setting](https://www.locksmith.guide/faqs/can-locksmith-hide-content-from-my-in-store-search#the-hide-from-sitemaps...-setting)
* [Related topics](https://www.locksmith.guide/faqs/can-locksmith-hide-content-from-my-in-store-search#related-topics)
Was this helpful?
---
# Privacy policy | Locksmith
For the complete documentation index, see [llms.txt](https://www.locksmith.guide/llms.txt)
. This page is also available as [Markdown](https://www.locksmith.guide/policies/privacy.md)
.
[](https://www.locksmith.guide/policies/privacy#locksmith-privacy-policy)
Locksmith Privacy Policy
-------------------------------------------------------------------------------------------------------
Locksmith "the App” provides access control for online Shopify storefronts "the Service" to merchants who use Shopify to power their stores. This Privacy Policy describes how personal information is collected, used, and shared when you install or use the App in connection with your Shopify-supported store.
[](https://www.locksmith.guide/policies/privacy#access-scopes-the-app-requests)
Access Scopes the App Requests
-------------------------------------------------------------------------------------------------------------------
When you install the App, we are automatically able to access certain types of information from your Shopify account:
* Themes: Published and unpublished themes for your Shopify storefront
* Customers: All customer data in your Shopify store
* Storefront content: Published and unpublished articles, blogs, comments, pages, and redirects in your Shopify store
* Products: Published and unpublished products in your Shopify store
If you configure the App to automatically remove Locksmith system information from new orders, you grant us the ability to access this additional information from your Shopify account:
* Orders: All orders processed in your Shopify store
Additionally, we collect the following types of personal information from you and/or your customers once you have installed the App: Information about you and others who may access the App on behalf of your store through the Shopify admin interface, such as your name, address, email address, phone number, and billing information; Information about individuals who visit your store, such as their Shopify customer ID, IP address, web browser details, time zone, and information about the cookies installed on the particular device.
We collect personal information directly from the relevant individual, through your Shopify account, or using the following technologies: “Cookies” are data files that are placed on your device or computer and often include an anonymous unique identifier. For more information about cookies, and how to disable cookies, visit [http://www.allaboutcookies.org](http://www.allaboutcookies.org/)
. “Log files” track actions occurring on the Site, and collect data including your IP address, browser type, Internet service provider, referring/exit pages, and date/time stamps. “Web beacons,” “tags,” and “pixels” are electronic files used to record information about how you browse the Site.
[](https://www.locksmith.guide/policies/privacy#how-do-we-use-your-personal-information)
How Do We Use Your Personal Information?
--------------------------------------------------------------------------------------------------------------------------------------
We use the personal information we collect from you and your customers in order to provide the Service and to operate the App. Additionally, we use this personal information to: Communicate with you; Optimize or improve the App; and Provide you with information or advertising relating to our products or services.
[](https://www.locksmith.guide/policies/privacy#sharing-your-personal-information)
Sharing Your Personal Information
-------------------------------------------------------------------------------------------------------------------------
Personal Information we collect about you and others who may access the App on behalf of your store through the Shopify admin interface may be shared with [Helpscout](https://www.helpscout.com/)
for the purpose of providing customer support services.
Finally, we may also share your Personal Information to comply with applicable laws and regulations, to respond to a subpoena, search warrant or other lawful request for information we receive, or to otherwise protect our rights.
[](https://www.locksmith.guide/policies/privacy#your-rights)
Your Rights
-----------------------------------------------------------------------------
If you are a European resident, you have the right to access personal information we hold about you and to ask that your personal information be corrected, updated, or deleted, per the GDPR. If you would like to exercise this right, please contact us through the contact information below.
Additionally, if you are a European resident we note that we are processing your information in order to pursue our legitimate business interests listed above. Additionally, please note that your information will be transferred outside of Europe, including to Canada and the United States.
[](https://www.locksmith.guide/policies/privacy#data-retention)
Data Retention
-----------------------------------------------------------------------------------
The App retains records describing your Shopify store and your ownership thereof, as provided by Shopify, for the purposes of recording your store's relationship with the App. These records are limited to your Shopify store name, [myshopify.com](http://myshopify.com/)
subdomain, and the owner name and email address.
The App may temporarily store customer records for up to 5 minutes, for performance reasons.
[](https://www.locksmith.guide/policies/privacy#changes)
Changes
---------------------------------------------------------------------
We may update this privacy policy from time to time in order to reflect, for example, changes to our practices or for other operational, legal or regulatory reasons.
[](https://www.locksmith.guide/policies/privacy#contact-us)
Contact Us
---------------------------------------------------------------------------
For more information about our privacy practices, if you have questions, or if you would like to make a complaint, please contact us by e-mail at [team@uselocksmith.com](mailto:team@uselocksmith.com)
.
[PreviousLocksmith's pricing policy: Pay what feels good](https://www.locksmith.guide/policies/pricing)
[NextData policy](https://www.locksmith.guide/policies/data)
Last updated 2 years ago
Was this helpful?
* [Locksmith Privacy Policy](https://www.locksmith.guide/policies/privacy#locksmith-privacy-policy)
* [Access Scopes the App Requests](https://www.locksmith.guide/policies/privacy#access-scopes-the-app-requests)
* [How Do We Use Your Personal Information?](https://www.locksmith.guide/policies/privacy#how-do-we-use-your-personal-information)
* [Sharing Your Personal Information](https://www.locksmith.guide/policies/privacy#sharing-your-personal-information)
* [Your Rights](https://www.locksmith.guide/policies/privacy#your-rights)
* [Data Retention](https://www.locksmith.guide/policies/privacy#data-retention)
* [Changes](https://www.locksmith.guide/policies/privacy#changes)
* [Contact Us](https://www.locksmith.guide/policies/privacy#contact-us)
Was this helpful?
---
# Data Processing Agreement | Locksmith
For the complete documentation index, see [llms.txt](https://www.locksmith.guide/llms.txt)
. This page is also available as [Markdown](https://www.locksmith.guide/policies/data-processing-agreement.md)
.
####
[](https://www.locksmith.guide/policies/data-processing-agreement#last-updated-18-november-2025)
Last updated: 18 November 2025
This Data Processing Addendum is part of the agreement between Lightward and the customer who uses our services.
By using Locksmith, the customer agrees to this DPA.
[](https://www.locksmith.guide/policies/data-processing-agreement#id-1.-roles)
1\. Roles
---------------------------------------------------------------------------------------------
The customer (as the controller) determines why and how Personal Data is processed.
Lightward (as the processor) processes Personal Data only as needed to provide our services and support the customer's use of them.
Lightward processes Personal Data only according to: (a) the customer's subscription, (b) the customer's configuration of Locksmith inside their shop, and (c) the customer's use of Locksmith's features.
[](https://www.locksmith.guide/policies/data-processing-agreement#id-2.-purpose)
2\. Purpose
-------------------------------------------------------------------------------------------------
Lightward processes Personal Data only as needed to provide Locksmith and as otherwise allowed under the agreement.
[](https://www.locksmith.guide/policies/data-processing-agreement#id-3.-security)
3\. Security
---------------------------------------------------------------------------------------------------
Lightward uses technical and organizational measures designed to keep Personal Data secure.
[](https://www.locksmith.guide/policies/data-processing-agreement#id-4.-confidentiality)
4\. Confidentiality
-----------------------------------------------------------------------------------------------------------------
Lightward ensures that team members who access Personal Data are bound by confidentiality obligations.
[](https://www.locksmith.guide/policies/data-processing-agreement#id-5.-sub-processors)
5\. Sub-Processors
---------------------------------------------------------------------------------------------------------------
The customer allows Lightward to use sub-processors to help provide Locksmith.
[](https://www.locksmith.guide/policies/data-processing-agreement#id-6.-international-transfers)
6\. International Transfers
---------------------------------------------------------------------------------------------------------------------------------
Lightward may transfer Personal Data internationally as needed to provide the service, using lawful transfer mechanisms when required.
[](https://www.locksmith.guide/policies/data-processing-agreement#id-7.-assistance)
7\. Assistance
-------------------------------------------------------------------------------------------------------
Where required by law and technically feasible, Lightward will help the customer respond to data-subject requests.
[](https://www.locksmith.guide/policies/data-processing-agreement#id-8.-deletion)
8\. Deletion
---------------------------------------------------------------------------------------------------
When the customer stops using Locksmith, Lightward will delete or return Personal Data according to the agreement unless the law requires us to keep it.
[](https://www.locksmith.guide/policies/data-processing-agreement#id-9.-breach-notification)
9\. Breach Notification
-------------------------------------------------------------------------------------------------------------------------
Lightward will notify the customer without undue delay if we become aware of a Personal Data Breach.
* * *
###
[](https://www.locksmith.guide/policies/data-processing-agreement#sub-processors-for-locksmith)
Sub-Processors for Locksmith
###
[](https://www.locksmith.guide/policies/data-processing-agreement#last-updated-18-november-2025-1)
Last updated: 18 November 2025
Lightward works with a small group of trusted service providers to operate Locksmith. These companies may process limited Personal Data as part of providing the service.
**Infrastructure & Hosting**
* Fly.io — application hosting and managed database services
**Platform Integrations**
* Shopify, Inc. — authentication, API platform, webhook delivery
**Monitoring**
* Rollbar, Inc. — error monitoring and diagnostics
* Cronitor — scheduled job monitoring
**Optional Service Providers (enabled only when the merchant connects these integrations or uses these features)**
* Google LLC — file storage (Google Drive for access lists)
* Mailchimp (Intuit Inc.) — email marketing list integration
* Klaviyo — email marketing list integration
* Mechanic (Lightward, Inc.) — automation platform integration
* MaxMind — IP geolocation services
[PreviousData policy](https://www.locksmith.guide/policies/data)
[NextContact us](https://www.locksmith.guide/policies/contact)
Last updated 7 months ago
Was this helpful?
* [1\. Roles](https://www.locksmith.guide/policies/data-processing-agreement#id-1.-roles)
* [2\. Purpose](https://www.locksmith.guide/policies/data-processing-agreement#id-2.-purpose)
* [3\. Security](https://www.locksmith.guide/policies/data-processing-agreement#id-3.-security)
* [4\. Confidentiality](https://www.locksmith.guide/policies/data-processing-agreement#id-4.-confidentiality)
* [5\. Sub-Processors](https://www.locksmith.guide/policies/data-processing-agreement#id-5.-sub-processors)
* [6\. International Transfers](https://www.locksmith.guide/policies/data-processing-agreement#id-6.-international-transfers)
* [7\. Assistance](https://www.locksmith.guide/policies/data-processing-agreement#id-7.-assistance)
* [8\. Deletion](https://www.locksmith.guide/policies/data-processing-agreement#id-8.-deletion)
* [9\. Breach Notification](https://www.locksmith.guide/policies/data-processing-agreement#id-9.-breach-notification)
* [Sub-Processors for Locksmith](https://www.locksmith.guide/policies/data-processing-agreement#sub-processors-for-locksmith)
* [Last updated: 18 November 2025](https://www.locksmith.guide/policies/data-processing-agreement#last-updated-18-november-2025-1)
Was this helpful?
---
# Locksmith Storefront API | Locksmith
For the complete documentation index, see [llms.txt](https://www.locksmith.guide/llms.txt)
. This page is also available as [Markdown](https://www.locksmith.guide/developer-tools/locksmith-storefront-api.md)
.
Locksmith includes a JavaScript-friendly Storefront API, embedded in your online store. This API can be used to check the current visitor's current authorization status for the resources that you name. For example, a search app could use this API to make sure a visitor has access to each of the resources that are in a set of search results, before showing those results to the visitor.
Locksmith's Storefront API is meant to facilitate user-facing browser experiences _within the Online Store channel's_ _storefront_. It cannot return authorization status for remote environments.
If you are wanting to query or update your Locksmith configuration from application code, use the [Admin API](https://www.locksmith.guide/developer-tools/locksmith-admin-api)
when building. This mirrors Shopify's own published APIs: Shopify's Admin API is meant for apps, whereas Shopify's Storefront API is meant for user-facing browser experiences.
###
[](https://www.locksmith.guide/developer-tools/locksmith-storefront-api#usage)
Usage
####
[](https://www.locksmith.guide/developer-tools/locksmith-storefront-api#requests)
Requests
This API has a single endpoint, available on your online store's domain:
* GET /apps/locksmith/api/resources
When calling this path, include a series of `urls[]` query parameters, naming the relative URLs of the resources you want to check on.
Note: In some cases, using repeated `urls[]` query parameters can cause problems with API clients, and in some cases, Shopify may drop repeated query parameters with the same key. In these cases, use the querystring form `?urls[0]=/path1&urls[1]=/path2` instead.
There are limits to how many requests can be made per page load, since this is a storefront tool that uses Shopify's own Liquid engine. Product urls have a limit of 20 per page since they use the [all\_products liquid object](https://shopify.dev/docs/api/liquid/objects/all_products) behind the scenes.
####
[](https://www.locksmith.guide/developer-tools/locksmith-storefront-api#responses)
Responses
This API returns text/html responses, containing a JSON body. The Content-Type header should be ignored (it's a quirk of how Shopify's API proxy works), and the body should be interpreted as JSON.
The JSON response is an object whose keys are the URLs provided in the request's query parameters. The values are each objects themselves, containing state information defining the current visitor's authorization for each resource. The keys in these interior objects map to standard Locksmith variables; for their definitions, see [Locksmith variables](https://docs.uselocksmith.com/article/474-locksmith-variables)
.
###
[](https://www.locksmith.guide/developer-tools/locksmith-storefront-api#example)
Example
Some JavaScript libraries, like jQuery, make it easy to supply an array of query parameters in a way that serializes well for this API.
The example below uses jQuery to check on a single, specific product. [See an interactive version of this example, here.](https://locksmith-demo-storefront-api.myshopify.com/)
This script results in a logged value that looks like this:
[PreviousLocksmith Admin API](https://www.locksmith.guide/developer-tools/locksmith-admin-api)
[NextLocksmith variables](https://www.locksmith.guide/developer-tools/locksmith-variables)
Last updated 1 year ago
Was this helpful?
* [Usage](https://www.locksmith.guide/developer-tools/locksmith-storefront-api#usage)
* [Example](https://www.locksmith.guide/developer-tools/locksmith-storefront-api#example)
Was this helpful?
Copy
Copy
{
"\/products\/short-sleeve-t-shirt": {
"canonical_url": "\/products\/short-sleeve-t-shirt",
"locked": true,
"access_granted": true,
"access_denied": false,
"manual_lock": false,
"hide_resource": false,
"hide_links_to_resource": false,
"locks": {
"all": [12345],
"opened": [12345]
},
"keys": [67890]
}
}
---
# Locksmith variables | Locksmith
For the complete documentation index, see [llms.txt](https://www.locksmith.guide/llms.txt)
. This page is also available as [Markdown](https://www.locksmith.guide/developer-tools/locksmith-variables.md)
.
Locksmith comes with two opportunities for programmatic interaction: manual mode, and the storefront API. Both APIs expose a set of variables, representing Locksmith's understanding of the resource in play, and the current visitor's authorization for that resource.
For more information on how these variables are exposed in both APIs, see their respective documentation pages:
* [Manual mode](https://www.locksmith.guide/keys/more/manual-mode)
* [The Locksmith storefront API](https://www.locksmith.guide/developer-tools/locksmith-storefront-api)
###
[](https://www.locksmith.guide/developer-tools/locksmith-variables#variable-definitions)
Variable definitions
* **"locked"** – Can be true or false, depending on whether or not the resource has any active locks that apply to it.
* **"initialized"** – Only relevant when server keys are in play; is true or false, depending on whether or not Locksmith has had an opportunity to initialize the visitor's session; access decisions cannot be made until initialization is complete. If "initialized" is false, trigger a refresh of the page to allow Locksmith to finish initializing.
* **"scope"** – A string describing the type of resource being analyzed. Can be values like "product", "collection", "article", etc.
* **"access\_granted"** – Can be true or false, depending on whether or not Locksmith has determined that the current visitor may view the content.
* **"access\_denied"** – Can be true or false; the opposite of "access\_granted".
* **"manual\_lock"** – Can be true or false, depending on whether or not all applicable locks have manual mode engaged.
* **"server\_lock"** – Can be true or false, depending on whether or not a [server key](https://docs.uselocksmith.com/article/206-server-keys)
must be evaluated for Locksmith to complete the visitor's authorization.
* **"hide\_resource"** – Can be true or false, depending on whether or not the visitor is permitted to see the resource when it occurs in a list (e.g. search results, or product lists shown in a collection).
* **"hide\_links\_to\_resource"** – Can be true or false, depending on whether or not the visitor is permitted to see navigation links to the resource, in the store's navigation menus.
* **"lock\_ids"** – An array of string IDs, identifying the set of locks that apply to the given resource.
* "**opened\_lock\_ids"** – An array of integer IDs, identifying the subset of locks that are currently considered "open" for the current visitor.
* **"key\_ids"** – An array of integer IDs, identifying the keys involved in opening the locks listed in "opened\_lock\_ids".
**Note:** Using the render tag with manual mode will result in string representations of booleans and arrays. Using the include tag will result in arrays of integer IDs being represented as arrays of string IDs. For more details, see [Manual mode](https://www.locksmith.guide/keys/more/manual-mode)
.
[PreviousLocksmith Storefront API](https://www.locksmith.guide/developer-tools/locksmith-storefront-api)
[NextUnsupported functionality](https://www.locksmith.guide/developer-tools/unsupported-functionality)
Last updated 3 years ago
Was this helpful?
Was this helpful?
---
# Usage agreement | Locksmith
For the complete documentation index, see [llms.txt](https://www.locksmith.guide/llms.txt)
. This page is also available as [Markdown](https://www.locksmith.guide/policies/usage-agreement.md)
.
There are a few things that are critical to understand when using an app like Locksmith. Our usage agreement, updated every so often, works to make sure these things are clearly communicated. Here, we elaborate on what's in the current agreement.
This agreement is shown in-app for all new Locksmith users, in an abbreviated form. To view that version, visit [uselocksmith.com/agreement](https://uselocksmith.com/agreement)
.
[](https://www.locksmith.guide/policies/usage-agreement#locksmith-lives-in-your-online-store-theme)
Locksmith lives in your Online Store theme.
----------------------------------------------------------------------------------------------------------------------------------------------------
###
[](https://www.locksmith.guide/policies/usage-agreement#if-you-need-to-remove-locksmith-from-your-shopify-apps-list-make-sure-to-disable-it-first-to-let-loc)
If you need to remove Locksmith from your Shopify apps list, make sure to disable it first, to let Locksmith clean up its theme code.
Locksmith (like other protection apps) works by adding code to your Online Store theme. Shopify doesn't let apps clean out this code when the app is removed from your Shopify store. This means that it's imperative to disable or delete all of your locks – or use the in-app "Disable Locksmith" button – _before_ deleting Locksmith from your apps list. If you do not, you risk unexpected behavior in your online store.
And if you forget, you can always temporarily reinstall the app and _then_ disable it.
More on all of this here: [Removing Locksmith](https://www.locksmith.guide/basics/removing-locksmith)
###
[](https://www.locksmith.guide/policies/usage-agreement#locksmith-does-not-work-with-other-sales-channels-e.g.-buy-button)
Locksmith does not work with other sales channels (e.g. Buy Button).
Visibility of products, collections, etc are individually controlled within each sales channel. The Online Store is itself a sales channel, and Locksmith works within the Online Store's published theme. This means that it absolutely cannot help with protecting, hiding, or restricting purchases on other channels.
###
[](https://www.locksmith.guide/policies/usage-agreement#locksmith-cannot-protect-cart-permalinks-and-may-not-protect-against-some-bots)
Locksmith cannot protect cart permalinks, and may not protect against some bots.
The Online Store theme – the place where Locksmith operates – generally only handles content displayed with your store's header and footer. Because [cart permalinks](https://community.shopify.com/c/Shopify-Design/Cart-Use-permalinks-to-pre-load-the-cart/td-p/613702)
and [the AJAX API](https://shopify.dev/docs/themes/ajax-api)
don't pass through the Online Store theme, Locksmith can't enforce security in those areas. If this is a problem for your store, you may need to set up an app that auto-cancels fraudulent or otherwise undesired orders.
###
[](https://www.locksmith.guide/policies/usage-agreement#locksmith-may-not-work-with-some-custom-search-or-filtering-apps)
Locksmith may not work with some custom search or filtering apps.
Second (third?) verse, same as the first. Custom search and filtering apps tend to pull in data in a way that does not pass through the Online Store theme, thus preventing Locksmith from enforcing protection on the contents they retrieve. (If you're working on such an app, check out [our storefront API](https://docs.uselocksmith.com/article/459-the-locksmith-storefront-api)
for integration.)
[](https://www.locksmith.guide/policies/usage-agreement#locksmiths-pricing-is-a-conversation)
Locksmith’s pricing is Pay What Feels Good.
----------------------------------------------------------------------------------------------------------------------------------------------
###
[](https://www.locksmith.guide/policies/usage-agreement#well-auto-suggest-a-price-based-on-your-stores-shopify-plan)
We’ll auto-suggest a price based on your store’s Shopify plan.
The intent is to make Locksmith available to everyone, while paying ourselves the respect of asking for a fair price, while recognizing that we can't perfectly guess what value you'll get from the app. So, we start with a suggested price, based on how much you're paying for Shopify itself.
###
[](https://www.locksmith.guide/policies/usage-agreement#if-that-price-doesnt-feel-good-to-you-read-lightward.com-pricing-then-get-in-touch)
If that price doesn’t feel good to you, read [lightward.com/pricing](https://lightward.com/pricing)
, then get in touch. :)
That's about it! :)
[](https://www.locksmith.guide/policies/usage-agreement#well-always-do-our-best-to-help)
We’ll always do our best to help.
-------------------------------------------------------------------------------------------------------------------------------
###
[](https://www.locksmith.guide/policies/usage-agreement#we-have-instant-ai-answers-and-lots-of-documentation-at-locksmith.guide)
We have [instant AI answers](https://www.locksmith.guide/?q=)
, and lots of documentation at [locksmith.guide](https://www.locksmith.guide/)
.
You're here! Thanks for reading! We're focused on creating solid, dependable resources – and that includes documentation, and an AI that's trained on it.
###
[](https://www.locksmith.guide/policies/usage-agreement#if-you-get-stuck-were-here.-email-us-at-team-uselocksmith.com)
If you get stuck, we’re here. :) Email us at [team@uselocksmith.com](mailto:team@uselocksmith.com)
.
We're humans! Come say hi!
[PreviousWhat order are different types of key conditions evaluated in?](https://www.locksmith.guide/faqs/more/what-order-are-key-conditions-evaluated-in)
[NextLocksmith's pricing policy: Pay what feels good](https://www.locksmith.guide/policies/pricing)
Last updated 1 year ago
Was this helpful?
* [Locksmith lives in your Online Store theme.](https://www.locksmith.guide/policies/usage-agreement#locksmith-lives-in-your-online-store-theme)
* [If you need to remove Locksmith from your Shopify apps list, make sure to disable it first, to let Locksmith clean up its theme code.](https://www.locksmith.guide/policies/usage-agreement#if-you-need-to-remove-locksmith-from-your-shopify-apps-list-make-sure-to-disable-it-first-to-let-loc)
* [Locksmith does not work with other sales channels (e.g. Buy Button).](https://www.locksmith.guide/policies/usage-agreement#locksmith-does-not-work-with-other-sales-channels-e.g.-buy-button)
* [Locksmith cannot protect cart permalinks, and may not protect against some bots.](https://www.locksmith.guide/policies/usage-agreement#locksmith-cannot-protect-cart-permalinks-and-may-not-protect-against-some-bots)
* [Locksmith may not work with some custom search or filtering apps.](https://www.locksmith.guide/policies/usage-agreement#locksmith-may-not-work-with-some-custom-search-or-filtering-apps)
* [Locksmith’s pricing is Pay What Feels Good.](https://www.locksmith.guide/policies/usage-agreement#locksmiths-pricing-is-a-conversation)
* [We’ll auto-suggest a price based on your store’s Shopify plan.](https://www.locksmith.guide/policies/usage-agreement#well-auto-suggest-a-price-based-on-your-stores-shopify-plan)
* [If that price doesn’t feel good to you, read lightward.com/pricing, then get in touch. :)](https://www.locksmith.guide/policies/usage-agreement#if-that-price-doesnt-feel-good-to-you-read-lightward.com-pricing-then-get-in-touch)
* [We’ll always do our best to help.](https://www.locksmith.guide/policies/usage-agreement#well-always-do-our-best-to-help)
* [We have instant AI answers, and lots of documentation at locksmith.guide.](https://www.locksmith.guide/policies/usage-agreement#we-have-instant-ai-answers-and-lots-of-documentation-at-locksmith.guide)
* [If you get stuck, we’re here. :) Email us at team@uselocksmith.com.](https://www.locksmith.guide/policies/usage-agreement#if-you-get-stuck-were-here.-email-us-at-team-uselocksmith.com)
Was this helpful?
---
# Data policy | Locksmith
For the complete documentation index, see [llms.txt](https://www.locksmith.guide/llms.txt)
. This page is also available as [Markdown](https://www.locksmith.guide/policies/data.md)
.
Locksmith only accesses what it needs to, and only stores on its servers what it must. We work hard to make securing your content easy, while keeping our systems safe and efficient in the process.
This document contains a summary of what data Locksmith accesses and why, and concludes with a summary of what data Locksmith does and doesn't keep on its servers.
[](https://www.locksmith.guide/policies/data#accessing-your-shopify-data)
Accessing your Shopify data
----------------------------------------------------------------------------------------------------------
When you install Locksmith for the first time, you'll be prompted to grant access to several areas of your Shopify store, with a screen that looks like this:
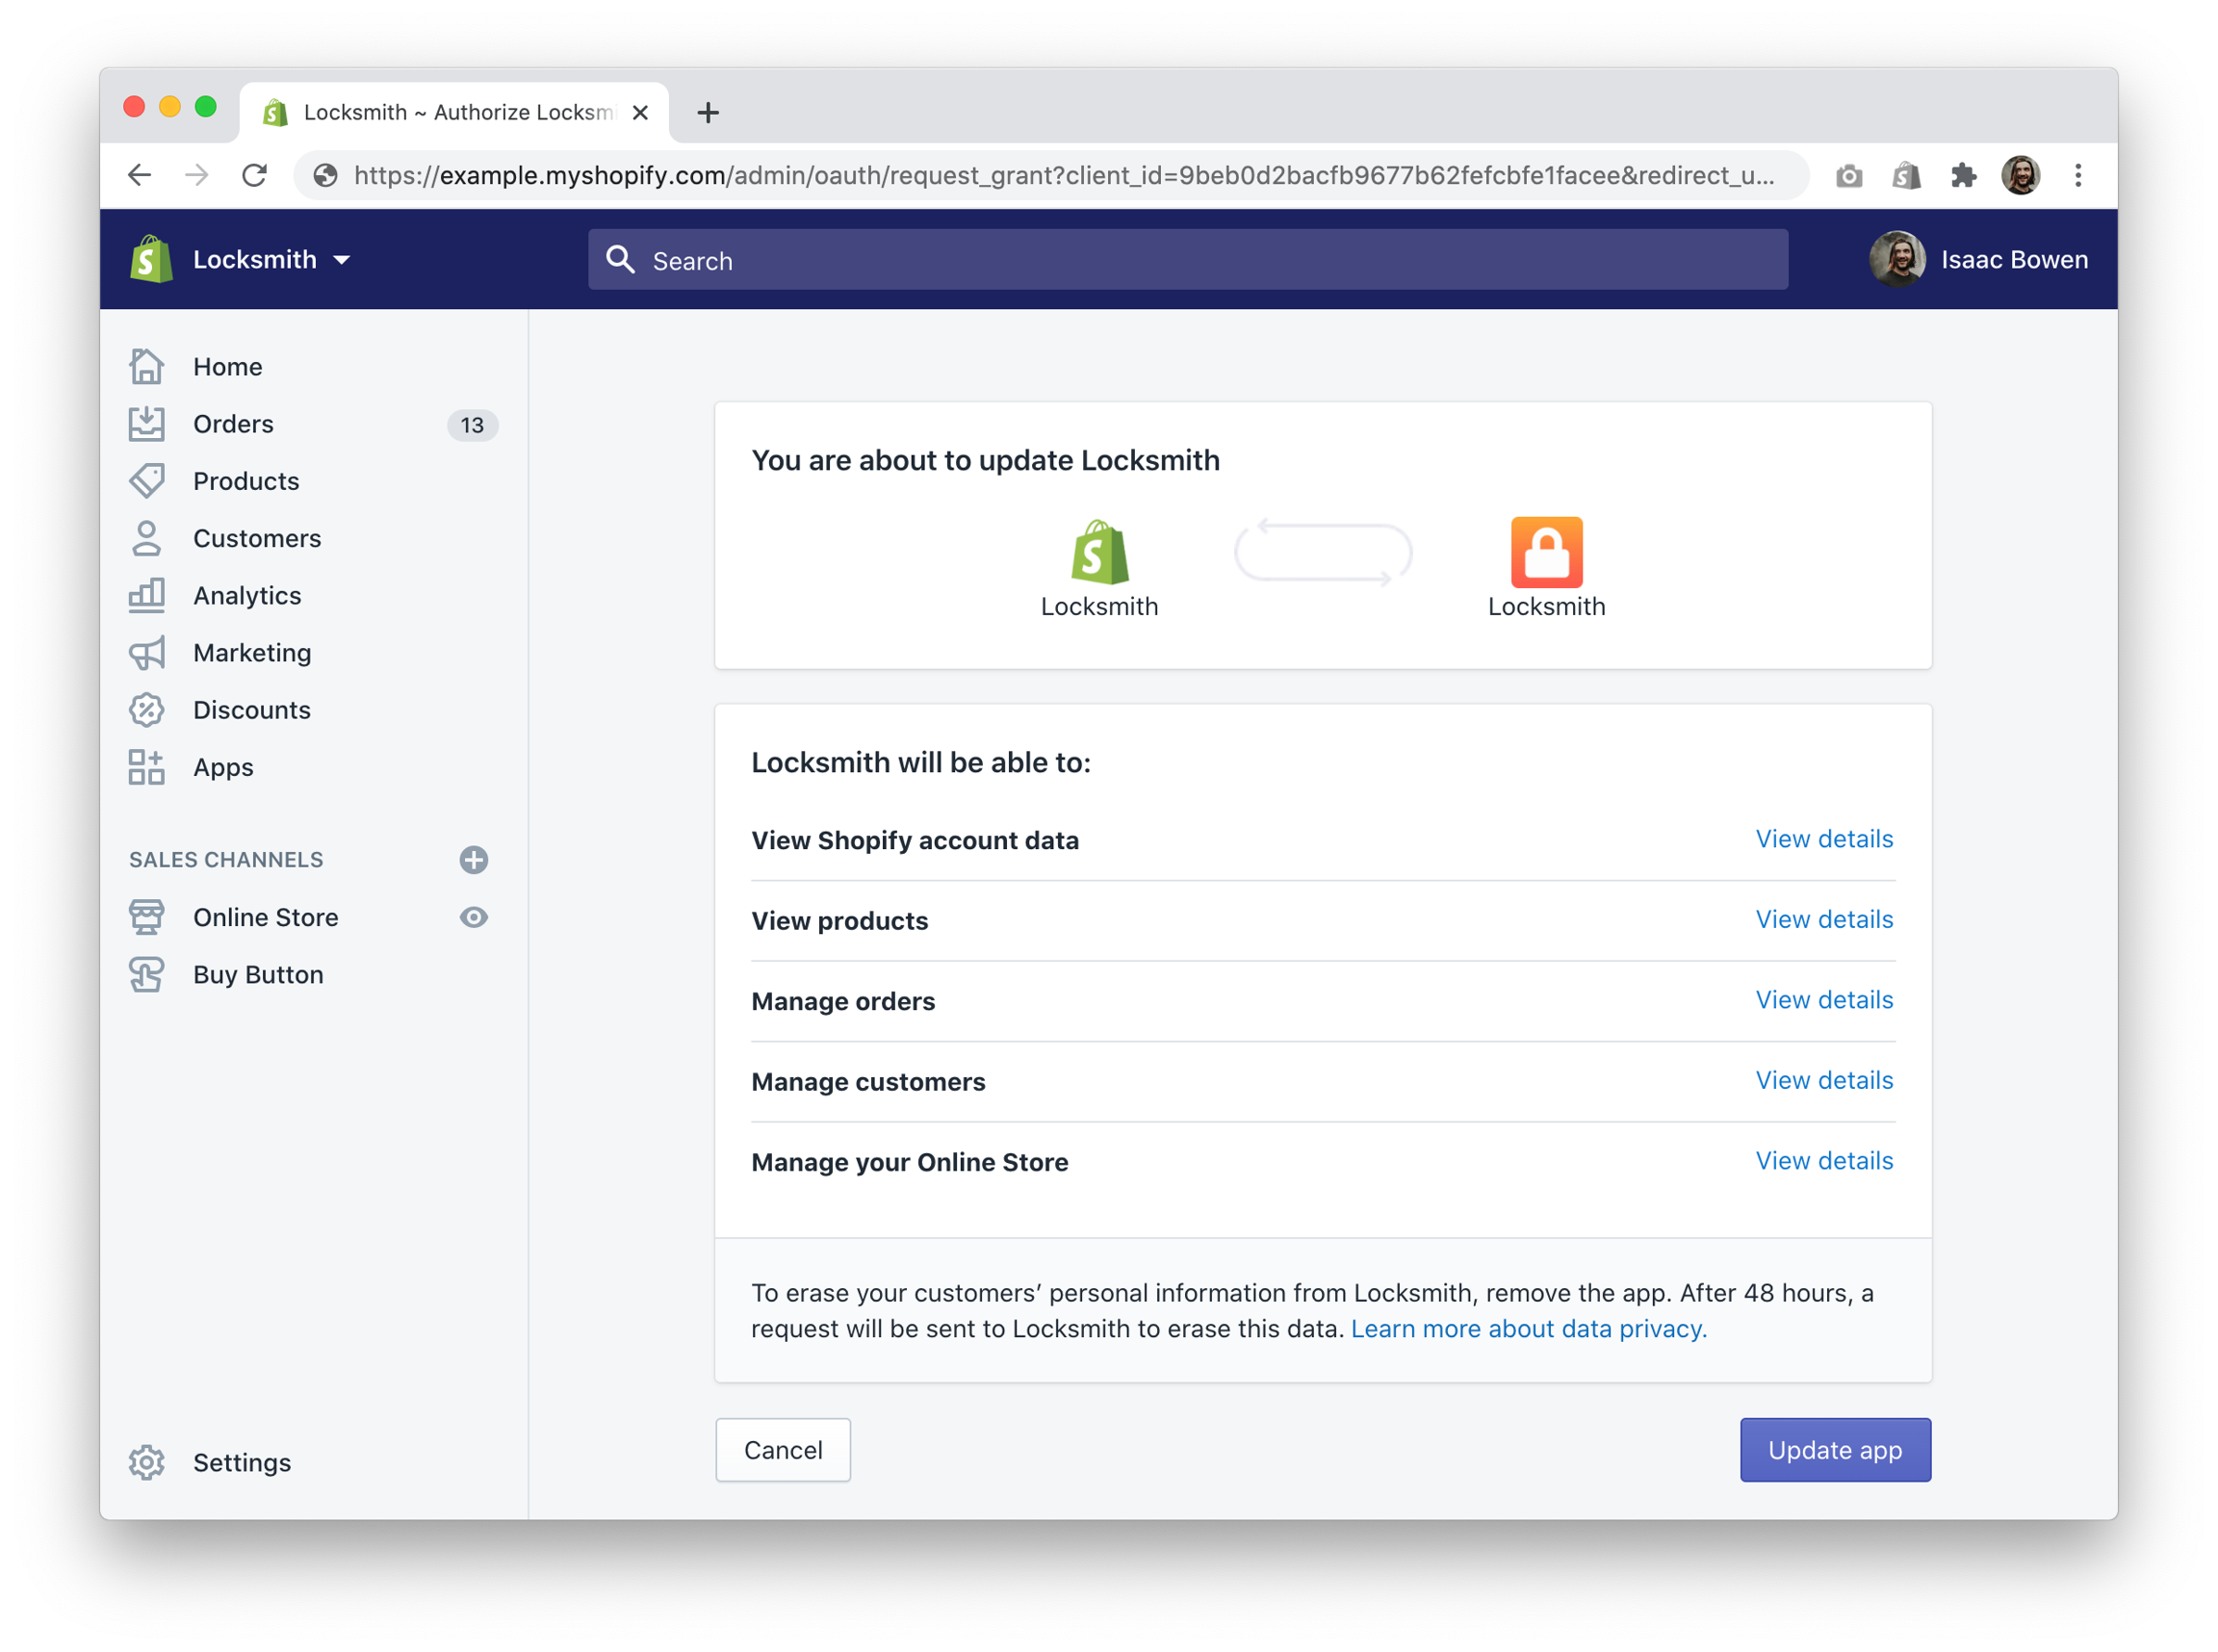
Each of these permissions has a purpose. Let's review them:
###
[](https://www.locksmith.guide/policies/data#view-shopify-account-data)
View Shopify account data
This is a required permission for every Shopify app. It allows us to identify your store.
###
[](https://www.locksmith.guide/policies/data#view-products)
View products
We use this permission to allow you to search for and protect your products and collections.
###
[](https://www.locksmith.guide/policies/data#manage-orders)
Manage orders
This permission is _only_ requested when you've elected to have Locksmith remove its metadata from your orders – which is only relevant when using certain types of key conditions. For more about this, see [Why is Locksmith adding information to my orders?](https://www.locksmith.guide/faqs/more/why-is-locksmith-adding-information-to-my-orders)
.
###
[](https://www.locksmith.guide/policies/data#manage-customers)
Manage customers
We use this permission to record access decisions for your customers, to perform auto-tagging (as configured) and to allow our support team to view customer details to help merchants with troubleshooting.
###
[](https://www.locksmith.guide/policies/data#manage-your-online-store)
Manage your Online Store
Locksmith lives in your online store's theme. We use this permission to install, maintain, and remove (at your request) Locksmith's code.
[](https://www.locksmith.guide/policies/data#storing-your-shopify-data)
Storing your Shopify data
------------------------------------------------------------------------------------------------------
###
[](https://www.locksmith.guide/policies/data#where-locksmiths-data-is-stored)
Where Locksmith's data is stored
All of our data is stored on encrypted volumes in the US.
###
[](https://www.locksmith.guide/policies/data#what-locksmith-stores)
What Locksmith stores
* We keep a copy of your shop's basic details (name, domain name, owner name, email address, Shopify account type, etc) for basic bookkeeping and support.
* Lock and key configuration is stored exclusively on Locksmith's servers. This configuration is used to generate code to be inserted into your shop's theme (see "Manage your Online Store", above), but the configuration itself is stored on our end.
* We may store temporary copies of your theme's files, to make any updates to those files as fast as possible.
* For content protected by [server keys](https://docs.uselocksmith.com/article/206-server-keys)
in [version v5](https://docs.uselocksmith.com/article/213-release-notes)
exclusively, we may store a temporary copy of the content as viewed by the visitor. This content is never transmitted unencrypted. The temporary copy expires automatically, and is used only to speed up the visitor experience.
###
[](https://www.locksmith.guide/policies/data#what-locksmith-doesnt-store)
What Locksmith doesn't store
* We do not store any of your customer data. While we may access a customer's account for purposes of applying tags or updating metafields, or for debugging purposes, no customer data is stored on Locksmith's servers.
* We do not store any of your shop's order data. We may access your order data if you've configured Locksmith to do so (see [Why is Locksmith adding information to my orders?](https://docs.uselocksmith.com/article/178-why-is-locksmith-adding-information-to-my-orders)
), but no order data is stored on Locksmith's servers.
[PreviousPrivacy policy](https://www.locksmith.guide/policies/privacy)
[NextData Processing Agreement](https://www.locksmith.guide/policies/data-processing-agreement)
Last updated 3 years ago
Was this helpful?
* [Accessing your Shopify data](https://www.locksmith.guide/policies/data#accessing-your-shopify-data)
* [View Shopify account data](https://www.locksmith.guide/policies/data#view-shopify-account-data)
* [View products](https://www.locksmith.guide/policies/data#view-products)
* [Manage orders](https://www.locksmith.guide/policies/data#manage-orders)
* [Manage customers](https://www.locksmith.guide/policies/data#manage-customers)
* [Manage your Online Store](https://www.locksmith.guide/policies/data#manage-your-online-store)
* [Storing your Shopify data](https://www.locksmith.guide/policies/data#storing-your-shopify-data)
* [Where Locksmith's data is stored](https://www.locksmith.guide/policies/data#where-locksmiths-data-is-stored)
* [What Locksmith stores](https://www.locksmith.guide/policies/data#what-locksmith-stores)
* [What Locksmith doesn't store](https://www.locksmith.guide/policies/data#what-locksmith-doesnt-store)
Was this helpful?
---
# About key conditions | Locksmith
For the complete documentation index, see [llms.txt](https://www.locksmith.guide/llms.txt)
. This page is also available as [Markdown](https://www.locksmith.guide/keys/about-key-conditions.md)
.
In Locksmith, customer access is always granted using _keys_ – simple statements that describe the conditions for access.
For example, one might have a key that says "Permit if the customer is signed in". In this example, the _key condition_ is "if the customer is signed in".
A full list of key conditions can be found in our guide here:
[Creating keys](https://www.locksmith.guide/basics/creating-keys)
Read on in this section to find out more information about how to set up many of our most popular key condition types.
[PreviousUsing date and time key conditions](https://www.locksmith.guide/tutorials/more/using-date-and-time-key-conditions)
[NextCustomer account keys](https://www.locksmith.guide/keys/customer-account-keys)
Last updated 2 years ago
Was this helpful?
Was this helpful?
---
# Visitor location keys | Locksmith
For the complete documentation index, see [llms.txt](https://www.locksmith.guide/llms.txt)
. This page is also available as [Markdown](https://www.locksmith.guide/keys/visitor-location-keys.md)
.
Locksmith can help you restrict access by _automatically_ detecting the location of the **IP address** of a visitor. The location condition supports many type of locations including:
* **Regions** (eg: North America, Asia, Antarctica)
* **Countries** (eg: Australia, Germany, Nauru)
* **Provinces/States** (eg: Texas, Nova Scotia, Sikkim)
* **Cities** (eg: Montreal, Chicago, Tokyo)
* **Towns** (eg: Český Krumlov, Santa Maddalena)
**Important**: Locksmith uses the word "location" in the generic sense. This "location key" feature from Locksmith does NOT correspond to the [inventory management scheme that Shopify also calls "Locations"](https://help.shopify.com/en/manual/locations). Consider using [Shopify's "Markets" feature](https://help.shopify.com/en/manual/markets/managing-markets)
, if you need to restrict purchasing based on inventory location.
**Also note**: If your store _is_ using the "[Shopify Markets](https://help.shopify.com/en/manual/markets)
" feature, and you are looking for a way to automatically show content based on which "market" the customer is visiting from, we have [a dedicated guide to doing this here](https://www.locksmith.guide/tutorials/more/shopify-markets)
.
[](https://www.locksmith.guide/keys/visitor-location-keys#giving-access-to-locations)
Giving access to locations
---------------------------------------------------------------------------------------------------------------------
Once you've created your lock, choose the Location key:

Next, in the key configuration box, search for the location:

Click the name of the area to add it to the key. Feel free to add additional locations:

Save the key, and you're all set. Those locations will be given access to your locked content, but everyone else around the world won't.
[](https://www.locksmith.guide/keys/visitor-location-keys#hiding-from-locations)
Hiding FROM locations
-----------------------------------------------------------------------------------------------------------
To make sure some locations _don't_ see your locked content, you'll use the same method.
Add your location(s) to the key like normal, but this time click the "invert" box in the lower left of the key box:

The result here is that customers around the world can get access to your locked content, all except for those in that location.
[](https://www.locksmith.guide/keys/visitor-location-keys#seo-limitations)
SEO Limitations
-----------------------------------------------------------------------------------------------
It is important to know that content protected under these key types will not be indexed properly, when used normally. This will strongly effect your SEO for any pages that are covered by these locks. This is because of Google's rules against cloaking. That is to say - we are not allowed to show different content to a search engine vs a regular visitor, as per Google regulations.
If you are using Location or IP address keys, and you still want your content to be indexed, you still have options!
If you have specific products that are not available in certain countries: You'll need to use manual locking to hide only the add-to-cart button. [More info on that here](https://www.locksmith.guide/tutorials/hiding-prices)
.
If you have different versions for different countries: You can create separate versions of your products using variants, and setting up Locksmith to hide the variants depending on who is visiting. [More info on that here](https://www.locksmith.guide/tutorials/more/locking-variants)
.
[](https://www.locksmith.guide/keys/visitor-location-keys#shipping-address-limitations)
Shipping Address Limitations
-------------------------------------------------------------------------------------------------------------------------
Locksmith can only protect the frontend of your Online Store, and cannot extend its protections to Checkout. So, this does not prevent customers who have IP addresses located in an allowed location from choosing a specific shipping address that is in a blocked location at checkout. Locksmith is not able to control shipping destinations during checkout. For this, [check out Shopify's Shipping Profiles feature](https://help.shopify.com/en/manual/shipping/setting-up-and-managing-your-shipping/shipping-profiles)
.
###
[](https://www.locksmith.guide/keys/visitor-location-keys#testing-the-location-key)
Testing the location key:
When testing, the browser may cache your access and continue showing you the same version of that page. So, to test the location key you'll want to:
1\. Connect to a VPN for a specific location.
2\. Open up a **new** private browsing session (sometimes called 'incognito mode').
3\. Visit the locked collection/page/product etc. using the private browsing session.
4\. Close **all** of your private browsing windows when you're done testing a single location.
5\. Repeat the steps 1-4 for each new location.
You'll want to make sure you use a **brand new private browsing session** _each time_ you test a location, as Locksmith uses the same mechanism as the browser and Shopify to remember previously stored access.
[Why isn't my passcode, secret link, newsletter, or location key working?](https://www.locksmith.guide/faqs/more/why-isnt-my-remote-key-condition-working)
[How to use a private browsing session](https://www.locksmith.guide/tutorials/more/how-to-use-a-private-browsing-session)
[PreviousSecret link keys](https://www.locksmith.guide/keys/secret-link-keys)
[NextMore about keys...](https://www.locksmith.guide/keys/more)
Last updated 2 months ago
Was this helpful?
* [Giving access to locations](https://www.locksmith.guide/keys/visitor-location-keys#giving-access-to-locations)
* [Hiding FROM locations](https://www.locksmith.guide/keys/visitor-location-keys#hiding-from-locations)
* [SEO Limitations](https://www.locksmith.guide/keys/visitor-location-keys#seo-limitations)
* [Shipping Address Limitations](https://www.locksmith.guide/keys/visitor-location-keys#shipping-address-limitations)
* [Testing the location key:](https://www.locksmith.guide/keys/visitor-location-keys#testing-the-location-key)
Was this helpful?
---
# Why aren't my locks working? | Locksmith
For the complete documentation index, see [llms.txt](https://www.locksmith.guide/llms.txt)
. This page is also available as [Markdown](https://www.locksmith.guide/faqs/why-arent-my-locks-working.md)
.
[](https://www.locksmith.guide/faqs/why-arent-my-locks-working#first-thing-to-try-update-locksmith)
First thing to try: Update Locksmith
---------------------------------------------------------------------------------------------------------------------------------------------
Is your Locksmith installation synced up with your current theme? When changing around themes, Locksmith needs to be re-installed each time you do this. To initiate a new theme install on your _currently published theme_, press the "Update Locksmith" button on the "Help" page:

[](https://www.locksmith.guide/faqs/why-arent-my-locks-working#using-passcodes-secret-links-newsletter-or-location-keys)
Using passcodes, secret links, newsletter, or location keys?
------------------------------------------------------------------------------------------------------------------------------------------------------------------------------------------
Read our full guide on this here:
[Why isn't my passcode, secret link, newsletter, or location key working?](https://www.locksmith.guide/faqs/more/why-isnt-my-remote-key-condition-working)
If you've been testing out your locks, and you've already entered the passcode or used the secret link, etc, during the current browser session, the content is now unlocked for you, and will be accessible on your current browser: Locksmith will not continue to ask you for access credentials.
To test out what a new visitor to your website will see, use an incognito window, or try on a different device or browser.
For more information from the sources on **how to use an incognito window** in each of the different types of browsers(sometimes called "private session"), use the following links:
* [Chrome](https://support.google.com/chrome/answer/95464)
* [Safari on Mac](https://support.apple.com/guide/safari/browse-in-private-ibrw1069/mac)
* [Safari on iOS](https://support.apple.com/en-us/HT203036)
* [Firefox](https://support.mozilla.org/en-US/kb/private-browsing-use-firefox-without-history)
* [Edge](https://support.microsoft.com/en-us/help/4026200/microsoft-edge-browse-inprivate)
###
[](https://www.locksmith.guide/faqs/why-arent-my-locks-working#using-manual-locks-or-locked-sections-and-noticing-that-prices-or-content-arent-hidden-anymore)
Using manual locks or locked sections and noticing that prices or content aren’t hidden anymore?
If you recently switched to a new theme or published an updated version of your existing theme, any manual locking code or theme hiding profile definitions you previously added will _not_ automatically carry over. This is expected behavior in Shopify — theme files are unique to each theme version, and apps can’t migrate custom edits between themes.
If you were relying on:
* [Manual Locking](https://www.locksmith.guide/tutorials/more/manual-mode)
Liquid code inserted directly into templates (for example, to hide prices, add-to-cart buttons, or sections etc)
* A [theme hiding profile](https://www.locksmith.guide/tutorials/more/how-to-hide-theme-sections-blocks-and-snippets)
that references your theme’s specific section or block structure
* Custom CSS added for supplemental hiding
* Any other theme-specific customization using Locksmith manual locking code made outside of Locksmith’s automatic installation
…you’ll need to re-add these changes in the newly published theme.
If you’d like help identifying which code needs to be brought over or where to place it in your new theme, please feel free to reach out at [**team@uselocksmith.com**](mailto:mailto:team@uselocksmith.com)
— we’re happy to walk with you through it or add it ourselves if that's helpful. :)
[](https://www.locksmith.guide/faqs/why-arent-my-locks-working#lastly)
Lastly...
-------------------------------------------------------------------------------------
If none of the above helps, inside the Locksmith app, double-check each lock individually for warnings. Or, for any extra keys that might be accidentally allowing access.
**If you're still having trouble, email us –** [**team@uselocksmith.com**](mailto:mailto:team@uselocksmith.com)
**. We're here to help. :)**
[PreviousLimiting the scope of variant locks using the product tag key condition](https://www.locksmith.guide/keys/more/limiting-the-scope-of-variant-locks-using-the-product-tag-key-condition)
[NextFAQ: I see blank spaces in my collections and/or searches when locking](https://www.locksmith.guide/faqs/faq-i-see-blank-spaces-in-my-collections-and-or-searches-when-locking)
Last updated 6 months ago
Was this helpful?
* [First thing to try: Update Locksmith](https://www.locksmith.guide/faqs/why-arent-my-locks-working#first-thing-to-try-update-locksmith)
* [Using passcodes, secret links, newsletter, or location keys?](https://www.locksmith.guide/faqs/why-arent-my-locks-working#using-passcodes-secret-links-newsletter-or-location-keys)
* [Using manual locks or locked sections and noticing that prices or content aren’t hidden anymore?](https://www.locksmith.guide/faqs/why-arent-my-locks-working#using-manual-locks-or-locked-sections-and-noticing-that-prices-or-content-arent-hidden-anymore)
* [Lastly...](https://www.locksmith.guide/faqs/why-arent-my-locks-working#lastly)
Was this helpful?
---
# Locksmith Admin API | Locksmith
For the complete documentation index, see [llms.txt](https://www.locksmith.guide/llms.txt)
. This page is also available as [Markdown](https://www.locksmith.guide/developer-tools/locksmith-admin-api.md)
.
Locksmith's Admin API can be used to query Locksmith to get information about your locks, keys, and settings. As a REST API, it closely resembles [Shopify's own REST Admin API](https://shopify.dev/docs/api/admin-rest)
.
Locksmith's Admin API is not intended for use in themes or user-facing browser experiences. For that, use Locksmith's [Storefront API](https://www.locksmith.guide/developer-tools/locksmith-storefront-api)
. Any client-side browser Javascript calling the Admin API will encounter [CORS](https://developer.mozilla.org/en-US/docs/Web/HTTP/Guides/CORS)
errors.
[](https://www.locksmith.guide/developer-tools/locksmith-admin-api#versions)
Versions
------------------------------------------------------------------------------------------
We maintain a 1-to-1 relationship with Shopify's API versions. Any [current and valid Shopify API versions](https://app.shopify.com/services/apis.json)
are also current and valid Locksmith versions.
Read more about [Shopify's versioning philosophy](https://shopify.dev/docs/api/usage/versioning)
.
For simplicity, the use of `unstable` as the version when calling this API will work for most use-cases.
[](https://www.locksmith.guide/developer-tools/locksmith-admin-api#authentication)
Authentication
------------------------------------------------------------------------------------------------------
There are two required headers:
Header
Description
`x-shopify-shop-domain`
Must be of the format "example.myshopify.com"
`x-locksmith-access-token`
Must be an enabled access token, generated in your Locksmith settings.
Using cURL, one might access the API this way:
Copy
curl \
--header "x-shopify-shop-domain: example.myshopify.com" \
--header "x-locksmith-access-token: xxxxxxxxxxxxxxxxxxxxxxxxxxxxxxxx" \
https://uselocksmith.com/api/unstable/shop.json
[](https://www.locksmith.guide/developer-tools/locksmith-admin-api#endpoints)
Endpoints
--------------------------------------------------------------------------------------------
All requests should be prefixed with **https://uselocksmith.com/api/:version**
####
[](https://www.locksmith.guide/developer-tools/locksmith-admin-api#input-lists)
Input lists
* `POST` `/input-lists/:id/sync` Requests an input list sync for the input list indicated by the ID
####
[](https://www.locksmith.guide/developer-tools/locksmith-admin-api#installs)
Installs
* `POST` `/install` Requests a full Locksmith installation to the _currently published_ theme
####
[](https://www.locksmith.guide/developer-tools/locksmith-admin-api#locks)
Locks
* `GET` `/locks.json` Returns an array of all locks in your Locksmith account
* `GET` `/locks/:id.json` Returns data for a single lock in your Locksmith account
* `POST` `/lock/` Creates a lock (single- or multi-resource). [See full documentation](https://www.locksmith.guide/more-developer-docs/using-the-admin-api-with-locks)
.
* `DELETE` `/locks/:id` Deletes the lock indicated by the ID
* `POST` `/locks/:lock_id/resources` Attaches a resource to an existing lock. [See documentation](https://www.locksmith.guide/more-developer-docs/using-the-admin-api-with-locks)
.
* `PATCH` `/locks/:lock_id/resources/:lock_resource_id` Updates a resource attached to a lock
* `DELETE` `/locks/:lock_id/resources/:lock_resource_id` Detaches a resource from a lock
####
[](https://www.locksmith.guide/developer-tools/locksmith-admin-api#shop)
Shop
* `GET` `/shop.json` Returns Locksmith's entire configuration for your store
[](https://www.locksmith.guide/developer-tools/locksmith-admin-api#conventions)
Conventions
------------------------------------------------------------------------------------------------
* Do not rely upon data keys that are prefixed with an underscore (e.g. "\_foobar"). They are subject to change or removal at any time.
[](https://www.locksmith.guide/developer-tools/locksmith-admin-api#generating-an-access-token)
Generating an access token
------------------------------------------------------------------------------------------------------------------------------
To access this API, generate an access token. You can find these toward the end of your settings area:

Use the "Add access token" link to add your first token.
Once created, an access token may be edited to enable/disable it, or to change its name. It may also be deleted.
[PreviousContact us](https://www.locksmith.guide/policies/contact)
[NextLocksmith Storefront API](https://www.locksmith.guide/developer-tools/locksmith-storefront-api)
Last updated 15 days ago
Was this helpful?
* [Versions](https://www.locksmith.guide/developer-tools/locksmith-admin-api#versions)
* [Authentication](https://www.locksmith.guide/developer-tools/locksmith-admin-api#authentication)
* [Endpoints](https://www.locksmith.guide/developer-tools/locksmith-admin-api#endpoints)
* [Conventions](https://www.locksmith.guide/developer-tools/locksmith-admin-api#conventions)
* [Generating an access token](https://www.locksmith.guide/developer-tools/locksmith-admin-api#generating-an-access-token)
Was this helpful?
---
# Locksmith is not working with my page builder app | Locksmith
For the complete documentation index, see [llms.txt](https://www.locksmith.guide/llms.txt)
. This page is also available as [Markdown](https://www.locksmith.guide/faqs/locksmith-is-not-working-with-my-page-builder-app.md)
.
Merchants frequently have issues with Locksmith and page building apps such as **GemPages** or **PageFly.**
This is a hard area to have full compatibility since those particular apps specialize in letting merchants have full control over the look and feel of the pages. This is a great thing, of course, but it does make it hard for apps such as Locksmith to come in after the fact and also attempt to control the display.
That being said, **if you are using Locksmith in a more standard way** - i.e. using full-page locks on some of your products or collections, there's still a good chance that you can use both.
If you're not sure, the following points should clear up when not to use the apps together...
[](https://www.locksmith.guide/faqs/locksmith-is-not-working-with-my-page-builder-app#editing-your-pages-while-locksmith-is-active)
Editing your pages while Locksmith is active
-------------------------------------------------------------------------------------------------------------------------------------------------------------------------------------
Even when using standard Locksmith locks, you may still find that you cannot edit your pages while Locksmith is active. The best way to get around this is to simply **disable Locksmith** while you are editing your pages. This can be an inconvenience, and we apologize for that in advance. You can disable Locksmith from the **Settings** page in the app.
[](https://www.locksmith.guide/faqs/locksmith-is-not-working-with-my-page-builder-app#hiding-prices-the-add-to-cart-button-or-other-types-of-manual-locking-on-your-pages)
Hiding prices, the add-to-cart button, or other types of manual locking on your pages
---------------------------------------------------------------------------------------------------------------------------------------------------------------------------------------------------------------------------------------------------------------------
Locksmith's [manual locking features](https://www.locksmith.guide/keys/more/manual-mode)
are NOT compatible with page builder apps, it is **not recommended** to try to use both, and Locksmith support cannot help with this.
[](https://www.locksmith.guide/faqs/locksmith-is-not-working-with-my-page-builder-app#variant-locking)
Variant locking
---------------------------------------------------------------------------------------------------------------------------
Locksmith's [variant locking](https://www.locksmith.guide/faqs/locksmith-is-not-working-with-my-page-builder-app#undefined)
works similarly to manual locking, and is **also not compatible** with page building apps.
[PreviousCan Locksmith hide content from my in-store search?](https://www.locksmith.guide/faqs/can-locksmith-hide-content-from-my-in-store-search)
[NextWhat should I do if my site is loading slowly?](https://www.locksmith.guide/faqs/what-should-i-do-if-my-site-is-loading-slowly)
Last updated 3 years ago
Was this helpful?
* [Editing your pages while Locksmith is active](https://www.locksmith.guide/faqs/locksmith-is-not-working-with-my-page-builder-app#editing-your-pages-while-locksmith-is-active)
* [Hiding prices, the add-to-cart button, or other types of manual locking on your pages](https://www.locksmith.guide/faqs/locksmith-is-not-working-with-my-page-builder-app#hiding-prices-the-add-to-cart-button-or-other-types-of-manual-locking-on-your-pages)
* [Variant locking](https://www.locksmith.guide/faqs/locksmith-is-not-working-with-my-page-builder-app#variant-locking)
Was this helpful?
---
# Unsupported functionality | Locksmith
For the complete documentation index, see [llms.txt](https://www.locksmith.guide/llms.txt)
. This page is also available as [Markdown](https://www.locksmith.guide/developer-tools/unsupported-functionality.md)
.
[](https://www.locksmith.guide/developer-tools/unsupported-functionality#working-with-passcodes-and-secret-links)
Working with passcodes and secret links
--------------------------------------------------------------------------------------------------------------------------------------------------------------
**Note:** The examples below use jQuery. If jQuery isn’t already included in your theme, you’ll need to load it first.
Including jQuery[](https://www.locksmith.guide/developer-tools/unsupported-functionality#including-jquery)
To include jQuery you. can add the following script right before the example scripts in this section:
Copy
The passcode and secret link can be extracted using the following:
`Locksmith.params.passcode`
`Locksmith.params.secret_link`
Example usage: add the passcode as a cart attribute with javascript:
Copy
Second example: Do the same thing, but add the "secret" part of the secret link instead:
[](https://www.locksmith.guide/developer-tools/unsupported-functionality#working-with-passcode-secret-link-expiry-in-unix-timestamp)
Working with Passcode/Secret Link expiry in UNIX timestamp
----------------------------------------------------------------------------------------------------------------------------------------------------------------------------------------------------
When you've set an expiration time in the passcode or secret link keys, you can see the expiration time as a UNIX timestamp. That's found in cart.json between the "-" and the ":" in the Locksmith entry:

The number before the "-" is the key id that was used to open the lock. What's after the colon is not valuable.
[](https://www.locksmith.guide/developer-tools/unsupported-functionality#clearing-the-locksmith-cart-attribute)
Clearing the Locksmith cart attribute
----------------------------------------------------------------------------------------------------------------------------------------------------------
Locksmith adds information as a cart attribute when using remote keys. You can clear that manually with something like this. This triggers when the page loads:
[](https://www.locksmith.guide/developer-tools/unsupported-functionality#responsive-background-image-for-the-passcode-form)
Responsive background image for the passcode form
----------------------------------------------------------------------------------------------------------------------------------------------------------------------------------
This code is designed to be added to the "Passcode prompt" field in Locksmith's settings, or the "Passcode prompt" field on a lock's settings page.
* Update `background-image:` attribute with the URL for your image
* Make sure you update the `padding-top:` attribute with your images aspect ratio. For example, calculate the aspect ratio of an image of size 1080\*1920 pixels like this: ((1080 / 1920) \* 100)% = 56.25%
[](https://www.locksmith.guide/developer-tools/unsupported-functionality#redirecting-after-customer-registration)
Redirecting after customer registration
--------------------------------------------------------------------------------------------------------------------------------------------------------------
[](https://www.locksmith.guide/developer-tools/unsupported-functionality#removing-product-information-from-shopify-analytics-in-the-page-source)
Removing product information from Shopify Analytics in the page source
----------------------------------------------------------------------------------------------------------------------------------------------------------------------------------------------------------------------------
Sometimes, Shopify Analytics, Google Analytics, or Web Pixels can leave bits of information about your locked products in the page source. Locksmith can't filter that, since it's outside of your theme, but you may be able to replace the content with null values for just your locked resources.
Here's an example of how that might work with Shopify Analytics scripts:
[PreviousLocksmith variables](https://www.locksmith.guide/developer-tools/locksmith-variables)
[NextRequests from Locksmith](https://www.locksmith.guide/developer-tools/requests-from-locksmith)
Last updated 1 year ago
Was this helpful?
* [Working with passcodes and secret links](https://www.locksmith.guide/developer-tools/unsupported-functionality#working-with-passcodes-and-secret-links)
* [Working with Passcode/Secret Link expiry in UNIX timestamp](https://www.locksmith.guide/developer-tools/unsupported-functionality#working-with-passcode-secret-link-expiry-in-unix-timestamp)
* [Clearing the Locksmith cart attribute](https://www.locksmith.guide/developer-tools/unsupported-functionality#clearing-the-locksmith-cart-attribute)
* [Responsive background image for the passcode form](https://www.locksmith.guide/developer-tools/unsupported-functionality#responsive-background-image-for-the-passcode-form)
* [Redirecting after customer registration](https://www.locksmith.guide/developer-tools/unsupported-functionality#redirecting-after-customer-registration)
* [Removing product information from Shopify Analytics in the page source](https://www.locksmith.guide/developer-tools/unsupported-functionality#removing-product-information-from-shopify-analytics-in-the-page-source)
Was this helpful?
Copy
Copy
Copy
Copy
Copy
{% comment %}
Find Shopify's analytics code and replace it with something free of
potentially-sensitive details, if Locksmith thinks access should be denied.
{% endcomment -%}
{% capture replacement_script_tag -%}
{%- endcapture -%}
{% if locksmith_access_denied -%}
{% assign content_for_header_pieces = content_for_header | split: "" | first | prepend: "" -%}
{% assign content_for_header = content_for_header | replace: complete_script_tag, replacement_script_tag -%}
{% break -%}
{% endfor -%}
{% endif -%}
---
# Locksmith's pricing policy: Pay what feels good | Locksmith
For the complete documentation index, see [llms.txt](https://www.locksmith.guide/llms.txt)
. This page is also available as [Markdown](https://www.locksmith.guide/policies/pricing.md)
.
Our top priority is to create health for ourselves, and to give you the best tools we can for creating health for you. (We interpret "health" broadly: healthy transactions created in healthy business can enable health in a million other areas.)
We believe (a) that the financial side of this is as important to get right as the technical side, and (b) that the best way to guarantee healthy financial movement is through clear and invitingly open conversation.
In practice, here's what that means:
1. When you install our app, we suggest a subscription price for you based on the cost of your Shopify plan, based on the prices that Shopify publishes. In general, we'll suggest a third of the Shopify plan cost.
2. If you want to keep using our app, and the price feels good to you, you pay it – no further conversation needed.
3. If the price we suggest doesn't feel good, you tell us what price _does_ feel good to you. This is important: the price we suggested was based on what we were able to see about you, but we're not claiming to know your entire story. In this part of the conversation, we rely on you to improve our knowledge of what's right for you, by asking you _specifically_ what price you'll feel good paying.
4. Our turn! If we can meet you at that number, we will. We'll update your account with the price you talked about, and we'll all move forward from there. (If we can't, then we'll talk about that too – it'll be our turn to execute step 3.)
_A note about “what feels good”: when talking about numbers, it’s that sweet spot where you feel you’re appropriately investing in something. Only you know what that number is for you, where you’re neither straining yourself to afford the thing, nor paying a number that represents undervaluing what you receive. If that gives you pause, it’s okay. Take a minute and feel it out. :)_
To learn more about why we work this way, see [lightward.com/pricing](https://lightward.com/pricing)
. If you have questions, hit that chat button in the corner. :)
[PreviousUsage agreement](https://www.locksmith.guide/policies/usage-agreement)
[NextPrivacy policy](https://www.locksmith.guide/policies/privacy)
Last updated 10 months ago
Was this helpful?
Was this helpful?
---
# Customer account keys | Locksmith
For the complete documentation index, see [llms.txt](https://www.locksmith.guide/llms.txt)
. This page is also available as [Markdown](https://www.locksmith.guide/keys/customer-account-keys.md)
.
Many of Locksmith's key conditions use the customer account system that comes by default with all Shopify stores to check for specific customer attributes before granting access. These are detailed below.
**Note**: Locksmith does **not** create a separate account system or customer database! In order to use customer accounts with Locksmith, you'll first need to [make sure that customer accounts are activated in your store](https://help.shopify.com/en/manual/customers/customer-accounts#set-your-customer-account-preferences)
.
When these key conditions are used, **Locksmith will ask that a customer signs in first**, whenever a customer tries to access the locked content in your store. Locksmith does so by automatically displaying the login template from your theme:

Some of the options available to you include checking **if the customer**...
* **is signed in** This condition requires all customers to log in. Once they're logged in, they'll be granted access to the locked resource.
* **is tagged with…** This condition _first_ requires all visitors to log in with a customer account. Once the customer has logged into their account, they'll be granted access _if_ their customer account has the tag you've chosen in Locksmith. (When inverted: _**unless**_ **the customer is tagged with..., or is** _**not**_ **signed in**)
* **has placed at least x orders** This condition requires the visitor to be logged in with their customer account. If their lifetime order count is at least the number that you specify, they'll be granted access.
* **has purchased…** This condition requires the visitor to be logged in with their customer account, prompting them to log in if they aren't already. If their last 50 orders contain a certain product (identified by SKU, title, or by product tag), they'll be granted access.
* **the customer's email contains…** This condition requires the visitor to be logged in with their customer account. If their email address matches some text that you specify (say, "@mycompany.com"), they'll be granted access.
* **has one of many email addresses** This condition requires the visitor to be logged in with their customer account. If their email address is on the list that you specify, they'll be granted access. Simply to set up, but not recommend if you have a large number of email addresses. See below for an alternate option.
* **has an email from an input list** This condition requires the visitor to be logged in with their customer account. If their email address is on the list that you specify, they'll be granted access. This key condition is different than the above, in that it leverages [Locksmith's input list feature](https://www.locksmith.guide/tutorials/more/input-lists)
, which lets you use a very large number of of email addresses. While not hard to set up, it does require a few more steps than the one-of-many-email-addresses key condition above.
[](https://www.locksmith.guide/keys/customer-account-keys#creating-keys)
Creating keys
-------------------------------------------------------------------------------------------
The guide linked below covers adding a key to a lock and selecting a key condition:
[Creating keys](https://www.locksmith.guide/basics/creating-keys)
[](https://www.locksmith.guide/keys/customer-account-keys#inverting-key-conditions)
Inverting key conditions
-----------------------------------------------------------------------------------------------------------------
Don't forget that all key conditions can be inverted! Which just means that Locksmith will check for _the opposite of_ the original condition. More info on that here:
[Inverting conditions in Locksmith](https://www.locksmith.guide/keys/more/inverting-conditions-in-locksmith)
[](https://www.locksmith.guide/keys/customer-account-keys#liquid-key-conditions)
Liquid key conditions
-----------------------------------------------------------------------------------------------------------
If the list above does not include the exact customer attribute that you are wanting to check, you have the flexibility to use [any Liquid attribute that Shopify makes available on the customer object](https://shopify.dev/api/liquid/objects#customer)
. This is done by using a "custom Liquid" key condition.
Most notably, **this would allow you to use customer metafields** in order to grant access. More complete information on custom liquid key conditions - including setup guide - here:
[Custom Liquid key-condition basics](https://www.locksmith.guide/keys/more/custom-liquid-key-condition-basics)
[](https://www.locksmith.guide/keys/customer-account-keys#more-information-related-to-customer-accounts)
More information related to customer accounts
-----------------------------------------------------------------------------------------------------------------------------------------------------------
Here are a few more links to guides that you might find useful as you set up Locksmith to work with your customer account system:
[Approving customer registrations](https://www.locksmith.guide/tutorials/approving-customer-registrations)
[Customizing the customer login page](https://www.locksmith.guide/tutorials/more/customizing-the-customer-login-page)
[Customizing the registration form](https://www.locksmith.guide/tutorials/more/customizing-the-registration-form)
[Customizing messages](https://www.locksmith.guide/tutorials/more/customizing-messages)
As always, please feel free to reach out to us directly via email at **team@uselocksmith.com** if you have any questions!
[PreviousAbout key conditions](https://www.locksmith.guide/keys/about-key-conditions)
[NextPasscode keys](https://www.locksmith.guide/keys/passcode-keys)
Last updated 3 months ago
Was this helpful?
* [Creating keys](https://www.locksmith.guide/keys/customer-account-keys#creating-keys)
* [Inverting key conditions](https://www.locksmith.guide/keys/customer-account-keys#inverting-key-conditions)
* [Liquid key conditions](https://www.locksmith.guide/keys/customer-account-keys#liquid-key-conditions)
* [More information related to customer accounts](https://www.locksmith.guide/keys/customer-account-keys#more-information-related-to-customer-accounts)
Was this helpful?
---
# Secret link keys | Locksmith
For the complete documentation index, see [llms.txt](https://www.locksmith.guide/llms.txt)
. This page is also available as [Markdown](https://www.locksmith.guide/keys/secret-link-keys.md)
.
**Note:** Some marketing and email services (such as Klaviyo or Mailchimp) may automatically add tracking information to the end of a URL to monitor clicks or other metrics. This code will also need to be separated from the secret link's extension code using an ampersand (&). See the [Secret link formatting section](https://www.locksmith.guide/keys/secret-link-keys#secret-link-formatting)
of this guide for more information.
**Testing:** We strongly recommend testing your secret links in the same manner they will be sent to customers before launching a marketing campaign or exclusive sale. This ensures that customers receive a functioning link. See our guide that covers testing troubleshooting tips below: [Why isn't my passcode, secret link, newsletter, or location key working?](https://www.locksmith.guide/faqs/more/why-isnt-my-remote-key-condition-working)
In Locksmith, a "secret link" is a Shopify URL that contains a "secret code" on the end of it, like this:
https://example.com/products/example?ls=FoO-rNBaTquJgqh1tbXjEQ
When a locked resource has a secret link key, only visitors who arrive via that link will be able to view the resource. This makes secret links useful for secret sales, or for offering specific products that are only available via certain ad campaigns.
[](https://www.locksmith.guide/keys/secret-link-keys#setup)
Setup
----------------------------------------------------------------------
To configure a secret link, start by creating a lock (If you need more information on creating a lock, [start with our guide here](https://www.locksmith.guide/basics/creating-locks)
).
Then, in the lock settings, follow the prompts to create a secret link key:

This image shows you how to quickly create a single secret link.
###
[](https://www.locksmith.guide/keys/secret-link-keys#secret-link-types)
**Secret link types**
####
[](https://www.locksmith.guide/keys/secret-link-keys#regular-secret-links)
**Regular secret links**
This will generate a single secret link for you that can immediately copy and use. You can also enter a custom secret link code if preferred. The setup is very straightforward (shown in the screenshot above).
####
[](https://www.locksmith.guide/keys/secret-link-keys#secret-links-from-an-input-list)
**Secret links from an input list**
It is also possible to use secret links in conjunction with our input list feature. Input lists allow you to store a list of links in a google sheet or other outside file source. This is great for merchants that want to easily create a large list of unique secret links that can be used. [Go here for information on setting up input lists](https://www.locksmith.guide/tutorials/more/input-lists)
. To use the input list version, select it instead of the regular secret link key condition type.
Input lists also allow you to create **usage limits on your secret links** (usage limits are not possible for the single secret link option). So, for example, you could create a large list of secret links that could each only be used one(the input list guide, link just above, gives more information on setting this up). Or, you could simply add in a single secret link with a large usage limit.
To use the input list version of the secret link key, select it from the key dropdown:

[](https://www.locksmith.guide/keys/secret-link-keys#how-secret-links-work)
How secret links work
------------------------------------------------------------------------------------------------------
Secret links consist of two parts:
* The secret link _code_ (top box): This is the "secret" part of the link, which you can change to whatever you like.
* The full secret link (bottom box): This is the link you send your customers, or whoever should see the locked content. It's the regular URL for your locked content, with the secret link code appended to it. Click the copy button to copy to your clipboard.
Want your link code to be something different? You can simply change that, and it will update the full link:

###
[](https://www.locksmith.guide/keys/secret-link-keys#secret-link-formatting)
Secret link formatting
It's important to note that the secret link code _must_ be an exact match in order to work. If the customer accidentally adds a character to the end of that link, they won't get access.
Having said that, there is some flexibility on how the URL is constructed. The secret link code can be presented in several, valid ways, illustrated here:
* https://example.com/?ls=MYSUPERSECRETLINK
* https://example.com/?another\_parameter=ABC123&ls=MYSUPERSECRETLINK
* https://example.com/?ls=MYSUPERSECRETLINK&another\_parameter=ABC123&...
* https://example.com/products/my-product?variant=32213744255111¤ty=USD&ls=MYSUPERSECRETLINK
Please note that the secret link must use URL-friendly characters in order to be evaluated correctly.
**Acceptable characters are:**
* Alphanumeric: 0-9a-zA-Z
* Special characters: $-\_.+!\*'()
[](https://www.locksmith.guide/keys/secret-link-keys#usage-notes)
Usage notes
----------------------------------------------------------------------------------
###
[](https://www.locksmith.guide/keys/secret-link-keys#returning-visitors)
Returning visitors
Once a visitor arrives via a secret link, Locksmith will remember their access for a while. If you're testing, this can make it look like the key is no longer working. Try using a new private browsing session to test for that.
The secret link key condition also has a "Grant access for a limited time" option that can revoke a customer's access after a set amount of time passes from initial use. Details on using this option are here: [Grant access for a limited time when using passcodes or secret links](https://www.locksmith.guide/tutorials/more/grant-access-for-a-limited-time-when-using-passcodes-or-secret-links)
Note: removing a secret link from a lock, or changing a secret link's extension code will revoke access for any customers who used the original secret link.
###
[](https://www.locksmith.guide/keys/secret-link-keys#re-using-secret-link-codes)
Re-using secret link codes
If you've got several secret link keys, across different locks, any keys that re-use the same secret code will _all_ be activated when _one_ link is used. This way, you can unlock several pieces of content across your store, using only a single secret link.
###
[](https://www.locksmith.guide/keys/secret-link-keys#using-a-vendors-referral-link-as-a-secret-code)
Using a vendor's referral link as a secret code
If you're using a referral service (or any other service that generates a URL with a specific code at the end), you can use the referral URL's "query string" as the secret code for your key.
For example, if you're using a referral URL that looks like https://example.com/?rfsn=abc123, you may set your secret link code to "rfsn=abc123", and your Locksmith key will just work:

Example: adding a referral link URL's querystring to the Secret Link key
###
[](https://www.locksmith.guide/keys/secret-link-keys#restricting-where-locked-content-is-revealed)
Restricting where locked content is revealed
If your lock has been configured for resource hiding, the successful use of a secret link will reveal the hidden resource across your online store. If you'd like to make sure that your locked product (for example) can _only ever_ be viewed on its product page, and never via store search or collection listings, add a second condition to your key which limits the key's usage to _only_ the product page.
To do this, use the "and..." link next to your existing key, and select the "(custom Liquid)" option. Fill in the Liquid condition with _request.page\_type == "product"_, as shown below.

The result: your secret link key will continue to work normally, but the access afforded by the key will _only_ work when the visitor is literally on a product page. This means that the key will _not_ kick in when the visitor is (for example) looking at search results, which means that the product will remain hidden in those places.
[](https://www.locksmith.guide/keys/secret-link-keys#some-things-to-be-mindful-of-when-sending-customers-secret-links)
Some things to be mindful of when sending customers secret links
--------------------------------------------------------------------------------------------------------------------------------------------------------------------------------------------
* If "ls=" hasn't been included at the beginning of the secret link code. A secret link code can still work without this, but if a customer is visiting your store for the first time, Shopify may be unsure of what the code at the end of the URL is doing and could redirect customers to the homepage before the lock is opened. This might make it appear as though the secret link isn't working. However, a second attempt usually succeeds. Including "ls=" at the beginning of the secret link code should prevent this issue.
* If you're sending out a marketing email or similar communication, make sure to test the email first. Sometimes the wrong or incomplete secret link can be added, or the marketing email can unexpectedly modify or add additional information to the URL.
* If additional information is being added to the URL, ensure that it is separated from the secret link code using an ampersand (&). This allows Locksmith to differentiate the secret link code from other information. See the [Secret link formatting section](https://www.locksmith.guide/keys/secret-link-keys#secret-link-formatting)
of this guide for more information.
###
[](https://www.locksmith.guide/keys/secret-link-keys#related-pages)
Related pages:
[Why isn't my passcode, secret link, newsletter, or location key working?](https://www.locksmith.guide/faqs/more/why-isnt-my-remote-key-condition-working)
[PreviousPasscode keys](https://www.locksmith.guide/keys/passcode-keys)
[NextVisitor location keys](https://www.locksmith.guide/keys/visitor-location-keys)
Last updated 8 months ago
Was this helpful?
* [Setup](https://www.locksmith.guide/keys/secret-link-keys#setup)
* [Secret link types](https://www.locksmith.guide/keys/secret-link-keys#secret-link-types)
* [How secret links work](https://www.locksmith.guide/keys/secret-link-keys#how-secret-links-work)
* [Secret link formatting](https://www.locksmith.guide/keys/secret-link-keys#secret-link-formatting)
* [Usage notes](https://www.locksmith.guide/keys/secret-link-keys#usage-notes)
* [Returning visitors](https://www.locksmith.guide/keys/secret-link-keys#returning-visitors)
* [Re-using secret link codes](https://www.locksmith.guide/keys/secret-link-keys#re-using-secret-link-codes)
* [Using a vendor's referral link as a secret code](https://www.locksmith.guide/keys/secret-link-keys#using-a-vendors-referral-link-as-a-secret-code)
* [Restricting where locked content is revealed](https://www.locksmith.guide/keys/secret-link-keys#restricting-where-locked-content-is-revealed)
* [Some things to be mindful of when sending customers secret links](https://www.locksmith.guide/keys/secret-link-keys#some-things-to-be-mindful-of-when-sending-customers-secret-links)
* [Related pages:](https://www.locksmith.guide/keys/secret-link-keys#related-pages)
Was this helpful?
---
# Requests from Locksmith | Locksmith
For the complete documentation index, see [llms.txt](https://www.locksmith.guide/llms.txt)
. This page is also available as [Markdown](https://www.locksmith.guide/developer-tools/requests-from-locksmith.md)
.
Locksmith occasionally makes requests to a shop's Online Store, starting with the shop's `myshopify.com` subdomain and then following redirects as necessary. (For example, Locksmith might request `https://lightward.myshopify.com/`, and then follow the redirect to `https://lightward.shop/`.)
Locksmith may make these requests to scan shop content or to verify Locksmith configuration, among other reasons.
Requests coming from Locksmith are identified with the following user agent header format, where `$VERSION` is Locksmith's own internal version identifier and `$SHOP` is the identifier for the Shopify store on whose behalf Locksmith is operating.
Copy
user-agent: Locksmith/v$VERSION (uselocksmith.com; +$SHOP.myshopify.com)
Occasionally we'll see a store's non-Shopify security layers or proxies have an issue with Locksmith's requests. If you're using a service like Cloudflare or Edgemesh, a good place to start is by checking request logs for this user agent.
Remember: user agent strings can be easily spoofed. Security-by-user-agent is not a great practice.
[PreviousUnsupported functionality](https://www.locksmith.guide/developer-tools/unsupported-functionality)
[NextMore developer docs...](https://www.locksmith.guide/more-developer-docs)
Last updated 2 years ago
Was this helpful?
Was this helpful?
---
# Shopify's New Customer Accounts and Locksmith | Locksmith
For the complete documentation index, see [llms.txt](https://www.locksmith.guide/llms.txt)
. This page is also available as [Markdown](https://www.locksmith.guide/shopifys-new-customer-accounts-and-locksmith.md)
.
Shopify has introduced a redesigned customer account system — referred to as **"new customer accounts"** (or sometimes "customer accounts"), replacing what is now called **"legacy customer accounts"**. This guide explains what the new system is, how it differs from the legacy system, and what you need to know when using Locksmith alongside it.
**Not sure which system your store is using?** Go to **Settings → Customer accounts** in your Shopify admin. You'll see whether you're on "Legacy customer accounts" or the newer "Customer accounts" system.
###
[](https://www.locksmith.guide/shopifys-new-customer-accounts-and-locksmith#what-are-shopifys-new-customer-accounts)
What are Shopify's new customer accounts?
The new customer account system is Shopify's modernized approach to customer login and account management. The most significant change is that it uses **passwordless authentication**: instead of signing in with an email and password, customers receive a one-time 6-digit verification code by email each time they log in. Customers can also sign in through the Shop app.
A few other things worth knowing about the new system:
* **Accounts are created automatically.** There's no longer a traditional registration form. When a customer checks out or enters their email on the login page, an account is created for them automatically upon email verification.
* **Login is hosted by Shopify, not your theme.** The sign-in page lives on Shopify's infrastructure (on a subdomain like `account.yourstore.com`), separate from your Online Store theme.
* **Legacy accounts are being deprecated.** [Shopify has announced that legacy customer accounts will eventually be sunset.](https://changelog.shopify.com/posts/legacy-customer-accounts-are-now-deprecated)
A final date will be announced later in 2026. It's worth planning your migration sooner rather than later.
For a full comparison of the two systems, refer to [Shopify's official documentation](https://help.shopify.com/en/manual/customers/customer-accounts)
.
* * *
###
[](https://www.locksmith.guide/shopifys-new-customer-accounts-and-locksmith#how-locksmith-works-with-new-customer-accounts)
How Locksmith works with new customer accounts
The good news: **Locksmith's core functionality works with both legacy and new customer accounts.** All of the standard customer account key conditions — checking if someone is signed in, checking customer tags, verifying email address, checking purchase history, and so on — continue to work exactly as you'd expect.
As always, Locksmith does **not** create a separate account system or customer database. It uses whichever customer account system you have active in your Shopify store.
When a visitor tries to access locked content and a customer account key condition is in use, Locksmith will present an access denied message and prompt the customer to sign in. Once they're signed in, Locksmith checks their account for the relevant condition (e.g. a customer tag) and grants access if the condition is met.
* * *
###
[](https://www.locksmith.guide/shopifys-new-customer-accounts-and-locksmith#whats-different-with-new-customer-accounts)
What's different with new customer accounts
While Locksmith's key conditions themselves work the same way, there are a few important differences in behavior when using the new customer account system.
####
[](https://www.locksmith.guide/shopifys-new-customer-accounts-and-locksmith#the-login-form-comes-from-shopify-not-your-theme)
The login form comes from Shopify, not your theme
With legacy customer accounts, Locksmith displays the login template directly from your theme when a visitor needs to sign in. With new customer accounts, **the sign-in experience is hosted by Shopify** and lives outside of your theme. Locksmith will still show its access denied message (which you can customize), but the sign-in form itself is Shopify's — it cannot be edited through your theme files.
You can still fully customize the message that Locksmith shows _before_ the sign-in link. More on that here:
[Customizing messages →](https://www.locksmith.guide/tutorials/more/customizing-messages)
[Customizing the customer login page →](https://www.locksmith.guide/tutorials/more/customizing-the-customer-login-page)
####
[](https://www.locksmith.guide/shopifys-new-customer-accounts-and-locksmith#the-registration-form-cannot-be-locked)
The registration form cannot be locked
With legacy customer accounts, it's possible to place a Locksmith lock directly on the customer registration form — for example, to prevent customers from signing up without an invitation. This is **not possible with new customer accounts**, because there is no traditional registration form. Accounts are created automatically when a customer verifies their email.
If you need to control who can access your content, the recommended approach is still to use a customer tag key condition and manually tag the customers you want to approve. More on that workflow here:
[Approving customer registrations →](https://www.locksmith.guide/tutorials/approving-customer-registrations)
####
[](https://www.locksmith.guide/shopifys-new-customer-accounts-and-locksmith#login-page-customization-is-more-limited)
Login page customization is more limited
With legacy accounts, you can customize the login template in your theme (removing the "Register" link, adjusting styling, etc.) and Locksmith will pick those changes up automatically. With new customer accounts, the sign-in page is managed by Shopify, so **theme-based customizations to the login page do not apply**.
You can still customize Locksmith's landing page — the page a visitor sees when they're denied access — with as much HTML, CSS, and Liquid as you need. Only the actual Shopify-hosted sign-in form is outside of your control.
* * *
###
[](https://www.locksmith.guide/shopifys-new-customer-accounts-and-locksmith#summary-what-works-and-whats-different)
Summary: What works, and what's different
Feature
Legacy accounts
New customer accounts
"Is signed in" key condition
✅ Works
✅ Works
Customer tag key conditions
✅ Works
✅ Works
Email-based key conditions
✅ Works
✅ Works
Purchase history key conditions
✅ Works
✅ Works
Custom Liquid key conditions
✅ Works
✅ Works
Customizing Locksmith's access message
✅ Works
✅ Works
Login form displayed inside your theme
✅ Works
❌ Not applicable
Locking the registration form
✅ Works
❌ Not applicable
Customizing the login template via theme
✅ Works
❌ Not applicable
"Forgot password?" link
✅ Works
❌ Not applicable
* * *
###
[](https://www.locksmith.guide/shopifys-new-customer-accounts-and-locksmith#related-guides)
Related guides
[Customer account keys →](https://www.locksmith.guide/keys/customer-account-keys)
[Approving customer registrations →](https://www.locksmith.guide/tutorials/approving-customer-registrations)
[Customizing the customer login page →](https://www.locksmith.guide/tutorials/more/customizing-the-customer-login-page)
[Customizing messages →](https://www.locksmith.guide/tutorials/more/customizing-messages)
* * *
As always, feel free to reach out to us directly at [**team@uselocksmith.com**](mailto:team@uselocksmith.com)
if you have any questions!
[PreviousEasy Appointment Booking](https://www.locksmith.guide/app-integrations/easy-appointment-booking)
Last updated 3 months ago
Was this helpful?
* [What are Shopify's new customer accounts?](https://www.locksmith.guide/shopifys-new-customer-accounts-and-locksmith#what-are-shopifys-new-customer-accounts)
* [How Locksmith works with new customer accounts](https://www.locksmith.guide/shopifys-new-customer-accounts-and-locksmith#how-locksmith-works-with-new-customer-accounts)
* [What's different with new customer accounts](https://www.locksmith.guide/shopifys-new-customer-accounts-and-locksmith#whats-different-with-new-customer-accounts)
* [Summary: What works, and what's different](https://www.locksmith.guide/shopifys-new-customer-accounts-and-locksmith#summary-what-works-and-whats-different)
* [Related guides](https://www.locksmith.guide/shopifys-new-customer-accounts-and-locksmith#related-guides)
Was this helpful?
---
# More about keys... | Locksmith
For the complete documentation index, see [llms.txt](https://www.locksmith.guide/llms.txt)
. This page is also available as [Markdown](https://www.locksmith.guide/keys/more.md)
.
[Inverting conditions in Locksmith](https://www.locksmith.guide/keys/more/inverting-conditions-in-locksmith)
[Combining key conditions](https://www.locksmith.guide/keys/more/combining-key-conditions)
["Has purchased..." key](https://www.locksmith.guide/keys/more/has-purchased)
[Using the "Force open other locks" setting](https://www.locksmith.guide/keys/more/using-the-force-open-other-locks-setting)
[Custom Liquid key-condition basics](https://www.locksmith.guide/keys/more/custom-liquid-key-condition-basics)
[Manual mode](https://www.locksmith.guide/keys/more/manual-mode)
[Excluding content from locks](https://www.locksmith.guide/keys/more/excluding-content-from-locks)
[IP address keys](https://www.locksmith.guide/keys/more/ip-address-keys)
[Newsletter keys](https://www.locksmith.guide/keys/more/newsletter-keys)
[Limiting the scope of variant locks using the product tag key condition](https://www.locksmith.guide/keys/more/limiting-the-scope-of-variant-locks-using-the-product-tag-key-condition)
[PreviousVisitor location keys](https://www.locksmith.guide/keys/visitor-location-keys)
[NextInverting conditions in Locksmith](https://www.locksmith.guide/keys/more/inverting-conditions-in-locksmith)
Last updated 1 year ago
Was this helpful?
Was this helpful?
---
# Combining key conditions | Locksmith
For the complete documentation index, see [llms.txt](https://www.locksmith.guide/llms.txt)
. This page is also available as [Markdown](https://www.locksmith.guide/keys/more/combining-key-conditions.md)
.
At times, you'll want to permit visitors to access a resource if _several_ conditions are met. This can be a method of increasing security: you might, for example, require visitors to arrive at your sale collection via a secret link, _but then_ you'll want them to _also_ provide their personal passcode.
All of Locksmith's key conditions can be combined with all other key conditions. (For the full list, see [Types of key conditions](https://docs.uselocksmith.com/article/492-types-of-key-conditions)
.) This is powerful! It means you can start to chain pieces of authorization logic together, to achieve really specific results.
[](https://www.locksmith.guide/keys/more/combining-key-conditions#setup)
Setup
-----------------------------------------------------------------------------------
To configure a combination key, begin by creating a standard key using whatever your first condition ought to be. Then, use the "Edit" link (shown next to the condition description). Scroll down to "+ Add key condition". Locksmith will prompt you to add a second condition, which you then configure in exactly the same way as the first.
Note that you'll see another "+ Add key condition" link, appearing in the key settings of your second condition. Yes, you may continue chaining conditions as needed – there are no limits here. :)
Using the example from earlier, in which a secret link condition is combined with a passcode condition, here's a demonstration:

[PreviousInverting conditions in Locksmith](https://www.locksmith.guide/keys/more/inverting-conditions-in-locksmith)
[Next"Has purchased..." key](https://www.locksmith.guide/keys/more/has-purchased)
Last updated 2 years ago
Was this helpful?
Was this helpful?
---
# Passcode keys | Locksmith
For the complete documentation index, see [llms.txt](https://www.locksmith.guide/llms.txt)
. This page is also available as [Markdown](https://www.locksmith.guide/keys/passcode-keys.md)
.
Passcode keys are a simple way to grant access to content **without** needing to require sign in or registration. They work completely independent of the Shopify customer account system.
After you use the Locksmith search bar to create a lock on the product or collection that you want to lock, choose one of the passcode conditions from the conditions list under "Keys":

Typing in "passcode" into the input will filter the list to only show passcode key condition types.
**Single passcode**: Use when only one passcode is needed.
**Many passcodes**: Allows you to enter many passcodes at one. Enter your passcodes one per line. This is a quick way to set up multiple passcodes at once. However, the input-list is more performant with large quantities(more than a thousand or so), _particularly if using single-use passcodes,_ so in these cases, it is recommended that you default to an input list.
**Input list**: Allows you to add your passcodes to a google sheet or other file that is stored online outside of Locksmith. Capacity for many hundreds of thousands of passcodes. [More information on input lists here](https://www.locksmith.guide/tutorials/more/input-lists)
. When setting up an input list, you can specify a usage limit that will apply to all passcodes inside the input list.
Once the key is created, and the lock is saved, your customers will now be prompted to enter the passcode when they visit the locked page:

####
[](https://www.locksmith.guide/keys/passcode-keys#important-info-about-testing-passcode-keys)
Important info about testing passcode keys
When you give the correct passcode at the passcode prompt form, Locksmith will remember you by saving a session cookie in your browser. That means that when you come back to view the shop, you'll likely still have access, making it seem like the lock isn't working.
So, when testing passcode keys, _be sure to use a new_ [_private browser window_](https://www.locksmith.guide/tutorials/more/how-to-use-a-private-browsing-session)
_each time_. That shows you what a new visitor will see.
###
[](https://www.locksmith.guide/keys/passcode-keys#general-passcode-key-notes)
General Passcode Key Notes
* Passcode keys allow you to require a password for access without requiring the customer to log into an account. They are completely separate from the customer account system.
* Passcode keys will increase loading time just a bit, on the first page load.
* The passcode key is what we call a "remote key" which saves info in your cart attributes. That info gets passed through as a note on your orders. You can remove that following [the steps here](https://www.locksmith.guide/faqs/more/why-is-locksmith-adding-information-to-my-orders)
.
* Passcode entry is applied across your entire store, so if you set multiple locks with the same passcode, entering the passcode at any of those locked pages will also allow the customer to access the other locked resources--all without requiring another passcode entry. This also works to reveal navigation links pointing to those locked resources, when the "hide links" option is enabled on a lock.
####
[](https://www.locksmith.guide/keys/passcode-keys#case-sensitivity)
Case sensitivity
Passcodes are **case-sensitive by default** — so `mypass` and `MyPass` are treated as different passcodes. You can disable this by unchecking the **Case sensitive** option on the key condition, which will make matching case-insensitive.
The **Input list** key condition does not have a case sensitivity option on the condition itself. Case sensitivity for input lists is configured on the input list, in your Locksmith settings.
####
[](https://www.locksmith.guide/keys/passcode-keys#whitespace-handling)
Whitespace handling
Leading and trailing whitespace is automatically stripped from what the customer types before it's compared to your passcode, so an accidental leading or trailing space won't cause a failed entry. However, whitespace **within** a passcode must match exactly — if your passcode is `hello world` (one space), `hello world` (two spaces) will not work.
####
[](https://www.locksmith.guide/keys/passcode-keys#undefined)
###
[](https://www.locksmith.guide/keys/passcode-keys#passcode-key-options)
Passcode key options
**Passcode uses left**
Found in the single passcode key. Use this option only if you want the passcode to have a usage limit. The number will decrease by one each time the passcode is entered. When the number hits zero, the passcode will no longer work.
**Case sensitive**
Available on single and many passcodes. Enabled by default — uncheck to allow case-insensitive matching (e.g. so `mypass` and `MYPASS` both work). For input lists, this setting lives on the input list itself.
**Hide the user's input as they type**
Available on all passcode key types. When enabled, the passcode field behaves like a standard password input, masking the characters as the customer types. Note: this option is automatically disabled when "Show passcodes as dropdown" is turned on.
**Show passcodes as dropdown**
Found in the "many passcodes" key only. Instead of a free-text input, customers choose their passcode from a dropdown menu. Limited to 100 passcodes.
This option reveals all valid passcodes to anyone who visits the locked page. Use it only when that's intentional.
**Allow only one use per passcode**
Found in the "many passcodes" key only. When the customer gives a passcode from the list, it gets removed from the list and can't be used again (unless you re-add it). **Note:** If you want to add a usage limit to a passcode-from-input-list key condition, that is done on the input list itself. [More information on input lists here](https://www.locksmith.guide/tutorials/more/input-lists)
.
**Remember for signed in customers**
This option will remember a customer who was signed in when they entered the passcode, and never ask them again when they're signed in.
**Customer auto tag**
If the customer is logged into their account when they give the passcode, they'll get tagged with the tag you enter here.
**Custom input prompt**
An optional message shown to the customer when asking for their passcode. Supports HTML and Liquid. If you only need one message across all your passcode locks, it's simpler to set it at the lock level in the Messages area instead.
**Automatic timeout**
Grant access for a limited period of time after the passcode is entered. [More information here](https://www.locksmith.guide/tutorials/more/grant-access-for-a-limited-time-when-using-passcodes-or-secret-links)
.
###
[](https://www.locksmith.guide/keys/passcode-keys#passcodes-and-manual-locking)
Passcodes and manual locking
Passcode keys are compatible with manual locking! This means that you can hide only selected parts of the page, instead of the whole page. For example, [when hiding prices](https://www.locksmith.guide/tutorials/hiding-prices)
.
If you have a manual passcode lock set up, the customer will not get prompted for a passcode automatically. So in this case it's necessary to add a button to trigger the passcode prompt. Use the following code to add a button to your page:
The classes may need editing to match your theme.
When the customer clicks that button, they'll be presented with the passcode prompt as normal. If they enter the correct passcode and submit, the page will reload but this time showing your locked content.
Passcode keys are _**not**_ compatible with variant locks by default. Please see: [https://www.locksmith.guide/tutorials/more/locking-variants#using-passcodes-with-variant-locks](https://www.locksmith.guide/tutorials/more/locking-variants#using-passcodes-with-variant-locks)
[](https://www.locksmith.guide/keys/passcode-keys#related-articles)
Related articles
-----------------------------------------------------------------------------------------
[Customizing messages](https://www.locksmith.guide/tutorials/more/customizing-messages)
[Customizing the passcode form](https://www.locksmith.guide/tutorials/more/customizing-the-passcode-form)
[Why isn't my passcode, secret link, newsletter, or location key working?](https://www.locksmith.guide/faqs/more/why-isnt-my-remote-key-condition-working)
[PreviousCustomer account keys](https://www.locksmith.guide/keys/customer-account-keys)
[NextSecret link keys](https://www.locksmith.guide/keys/secret-link-keys)
Last updated 1 month ago
Was this helpful?
* [General Passcode Key Notes](https://www.locksmith.guide/keys/passcode-keys#general-passcode-key-notes)
* [Passcode key options](https://www.locksmith.guide/keys/passcode-keys#passcode-key-options)
* [Passcodes and manual locking](https://www.locksmith.guide/keys/passcode-keys#passcodes-and-manual-locking)
* [Related articles](https://www.locksmith.guide/keys/passcode-keys#related-articles)
Was this helpful?
Copy
Enter passcode to access
---
# Easy Appointment Booking | Locksmith
For the complete documentation index, see [llms.txt](https://www.locksmith.guide/llms.txt)
. This page is also available as [Markdown](https://www.locksmith.guide/app-integrations/easy-appointment-booking.md)
.
Easy Appointment Booking is a Shopify app for bookings and appointments for any service, turning “Add to Cart” buttons into a “Select a Time” button allowing the customer to book an appointment.
It can be used with Locksmith to…
* Filter events by zip code so that your customers see events available in their region
* Password protect services for only those customers that can access it
**Note**: [Easy Appointment Booking](https://apps.shopify.com/appointments-and-bookings)
is offered by Servicify. Get assistance with this integration at [getservicify.com/helpcenter](https://www.getservicify.com/helpcenter)
, or by emailing [hey@getservicify.com](mailto:hey@getservicify.com)
.
[](https://www.locksmith.guide/app-integrations/easy-appointment-booking#usage)
Usage
------------------------------------------------------------------------------------------
1. Choose the product you want to use with Easy Appointment Booking
2. [Install](https://apps.shopify.com/appointments-and-bookings)
the Easy Appointment Booking app from the Shopify App Store
3. In Easy Appointment Booking, create an event using the product from Step 1. Configure the basic event details. There are prefilled options for you for the event duration and availability. See a tutorial video here: [youtube.com/watch?v=v5sp-7DI\_I8&ab\_channel=Servicify](https://www.youtube.com/watch?v=v5sp-7DI_I8&ab_channel=Servicify)
4. You can now use Locksmith to add whatever access conditions you'd like to your newly created event product! For more guidance on creating locks, [see our guide here](https://www.locksmith.guide/)
.
[](https://www.locksmith.guide/app-integrations/easy-appointment-booking#other-features)
Other features
------------------------------------------------------------------------------------------------------------
Easy Appointment Booking can also be used to...
* Send automatic email and SMS for confirmation, reminders, and follow-ups
* Connect Google Calendar to avoid scheduling conflicts and double bookings
* Generate Zoom and Google Meet links instantly for online events
* Team members and locations have their own portal to manage bookings, with sales and booking reports available
* Sync to Shopify Orders & Customers for easy reporting
* Supports multiple languages, including French and German
* Integrates with Zapier, allowing you to connect your bookings, appointments, and customer details to tools like Outlook, Excel, Hubspot, and more
[PreviousUsing the Admin API with Locks](https://www.locksmith.guide/more-developer-docs/using-the-admin-api-with-locks)
[NextShopify's New Customer Accounts and Locksmith](https://www.locksmith.guide/shopifys-new-customer-accounts-and-locksmith)
Last updated 1 year ago
Was this helpful?
* [Usage](https://www.locksmith.guide/app-integrations/easy-appointment-booking#usage)
* [Other features](https://www.locksmith.guide/app-integrations/easy-appointment-booking#other-features)
Was this helpful?
---
# Excluding content from locks | Locksmith
For the complete documentation index, see [llms.txt](https://www.locksmith.guide/llms.txt)
. This page is also available as [Markdown](https://www.locksmith.guide/keys/more/excluding-content-from-locks.md)
.
This is useful if you have a lock on a collection, but want specific products still available. Or if you have a lock on your "entire store", but want specific pages always accessible.
_It's a quick setup_: you'll actually create a **lock** directly on the content that you want to be unlocked. This can be anything such an entire collection, a product, page, blog, etc.
Once you've added the lock, use the key condition labelled "always permit":

Save the lock, and you're done.
The "lock" that you've just created becomes a sort of anti-lock, so the product, collection, etc that you've placed it one will now always be available.
You may need to create multiple locks like this if you have multiple areas of your store that you would like to remain accessible.
[](https://www.locksmith.guide/keys/more/excluding-content-from-locks#related-feature-the-force-open-other-locks-setting)
Related feature: the force open other locks setting
----------------------------------------------------------------------------------------------------------------------------------------------------------------------------------
The force open other locks setting is useful if you have multiple locks with overlapping content. This usually means locked collections with some of the same products. If this is you, check out our guide here:
[Using the "Force open other locks" setting](https://www.locksmith.guide/keys/more/using-the-force-open-other-locks-setting)
[PreviousManual mode](https://www.locksmith.guide/keys/more/manual-mode)
[NextIP address keys](https://www.locksmith.guide/keys/more/ip-address-keys)
Last updated 1 year ago
Was this helpful?
Was this helpful?
---
# Inverting conditions in Locksmith | Locksmith
For the complete documentation index, see [llms.txt](https://www.locksmith.guide/llms.txt)
. This page is also available as [Markdown](https://www.locksmith.guide/keys/more/inverting-conditions-in-locksmith.md)
.
There are many instances in which it is useful for a key to grant access if the _opposite_ of your key condition is true.
Locksmith makes it easy to invert keys. To do so, simply click the box next to "invert" when you're editing the key:

Notice that when this is done, the wording will update, inverting the key condition logic:

Make sure to "Save" the lock, and you're done!
As always, **feel free to contact us via email** at team@uselocksmith.com.
**A note on inverted customer account keys**
When you invert a [customer account key condition](https://www.locksmith.guide/keys/customer-account-keys)
— such as "is tagged with," "has purchased," or "email contains" — the inverted key will also grant access to visitors who are **not** signed in, since they technically meet the inverted condition — they have no customer account details (tags, email, purchase history, etc.) associated with them.
If you want to require sign-in, combine the inverted condition with an "is signed in" condition inside the same key:
[Combining key conditions](https://www.locksmith.guide/keys/more/combining-key-conditions)
[PreviousMore about keys...](https://www.locksmith.guide/keys/more)
[NextCombining key conditions](https://www.locksmith.guide/keys/more/combining-key-conditions)
Last updated 2 months ago
Was this helpful?
Was this helpful?
---
# Manual mode | Locksmith
For the complete documentation index, see [llms.txt](https://www.locksmith.guide/llms.txt)
. This page is also available as [Markdown](https://www.locksmith.guide/keys/more/manual-mode.md)
.
In some cases, you may want your keys to unlock certain parts of the page - like keeping the product price or add-to-cart hidden, until a customer qualifies for one of your keys.
This sort of behavior can be achieved with some custom code, and the "manual mode" setting for the relevant locks. Click the link below to learn more.
[🛠️Manual mode](https://www.locksmith.guide/tutorials/more/manual-mode)
[PreviousCustom Liquid key-condition basics](https://www.locksmith.guide/keys/more/custom-liquid-key-condition-basics)
[NextExcluding content from locks](https://www.locksmith.guide/keys/more/excluding-content-from-locks)
Last updated 2 years ago
Was this helpful?
Was this helpful?
---
# Using the "Force open other locks" setting | Locksmith
For the complete documentation index, see [llms.txt](https://www.locksmith.guide/llms.txt)
. This page is also available as [Markdown](https://www.locksmith.guide/keys/more/using-the-force-open-other-locks-setting.md)
.
This setting is useful if you have multiple Locksmith locks that cover overlapping content (e.g. collection locks with some of the same products), and want to make sure that each lock grants full access to the content it covers, without other locks preventing access.
To turn on the "Force open other locks" setting, go to **each applicable (overlapping) lock** and follow these steps:
It is found directly under your keys in the section labelled "**Key options**":

You'll also notice that the the key shows a message telling you which keys are forcing open other locks.

**Note**: Since this is a key-specific setting, if you have multiple keys, make sure it is turned on for each key. Each key has its own key icon, so that's a quick way to tell if you have multiple keys.
[Previous"Has purchased..." key](https://www.locksmith.guide/keys/more/has-purchased)
[NextCustom Liquid key-condition basics](https://www.locksmith.guide/keys/more/custom-liquid-key-condition-basics)
Last updated 1 year ago
Was this helpful?
Was this helpful?
---
# IP address keys | Locksmith
For the complete documentation index, see [llms.txt](https://www.locksmith.guide/llms.txt)
. This page is also available as [Markdown](https://www.locksmith.guide/keys/more/ip-address-keys.md)
.
Locksmith supports permitting visitors based on their IP address.
[](https://www.locksmith.guide/keys/more/ip-address-keys#setup)
Setup
--------------------------------------------------------------------------
Start by opening the settings for a lock you've created. Then, follow the steps shown to add a key that permits "if the customer has a certain IP address", as shown below:


This key can be configured with a series of IP addresses, one given per line. It can also be configured with CIDR definitions, allowing you to specify entire subnet ranges.
[](https://www.locksmith.guide/keys/more/ip-address-keys#notes)
Notes
--------------------------------------------------------------------------
This key condition can be inverted, resulting in a condition that permits _unless_ the visitor has a certain IP address. When used with a lock on your entire online store, this is a useful way to block certain visitors.
To accomplish this, invert the key condition, as shown below by clicking on the checkbox next to "invert". (To learn more about inverting conditions, see [Inverting keys in Locksmith](https://www.locksmith.guide/keys/more/inverting-conditions-in-locksmith)
.)

Because of the way IP address detection works, a IP address key on your entire store will show _everyone_ a spinner graphic for a moment, before your store's content is loaded. This will only happen once, if the visitor has an accepted IP address.
**Important**: When used, this key condition has the potential to negatively affect the SEO of any content that is locked in this way. [More information on SEO and Locksmith here](https://www.locksmith.guide/faqs/more/how-does-locksmith-affect-search-engines-and-seo)
.
[PreviousExcluding content from locks](https://www.locksmith.guide/keys/more/excluding-content-from-locks)
[NextNewsletter keys](https://www.locksmith.guide/keys/more/newsletter-keys)
Last updated 10 months ago
Was this helpful?
* [Setup](https://www.locksmith.guide/keys/more/ip-address-keys#setup)
* [Notes](https://www.locksmith.guide/keys/more/ip-address-keys#notes)
Was this helpful?
---
# Limiting the scope of variant locks using the product tag key condition | Locksmith
For the complete documentation index, see [llms.txt](https://www.locksmith.guide/llms.txt)
. This page is also available as [Markdown](https://www.locksmith.guide/keys/more/limiting-the-scope-of-variant-locks-using-the-product-tag-key-condition.md)
.
By default, Locksmith's [variant locks](https://www.locksmith.guide/tutorials/more/locking-variants)
apply to all matching option/value combinations. For example, you'll typically see something like this:

Once a variant lock is created, you can limit which products it applies to by using the key condition labelled "If the product is tagged with":

Type "product" in the popover filter, as shown above, to more easily find the correct key condition
You'll use any existing product tags to denote which products you want the variant lock to apply to, or create new product tags if needed.
If you want the lock to **apply to variants on one product tag only**, and leave all other products untouched, for example, you'll use an inverted key condition like so:

Then, **as a separate key,** add in your conditions for access to the product. So if you want to allow access to the variant with a sign in, that will look like this:

The result of this is that all matching variants will automatically be unlocked if the product is NOT tagged with "Snowboard". In other words, **the variant lock will only apply to products tagged with "Snowboard"**.
[PreviousNewsletter keys](https://www.locksmith.guide/keys/more/newsletter-keys)
[NextWhy aren't my locks working?](https://www.locksmith.guide/faqs/why-arent-my-locks-working)
Last updated 1 year ago
Was this helpful?
Was this helpful?
---
# "Has purchased..." key | Locksmith
For the complete documentation index, see [llms.txt](https://www.locksmith.guide/llms.txt)
. This page is also available as [Markdown](https://www.locksmith.guide/keys/more/has-purchased.md)
.
Locksmith allows you to check for a purchase of a specific product and _only_ grant access to your locked content if an applicable purchase has been made.
This key condition can only account for a customer's latest 50 orders (and in some cases only the latest 25). Learn more about this in the [Limitations](https://www.locksmith.guide/keys/more/has-purchased#limitations)
section.
This key condition relies on [Shopify's customer account system](https://help.shopify.com/en/manual/customers/customer-accounts)
, the same that's used throughout Shopify for all Shopify stores. Customer accounts need to be enabled for your store in order for this key condition to function correctly.
Additionally, when this key condition is used, Locksmith will automatically prompt guests to sign in to their customer account when they visit a locked page.
[Learn more about customer account keys](https://www.locksmith.guide/keys/customer-account-keys)
[](https://www.locksmith.guide/keys/more/has-purchased#setup)
Setup
------------------------------------------------------------------------
Once you [create a lock](https://www.locksmith.guide/basics/creating-locks)
that covers the content that you want to require a purchase for, click the "+ Add key" button. In the condition selector that appears, select "if the customer has purchased...".

Locksmith will examine the customer's order history for products matching what you enter.
**Important**: Whether you choose to enter the SKU, title (shown above), variant ID, or product tag, **they are all case sensitive**!

[](https://www.locksmith.guide/keys/more/has-purchased#options)
Options
----------------------------------------------------------------------------
####
[](https://www.locksmith.guide/keys/more/has-purchased#maximum-quantity-purchased)
Maximum quantity purchased
Sets a maximum allowed purchase amount. When used, Locksmith will only grant access if the customer has not yet purchased _this many_ units of the product
####
[](https://www.locksmith.guide/keys/more/has-purchased#only-look-at-orders-in-the-last)
Only look at orders in the last...
Allows to you specify how far back, in days, you would like Locksmith to check for the purchase of the specified product. E.g. you may want to only allow access for 30 days after purchase.
####
[](https://www.locksmith.guide/keys/more/has-purchased#ignore-cancelled-orders)
Ignore cancelled orders
When ON - Cancelled orders will not fulfill the requirements for access. Default: ON.
####
[](https://www.locksmith.guide/keys/more/has-purchased#ignore-unfulfilled-or-partially-fulfilled-orders)
Ignore unfulfilled or partially fulfilled orders
When ON - Unfulfilled orders will not fulfill the requirements for access. Default: OFF, most merchants will want to leave it this way.
####
[](https://www.locksmith.guide/keys/more/has-purchased#ignore-orders-that-are-not-fully-paid)
Ignore orders that are not fully paid
When ON - Only orders with a payment status of "Paid" will fulfill the requirements for this lock. Default: ON.
**Caution**: This setting often causes issues for merchants _who are testing out their locks_. Consider turning this setting OFF while testing, but back ON for general use.
[](https://www.locksmith.guide/keys/more/has-purchased#inverting-this-key-condition)
Inverting this key condition
----------------------------------------------------------------------------------------------------------------------
Like all key conditions, this one can be inverted. This is useful to verify that a customer has NOT yet purchased a specific product:
[Inverting conditions in Locksmith](https://www.locksmith.guide/keys/more/inverting-conditions-in-locksmith)
On its own, the inverted "_**unless**_ the customer has purchased..." key will grant access to anyone who has not purchased the product, including non-signed in customers. To require customers sign in, you'll want to _combine_ the "_**unless**_ the customer has purchased..." key with the "is signed in" key:
[Combining key conditions](https://www.locksmith.guide/keys/more/combining-key-conditions)
[](https://www.locksmith.guide/keys/more/has-purchased#limitations)
Limitations
------------------------------------------------------------------------------------
This key condition can only account for the 50 most recent orders for the current customer. In some cases, it can only account for the most recent 25 orders instead.
The stricter 25-order limit comes into play when a customer navigates to a URL that includes a page number, e.g. a URL with "?page=2" in it. This is because a page number in the URL limits Locksmith's ability to ask Shopify for the maximum number of orders possible (i.e. 50), leaving Locksmith to work with the default number of orders (i.e. 25).
To work around this limit, consider setting up your Shopify store to auto-tag customers according to their order history. These customer tags can then be used in new Locksmith keys which grant access based on those tags.
Locksmith doesn't have customer auto-tagging built in, so merchants generally accomplish this by involving a second app.
* [Shopify Flow](https://apps.shopify.com/flow)
has options for auto-tagging, and is available for free for all stores.
* [Mechanic](https://apps.shopify.com/mechanic)
(also made by Lightward) has [a variety of tasks](https://tasks.mechanic.dev/?q=tag%20customer)
that can be used for this purpose. Like Locksmith, Mechanic is also available under Lightward's [Pay What Feels Good](https://lightward.com/pricing)
pricing policy.
[](https://www.locksmith.guide/keys/more/has-purchased#related-articles)
Related articles
----------------------------------------------------------------------------------------------
[Customer account keys](https://www.locksmith.guide/keys/customer-account-keys)
[Selling digital content on Shopify](https://www.locksmith.guide/tutorials/selling-digital-content-on-shopify)
[PreviousCombining key conditions](https://www.locksmith.guide/keys/more/combining-key-conditions)
[NextUsing the "Force open other locks" setting](https://www.locksmith.guide/keys/more/using-the-force-open-other-locks-setting)
Last updated 1 year ago
Was this helpful?
* [Setup](https://www.locksmith.guide/keys/more/has-purchased#setup)
* [Options](https://www.locksmith.guide/keys/more/has-purchased#options)
* [Inverting this key condition](https://www.locksmith.guide/keys/more/has-purchased#inverting-this-key-condition)
* [Limitations](https://www.locksmith.guide/keys/more/has-purchased#limitations)
* [Related articles](https://www.locksmith.guide/keys/more/has-purchased#related-articles)
Was this helpful?
---
# Custom Liquid key-condition basics | Locksmith
For the complete documentation index, see [llms.txt](https://www.locksmith.guide/llms.txt)
. This page is also available as [Markdown](https://www.locksmith.guide/keys/more/custom-liquid-key-condition-basics.md)
.
Locksmith allows you to create a custom key conditions that use Liquid to determine whether or not the current visitor has access. This gives you a few more options than what comes with Locksmith's out-of-the-box key conditions.
Before continuing on, you may want to [check out Shopify's Liquid reference](https://shopify.dev/api/liquid)
, as that will give you a good idea of the kinds of things you can use when creating Liquid key conditions. Keep in mind that while Liquid key conditions can add more versatility, they are still limited to the scope of what's already available inside of Shopify's Liquid engine for the Online Store channel.
This is an advanced guide that requires knowledge of [Shopify's Liquid language](https://shopify.dev/api/liquid)
. If you're a developer type, read on! Otherwise, please note that Locksmith support is not able to write advanced custom Liquid keys for you. While we are happy to answer any questions you have along the way, if you need help writing these, you'll need to hire a paid Shopify expert. [Our list of partners is here](https://locksmith.partnerpage.io/)
. Alternatively, you can check [Shopify's own list of Shopify experts](https://www.shopify.com/partners/directory)
.
To create a Liquid key condition, start by selecting it from the key condition list. You'll be presented with the key condition area for Liquid key conditions:

[](https://www.locksmith.guide/keys/more/custom-liquid-key-condition-basics#the-liquid-condition)
The "Liquid condition"
-----------------------------------------------------------------------------------------------------------------------------
This is where you'll write the primary condition, using Liquid. The condition simply needs to evaluate to true or false.
For example, consider if you simply wrote the following:
`{% if``**false**``%}`
This would result in this particular key never opening, since it's always false. This is not necessarily advisable(it would be the equivalent of adding no keys at all), but it's a proof of concept.
So, here are some examples of useful conditions.
####
[](https://www.locksmith.guide/keys/more/custom-liquid-key-condition-basics#to-check-for-a-metafield)
**To check for a metafield**
`{% if customer.metafields.namespace.key == "matching-value" %}`
The metafield must be public in order for it to be accessed this way. [More information on Shopify meta-fields here](https://shopify.dev/api/liquid/objects#metafield)
.
####
[](https://www.locksmith.guide/keys/more/custom-liquid-key-condition-basics#to-check-if-the-customer-has-at-least-5-items-in-the-cart-currently)
To check if the customer has at least 5 items in the cart currently
`{% if cart.item_count > 4 %}`
####
[](https://www.locksmith.guide/keys/more/custom-liquid-key-condition-basics#to-check-if-the-customer-has-spent-at-least-usd50-in-the-past)
To check if the customer has spent at least $50 in the past
`{% if customer.total_spent > 5000 %}`
####
[](https://www.locksmith.guide/keys/more/custom-liquid-key-condition-basics#to-check-if-the-current-page-is-a-using-the-collection-template)
To check if the current page is a using the "collection" template
`{% if template == "collection" %}`
For most themes, this should match any collection pages unless you've created custom templates. You can use this strategy for other resource types as well (products, pages, etc).
####
[](https://www.locksmith.guide/keys/more/custom-liquid-key-condition-basics#to-check-for-a-specific-sub-string-inside-of-the-current-url)
To check for a specific sub-string inside of the current URL
`{% if canonical_url contains "/special-product-handle" %}`
The **canonical\_url** global Liquid object is accessible anywhere in the theme and always contains the entire URL of the current page, but does NOT contain any URL parameters. [More information from Shopify on it here](https://shopify.dev/api/liquid/objects#canonical_url)
.
####
[](https://www.locksmith.guide/keys/more/custom-liquid-key-condition-basics#to-check-for-some-attribute-of-the-request-object)
To check for some attribute of the request object
`{% if request.page_type == "index" %}`
As seen here, another Liquid global object of note is the **request** object, and it can very useful in this context. [Check out Shopify's documentation on it here](https://shopify.dev/api/liquid/objects#request)
.
[](https://www.locksmith.guide/keys/more/custom-liquid-key-condition-basics#the-liquid-prelude)
The "Liquid prelude"
-------------------------------------------------------------------------------------------------------------------------
This is a place for you to write any code that that you may need to set up the Liquid condition. It does _not_ need to evaluate to true or false, but it does need to use valid Liquid syntax.
Basically, you can assign to any custom variable in the prelude, and then use that variable in the condition to ultimately decide whether or not the customer qualifies to use this key.
For example, your prelude could look something like this:
So now, in the "Liquid condition", you would have access to the `purchase_allowed` variable, so it would simply look like this:
`{% if purchase_allowed %}`
So that would give you even more flexibility to write different Liquid conditions that can be used to set up your locks and keys.
[](https://www.locksmith.guide/keys/more/custom-liquid-key-condition-basics#other-resources)
Other resources
-----------------------------------------------------------------------------------------------------------------
Relatedly, you can also use Liquid to create Locks! More information on that here:
[Liquid locking basics](https://www.locksmith.guide/tutorials/more/liquid-locking-basics)
As always, feel free to check in with us via email at **team@uselocksmith.com**, if you have any questions about any of this!
[PreviousUsing the "Force open other locks" setting](https://www.locksmith.guide/keys/more/using-the-force-open-other-locks-setting)
[NextManual mode](https://www.locksmith.guide/keys/more/manual-mode)
Last updated 1 year ago
Was this helpful?
* [The "Liquid condition"](https://www.locksmith.guide/keys/more/custom-liquid-key-condition-basics#the-liquid-condition)
* [The "Liquid prelude"](https://www.locksmith.guide/keys/more/custom-liquid-key-condition-basics#the-liquid-prelude)
* [Other resources](https://www.locksmith.guide/keys/more/custom-liquid-key-condition-basics#other-resources)
Was this helpful?
Copy
---
# Newsletter keys | Locksmith
For the complete documentation index, see [llms.txt](https://www.locksmith.guide/llms.txt)
. This page is also available as [Markdown](https://www.locksmith.guide/keys/more/newsletter-keys.md)
.
Locksmith allows you to integrate directly with either **Mailchimp** or **Klaviyo**. When setup, Locksmith will ask customers for an email address when they arrive on a locked page. Once the email is entered, a customer is immediately granted access, and Locksmith will automatically send the subscription information to the corresponding service.

**Note**: Mailchimp and Klaviyo both have their own policies regarding double opt in, and it is typically enabled by default. This setting is adjusted in your Mailchimp or Klaviyo dashboards - it is not a setting that is controlled by Locksmith.
[](https://www.locksmith.guide/keys/more/newsletter-keys#mailchimp)
Mailchimp
----------------------------------------------------------------------------------
Detailed information on how to setup Mailchimp can be found here:
[Use Mailchimp to collect customer emails](https://www.locksmith.guide/tutorials/more/mailchimp)
[](https://www.locksmith.guide/keys/more/newsletter-keys#klaviyo)
Klaviyo
------------------------------------------------------------------------------
If using Klaviyo, you have the option to simply request that visitors subscribe in order to gain access:
[Grow your subscriber lists with Klaviyo](https://www.locksmith.guide/tutorials/more/klaviyo)
Or, you can also use Klaviyo to grant access only to those who are _already_ subscribed to a specific list in your Klaviyo account:
[Use a Klaviyo list or segment as an access control list](https://www.locksmith.guide/tutorials/more/use-a-klaviyo-list-or-segment-as-an-access-control-list)
[](https://www.locksmith.guide/keys/more/newsletter-keys#using-your-default-shopify-mailing-list)
Using your default Shopify mailing list
----------------------------------------------------------------------------------------------------------------------------------------------
Shopify ships out of the box with a marketing mailing list service. If you would like to use Locksmith to grant access to those who have already subscribed to this, you can do so using a custom Liquid key condition.
This is slightly different than the above options, in that **it will only grant access to a signed in customers - if the customer is already subscribed**! To start, check out our guide on this here:
[Custom Liquid key-condition basics](https://www.locksmith.guide/keys/more/custom-liquid-key-condition-basics)
The condition you're looking for is:
`{% if customer.accepts_marketing %}`
When set up, this will present the customer will the regular prompt to sign in (as opposed to the subscription prompt):

If desired, you can adjust your message prompt to direct your customers to the page footer(in most stores) to subscribe to your newsletter. More information on editing messages here:
[Customizing messages](https://www.locksmith.guide/tutorials/more/customizing-messages)
[](https://www.locksmith.guide/keys/more/newsletter-keys#using-other-mail-services)
Using other mail services
------------------------------------------------------------------------------------------------------------------
Locksmith does not support other mail services at this time.
However, if you have a mail service that automatically tags customers that are subscribed, you can use Locksmith to check for a customer tag:
[Customer account keys](https://www.locksmith.guide/keys/customer-account-keys)
Please feel free to contact us via email at **team@uselocksmith.com** if you have any questions!
###
[](https://www.locksmith.guide/keys/more/newsletter-keys#related-pages)
Related pages:
[Why isn't my passcode, secret link, newsletter, or location key working?](https://www.locksmith.guide/faqs/more/why-isnt-my-remote-key-condition-working)
[PreviousIP address keys](https://www.locksmith.guide/keys/more/ip-address-keys)
[NextLimiting the scope of variant locks using the product tag key condition](https://www.locksmith.guide/keys/more/limiting-the-scope-of-variant-locks-using-the-product-tag-key-condition)
Last updated 10 months ago
Was this helpful?
* [Mailchimp](https://www.locksmith.guide/keys/more/newsletter-keys#mailchimp)
* [Klaviyo](https://www.locksmith.guide/keys/more/newsletter-keys#klaviyo)
* [Using your default Shopify mailing list](https://www.locksmith.guide/keys/more/newsletter-keys#using-your-default-shopify-mailing-list)
* [Using other mail services](https://www.locksmith.guide/keys/more/newsletter-keys#using-other-mail-services)
* [Related pages:](https://www.locksmith.guide/keys/more/newsletter-keys#related-pages)
Was this helpful?
---
# Using the Admin API with Locks | Locksmith
For the complete documentation index, see [llms.txt](https://www.locksmith.guide/llms.txt)
. This page is also available as [Markdown](https://www.locksmith.guide/more-developer-docs/using-the-admin-api-with-locks.md)
.
**Important**: Locksmith support cannot help write or troubleshoot these requests for you. However, if there is anything unclear in our documentation, please feel free to contact us with questions.
Locks can be created via our Admin API using the following endpoint:
`POST` `/lock`
This guide covers information specific to creating locks. See our general Admin API guide for more general information on forming these requests (including headers and authentication):
[Locksmith Admin API](https://www.locksmith.guide/developer-tools/locksmith-admin-api)
[](https://www.locksmith.guide/more-developer-docs/using-the-admin-api-with-locks#body-parameters)
Body Parameters
-----------------------------------------------------------------------------------------------------------------------
A lock can protect **one or more resources of the same type**. Set the lock's type with the top-level `resource_type`, and list the resources it protects in the `resources` array — each entry an object with its own `resource_type`, `resource_id`, and optional `resource_options`. Every resource on a lock must be the same type (the three collection flavors — manual `custom_collection`, automated `smart_collection`, and the all-products `liquid:collection-all` — count as one type and can be combined).
A **shop lock** is the exception: pass `resource_type: "shop"` with no `resources` array, since it protects the entire storefront.
After creation, a lock's resources can also be managed individually using the dedicated resource endpoints (see [Managing a lock's resources](https://www.locksmith.guide/more-developer-docs/using-the-admin-api-with-locks#managing-a-locks-resources)
below).
Note that `resource_type` and `keys` are required. If left blank, the rest will use their defaults as noted.
Parameter
Type
Description
Required
`resource_type`
string
The lock's resource type — `product`, `custom_collection`, `smart_collection`, `page`, `blog`, or `shop`. Determines how the lock is enforced; every entry in `resources` must be this same type. Other types of locks unsupported.
Required
`resources`
array
The resources this lock protects. Each entry is an object with `resource_type`, `resource_id`, and an optional `resource_options` object. The `resource_id` is the Shopify resource ID, found at the end of the resource URL in your **Shopify Admin.** All entries must be the same type as the lock. Omit for a shop lock. **Note**: a resource can belong to only one lock. Attaching one that's already locked elsewhere is rejected — to add a resource to an existing lock, use the resource endpoints below rather than re-posting.
Required, except for shop locks
`name`
string
An optional, human-friendly label for the lock, shown in the lock list. Has no effect on what the lock protects.
Optional Default: none
`keys`
array
List of key definitions that grant access; can be an empty array on creation.
Required
`enabled`
boolean
Whether the lock is active.
Optional Default: true
`options`
object
Lock behavior options. See below.
Optional
`options.hide_links_to_resource`
boolean
Hide navigation links pointing to the resource on storefront. [See documentation](https://www.locksmith.guide/tutorials/more/hiding-navigation-links-for-locked-resources)
.
Optional Default: false
`options.hide_resource`
boolean
Hide the resource from product grids. [See documentation](https://www.locksmith.guide/tutorials/more/hiding-products-and-other-content-from-lists-in-your-online-store)
.
Optional
Default: false
`options.hide_resource_from_sitemaps`
boolean
Remove resource from sitemap generation. [See documentation](https://www.locksmith.guide/tutorials/more/automatically-hide-from-sitemaps-and-manage-seo-metafield)
.
Optional
Default: false
`options.manual`
boolean
Indicates a manual lock. [See documentation.](https://www.locksmith.guide/tutorials/more/manual-mode)
Optional Default: false
`options.noindex`
boolean
Add `noindex` meta tag to the storefreont rendering to prevent search engine indexing. [See documentation](https://www.locksmith.guide/faqs/more/how-does-locksmith-affect-search-engines-and-seo)
.
Optional Default: true
[](https://www.locksmith.guide/more-developer-docs/using-the-admin-api-with-locks#optional-query-parameters)
Optional query parameters
-------------------------------------------------------------------------------------------------------------------------------------------
Add these to the end of the /lock endpoint. For example:
`https://uselocksmith.com/api/unstable/lock?dryrun=true`
Name
Type
Description
Extra info
`install`
boolean
If true, a theme install on your published theme is performed (if request is successful).
Recommended unless you are manually triggering an install later! See `POST /install` endpoint.
`dryrun`
boolean
If true, changes are not persisted, but a success/error response is still returned.
Useful for testing/debugging.
[](https://www.locksmith.guide/more-developer-docs/using-the-admin-api-with-locks#keys)
Keys
-------------------------------------------------------------------------------------------------
Locksmith has a large variety of key conditions types and their corresponding options. The easiest way to create a valid key config is doing it **right inside the Locksmith app on a lock page**. Once created, the key config can be copy-pasted directly from the Locksmith app:

If using multiple keys, make sure to create a valid JSON array and use it as the "keys" parameter in your request. Once you've created valid key configs, you can reuse them wherever you are using this API. Check the **examples below**.
[](https://www.locksmith.guide/more-developer-docs/using-the-admin-api-with-locks#responses)
Responses
-----------------------------------------------------------------------------------------------------------
* `200` Success - the response body will contain the json representation of the newly created lock
* `400` Error - Post payload incorrectly formed
* `404` Error - Post URL incorrectly formed
Creating locks using invalid input may occasionally create malfunctioning locks. It is important that you test your storefront and delete any locks that aren't working as expected.
[](https://www.locksmith.guide/more-developer-docs/using-the-admin-api-with-locks#notes)
Notes
---------------------------------------------------------------------------------------------------
* On success, the returned json object will contain fields you did not explicitly add. Note that fields prefixed with `_` are automatically generated by the backend and should not be included in request bodies.
* After creation, you can use the `GET /locks/:lock_id` endpoint to verify.
[](https://www.locksmith.guide/more-developer-docs/using-the-admin-api-with-locks#example-curl-requests)
Example cURL requests
-----------------------------------------------------------------------------------------------------------------------------------
[](https://www.locksmith.guide/more-developer-docs/using-the-admin-api-with-locks#managing-a-locks-resources)
Managing a lock's resources
----------------------------------------------------------------------------------------------------------------------------------------------
Once a lock exists, you can attach, update, or detach individual resources without re-posting the whole lock. Every resource on a lock must be the same type (the three collection flavors — manual `custom_collection`, automated `smart_collection`, and the all-products `liquid:collection-all` — count as one type and can be combined). A resource can belong to only one lock; attaching one that's already locked elsewhere is rejected.
* `POST` `/locks/:lock_id/resources` Attaches a resource to the lock. Body: an object with `resource_type`, `resource_id`, and optional `resource_options`.
* `PATCH` `/locks/:lock_id/resources/:lock_resource_id` Updates an attached resource.
* `DELETE` `/locks/:lock_id/resources/:lock_resource_id` Detaches a resource from the lock. A lock with no resources is inactive (its keys are preserved) until one is re-added.
[](https://www.locksmith.guide/more-developer-docs/using-the-admin-api-with-locks#undefined)
------------------------------------------------------------------------------------------------
[PreviousMore developer docs...](https://www.locksmith.guide/more-developer-docs)
[NextEasy Appointment Booking](https://www.locksmith.guide/app-integrations/easy-appointment-booking)
Last updated 15 days ago
Was this helpful?
* [Body Parameters](https://www.locksmith.guide/more-developer-docs/using-the-admin-api-with-locks#body-parameters)
* [Optional query parameters](https://www.locksmith.guide/more-developer-docs/using-the-admin-api-with-locks#optional-query-parameters)
* [Keys](https://www.locksmith.guide/more-developer-docs/using-the-admin-api-with-locks#keys)
* [Responses](https://www.locksmith.guide/more-developer-docs/using-the-admin-api-with-locks#responses)
* [Notes](https://www.locksmith.guide/more-developer-docs/using-the-admin-api-with-locks#notes)
* [Example cURL requests](https://www.locksmith.guide/more-developer-docs/using-the-admin-api-with-locks#example-curl-requests)
* [Managing a lock's resources](https://www.locksmith.guide/more-developer-docs/using-the-admin-api-with-locks#managing-a-locks-resources)
* [](https://www.locksmith.guide/more-developer-docs/using-the-admin-api-with-locks#undefined)
Was this helpful?
Copy
# Create a minimal product-level lock with required fields only
curl -X POST https://uselocksmith.com/api/unstable/lock \
-H "x-shopify-shop-domain: example-store.myshopify.com" \
-H "x-locksmith-access-token: abcd1234" \
-H "Content-Type: application/json" \
-d '{
"resource_type": "product",
"resources": [\
{ "resource_type": "product", "resource_id": 1234567890 }\
],
"keys": []
}'
Copy
# Create a shop-level lock that applies to the entire storefront
curl -X POST https://uselocksmith.com/api/unstable/lock \
-H "x-shopify-shop-domain: example-store.myshopify.com" \
-H "x-locksmith-access-token: abcd1234" \
-H "Content-Type: application/json" \
-d '{
"resource_type": "shop",
"keys": []
}'
Copy
# Create a product-level lock. Optional parameters included. without keys.
curl -X POST https://uselocksmith.com/api/unstable/lock \
-H "x-shopify-shop-domain: example-store.myshopify.com" \
-H "x-locksmith-access-token: abcd1234" \
-H "Content-Type: application/json" \
-d '{
"resource_type": "product",
"resources": [\
{ "resource_type": "product", "resource_id": 1234567890 }\
],
"enabled": true,
"options": {
"hide_links_to_resource": true,
"hide_resource": true,
"hide_resource_from_sitemaps": true,
"manual": false,
"noindex": true
},
"keys": []
}'
Copy
# minimal product level lock. WITH keys
curl -X POST "https://uselocksmith.com/api/unstable/lock" \
-H "x-shopify-shop-domain: example-store.myshopify.com" \
-H "x-locksmith-access-token: abcd1234" \
-H "Content-Type: application/json" \
-d '{
"resource_type": "product",
"resources": [\
{ "resource_type": "product", "resource_id": 1234567890 }\
],
"keys": [\
{\
"options": {\
"customer_autotag": "",\
"force_open": false,\
"redirect_url": "",\
"inverse": false\
},\
"conditions": [\
{\
"type": "customer_tag",\
"inverse": false,\
"options": {\
"customer_tag": "approved"\
}\
}\
]\
},\
{\
"options": {\
"customer_autotag": "",\
"force_open": false,\
"redirect_url": "",\
"inverse": false\
},\
"conditions": [\
{\
"type": "passcodes",\
"inverse": false,\
"options": {\
"passcodes": ["letmein"],\
"case_sensitive": true,\
"customer_remember": true\
}\
}\
]\
}\
]
}'
Copy
# Create a named lock protecting MULTIPLE products at once
curl -X POST https://uselocksmith.com/api/unstable/lock \
-H "x-shopify-shop-domain: example-store.myshopify.com" \
-H "x-locksmith-access-token: abcd1234" \
-H "Content-Type: application/json" \
-d '{
"name": "Wholesale catalog",
"resource_type": "product",
"resources": [\
{ "resource_type": "product", "resource_id": 1234567890 },\
{ "resource_type": "product", "resource_id": 1234567891 },\
{ "resource_type": "product", "resource_id": 1234567892 }\
],
"keys": []
}'
Copy
# Attach another product to an existing lock
curl -X POST https://uselocksmith.com/api/unstable/locks/55555/resources \
-H "x-shopify-shop-domain: example-store.myshopify.com" \
-H "x-locksmith-access-token: abcd1234" \
-H "Content-Type: application/json" \
-d '{
"resource_type": "product",
"resource_id": 1234567893
}'
---
# More FAQs... | Locksmith
For the complete documentation index, see [llms.txt](https://www.locksmith.guide/llms.txt)
. This page is also available as [Markdown](https://www.locksmith.guide/faqs/more.md)
.
[I'm having trouble using Locksmith with a site speed optimization app.](https://www.locksmith.guide/faqs/more/site-speed-apps)
[The app isn't loading. What do I do?](https://www.locksmith.guide/faqs/more/app-not-loading)
[Can Locksmith protect shipping methods, billing methods, or discount codes?](https://www.locksmith.guide/faqs/more/can-locksmith-protect-shipping-methods-billing-methods-or-coupon-codes)
[I switched themes, and Locksmith isn't working](https://www.locksmith.guide/faqs/more/i-switched-themes-and-locksmith-isnt-working)
[Why isn't my passcode, secret link, newsletter, or location key working?](https://www.locksmith.guide/faqs/more/why-isnt-my-remote-key-condition-working)
[Can Locksmith lock Shopify's public JSON API for my online store?](https://www.locksmith.guide/faqs/more/can-locksmith-lock-shopifys-public-json-api-for-my-online-store)
[Why are my customers seeing a reCAPTCHA when logging in?](https://www.locksmith.guide/faqs/more/why-are-my-customers-seeing-a-recaptcha-when-logging-in)
[My passcode or newsletter prompt is not updating on my store when I change it.](https://www.locksmith.guide/faqs/more/passcode-prompt-issues)
[My featured collections on my home page only show one product.](https://www.locksmith.guide/faqs/more/my-featured-collections-on-my-home-page-only-show-one-product.)
[My infinite scrolling doesn't show all of my products.](https://www.locksmith.guide/faqs/more/my-infinite-scrolling-doesnt-show-all-of-my-products.)
[My customers have to enter their e-mail address into the Mailchimp key every time they visit.](https://www.locksmith.guide/faqs/more/my-customers-have-to-enter-their-e-mail-address-into-the-mailchimp-key-every-time-they-visit.)
[How do I know which customers have used a certain key?](https://www.locksmith.guide/faqs/more/how-do-i-know-which-customers-have-used-a-certain-key)
[Why is Locksmith adding information to my orders?](https://www.locksmith.guide/faqs/more/why-is-locksmith-adding-information-to-my-orders)
[Locksmith isn't installing correctly!](https://www.locksmith.guide/faqs/more/locksmith-isnt-installing-correctly)
[Locksmith is not uninstalling correctly!](https://www.locksmith.guide/faqs/more/locksmith-is-not-uninstalling-correctly)
[How does Locksmith affect search engines and SEO?](https://www.locksmith.guide/faqs/more/how-does-locksmith-affect-search-engines-and-seo)
[How do I change where customers are redirected to after registration on Shopify](https://www.locksmith.guide/faqs/more/how-do-i-change-where-customers-are-redirected-to-after-registration-on-shopify)
[The thing I want to lock isn't showing up in the Locksmith search](https://www.locksmith.guide/faqs/more/the-thing-i-want-to-lock-isnt-showing-up-in-the-locksmith-search)
[I am getting an "already taken" error when trying to create a metafield definition for seo.hidden](https://www.locksmith.guide/faqs/more/i-am-getting-an-already-taken-error-when-trying-to-create-a-metafield-definition-for-seo.hidden)
[How do I add a hero banner image to Locksmith's access messages](https://www.locksmith.guide/faqs/more/how-do-i-add-a-hero-banner-image-to-locksmiths-access-messages)
[What order are different types of key conditions evaluated in?](https://www.locksmith.guide/faqs/more/what-order-are-key-conditions-evaluated-in)
[PreviousI'm the administrator of my site and I cannot access pages because of Locksmith locks.](https://www.locksmith.guide/faqs/im-the-administrator-of-my-site-and-cannot-access)
[NextI'm having trouble using Locksmith with a site speed optimization app.](https://www.locksmith.guide/faqs/more/site-speed-apps)
Last updated 1 year ago
Was this helpful?
Was this helpful?
---
# Can Locksmith protect shipping methods, billing methods, or discount codes? | Locksmith
For the complete documentation index, see [llms.txt](https://www.locksmith.guide/llms.txt)
. This page is also available as [Markdown](https://www.locksmith.guide/faqs/more/can-locksmith-protect-shipping-methods-billing-methods-or-coupon-codes.md)
.
**No - It's not possible to protect shipping methods, billing methods, or discount codes.**
Shopify keeps a pretty tight leash on the checkout process itself, and third-party apps aren't permitted to get involved here at this time.
If you absolutely must set up different shipping or billing terms, your best bet may be to set up a completely new Shopify store.
If you want to dig into this further, get in touch with the Shopify support crew directly, at [support@shopify.com](mailto:support@shopify.com)
.
[PreviousThe app isn't loading. What do I do?](https://www.locksmith.guide/faqs/more/app-not-loading)
[NextI switched themes, and Locksmith isn't working](https://www.locksmith.guide/faqs/more/i-switched-themes-and-locksmith-isnt-working)
Last updated 3 months ago
Was this helpful?
Was this helpful?
---
# My customers have to enter their e-mail address into the Mailchimp key every time they visit. | Locksmith
For the complete documentation index, see [llms.txt](https://www.locksmith.guide/llms.txt)
. This page is also available as [Markdown](https://www.locksmith.guide/faqs/more/my-customers-have-to-enter-their-e-mail-address-into-the-mailchimp-key-every-time-they-visit..md)
.
Every time an e-mail address is entered into a Mailchimp key, the e-mail address is saved to your Mailchimp list. If a customer is signed in, Locksmith will remember this and will not ask for their e-mail address again. If a customer is not signed in, the fact that the current visitor has entered their e-mail address is remembered via a cookie. However, these cookies are deleted when the browser is closed down. This means that on a future visit, a customer might need to enter their e-mail address again if they aren't signed in because it won't know who the visitor is.
When the e-mail address is entered, it will **not** be added to the Mailchimp list a second time: the customer will simply be granted access again.
[PreviousMy infinite scrolling doesn't show all of my products.](https://www.locksmith.guide/faqs/more/my-infinite-scrolling-doesnt-show-all-of-my-products.)
[NextHow do I know which customers have used a certain key?](https://www.locksmith.guide/faqs/more/how-do-i-know-which-customers-have-used-a-certain-key)
Last updated 3 years ago
Was this helpful?
Was this helpful?
---
# I'm having trouble using Locksmith with a site speed optimization app. | Locksmith
For the complete documentation index, see [llms.txt](https://www.locksmith.guide/llms.txt)
. This page is also available as [Markdown](https://www.locksmith.guide/faqs/more/site-speed-apps.md)
.
Locksmith isn't supported in combination with site speed optimization apps. It may work with some, but we don't offer support for this combination.
[](https://www.locksmith.guide/faqs/more/site-speed-apps#apps-known-to-be-affected)
Apps known to be affected
------------------------------------------------------------------------------------------------------------------
* [Nostra](https://www.nostra.ai/)
If you run into an app that should be on this list (or if you find one that _does_ seem to work), please let us know: [team@uselocksmith.com](mailto:team@uselocksmith.com)
.
[](https://www.locksmith.guide/faqs/more/site-speed-apps#why-isnt-this-supported)
Why isn't this supported?
----------------------------------------------------------------------------------------------------------------
Locksmith's session state is very tightly coupled with the customer's Shopify session state (as managed by the Online Store channel). The two operate hand in hand, and depend on each other.
Site speed apps usually work by caching, or by dynamic injection of content delivered from a non-Shopify source. This introduces a layer _between_ Locksmith's state and Shopify's state, which creates a synchronization problem, and one that we can't sustainably sign up for.
[PreviousMore FAQs...](https://www.locksmith.guide/faqs/more)
[NextThe app isn't loading. What do I do?](https://www.locksmith.guide/faqs/more/app-not-loading)
Last updated 2 years ago
Was this helpful?
* [Apps known to be affected](https://www.locksmith.guide/faqs/more/site-speed-apps#apps-known-to-be-affected)
* [Why isn't this supported?](https://www.locksmith.guide/faqs/more/site-speed-apps#why-isnt-this-supported)
Was this helpful?
---
# Why are my customers seeing a reCAPTCHA when logging in? | Locksmith
For the complete documentation index, see [llms.txt](https://www.locksmith.guide/llms.txt)
. This page is also available as [Markdown](https://www.locksmith.guide/faqs/more/why-are-my-customers-seeing-a-recaptcha-when-logging-in.md)
.
While Locksmith does often use the information of already-signed-in customers to decided whether or not to grant access (depending on your settings), Locksmith does this by using the account system _provided by Shopify_ for your store, and does not create its own, or directly edit the sign in process in any way.
For security, Shopify may ask your customers to complete a Google reCAPTCHA task, verifying that a human user is present. This is an effective way to prevent bot submissions of orders and contact forms. Locksmith doesn't have any control over these; they're entirely managed by Shopify.
For information on editing the Shopify setting regarding the re-captcha in your store, [see Shopify's guide here](https://help.shopify.com/en/manual/online-store/setting-up/preferences#protect-your-store-with-google-recaptcha)
, or continue reading for information on how to turn it off...
###
[](https://www.locksmith.guide/faqs/more/why-are-my-customers-seeing-a-recaptcha-when-logging-in#turning-re-captcha-off)
Turning re-captcha off
Shopify allows these reCAPTCHA tasks to be enabled or disabled in two categories: at checkout, and on contact forms. That second category is a little misleading: it _also_ applies to normal customer login attempts.
To manage these settings, find the "Online Store" navigation category, in your Shopify admin's list of sales channels. From that navigation list, head to the "Preferences" area, and scroll to the very end of the page of settings. You'll find a section titled "Spam protection". Use this section to control your online storefront's settings for Google reCAPTCHA.
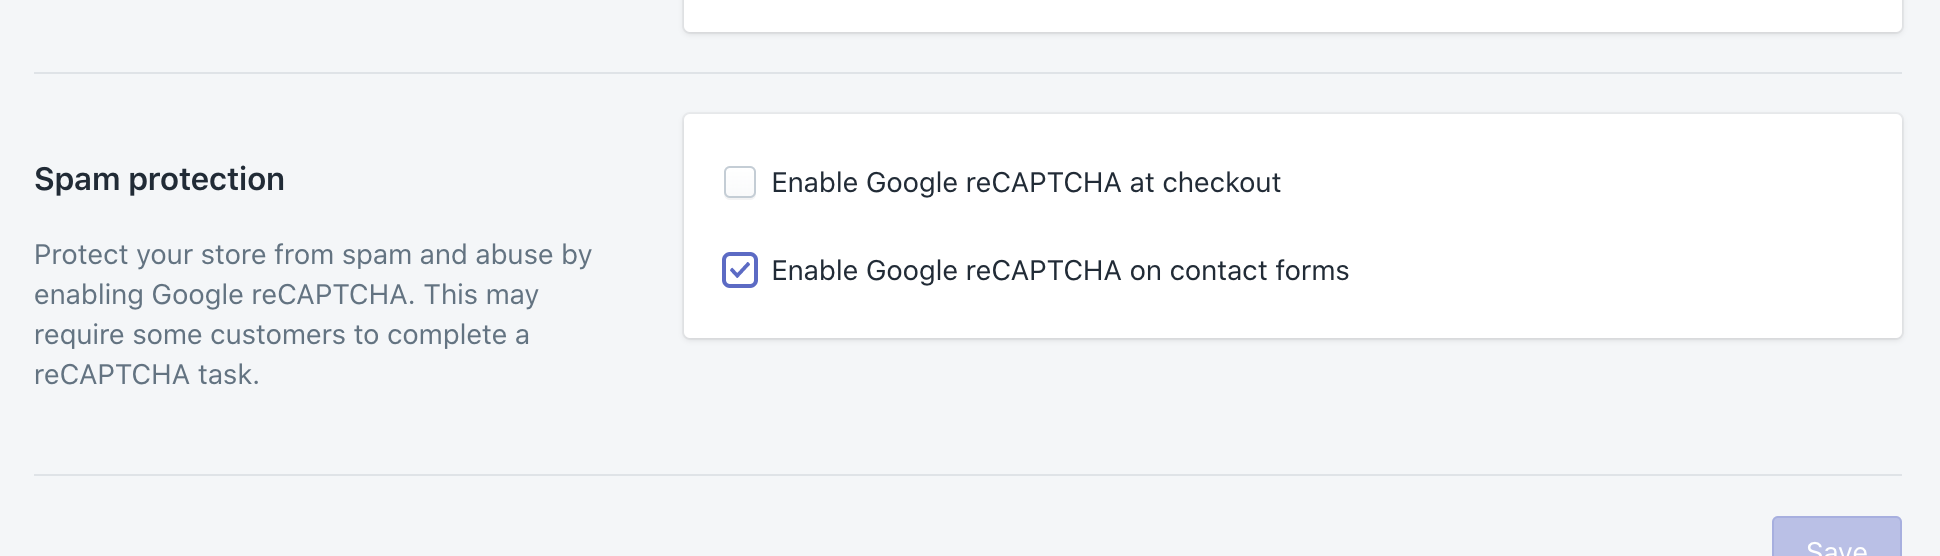
If you have more questions about how these work, [contact Shopify support](https://help.shopify.com/en/questions)
.
[PreviousCan Locksmith lock Shopify's public JSON API for my online store?](https://www.locksmith.guide/faqs/more/can-locksmith-lock-shopifys-public-json-api-for-my-online-store)
[NextMy passcode or newsletter prompt is not updating on my store when I change it.](https://www.locksmith.guide/faqs/more/passcode-prompt-issues)
Last updated 3 years ago
Was this helpful?
Was this helpful?
---
# Can Locksmith lock Shopify's public JSON API for my online store? | Locksmith
For the complete documentation index, see [llms.txt](https://www.locksmith.guide/llms.txt)
. This page is also available as [Markdown](https://www.locksmith.guide/faqs/more/can-locksmith-lock-shopifys-public-json-api-for-my-online-store.md)
.
It cannot. To our knowledge, this feature cannot be disabled, and its behavior cannot be adjusted – and, it's an integral part of the operation of many themes. If you have questions about this, contact Shopify support.
If preventing access to these endpoints is _mission critical_, you could consider building a web proxy that allows all traffic _except_ those endpoints. This would be a custom project, and it's not something we can help with, or support.
[PreviousWhy isn't my passcode, secret link, newsletter, or location key working?](https://www.locksmith.guide/faqs/more/why-isnt-my-remote-key-condition-working)
[NextWhy are my customers seeing a reCAPTCHA when logging in?](https://www.locksmith.guide/faqs/more/why-are-my-customers-seeing-a-recaptcha-when-logging-in)
Last updated 3 years ago
Was this helpful?
Was this helpful?
---
# The app isn't loading. What do I do? | Locksmith
For the complete documentation index, see [llms.txt](https://www.locksmith.guide/llms.txt)
. This page is also available as [Markdown](https://www.locksmith.guide/faqs/more/app-not-loading.md)
.
Deep breaths! We can figure this out. :)
1. Check [status.uselocksmith.com](https://status.uselocksmith.com/)
for platform updates.
2. Try accessing Locksmith's app domains directly:
* Try opening [uselocksmith.com](https://uselocksmith.com/)
directly.
* Try opening [ui.uselocksmith.com](https://ui.uselocksmith.com/)
. (You should be redirected to [uselocksmith.com/auth/login](https://uselocksmith.com/auth/login)
; this is normal.)
3. If loading fails, try again from a private/incognito browser session.
4. If that doesn't work, try again from another device.
5. If that doesn't work, try again from another network. (Switch WiFi networks, or switch to cellular.)
If these steps don't reveal the issue and a path for resolving it, write to [team@uselocksmith.com](mailto:team@uselocksmith.com)
with the following details:
* How far you got in the list above
* The contents of [myip.wtf/text](https://myip.wtf/text)
and [myip.wtf/headers](https://myip.wtf/headers)
* A screenshot from [ipv6test.google.com](https://ipv6test.google.com/)
* A screenshot (including the browser's URL bar) of the app failing to load
[PreviousI'm having trouble using Locksmith with a site speed optimization app.](https://www.locksmith.guide/faqs/more/site-speed-apps)
[NextCan Locksmith protect shipping methods, billing methods, or discount codes?](https://www.locksmith.guide/faqs/more/can-locksmith-protect-shipping-methods-billing-methods-or-coupon-codes)
Last updated 2 years ago
Was this helpful?
Was this helpful?
---
# I switched themes, and Locksmith isn't working | Locksmith
For the complete documentation index, see [llms.txt](https://www.locksmith.guide/llms.txt)
. This page is also available as [Markdown](https://www.locksmith.guide/faqs/more/i-switched-themes-and-locksmith-isnt-working.md)
.
[](https://www.locksmith.guide/faqs/more/i-switched-themes-and-locksmith-isnt-working#the-solution-trigger-a-new-locksmith-install-for-your-theme)
**The solution: trigger a new Locksmith install for your theme**
------------------------------------------------------------------------------------------------------------------------------------------------------------------------------------------------------------------------
**Click the "Help" button, and then click the "Update Locksmith" button:**
When changing around themes, Locksmith needs to be re-installed each time you do this. To initiate a new theme install on your _currently published theme_, press the "Update Locksmith" button on the "Help" page:

This will trigger a full reinstall of Locksmith's code into your theme - this is important, because Locksmith is able to do what it does via Liquid code in your shop's theme.
[](https://www.locksmith.guide/faqs/more/i-switched-themes-and-locksmith-isnt-working#using-manual-locking)
**Using manual locking?**
------------------------------------------------------------------------------------------------------------------------------------------
**This is important!** If you are using Locksmith for price hiding or other types of manual locking, _or any other type of Locksmith code manually added to your theme by a developer or our team,_ you'll need to re-instate the code changes in your new theme.
If this is the case, contact us via email at **team@uselocksmith.com,** and we'll be happy to add the manual code to your new theme for you.
[PreviousCan Locksmith protect shipping methods, billing methods, or discount codes?](https://www.locksmith.guide/faqs/more/can-locksmith-protect-shipping-methods-billing-methods-or-coupon-codes)
[NextWhy isn't my passcode, secret link, newsletter, or location key working?](https://www.locksmith.guide/faqs/more/why-isnt-my-remote-key-condition-working)
Last updated 1 year ago
Was this helpful?
* [The solution: trigger a new Locksmith install for your theme](https://www.locksmith.guide/faqs/more/i-switched-themes-and-locksmith-isnt-working#the-solution-trigger-a-new-locksmith-install-for-your-theme)
* [Using manual locking?](https://www.locksmith.guide/faqs/more/i-switched-themes-and-locksmith-isnt-working#using-manual-locking)
Was this helpful?
---
# My infinite scrolling doesn't show all of my products. | Locksmith
For the complete documentation index, see [llms.txt](https://www.locksmith.guide/llms.txt)
. This page is also available as [Markdown](https://www.locksmith.guide/faqs/more/my-infinite-scrolling-doesnt-show-all-of-my-products..md)
.
[](https://www.locksmith.guide/faqs/more/my-infinite-scrolling-doesnt-show-all-of-my-products.#background)
Background
--------------------------------------------------------------------------------------------------------------------------
In general, collections with infinite scrolling work like this:
1. The page loads with the first set of products, from page 1.
2. The user scrolls down to the end, your shop loads page 2 in the background, and then inserts the products from page 2 after all of the products already on the screen.
3. Repeat step 2, for each additional page available.
4. When the next page, loaded in the background, is found to have _no_ products on it, your shop stops trying to load additional pages.
With Locksmith, Step 4 is where things get interesting.
Product hiding is a frequently-used feature of Locksmith - it allows you to mix your protected and unprotected products in the same collection, ensuring that your customers see _only_ the products they _should_ see.
A side-effect of this is that each page of your collection _may not_ be "full". For example, if your page size is 10, a user that is authorized to see _everything_ will see 10 products on page 1, but a user who's only authorized to see 5 products _will only see 5 products_, even if page 2 has more products available.
(We have a whole article about this here: [Improving collection filtering](https://www.locksmith.guide/faqs/faq-i-see-blank-spaces-in-my-collections-and-or-searches-when-locking).)
Now, imagine that you have a collection for which the user can see 10 products on page 1, 10 products on page 2, _zero_ products on page 3, and another 10 products on page 4. This might be annoying _without_ infinite scrolling, but _with_ infinite scrolling it becomes impossible for the user to reach the last set of products. Remember: in step 4 of the infinite scrolling process, when an empty page is encountered, the shop stops trying to load more products.
[](https://www.locksmith.guide/faqs/more/my-infinite-scrolling-doesnt-show-all-of-my-products.#solutions)
Solutions
------------------------------------------------------------------------------------------------------------------------
1. Increase the page size (usually configurable in your theme settings), so that there are never any empty pages of products. It's much easier to accidentally have an empty page if each page is limited to a small number of products, and much harder to have that happen if you use the maximum page size of 50.
2. Or, hire a theme developer to alter the infinite scrolling code for your theme, so that it only stops trying to load more products after encountering _several_ empty pages, instead of after only encountering one.
[](https://www.locksmith.guide/faqs/more/my-infinite-scrolling-doesnt-show-all-of-my-products.#notes)
Notes
----------------------------------------------------------------------------------------------------------------
* This doesn't apply to server keys (e.g. passcodes, secret links). In most cases, infinite scrolling _will not_ work with these keys. If it doesn't work in your theme, there is no workaround, short of disabling infinite scrolling, or going with a new theme entirely.
[PreviousMy featured collections on my home page only show one product.](https://www.locksmith.guide/faqs/more/my-featured-collections-on-my-home-page-only-show-one-product.)
[NextMy customers have to enter their e-mail address into the Mailchimp key every time they visit.](https://www.locksmith.guide/faqs/more/my-customers-have-to-enter-their-e-mail-address-into-the-mailchimp-key-every-time-they-visit.)
Last updated 3 years ago
Was this helpful?
* [Background](https://www.locksmith.guide/faqs/more/my-infinite-scrolling-doesnt-show-all-of-my-products.#background)
* [Solutions](https://www.locksmith.guide/faqs/more/my-infinite-scrolling-doesnt-show-all-of-my-products.#solutions)
* [Notes](https://www.locksmith.guide/faqs/more/my-infinite-scrolling-doesnt-show-all-of-my-products.#notes)
Was this helpful?
---
# My passcode or newsletter prompt is not updating on my store when I change it. | Locksmith
For the complete documentation index, see [llms.txt](https://www.locksmith.guide/llms.txt)
. This page is also available as [Markdown](https://www.locksmith.guide/faqs/more/passcode-prompt-issues.md)
.
Locksmith allows you to set messages at different scopes. It is possible to set the messages up for individual passcode or newsletter key conditions which can allow for greater flexibility. When present, a key-condition-level message will always override messages set up at the lock-level.
If you are having issues with your lock message being overridden, this can easily be fixed by clicking on the key condition and deleting the message inside of the key condition popup under "Custom input prompt". After you delete it, you should see a greyed out version of the message you've set at the lock-level, which means you're good to go:
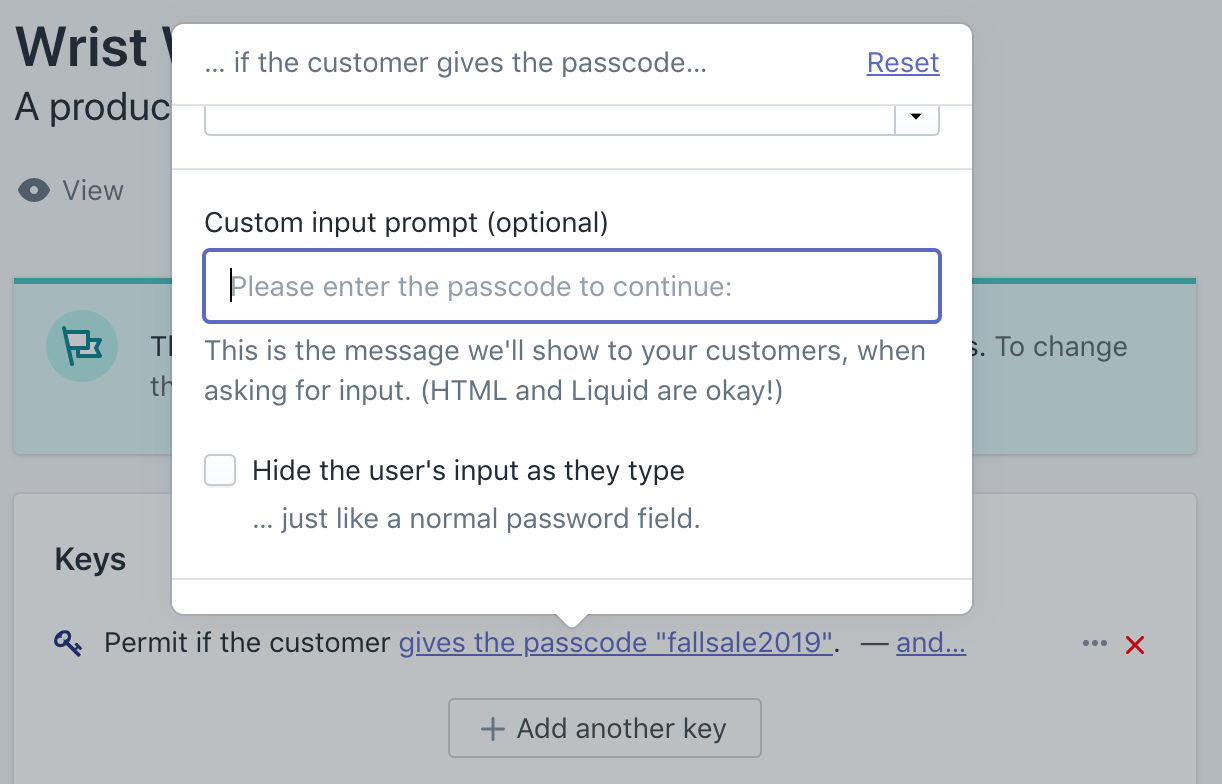
For more general information on editing messages, check out our guide here:
[Customizing messages](https://www.locksmith.guide/tutorials/more/customizing-messages)
[PreviousWhy are my customers seeing a reCAPTCHA when logging in?](https://www.locksmith.guide/faqs/more/why-are-my-customers-seeing-a-recaptcha-when-logging-in)
[NextMy featured collections on my home page only show one product.](https://www.locksmith.guide/faqs/more/my-featured-collections-on-my-home-page-only-show-one-product.)
Last updated 3 years ago
Was this helpful?
Was this helpful?
---
# My featured collections on my home page only show one product. | Locksmith
For the complete documentation index, see [llms.txt](https://www.locksmith.guide/llms.txt)
. This page is also available as [Markdown](https://www.locksmith.guide/faqs/more/my-featured-collections-on-my-home-page-only-show-one-product..md)
.
This error happens on specific themes (notably, the "Minimal" theme and similiar themes). There is a minor incompatibility with theses themes, but we can get it patched up for you pretty quickly!
Please get ahold of us if you would like us to make the edit. That being said, if you need an immediate update, here are the steps to fix it.
Start by opening the **sections/featured-collection.liquid** file in the theme editor and making the following replacements:
###
[](https://www.locksmith.guide/faqs/more/my-featured-collections-on-my-home-page-only-show-one-product.#line-1)
Line 1
Before:
Copy
{% assign featured = section.settings.featured_collection %}
After:
Copy
{% assign featured_collection = section.settings.featured_collection %}
###
[](https://www.locksmith.guide/faqs/more/my-featured-collections-on-my-home-page-only-show-one-product.#line-28)
Line 28
Before:
Copy
{% for product in collections[featured].products limit: total_products %}
After:
Copy
{% for product in collections[featured_collection].products limit: total_products %}
###
[](https://www.locksmith.guide/faqs/more/my-featured-collections-on-my-home-page-only-show-one-product.#line-30)
Line 30
Before:
Copy
{%- include 'locksmith-variables', locksmith_scope: 'subject', locksmith_subject: product, locksmith_subject_parent: collections[featured] %} ...
After:
So, as you can see, you'll just be replacing "featured", with "featured\_collection" in a couple places. This will clear up the ambiguity on what the "featured" holds.
Note: If your theme has been custom edited, the above line number may not be _exact_.
**As always, do contact us if you aren't feeling up to this!** We are happy to do this for you. You can get in touch with the message button in the lower right corner.
[PreviousMy passcode or newsletter prompt is not updating on my store when I change it.](https://www.locksmith.guide/faqs/more/passcode-prompt-issues)
[NextMy infinite scrolling doesn't show all of my products.](https://www.locksmith.guide/faqs/more/my-infinite-scrolling-doesnt-show-all-of-my-products.)
Last updated 3 years ago
Was this helpful?
* [Line 1](https://www.locksmith.guide/faqs/more/my-featured-collections-on-my-home-page-only-show-one-product.#line-1)
* [Line 28](https://www.locksmith.guide/faqs/more/my-featured-collections-on-my-home-page-only-show-one-product.#line-28)
* [Line 30](https://www.locksmith.guide/faqs/more/my-featured-collections-on-my-home-page-only-show-one-product.#line-30)
Was this helpful?
Copy
{%- include 'locksmith-variables', locksmith_scope: 'subject', locksmith_subject: product, locksmith_subject_parent: collections[featured_collection] %} ...
---
# The thing I want to lock isn't showing up in the Locksmith search | Locksmith
For the complete documentation index, see [llms.txt](https://www.locksmith.guide/llms.txt)
. This page is also available as [Markdown](https://www.locksmith.guide/faqs/more/the-thing-i-want-to-lock-isnt-showing-up-in-the-locksmith-search.md)
.
If a collection, product, page (etc) isn't showing up in the search results when you're setting up a lock, try specifying a resource type in your search, like this:
* blog:marketing
* collection:tops
* page:sales
* product:blue
* vendor:brandname
Learn more: [Specifying a resource type when searching](https://www.locksmith.guide/basics/creating-locks#specifying-a-resource-type-when-searching)

[PreviousHow do I change where customers are redirected to after registration on Shopify](https://www.locksmith.guide/faqs/more/how-do-i-change-where-customers-are-redirected-to-after-registration-on-shopify)
[NextI am getting an "already taken" error when trying to create a metafield definition for seo.hidden](https://www.locksmith.guide/faqs/more/i-am-getting-an-already-taken-error-when-trying-to-create-a-metafield-definition-for-seo.hidden)
Last updated 11 months ago
Was this helpful?
Was this helpful?
---
# How do I know which customers have used a certain key? | Locksmith
For the complete documentation index, see [llms.txt](https://www.locksmith.guide/llms.txt)
. This page is also available as [Markdown](https://www.locksmith.guide/faqs/more/how-do-i-know-which-customers-have-used-a-certain-key.md)
.
Locksmith does not keep any usage statistics. However this guide suggests some workarounds which might help in certain cases.
[](https://www.locksmith.guide/faqs/more/how-do-i-know-which-customers-have-used-a-certain-key#id-1.-autotagging)
1\. Autotagging
--------------------------------------------------------------------------------------------------------------------------------------
Many of Locksmith's key conditions support a customer auto-tagging feature. When enabled, this feature **automatically adds a tag to any customer who gains access to a resource** in your online storefront, using that particular key condition.
Here's how to find it, using a passcode condition as an example:

Keep in mind that this feature **only works if a customer is signed in** when visiting the locked page. If a visitor is not signed in, Locksmith will not make any record that they used the passcode, secret link, etc.
[](https://www.locksmith.guide/faqs/more/how-do-i-know-which-customers-have-used-a-certain-key#id-2.-tracking-how-many-times-a-passcode-as-been-used)
2\. Tracking how many times a passcode as been used.
---------------------------------------------------------------------------------------------------------------------------------------------------------------------------------------------------------------
Locksmith allows you to set a usage limit for passcodes, and the number will count down each time the passcode is submitted. If you set it to a very high number to begin with, you can check in on the number to see how much it has been used:

Keep in mind that is only works for the single **passcode key condition type (labelled "Permit if customer gives the passcode")**.
The one-of-many passcode key conditions and the passcode-from-input-list key conditions do not work in the same way so it's not possible to use this tactic for them. If you're using more than one passcode, try setting those up in separate keys with a usage limit on each.
[](https://www.locksmith.guide/faqs/more/how-do-i-know-which-customers-have-used-a-certain-key#id-3.-if-using-secret-links-and-the-mechanic-app)
3\. If using secret links and the Mechanic app
----------------------------------------------------------------------------------------------------------------------------------------------------------------------------------------------------
If using secret link key condition, it is possible to tag orders that come through after a customer has used a secret link. It's possible to set up a task with [Mechanic](https://mechanic.dev/)
, our other app, that tags orders with the Locksmith secret link a customer used, when placing an order. Optionally, this task tags the customer as well: [Tag online orders by ?ls= Locksmith secret link used, with Mechanic](https://tasks.mechanic.dev/tag-orders-by-locksmith-secret-link)
[PreviousMy customers have to enter their e-mail address into the Mailchimp key every time they visit.](https://www.locksmith.guide/faqs/more/my-customers-have-to-enter-their-e-mail-address-into-the-mailchimp-key-every-time-they-visit.)
[NextWhy is Locksmith adding information to my orders?](https://www.locksmith.guide/faqs/more/why-is-locksmith-adding-information-to-my-orders)
Last updated 1 year ago
Was this helpful?
* [1\. Autotagging](https://www.locksmith.guide/faqs/more/how-do-i-know-which-customers-have-used-a-certain-key#id-1.-autotagging)
* [2\. Tracking how many times a passcode as been used.](https://www.locksmith.guide/faqs/more/how-do-i-know-which-customers-have-used-a-certain-key#id-2.-tracking-how-many-times-a-passcode-as-been-used)
* [3\. If using secret links and the Mechanic app](https://www.locksmith.guide/faqs/more/how-do-i-know-which-customers-have-used-a-certain-key#id-3.-if-using-secret-links-and-the-mechanic-app)
Was this helpful?
---
# Why is Locksmith adding information to my orders? | Locksmith
For the complete documentation index, see [llms.txt](https://www.locksmith.guide/llms.txt)
. This page is also available as [Markdown](https://www.locksmith.guide/faqs/more/why-is-locksmith-adding-information-to-my-orders.md)
.
[](https://www.locksmith.guide/faqs/more/why-is-locksmith-adding-information-to-my-orders#why-is-this-happening)
Why is this happening?
--------------------------------------------------------------------------------------------------------------------------------------------
For key conditions like passcodes, secret links, and location limits, Locksmith adds system information to the visitor's cart. **This is how we keep things fast** – the cart is the only place that Shopify can store visit-specific information.
This means that, on checkout, this data can make it all the way into your order records. If this is happening, you'll see something like this in your order information:

If you have a large number of keys in your shop, this value can get quite large!
**Note:** You may see Locksmith notes in the order even if the order came from a customer _that does not have access_ to any of your locked content. Depending on your Locksmith settings, it may be necessary to cache the fact that the current customer does indeed not have access, which still keeps server pings to a minimum (and helps speed things up, as per the above).
[](https://www.locksmith.guide/faqs/more/why-is-locksmith-adding-information-to-my-orders#what-does-the-value-actually-mean)
What does the value actually mean?
--------------------------------------------------------------------------------------------------------------------------------------------------------------------
The Locksmith attribute value can tell you how a customer interacted with your locked content during their visit. There are two parts to look for: the colon and any numbers in front of it.
When the value starts with a colon (for example, `:6e5deb114b44`), with no numbers in front, it means the customer interacted with a locked page during their browsing session but did not unlock it. Even just landing on a locked page is enough to generate this — it _doesn't_ mean they gained access.
When there are numbers before the colon (for example, `471092:6e5deb114b44`), those numbers correspond to the key ID(s) the customer satisfied. In other words, the customer did use a key to open the lock, and the number points to which key. If a customer met the conditions of several keys, you may see more than one ID here.
**Note:** This information is added for server-side key conditions (like passcodes, secret links, and location limits — any key that shows a loading spinner). It can appear whether or not the customer was ultimately granted access, so seeing a value here is not on its own a sign that a customer got past a lock.
This can be a useful diagnostic clue. For example, if you're investigating an order on a locked product and the value starts with a colon (no key ID), that tells you the customer likely never unlocked the product page itself — which can point to the item being added to the cart another way, such as through a cart permalink, a third-party app, or another sales channel.
[](https://www.locksmith.guide/faqs/more/why-is-locksmith-adding-information-to-my-orders#a-partial-solution)
A (partial) solution
---------------------------------------------------------------------------------------------------------------------------------------
To allow Locksmith to automatically remove its information from an order's "Additional Details", head to your Locksmith _**Settings**_ area, and **enable the "Remove Locksmith information from orders" setting** next to _Advanced_ on the page. The setting looks like this:

After you enable this setting, Locksmith may ask you for the additional permissions needed for updating your order records. Once you grant permission, Locksmith will take care of keeping its data out of your orders from that point onward.
[](https://www.locksmith.guide/faqs/more/why-is-locksmith-adding-information-to-my-orders#locksmith-notes-still-appearing-in-confirmation-emails-or-third-party-apps)
Locksmith notes still appearing in confirmation emails or third party apps?
------------------------------------------------------------------------------------------------------------------------------------------------------------------------------------------------------------------------------------------------------
In most cases, this information won't be customer-facing. However, some third party invoicing apps will automatically include `cart.attributes` in their invoices. If your invoices include the Locksmith information in them, you may need to contact the support for your invoice service and ask them to exclude cart attributes from invoices.
The above setting does NOT help in all cases, particularly when your order information is sent off before Locksmith has the chance to remove its own information.
If you are having issues with this, your best bet is to contact us via email at **team@uselocksmith.com** and we can go through your other options with you.
[](https://www.locksmith.guide/faqs/more/why-is-locksmith-adding-information-to-my-orders#removed-locksmith-but-still-noticing-order-notes)
Removed Locksmith but still noticing order notes?
--------------------------------------------------------------------------------------------------------------------------------------------------------------------------------------------------
The notes are stored _on the customer's browser_, and the traces of this can still end up in the "Additional Details" section of some incoming orders. If you've deleted Locksmith, **seeing these in your orders is not an indication that Locksmith is still embedded in your theme**, just that the customer in question is running on the same browser "session" that they were running when you still had Locksmith installed on your store. You should see these drop off over time. However, if they are causing you issues, let us know at team@uselocksmith.com - we can help you out by adding a script to your theme that will delete the Locksmith cache from their browser as soon as customers visit (and before they place their next order).
[PreviousHow do I know which customers have used a certain key?](https://www.locksmith.guide/faqs/more/how-do-i-know-which-customers-have-used-a-certain-key)
[NextLocksmith isn't installing correctly!](https://www.locksmith.guide/faqs/more/locksmith-isnt-installing-correctly)
Last updated 1 month ago
Was this helpful?
* [Why is this happening?](https://www.locksmith.guide/faqs/more/why-is-locksmith-adding-information-to-my-orders#why-is-this-happening)
* [What does the value actually mean?](https://www.locksmith.guide/faqs/more/why-is-locksmith-adding-information-to-my-orders#what-does-the-value-actually-mean)
* [A (partial) solution](https://www.locksmith.guide/faqs/more/why-is-locksmith-adding-information-to-my-orders#a-partial-solution)
* [Locksmith notes still appearing in confirmation emails or third party apps?](https://www.locksmith.guide/faqs/more/why-is-locksmith-adding-information-to-my-orders#locksmith-notes-still-appearing-in-confirmation-emails-or-third-party-apps)
* [Removed Locksmith but still noticing order notes?](https://www.locksmith.guide/faqs/more/why-is-locksmith-adding-information-to-my-orders#removed-locksmith-but-still-noticing-order-notes)
Was this helpful?
---
# Locksmith isn't installing correctly! | Locksmith
For the complete documentation index, see [llms.txt](https://www.locksmith.guide/llms.txt)
. This page is also available as [Markdown](https://www.locksmith.guide/faqs/more/locksmith-isnt-installing-correctly.md)
.
On very rare occasions, Locksmith runs into an issue processing a particular asset in your theme, and can't perfectly complete the installation. If this is happening, Locksmith will let you know within the app, like this:
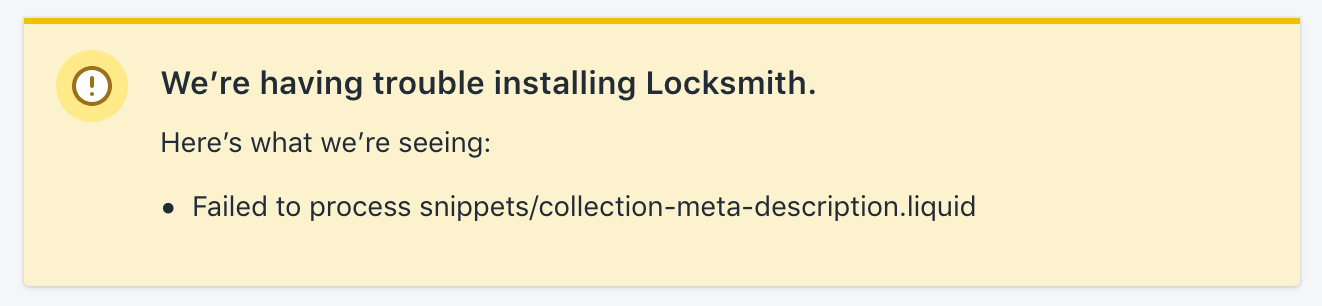
[](https://www.locksmith.guide/faqs/more/locksmith-isnt-installing-correctly#if-youre-confident-you-dont-need-locksmiths-code-in-that-asset)
If you're confident you don't need Locksmith's code in that asset...
----------------------------------------------------------------------------------------------------------------------------------------------------------------------------------------------------------------------
... you can add the asset key to your shop's list of Liquid assets to ignore. You can find this in the "Settings" page of your Locksmith app in the "Advanced" section, and it looks like this:

Add whatever asset keys you like, making sure to include both the portion before the slash, and the ".liquid" at the end.
[](https://www.locksmith.guide/faqs/more/locksmith-isnt-installing-correctly#if-youre-seeing-asset-template-content-exceeds-256-kb-limit)
If you're seeing "Asset Template content exceeds 256 KB limit"...
----------------------------------------------------------------------------------------------------------------------------------------------------------------------------------------------------------------
... you may have too many locks and/or keys. We work hard to keep Locksmith trim and efficient, but it _is_ possible to exhaust Shopify's size limit for the assets Locksmith uses.
To solve this, remove what locks and keys you can. If you don't see a good way to do so, get in touch – we're happy to help you set up a configuration strategy that covers your bases while staying under the size limit.
[](https://www.locksmith.guide/faqs/more/locksmith-isnt-installing-correctly#if-youre-not-sure-if-the-problem-assets-are-important-or-not)
If you're not sure if the problem assets are important or not...
----------------------------------------------------------------------------------------------------------------------------------------------------------------------------------------------------------------
... let us know. Email us at team@uselocksmith.com, and we'll help. :) These kinds of things tend to be very, _very_ theme-specific, and the best way we can help you is by rolling up our sleeves and going under the hood on your behalf.
[PreviousWhy is Locksmith adding information to my orders?](https://www.locksmith.guide/faqs/more/why-is-locksmith-adding-information-to-my-orders)
[NextLocksmith is not uninstalling correctly!](https://www.locksmith.guide/faqs/more/locksmith-is-not-uninstalling-correctly)
Last updated 2 years ago
Was this helpful?
* [If you're confident you don't need Locksmith's code in that asset...](https://www.locksmith.guide/faqs/more/locksmith-isnt-installing-correctly#if-youre-confident-you-dont-need-locksmiths-code-in-that-asset)
* [If you're seeing "Asset Template content exceeds 256 KB limit"...](https://www.locksmith.guide/faqs/more/locksmith-isnt-installing-correctly#if-youre-seeing-asset-template-content-exceeds-256-kb-limit)
* [If you're not sure if the problem assets are important or not...](https://www.locksmith.guide/faqs/more/locksmith-isnt-installing-correctly#if-youre-not-sure-if-the-problem-assets-are-important-or-not)
Was this helpful?
---
# I am getting an "already taken" error when trying to create a metafield definition for seo.hidden | Locksmith
For the complete documentation index, see [llms.txt](https://www.locksmith.guide/llms.txt)
. This page is also available as [Markdown](https://www.locksmith.guide/faqs/more/i-am-getting-an-already-taken-error-when-trying-to-create-a-metafield-definition-for-seo.hidden.md)
.
The Locksmith app has the ability to automatically manage the seo.hidden metafield for locked products in your store. [More information about that here](https://www.locksmith.guide/tutorials/more/automatically-hide-from-sitemaps-and-manage-seo-metafield)
. If you've toggled this setting on at any point, but still wish to create a definition for this metafield, this guide can help.
Shopify allows you to create metafield definitions for products, and other content, in your store, even if the metafield already exists on your products. This is typically done by viewing your unstructured metafields and pressing the "Add definition" button. You can find more general information on creating metafield definitions [in this Shopify guide](https://help.shopify.com/en/manual/custom-data/metafields/metafield-definitions)
.
For reasons unknown, Shopify has decided to exclude the `seo.hidden` metafield from this list, even if some of your products have this metafield.
There is a simple trick to get around this.
1. Go to the "Product metafield definitions" page. It should look something like this:

1. In the URL bar for your browser, paste add in the following _to the end of the already existing URL_:
You should end up with something like:
1. You'll be brought to the page to create a definition for `seo.hidden`. Change the type to "Integer" all other settings are up to you.

[PreviousThe thing I want to lock isn't showing up in the Locksmith search](https://www.locksmith.guide/faqs/more/the-thing-i-want-to-lock-isnt-showing-up-in-the-locksmith-search)
[NextHow do I add a hero banner image to Locksmith's access messages](https://www.locksmith.guide/faqs/more/how-do-i-add-a-hero-banner-image-to-locksmiths-access-messages)
Last updated 1 year ago
Was this helpful?
Was this helpful?
Copy
/migrate/seo/hidden
Copy
https://admin.shopify.com/store/YOUR-SHOP-URL/settings/custom_data/product/metafields/migrate/seo/hidden
---
# Locksmith is not uninstalling correctly! | Locksmith
For the complete documentation index, see [llms.txt](https://www.locksmith.guide/llms.txt)
. This page is also available as [Markdown](https://www.locksmith.guide/faqs/more/locksmith-is-not-uninstalling-correctly.md)
.
Locksmith was designed to integrate into your theme automatically, and pull out automatically as well. Our basic guide to removing Locksmith is here:
[Removing Locksmith](https://www.locksmith.guide/basics/removing-locksmith)
It _can't_, however, automatically remove custom code that's added to your shop theme, to support [manual locking](https://www.locksmith.guide/keys/more/manual-mode)
(e.g. for hiding price or add-to-cart buttons).
Because of this, Locksmith will NOT run an uninstallation if it detects custom manual locking code in your theme. If this is affecting you, you'll see this warning in the app, letting you know exactly which theme files contain the detected code:
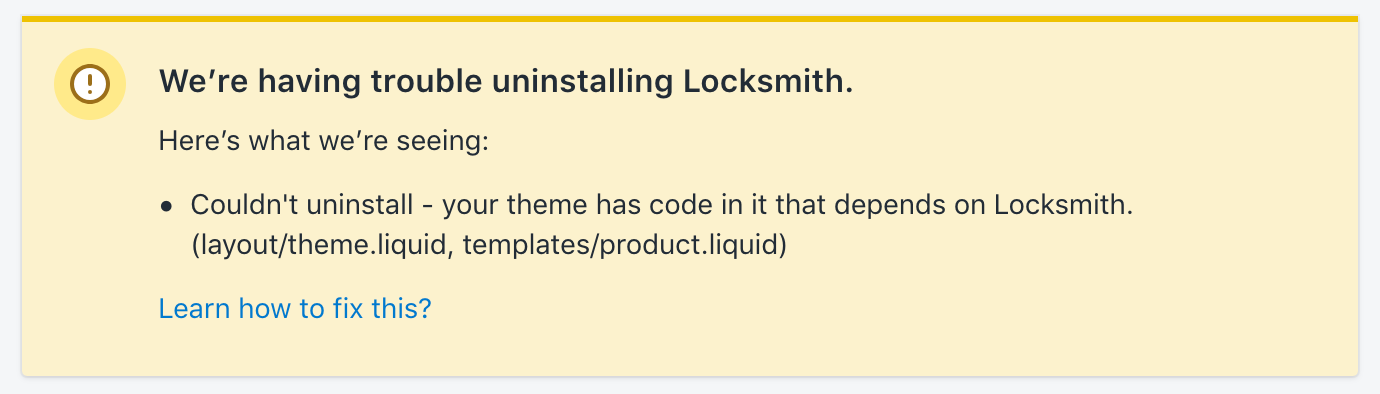
[](https://www.locksmith.guide/faqs/more/locksmith-is-not-uninstalling-correctly#how-to-fix-this)
How to fix this
----------------------------------------------------------------------------------------------------------------------
If they're handy, contact the person who added the manual locking code to the theme, have them remove it, and return to Locksmith's "Help" area to run the removal one more time.
Or, do not hesitate to get in touch with us via email at **team@uselocksmith.com** and we'll help you with this as soon as we can!
[](https://www.locksmith.guide/faqs/more/locksmith-is-not-uninstalling-correctly#related-article)
Related article:
-----------------------------------------------------------------------------------------------------------------------
[Locksmith isn't installing correctly!](https://www.locksmith.guide/faqs/more/locksmith-isnt-installing-correctly)
[PreviousLocksmith isn't installing correctly!](https://www.locksmith.guide/faqs/more/locksmith-isnt-installing-correctly)
[NextHow does Locksmith affect search engines and SEO?](https://www.locksmith.guide/faqs/more/how-does-locksmith-affect-search-engines-and-seo)
Last updated 3 years ago
Was this helpful?
* [How to fix this](https://www.locksmith.guide/faqs/more/locksmith-is-not-uninstalling-correctly#how-to-fix-this)
* [Related article:](https://www.locksmith.guide/faqs/more/locksmith-is-not-uninstalling-correctly#related-article)
Was this helpful?
---
# What order are different types of key conditions evaluated in? | Locksmith
For the complete documentation index, see [llms.txt](https://www.locksmith.guide/llms.txt)
. This page is also available as [Markdown](https://www.locksmith.guide/faqs/more/what-order-are-key-conditions-evaluated-in.md)
.
When a key has multiple key conditions, Locksmith evaluates them in a specific order to provide the best user experience. The evaluation order is designed to prioritize conditions based on the level of control a user has over their authorization.
###
[](https://www.locksmith.guide/faqs/more/what-order-are-key-conditions-evaluated-in#evaluation-order)
Evaluation Order
Key conditions are evaluated in the following order:
1. **(always permit)**
2. **is signed in**
3. **is tagged with...**
4. **(the product) is tagged with...**
5. **has one of many email addresses**
6. **has a list of email addresses**
7. **the customer's email contains...**
8. **has purchased...**
9. **has not placed an order in the last 24 hours**
10. **has placed at least x orders**
11. **has a certain product in their cart**
12. **has a certain variant in their cart**
13. **has at least $x in their cart**
14. **(custom Liquid)**
15. **is visiting after a certain date and time**
16. **is visiting before a certain date and time**
17. **is visiting a certain domain**
18. **is visiting from a certain location (city, country, etc)**
19. **has a certain IP address**
20. **is visiting from certain locations**
21. **arrives via a secret link...**
22. **arrives using a secret link code from an input list...**
23. **has an email address from an input list...**
24. **subscribes to your Mailchimp list**
25. **subscribes to your Klaviyo list**
26. **is a member of a Klaviyo segment or list**
27. **gives the passcode...**
28. **gives a passcode from an input list...**
29. **gives one of many passcodes...**
30. **the customer confirms the prompt**
When you create a key with multiple conditions, the display order will automatically update to reflect the above, _after you save the lock._ However, this is not the same as the display order when choosing new key conditions, which is simply organized so the more frequently-used key conditions appear near the top.
###
[](https://www.locksmith.guide/faqs/more/what-order-are-key-conditions-evaluated-in#why-this-order-matters)
Why This Order Matters
The evaluation order is important because:
1. **User Experience**: Conditions with less user control (like IP address) are checked first, so users aren't prompted for passcodes only to be denied by location.
2. **Performance**: Local checks (like customer tags) are performed before remote ones (like API calls to external services).
3. **Fail-Fast Principle**: If a user will be denied access regardless of their input, they find out immediately rather than after entering information.
###
[](https://www.locksmith.guide/faqs/more/what-order-are-key-conditions-evaluated-in#multiple-keys-on-a-lock)
Multiple Keys on a Lock
When a lock has multiple keys, each key is evaluated independently. Access is granted if **any** key's conditions are all met. Within each key, **all** conditions must be satisfied for that key to grant access.
###
[](https://www.locksmith.guide/faqs/more/what-order-are-key-conditions-evaluated-in#related-topics)
Related Topics
* [Combining key conditions](https://www.locksmith.guide/keys/more/combining-key-conditions)
* [Inverting conditions in Locksmith](https://www.locksmith.guide/keys/more/inverting-conditions-in-locksmith)
* [About key conditions](https://www.locksmith.guide/keys/about-key-conditions)
[PreviousHow do I add a hero banner image to Locksmith's access messages](https://www.locksmith.guide/faqs/more/how-do-i-add-a-hero-banner-image-to-locksmiths-access-messages)
[NextUsage agreement](https://www.locksmith.guide/policies/usage-agreement)
Last updated 4 months ago
Was this helpful?
* [Evaluation Order](https://www.locksmith.guide/faqs/more/what-order-are-key-conditions-evaluated-in#evaluation-order)
* [Why This Order Matters](https://www.locksmith.guide/faqs/more/what-order-are-key-conditions-evaluated-in#why-this-order-matters)
* [Multiple Keys on a Lock](https://www.locksmith.guide/faqs/more/what-order-are-key-conditions-evaluated-in#multiple-keys-on-a-lock)
* [Related Topics](https://www.locksmith.guide/faqs/more/what-order-are-key-conditions-evaluated-in#related-topics)
Was this helpful?
---
# How do I change where customers are redirected to after registration on Shopify | Locksmith
For the complete documentation index, see [llms.txt](https://www.locksmith.guide/llms.txt)
. This page is also available as [Markdown](https://www.locksmith.guide/faqs/more/how-do-i-change-where-customers-are-redirected-to-after-registration-on-shopify.md)
.
This guide is specific to Locksmith key conditions that require a customer to sign into a store account.
[Customer account keys](https://www.locksmith.guide/keys/customer-account-keys)
Locksmith will automatically present locked content to customers after they sign into a store account and are granted access by a locks key conditions. Part of this involves redirecting customers back to the store location where they signed in for access.
However, Locksmith doesn't have a built in way to automatically redirect customers back to locked content after _registration_. This is because Locksmith doesn't handle the registration process at all.
Locksmith uses the [built in customer account system that comes with your store](https://help.shopify.com/manual/customers/customer-accounts)
! This means it doesn't create a separate registration form, sign-in form, or customer database.
All Shopify themes come with a registration form that includes Name, E-mail, and Password fields.
[](https://www.locksmith.guide/faqs/more/how-do-i-change-where-customers-are-redirected-to-after-registration-on-shopify#changing-the-default-location-customers-are-redirected-to-after-registration)
Changing the default location customers are redirected to after registration
----------------------------------------------------------------------------------------------------------------------------------------------------------------------------------------------------------------------------------------------------------------------------------------
The default location customers are redirected to after registration is determined by the theme and is typically the customer account page. The team over at Helium apps have written blog post on how to change that location using their app _or_ some JavaScript:
[Helium - How to manually redirect customers after registration on Shopify](https://heliumdev.com/blog/shopify-redirect-after-registration)
[](https://www.locksmith.guide/faqs/more/how-do-i-change-where-customers-are-redirected-to-after-registration-on-shopify#how-to-redirect-customers-to-unlocked-content-after-a-customer-creates-an-account)
How to redirect customers to unlocked content after a customer creates an account
--------------------------------------------------------------------------------------------------------------------------------------------------------------------------------------------------------------------------------------------------------------------------------------------------
The access message and content that Locksmith presents for customer account key conditions can be modified to include a login and registration form on the same page. See our Customizing the customer login page guide:
[Customizing the customer login page](https://www.locksmith.guide/tutorials/more/customizing-the-customer-login-page)
We don't officially have support for a return redirect after customer registration, but it should be possible to achieve that using Helium's redirect script from the [above section](https://www.locksmith.guide/faqs/more/how-do-i-change-where-customers-are-redirected-to-after-registration-on-shopify#changing-the-default-location-customers-are-redirected-to-after-registration)
and modifying that script a little.
Replace the following:
Copy
var REDIRECT_PATH = '/checkout';
With this code:
The above modification should only work to redirect customers to locked content if the registration form was submitted from the access message Locksmith presents, for product, collection and page locks. For other parts of the store, customers will be returned to the homepage.
[](https://www.locksmith.guide/faqs/more/how-do-i-change-where-customers-are-redirected-to-after-registration-on-shopify#related-articles)
Related articles
----------------------------------------------------------------------------------------------------------------------------------------------------------------
[Customizing the registration form](https://www.locksmith.guide/tutorials/more/customizing-the-registration-form)
[Approving customer registrations](https://www.locksmith.guide/tutorials/approving-customer-registrations)
[](https://www.locksmith.guide/faqs/more/how-do-i-change-where-customers-are-redirected-to-after-registration-on-shopify#something-else-not-covered-here)
Something else not covered here?
-----------------------------------------------------------------------------------------------------------------------------------------------------------------------------------------------
Let us know by emailing us at: **team@uselocksmith.com**
[PreviousHow does Locksmith affect search engines and SEO?](https://www.locksmith.guide/faqs/more/how-does-locksmith-affect-search-engines-and-seo)
[NextThe thing I want to lock isn't showing up in the Locksmith search](https://www.locksmith.guide/faqs/more/the-thing-i-want-to-lock-isnt-showing-up-in-the-locksmith-search)
Last updated 2 years ago
Was this helpful?
* [Changing the default location customers are redirected to after registration](https://www.locksmith.guide/faqs/more/how-do-i-change-where-customers-are-redirected-to-after-registration-on-shopify#changing-the-default-location-customers-are-redirected-to-after-registration)
* [How to redirect customers to unlocked content after a customer creates an account](https://www.locksmith.guide/faqs/more/how-do-i-change-where-customers-are-redirected-to-after-registration-on-shopify#how-to-redirect-customers-to-unlocked-content-after-a-customer-creates-an-account)
* [Related articles](https://www.locksmith.guide/faqs/more/how-do-i-change-where-customers-are-redirected-to-after-registration-on-shopify#related-articles)
* [Something else not covered here?](https://www.locksmith.guide/faqs/more/how-do-i-change-where-customers-are-redirected-to-after-registration-on-shopify#something-else-not-covered-here)
Was this helpful?
Copy
var current_url = window.location.href;
var REDIRECT_PATH = '{{ current_url }}{% if collection %}/collections/{{ collection.handle }}/products/{{ product.handle }}{% elsif product %}/products/{{ product.handle }}{% elsif page %}/pages/{{ page.handle }}{% else %}{% endif %}';
---
# Why isn't my passcode, secret link, newsletter, or location key working? | Locksmith
For the complete documentation index, see [llms.txt](https://www.locksmith.guide/llms.txt)
. This page is also available as [Markdown](https://www.locksmith.guide/faqs/more/why-isnt-my-remote-key-condition-working.md)
.
Tip: we call these "remote key conditions", because they involve making remote calls to Locksmith for verification.
You tested out your key, and it worked great. But now it stopped asking for verification. This can often happen when using one of these key types:
* [Passcode](https://www.locksmith.guide/keys/passcode-keys)
* [Secret link](https://www.locksmith.guide/keys/secret-link-keys)
* [Newsletter](https://www.locksmith.guide/keys/more/newsletter-keys)
* [Location](https://www.locksmith.guide/keys/visitor-location-keys)
* IP Address
For background, Locksmith remembers your previous access using the same mechanism Shopify uses to remember you: via browser cache.
The easiest way to move forward is by opening a private browsing session (sometimes called "incognito mode"), and _then_ proceeding to test Locksmith in your online storefront.
**Important:** If you're using a URL with the `shopifypreview.com` domain to test, Locksmith changes won't appear there.
The Shopify theme editor's built-in preview bypasses Locksmith entirely. Locks, keys, and any manual locking code can look like they are not in place.
If you're testing your published theme, open the live storefront URL in a new private browsing window.
If you're testing an unpublished theme, use the preview URL that includes `?fts=0&preview_theme_id=` followed by your theme ID, as described in [Testing Locksmith on unpublished themes](https://www.locksmith.guide/tutorials/more/testing-locksmith-on-unpublished-themes)
.
Detailed information on using private/incognito mode here:
[How to use a private browsing session](https://www.locksmith.guide/tutorials/more/how-to-use-a-private-browsing-session)
**Note**: If you're using location keys, and you're changing your location with a VPN for testing purposes, the cause is the same in that Locksmith caches your access status. Using a private browsing session can still help with this in that you'll have fresh cache
**Tip:** Each time you test, be sure to start a _**new**_ private browsing session. Remember, the cache in private browsing doesn't clear stored access until you close all private windows or stop the main Incognito process.
[](https://www.locksmith.guide/faqs/more/why-isnt-my-remote-key-condition-working#locksmith-is-remembering-your-browser)
Locksmith is remembering your browser.
--------------------------------------------------------------------------------------------------------------------------------------------------------------------
When you open the key, Locksmith remembers it as long as your browser application remains running. To get around this, you'll need to use a private session (see above), or use a different browser or device.
In the case of location keys, if you're using a VPN to change your apparent location, it can even be useful to delete the browser cache _during the same browser session_. We have a guide on how to do this here:
[How to clear cache for a single website](https://www.locksmith.guide/tutorials/more/how-to-clear-cache-for-a-single-website)
[](https://www.locksmith.guide/faqs/more/why-isnt-my-remote-key-condition-working#locksmith-is-remembering-your-account)
Locksmith is remembering your account.
--------------------------------------------------------------------------------------------------------------------------------------------------------------------
_If you were signed into a customer account when you opened the key_, Locksmith can remember access on that account. This is a toggle-able setting on those key condition types, and, when turned on, Locksmith will never ask again when you're signed in.
To turn this setting off, head into the lock and click on the link to the key condition. Next, scroll down in the pop up and disable the option "Remember for signed in customer":

Toggle the setting OFF, and **don't forget to save your lock**!
[PreviousI switched themes, and Locksmith isn't working](https://www.locksmith.guide/faqs/more/i-switched-themes-and-locksmith-isnt-working)
[NextCan Locksmith lock Shopify's public JSON API for my online store?](https://www.locksmith.guide/faqs/more/can-locksmith-lock-shopifys-public-json-api-for-my-online-store)
Last updated 7 days ago
Was this helpful?
* [Locksmith is remembering your browser.](https://www.locksmith.guide/faqs/more/why-isnt-my-remote-key-condition-working#locksmith-is-remembering-your-browser)
* [Locksmith is remembering your account.](https://www.locksmith.guide/faqs/more/why-isnt-my-remote-key-condition-working#locksmith-is-remembering-your-account)
Was this helpful?
---
# How does Locksmith affect search engines and SEO? | Locksmith
For the complete documentation index, see [llms.txt](https://www.locksmith.guide/llms.txt)
. This page is also available as [Markdown](https://www.locksmith.guide/faqs/more/how-does-locksmith-affect-search-engines-and-seo.md)
.
Locksmith works hard to fully protect anything you lock, in as many ways as possible. This includes deep protection of _meta_ content - the content that's read by search engines and other computerized agents.
[](https://www.locksmith.guide/faqs/more/how-does-locksmith-affect-search-engines-and-seo#robots-tags)
"Robots" tags
-------------------------------------------------------------------------------------------------------------------------
By default, Locksmith automatically adds the following [robots meta tag](https://developers.google.com/webmasters/control-crawl-index/docs/robots_meta_tag?csw=1)
for **all of your locked resources:**
Copy
This means that search engines will be prevented from indexing your locked content.
If you do not want Locksmith to add this metatag to your locked pages, you can turn it off in the lock settings under **Advanced > Add the "noindex" meta tag to any pages protected by this lock**. Keep in mind that this does NOT allow your locked content to be accessed or indexed - it simply allows the locked landing page (E.g. "This content is protected...") to be found by search engines.
**Note**: When using Locksmith's manual mode(e.g. hiding only prices or add-to-cart), this meta tag will NOT be added, which means that any content not directly protected by your manual lock _will_ be indexed. [Read more about manual mode here.](https://www.locksmith.guide/keys/more/manual-mode)
[](https://www.locksmith.guide/faqs/more/how-does-locksmith-affect-search-engines-and-seo#sitemaps)
Sitemaps
-----------------------------------------------------------------------------------------------------------------
Some locks in Locksmith support an extra advanced setting, called "Hide product from sitemaps". Enable this setting to have Locksmith ask Shopify to exclude your locked resource from sitemaps, and from storefront searches.
**When this setting is enabled, the locked resource will** _**never**_ **show up in store search, even when the lock is opened.**
This setting is not strictly necessary for hiding your content from search engines, if you already have the "Add the noindex metatag..." setting turned on. However, this setting can be useful to more completely signal your intent to search engines. More information about this setting here:
[Automatically managing the seo.hidden metafield using Locksmith](https://www.locksmith.guide/tutorials/more/automatically-hide-from-sitemaps-and-manage-seo-metafield)
###
[](https://www.locksmith.guide/faqs/more/how-does-locksmith-affect-search-engines-and-seo#important-note)
Important note
Enabling this setting creates a metafield, which is maintained but not owned by Locksmith. If you remove Locksmith from your list of installed apps, Locksmith will not be authorized to remove this meta field for you. In this scenario, any locked resources with this setting enabled will still be excluded from sitemaps, and from storefront searches.
If you need to remove Locksmith from your list of installed apps, make sure to remove [Locksmith completely from your theme](https://www.locksmith.guide/basics/removing-locksmith)
beforehand.
[](https://www.locksmith.guide/faqs/more/how-does-locksmith-affect-search-engines-and-seo#meta-tags)
Meta tags
-------------------------------------------------------------------------------------------------------------------
Locksmith hides the following meta tags for your content, so long as you've enabled the lock option for hiding the lock's resource in your shop:
* Open Graph: `og:title` , `og:type` , `og:description` , `og:image` , `og:image:secure_url`
* Twitter: `twitter:title` , `twitter:description` , `twitter:image` , `twitter:image:width` , `twitter:image:height`
* Description: `description`
Regardless of whether or not lock resource hiding is enabled, Locksmith will _always_ protect these meta tags for locked content:
* Open Graph: `og:price:amount` , `price:currency`
[](https://www.locksmith.guide/faqs/more/how-does-locksmith-affect-search-engines-and-seo#location-and-ip-address-keys)
Location and IP address keys
---------------------------------------------------------------------------------------------------------------------------------------------------------
It is important to know that content protected under these key types will not be indexed properly in most cases. Search engine "web crawlers" will access the page in the same way that a regular visitor would, and the server that the crawling is taking place from may or may not be located in a location that is allowed by your key conditions. Additionally, because of [Google's rules against cloaking](https://developers.google.com/search/docs/essentials/spam-policies#cloaking)
, we are not allowed to simply grant access to a crawling agent automatically (show different content to a search engine vs a regular visitor, as per Google regulations).
If you are using Location or IP address keys, and you still want your content to be indexed, **you still have options!**
**If you have specific products that are not available in certain countries:** You'll need to use manual locking to hide only the add-to-cart button. [More info on that here](https://www.locksmith.guide/tutorials/hiding-prices)
.
**If you have different versions for different countries:** You can create separate versions of your products using variants, and setting up Locksmith to hide the variants depending on who is visiting. [More info on that here](https://www.locksmith.guide/tutorials/more/price-tiers#using-variants)
.
[](https://www.locksmith.guide/faqs/more/how-does-locksmith-affect-search-engines-and-seo#wondering-how-else-locksmith-affects-seo)
Wondering how else Locksmith affects SEO?
----------------------------------------------------------------------------------------------------------------------------------------------------------------------------------
Locksmith doesn’t distinguish between a regular visitor and a search engine, so anything that is blocked for a regular non-signed-in visitor will also be blocked to search engines.
With that in mind, here are a few of the common questions related to this:
**"I want to make sure that Locksmith is blocking access to search engines, and that my locked pages won’t be indexed by search engines**”
Locksmith does this automatically by default. As long as you have a regular, full page (non-manual) lock, your content will be hidden from search engines.
**“I want to lock content but I still want potential customers to find my products using search engines”**
Since any locked content will be hidden from search engines, your option here is to do manual locking. Using manual locking, you can specify certain content to be locked on pages (instead of the whole page). [We have a guide on manual locking here](https://www.locksmith.guide/keys/more/manual-mode)
. Here are a few examples of how you could manage that:
* Metadata - you can hide certain parts of the page but leave the metadata unlocked. This is what search engines use to index your pages anyway. So leaving this unlocked would be an effective way to allow your pages to be searchable. [More information from Shopify about Metadata here](https://help.shopify.com/manual/products/promoting-marketing/seo)
.
* “Add to Cart” button - this would prevent people from buying the product unless they have access, but they would still be able to see all the information about the product.
* Prices - You can hide the price while leaving all other information visible. This is usually done along with the “Add to Cart” button. [Our guide on price hiding is here](https://www.locksmith.guide/tutorials/hiding-prices)
.
[PreviousLocksmith is not uninstalling correctly!](https://www.locksmith.guide/faqs/more/locksmith-is-not-uninstalling-correctly)
[NextHow do I change where customers are redirected to after registration on Shopify](https://www.locksmith.guide/faqs/more/how-do-i-change-where-customers-are-redirected-to-after-registration-on-shopify)
Last updated 2 years ago
Was this helpful?
* ["Robots" tags](https://www.locksmith.guide/faqs/more/how-does-locksmith-affect-search-engines-and-seo#robots-tags)
* [Sitemaps](https://www.locksmith.guide/faqs/more/how-does-locksmith-affect-search-engines-and-seo#sitemaps)
* [Important note](https://www.locksmith.guide/faqs/more/how-does-locksmith-affect-search-engines-and-seo#important-note)
* [Meta tags](https://www.locksmith.guide/faqs/more/how-does-locksmith-affect-search-engines-and-seo#meta-tags)
* [Location and IP address keys](https://www.locksmith.guide/faqs/more/how-does-locksmith-affect-search-engines-and-seo#location-and-ip-address-keys)
* [Wondering how else Locksmith affects SEO?](https://www.locksmith.guide/faqs/more/how-does-locksmith-affect-search-engines-and-seo#wondering-how-else-locksmith-affects-seo)
Was this helpful?
---
# How do I add a hero banner image to Locksmith's access messages | Locksmith
For the complete documentation index, see [llms.txt](https://www.locksmith.guide/llms.txt)
. This page is also available as [Markdown](https://www.locksmith.guide/faqs/more/how-do-i-add-a-hero-banner-image-to-locksmiths-access-messages.md)
.
**Note:** While we can provide examples and guidance, we're unable to write custom code for individual store customisations. This example is meant as a starting point for your own implementation.
Locksmith's access messages can be modified using text, HTML, CSS, JavaScript and Liquid code. We cover this and where to edit Locksmith's access messages in our customising messages guide, linked below:
[Customizing messages](https://www.locksmith.guide/tutorials/more/customizing-messages)
[](https://www.locksmith.guide/faqs/more/how-do-i-add-a-hero-banner-image-to-locksmiths-access-messages#adding-a-hero-banner-above-your-access-content)
Adding a hero banner above your access content:
------------------------------------------------------------------------------------------------------------------------------------------------------------------------------------------------------------
The following code can be added to your "Guest message content" field, above your existing message:
###
[](https://www.locksmith.guide/faqs/more/how-do-i-add-a-hero-banner-image-to-locksmiths-access-messages#hero-banner-css-and-html)
Hero banner CSS and HTML:
Copy
The above code is based on an example from W3 School, here: [https://www.w3schools.com/howto/howto\_css\_hero\_image.asp](https://www.w3schools.com/howto/howto_css_hero_image.asp)

Example image of where the above example code can be added to the "Guest message content" field to include a hero banner above the lock's guest message content.
[](https://www.locksmith.guide/faqs/more/how-do-i-add-a-hero-banner-image-to-locksmiths-access-messages#customising-this-example)
Customising this example:
----------------------------------------------------------------------------------------------------------------------------------------------------------------
* To replace the example image with your own, replace the URL with the quotes for the `background-image` with the URL of your banner image
* Adjusting the height of the hero banner by changing the `height` value (300px in this example) to suit your needs
[](https://www.locksmith.guide/faqs/more/how-do-i-add-a-hero-banner-image-to-locksmiths-access-messages#modify-this-code-to-display-a-collection-specific-banner-image-advanced)
Modify this code to display a collection-specific banner image (advanced):
----------------------------------------------------------------------------------------------------------------------------------------------------------------------------------------------------------------------------------------------------------------
This section describes how to modify a Shopify image URL so that Locksmith’s default access message content can be used to display collection-specific hero banners.[](https://www.locksmith.guide/faqs/more/how-do-i-add-a-hero-banner-image-to-locksmiths-access-messages#this-section-describes-how-to-modify-a-shopify-image-url-so-that-locksmiths-default-access-message-c)
It’s possible to add some Liquid code if you would like to display a collection-specific banner image to multiple collections without needing to customise the above code for each image and then applying that to each collection lock.
####
[](https://www.locksmith.guide/faqs/more/how-do-i-add-a-hero-banner-image-to-locksmiths-access-messages#to-set-this-up)
To set this up:
1. **Image titles:**
You’ll need to title each banner image with the corresponding collection handle. For example, if your collection is located at my-store.myshopify.com/collections/**collection-a**, then the image title for this collection should be **collection-a**.
2. **Image file types:**
Make sure all your collection banner images are of the same file type. This can be any file type compatible with [Shopify’s file requirements](https://help.shopify.com/en/manual/shopify-admin/productivity-tools/file-uploads#file-requirements)
(or wherever you’ve stored your images), so long as they’re consistent.
3. **Image file paths:**
Images stored with Shopify will have a file path similar to the following example, where the image is titled **collection-a**:
`https://cdn.shopify.com/s/files/1/1234/5678/9012/files/collection-a.jpeg`
This path should remain the same for all your images, except for the image title.
4. **Modifying the image link:**
You can modify a link for one of your images by replacing the image title with the following Liquid:
`{{ collection.handle }}`
This will give you URL like this:
`https://cdn.shopify.com/s/files/1/1234/5678/9012/files/{{ collection.handle }}.jpeg`
5. **Updating the style code:**
The URL can then be added to the background-image style element’s URL.

6. **Editing the default message content:**
[Locksmith’s default access messages](https://www.locksmith.guide/tutorials/more/customizing-messages#default-messages)
are located in the Locksmith app’s Settings tab. By adding this modified hero banner image code to a message field in Locksmith’s settings—instead of a specific lock’s settings page—the code will apply to any lock that is using the default message.
**(Optional) Limiting the scope of the hero banner code to collection and product pages:**
The banner code can be wrapped in some Liquid so that it runs only on collection and product pages. Here’s an example of Liquid for this purpose:
[](https://www.locksmith.guide/faqs/more/how-do-i-add-a-hero-banner-image-to-locksmiths-access-messages#uploading-and-storing-images)
Uploading and storing images:
------------------------------------------------------------------------------------------------------------------------------------------------------------------------
Shopify has some documentation on uploading and managing files here: [https://help.shopify.com/en/manual/shopify-admin/productivity-tools/file-uploads](https://help.shopify.com/en/manual/shopify-admin/productivity-tools/file-uploads)
[](https://www.locksmith.guide/faqs/more/how-do-i-add-a-hero-banner-image-to-locksmiths-access-messages#related-articles)
Related articles:
------------------------------------------------------------------------------------------------------------------------------------------------
[Customizing messages](https://www.locksmith.guide/tutorials/more/customizing-messages)
[Customizing the passcode form](https://www.locksmith.guide/tutorials/more/customizing-the-passcode-form)
[Customizing the email list signup form](https://www.locksmith.guide/tutorials/more/customizing-the-email-list-signup-form)
[PreviousI am getting an "already taken" error when trying to create a metafield definition for seo.hidden](https://www.locksmith.guide/faqs/more/i-am-getting-an-already-taken-error-when-trying-to-create-a-metafield-definition-for-seo.hidden)
[NextWhat order are different types of key conditions evaluated in?](https://www.locksmith.guide/faqs/more/what-order-are-key-conditions-evaluated-in)
Last updated 1 year ago
Was this helpful?
* [Adding a hero banner above your access content:](https://www.locksmith.guide/faqs/more/how-do-i-add-a-hero-banner-image-to-locksmiths-access-messages#adding-a-hero-banner-above-your-access-content)
* [Hero banner CSS and HTML:](https://www.locksmith.guide/faqs/more/how-do-i-add-a-hero-banner-image-to-locksmiths-access-messages#hero-banner-css-and-html)
* [Customising this example:](https://www.locksmith.guide/faqs/more/how-do-i-add-a-hero-banner-image-to-locksmiths-access-messages#customising-this-example)
* [Modify this code to display a collection-specific banner image (advanced):](https://www.locksmith.guide/faqs/more/how-do-i-add-a-hero-banner-image-to-locksmiths-access-messages#modify-this-code-to-display-a-collection-specific-banner-image-advanced)
* [Uploading and storing images:](https://www.locksmith.guide/faqs/more/how-do-i-add-a-hero-banner-image-to-locksmiths-access-messages#uploading-and-storing-images)
* [Related articles:](https://www.locksmith.guide/faqs/more/how-do-i-add-a-hero-banner-image-to-locksmiths-access-messages#related-articles)
Was this helpful?
Copy
{% if template == "collection" or "product" %}
banner code goes here
{% endif %}
---
# More tutorials... | Locksmith
For the complete documentation index, see [llms.txt](https://www.locksmith.guide/llms.txt)
. This page is also available as [Markdown](https://www.locksmith.guide/tutorials/more.md)
.
[Setting up multiple price tiers](https://www.locksmith.guide/tutorials/more/price-tiers)
[Customizing messages](https://www.locksmith.guide/tutorials/more/customizing-messages)
[Customizing the customer login page](https://www.locksmith.guide/tutorials/more/customizing-the-customer-login-page)
[Customizing the registration form](https://www.locksmith.guide/tutorials/more/customizing-the-registration-form)
[Customizing the passcode form](https://www.locksmith.guide/tutorials/more/customizing-the-passcode-form)
[Customizing Locksmith’s "Access denied content" messages, and redirecting customers](https://www.locksmith.guide/tutorials/more/customising-locksmiths-access-denied-content-messages-and-redirecting-customers)
[Customizing the email list signup form](https://www.locksmith.guide/tutorials/more/customizing-the-email-list-signup-form)
[Showing multiple prompts on the same page](https://www.locksmith.guide/tutorials/more/showing-multiple-prompts-on-the-same-page)
[Showing content only to specific Markets](https://www.locksmith.guide/tutorials/more/shopify-markets)
[Input lists](https://www.locksmith.guide/tutorials/more/input-lists)
[Protecting against bots](https://www.locksmith.guide/tutorials/more/protecting-against-bots)
[Earn recurring revenue on your exclusive content using ReCharge](https://www.locksmith.guide/tutorials/more/recharge)
[Use Locksmith and PayWhirl together to grant access based on subscriptions](https://www.locksmith.guide/tutorials/more/use-locksmith-and-paywhirl-together-to-grant-access-based-on-subscriptions)
[Use Locksmith and Seal Subscriptions to grant access based on subscriptions](https://www.locksmith.guide/tutorials/more/use-locksmith-and-seal-subscriptions-to-grant-access-based-on-subscriptions)
[Liquid locking basics](https://www.locksmith.guide/tutorials/more/liquid-locking-basics)
[Restricting checkout from the cart](https://www.locksmith.guide/tutorials/more/restricting-checkout-from-the-cart)
[Confirmation key condition](https://www.locksmith.guide/tutorials/more/editing-the-confirmation-message)
[Restricting customers to a specific collection](https://www.locksmith.guide/tutorials/more/restricting-customers-to-a-specific-collection)
[Passcode-specific redirects](https://www.locksmith.guide/tutorials/more/passcode-specific-redirects)
[Grow your subscriber lists with Klaviyo](https://www.locksmith.guide/tutorials/more/klaviyo)
[Use a Klaviyo list or segment as an access control list](https://www.locksmith.guide/tutorials/more/use-a-klaviyo-list-or-segment-as-an-access-control-list)
[Use Mailchimp to collect customer emails](https://www.locksmith.guide/tutorials/more/mailchimp)
[Hiding out-of-stock products](https://www.locksmith.guide/tutorials/more/hiding-out-of-stock-products)
[How to use a private browsing session](https://www.locksmith.guide/tutorials/more/how-to-use-a-private-browsing-session)
[Granting access to variants by visitor input](https://www.locksmith.guide/tutorials/more/granting-access-to-variants-by-visitor-input)
[Offering different variants by postal code](https://www.locksmith.guide/tutorials/more/offering-different-variants-by-postal-code)
[Locking products by tag](https://www.locksmith.guide/tutorials/more/locking-products-by-tag)
[Locking multiple pages at once](https://www.locksmith.guide/tutorials/more/locking-multiple-pages-at-once)
[Making a product accessible exclusively from the direct product link](https://www.locksmith.guide/tutorials/more/making-a-product-accessible-exclusively-from-the-direct-product-link)
[Creating private team areas](https://www.locksmith.guide/tutorials/more/creating-private-team-areas)
[Importing customers in bulk](https://www.locksmith.guide/tutorials/more/importing-customers-in-bulk)
[Disabling Locksmith for certain theme files](https://www.locksmith.guide/tutorials/more/disabling-locksmith-for-certain-theme-files)
[Adding translations to your Locksmith messages](https://www.locksmith.guide/tutorials/more/adding-translations-to-your-locksmith-messages)
[Redirecting using Locksmith](https://www.locksmith.guide/tutorials/more/redirecting-using-locksmith)
[Locking variants](https://www.locksmith.guide/tutorials/more/locking-variants)
[Locking the customer registration form](https://www.locksmith.guide/tutorials/more/locking-the-customer-registration-form)
[Locking the search results page in your store](https://www.locksmith.guide/tutorials/more/locking-the-search-results-page-in-your-store)
[How to clear cache for a single website](https://www.locksmith.guide/tutorials/more/how-to-clear-cache-for-a-single-website)
[🛠️Manual mode](https://www.locksmith.guide/tutorials/more/manual-mode)
[Grant access for a limited time when using passcodes or secret links](https://www.locksmith.guide/tutorials/more/grant-access-for-a-limited-time-when-using-passcodes-or-secret-links)
[Testing Locksmith on unpublished themes](https://www.locksmith.guide/tutorials/more/testing-locksmith-on-unpublished-themes)
[Locking blog posts](https://www.locksmith.guide/tutorials/more/locking-blog-posts)
[How to access your browser's dev tools](https://www.locksmith.guide/tutorials/more/how-to-access-your-browsers-dev-tools)
[Restricting the cart for mixed products and combinations of products](https://www.locksmith.guide/tutorials/more/restricting-the-cart-for-mixed-products-and-combinations-of-products)
[Locking products by vendor](https://www.locksmith.guide/tutorials/more/locking-products-by-vendor)
[How do I hide my Shopify store's header and footer](https://www.locksmith.guide/tutorials/more/how-do-i-hide-my-shopify-stores-header-and-footer)
[Hiding navigation links for locked resources](https://www.locksmith.guide/tutorials/more/hiding-navigation-links-for-locked-resources)
[Hiding products and other content from lists in your online store](https://www.locksmith.guide/tutorials/more/hiding-products-and-other-content-from-lists-in-your-online-store)
[Restricting a product so that it can only be purchased by new customers](https://www.locksmith.guide/tutorials/more/restricting-a-product-so-that-it-can-only-be-purchased-by-new-customers)
[Automatically managing the seo.hidden metafield using Locksmith](https://www.locksmith.guide/tutorials/more/automatically-hide-from-sitemaps-and-manage-seo-metafield)
[Locking the home page](https://www.locksmith.guide/tutorials/more/locking-the-home-page)
[Setting up checkout validation with Locksmith](https://www.locksmith.guide/tutorials/more/setting-up-checkout-validation-with-locksmith)
[Restricting access to payment methods with Locksmith](https://www.locksmith.guide/tutorials/more/hiding-payment-methods-by-customer-tag)
[How to hide theme sections, blocks, and snippets](https://www.locksmith.guide/tutorials/more/how-to-hide-theme-sections-blocks-and-snippets)
[Creating weekly schedules](https://www.locksmith.guide/tutorials/more/creating-weekly-schedules)
[Using date and time key conditions](https://www.locksmith.guide/tutorials/more/using-date-and-time-key-conditions)
[PreviousSelling digital content on Shopify](https://www.locksmith.guide/tutorials/selling-digital-content-on-shopify)
[NextSetting up multiple price tiers](https://www.locksmith.guide/tutorials/more/price-tiers)
Last updated 3 months ago
Was this helpful?
Was this helpful?
---
# Customizing the registration form | Locksmith
For the complete documentation index, see [llms.txt](https://www.locksmith.guide/llms.txt)
. This page is also available as [Markdown](https://www.locksmith.guide/tutorials/more/customizing-the-registration-form.md)
.
First thing to know is that Locksmith uses the [built in customer account system that comes with your store](https://help.shopify.com/manual/customers/customer-accounts)
! This means it doesn't create a separate registration form, sign-in form, or customer database.
Important: This guide applies only to **Legacy** Customer Accounts.
Shopify’s New Customer Accounts don’t use a traditional registration page — an account is created automatically when someone signs in. Because of this, the registration form can’t be locked or customized in the same way.
If your store is using **New** Customer Accounts, we recommend using customer tags to approve or review new customers after their account is created instead.
All Shopify themes come with a registration form that includes Name, E-mail, and Password fields.
Many merchants want to collect more information from a customer when they register. Although **Locksmith doesn't get involved directly with this process**, you do have options here.
###
[](https://www.locksmith.guide/tutorials/more/customizing-the-registration-form#id-1.-simply-request-that-your-customers-e-mail-you-the-information)
1\. Simply request that your customers e-mail you the information
This is a simple solution to the issue and does work for some merchants. Use the Locksmith access-denied "Messages" area, which you can customize in the app, to let your customers know the contact email.
###
[](https://www.locksmith.guide/tutorials/more/customizing-the-registration-form#id-2.-use-a-dedicated-shopify-app)
2\. Use a dedicated Shopify app
[The Customer Fields app](https://app.customerfields.com/billing/referral?code=LOCKSMITH)
lets you create unique registration forms and add fields in an easy way. You can enable account approval, auto-tag customers, and receive email notifications when customers create or update their accounts. The Customer Fields app is not created by us, but we have had merchants have a lot of success with it!
####
[](https://www.locksmith.guide/tutorials/more/customizing-the-registration-form#pros)
Pros:
* Extremely easy to set up
* Install forms nearly anywhere on your storefront (no coding required)
* Choose whether to automatically create customer accounts in Shopify or require admin approval before an account is created
* Create unique forms for different customer groups, or use conditional logic to show/hide fields for different users on one form
* You can get notified by e-mail when the form is filled out!
* Plenty of other features
####
[](https://www.locksmith.guide/tutorials/more/customizing-the-registration-form#cons)
Cons:
* It is, naturally, a paid app
###
[](https://www.locksmith.guide/tutorials/more/customizing-the-registration-form#id-3.-use-a-third-party-form-creating-service)
3\. Use a third party form-creating service
If you just need to collect information, and don't need to automatically do anything with it, it is always an option to use Google forms, Wufoo, or other online forms. There are some other great services out there that let you create a fully customized HTML form.
####
[](https://www.locksmith.guide/tutorials/more/customizing-the-registration-form#pros-1)
Pros:
* Free
* Can be used to create a **second registration** to be used by _some_ of your customers while leaving your regular registration form alone. (These accounts will still be funneled back to the same customer database.)
* You can get notified by e-mail when the form is filled out!
####
[](https://www.locksmith.guide/tutorials/more/customizing-the-registration-form#cons-1)
Cons:
* The accounts are not automatically created which means you'll need to manually move the information over to Shopify from the third party app
###
[](https://www.locksmith.guide/tutorials/more/customizing-the-registration-form#legacy-option-4-edit-the-registration-form-in-your-theme-directly)
Legacy Option 4: Edit the registration form in your theme directly
If you are using Shopify's Legacy account system with a Legacy theme, your theme will have a built-in registration form which you can edit as needed. Shopify has a guide that will walk you through doing this. You can [view that here](https://shopify.dev/docs/storefronts/themes/architecture/templates/customers-register)
.
####
[](https://www.locksmith.guide/tutorials/more/customizing-the-registration-form#pros-2)
Pros:
* Editing your own theme is free
####
[](https://www.locksmith.guide/tutorials/more/customizing-the-registration-form#cons-2)
Cons:
* Requires coding knowledge. (But, If you don't have coding knowledge, you can still [hire an expert](https://experts.shopify.com/)
!)
* Extra fields in the registration form end up as customer "notes". Saving unique customer data to the customer note doesn’t allow much flexibility for using that data, or segmenting customers accordingly.
* Changes the registration form for _everyone_ which means that your different types of customers(I.e. wholesale and retail, if applicable) would be using the same registration form. You can still make the form usable for everyone by making the extra fields optional.
* There is **not** an option to get notified when customers register.
[PreviousCustomizing the customer login page](https://www.locksmith.guide/tutorials/more/customizing-the-customer-login-page)
[NextCustomizing the passcode form](https://www.locksmith.guide/tutorials/more/customizing-the-passcode-form)
Last updated 7 months ago
Was this helpful?
* [1\. Simply request that your customers e-mail you the information](https://www.locksmith.guide/tutorials/more/customizing-the-registration-form#id-1.-simply-request-that-your-customers-e-mail-you-the-information)
* [2\. Use a dedicated Shopify app](https://www.locksmith.guide/tutorials/more/customizing-the-registration-form#id-2.-use-a-dedicated-shopify-app)
* [3\. Use a third party form-creating service](https://www.locksmith.guide/tutorials/more/customizing-the-registration-form#id-3.-use-a-third-party-form-creating-service)
* [Legacy Option 4: Edit the registration form in your theme directly](https://www.locksmith.guide/tutorials/more/customizing-the-registration-form#legacy-option-4-edit-the-registration-form-in-your-theme-directly)
Was this helpful?
---
# Use Locksmith and PayWhirl together to grant access based on subscriptions | Locksmith
For the complete documentation index, see [llms.txt](https://www.locksmith.guide/llms.txt)
. This page is also available as [Markdown](https://www.locksmith.guide/tutorials/more/use-locksmith-and-paywhirl-together-to-grant-access-based-on-subscriptions.md)
.
You can use Locksmith alongside a dedicated subscription app to lock content so that the content can only be accessed by active subscribers. This guide covers how to use PayWhirl, but any recurring payment service that offers the "auto-tagging" feature would work with Locksmith.
**Note**: This guide covers recurring subscriptions. If you want to grant access based on a _single purchase,_ that is a built-in Locksmith feature, no third party app required. [More info on that here](https://www.locksmith.guide/tutorials/selling-digital-content-on-shopify)
.
###
[](https://www.locksmith.guide/tutorials/more/use-locksmith-and-paywhirl-together-to-grant-access-based-on-subscriptions#recharge-setup)
PayWhirl Setup:
If you haven't already, install the PayWhirl app and use their instructions to set up a recurring subscription for one of your products. Start by creating a product on your store, and then linking it to a subscription through PayWhirl. You can find the full setup instructions here:
[Shopify Subscription App | PayWhirl Subscriptions Help & Supportdocs.paywhirl.com](https://docs.paywhirl.com/en/collections/2664862-shopify-subscription-app)
**Important: You'll need to configure PayWhirl to tag customers who subscribe.** To do this, click on the Workflows tab in PayWhirl, and then click on "Create customer tagging":

Next, click on "Tag active subscribers", and then "Create and activate workflow". Your setup should look something like this on the Workflows screen when you're done:

###
[](https://www.locksmith.guide/tutorials/more/use-locksmith-and-paywhirl-together-to-grant-access-based-on-subscriptions#locksmith-setup)
Locksmith Setup:
Open up the Locksmith app and create a lock by searching for the page, product, collection, etc that you want to limit access to.
Once the lock is created, add the following key:

Here's a refresher on how to create keys:
[Creating keys | Locksmithwww.locksmith.guide](https://www.locksmith.guide/basics/creating-keys)
That's all it takes! Locksmith will now only grant access to accounts tagged with "Active Subscriber", which will be added to accounts that have an active subscription via PayWhirl. Based on the Workflow settings you set up already, the tag will be removed when the customer cancels or is otherwise unsubscribed. As a result, they'll also automatically lose access to the locked content.
###
[](https://www.locksmith.guide/tutorials/more/use-locksmith-and-paywhirl-together-to-grant-access-based-on-subscriptions#advanced-setup-for-multiple-tiers)
Advanced setup for multiple tiers:
####
[](https://www.locksmith.guide/tutorials/more/use-locksmith-and-paywhirl-together-to-grant-access-based-on-subscriptions#if-all-of-your-plans-are-accessing-the-same-content)
If all of your plans are accessing the same content...
E.g. - you have a monthly, yearly, etc option - no additional setup needed: the same tag will get added to a customer account to matter what plan they have, and customers using all plans will be able to access the content.
####
[](https://www.locksmith.guide/tutorials/more/use-locksmith-and-paywhirl-together-to-grant-access-based-on-subscriptions#if-you-have-multiple-plan-tiers-to-access-different-content-depending-on-the-tier)
If you have multiple plan tiers to access _different_ content, depending on the tier...
E.g. Gold, Silver, Bronze tiers, but the access for each tier is different.
In PayWhirl, you'd create a recurring order product for each of your tiers.
In Locksmith, add a lock to the content that is associated with a particular membership level. You will end up with at least one lock for each tier, maybe multiple, depending what content you are locking!
Use the following key:

Make sure to fill out the "Only look at orders in the last..." field with the appropriate subscription length that matches your PayWhirl subscription:

If there is any content that can be accessed by more than one type of membership level, just add them both as Locksmith keys:

**Feel free to ask questions if you're having any issues with any of that!** We can be contacted via email at team@uselocksmith.com**.**
[PreviousEarn recurring revenue on your exclusive content using ReCharge](https://www.locksmith.guide/tutorials/more/recharge)
[NextUse Locksmith and Seal Subscriptions to grant access based on subscriptions](https://www.locksmith.guide/tutorials/more/use-locksmith-and-seal-subscriptions-to-grant-access-based-on-subscriptions)
Last updated 2 years ago
Was this helpful?
* [PayWhirl Setup:](https://www.locksmith.guide/tutorials/more/use-locksmith-and-paywhirl-together-to-grant-access-based-on-subscriptions#recharge-setup)
* [Locksmith Setup:](https://www.locksmith.guide/tutorials/more/use-locksmith-and-paywhirl-together-to-grant-access-based-on-subscriptions#locksmith-setup)
* [Advanced setup for multiple tiers:](https://www.locksmith.guide/tutorials/more/use-locksmith-and-paywhirl-together-to-grant-access-based-on-subscriptions#advanced-setup-for-multiple-tiers)
Was this helpful?
---
# Customizing the customer login page | Locksmith
For the complete documentation index, see [llms.txt](https://www.locksmith.guide/llms.txt)
. This page is also available as [Markdown](https://www.locksmith.guide/tutorials/more/customizing-the-customer-login-page.md)
.
If you are using Shopify's [new customer account system](https://help.shopify.com/en/manual/customers/customer-accounts/new-customer-accounts)
, the login form comes directly from Shopify (as opposed to coming from the theme) so editing the login form is **not possible**. However, using this guide, you can still edit Locksmith's landing page (which links to the login form).
Whenever you use Locksmith to require your visitors to log in with their customer account, Locksmith will automatically pull in your theme's customer login form, with a message of your choosing added just above it.
You can customize the message in two places:
* Using the sidebar navigation, go to **Settings > Messages > Guest message content**. This is where you can edit the default message that is applied to all locks.
* **On the lock page, find Messages > Guest message content**. This is where you can edit the lock-specific message, which overrides the default.
Copy
This content is protected - please log in with your customer account to continue.
You can customize this message using as much HTML, CSS, and Liquid as you need!
Also, keep in mind that the "Guest message content" only applies to pages locked by keys that actually require a login. If your lock does not require a login, you may need to edit one of the other fields under "Lock Messages".
There are many ways to customize this page which the rest of this guide will cover!
[](https://www.locksmith.guide/tutorials/more/customizing-the-customer-login-page#id-1.-customizing-the-login-form-itself)
1\. Customizing the login form itself
---------------------------------------------------------------------------------------------------------------------------------------------------------------------
Since Locksmith is just grabbing the login template directly from your theme, you'll need to head into your theme to edit it. Shopify has [a guide dedicated to doing this here](https://shopify.dev/docs/storefronts/themes/architecture/templates/customers-login)
_**(please note: this is for Legacy customer accounts only )**_. Using that guide you can do things like remove the "Register" link from your login form or edit the styling in other ways. If you have a theme from a third-party developer, feel free to contact them for more personalized guidance on your specific theme's login template.
**Important:** Anytime you edit the login template in your theme, you'll want to make sure that Locksmith is using the updated version of it. To do this, go to the Help area within the Locksmith app and press the "Update Locksmith" button there.
[](https://www.locksmith.guide/tutorials/more/customizing-the-customer-login-page#id-2.-adding-the-registration-form-to-this-page)
2\. Adding the registration form to this page
-------------------------------------------------------------------------------------------------------------------------------------------------------------------------------------
Easy! Just add the following into the "Guest message content" area.
Copy
{{ locksmith_customer_register_form }}
Once again, this is just grabbing the registration page from your theme. If you've edited your registration template and you aren't seeing it updated here, head to the "Help" area within the Locksmith app and press the "Update Locksmith" button to see the latest version on your lock page.
[](https://www.locksmith.guide/tutorials/more/customizing-the-customer-login-page#id-3.-editing-the-placement-of-the-login-form-in-relation-to-your-lock-message)
3\. Editing the placement of the login form in relation to your lock message
---------------------------------------------------------------------------------------------------------------------------------------------------------------------------------------------------------------------------------------------------
By default, the "Guest message content" is displayed in its entirety as the first thing on the page (after the header) followed by the login form. You have the ability to change this: display the message after the login form, or perhaps add content before _and_ after the login form. To do this, use the following in your "Guest message content" area:
This will determine the placement of your login form and you're then free to add any content before/after it.
[](https://www.locksmith.guide/tutorials/more/customizing-the-customer-login-page#id-4.-remove-the-login-form-from-the-page-entirely-or-prevent-locksmith-from-adding-its-version-of-your)
4\. Remove the login form from the page entirely, or prevent Locksmith from adding it's version of your login form.
-------------------------------------------------------------------------------------------------------------------------------------------------------------------------------------------------------------------------------------------------------------------------------------------------------------------
If you don't want your customers to see the login form on this page for whatever reason, you can remove it by just adding this to your "Guest message content":
You can then add the rest of your message alongside that code.
This method is necessary when adding your own custom html form to the Guest Message Content field. Otherwise, you may see two login forms on the lock page.
[](https://www.locksmith.guide/tutorials/more/customizing-the-customer-login-page#id-5.-the-locksmith-message-isnt-visible-on-the-locked-page-or-its-partially-hidden)
5\. The Locksmith message isn't visible on the locked page, or its partially hidden
---------------------------------------------------------------------------------------------------------------------------------------------------------------------------------------------------------------------------------------------------------------
If the message is nowhere to be seen, it's probably just hidden under your header. Some themes don't add padding directly to the header and rely on the template to have its own padding. Since Locksmith replaces the template's code with its own content, it may be necessary to add the padding to it. This is usually as easy as adding this to the beginning of your "Guest message content":
Of course, you can adjust the number as needed.
As always, feel free to contact us at **team@uselocksmith.com** if you need help with this.
[](https://www.locksmith.guide/tutorials/more/customizing-the-customer-login-page#id-6.-centering-the-message-on-the-lock-page)
6\. Centering the message on the lock page
-------------------------------------------------------------------------------------------------------------------------------------------------------------------------------
To get the text on this page centered, change the beginning
tag to the following:
If you've removed the beginning
tag, just add a new one :) And, of course, make sure to close it with
at the end of your text.
[](https://www.locksmith.guide/tutorials/more/customizing-the-customer-login-page#id-7.-including-other-form-types)
7\. Including other form types
-------------------------------------------------------------------------------------------------------------------------------------------------------
If you have multiple key condition types on the same lock, it might be useful to include other form types within the prompt, so that they display on the same page. We have a guide on doing this here:
[Showing multiple prompts on the same page](https://www.locksmith.guide/tutorials/more/showing-multiple-prompts-on-the-same-page)
[](https://www.locksmith.guide/tutorials/more/customizing-the-customer-login-page#id-8.-placing-the-lock-message-within-the-login-form-itself)
8\. Placing the lock message within the login form itself
-------------------------------------------------------------------------------------------------------------------------------------------------------------------------------------------------------------
There are a few reasons you might want this. For example, if your login form is preceded by a heading or some breadcrumbs, you may want to insert the Locksmith-specific message beneath the heading, but above the email and password fields.
_This gets a bit technical, so if you need a hand, just hit that message button in the lower-right corner! :)_
To customize where your guest content message appears, open up the code editor for your Shopify theme ( [here's how!](https://help.shopify.com/themes/customization#view-the-edit-code-page)
), and open the file **templates/customers/login.liquid**. You might see something like this:
Add the code `` wherever you'd like your guest message to appear, like so:
Next, head to the "Settings" tab of your Locksmith account, and scroll down to the "Guest message content" field. Use a value like the example below to (a) customize your guest message, and (b) have Locksmith display your login template with your custom message injected into it:
That's it! :D You've just customized the login form's display using pure Liquid - congratulations, and feel free to experiment until the result is just right for your shop. :)
[](https://www.locksmith.guide/tutorials/more/customizing-the-customer-login-page#something-else-not-covered-here)
Something else not covered here?
--------------------------------------------------------------------------------------------------------------------------------------------------------
Let us know by emailing us at: **team@uselocksmith.com**
[PreviousCustomizing messages](https://www.locksmith.guide/tutorials/more/customizing-messages)
[NextCustomizing the registration form](https://www.locksmith.guide/tutorials/more/customizing-the-registration-form)
Last updated 1 year ago
Was this helpful?
* [1\. Customizing the login form itself](https://www.locksmith.guide/tutorials/more/customizing-the-customer-login-page#id-1.-customizing-the-login-form-itself)
* [2\. Adding the registration form to this page](https://www.locksmith.guide/tutorials/more/customizing-the-customer-login-page#id-2.-adding-the-registration-form-to-this-page)
* [3\. Editing the placement of the login form in relation to your lock message](https://www.locksmith.guide/tutorials/more/customizing-the-customer-login-page#id-3.-editing-the-placement-of-the-login-form-in-relation-to-your-lock-message)
* [4\. Remove the login form from the page entirely, or prevent Locksmith from adding it's version of your login form.](https://www.locksmith.guide/tutorials/more/customizing-the-customer-login-page#id-4.-remove-the-login-form-from-the-page-entirely-or-prevent-locksmith-from-adding-its-version-of-your)
* [5\. The Locksmith message isn't visible on the locked page, or its partially hidden](https://www.locksmith.guide/tutorials/more/customizing-the-customer-login-page#id-5.-the-locksmith-message-isnt-visible-on-the-locked-page-or-its-partially-hidden)
* [6\. Centering the message on the lock page](https://www.locksmith.guide/tutorials/more/customizing-the-customer-login-page#id-6.-centering-the-message-on-the-lock-page)
* [7\. Including other form types](https://www.locksmith.guide/tutorials/more/customizing-the-customer-login-page#id-7.-including-other-form-types)
* [8\. Placing the lock message within the login form itself](https://www.locksmith.guide/tutorials/more/customizing-the-customer-login-page#id-8.-placing-the-lock-message-within-the-login-form-itself)
* [Something else not covered here?](https://www.locksmith.guide/tutorials/more/customizing-the-customer-login-page#something-else-not-covered-here)
Was this helpful?
Copy
{{ locksmith_customer_login_form }}
Copy
{% comment %}
{{ locksmith_customer_login_form }}
{% endcomment %}
Copy
Copy
{{ locksmith_customer_login_form | replace: '', locksmith_message }}
---
# Showing multiple prompts on the same page | Locksmith
For the complete documentation index, see [llms.txt](https://www.locksmith.guide/llms.txt)
. This page is also available as [Markdown](https://www.locksmith.guide/tutorials/more/showing-multiple-prompts-on-the-same-page.md)
.
Many of Locksmith's access conditions require input from your customers, whether that be a login, or just a code entry or a confirm button press. Sometimes you might wish to give your customers flexibility by providing multiple different ways for a customer to gain access. For example, perhaps they can enter a passcode OR subscribe to your mailing list. Setting that up would look something like this:

By default, **Locksmith only shows one entry method at a time to customers**. In the above example, you'd see something like this:

Newsletter prompts are prioritized over passcode prompts according to Locksmith's internal rules
[](https://www.locksmith.guide/tutorials/more/showing-multiple-prompts-on-the-same-page#editing-messages-to-show-both-forms)
Editing messages to show both forms
---------------------------------------------------------------------------------------------------------------------------------------------------------------------
To include a specific form for a key condition that you're using, you can mix and match the following liquid variable outputs in your Locksmith messages:
Form/condition type
Liquid code used to include the form
passcode
`{{ locksmith_passcode_form }}`
mailing list signup (i.e. Klaviyo or Mailchimp)
`{{ locksmith_email_form }}`
confirmation
`{{ locksmith_confirmation_form }}`
login - for store accounts. If you are not using legacy customer accounts, this is just a button pointing to the sign in page
`{{ locksmith_customer_login_form }}`
registration - for store accounts. only applicable if you are using the legacy customer account system
`{{ locksmith_customer_registration_form }}`
[](https://www.locksmith.guide/tutorials/more/showing-multiple-prompts-on-the-same-page#example)
Example
-------------------------------------------------------------------------------------------------------------
Continuing the passcode/klaviyo example from above, add this:
Which results in this:

[](https://www.locksmith.guide/tutorials/more/showing-multiple-prompts-on-the-same-page#which-message-should-you-edit)
Which message should you edit?
----------------------------------------------------------------------------------------------------------------------------------------------------------
The easiest way to make sure your locked pages display correctly when using multiple prompts is to simply **copy/paste the same exact message to each of your messages**. Technically only one of them will be used - which is based on Locksmith's internal sorting rules. But, for simplicity, use consistent messages:

[PreviousCustomizing the email list signup form](https://www.locksmith.guide/tutorials/more/customizing-the-email-list-signup-form)
[NextShowing content only to specific Markets](https://www.locksmith.guide/tutorials/more/shopify-markets)
Last updated 9 months ago
Was this helpful?
* [Editing messages to show both forms](https://www.locksmith.guide/tutorials/more/showing-multiple-prompts-on-the-same-page#editing-messages-to-show-both-forms)
* [Example](https://www.locksmith.guide/tutorials/more/showing-multiple-prompts-on-the-same-page#example)
* [Which message should you edit?](https://www.locksmith.guide/tutorials/more/showing-multiple-prompts-on-the-same-page#which-message-should-you-edit)
Was this helpful?
Copy
Subscribe to our mailing list to continue!
{{ locksmith_email_form }}
Or, enter the passcode:
{{ locksmith_passcode_form }}
---
# Setting up multiple price tiers | Locksmith
For the complete documentation index, see [llms.txt](https://www.locksmith.guide/llms.txt)
. This page is also available as [Markdown](https://www.locksmith.guide/tutorials/more/price-tiers.md)
.
Many, many merchants use Locksmith for managing different price levels **within the same store.**
Frequently, this means _wholesale and retail_. We'll use those terms in the rest of this article, but feel free to substitute them for whatever applies to your situation - for example:
* Members vs Non-members
* EU customers Vs. Non-EU customers
...or any other situations that require price tiers.
[](https://www.locksmith.guide/tutorials/more/price-tiers#customer-management)
**Customer management**
-----------------------------------------------------------------------------------------------------------
Before setting up your product tiers, you'll need to decide how you want your customers to gain access to the separate tiers. The most common way to do this is to use approved customer registrations. More information on setting this up here:
[Approving customer registrations](https://www.locksmith.guide/tutorials/approving-customer-registrations)
So in this case, you would use customer tags to denote the customer tiers. So, for example, customers with the "wholesale" customer tag are considered wholesale customers, while customers without the "wholesale" tag are regular/retail customers.
[](https://www.locksmith.guide/tutorials/more/price-tiers#deciding-between-product-duplicates-or-variants)
**Deciding between product duplicates or variants**
-------------------------------------------------------------------------------------------------------------------------------------------------------------------
Using Locksmith to sell products at two different prices levels means that **your products need to be duplicated in some way**. This can be achieved using either product duplicates _or_ by using variant tiers.
Keep in mind that Locksmith itself does not create these alternate versions. No matter which one you choose, the work to duplicate the products will be done on your end.
###
[](https://www.locksmith.guide/tutorials/more/price-tiers#using-product-duplicates)
[**Using Product duplicates**](https://www.locksmith.guide/tutorials/more/price-tiers#using-product-duplicates)
**Pros** -
* Allows you to have distinct sections in your store that are dedicated to different types of customers.
* A straightforward approach
**Cons** -
* Introduces [collection filtering issues](https://www.locksmith.guide/faqs/faq-i-see-blank-spaces-in-my-collections-and-or-searches-when-locking)
.
###
[](https://www.locksmith.guide/tutorials/more/price-tiers#using-variant-tiers)
[**Using variant tiers**](https://www.locksmith.guide/tutorials/more/price-tiers#using-variants)
**Pros** -
* Uses the same products, collections, and navigation menus
* Avoids [collection filtering issues](https://www.locksmith.guide/faqs/faq-i-see-blank-spaces-in-my-collections-and-or-searches-when-locking)
!
**Cons** -
* This is not a good option if your products already have many variants. Adding a price tier variant essentially doubles the number of product variants that each product has. The Shopify-wide **maximum** number of variants per product is 100.
* Can be seen as more complicated since managing individual variants is less straightforward than managing products.
* Variant locks are **not** compatible with [passcode keys](https://www.locksmith.guide/keys/passcode-keys)
.
[](https://www.locksmith.guide/tutorials/more/price-tiers#using-product-duplicates-1)
Option 1 - Using product duplicates
------------------------------------------------------------------------------------------------------------------------------
###
[](https://www.locksmith.guide/tutorials/more/price-tiers#basic-steps)
Basic steps:
1. Use your Shopify admin area to create duplicate versions of every single one of your products that will be sold at more than one price.
2. Once your product duplicates are created, create a collection of wholesale-only products - no mixing in other products from other parts of your store! Don't forget you can use [Shopify's automated collection feature here](https://help.shopify.com/en/manual/products/collections/automated-collections).
3. Next, use Locksmith to [create a lock](https://www.locksmith.guide/basics/creating-locks)
on your wholesale collection. This lock will cover all of the products in that collection.
4. On the next screen, use the "Keys" section to create a key that corresponds to [the method of access that you decided on earlier](https://www.locksmith.guide/tutorials/more/price-tiers#customer-management)
.
That's it for the basic setup! There are some optional steps below...
###
[](https://www.locksmith.guide/tutorials/more/price-tiers#optional-locking-your-retail-products)
Optional: Locking your retail products
You may want to consider also adding a lock to your retail products, so that wholesale customers don't get confused after they sign in. We'll use a new lock with the opposite condition, to make sure that the customer can only view your retail products if they're _not_ approved.
**To add a corresponding lock to your retail products**, following these steps:
1. Create a collection that covers all of your non-wholesale products.
2. [Create a lock](https://www.locksmith.guide/basics/creating-locks)
on this new collection: search for it by name in the Locksmith app
3. On the next screen, use the "Keys" section to create that has the [exact inverse condition of the key you created above](https://www.locksmith.guide/keys/more/inverting-conditions-in-locksmith)
.
That's it! Your wholesalers will now be prevented from seeing retail products once they're logged in. (Note: this trick doesn't prevent the wholesaler from arriving at your shop as a guest, adding retail products to the cart, _then_ logging in to their wholesale account!)
###
[](https://www.locksmith.guide/tutorials/more/price-tiers#optional-pointing-your-wholesale-customers-to-your-wholesale-collection)
**Optional: Pointing your wholesale customers to your wholesale collection**
Now that you have a wholesale collection set up, you will want give your wholesale customers a way to find their content. You can do this by adding a "Wholesale" link to your navigation menu, that points directly to the Wholesale collection. This link will be visible to everyone, but once it's clicked, Locksmith will ask for access credentials.
Locksmith will automatically use the login template and style from your theme. The message is easily customizable:
[Customizing messages](https://www.locksmith.guide/tutorials/more/customizing-messages)
###
[](https://www.locksmith.guide/tutorials/more/price-tiers#optional-hiding-wholesale-product-prices)
Optional: Hiding wholesale product prices
If you prefer to **leave your wholesale offerings open to the public**, but still want to hide the prices, this is also possible!
This requires a few more steps, and we have a guide that covers that kind of thing here:
[Hiding product prices and/or the add to cart button](https://www.locksmith.guide/tutorials/hiding-prices)
[](https://www.locksmith.guide/tutorials/more/price-tiers#using-variants)
Option 2 - Using variant tiers
-------------------------------------------------------------------------------------------------------------
To create price tiers using product variants, you'll need to use your Shopify admin area to **create an "Audience" option** _on each of your products that you want to add tiers to:_

**Note**: You can use whatever Option or value names you prefer! Just make sure that you _use consistent naming_ on each of your products. This will make creating the locks easier. If you have a large number of products, we recommend that you use the [export/import CSV method.](https://help.shopify.com/en/manual/products/import-export)
Next, **create a variant lock in the Locksmith app**:
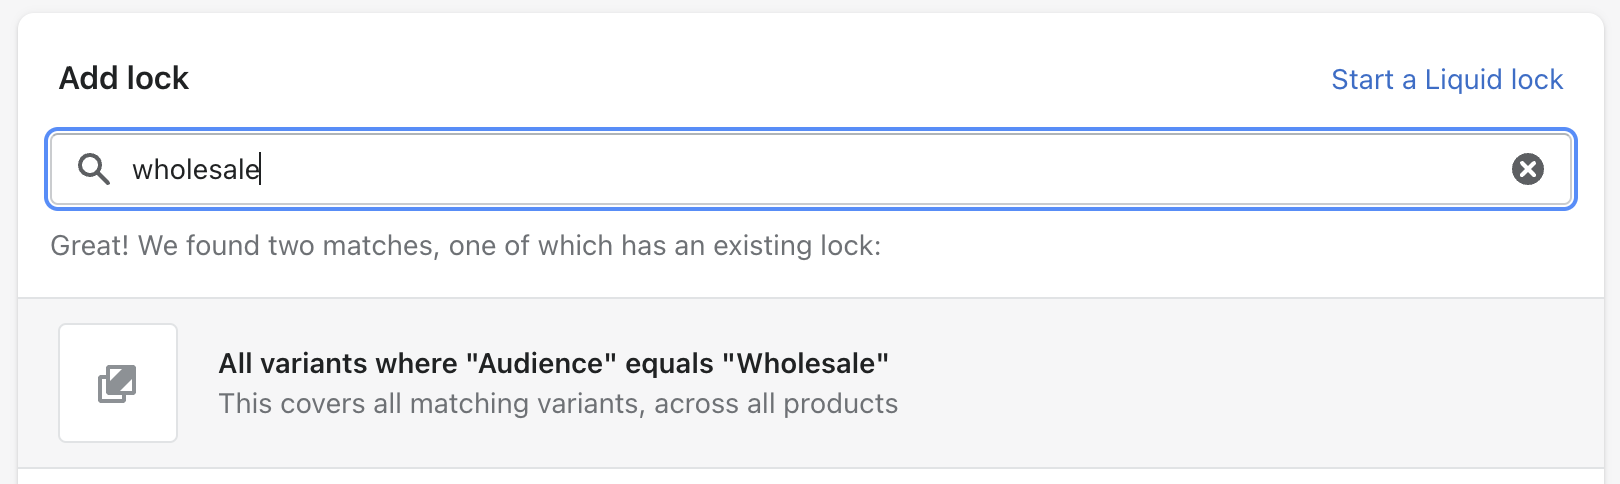
**Create a key**. If you are using customer tags to grant access, that will look like this:

Additionally, **create a corresponding lock for the retail variant**. You should end up with two locks:
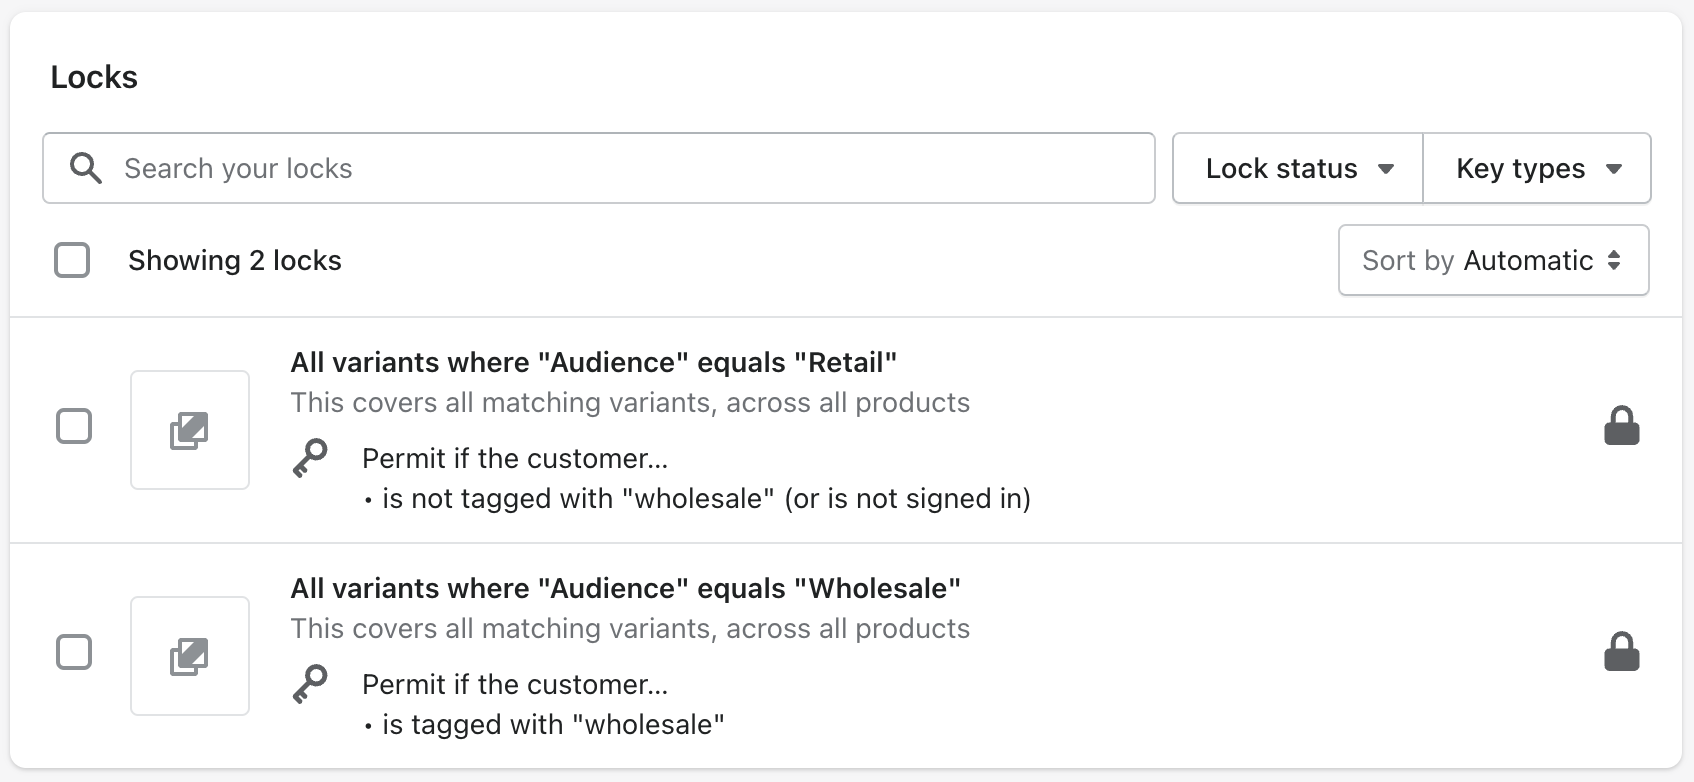
[](https://www.locksmith.guide/tutorials/more/price-tiers#inventory)
Inventory
-----------------------------------------------------------------------------------
Managing inventory across multiple price tiers is a very common concern
**Separate inventory for each tier**
Some merchants love the ability to set inventory separately for wholesale and retail customers. If that is you, then you're already good to go, no matter which option you have chosen, since each product and variant has separate inventory.
**Same inventory across tiers**
If you have more retail purchases than wholesale, one option is to let Shopify track the retail products, and manually update your retail inventory when you receive a wholesale order.
If you absolutely need to sync inventory across your products or variants, you'll need to get another app involved. Namely, [the Mechanic app](https://apps.shopify.com/mechanic)
! This app is made by the same folks here at Locksmith. It offers several automation "tasks" for syncing inventory levels:
* [Sync inventory for shared SKUs](https://usemechanic.com/task/sync-inventory-for-shared-skus)
* [Sync inventory across product variants](https://usemechanic.com/task/sync-inventory-across-product-variants)
**Note**: if you are concerned about incurring a lot of extra cost by adding another app for managing inventory, both Locksmith and Mechanic have a "Pay what feels good" pricing policy. So, we're confidant that we can get you at a price that feels good while using both apps. [See the policy here](https://www.locksmith.guide/policies/pricing)
.
[PreviousMore tutorials...](https://www.locksmith.guide/tutorials/more)
[NextCustomizing messages](https://www.locksmith.guide/tutorials/more/customizing-messages)
Last updated 1 year ago
Was this helpful?
* [Customer management](https://www.locksmith.guide/tutorials/more/price-tiers#customer-management)
* [Deciding between product duplicates or variants](https://www.locksmith.guide/tutorials/more/price-tiers#deciding-between-product-duplicates-or-variants)
* [Using Product duplicates](https://www.locksmith.guide/tutorials/more/price-tiers#using-product-duplicates)
* [Using variant tiers](https://www.locksmith.guide/tutorials/more/price-tiers#using-variant-tiers)
* [Option 1 - Using product duplicates](https://www.locksmith.guide/tutorials/more/price-tiers#using-product-duplicates-1)
* [Basic steps:](https://www.locksmith.guide/tutorials/more/price-tiers#basic-steps)
* [Optional: Locking your retail products](https://www.locksmith.guide/tutorials/more/price-tiers#optional-locking-your-retail-products)
* [Optional: Pointing your wholesale customers to your wholesale collection](https://www.locksmith.guide/tutorials/more/price-tiers#optional-pointing-your-wholesale-customers-to-your-wholesale-collection)
* [Optional: Hiding wholesale product prices](https://www.locksmith.guide/tutorials/more/price-tiers#optional-hiding-wholesale-product-prices)
* [Option 2 - Using variant tiers](https://www.locksmith.guide/tutorials/more/price-tiers#using-variants)
* [Inventory](https://www.locksmith.guide/tutorials/more/price-tiers#inventory)
Was this helpful?
---
# Customizing messages | Locksmith
For the complete documentation index, see [llms.txt](https://www.locksmith.guide/llms.txt)
. This page is also available as [Markdown](https://www.locksmith.guide/tutorials/more/customizing-messages.md)
.
Most of the messages that Locksmith shows to your customers on the front end of your store are completely customizable!
You can edit the text itself as much as you need, plus you can add code, just like you would a template in your theme. That means you can use the following:
* HTML
* CSS (via the
* Javascript - using
* Liquid - using [regular Liquid syntax](https://shopify.dev/api/liquid/basics)
[](https://www.locksmith.guide/tutorials/more/customizing-the-email-list-signup-form#adding-content-after-the-form)
Adding content after the form
------------------------------------------------------------------------------------------------------------------------------------------------------
Use `{{ locksmith_email_form }}` to denote where the form (input and button) itself will go, and then add in content that you want to display before and after it.
This results in the following:

[](https://www.locksmith.guide/tutorials/more/customizing-the-email-list-signup-form#editing-the-continue-and-one-moment-text)
Editing the "Continue" and "One moment" text
--------------------------------------------------------------------------------------------------------------------------------------------------------------------------------
To edit the text for the button, you'll need to follow Shopify's guide to "Edit default theme content":
[Changing the wording in themesShopify Help Center](https://help.shopify.com/en/manual/online-store/themes/customizing-themes/language/change-wording)
Once there, you'll find a Locksmith tab in which you can edit the text as needed:

You may need to press the "..." button to the right, which will give you the option to choose more tabs, if the "Locksmith" tab isn't visible right away.
[](https://www.locksmith.guide/tutorials/more/customizing-the-email-list-signup-form#translating-messages)
Translating messages
------------------------------------------------------------------------------------------------------------------------------------
We have a dedicated guide on adding translated messages here:
[Adding translations to your Locksmith messages](https://www.locksmith.guide/tutorials/more/adding-translations-to-your-locksmith-messages)
[](https://www.locksmith.guide/tutorials/more/customizing-the-email-list-signup-form#including-other-form-types)
Including other form types
------------------------------------------------------------------------------------------------------------------------------------------------
If you have multiple key condition types on the same lock, it might be useful to include other form types within the prompt, so that they display on the same page. We have a guide on doing this here:
[Showing multiple prompts on the same page](https://www.locksmith.guide/tutorials/more/showing-multiple-prompts-on-the-same-page)
Please note that this is NOT compatible with overriding/editing the form itself (as detailed in the next section).
[](https://www.locksmith.guide/tutorials/more/customizing-the-email-list-signup-form#overriding-or-editing-the-form-itself)
Overriding or editing the form itself
----------------------------------------------------------------------------------------------------------------------------------------------------------------------
**Note**: This is advanced and requires knowledge of code. If you choose to override the form, the coding and style is up to you, we are not able to create a new form for you or edit the code for you. With that said, you are still free to contact us with any troubleshooting questions that you have.
Use the following steps in order to override the form. The screenshots are taken from Chrome, but the steps are similar if using other browsers.
1. Once you've created a Mailchimp or Klaviyo key condition, open up your locked page in your storefront.
2. Right click on the email list signup form to inspect the code.

1. This should take you to the "Elements" tab. There, find the
element with the "locksmith-email-container" class:
You can copy the entire element and all child elements like so:

1. Paste this directly into your "Mailing list signup prompt". You should end up with something like this:

The "key\_condition\_id" will vary depending on you _actual_ key condition id
1. Save that, and open your locked page again on your storefront. If everything worked, your email list signup prompt and form should look exactly like it did before. But now you have the ability to edit it as needed. Please note that you must always include a `