# Table of Contents
- [Learn LaTeX - Overleaf, Online LaTeX Editor](#learn-latex-overleaf-online-latex-editor)
- [Overleaf, Online LaTeX Editor](#overleaf-online-latex-editor)
- [Log in to Overleaf - Overleaf, Online LaTeX Editor](#log-in-to-overleaf-overleaf-online-latex-editor)
- [Register - Overleaf, Online LaTeX Editor](#register-overleaf-online-latex-editor)
- [Benefits of using LaTeX editing software | Overleaf - Overleaf, Online LaTeX Editor](#benefits-of-using-latex-editing-software-overleaf-overleaf-online-latex-editor)
- [LaTeX editor for enterprises - Overleaf, Online LaTeX Editor](#latex-editor-for-enterprises-overleaf-online-latex-editor)
- [Overleaf for Publishers & Journals - Overleaf, Online LaTeX Editor](#overleaf-for-publishers-journals-overleaf-online-latex-editor)
- [LaTeX editor for universities & institutions | Overleaf - Overleaf, Online LaTeX Editor](#latex-editor-for-universities-institutions-overleaf-overleaf-online-latex-editor)
- [Overleaf for government - Overleaf, Online LaTeX Editor](#overleaf-for-government-overleaf-online-latex-editor)
- [Customer Stories - Overleaf, Online LaTeX Editor](#customer-stories-overleaf-online-latex-editor)
- [LaTeX editor features & benefits - Overleaf, Online LaTeX Editor](#latex-editor-features-benefits-overleaf-online-latex-editor)
- [Overleaf and LaTeX Resources - Overleaf, Online LaTeX Editor](#overleaf-and-latex-resources-overleaf-online-latex-editor)
- [AI features - Overleaf, Online LaTeX Editor](#ai-features-overleaf-online-latex-editor)
- [Plans and Pricing - Overleaf, Online LaTeX Editor](#plans-and-pricing-overleaf-online-latex-editor)
- [Blog - Overleaf, Online LaTeX Editor](#blog-overleaf-online-latex-editor)
- [Contents - Overleaf, Online LaTeX Editor](#contents-overleaf-online-latex-editor)
- [Templates - Journals, CVs, Presentations, Reports and More - Overleaf, Online LaTeX Editor](#templates-journals-cvs-presentations-reports-and-more-overleaf-online-latex-editor)
- [Positioning images and tables - Overleaf, Online LaTeX Editor](#positioning-images-and-tables-overleaf-online-latex-editor)
- [Natbib bibliography styles - Overleaf, Online LaTeX Editor](#natbib-bibliography-styles-overleaf-online-latex-editor)
- [Mathematical fonts - Overleaf, Online LaTeX Editor](#mathematical-fonts-overleaf-online-latex-editor)
- [Text alignment - Overleaf, Online LaTeX Editor](#text-alignment-overleaf-online-latex-editor)
- [Integrals, sums and limits - Overleaf, Online LaTeX Editor](#integrals-sums-and-limits-overleaf-online-latex-editor)
- [List of Greek letters and math symbols - Overleaf, Online LaTeX Editor](#list-of-greek-letters-and-math-symbols-overleaf-online-latex-editor)
- [Operators - Overleaf, Online LaTeX Editor](#operators-overleaf-online-latex-editor)
- [Bold, italics and underlining - Overleaf, Online LaTeX Editor](#bold-italics-and-underlining-overleaf-online-latex-editor)
- [Font typefaces - Overleaf, Online LaTeX Editor](#font-typefaces-overleaf-online-latex-editor)
- [Cross referencing sections, equations and floats - Overleaf, Online LaTeX Editor](#cross-referencing-sections-equations-and-floats-overleaf-online-latex-editor)
- [Management in a large project - Overleaf, Online LaTeX Editor](#management-in-a-large-project-overleaf-online-latex-editor)
- [Display style in math mode - Overleaf, Online LaTeX Editor](#display-style-in-math-mode-overleaf-online-latex-editor)
- [Brackets and Parentheses - Overleaf, Online LaTeX Editor](#brackets-and-parentheses-overleaf-online-latex-editor)
- [Lists of tables and figures - Overleaf, Online LaTeX Editor](#lists-of-tables-and-figures-overleaf-online-latex-editor)
- [Biblatex bibliography styles - Overleaf, Online LaTeX Editor](#biblatex-bibliography-styles-overleaf-online-latex-editor)
- [Page size and margins - Overleaf, Online LaTeX Editor](#page-size-and-margins-overleaf-online-latex-editor)
- [Line breaks and blank spaces - Overleaf, Online LaTeX Editor](#line-breaks-and-blank-spaces-overleaf-online-latex-editor)
- [TikZ package - Overleaf, Online LaTeX Editor](#tikz-package-overleaf-online-latex-editor)
- [Margin notes - Overleaf, Online LaTeX Editor](#margin-notes-overleaf-online-latex-editor)
- [Aligning equations with amsmath - Overleaf, Online LaTeX Editor](#aligning-equations-with-amsmath-overleaf-online-latex-editor)
- [Font sizes, families, and styles - Overleaf, Online LaTeX Editor](#font-sizes-families-and-styles-overleaf-online-latex-editor)
- [Indices - Overleaf, Online LaTeX Editor](#indices-overleaf-online-latex-editor)
- [Nomenclatures - Overleaf, Online LaTeX Editor](#nomenclatures-overleaf-online-latex-editor)
- [Single sided and double sided documents - Overleaf, Online LaTeX Editor](#single-sided-and-double-sided-documents-overleaf-online-latex-editor)
- [Matrices - Overleaf, Online LaTeX Editor](#matrices-overleaf-online-latex-editor)
- [Table of contents - Overleaf, Online LaTeX Editor](#table-of-contents-overleaf-online-latex-editor)
- [Natbib citation styles - Overleaf, Online LaTeX Editor](#natbib-citation-styles-overleaf-online-latex-editor)
- [Fractions and Binomials - Overleaf, Online LaTeX Editor](#fractions-and-binomials-overleaf-online-latex-editor)
- [Mathematical expressions - Overleaf, Online LaTeX Editor](#mathematical-expressions-overleaf-online-latex-editor)
- [Lists - Overleaf, Online LaTeX Editor](#lists-overleaf-online-latex-editor)
- [Page numbering - Overleaf, Online LaTeX Editor](#page-numbering-overleaf-online-latex-editor)
- [Bibtex bibliography styles - Overleaf, Online LaTeX Editor](#bibtex-bibliography-styles-overleaf-online-latex-editor)
- [Glossaries - Overleaf, Online LaTeX Editor](#glossaries-overleaf-online-latex-editor)
- [Hyperlinks - Overleaf, Online LaTeX Editor](#hyperlinks-overleaf-online-latex-editor)
- [Lengths in LaTeX - Overleaf, Online LaTeX Editor](#lengths-in-latex-overleaf-online-latex-editor)
- [Subscripts and superscripts - Overleaf, Online LaTeX Editor](#subscripts-and-superscripts-overleaf-online-latex-editor)
- [Multiple columns - Overleaf, Online LaTeX Editor](#multiple-columns-overleaf-online-latex-editor)
- [Footnotes - Overleaf, Online LaTeX Editor](#footnotes-overleaf-online-latex-editor)
- [Multi-file LaTeX projects - Overleaf, Online LaTeX Editor](#multi-file-latex-projects-overleaf-online-latex-editor)
- [Picture environment - Overleaf, Online LaTeX Editor](#picture-environment-overleaf-online-latex-editor)
- [Spacing in math mode - Overleaf, Online LaTeX Editor](#spacing-in-math-mode-overleaf-online-latex-editor)
- [Sections and chapters - Overleaf, Online LaTeX Editor](#sections-and-chapters-overleaf-online-latex-editor)
- [Paragraphs and new lines - Overleaf, Online LaTeX Editor](#paragraphs-and-new-lines-overleaf-online-latex-editor)
- [Code listing - Overleaf, Online LaTeX Editor](#code-listing-overleaf-online-latex-editor)
- [Biblatex citation styles - Overleaf, Online LaTeX Editor](#biblatex-citation-styles-overleaf-online-latex-editor)
- [Using colors in LaTeX - Overleaf, Online LaTeX Editor](#using-colors-in-latex-overleaf-online-latex-editor)
- [Counters - Overleaf, Online LaTeX Editor](#counters-overleaf-online-latex-editor)
- [Bibliography management with biblatex - Overleaf, Online LaTeX Editor](#bibliography-management-with-biblatex-overleaf-online-latex-editor)
- [Tables - Overleaf, Online LaTeX Editor](#tables-overleaf-online-latex-editor)
- [Headers and footers - Overleaf, Online LaTeX Editor](#headers-and-footers-overleaf-online-latex-editor)
- [Code Highlighting with minted - Overleaf, Online LaTeX Editor](#code-highlighting-with-minted-overleaf-online-latex-editor)
- [Bibliography management with bibtex - Overleaf, Online LaTeX Editor](#bibliography-management-with-bibtex-overleaf-online-latex-editor)
- [Learn LaTeX in 30 minutes - Overleaf, Online LaTeX Editor](#learn-latex-in-30-minutes-overleaf-online-latex-editor)
- [Errors - Overleaf, Online LaTeX Editor](#errors-overleaf-online-latex-editor)
- [Articles - Overleaf, Online LaTeX Editor](#articles-overleaf-online-latex-editor)
- [About us - Overleaf, Online LaTeX Editor](#about-us-overleaf-online-latex-editor)
- [Overleaf Webinars - Overleaf, Online LaTeX Editor](#overleaf-webinars-overleaf-online-latex-editor)
- [Contact Us - Overleaf, Online LaTeX Editor](#contact-us-overleaf-online-latex-editor)
- [Privacy and Terms - Overleaf, Online LaTeX Editor](#privacy-and-terms-overleaf-online-latex-editor)
- [Customer Stories: Vialab | Overleaf - Overleaf, Online LaTeX Editor](#customer-stories-vialab-overleaf-overleaf-online-latex-editor)
- [Contact Sales - Overleaf, Online LaTeX Editor](#contact-sales-overleaf-online-latex-editor)
- [Customer Stories: University of Manchester | Overleaf - Overleaf, Online LaTeX Editor](#customer-stories-university-of-manchester-overleaf-overleaf-online-latex-editor)
- [Reset Password - Overleaf, Online LaTeX Editor](#reset-password-overleaf-online-latex-editor)
- [Customer Stories: CERN | Overleaf - Overleaf, Online LaTeX Editor](#customer-stories-cern-overleaf-overleaf-online-latex-editor)
- [Example Project - Overleaf, Online LaTeX Editor](#example-project-overleaf-online-latex-editor)
- [Contact Sales - Universities - Overleaf, Online LaTeX Editor](#contact-sales-universities-overleaf-online-latex-editor)
- [Contact Sales - Enterprise - Overleaf, Online LaTeX Editor](#contact-sales-enterprise-overleaf-online-latex-editor)
- [Customer Stories: Purdue University | Overleaf - Overleaf, Online LaTeX Editor](#customer-stories-purdue-university-overleaf-overleaf-online-latex-editor)
- [Templates - Journals, CVs, Presentations, Reports and More - Overleaf, Online LaTeX Editor](#templates-journals-cvs-presentations-reports-and-more-overleaf-online-latex-editor)
- [Templates - Journals, CVs, Presentations, Reports and More - Overleaf, Online LaTeX Editor](#templates-journals-cvs-presentations-reports-and-more-overleaf-online-latex-editor)
- [Templates - Journals, CVs, Presentations, Reports and More - Overleaf, Online LaTeX Editor](#templates-journals-cvs-presentations-reports-and-more-overleaf-online-latex-editor)
- [Unknown](#unknown)
- [Customer Stories: Symplectic | Overleaf - Overleaf, Online LaTeX Editor](#customer-stories-symplectic-overleaf-overleaf-online-latex-editor)
- [Institutions using Overleaf - Overleaf, Online LaTeX Editor](#institutions-using-overleaf-overleaf-online-latex-editor)
- [Customer Stories: CUAir | Overleaf - Overleaf, Online LaTeX Editor](#customer-stories-cuair-overleaf-overleaf-online-latex-editor)
- [Log in to Overleaf - Overleaf, Online LaTeX Editor](#log-in-to-overleaf-overleaf-online-latex-editor)
- [Accessible PDFs with LaTeX - Overleaf, Online LaTeX Editor](#accessible-pdfs-with-latex-overleaf-online-latex-editor)
- [Contact Sales - Overleaf, Online LaTeX Editor](#contact-sales-overleaf-online-latex-editor)
- [Customer Stories: F1000 Research | Overleaf - Overleaf, Online LaTeX Editor](#customer-stories-f1000-research-overleaf-overleaf-online-latex-editor)
- [Templates - Journals, CVs, Presentations, Reports and More - Overleaf, Online LaTeX Editor](#templates-journals-cvs-presentations-reports-and-more-overleaf-online-latex-editor)
- [TeX Live 2025 is now available - Overleaf, Online LaTeX Editor](#tex-live-2025-is-now-available-overleaf-online-latex-editor)
- [Overleaf Keyboard Shortcuts - Overleaf, Online LaTeX Editor](#overleaf-keyboard-shortcuts-overleaf-online-latex-editor)
- [Templates - Journals, CVs, Presentations, Reports and More - Overleaf, Online LaTeX Editor](#templates-journals-cvs-presentations-reports-and-more-overleaf-online-latex-editor)
- [A quick guide to LaTeX - Overleaf, Online LaTeX Editor](#a-quick-guide-to-latex-overleaf-online-latex-editor)
- [Overleaf 6.1.0 is available - Overleaf, Online LaTeX Editor](#overleaf-6-1-0-is-available-overleaf-online-latex-editor)
- [Blog - Overleaf, Online LaTeX Editor](#blog-overleaf-online-latex-editor)
- [Overleaf, Online LaTeX Editor](#overleaf-online-latex-editor)
- [Gallery - Templates, Examples and Articles written in LaTeX - Overleaf, Online LaTeX Editor](#gallery-templates-examples-and-articles-written-in-latex-overleaf-online-latex-editor)
- [Examples - Equations, Formatting, TikZ, Packages and More - Overleaf, Online LaTeX Editor](#examples-equations-formatting-tikz-packages-and-more-overleaf-online-latex-editor)
- [Blog - Overleaf, Online LaTeX Editor](#blog-overleaf-online-latex-editor)
- [Blog - Overleaf, Online LaTeX Editor](#blog-overleaf-online-latex-editor)
- [Introducing Overleaf’s new look - Overleaf, Online LaTeX Editor](#introducing-overleaf-s-new-look-overleaf-online-latex-editor)
- [Support an Overleaf Institutional Subscription at Your University - Overleaf, Online LaTeX Editor](#support-an-overleaf-institutional-subscription-at-your-university-overleaf-online-latex-editor)
- [Blog - Overleaf, Online LaTeX Editor](#blog-overleaf-online-latex-editor)
- [Templates - Journals, CVs, Presentations, Reports and More - Overleaf, Online LaTeX Editor](#templates-journals-cvs-presentations-reports-and-more-overleaf-online-latex-editor)
- [Templates - Journals, CVs, Presentations, Reports and More - Overleaf, Online LaTeX Editor](#templates-journals-cvs-presentations-reports-and-more-overleaf-online-latex-editor)
- [Articles - Papers, Presentations, Reports and more - Overleaf, Online LaTeX Editor](#articles-papers-presentations-reports-and-more-overleaf-online-latex-editor)
- [Overleaf 6.0.1 is available - Overleaf, Online LaTeX Editor](#overleaf-6-0-1-is-available-overleaf-online-latex-editor)
- [Templates - Journals, CVs, Presentations, Reports and More - Overleaf, Online LaTeX Editor](#templates-journals-cvs-presentations-reports-and-more-overleaf-online-latex-editor)
- [Templates - Journals, CVs, Presentations, Reports and More - Overleaf, Online LaTeX Editor](#templates-journals-cvs-presentations-reports-and-more-overleaf-online-latex-editor)
- [Blog - Overleaf, Online LaTeX Editor](#blog-overleaf-online-latex-editor)
- [Templates - Journals, CVs, Presentations, Reports and More - Overleaf, Online LaTeX Editor](#templates-journals-cvs-presentations-reports-and-more-overleaf-online-latex-editor)
- [Blog - Overleaf, Online LaTeX Editor](#blog-overleaf-online-latex-editor)
- [Blog - Overleaf, Online LaTeX Editor](#blog-overleaf-online-latex-editor)
- [Blog - Overleaf, Online LaTeX Editor](#blog-overleaf-online-latex-editor)
- [Templates - Journals, CVs, Presentations, Reports and More - Overleaf, Online LaTeX Editor](#templates-journals-cvs-presentations-reports-and-more-overleaf-online-latex-editor)
- [Blog - Overleaf, Online LaTeX Editor](#blog-overleaf-online-latex-editor)
- [Templates - Journals, CVs, Presentations, Reports and More - Overleaf, Online LaTeX Editor](#templates-journals-cvs-presentations-reports-and-more-overleaf-online-latex-editor)
- [Qualification Paper in Ukrainian (Ferenc Rakoczi II Transcarpathian Hungarian University) - Overleaf, Online LaTeX Editor](#qualification-paper-in-ukrainian-ferenc-rakoczi-ii-transcarpathian-hungarian-university-overleaf-online-latex-editor)
- [Blog - Overleaf, Online LaTeX Editor](#blog-overleaf-online-latex-editor)
- [Qualification Paper in Hungarian (Ferenc Rakoczi II Transcarpathian Hungarian University) - Overleaf, Online LaTeX Editor](#qualification-paper-in-hungarian-ferenc-rakoczi-ii-transcarpathian-hungarian-university-overleaf-online-latex-editor)
- [Constructions - Overleaf, Online LaTeX Editor](#constructions-overleaf-online-latex-editor)
- [AI Agent Journal 2026 Submission Template - Overleaf, Online LaTeX Editor](#ai-agent-journal-2026-submission-template-overleaf-online-latex-editor)
- [Rho Class - Research Article Template - Overleaf, Online LaTeX Editor](#rho-class-research-article-template-overleaf-online-latex-editor)
- [Journal of Artificial Intelligence for Sustainable Development - Overleaf, Online LaTeX Editor](#journal-of-artificial-intelligence-for-sustainable-development-overleaf-online-latex-editor)
- [Journal of Artificial Intelligence for Sustainable Development (JAISD) -- non-english version - Overleaf, Online LaTeX Editor](#journal-of-artificial-intelligence-for-sustainable-development-jaisd-non-english-version-overleaf-online-latex-editor)
- [Revista Mexicana de Astronomía y Astrofísica and Serie de Conferencias (RMxAA/RMxAC) LaTeX Templates and Files, Version 4.6 - Overleaf, Online LaTeX Editor](#revista-mexicana-de-astronom-a-y-astrof-sica-and-serie-de-conferencias-rmxaa-rmxac-latex-templates-and-files-version-4-6-overleaf-online-latex-editor)
- [ICCK LaTeX Template - Overleaf, Online LaTeX Editor](#icck-latex-template-overleaf-online-latex-editor)
- [AAPOR Appendix A (Required Disclosure Elements) - Overleaf, Online LaTeX Editor](#aapor-appendix-a-required-disclosure-elements-overleaf-online-latex-editor)
- [Examples - Equations, Formatting, TikZ, Packages and More - Overleaf, Online LaTeX Editor](#examples-equations-formatting-tikz-packages-and-more-overleaf-online-latex-editor)
- [Brain Organoid and Systems Neuroscience Journal template - Overleaf, Online LaTeX Editor](#brain-organoid-and-systems-neuroscience-journal-template-overleaf-online-latex-editor)
- [Gallery - Templates, Examples and Articles written in LaTeX - Overleaf, Online LaTeX Editor](#gallery-templates-examples-and-articles-written-in-latex-overleaf-online-latex-editor)
- [Articles - Papers, Presentations, Reports and more - Overleaf, Online LaTeX Editor](#articles-papers-presentations-reports-and-more-overleaf-online-latex-editor)
- [Templates - Journals, CVs, Presentations, Reports and More - Overleaf, Online LaTeX Editor](#templates-journals-cvs-presentations-reports-and-more-overleaf-online-latex-editor)
- [Templates - Journals, CVs, Presentations, Reports and More - Overleaf, Online LaTeX Editor](#templates-journals-cvs-presentations-reports-and-more-overleaf-online-latex-editor)
- [Templates - Journals, CVs, Presentations, Reports and More - Overleaf, Online LaTeX Editor](#templates-journals-cvs-presentations-reports-and-more-overleaf-online-latex-editor)
- [Templates - Journals, CVs, Presentations, Reports and More - Overleaf, Online LaTeX Editor](#templates-journals-cvs-presentations-reports-and-more-overleaf-online-latex-editor)
- [Gallery - Templates, Examples and Articles written in LaTeX - Overleaf, Online LaTeX Editor](#gallery-templates-examples-and-articles-written-in-latex-overleaf-online-latex-editor)
- [Gallery - Templates, Examples and Articles written in LaTeX - Overleaf, Online LaTeX Editor](#gallery-templates-examples-and-articles-written-in-latex-overleaf-online-latex-editor)
- [Examples - Equations, Formatting, TikZ, Packages and More - Overleaf, Online LaTeX Editor](#examples-equations-formatting-tikz-packages-and-more-overleaf-online-latex-editor)
- [Articles - Papers, Presentations, Reports and more - Overleaf, Online LaTeX Editor](#articles-papers-presentations-reports-and-more-overleaf-online-latex-editor)
- [Templates - Journals, CVs, Presentations, Reports and More - Overleaf, Online LaTeX Editor](#templates-journals-cvs-presentations-reports-and-more-overleaf-online-latex-editor)
- [AGH University of Science and Technology - Overleaf, Online LaTeX Editor](#agh-university-of-science-and-technology-overleaf-online-latex-editor)
- [Aalborg University - Overleaf, Online LaTeX Editor](#aalborg-university-overleaf-online-latex-editor)
- [Texas A&M University - Overleaf, Online LaTeX Editor](#texas-a-m-university-overleaf-online-latex-editor)
- [Blog - Overleaf, Online LaTeX Editor](#blog-overleaf-online-latex-editor)
- [Blog - Overleaf, Online LaTeX Editor](#blog-overleaf-online-latex-editor)
- [Blog - Overleaf, Online LaTeX Editor](#blog-overleaf-online-latex-editor)
- [Thesis Template - Master's Degree in Engineering UTB - Overleaf, Online LaTeX Editor](#thesis-template-master-s-degree-in-engineering-utb-overleaf-online-latex-editor)
- [[TUST][MASTER]2024天津科技大学人工智能学院研究生生毕业论文0.3版 - Overleaf, Online LaTeX Editor](#-tust-master-2024-0-3-overleaf-online-latex-editor)
- [Plantilla de Trabajo de Grado - Maestría en Ingeniería UTB - Overleaf, Online LaTeX Editor](#plantilla-de-trabajo-de-grado-maestr-a-en-ingenier-a-utb-overleaf-online-latex-editor)
- [Unknown](#unknown)
- [Unknown](#unknown)
- [University of Waterloo Thesis Template (v03.2026) - Overleaf, Online LaTeX Editor](#university-of-waterloo-thesis-template-v03-2026-overleaf-online-latex-editor)
- [Unknown](#unknown)
- [Unknown](#unknown)
- [Plantilla TFG - EPSC UCO - Overleaf, Online LaTeX Editor](#plantilla-tfg-epsc-uco-overleaf-online-latex-editor)
- [2021 Math Thesis Template - Overleaf, Online LaTeX Editor](#2021-math-thesis-template-overleaf-online-latex-editor)
- [Templates - Journals, CVs, Presentations, Reports and More - Overleaf, Online LaTeX Editor](#templates-journals-cvs-presentations-reports-and-more-overleaf-online-latex-editor)
- [Plantilla Tésis - Universidad Tecnológica de Tlaxcala - Overleaf, Online LaTeX Editor](#plantilla-t-sis-universidad-tecnol-gica-de-tlaxcala-overleaf-online-latex-editor)
- [Templates - Journals, CVs, Presentations, Reports and More - Overleaf, Online LaTeX Editor](#templates-journals-cvs-presentations-reports-and-more-overleaf-online-latex-editor)
- [TeX Live 2022 Now Available! - Overleaf, Online LaTeX Editor](#tex-live-2022-now-available-overleaf-online-latex-editor)
- [Templates - Journals, CVs, Presentations, Reports and More - Overleaf, Online LaTeX Editor](#templates-journals-cvs-presentations-reports-and-more-overleaf-online-latex-editor)
- [Unknown](#unknown)
- [Gallery - Templates, Examples and Articles written in LaTeX - Overleaf, Online LaTeX Editor](#gallery-templates-examples-and-articles-written-in-latex-overleaf-online-latex-editor)
- [Templates - Journals, CVs, Presentations, Reports and More - Overleaf, Online LaTeX Editor](#templates-journals-cvs-presentations-reports-and-more-overleaf-online-latex-editor)
- [Unknown](#unknown)
- [Blog - Overleaf, Online LaTeX Editor](#blog-overleaf-online-latex-editor)
- [Overleaf Server Pro 5.3.1 is available - Overleaf, Online LaTeX Editor](#overleaf-server-pro-5-3-1-is-available-overleaf-online-latex-editor)
- [Templates - Journals, CVs, Presentations, Reports and More - Overleaf, Online LaTeX Editor](#templates-journals-cvs-presentations-reports-and-more-overleaf-online-latex-editor)
- [Template for Editor of a Springer Nature Contributed Volume - Overleaf, Online LaTeX Editor](#template-for-editor-of-a-springer-nature-contributed-volume-overleaf-online-latex-editor)
- [Overleaf Server Pro 5.4.0 is available - Overleaf, Online LaTeX Editor](#overleaf-server-pro-5-4-0-is-available-overleaf-online-latex-editor)
- [Overleaf Server Pro 5.5.0 is available - Overleaf, Online LaTeX Editor](#overleaf-server-pro-5-5-0-is-available-overleaf-online-latex-editor)
- [Blog - Overleaf, Online LaTeX Editor](#blog-overleaf-online-latex-editor)
- [Tex Live 2021 Now Available! - Overleaf, Online LaTeX Editor](#tex-live-2021-now-available-overleaf-online-latex-editor)
- [Examples - Equations, Formatting, TikZ, Packages and More - Overleaf, Online LaTeX Editor](#examples-equations-formatting-tikz-packages-and-more-overleaf-online-latex-editor)
- [Templates - Journals, CVs, Presentations, Reports and More - Overleaf, Online LaTeX Editor](#templates-journals-cvs-presentations-reports-and-more-overleaf-online-latex-editor)
- [Examples - Equations, Formatting, TikZ, Packages and More - Overleaf, Online LaTeX Editor](#examples-equations-formatting-tikz-packages-and-more-overleaf-online-latex-editor)
- [TeX Live 2024 is now available - Overleaf, Online LaTeX Editor](#tex-live-2024-is-now-available-overleaf-online-latex-editor)
- [TeX Live 2023 is now available - Overleaf, Online LaTeX Editor](#tex-live-2023-is-now-available-overleaf-online-latex-editor)
- [Templates - Journals, CVs, Presentations, Reports and More - Overleaf, Online LaTeX Editor](#templates-journals-cvs-presentations-reports-and-more-overleaf-online-latex-editor)
- [Examples - Equations, Formatting, TikZ, Packages and More - Overleaf, Online LaTeX Editor](#examples-equations-formatting-tikz-packages-and-more-overleaf-online-latex-editor)
- [Gallery - Templates, Examples and Articles written in LaTeX - Overleaf, Online LaTeX Editor](#gallery-templates-examples-and-articles-written-in-latex-overleaf-online-latex-editor)
- [Unknown](#unknown)
- [Overleaf Server Pro 5.0.3 is available - Overleaf, Online LaTeX Editor](#overleaf-server-pro-5-0-3-is-available-overleaf-online-latex-editor)
- [Examples - Equations, Formatting, TikZ, Packages and More - Overleaf, Online LaTeX Editor](#examples-equations-formatting-tikz-packages-and-more-overleaf-online-latex-editor)
- [Articles - Papers, Presentations, Reports and more - Overleaf, Online LaTeX Editor](#articles-papers-presentations-reports-and-more-overleaf-online-latex-editor)
- [Gallery - Templates, Examples and Articles written in LaTeX - Overleaf, Online LaTeX Editor](#gallery-templates-examples-and-articles-written-in-latex-overleaf-online-latex-editor)
- [Gallery - Templates, Examples and Articles written in LaTeX - Overleaf, Online LaTeX Editor](#gallery-templates-examples-and-articles-written-in-latex-overleaf-online-latex-editor)
- [Gallery - Templates, Examples and Articles written in LaTeX - Overleaf, Online LaTeX Editor](#gallery-templates-examples-and-articles-written-in-latex-overleaf-online-latex-editor)
- [Articles - Papers, Presentations, Reports and more - Overleaf, Online LaTeX Editor](#articles-papers-presentations-reports-and-more-overleaf-online-latex-editor)
- [Examples - Equations, Formatting, TikZ, Packages and More - Overleaf, Online LaTeX Editor](#examples-equations-formatting-tikz-packages-and-more-overleaf-online-latex-editor)
---
# Learn LaTeX - Overleaf, Online LaTeX Editor
[Skip to content](https://www.overleaf.com/learn#main-content)
Search help library…searchclear
No Search Results
Learn LaTeX
===========
Struggling to create a LaTeX table? Need help formatting figures? You're in the right place. From LaTeX basics to advanced techniques, Overleaf has you covered.
Introduction to LaTeX
---------------------
Start with our _[Learn LaTeX in 30 minutes](https://www.overleaf.com/learn/latex/Learn_LaTeX_in_30_minutes "Learn LaTeX in 30 minutes")
_ guide.
See [Overleaf's documentation](https://docs.overleaf.com/)
for additional [tutorial suggestions](https://docs.overleaf.com/getting-started/latex-tutorials)
.
Overleaf guides
---------------
* [Overleaf user documentation](https://docs.overleaf.com/)
* [Overleaf group administration](https://docs.overleaf.com/groups)
* [Overleaf Commons administration](https://docs.overleaf.com/commons)
* [Overleaf on-premises](https://docs.overleaf.com/on-premises)
LaTeX essentials
----------------
See our [comprehensive list of LaTeX topics](https://www.overleaf.com/learn/latex/Contents "Contents")
. Some of the most popular pages in our collection include:
* [Tables](https://www.overleaf.com/learn/latex/Tables "Tables")
* [Positioning Images and Tables](https://www.overleaf.com/learn/latex/Positioning_images_and_tables "Positioning images and tables")
* [Text alignment](https://www.overleaf.com/learn/latex/Text_alignment "Text alignment")
* [List of Greek letters and math symbols](https://www.overleaf.com/learn/latex/List_of_Greek_letters_and_math_symbols "List of Greek letters and math symbols")
* [Lists](https://www.overleaf.com/learn/latex/Lists "Lists")
* [Errors](https://www.overleaf.com/learn/latex/Errors "Errors")
* [Using colours in LaTeX](https://www.overleaf.com/learn/latex/Using_colours_in_LaTeX "Using colours in LaTeX")
* [Aligning equations](https://www.overleaf.com/learn/latex/Aligning_equations_with_amsmath "Aligning equations with amsmath")
* [Line breaks and blank spaces](https://www.overleaf.com/learn/latex/Line_breaks_and_blank_spaces "Line breaks and blank spaces")
[More topics](https://www.overleaf.com/learn/latex/Contents "Contents")
Advanced TeX/LaTeX
------------------
Overleaf has published a wide range of [in-depth technical articles](https://www.overleaf.com/learn/latex/Articles "Articles")
for readers interested in the low-level behaviour of TeX engines.
We only use cookies for essential purposes and to improve your experience on our site. You can find out more in our [cookie policy](https://www.overleaf.com/legal#Cookies)
.
Essential cookies onlyAccept all cookies
---
# Overleaf, Online LaTeX Editor
[Skip to content](https://www.overleaf.com/#main-content)
\\begin{ }
Write like a rocket scientist with Overleaf—the collaborative, online LaTeX editor that _anyone_ can use.
=========================================================================================================
[Sign up with Google](https://www.overleaf.com/auth/google?intent=sign_up)
[Sign up with ORCID](https://www.overleaf.com/auth/orcid?intent=sign_up)
OR
Enter your emailCreate password
visibilityvisibility\_off
Sign up for freeRegistering…
By registering, you agree to our [terms of service](https://www.overleaf.com/legal#Terms)
and [privacy notice](https://www.overleaf.com/legal#Privacy)
.
Over 25 million users at research institutions and businesses worldwide love Overleaf

Explore Overleaf for[business](https://www.overleaf.com/for/enterprises)
and [universities](https://www.overleaf.com/for/universities)
{features}The home of scientific and technical writing
------------------------------------------------------
Create complex, beautifully formatted documents with ease.
Collaborate with anyone, work from anywhere.


### Get started fast
No downloads, no setup, and no need to know LaTeX before you start.
* Visual Editor and Code Editor
* Thousands of free templates
* Detailed guidance and LaTeX learning
* Stellar support from real-life TeXperts
[Explore features](https://www.overleaf.com/about/features-overview)

### Write your best work, together
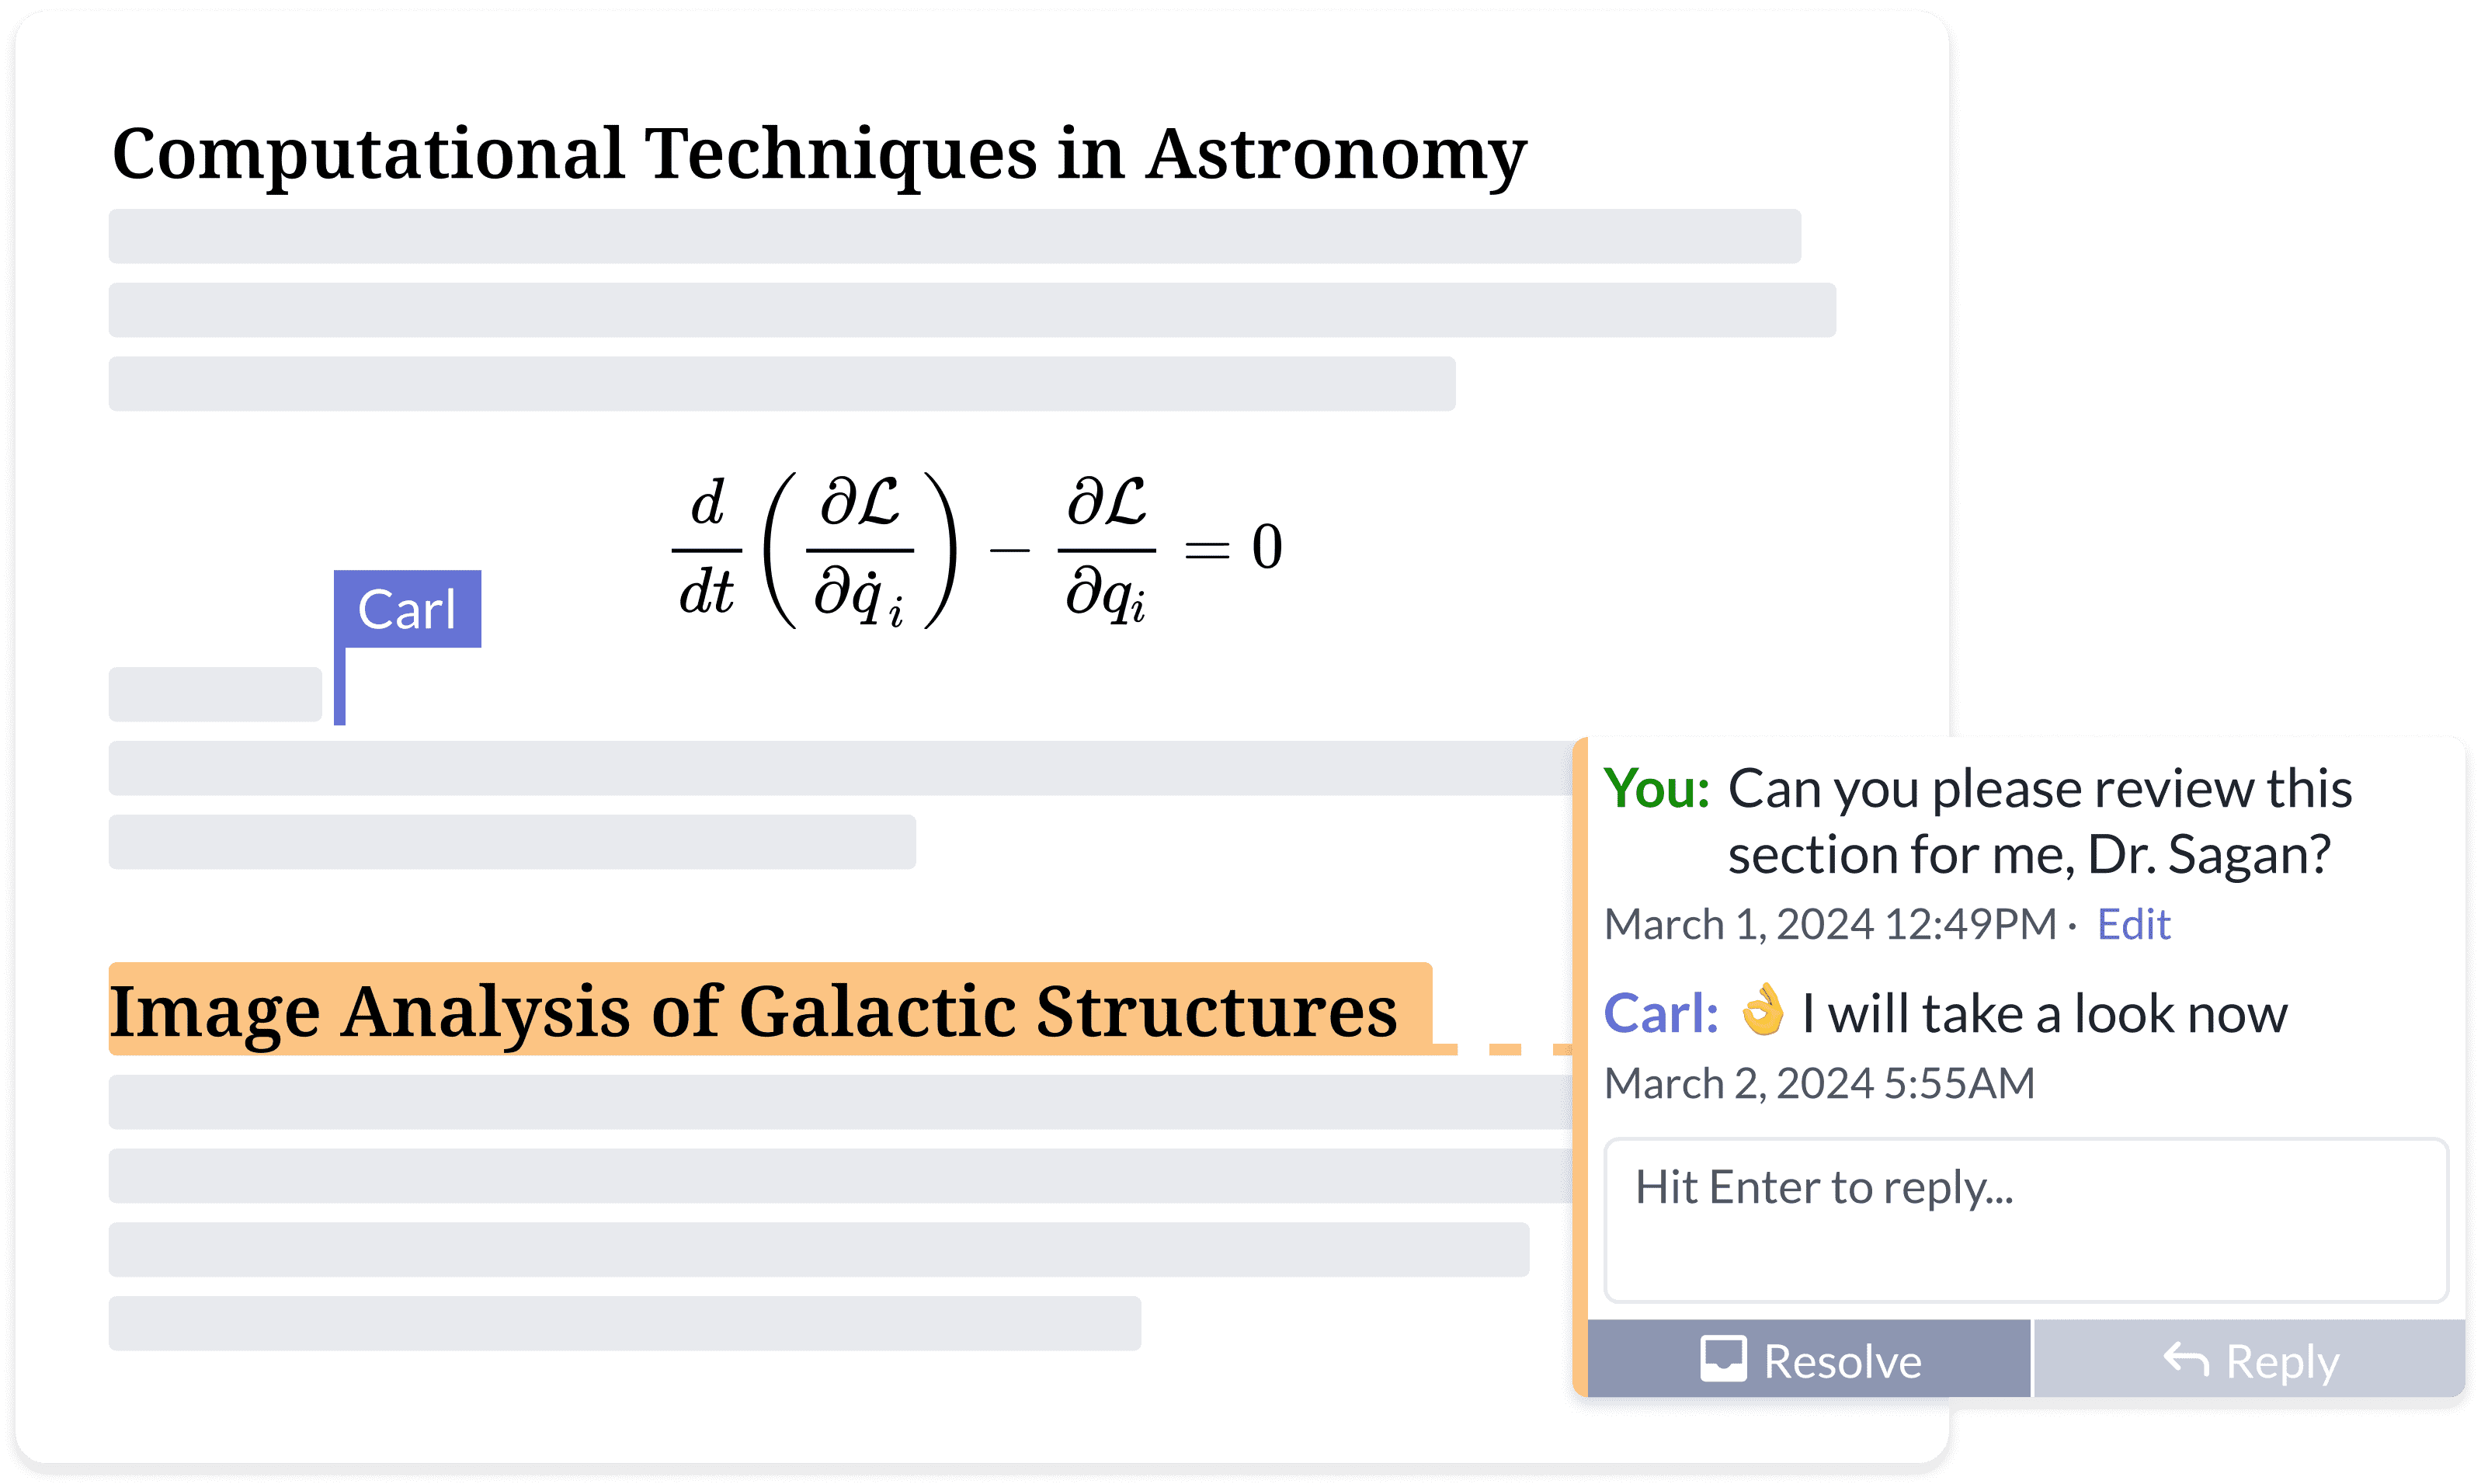
Say goodbye to endless rounds of email feedback.
* Access from anywhere, on any device
* Document sharing
* Simultaneous editing and commenting
* Real-time track changes

Premium
* Project history and version control

Premium
[Explore features](https://www.overleaf.com/about/features-overview)

### Use the right tool for _your_ job
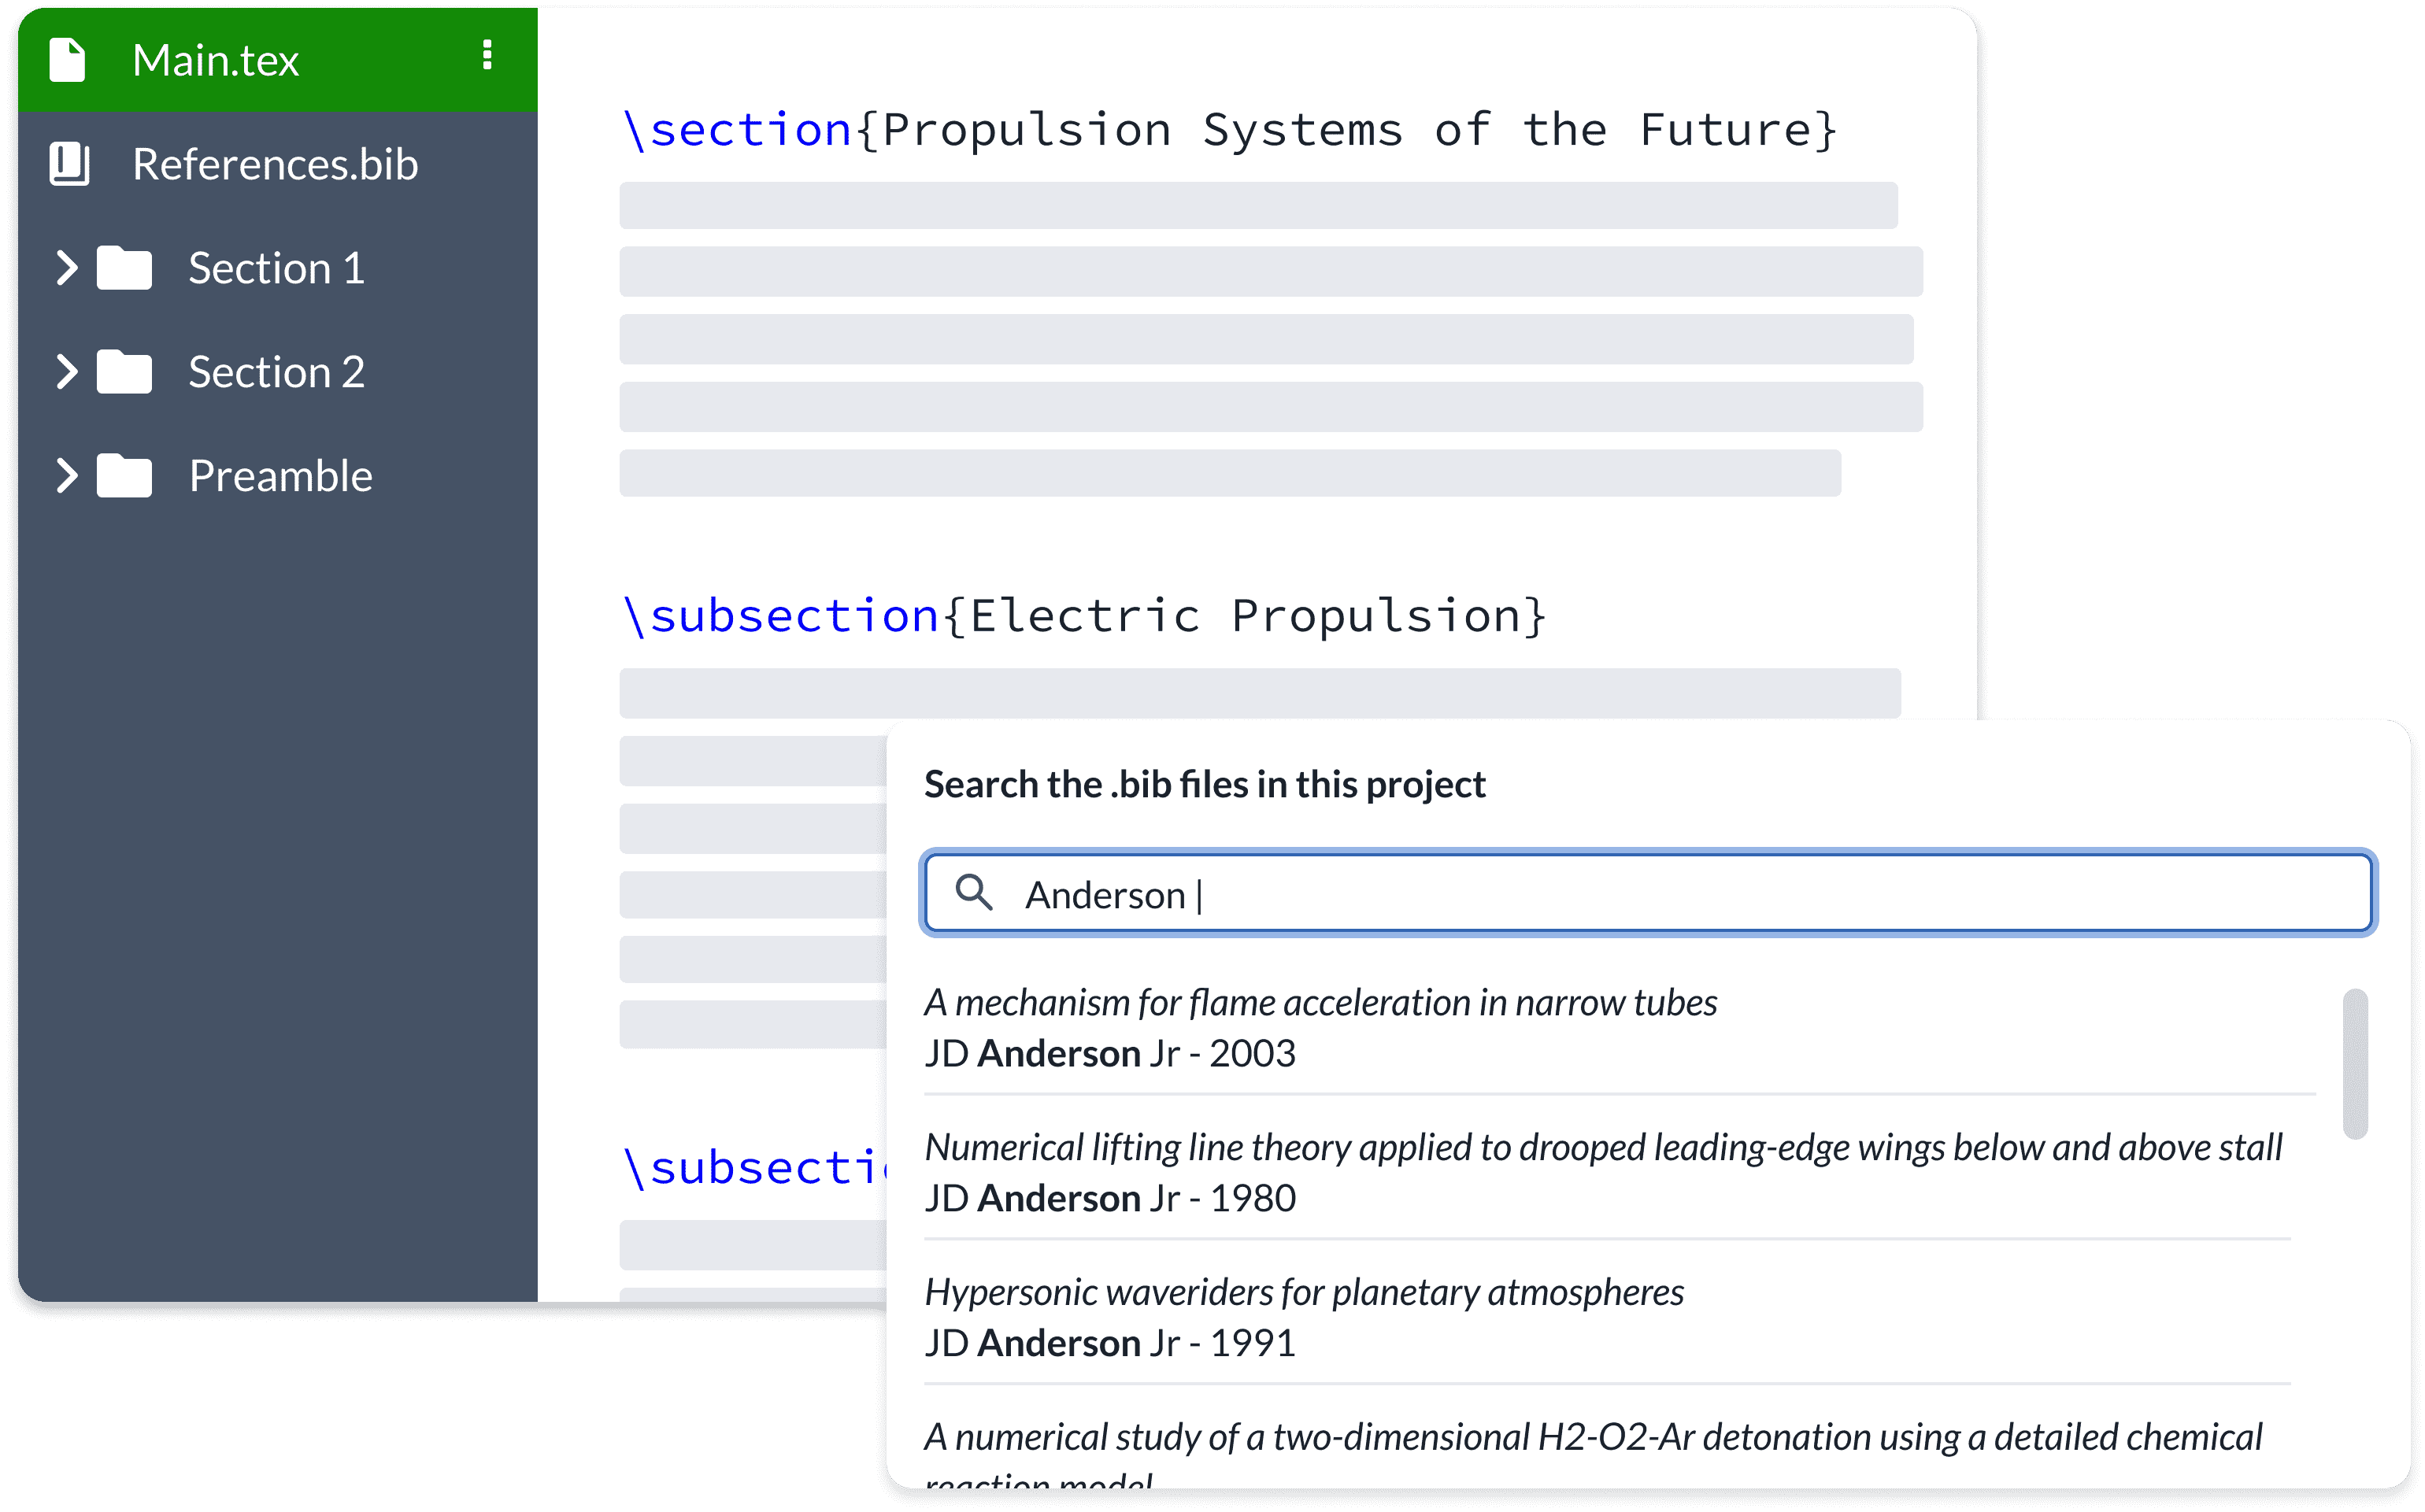
Purpose-built for scientific and technical writing. Powered by LaTeX.
* Beautiful formatting
* Clever bibliographies and citations
* Better formulas, figures, and tables
* Built-in templates
* Advanced reference search Premium
[Discover LaTeX](https://www.overleaf.com/about/why-latex)
> Overleaf is indispensable for us. We use it in our research, thesis writing, project proposals, and manuscripts for publication. When it comes to writing, it’s our main tool.
>
> 
[Read the full storyarrow\_right\_alt](https://www.overleaf.com/about/customer-story/vialab)

{why LaTeX?}Write like a rocket scientist (without having to be one)
--------------------------------------------------------------------
Overleaf is powered by LaTeX—a clever typesetting system that turns even the most complex ideas into flawlessly formatted documents. But you don’t need to know LaTeX to get started.
### Choose Visual Editor or Code Editor
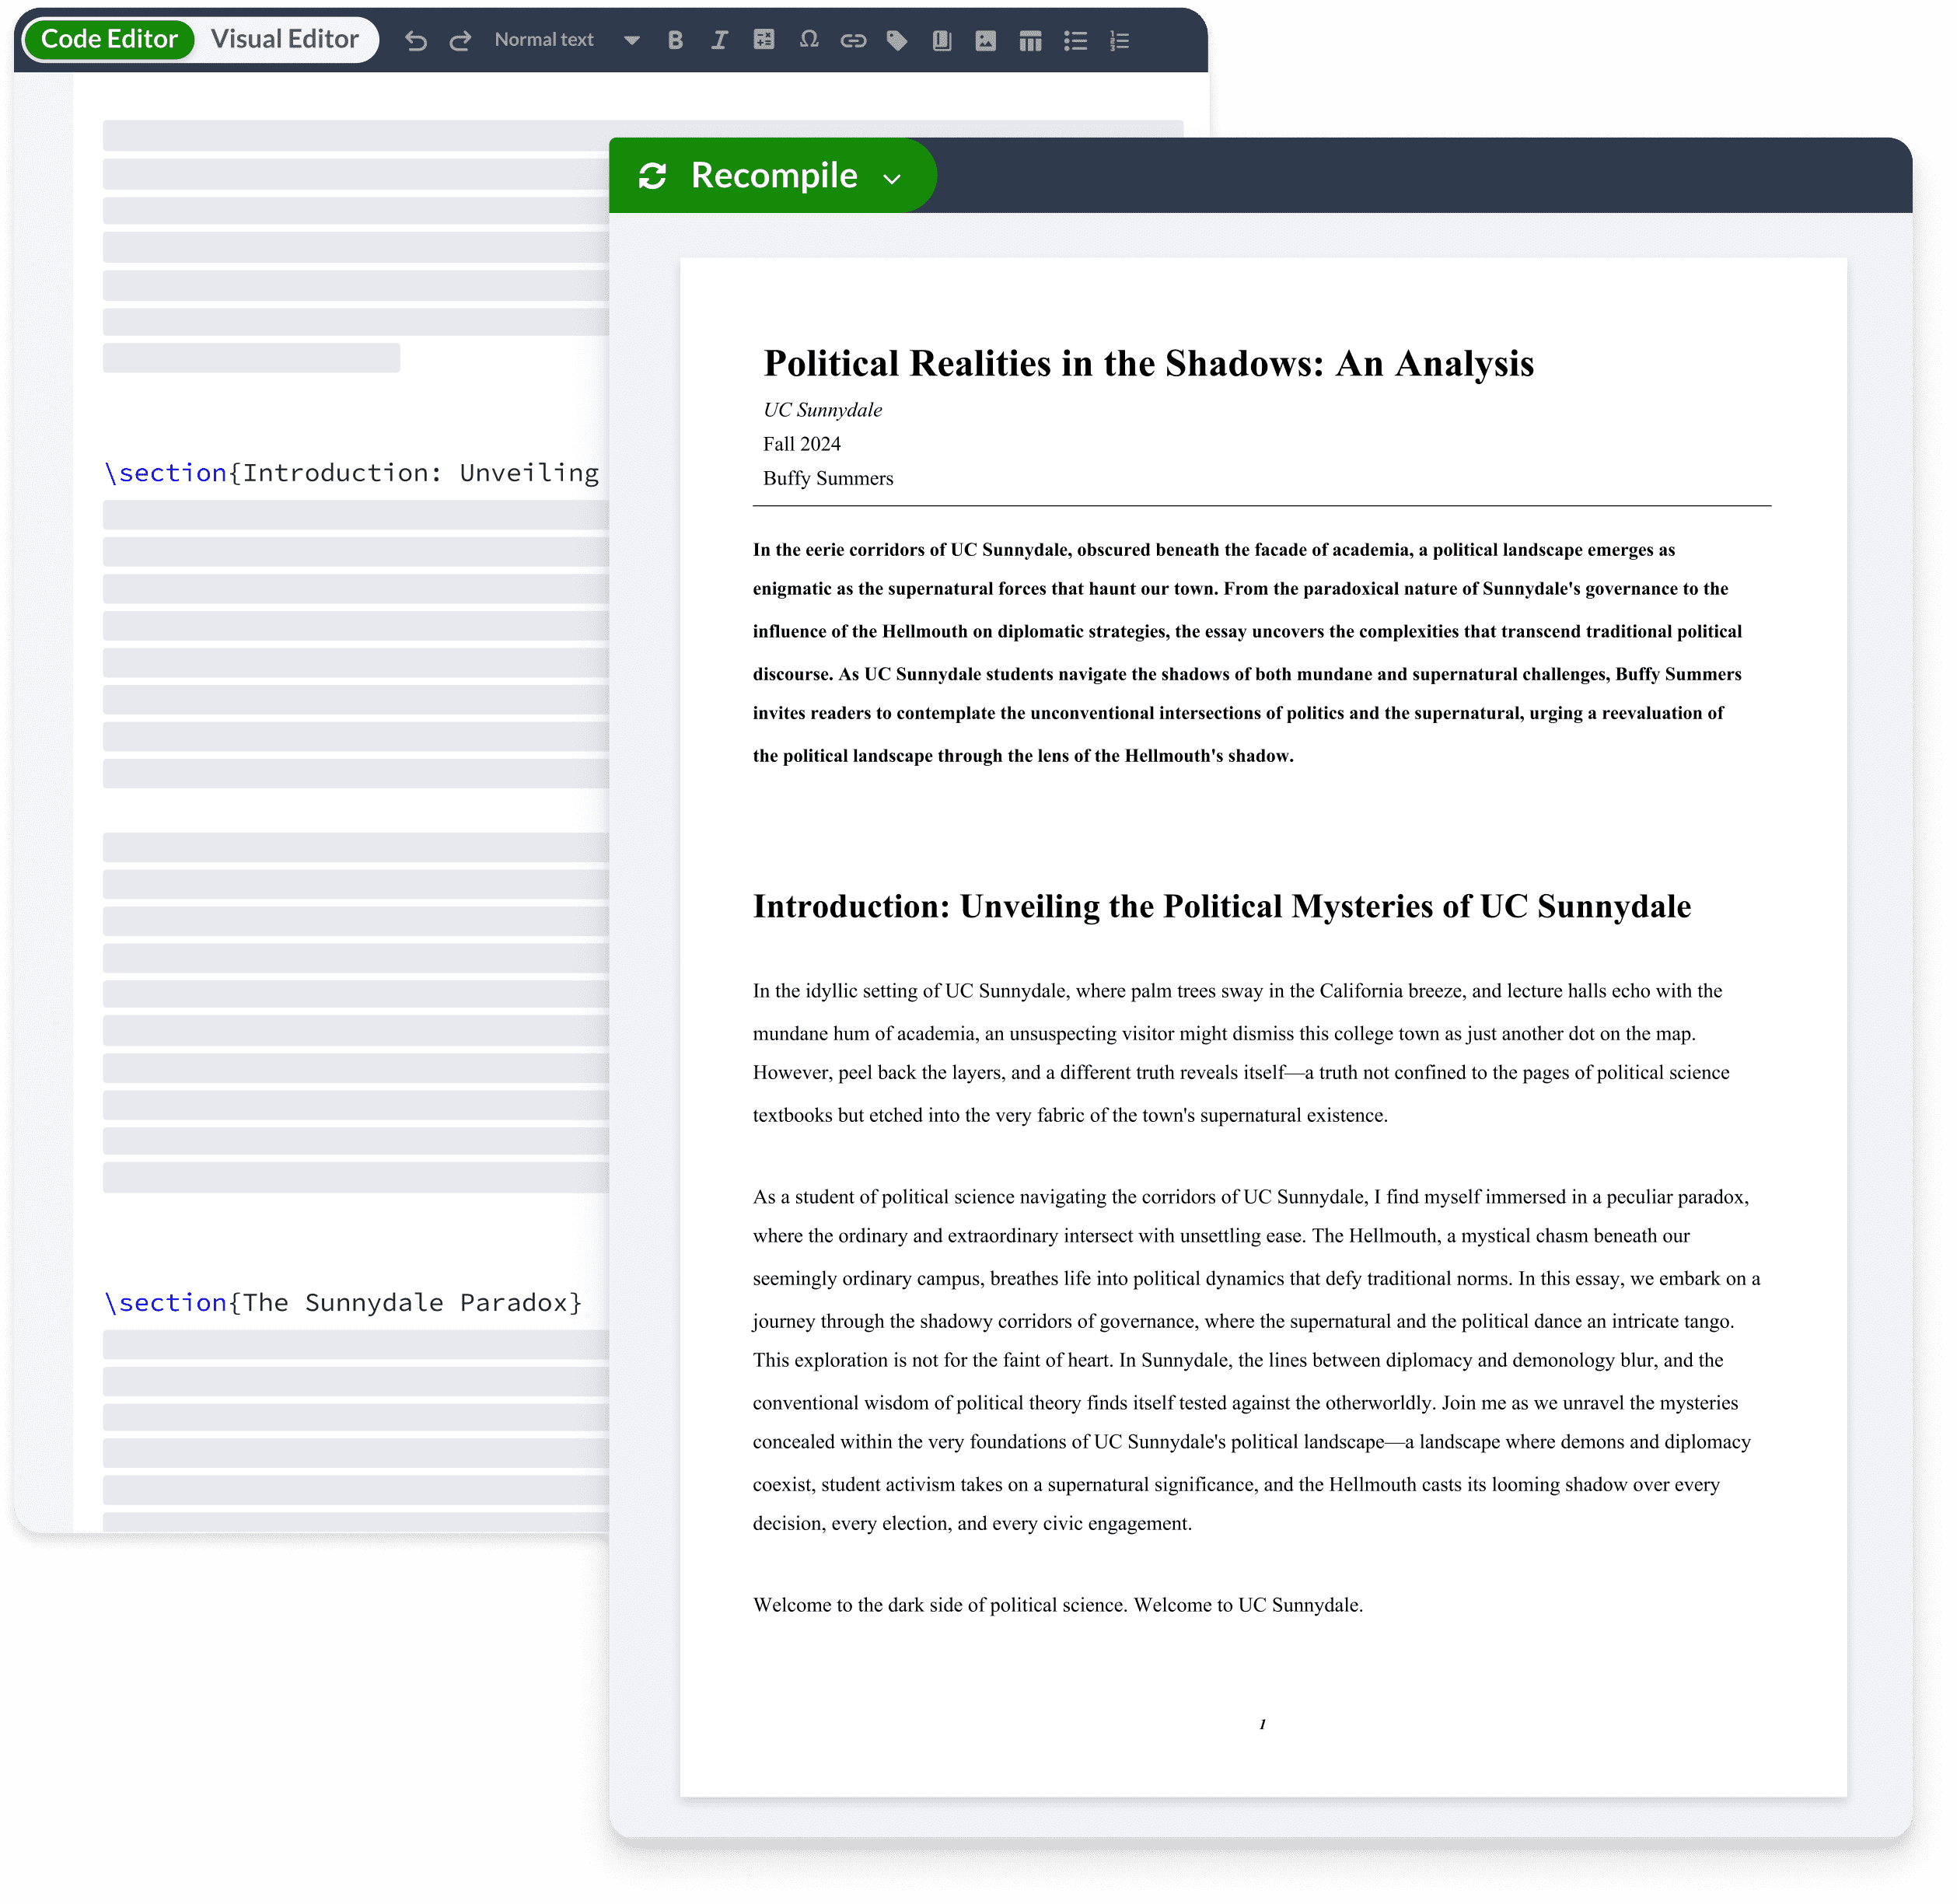
Insert figures, create tables, and format your writing without coding using Overleaf’s Visual Editor. Switch seamlessly to Code Editor to see the code behind your creation.
[Explore features](https://www.overleaf.com/about/features-overview)
### Learn by doing
Start with our example project to get familiar with how LaTeX works.
[View example project](https://www.overleaf.com/latex/templates/example-project/qzykddzqhkwk)
### Explore our resources
With hundreds of articles explaining everything from LaTeX fundamentals to advanced TeX, we’ve got your questions answered.
[Learn LaTeX](https://www.overleaf.com/learn)
{templates}Thousands of free templates
--------------------------------------
From publisher-approved research article templates to business proposals, and so much more.
[Explore all templates](https://www.overleaf.com/latex/templates)
[Journal articles](https://www.overleaf.com/latex/templates/tagged/academic-journal)
Select from an array of journal templates and submit directly from Overleaf.

[Reports](https://www.overleaf.com/latex/templates/tagged/report)
Templates for producing project and lab reports, including layout guidelines to help you through the writing process.

[Presentations](https://www.overleaf.com/latex/templates/tagged/presentation)
Communicate more effectively with our selection of engaging presentation templates.
[Explore all templates](https://www.overleaf.com/latex/templates)
{plans}For everyone, everywhere
-------------------------------
Start for free, upgrade when you’re ready
### Overleaf Free
* Great for getting started
* Unlimited projects
* Only 1 collaborator
[Sign up now](https://www.overleaf.com/register)
### For individuals
* Ideal for collaboration
* Access to integrations
* Real-time track changes
* Project history
* Advanced reference search
[Explore plans](https://www.overleaf.com/user/subscription/plans)
### For teams and organizations
* For teams who want to collaborate
* Security you can trust
* Cloud or on-premises solutions
* All the benefits of premium features
[Explore plans](https://www.overleaf.com/user/subscription/plans)
[Talk to Sales](https://www.overleaf.com/for/contact-sales)
We have plans to suit all LaTeX users—students, teams, businesses, government, and educational institutions of all sizes
[See all plans](https://www.overleaf.com/user/subscription/plans)
{customer stories}Join the organizations writing smarter in Overleaf
--------------------------------------------------------------------
[Explore customer stories](https://www.overleaf.com/about/customer-stories)
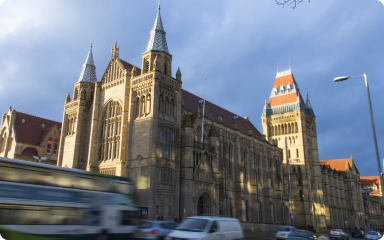
[The University of Manchester sees international collaboration thrive with Overleafarrow\_outward](https://www.overleaf.com/about/customer-story/university-of-manchester)
The leading UK university more than quadrupled the number of institutions with which it collaborates and saw a 310% jump in new projects.

[Overleaf solves authoring challenges at Canadian computer science labarrow\_outward](https://www.overleaf.com/about/customer-story/vialab)
Ontario Tech’s Vialab group saves ‘significant’ time writing, editing, and collaborating.
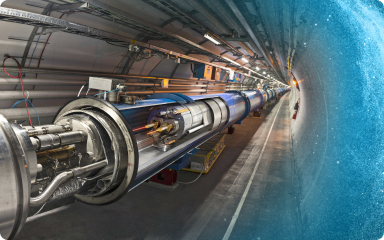
[CERN accelerates global collaboration with Overleafarrow\_outward](https://www.overleaf.com/about/customer-story/cern)
Discover how Overleaf is powering thousands of collaborations at one of the world’s foremost research organizations.
\\begin{now}
Discover why over 25 million people worldwide trust Overleaf with their work.
[Sign up for free](https://www.overleaf.com/register)
[Explore all plans](https://www.overleaf.com/user/subscription/plans)
We only use cookies for essential purposes and to improve your experience on our site. You can find out more in our [cookie policy](https://www.overleaf.com/legal#Cookies)
.
Essential cookies onlyAccept all cookies
---
# Log in to Overleaf - Overleaf, Online LaTeX Editor
Log in
======
Your email or password is incorrect. Please try again, or [set or reset your password](https://www.overleaf.com/user/password/reset)
.Click this link to reset your password
The password you’ve entered is on a [public list of compromised passwords](https://haveibeenpwned.com/passwords)
. Please try logging in from a device you’ve previously used or [reset your password](https://www.overleaf.com/user/password/reset)
.
[Log in with Google](https://www.overleaf.com/auth/google?intent=sign_in)
[Log in with ORCID](https://www.overleaf.com/auth/orcid?intent=sign_in)
[Log in with IEEE](https://www.overleaf.com/org/ieee/saml/init?)
OR
Email
Password
Log in
Logging in…
[Forgot password?](https://www.overleaf.com/user/password/reset)
OR
Work/university single sign-on
[Log in with SSO](https://www.overleaf.com/sso-login)
Don’t have an account? [Register](https://www.overleaf.com/register)
The site is protected by reCAPTCHA and the Google [Privacy Policy](https://policies.google.com/privacy)
and [Terms of Service](https://policies.google.com/terms)
apply.
* * *
[](https://www.digital-science.com/)
Advancing research with [Overleaf](https://www.overleaf.com/)
, [Papers](https://www.papersapp.com/)
, and more.
We only use cookies for essential purposes and to improve your experience on our site. You can find out more in our [cookie policy](https://www.overleaf.com/legal#Cookies)
.
Essential cookies onlyAccept all cookies
---
# Register - Overleaf, Online LaTeX Editor
Create your account
===================
Password cannot contain parts of email address. Please use a different password.
Password is too similar to parts of email address. Please use a different password.
Something went wrong. Please try again.
[Continue with Google](https://www.overleaf.com/auth/google?intent=sign_up)
[Continue with ORCID](https://www.overleaf.com/auth/orcid?intent=sign_up)
OR
Email
Password
Must be at least 8 characters. Avoid common passwords.
Create account
Registering…
OR
Work/university single sign-on
[Log in with SSO](https://www.overleaf.com/sso-login)
Already have an account? [Log in](https://www.overleaf.com/login)
By registering, you agree to our [terms of service](https://www.overleaf.com/legal#Terms)
and [privacy notice](https://www.overleaf.com/legal#Privacy)
.
The site is protected by reCAPTCHA and the Google [Privacy Policy](https://policies.google.com/privacy)
and [Terms of Service](https://policies.google.com/terms)
apply.
* * *
[](https://www.digital-science.com/)
Advancing research with [Overleaf](https://www.overleaf.com/)
, [Papers](https://www.papersapp.com/)
, and more.
We only use cookies for essential purposes and to improve your experience on our site. You can find out more in our [cookie policy](https://www.overleaf.com/legal#Cookies)
.
Essential cookies onlyAccept all cookies
---
# Benefits of using LaTeX editing software | Overleaf - Overleaf, Online LaTeX Editor
[Skip to content](https://www.overleaf.com/about/why-latex#main-content)
{why LaTeX?}The secret to better scientific and technical writing
=================================================================
LaTeX is a powerful typesetting system that takes care of the formatting so you can focus on your content.
What is LaTeX?
--------------
LaTeX (pronounced either “LAY-tek” or “LAH-tek” depending on who you talk to) is a tool that lets anyone create beautifully typeset documents. It’s the code you write in when you use Overleaf’s Code Editor and it underlies what you see in our Visual Editor.

### Separate your content from the formatting
Unlike document editors such as Microsoft Word or Google Docs, LaTeX separates the process of writing your content from the process of formatting it. This means once you’ve written the content, it’s easy to change its appearance.

### Go from plain text to polished PDF
You write a plain text file interspersed with LaTeX commands. These commands tell a piece of software called a TeX engine how to format and typeset the document to produce a polished, typeset PDF.

### Get the benefits of LaTeX, without the code
In Overleaf, you can use our Code Editor or Visual Editor. Whichever you choose, the effect is the same—you write the content, Overleaf and LaTeX take care of the formatting.
{LaTeX features}Faster, simpler writing for complex documents
-------------------------------------------------------------
[Sign up for free](https://www.overleaf.com/register)
[Explore plans](https://www.overleaf.com/user/subscription/plans)

### Easily handles mathematics, tables, and technical content
Thanks to its array of packages, LaTeX can typeset extremely complex mathematics, figures, tables, and technical content that other document editors struggle with.

### Beautiful formatting and lots of templates
LaTeX turns your plain text content into organized, well-presented, and aesthetically beautiful documents. And because there’s such a dedicated community of users, there are thousands of templates ready for you to choose from.


### Better bibliographies, references, and citations
LaTeX enables you to create ordered, highly customizable bibliographies. It also lets you label any piece of information you would like to use later for citations or as a reference.
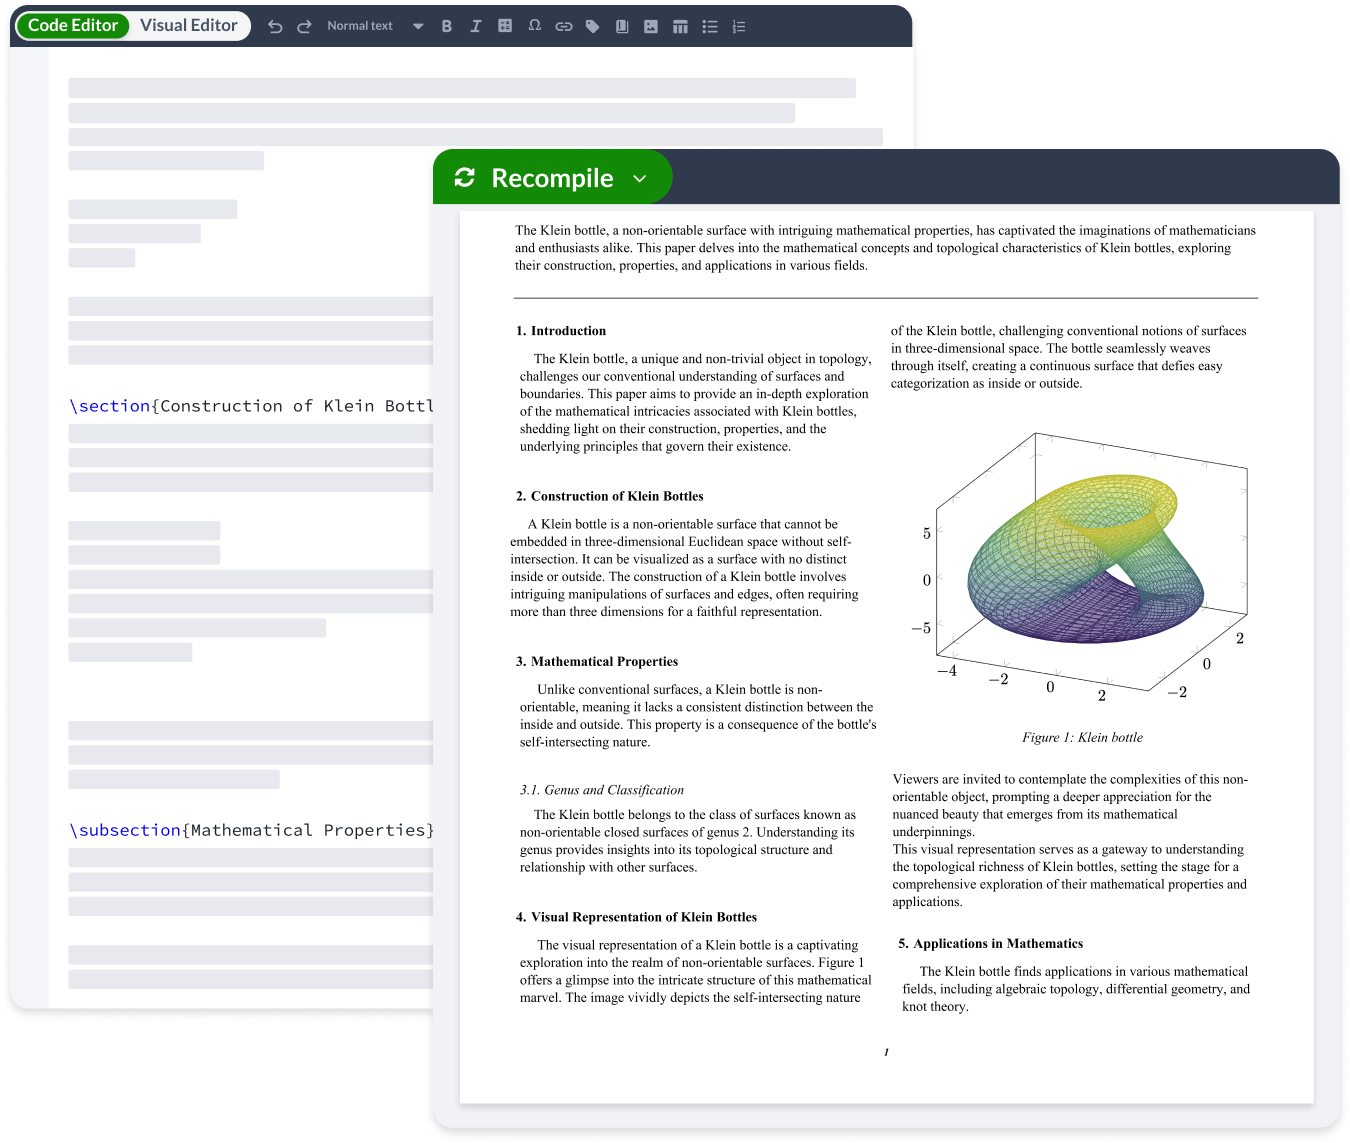

### Highly customizable
You can produce unique, bespoke documents thanks to LaTeX’s thousands of free add-on packages, while confident programmers can even create their own.

LaTeX on Overleaf
-----------------
Overleaf is LaTeX, simplified. You can work collaboratively on documents, there’s no downloads or installation, and you can choose whether you work in LaTeX code or our Visual Editor.
### Visual Editor
Our Visual Editor lets you work with LaTeX, without writing code. Insert tables and figures with a few button clicks.
### Seamless collaboration
No more email feedback and endless versions of documents. Instead, get comments, sharing, real-time track changes, and document history directly in your LaTeX project.
### Work from anywhere
Overleaf lives in the cloud, so there are no downloads or installations to worry about. And with support for mobile and tablet devices, you can even take it with you on the go.
Go from beginner to TeXpert
---------------------------
Learning LaTeX can feel daunting at first, but we’ve got lots of resources to help you get started.

### Templates
Pick from thousands of free templates in our gallery—from research articles to CVs, and so much more.
[Browse templatesarrow\_right\_alt](https://www.overleaf.com/latex/templates)

### Example project
Learn by doing with our example project that walks you through the LaTeX basics.
[Explore example projectarrow\_right\_alt](https://www.overleaf.com/latex/templates/example-project/qzykddzqhkwk)

### Visual Editor
Switch to our Visual Editor to edit without writing code. Switch back to Code Editor anytime to see the code behind your writing.
[Try Overleafarrow\_right\_alt](https://www.overleaf.com/register)

### LaTeX in a nutshell
Learn how to start your first document and get to grips with LaTeX basics in our step-by-step intro.
[Start learningarrow\_right\_alt](https://www.overleaf.com/learn/latex/Learn_LaTeX_in_30_minutes)

### Webinars
Get support direct from our TeXpert Support team by signing up for our live intro webinars (or watch previous ones on demand).
[Browse webinarsarrow\_right\_alt](https://www.overleaf.com/events/webinars)

### More resources
Discover hundreds of help and learning articles, tutorials, and more.
[Explore Overleaf Learnarrow\_right\_alt](https://www.overleaf.com/learn)
\\begin{now}
Discover why over 25 million people worldwide trust Overleaf with their work.
[Sign up for free](https://www.overleaf.com/register)
[Explore all plans](https://www.overleaf.com/user/subscription/plans)
We only use cookies for essential purposes and to improve your experience on our site. You can find out more in our [cookie policy](https://www.overleaf.com/legal#Cookies)
.
Essential cookies onlyAccept all cookies
---
# LaTeX editor for enterprises - Overleaf, Online LaTeX Editor
[Skip to content](https://www.overleaf.com/for/enterprises#main-content)
{overleaf for business}Enable smarter, faster scientific and technical writing
==============================================================================
Overleaf is the collaborative LaTeX editor loved by research and technical teams. Choose from secure cloud or on-premises options.
[Talk to Sales](https://www.overleaf.com/for/contact-sales-enterprise-2)
[Explore plans](https://www.overleaf.com/user/subscription/plans?plan=group)
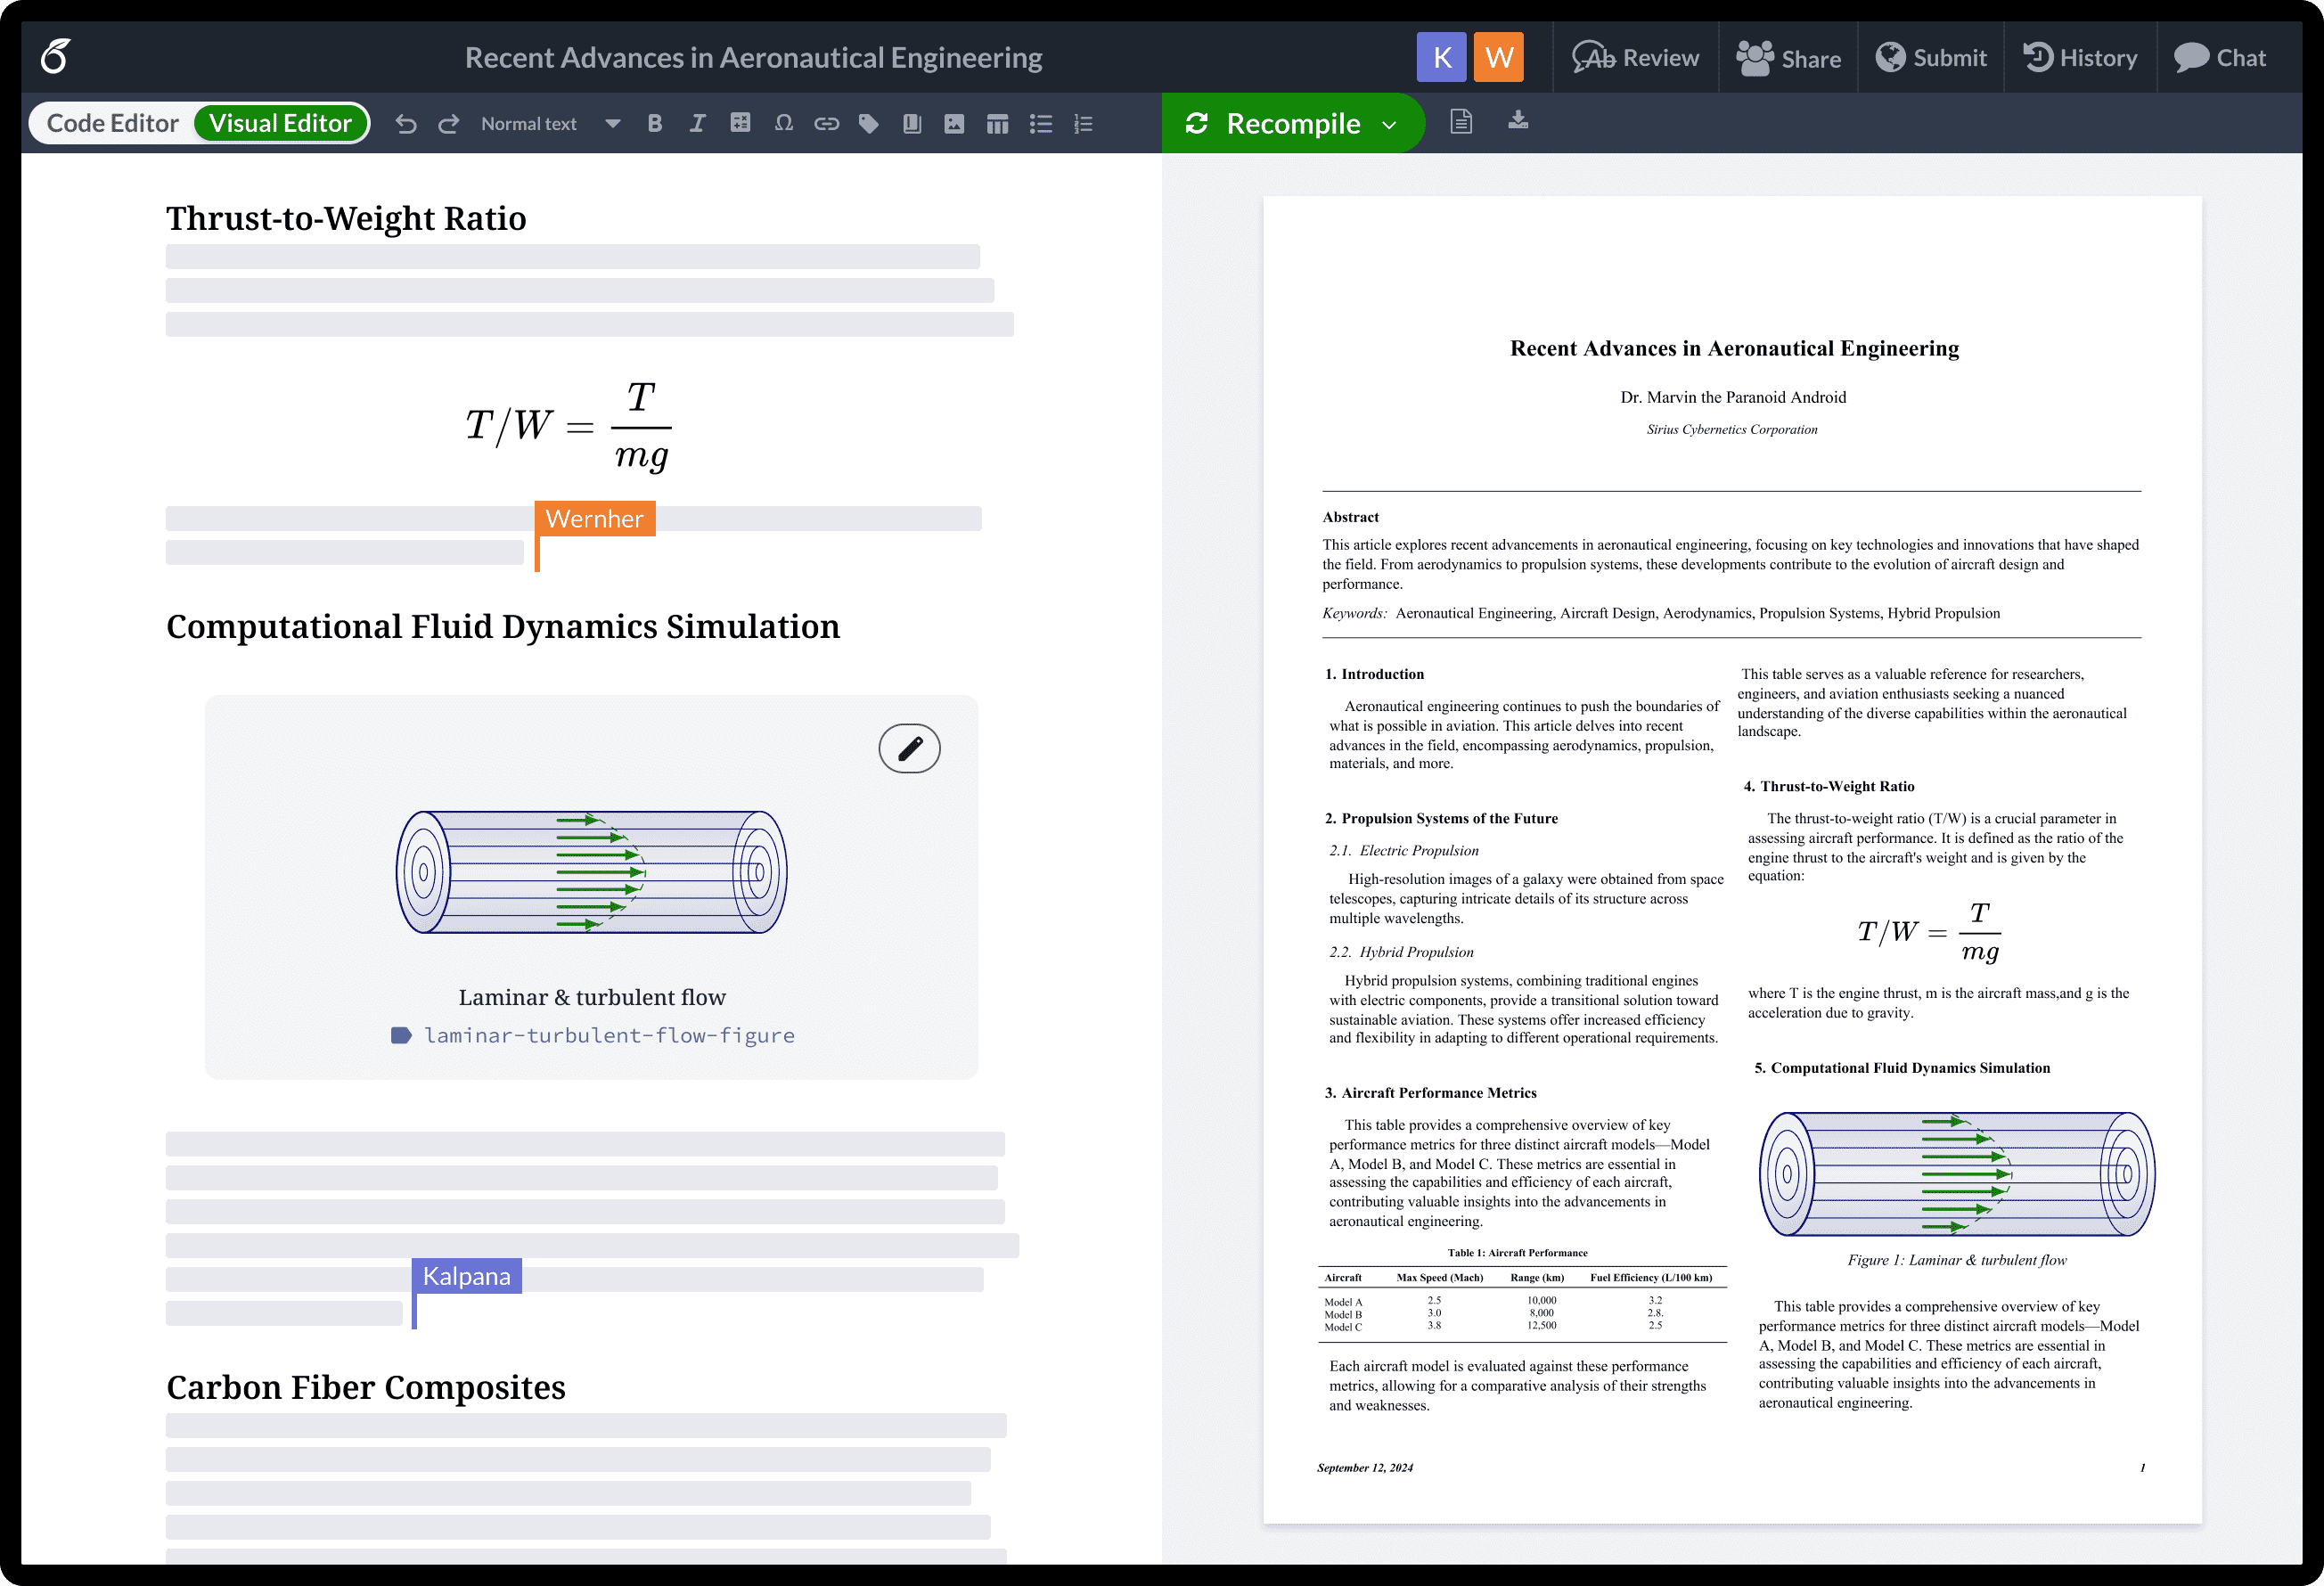
Over 25 million users at businesses and research organizations worldwide love Overleaf






{benefits}The essential writing platform for research and technical teams
-------------------------------------------------------------------------
[Talk to Sales](https://www.overleaf.com/for/contact-sales-enterprise-2)
[Explore plans](https://www.overleaf.com/user/subscription/plans?plan=group)
_biotech_
### Researchers
Designed by scientists, Overleaf helps researchers communicate their ideas faster—from writing notes, to publishing articles, and giving presentations.
_function_
### Mathematicians and economists
Powerful math packages and a built-in symbol palette mean mathematicians and economists can write more efficiently in Overleaf.
_lock_
### Technical writers
Long, complex documentation is easy with Overleaf, thanks to clever bibliographies and referencing, built-in templates, and flawless formatting.

### Discover hassle-free scientific and technical writing
Empower your teams to write scientific and technical content efficiently. Use templates to enhance consistency and quality.
* Ideal for long and complex content
* Beautiful formatting
* Clever bibliographies and citations
* Better formulas, figures, and tables
* Choose from 1000s of templates or create your own
[Discover LaTeX_arrow\_right\_alt_](https://www.overleaf.com/about/why-latex)

### Collaborate without compromise
LaTeX novices and TeXperts alike can collaborate easily, without losing any of the LaTeX features your teams want and need.
* Sharing
* Simultaneous editing
* Commenting
* Real-time track changes
* Version control
* LaTeX Code Editor and Visual Editor

### Let us do the support
We’ll get your teams up and running in no time.
* No installation or maintenance (for cloud options)
* No LaTeX package management
* Detailed LaTeX learning and product help
* High-quality support from real people with LaTeX expertise

{security}
Security you can count on
-------------------------
Protect your projects and proprietary information with enterprise-grade security for both our cloud and on-premises solutions.
_security_
### Enterprise-grade security
Trust our enterprise-grade security in all the ways your team collaborates, shares, and stores their work.
_lock_
### On-premises option
Server Pro is Overleaf hosted in your own secure environment, with enhanced administrative control over projects and user access.
_groups_
### Managed user accounts and SSO
With managed user accounts and single sign-on options, you stay in control of your projects and user access.
_verified\_user_
### Regulatory compliance
We comply with leading global regulations such as GDPR and UKGDPR.
_assured\_workload_
### Global privacy standards
Our policies and procedures protect your data by meeting global privacy standards and obligations.
_workspace\_premium_
### ISO certified
Overleaf, as part of Digital Science, is [certified in compliance with ISO/IEC 27001:2022](https://www.digital-science.com/security-certifications)
[.](https://www.digital-science.com/security-certifications)
> With Overleaf, we now have a process for developing technical documentation which has virtually eliminated the time required to properly format and layout documents.
>
> 
{integrations}Streamline workflows with clever integrations Premium
--------------------------------------------------------------------------------------------------------------------------------------


{plans}Plans to fit your needs
------------------------------
From small departments to entire agencies
### Group Professional
For teams and organizations who want to collaborate securely, with Overleaf premium features for all users, managed user accounts, and SSO.
[Talk to Sales](https://www.overleaf.com/for/contact-sales-enterprise-2)
### Commons
The easy way to unlock premium Overleaf features for your entire organization, with domain-based enrollment, SSO, and a custom resource portal.
[Talk to Sales](https://www.overleaf.com/for/contact-sales-enterprise-2)
### On-premises Server Pro
For teams and organizations who want to host Overleaf in their own secure environment, with enhanced administrative control over projects and user access.
[Talk to Sales](https://www.overleaf.com/for/contact-sales-enterprise-2)
Don’t see the right fit for you?
[See all plans](https://www.overleaf.com/user/subscription/plans)
or [contact Sales](https://www.overleaf.com/for/contact-sales-enterprise-2)
{customer stories}Join the organizations writing smarter in Overleaf
--------------------------------------------------------------------
[Explore customer stories](https://www.overleaf.com/about/customer-stories)
[A lasting solution: technical documentation simplified with Overleaf_arrow\_outward_](https://www.overleaf.com/about/customer-story/symplectic)
Find out how Symplectic’s flagship research information management system went from strength to strength with Overleaf’s ‘flexible, scaleable’ authoring platform.

[Overleaf solves authoring challenges at Canadian computer science lab_arrow\_outward_](https://www.overleaf.com/about/customer-story/vialab)
Ontario Tech’s Vialab group saves ‘significant’ time writing, editing, and collaborating.
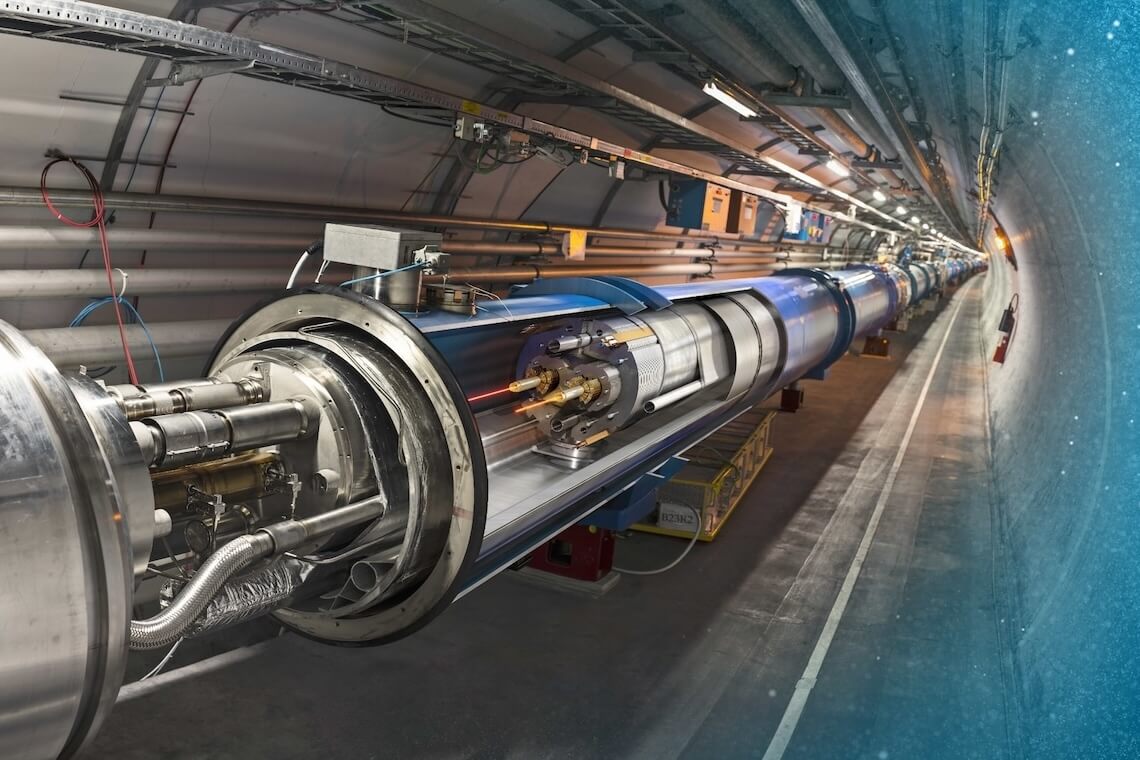
[CERN accelerates global collaboration with Overleaf_arrow\_outward_](https://www.overleaf.com/about/customer-story/cern)
Discover how Overleaf is powering thousands of collaborations at one of the world’s foremost research organizations.
\\begin{now}
Our friendly team will help you find the right solution for your organization.
[Talk to Sales](https://www.overleaf.com/for/contact-sales-enterprise-2)
We only use cookies for essential purposes and to improve your experience on our site. You can find out more in our [cookie policy](https://www.overleaf.com/legal#Cookies)
.
Essential cookies onlyAccept all cookies
---
# Overleaf for Publishers & Journals - Overleaf, Online LaTeX Editor
[Skip to content](https://www.overleaf.com/for/publishers#main-content)
{overleaf for publishers} Simplified research publishing for authors and editors
================================================================================
With Overleaf, authors and editors can work seamlessly in the same platform to get an article from first draft to final publication.
[Talk to Sales](https://www.overleaf.com/contact)
Over 25 million users at research institutions and businesses worldwide love Overleaf






{services}
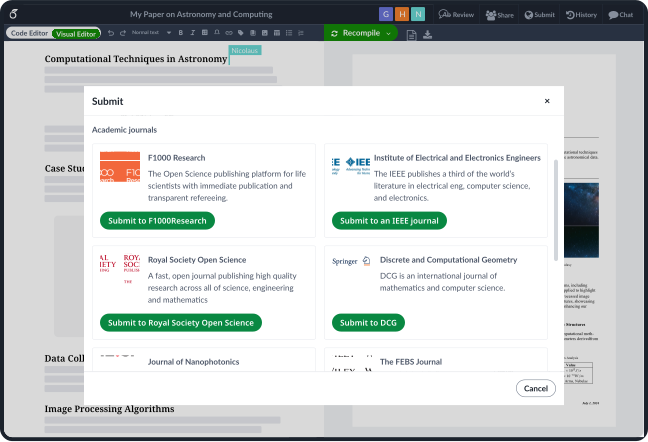
Overleaf Link: streamline the LaTeX submission process
------------------------------------------------------
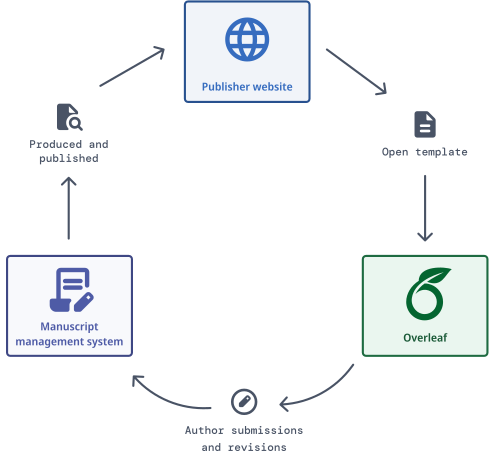
With Overleaf Link, we can integrate your own LaTeX templates into our platform and then provide custom submission links from the template directly to your own submission web portal.
### One seamless process
An author can write, edit, and submit all in one place. And if you choose an Overleaf subscription for editorial staff, editorial feedback and revisions can be carried out in Overleaf too.
### Higher quality submissions
Official publisher templates give authors the guidance they need to deliver LaTeX submissions in the correct format with publisher requirements followed.
### Increase author satisfaction
Over 25 million researchers around the world use Overleaf. Make their experience with you that bit easier by smoothing and speeding up the submission process.
{services}LaTeX Validation Service
----------------------------------
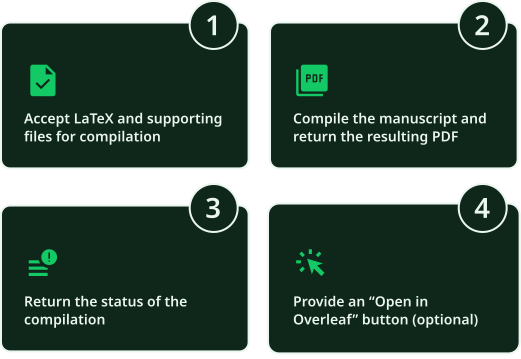
Your LaTeX compilations handled on Overleaf technology and servers through a managed API.
* Outsource LaTeX technology management and maintenance
* Compile using the latest LaTeX versions and packages
* Trusted technology used by over 25 million people
### Group Standard
For research groups and small departments. Premium features for all group members, including real-time track changes, project history, and much more.
[Buy now](https://www.overleaf.com/user/subscription/plans)
### Group Professional
All the benefits of our Group plan, plus single sign-on, managed user accounts, and unlimited collaborators per project.
[Talk to Sales](https://www.overleaf.com/contact)
[Buy now](https://www.overleaf.com/user/subscription/plans)
### Commons
Unlock premium Overleaf features and unlimited collaboration for your entire campus, with streamlined user enrollment, a custom resource portal, and enhanced support.
[Talk to Sales](https://www.overleaf.com/contact)
Don’t see the right fit for you?
[See all plans](https://www.overleaf.com/user/subscription/plans)
or [contact Sales](https://www.overleaf.com/contact)
\\begin{now}
Our friendly team will help you find the right solution for your organization.
[Talk to Sales](https://www.overleaf.com/contact)
We only use cookies for essential purposes and to improve your experience on our site. You can find out more in our [cookie policy](https://www.overleaf.com/legal#Cookies)
.
Essential cookies onlyAccept all cookies
---
# LaTeX editor for universities & institutions | Overleaf - Overleaf, Online LaTeX Editor
[Skip to content](https://www.overleaf.com/for/universities#main-content)
{overleaf for universities}Simplify academic writing and collaboration
======================================================================
Empower your students and academics to write, edit, teach, and collaborate in a platform designed with them in mind. Unlock premium features for your department, faculty, or entire campus.
[Talk to Sales](https://www.overleaf.com/for/contact-sales-universities)
[Explore plans](https://www.overleaf.com/user/subscription/plans)
Over 25 million users at research institutions and businesses worldwide love Overleaf

[View institutions using Overleaf](https://www.overleaf.com/for/institutions-using-overleaf)
{features}The essential writing platform for students and academics
-------------------------------------------------------------------
[Talk to Sales](https://www.overleaf.com/for/contact-sales-universities)
[Explore plans](https://www.overleaf.com/user/subscription/plans)

### Students
Overleaf simplifies academic writing and collaboration on everything from assignments to PhD theses. Plus students can learn LaTeX faster, with our Visual Editor, templates, and help resources.

### Teaching staff
Teachers and lecturers can easily create consistent, beautifully formatted teaching materials. And with access to premium features like track changes, they can review student work directly in Overleaf.

### Researchers
Designed by scientists, Overleaf helps researchers communicate and collaborate faster—from writing notes, to publishing articles, and giving presentations.

### Enable collaboration without bounds
Make global, interdisciplinary research easier for everyone.
* Sharing
* Commenting
* Real-time track changes
* Project history
* LaTeX Code Editor and Visual Editor
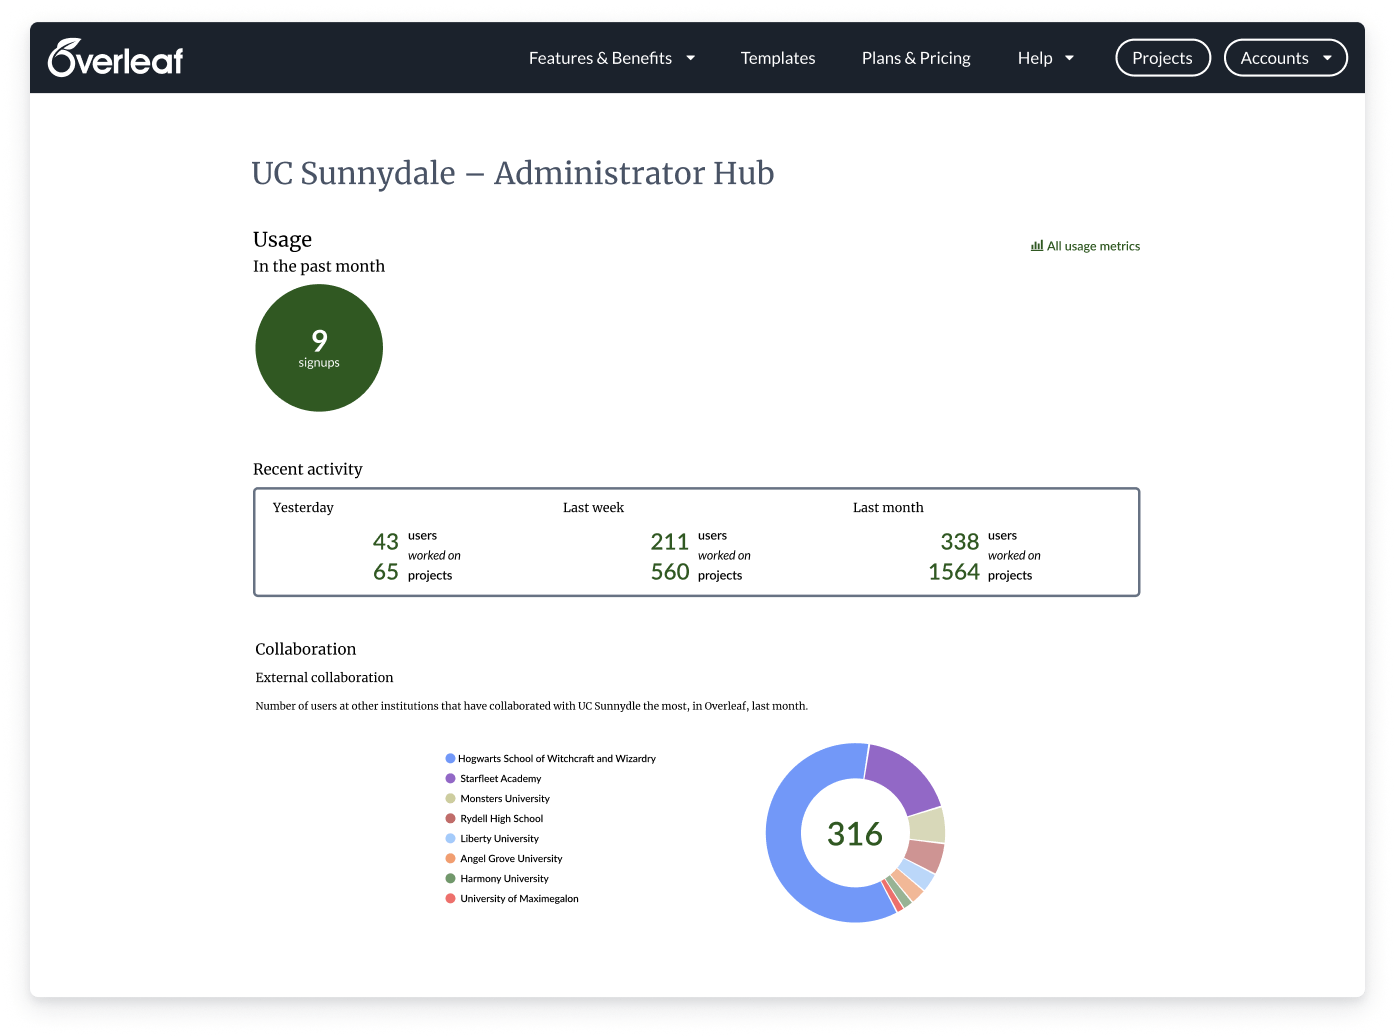

### Gain powerful data insights
Get the full picture of how your researchers and students are collaborating.
* Insights on internal usage, editing sessions, and collaboration
* Data on how your users are collaborating with other universities, research institutions, and businesses
* Download and share insights whenever you need to

### Discover hassle-free academic writing
Give your campus community the ability to write scientific and technical content easily and efficiently.
* Ideal for long and complex content
* Beautiful formatting
* Clever bibliographies and citations
* Better formulas, figures, and tables
* Choose from 1000s of templates or create your own
[Discover LaTeX](https://www.overleaf.com/about/why-latex)

### Let us do the support
We’ll get you up and running in no time.
* No installation (for cloud options)
* No LaTeX package management
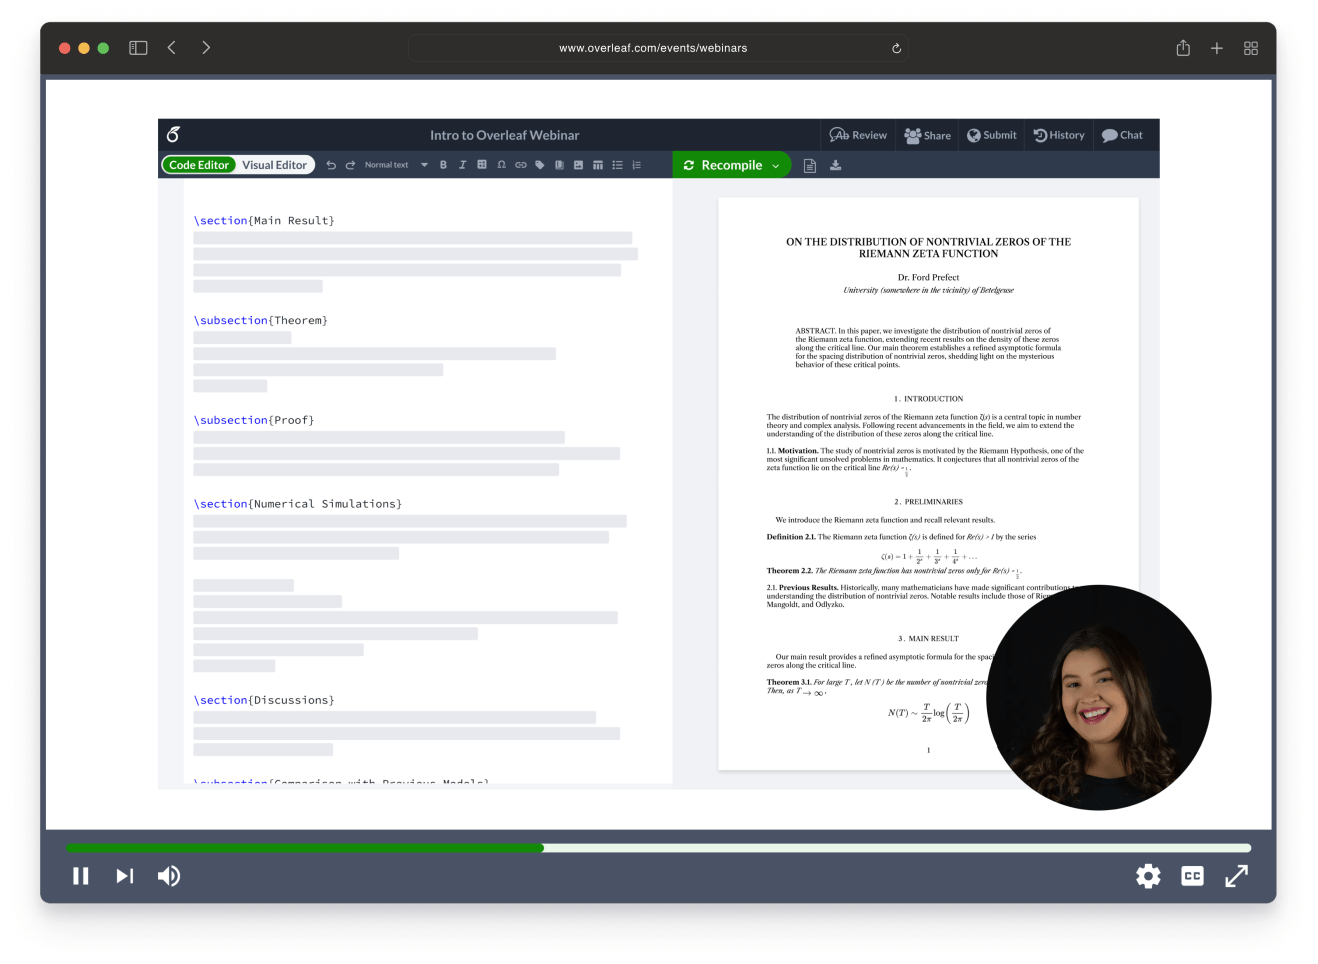
* Training videos and webinars
* LaTeX learning and product help
* High-quality support from real people with LaTeX expertise
> It’s easy to use, very intuitive, with nothing to install—just open and write. And the ability to have our template loaded and ready for students to use made it a perfect fit.
[Read the full storyarrow\_right\_alt](https://www.overleaf.com/about/customer-story/purdue-university)

### Premium Overleaf features for your entire campus
Invest in better research writing for your whole academic community with Overleaf Commons.
[Talk to Sales](https://www.overleaf.com/for/contact-sales-universities)
### Unlock premium features for all your students and academics
Drive interdisciplinary, global collaboration with enhanced features like real-time track changes, project history, multiple collaborators, and more.
### Streamline sign up with domain-based enrollment or SSO
Users are automatically enrolled in your subscription when they register with Overleaf using their university email address or single sign-on.
### Personalized support and onboarding
We walk you through the setup process, create your branded portal, and help encourage user enrollment. And we’re here to support you and your users whenever you need help.
{plans}Plans to fit your needs
------------------------------
From research groups and departments to campus-wide access
### Group Standard
For research groups and small departments. Premium features for all group members, including real-time track changes, project history, and much more.
[Buy now](https://www.overleaf.com/user/subscription/plans)
### Group Professional
All the benefits of our Group plan, plus single sign-on, managed user accounts, and unlimited collaborators per project.
[Talk to Sales](https://www.overleaf.com/for/contact-sales-universities)
[Buy now](https://www.overleaf.com/user/subscription/plans)
### Commons
Unlock premium Overleaf features and unlimited collaboration for your entire campus, with streamlined user enrollment, a custom resource portal, and enhanced support.
[Talk to Sales](https://www.overleaf.com/for/contact-sales-universities)
Don’t see the right fit for you?
[See all plans](https://www.overleaf.com/user/subscription/plans)
or [contact Sales](https://www.overleaf.com/for/contact-sales-universities)
{customer stories}Join the organizations writing smarter in Overleaf
--------------------------------------------------------------------
[Explore customer stories](https://www.overleaf.com/about/customer-stories)

[The University of Manchester sees international collaboration thrive with Overleafarrow\_outward](https://www.overleaf.com/about/customer-story/university-of-manchester)
The leading UK university more than quadrupled the number of institutions with which it collaborates and saw a 310% jump in new projects.
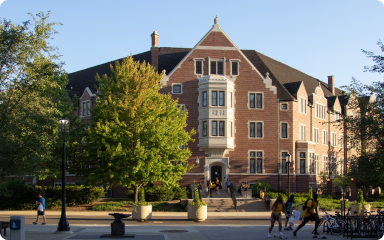
[Purdue Graduate School improves its thesis writing process with Overleafarrow\_outward](https://www.overleaf.com/about/customer-story/purdue-university)
Time spent on formatting and reviewing was dramatically reduced after Overleaf was adopted by the leading American public research university.
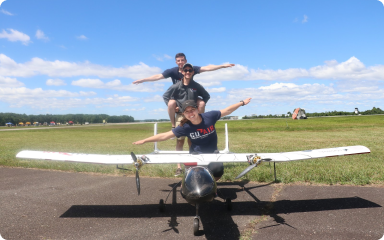
[Ivy League aerospace engineering team increases efficiency with Overleafarrow\_outward](https://www.overleaf.com/about/customer-story/cuair)
Undergraduates at New York’s Cornell University collaborated easily and efficiently on a global competition entry after switching to Overleaf’s collaborative LaTeX editor.
{integrations}Sync with the tools your researchers already usePremium
---------------------------------------------------------------------------------------------------------------------------------------
From editing projects in GitHub, to using Zotero bibliographies, or syncing with Dropbox, Overleaf integrates with tools your researchers already use and love.


\\begin{now}
Our friendly team will help you find the right solution for your organization.
[Talk to Sales](https://www.overleaf.com/for/contact-sales-universities)
We only use cookies for essential purposes and to improve your experience on our site. You can find out more in our [cookie policy](https://www.overleaf.com/legal#Cookies)
.
Essential cookies onlyAccept all cookies
---
# Overleaf for government - Overleaf, Online LaTeX Editor
[Skip to content](https://www.overleaf.com/for/government#main-content)
{overleaf for government}Fast, simple, secure scientific and technical writing
==============================================================================
Overleaf is the collaborative LaTeX editor trusted by US Federal Government agencies and world-class research institutions. Choose from **secure cloud** or **on-premises** options.
[Talk to Sales](https://www.overleaf.com/for/contact-sales-government)

FedRAMP® authorized
-------------------
Overleaf is now Federal Risk and Authorization Management Program authorized.
[Learn more_arrow\_right\_alt_](https://marketplace.fedramp.gov/products/FR2414718666)

Over 25 million users in the public sector, businesses, and research organizations worldwide






{benefits}The essential writing platform for government research and technical teams
------------------------------------------------------------------------------------
[Talk to Sales](https://www.overleaf.com/for/contact-sales-government)
_biotech_
### Researchers
Designed by scientists, Overleaf helps researchers communicate their ideas faster—from writing notes, to publishing articles, and giving presentations.
_function_
### Mathematicians and economists
Powerful math packages and a built-in symbol palette mean mathematicians and economists can write more efficiently in Overleaf.
_lock_
### Technical writers
Long, complex documentation is easy with Overleaf, thanks to clever bibliographies and referencing, built-in templates, and flawless formatting.
{security}Security you can count on
-----------------------------------
Protect your projects and proprietary information with enterprise-grade security for both our cloud and on-premises solutions.
_security_
### Enterprise-grade security
Trust our enterprise-grade security in all the ways your team collaborates, shares, and stores their work.
_lock_
### On-premises option
Server Pro is Overleaf hosted in your own secure environment, with enhanced administrative control over projects and user access.
_groups_
### Managed user accounts and SSO
With managed user accounts and single sign-on options, you stay in control of your projects and user access.
_verified\_user_
### FedRAMP authorized
Overleaf Group Professional is Federal Risk and Authorization Management Program (FedRAMP) authorized.
_assured\_workload_
### Global privacy standards
Our policies and procedures protect your data. We comply with leading global regulations such as GDPR and UKGDPR.
_workspace\_premium_
### ISO certified
Overleaf, as part of Digital Science, is [certified in compliance with ISO/IEC 27001:2022](https://www.digital-science.com/security-certifications)
[.](https://www.digital-science.com/security-certifications)
{plans}Plans to fit your needs
------------------------------
From small departments to entire agencies
### On-premises Server Pro
For teams and organizations who want to host Overleaf in their own secure environment, including private cloud and air-gapped environments. With enhanced administrative control over projects and user access.
[Talk to Sales](https://www.overleaf.com/for/contact-sales-government)
### Group Professional
The FedRAMP authorized, secure cloud option for teams and organizations, with Overleaf premium features for all users. Plus managed user accounts and SSO.
[Talk to Sales](https://www.overleaf.com/for/contact-sales-government)
### Commons
The easy way to unlock premium Overleaf features for your entire organization, with domain-based enrollment, SSO, and a custom resource portal.
[Talk to Sales](https://www.overleaf.com/for/contact-sales-government)
Don’t see the right fit for you?
[See all plans](https://www.overleaf.com/user/subscription/plans)
or [contact Sales](https://www.overleaf.com/for/contact-sales-government)

{procurement}Streamlined procurement
------------------------------------
Move quickly through the US Federal Government purchasing process.
* ### FedRAMP authorized
Overleaf Group Professional is Federal Risk and Authorization Management Program (FedRAMP) authorized.
* ### Small business resellers
We partner with preferred small business resellers that are SDVOSB and/or HUBZone certified.
* ### NASA SEWP and other contract vehicles
We offer unique packages with additional support options and benefits via contract vehicles, including NASA SEWP and NITAAC CIO-CS GWACs.
> With Overleaf, we now have a process for developing technical documentation which has virtually eliminated the time required to properly format and layout documents.
>
> 
{customer stories}Join the organizations writing smarter in Overleaf
--------------------------------------------------------------------
[Explore customer stories](https://www.overleaf.com/about/customer-stories)

[A lasting solution: technical documentation simplified with Overleaf_arrow\_outward_](https://www.overleaf.com/about/customer-story/symplectic)
Find out how Symplectic’s flagship research information management system went from strength to strength with Overleaf’s ‘flexible, scaleable’ authoring platform.

[Overleaf solves authoring challenges at Canadian computer science lab_arrow\_outward_](https://www.overleaf.com/about/customer-story/vialab)
Ontario Tech’s Vialab group saves ‘significant’ time writing, editing, and collaborating.

[CERN accelerates global collaboration with Overleaf_arrow\_outward_](https://www.overleaf.com/about/customer-story/cern)
Discover how Overleaf is powering thousands of collaborations at one of the world’s foremost research organizations.
\\begin{now}
Our friendly team will help you find the right solution for your organization.
[Talk to Sales](https://www.overleaf.com/for/contact-sales-government)
We only use cookies for essential purposes and to improve your experience on our site. You can find out more in our [cookie policy](https://www.overleaf.com/legal#Cookies)
.
Essential cookies onlyAccept all cookies
---
# Customer Stories - Overleaf, Online LaTeX Editor
[Skip to content](https://www.overleaf.com/about/customer-stories#main-content)
{customer stories}Meet the organizations writing smarter with Overleaf
======================================================================
From universities and research institutions, to businesses and government organizations.

Explore Overleaf for [business](https://www.overleaf.com/for/enterprises)
and [universities](https://www.overleaf.com/for/universities)

[Overleaf solves authoring challenges at Canadian computer science labarrow\_outward](https://www.overleaf.com/about/customer-story/vialab)
Ontario Tech’s Vialab group saves ‘significant’ time writing, editing, and collaborating.
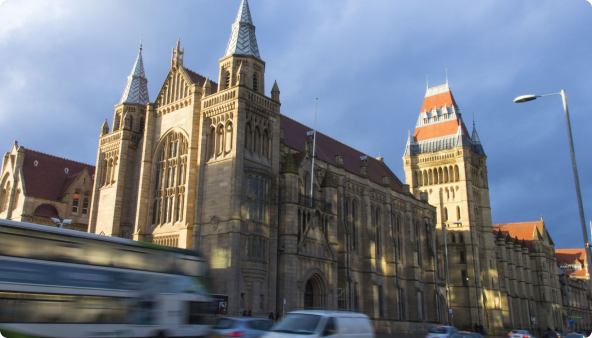
[The University of Manchester sees international collaboration thrive with Overleafarrow\_outward](https://www.overleaf.com/about/customer-story/university-of-manchester)
The leading UK university more than quadrupled the number of institutions with which it collaborates and saw a 310% jump in new projects.

[CERN accelerates global collaboration with Overleafarrow\_outward](https://www.overleaf.com/about/customer-story/cern)
Discover how Overleaf is powering thousands of collaborations at one of the world’s foremost research organizations.
[A lasting solution: technical documentation simplified with Overleafarrow\_outward](https://www.overleaf.com/about/customer-story/symplectic)
Find out how Symplectic’s flagship research information management system went from strength to strength with Overleaf’s ‘flexible, scaleable’ authoring platform.

[Purdue Graduate School improves its thesis writing process with Overleafarrow\_outward](https://www.overleaf.com/about/customer-story/purdue-university)
Time spent on formatting and reviewing was dramatically reduced after Overleaf was adopted by the leading American public research university.

[Publisher F1000Research attracts target authors with Overleafarrow\_outward](https://www.overleaf.com/about/customer-story/f1000research)
Customized LaTeX templates and a simplified submission process make it even easier to publish on the innovative open research platform.

[Ivy League aerospace engineering team increases efficiency with Overleafarrow\_outward](https://www.overleaf.com/about/customer-story/cuair)
Undergraduates at New York’s Cornell University collaborated easily and efficiently on a global competition entry after switching to Overleaf’s collaborative LaTeX editor.
> With Overleaf, we now have a process for developing technical documentation which has virtually eliminated the time required to properly format and layout documents.
>
> 
[Read the full storyarrow\_right\_alt](https://www.overleaf.com/about/customer-story/symplectic)
{plans}Plans to fit your needs
------------------------------
From small teams to large enterprises
### Group Professional
For teams and organizations who want to collaborate securely, with Overleaf premium features for all users and managed user accounts. SSO is available on request.
[Talk to Sales](https://www.overleaf.com/for/contact-sales-enterprise-2)
### Commons
The easy way to unlock premium Overleaf features for your entire organization, with domain-based enrollment, SSO, and a custom resource portal.
[Talk to Sales](https://www.overleaf.com/for/contact-sales-enterprise-2)
### On-premises Server Pro
For teams and organizations who want to host Overleaf in their own secure environment, with enhanced administrative control over projects and user access.
[Talk to Sales](https://www.overleaf.com/for/contact-sales-enterprise-2)
Don’t see the right fit for you?
[See all plans](https://www.overleaf.com/user/subscription/plans)
or [contact Sales](https://www.overleaf.com/for/contact-sales-enterprise-2)
\\begin{now}
Our friendly team will help you find the right solution for your organization.
[Talk to Sales](https://www.overleaf.com/for/contact-sales-enterprise-2)
We only use cookies for essential purposes and to improve your experience on our site. You can find out more in our [cookie policy](https://www.overleaf.com/legal#Cookies)
.
Essential cookies onlyAccept all cookies
---
# LaTeX editor features & benefits - Overleaf, Online LaTeX Editor
[Skip to content](https://www.overleaf.com/about/features-overview#main-content)
{features}
Write, collaborate, and create with Overleaf
============================================
Overleaf is the collaborative LaTeX editor that anyone can use. Find out why we’re loved by beginners and TeXperts alike.
[Sign up for free](https://www.overleaf.com/register)
[Explore plans](https://www.overleaf.com/user/subscription/plans)

> With Overleaf, working with large complex documents is no longer a daunting task.
>
> 

LaTeX, simplified
-----------------
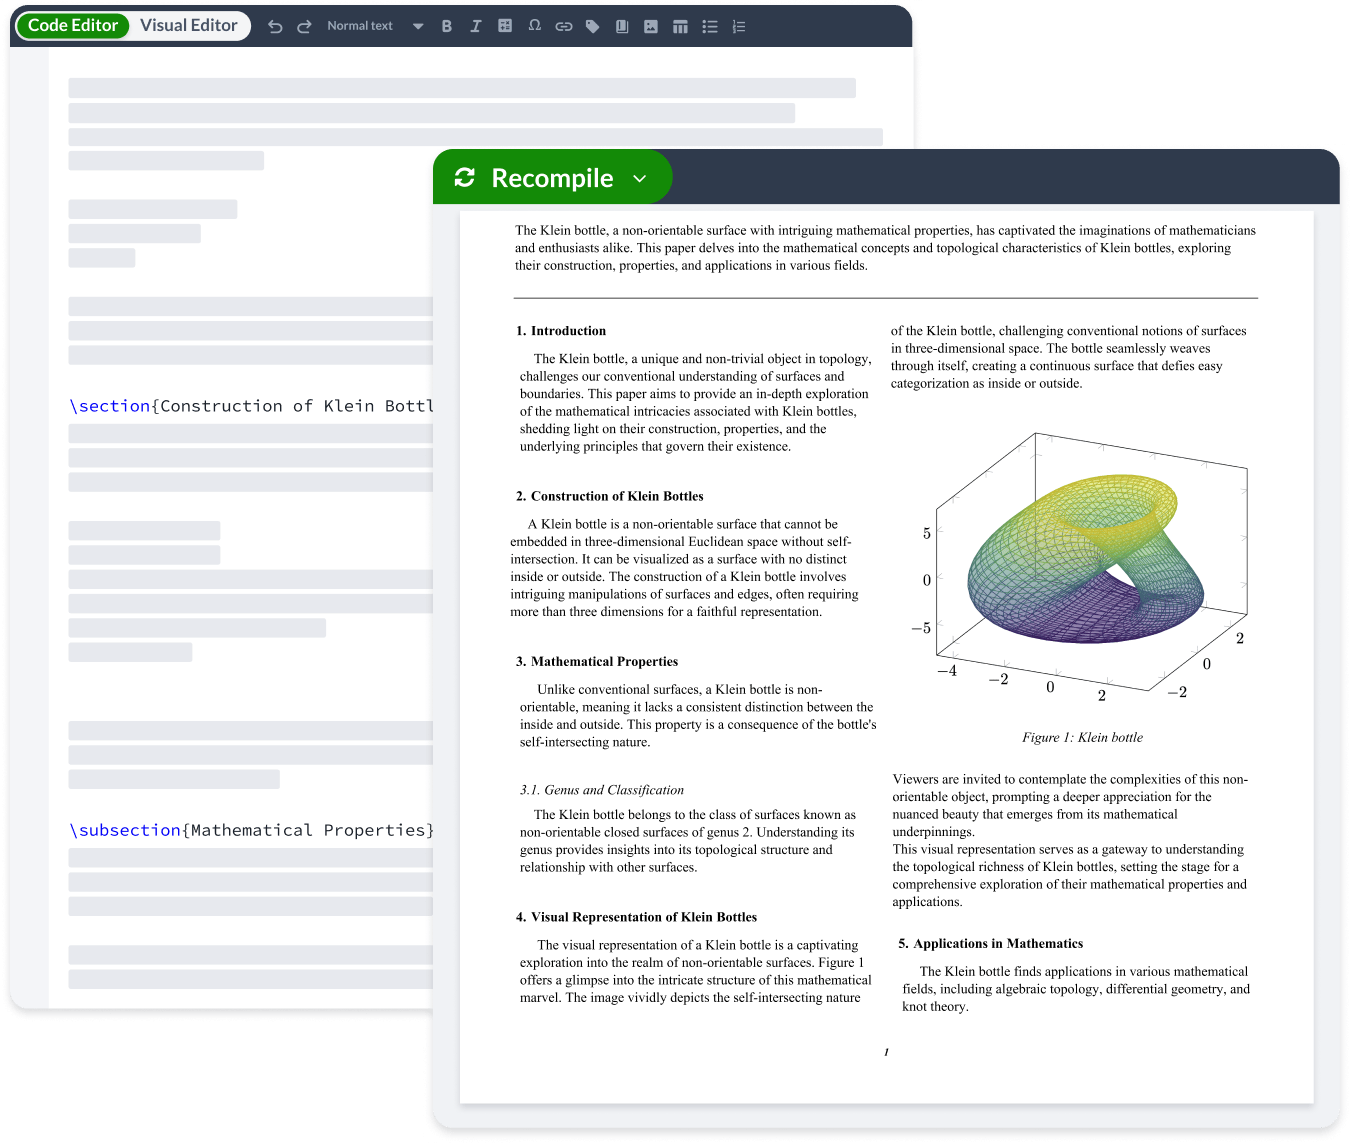
* ### Visual Editor and Code Editor
Switch to our Visual Editor to edit without writing code. Switch back to Code Editor anytime to see the code behind your writing.
* ### Tables and figures with the click of a button
Whether you’re working in Visual Editor or Code Editor, our toolbar lets you add figures and tables, and easily format text.
* ### Templates for everything
Our range of free templates and example projects mean you don’t have to start from scratch.
* ### No setup, installation, or package management
Our online editor is setup and ready to go the minute you log in.


Seamless collaboration
----------------------
* ### Project sharing
Share your project via a link or add collaborators directly by email.
* ### Simultaneous editing, commenting, and chat
Multiple people can edit and comment on shared LaTeX documents simultaneously and take advantage of in-document chat to discuss changes as they go.
* ### Real-time track changes Premium
See your collaborators’ edits in real time and easily identify what they’ve changed.
* ### Project history and version control Premium
Easily review changes to your project over time. Compare, label, and download different versions.

Hassle-free scientific and technical writing
--------------------------------------------
* ### Powered by LaTeX for perfect formatting
LaTeX’s powerful typesetting capabilities mean you can focus on your writing without worrying about the layout.
* ### Better bibliographies and citations
Easily manage your bibliographies, citations, and cross-referencing with LaTeX or use our integrations with Papers, Mendeley or Zotero.
* ### Symbol palette Premium
Insert math symbols into your document with the click of a button.
* ### Advanced reference search Premium
Find your references simply—search by author, title, year, or journal.

{integrations}
Connect your favorite tools Premium
------------------------------------------------------------------------------------------------------
Whether you want to edit your project in GitHub, use your Papers bibliography, or sync with Dropbox, Overleaf integrates with tools you already use and love.

{templates}
Get started with a template
---------------------------
From publisher-approved research article templates to business proposals, and so much more.
[Explore all templates](https://www.overleaf.com/latex/templates)
### [Journal articles_arrow\_outward_](https://www.overleaf.com/latex/templates/tagged/academic-journal)
Select from an array of journal templates and submit directly from Overleaf.

### [Theses_arrow\_outward_](https://www.overleaf.com/latex/templates/tagged/thesis)
Templates to help you tackle the most important piece of work you’ll produce as a student.
### [CVs and résumés_arrow\_outward_](https://www.overleaf.com/latex/templates/tagged/cv)
Make the right first impression with our popular range of CV templates.
\\begin{now}
Discover why over 20 million people worldwide trust Overleaf with their work.
[Sign up for free](https://www.overleaf.com/register)
We only use cookies for essential purposes and to improve your experience on our site. You can find out more in our [cookie policy](https://www.overleaf.com/legal#Cookies)
.
Essential cookies onlyAccept all cookies
---
# Overleaf and LaTeX Resources - Overleaf, Online LaTeX Editor
[Skip to content](https://www.overleaf.com/for/community/resources#main-content)
{learning resources}Level up your Overleaf and LaTeX skills
===========================================================
Whether you’re just starting out or looking for pro tips, we’ve got guides, webinars, tutorials, and docs to help you along the way.
_live\_tv_
Webinars
--------
Get support direct from our TeXpert Support team by signing up for our live intro webinars (or watch previous ones on demand).
[Browse webinars_arrow\_right\_alt_](https://www.overleaf.com/events/webinars)
_local\_library_
Documentation
-------------
Discover hundreds of help and learning articles, tutorials, and more.
[Explore Overleaf Learn_arrow\_right\_alt_](https://www.overleaf.com/learn)
_school_
Tutorials
---------
Whether you want a general overview of LaTeX or need to know how to do something specific like setting up tables, our tutorials help you get started.
[Browse tutorials_arrow\_right\_alt_](https://www.overleaf.com/learn/latex/Tutorials)
_add\_notes_
Templates
---------
Pick from thousands of free templates in our gallery—from research articles to CVs, and so much more.
[Browse templates_arrow\_right\_alt_](https://www.overleaf.com/latex/templates)
_workspace\_premium_
Premium features guide
----------------------
Find out which features you'll have access to with an Overleaf subscription — and how to get the most from them — in this comprehensive guide.
[Explore premium features_arrow\_right\_alt_](https://www.overleaf.com/learn/how-to/Overleaf_premium_features)
_bolt_
Quick guides
------------
Need a cheat sheet? Check out our handy LaTeX command sheet and keyboard shortcuts to speed up your workflow.
[Overleaf keyboard shortcuts_arrow\_right\_alt_](https://www.overleaf.com/latex/templates/overleaf-keyboard-shortcuts/pphdnzrwmttk)
[LaTeX command sheet_arrow\_right\_alt_](https://www.overleaf.com/latex/templates/a-quick-guide-to-latex/fghqpfgnxggz)
Stay in the Loop
----------------
Stay up to date with the latest Overleaf features, improvements, and tips by visiting our blog. Whether it’s product updates, helpful guides, or LaTeX insights, you’ll find plenty to explore.
[Read the blog](https://www.overleaf.com/blog)
We only use cookies for essential purposes and to improve your experience on our site. You can find out more in our [cookie policy](https://www.overleaf.com/legal#Cookies)
.
Essential cookies onlyAccept all cookies
---
# AI features - Overleaf, Online LaTeX Editor
[Skip to content](https://www.overleaf.com/about/ai-features#main-content)
{ai features}
Write smarter, faster, and with confidence with ✨ AI Assist
===========================================================
The ultimate research writing toolkit—combining AI LaTeX tools with language and editing assistance
[Try for free](https://www.overleaf.com/register)
### _table\_chart_
#### LaTeX table generator and equation generator
#### _build_
#### Help with LaTeX writing and errors
#### _dictionary_
#### Research-tailored language suggestions, AI paraphrase tool, and more
Write smarter, right now
------------------------
Try our AI features for free. Unlock unlimited use when you buy AI Assist.
[Try for free](https://www.overleaf.com/register)
{features}
Bringing together LaTeX-tailored AI tools from Overleaf and Writefull
---------------------------------------------------------------------

### LaTeX table generator and equation generator
Generate tables and equations in seconds, saving you hours of manual coding.
* Generates LaTeX tables and equations from images or simple text prompts
* Creates the LaTeX code for you
* Works with even the most complex tables and equations
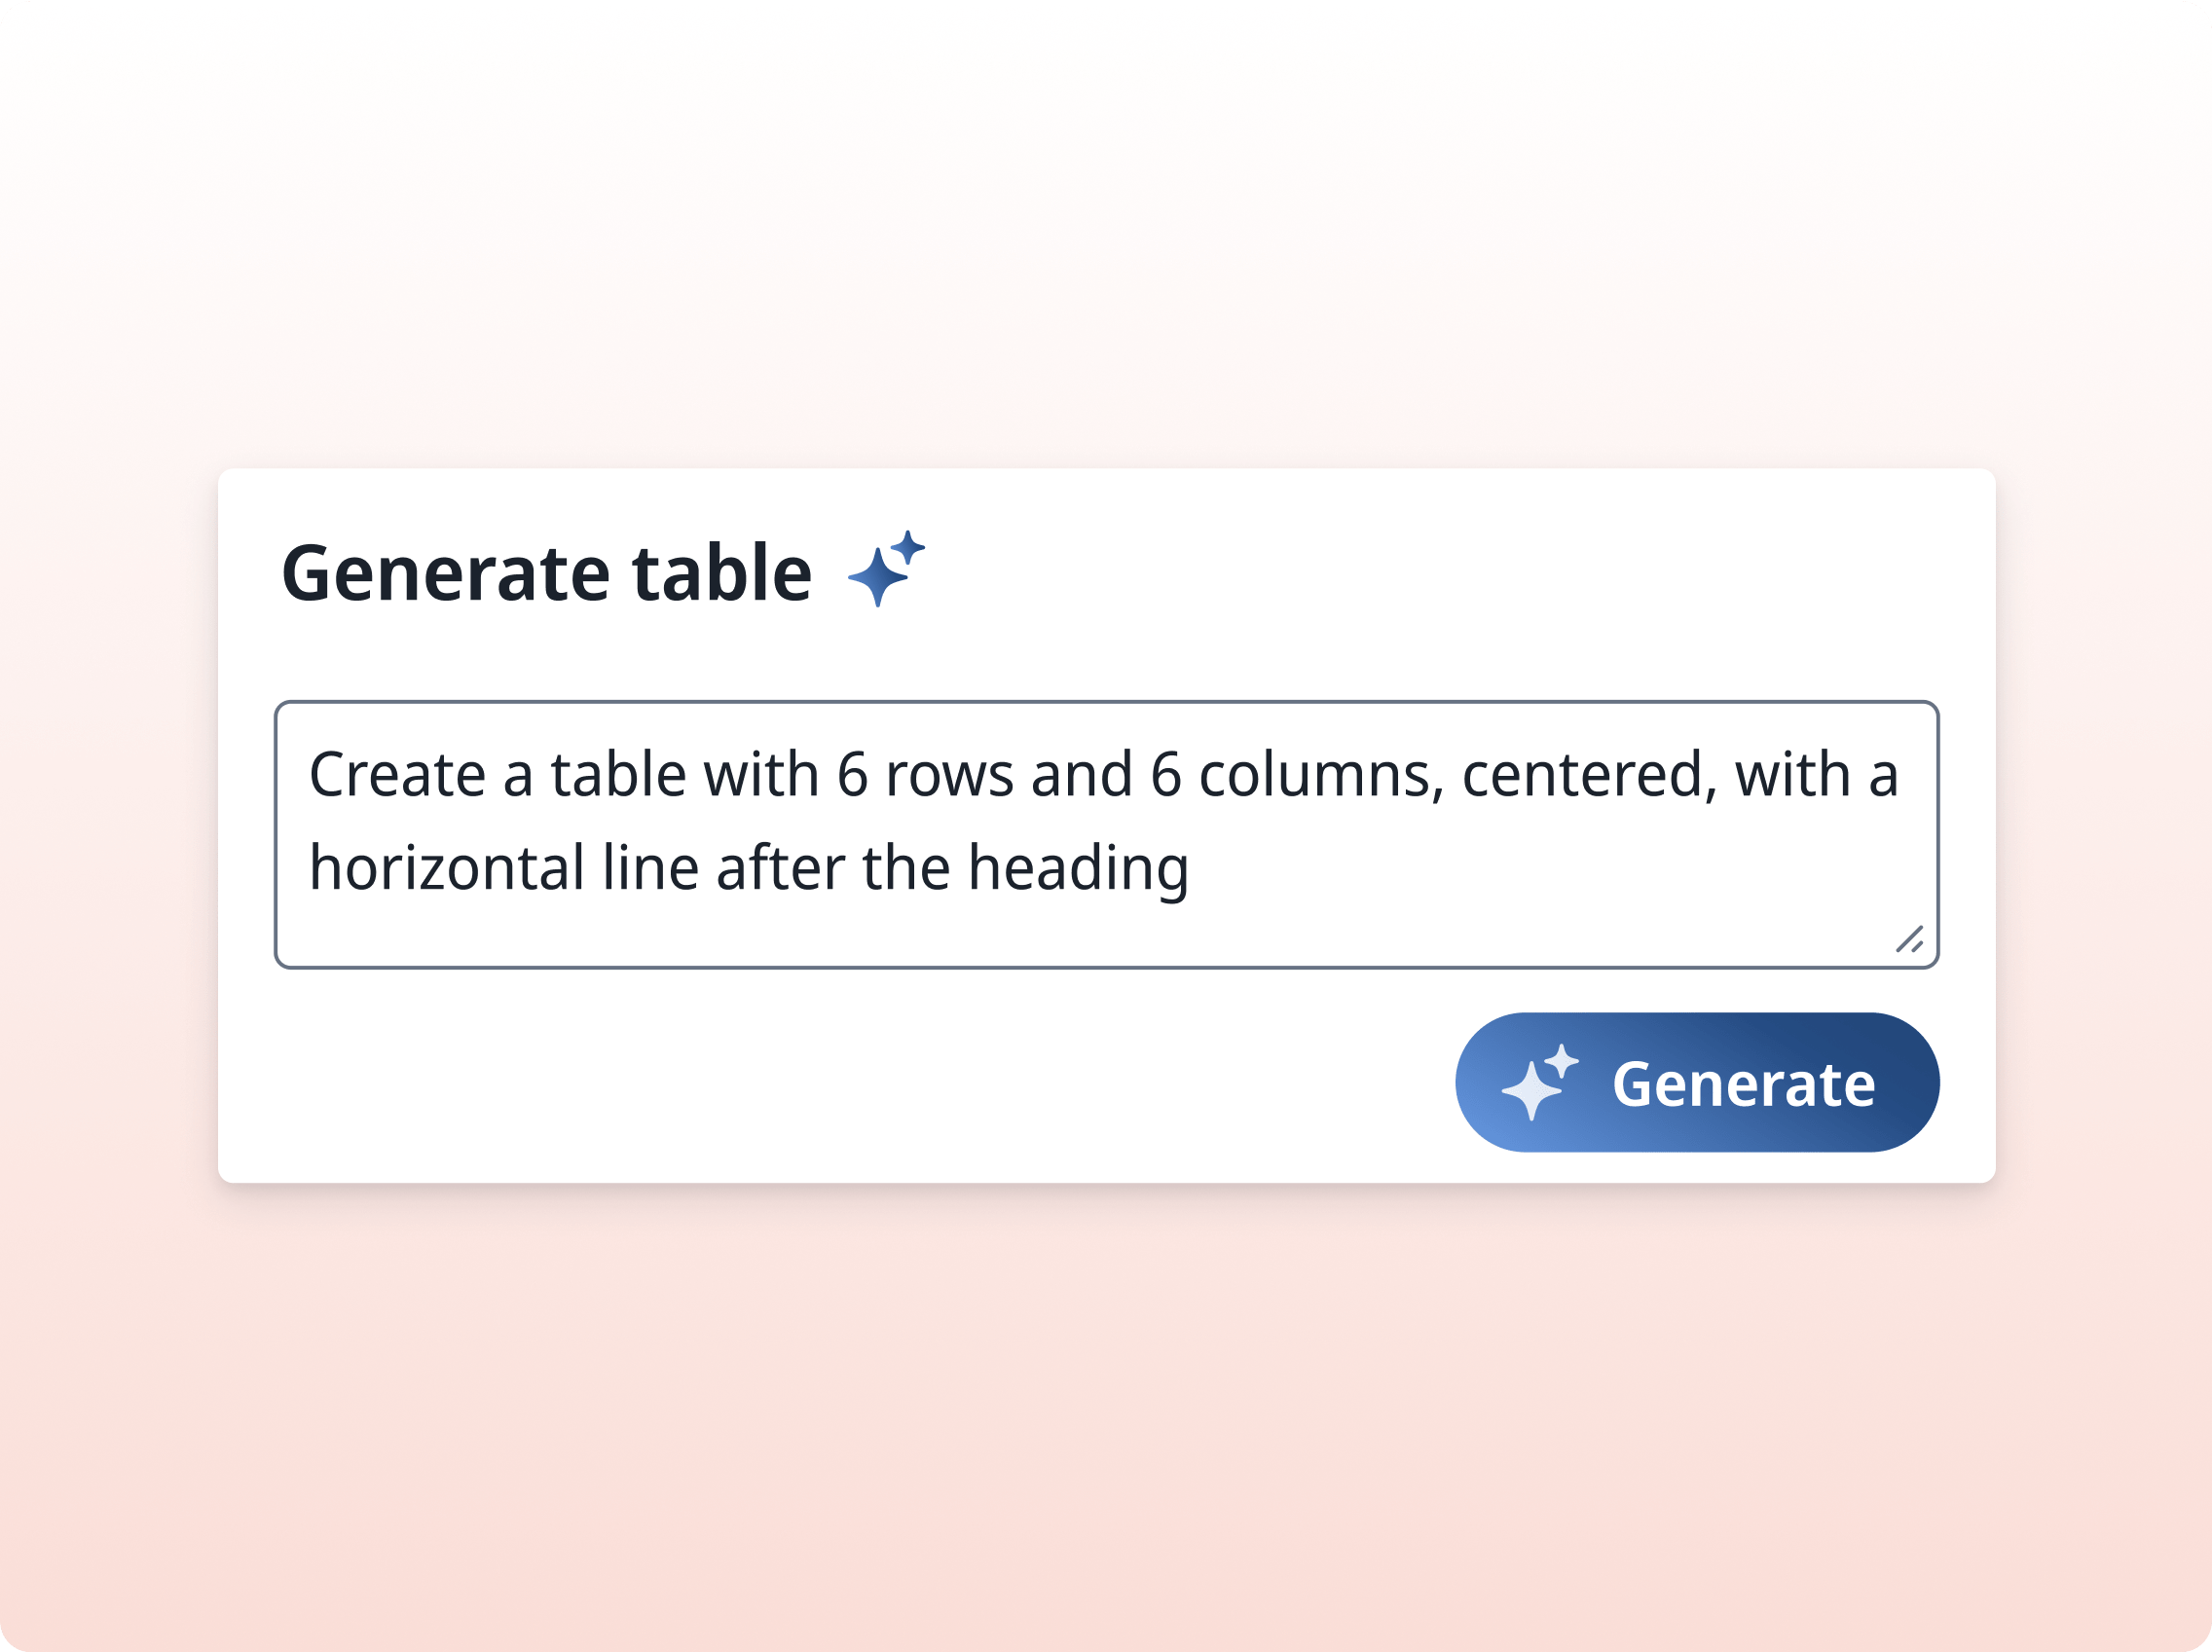
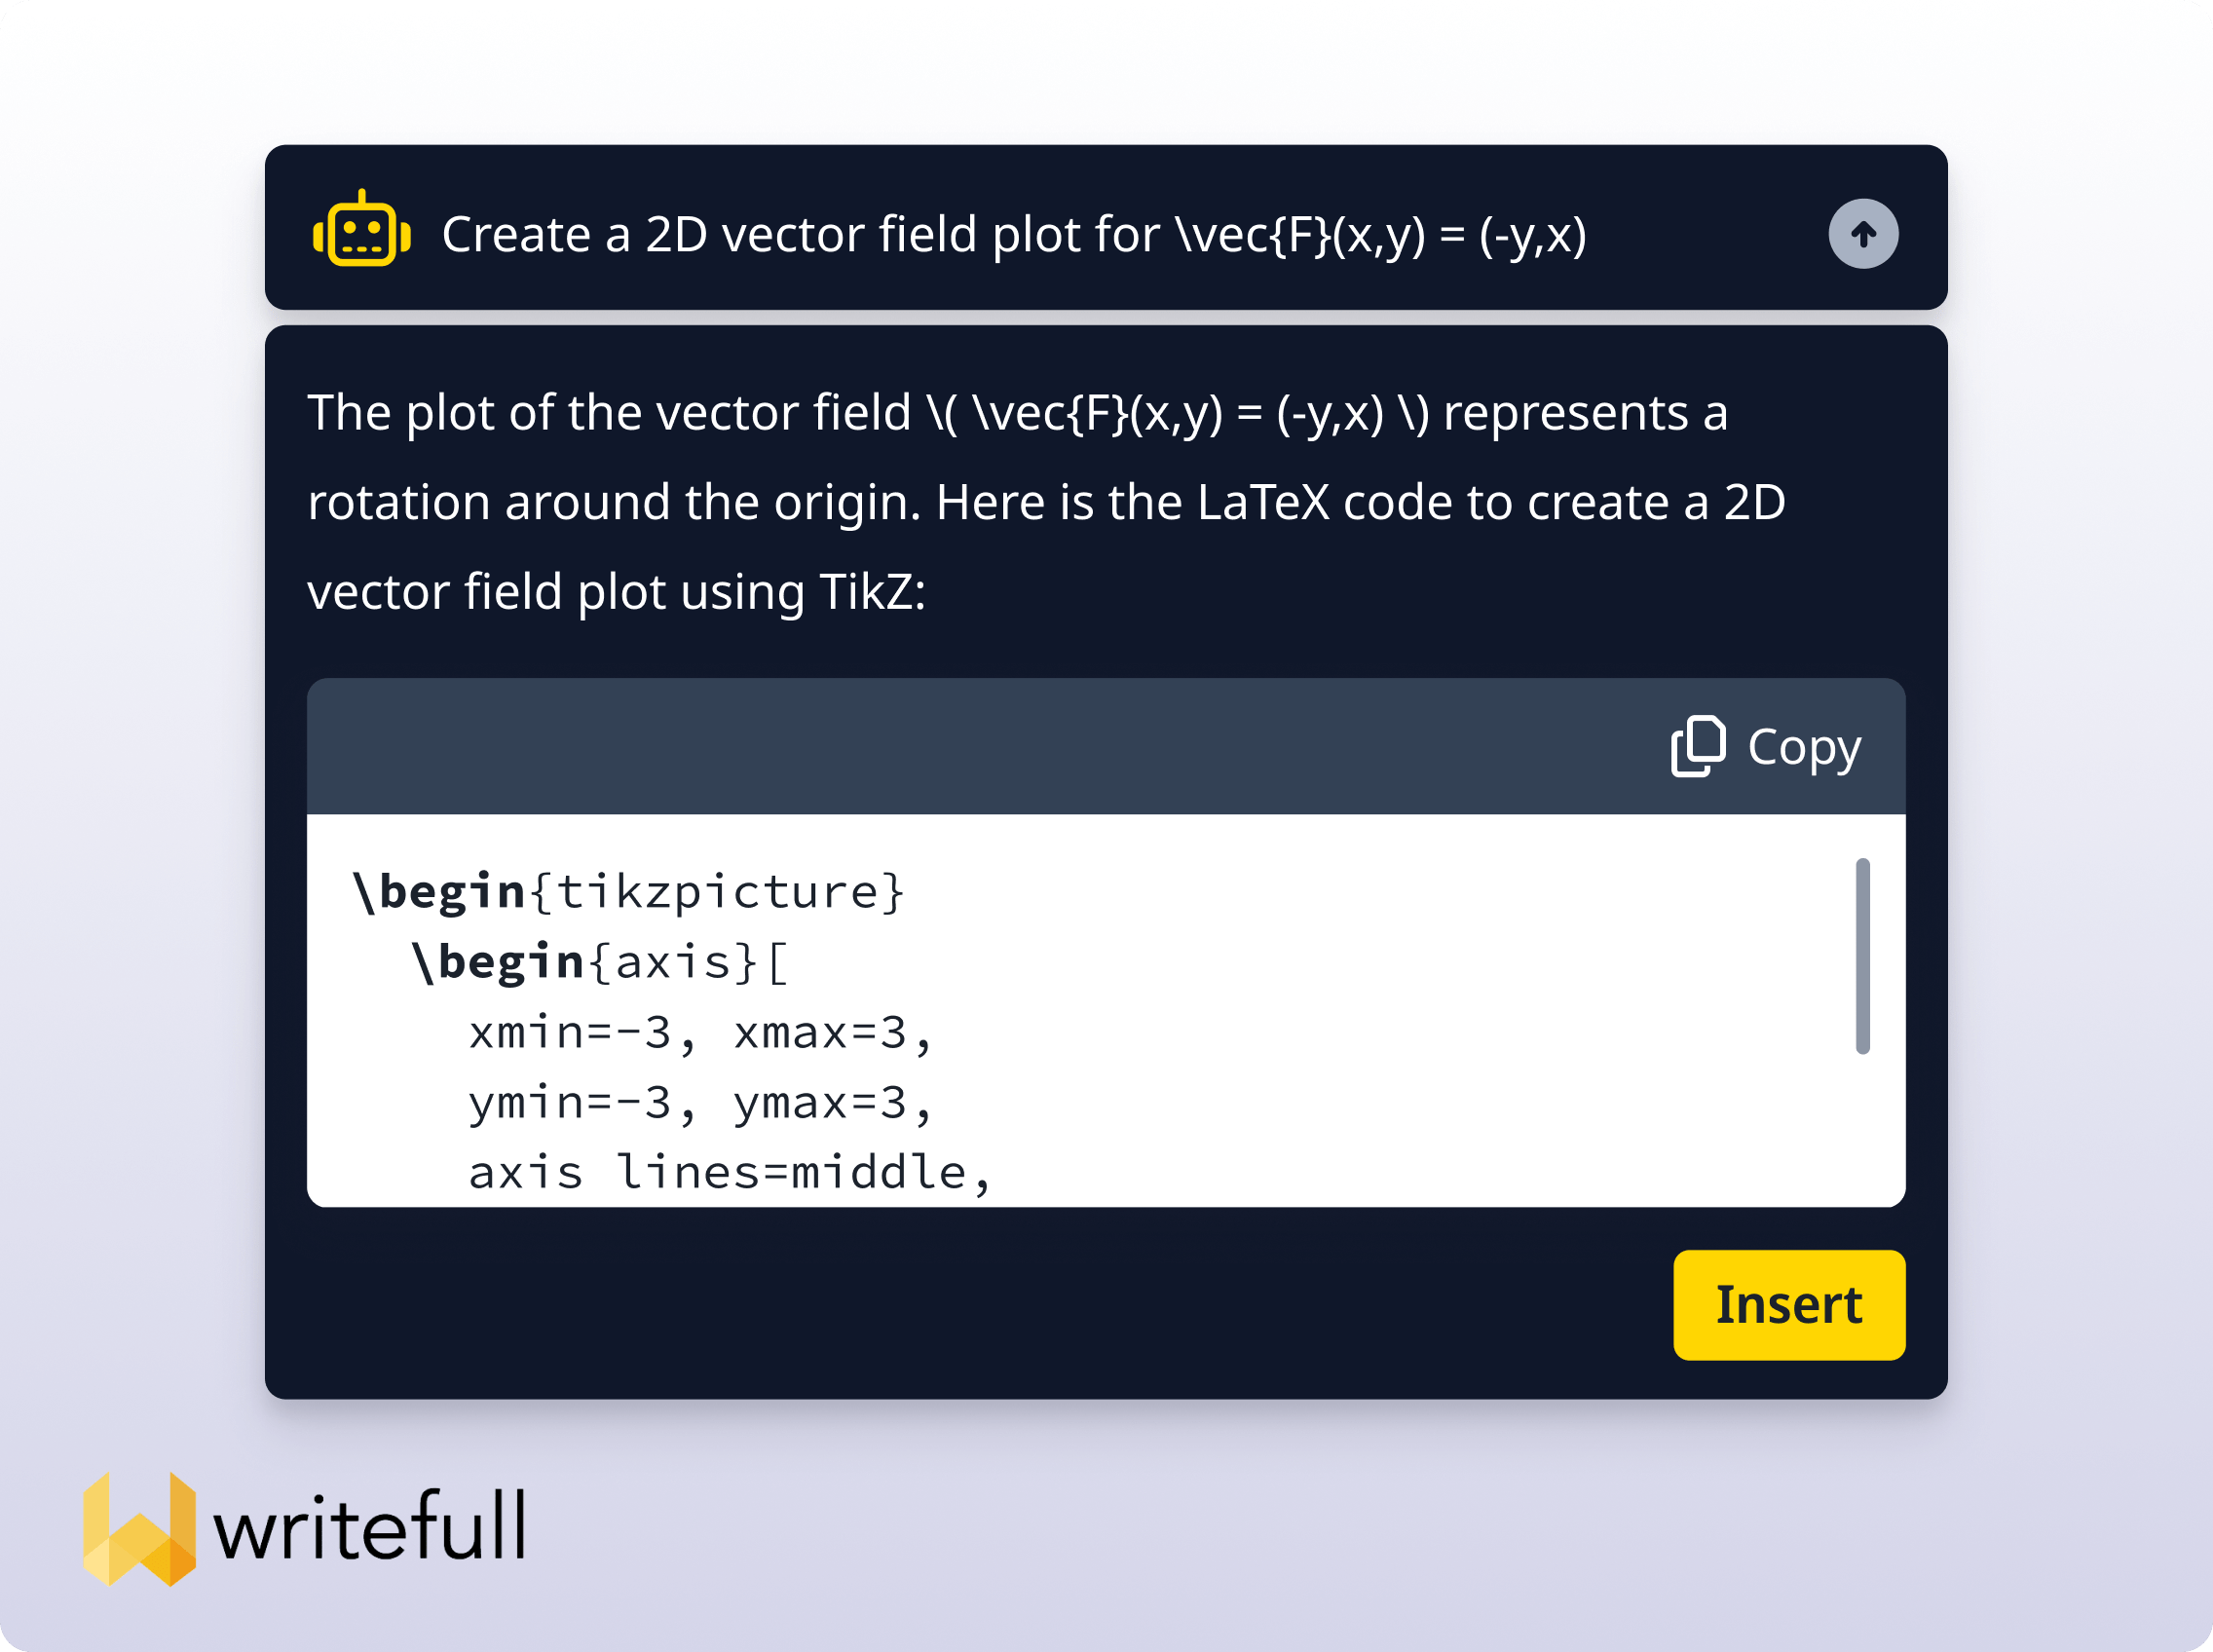

### LaTeX AI code and writing assistance from TeXGPT
It won’t write your paper for you, but TeXGPT can help you create it faster.
* Generates figures and other LaTeX code
* Creates outlines, examples, skeleton documents, and writing feedback
* Gives explanations of content
* Corrects or updates your formatting

### LaTeX error assistance
Get your documents compiling smoothly with AI error support.
* Explains errors in your LaTeX code
* Suggests the most appropriate fix
* Applies suggestions for you (if you ask it to)
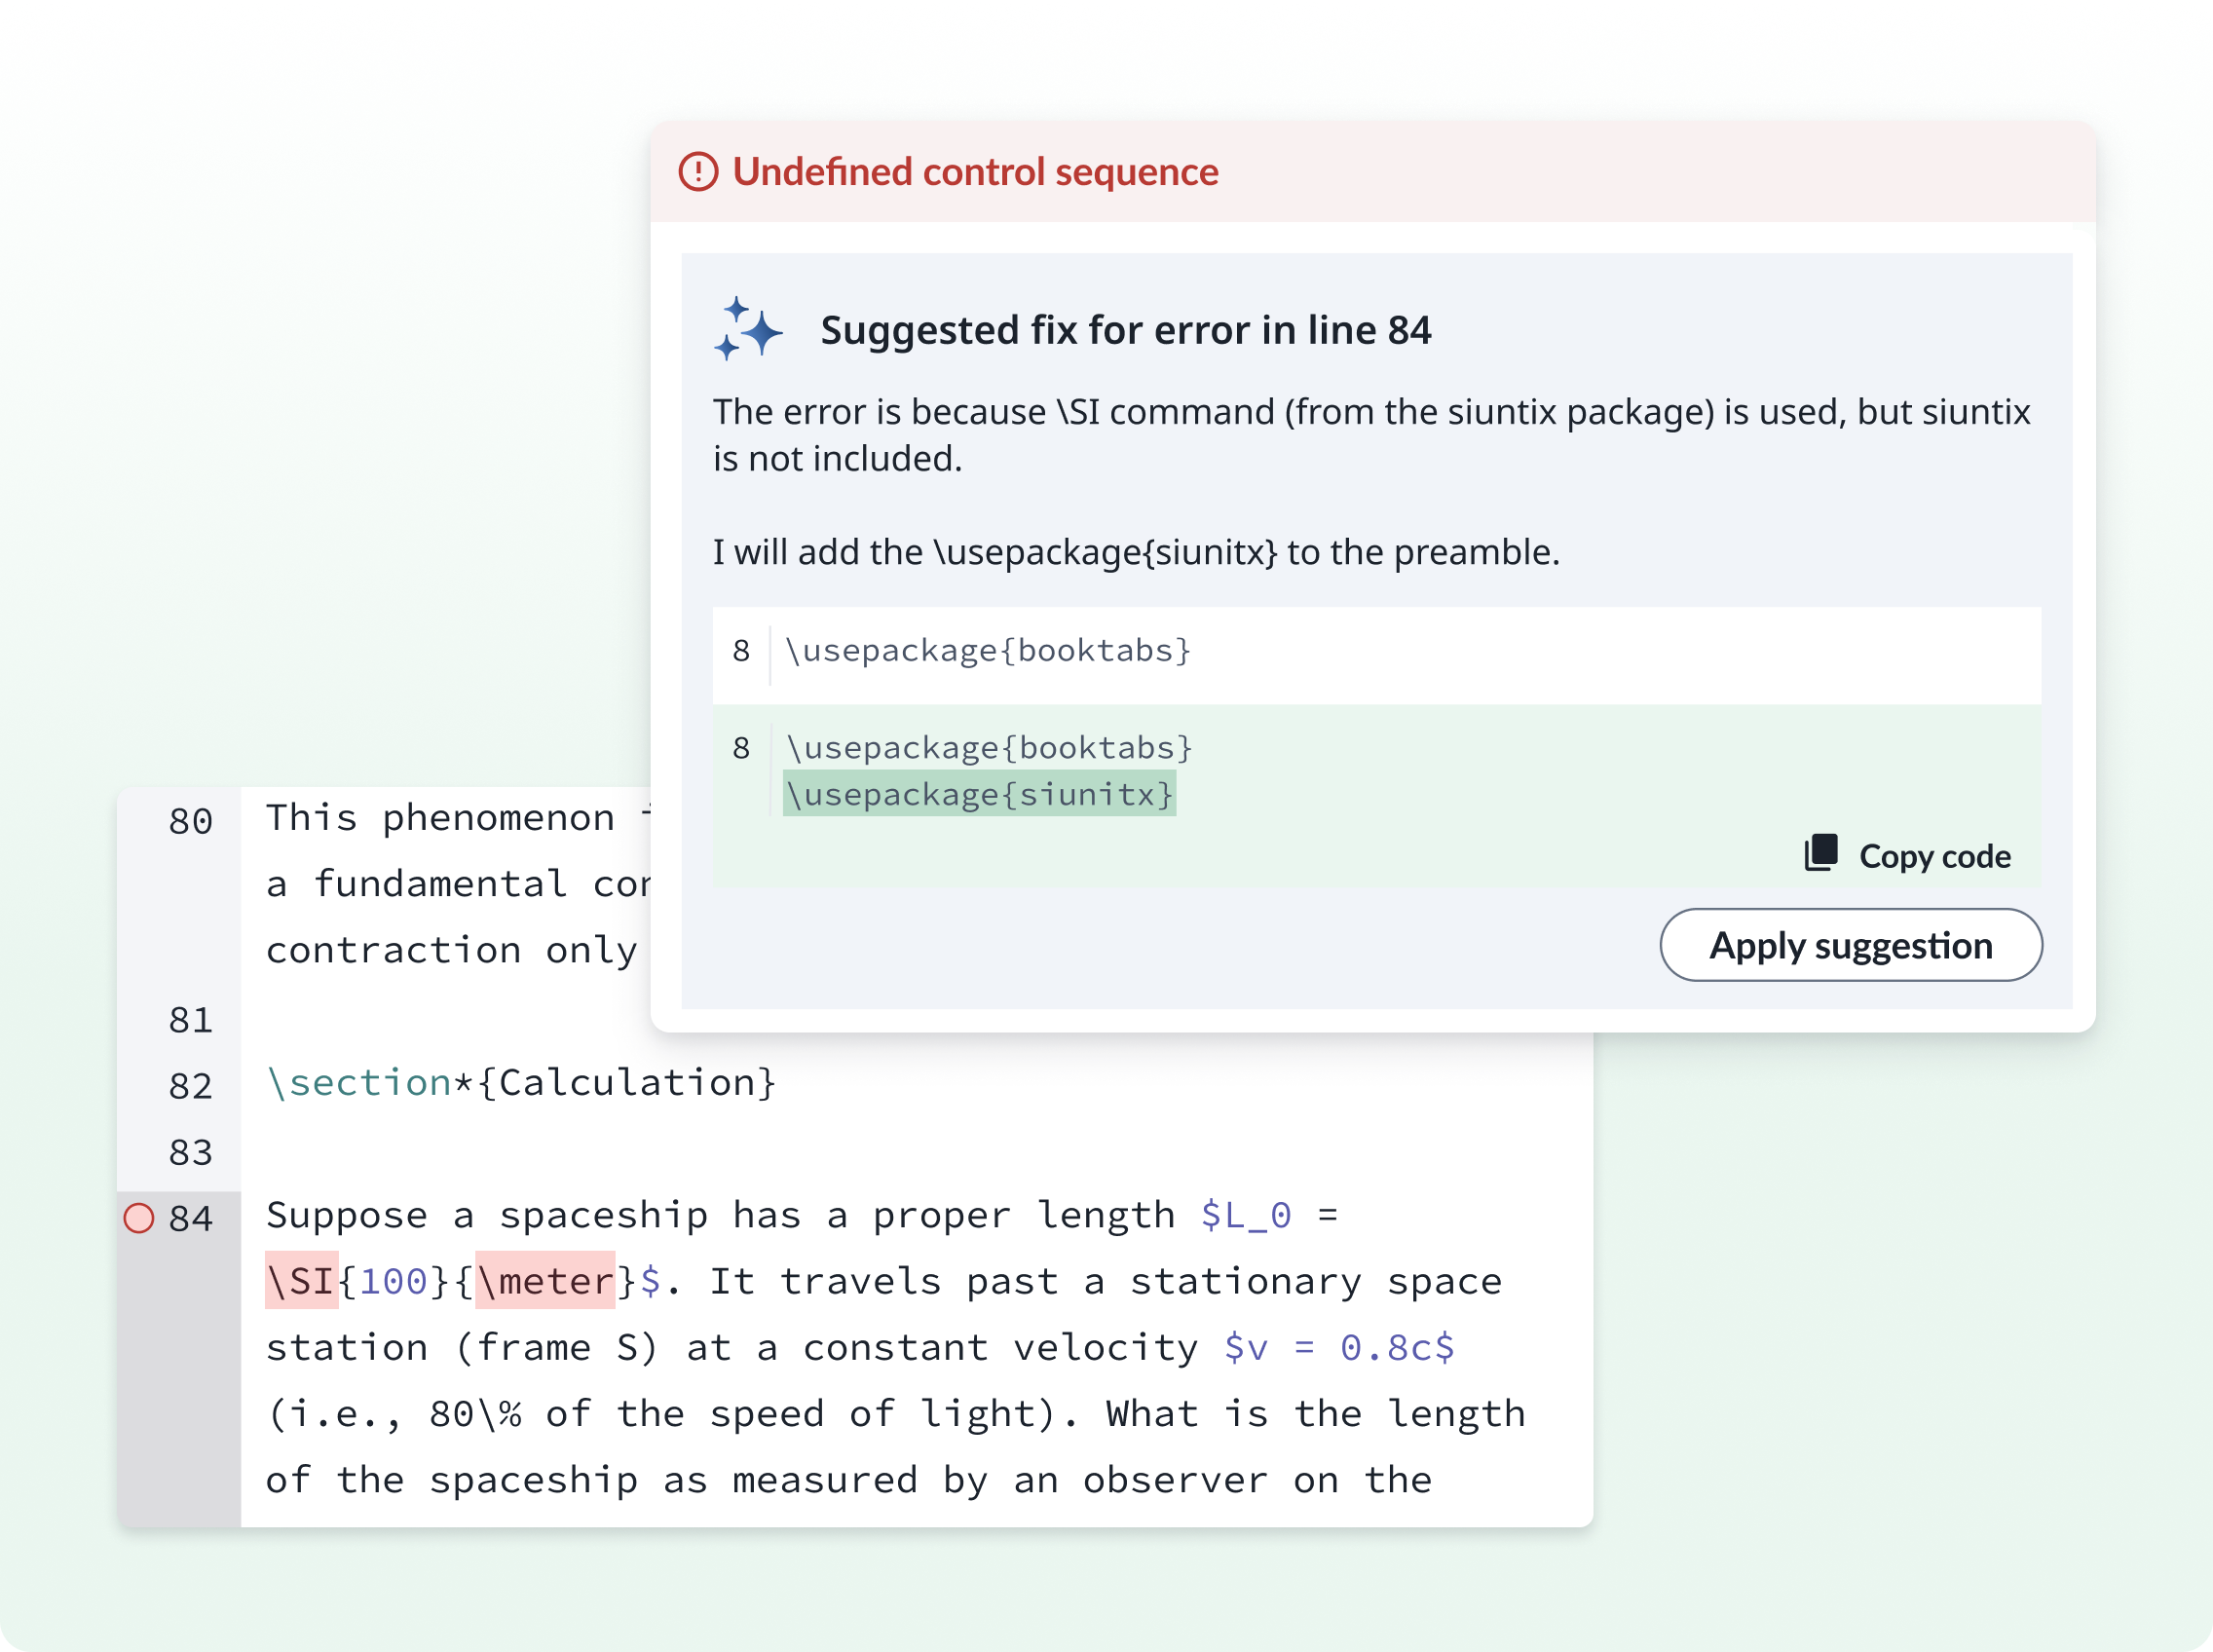
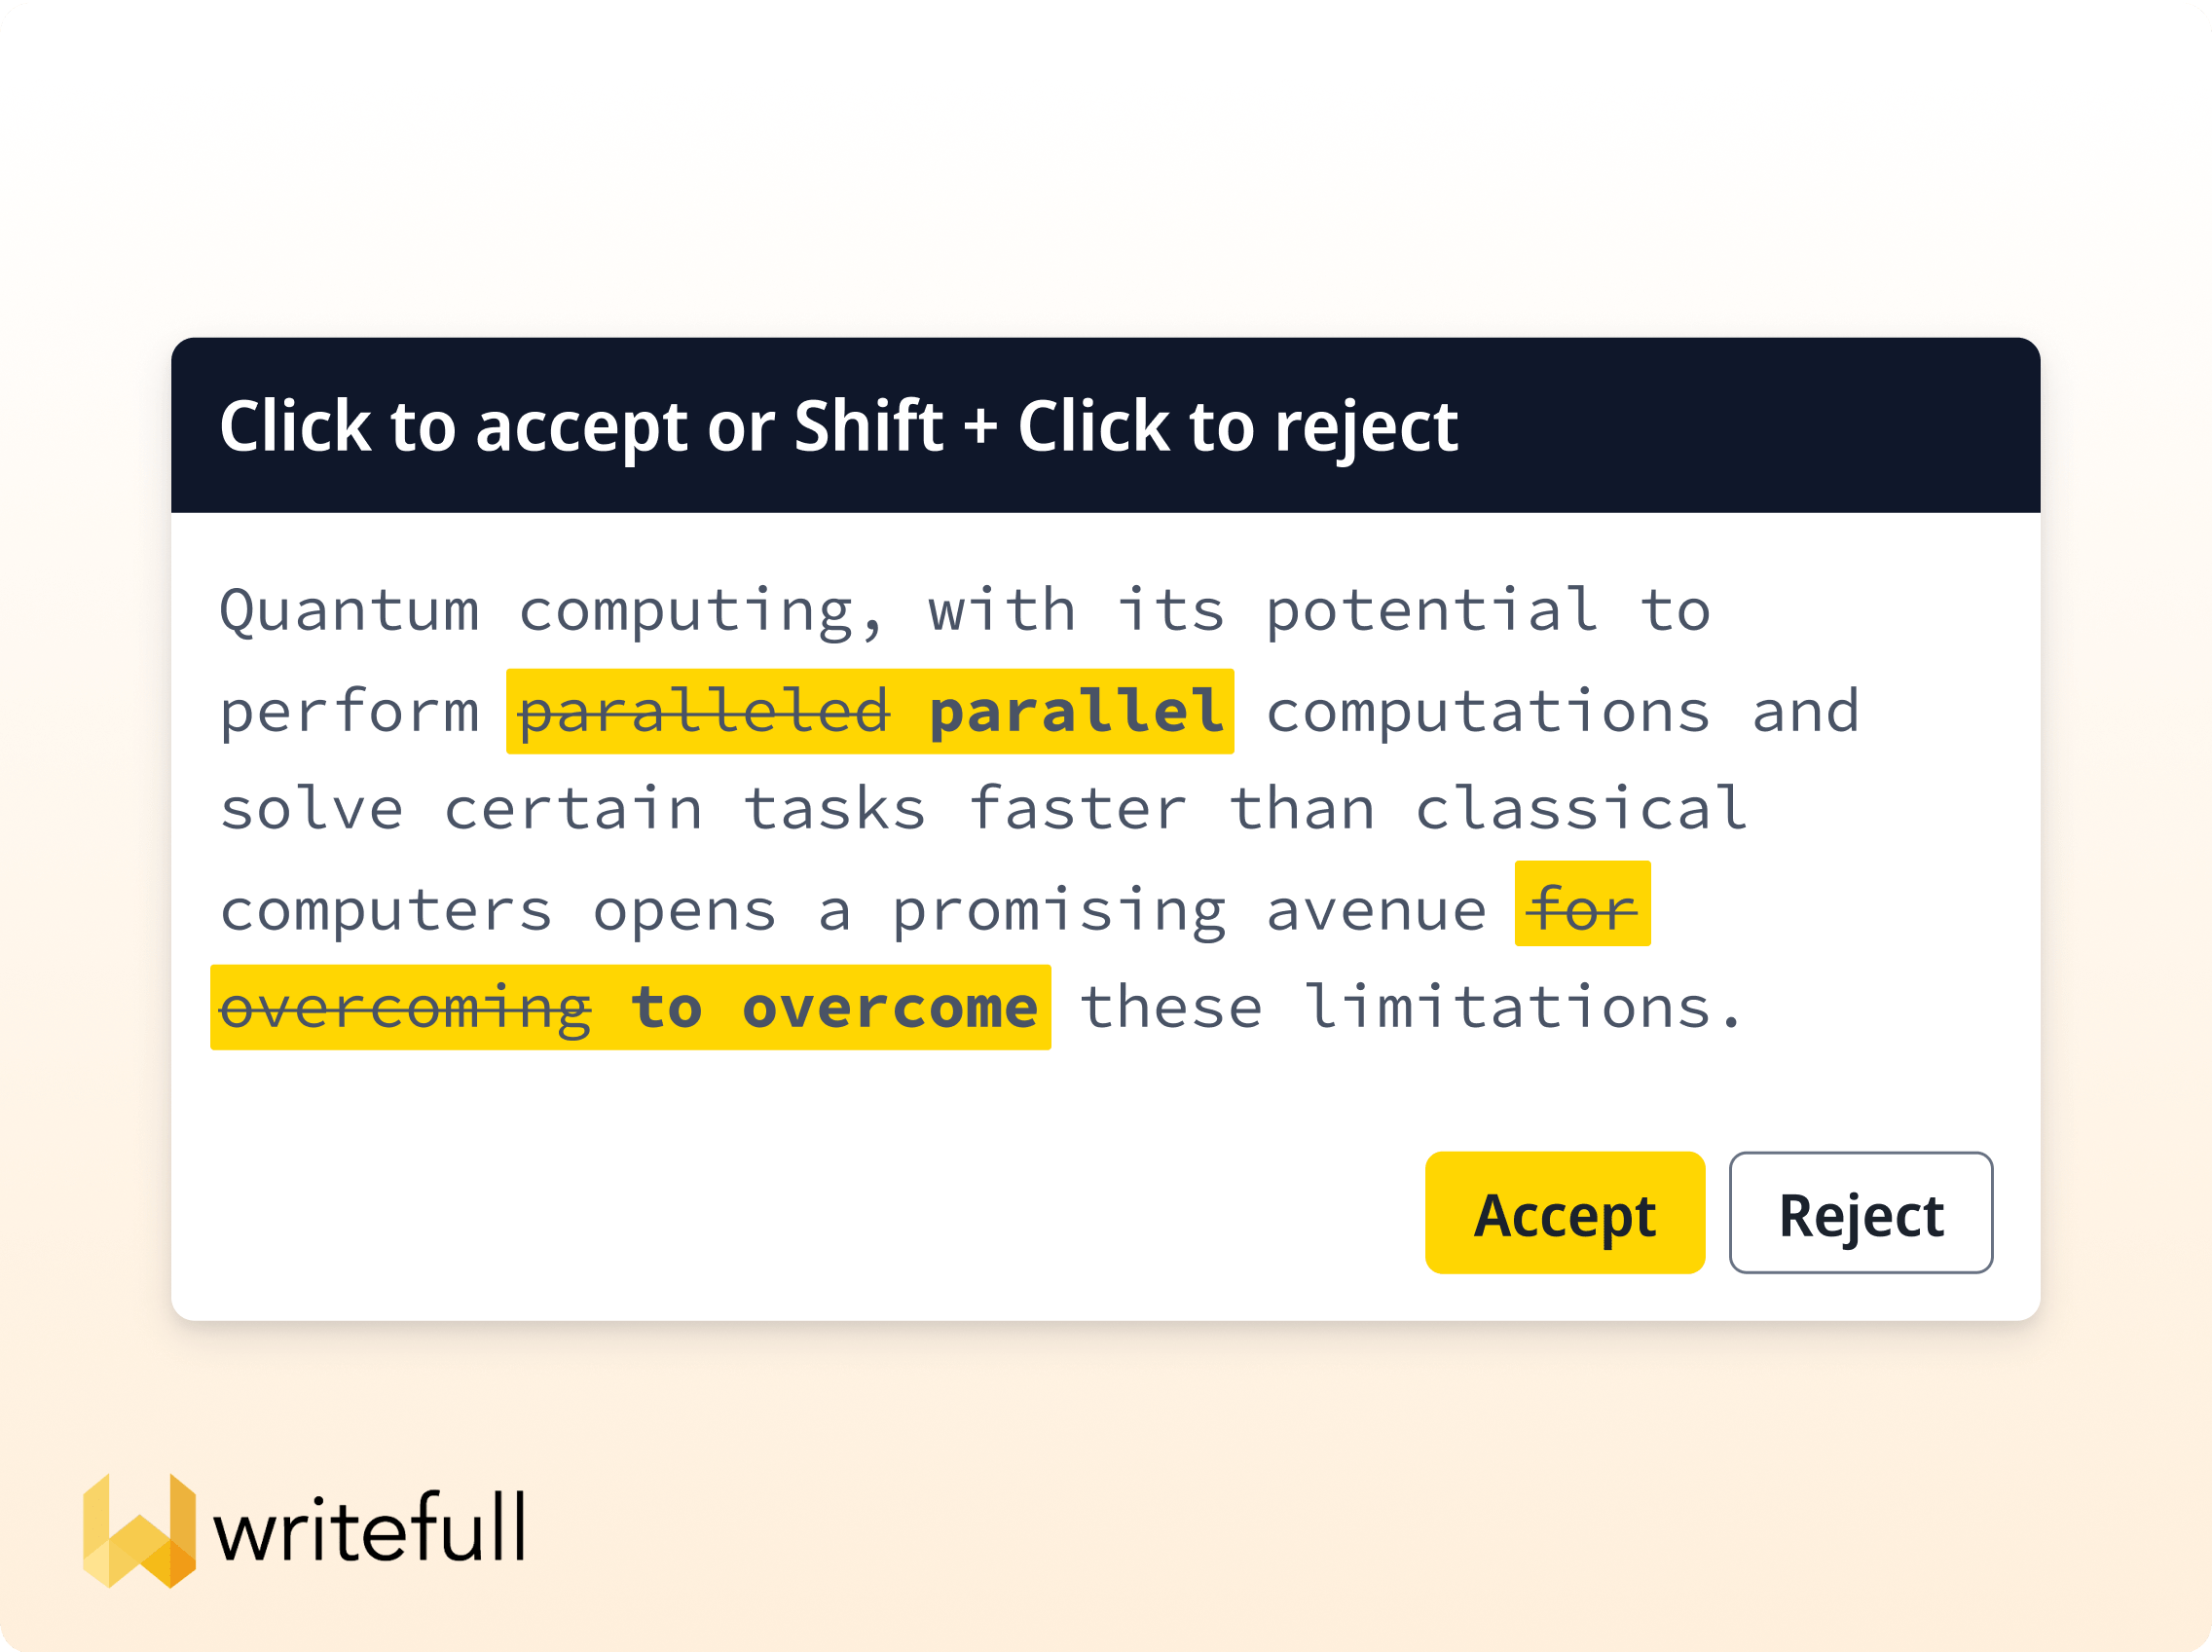

### Research-tailored AI language feedback
Get context-aware suggestions to improve grammar, spelling, word choice, and sentence structure.
* Corrects and perfects your writing
* Tailored to the nuances of academic and research writing
* Trained on published academic papers

### AI paraphrase tool and contextual editing
Expand your draft, elevate your writing style, and clarify your ideas with ease.
* Paraphrases selected text
* Summarizes lengthy paragraphs
* Checks synonyms in content
* Generates abstracts and titles
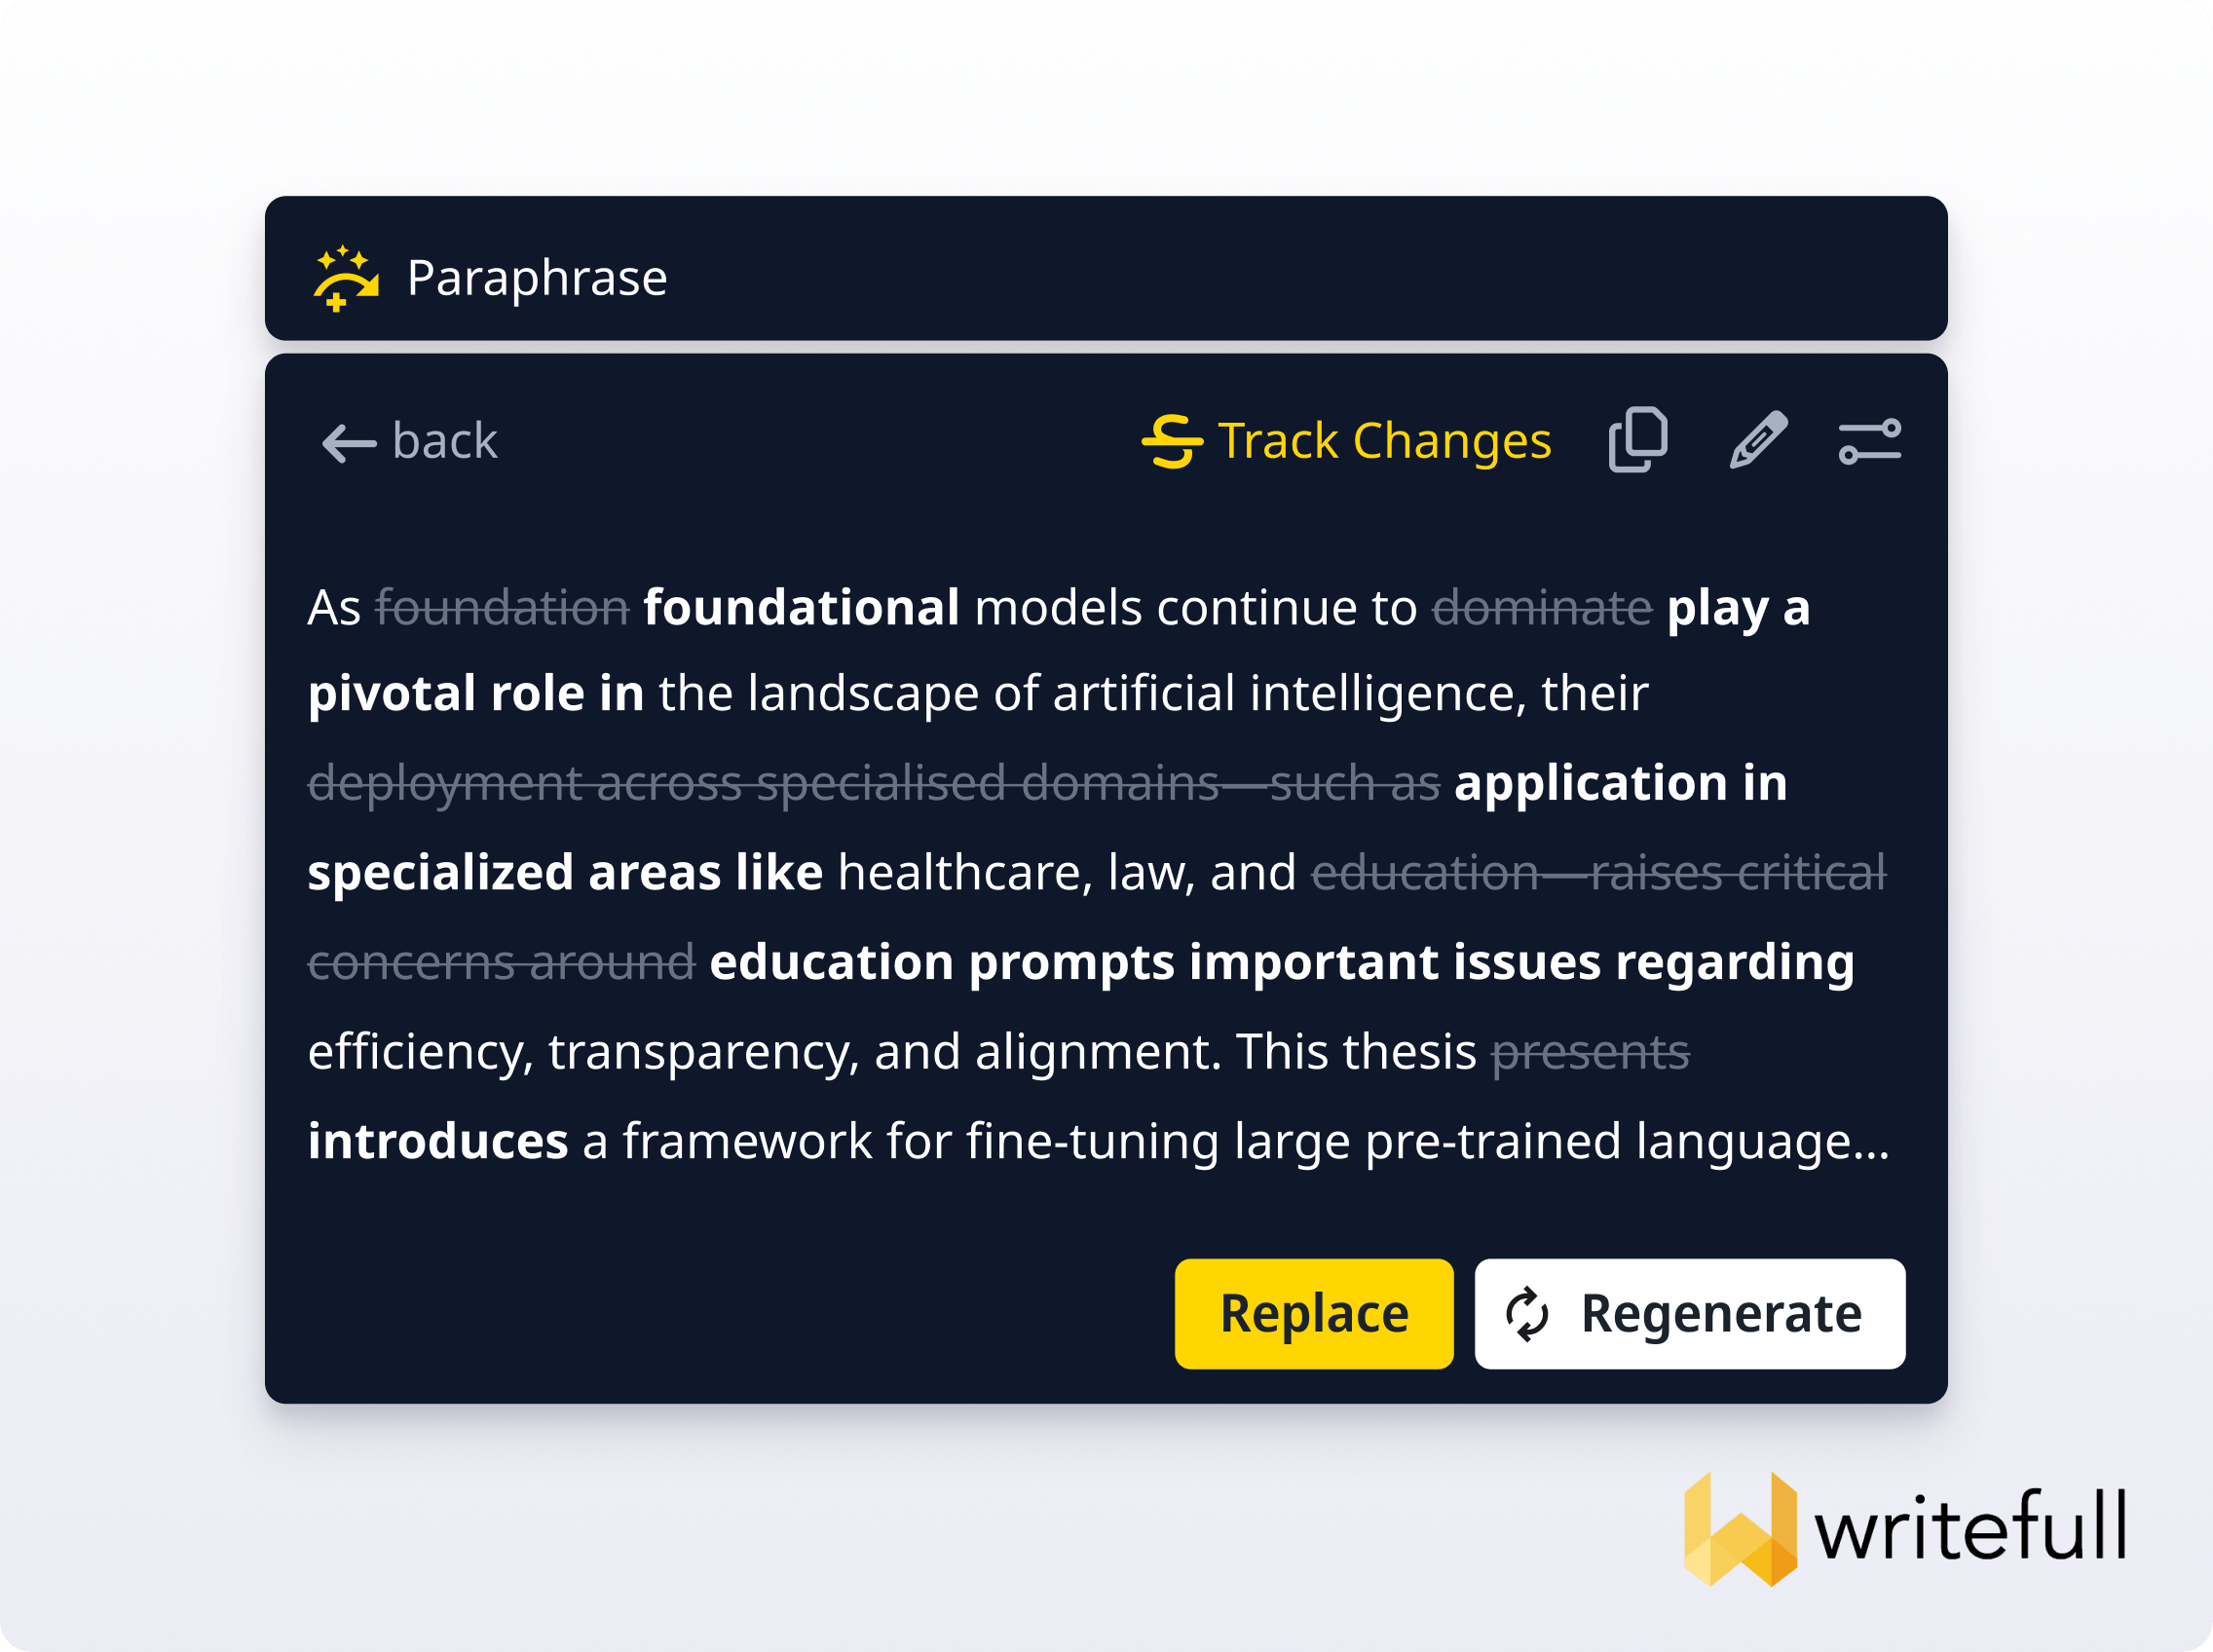
{why ai assist?}
----------------
Responsible AI built for research writing
-----------------------------------------
_bolt_
#### Speed up your workflow
Spend less time wrestling with LaTeX code and perfecting your prose, and more time focusing on your groundbreaking research.
_contract\_edit_
#### Write with confidence with Writefull
Ensure your documents are error-free, polished, and ready for publication, thanks to Writefull’s language tools, all included in AI Assist.
_automation_
#### Built for the way you work
Our LaTeX AI features are built by the TeXperts at Overleaf, while writing suggestions are specifically tailored to research and academic writing.
_database_
#### No training on your data
Your project data and interactions are never used to train AI models.
_lock_
#### You’re in control
You’ll be notified if a feature uses a third-party service (such as OpenAI’s GPT). And you can choose the level of AI support that feels right for you .
_workspace\_premium_
#### ISO certified
As part of Digital Science, [Overleaf is ISO/IEC 27001:2022 certified](https://www.digital-science.com/security-certifications/)
, showing our commitment to the highest requirements of information security.
> This has greatly enhanced my productivity in paper writing. I’m very happy that it understands LaTeX, and I was able to use it to generate complex LaTeX tables and sub-figure plots.
{frequently asked questions}
### Your questions answered
* [General questions](https://www.overleaf.com/about/ai-features#general-questions)
* [Features](https://www.overleaf.com/about/ai-features#features)
* [Data privacy and usage limits](https://www.overleaf.com/about/ai-features#data-privacy)
* [Subscription](https://www.overleaf.com/about/ai-features#subscriptons)
* [Other](https://www.overleaf.com/about/ai-features#other)
##### How do I get started with AI Assist?
You can start using AI tools in Overleaf by enabling AI features in your [account settings](https://www.overleaf.com/user/settings)
. This gives you free limited access. For more information on how to use the tools, you can [read our documentation](https://www.overleaf.com/learn/how-to/AI_Assist)
.
##### Is there a free trial of AI Assist?
Once AI features are enabled in your [account settings](https://www.overleaf.com/user/settings)
, you can use them a limited number of times each day, for as long as you like. Buying AI Assist will remove these limits and give you unlimited access to all the AI features.
##### Does AI Assist adhere to rules about AI use at my institution/organization?
Different institutions, organizations, and publishers have different policies around use of AI. The level of AI support you use with AI Assist is entirely up to you. For example, you could use it for language revision and fixing LaTeX errors without using the text rewriting/rephrasing features. Choose what feels right to you, and make sure to follow your institution’s or publisher’s policy.
##### What kind of LaTeX errors can AI Assist help with?
The Error Assist tool simplifies the debugging process by providing explanations and suggested fixes for LaTeX coding errors, both simple and complex. It can only correct LaTeX coding errors, it doesn’t fix all errors within your project. For example, if you’re experiencing [a compile timeout](https://www.overleaf.com/learn/how-to/Fixing_and_preventing_compile_timeouts)
, there may be other problems you need to fix. It’s important to bear in mind that the more specialized your LaTeX code is, the greater the potential for inaccurate error suggestions. Error Assist is not always aware of your custom commands and may offer more general solutions.
##### Can I use AI Assist for documents written in a language other than English?
AI Assist’s language suggestions (by Writefull) can support multiple languages. All you need to do is select the GPT model to start checking your text in Spanish, Dutch, German, Chinese, or any other language. [Find out more about Writefull’s language support](https://blog.writefull.com/new-nieuw-nuevo-writefull-now-supports-other-languages-and-writing-genres/)
.
##### Can AI Assist help me generate LaTeX tables and equations?
The Table and Equation Generator tools let you instantly generate the LaTeX code for tables and equations using just an image or a prompt, saving you time when writing in LaTeX. Find out how in our [documentation](https://www.overleaf.com/learn/how-to/AI_Assist)
.
Note that while you can use these features for free, you will be subject to a daily cap. Purchasing AI Assist will let you use the Table Generator and Equation Generator tools as much as you like!
##### How does AI Assist use my data?
The different AI features within AI Assist are designed to protect your data and comply with Overleaf's and Writefull's [policies](https://www.overleaf.com/learn/how-to/AI_Assist#Data_privacy_and_responsible_use)
. **Importantly, your projects and data are never used for training.**
Some of Overleaf and Writefull’s AI features (such as Error Assist, or Writefull’s GPT language model) use third-party services like OpenAI. Before using these features, you'll be prompted to give consent the first time content is sent for external processing. If you choose to use these features, your text may be sent to and temporarily stored by this third-party service provider, but will not be used for training their models. [Find out more in our documentation](https://www.overleaf.com/learn/how-to/AI_Assist)
.
##### What are the fair use limits?
All eligible users can try Overleaf and Writefull AI features with a limited number of free uses each day. If you hit your daily quota for a particular feature, you'll need to either:
* Purchase **AI Assist** for unlimited access (fair use applies), or
* Wait up to 72 hours for your quota to reset
You may still be able to use other AI features in the meantime if they fall under a different quota category.
Usage limits (quotas) are separated into:
* A quota for **Error Assist**
* A quota for **Writefull language suggestions**
* A combined quota for other AI Assist tools (e.g. Rewrite, Equation/Table Generator, Summarize, etc.)
AI Assist users receive unlimited access to our AI tools (subject to a fair usage policy).
##### How much does AI Assist cost?
AI Assist is an add-on that can be purchased with any type of Overleaf plan (including the free plan). For pricing details, please see our [pricing page](https://www.overleaf.com/user/subscription/plans#ai-assist)
.
##### Do I need an Overleaf premium plan subscription to use AI Assist?
No. AI Assist is an add-on that can be purchased with any type of Overleaf plan (including the free plan). You can use Overleaf and Writefull’s AI features a limited number of times each day, for as long as you like. Buying the AI Assist add-on will remove these limits and give you unlimited access to all AI features within Overleaf.
##### What is Writefull?
[Writefull](https://www.writefull.com/)
helps students and researchers around the world to write better, faster, and with confidence. Overleaf and Writefull are both part of [Digital Science](https://www.digital-science.com/)
, a company that drives global research progress through innovative, AI-powered technology.
Writefull doesn’t just copy-edit research texts, it helps with a range of writing tasks, from choosing words and rephrasing sentences, to writing abstracts, and more. Using custom language models trained on published research, Writefull gives high-quality language support tailored to research writing. Even some of the world’s leading scholarly publishers use Writefull’s AI language edits.
##### Why is Writefull available within Overleaf?
Overleaf and Writefull are both part of [Digital Science](https://www.digital-science.com/)
, an AI-driven research technology and data company. Because of this, we’re able to work together to bring Writefull’s AI language assistance, TeXGPT, and editing tools directly into Overleaf, offering our users a much more seamless experience.
We only use cookies for essential purposes and to improve your experience on our site. You can find out more in our [cookie policy](https://www.overleaf.com/legal#Cookies)
.
Essential cookies onlyAccept all cookies
---
# Plans and Pricing - Overleaf, Online LaTeX Editor
[Skip to content](https://www.overleaf.com/user/subscription/plans#main-content)
{overleaf plans and pricing}
Get the best Overleaf experience
================================
Flexible plans for everyone—from individual students and researchers, to large businesses and universities.
* [personIndividuals](https://www.overleaf.com/user/subscription/plans#individual)
* [groupsGroupsSave 10% or more](https://www.overleaf.com/user/subscription/plans#group)
* [schoolStudents](https://www.overleaf.com/user/subscription/plans#student)
Billing periodYearlysave 20%Monthly
| | Free | Most popular
Standard | Professional |
| --- | --- | --- | --- |
| | $0forever
$0forever | Original price~$252~Current price$199per year
$21per month | Original price~$504~Current price$399per year
$42per month |
| | Great for getting started | Collaborate easily on your projects. Work on longer or more complex docs. | All the pros of our standard plan, plus unlimited collaborators per project. |
| | [Try for free](https://www.overleaf.com/register)
[Try for free](https://www.overleaf.com/register) | [Buy now](https://www.overleaf.com/user/subscription/new?planCode=collaborator-annual¤cy=USD&itm_campaign=plans&itm_content=table-header)
[Buy now](https://www.overleaf.com/user/subscription/new?planCode=collaborator¤cy=USD&itm_campaign=plans&itm_content=table-header) [Try for free](https://www.overleaf.com/user/subscription/new?planCode=collaborator_free_trial_7_days¤cy=USD&itm_campaign=plans&itm_content=table-header) | [Buy now](https://www.overleaf.com/user/subscription/new?planCode=professional-annual¤cy=USD&itm_campaign=plans&itm_content=table-header)
[Buy now](https://www.overleaf.com/user/subscription/new?planCode=professional¤cy=USD&itm_campaign=plans&itm_content=table-header) [Try for free](https://www.overleaf.com/user/subscription/new?planCode=professional_free_trial_7_days¤cy=USD&itm_campaign=plans&itm_content=table-header) |
| Number of collaboratorshelp | 1 per project | 10 per project | Unlimited |
| Number of projects | Unlimited | Unlimited | Unlimited |
| Compile timeouthelp | Basic | 24x Basic | 24x Basic |
| Compile servershelp | Fast | Fastest | Fastest |
| Editing and collaboration | | | |
| Ready-to-use templates | Feature included | Feature included | Feature included |
| Real-time track changes | \-Feature not included | Feature included | Feature included |
| Full document history | \-Feature not included | Feature included | Feature included |
| Advanced reference searchhelp | \-Feature not included | Feature included | Feature included |
| Symbol palettehelp | \-Feature not included | Feature included | Feature included |
| Integrations | | | |
| Git | \-Feature not included | Feature included | Feature included |
| GitHub | \-Feature not included | Feature included | Feature included |
| Dropbox | \-Feature not included | Feature included | Feature included |
| Papers | \-Feature not included | Feature included | Feature included |
| Zotero | \-Feature not included | Feature included | Feature included |
| Mendeley | \-Feature not included | Feature included | Feature included |
| Support | | | |
| Priority support | \-Feature not included | Feature included | Feature included |
All prices displayed are in USD. Prices may be subject to additional VAT, depending on your country.
Mastercard acceptedVisa acceptedAmex acceptedPaypal accepted
Free
$0
forever
$0
forever
Great for getting started
* 
1 collaborator per project
* 
Unlimited projects
* 
Basic compile timeout on fast servers
* 
Ready-to-use templates
[Try for free](https://www.overleaf.com/register)
[Try for free](https://www.overleaf.com/register)
Standard
~$252~
$199
per year
$21
per month
Everything in Free, plus…
* 
10 collaborators per project
* 
Longer compile timeout on faster servers
* 
Real-time track-changes
* 
Full document history
* 
Advanced reference search
* 
Symbol palette
* 
Git, GitHub, Dropbox, Papers, Zotero, and Mendeley integrations
[Buy now](https://www.overleaf.com/user/subscription/new?planCode=collaborator-annual¤cy=USD&itm_campaign=plans&itm_content=mobile-card)
[Buy now](https://www.overleaf.com/user/subscription/new?planCode=collaborator¤cy=USD&itm_campaign=plans&itm_content=mobile-card)
[Try for free](https://www.overleaf.com/user/subscription/new?planCode=collaborator_free_trial_7_days¤cy=USD&itm_campaign=plans&itm_content=mobile-card)
Professional
~$504~
$399
per year
$42
per month
Everything in Standard, plus…
* 
Unlimited collaborators per project
[Buy now](https://www.overleaf.com/user/subscription/new?planCode=professional-annual¤cy=USD&itm_campaign=plans&itm_content=mobile-card)
[Buy now](https://www.overleaf.com/user/subscription/new?planCode=professional¤cy=USD&itm_campaign=plans&itm_content=mobile-card)
[Try for free](https://www.overleaf.com/user/subscription/new?planCode=professional_free_trial_7_days¤cy=USD&itm_campaign=plans&itm_content=mobile-card)
All prices displayed are in USD. Prices may be subject to additional VAT, depending on your country.
Mastercard acceptedVisa acceptedAmex acceptedPaypal accepted
Compare features
| Free
$0/forever
$0/forever | Standard
$199/per year
$21/per month | Professional
$399/per year
$42/per month |
| --- | --- | --- |
| Number of collaboratorskeyboard\_arrow\_down
The number of people you can invite to work on a project with you. The limit is per project, so you can invite different people to each project. | | |
| 1 per project | 10 per project | Unlimited |
| Number of projects | | |
| Unlimited | Unlimited | Unlimited |
| Compile timeoutkeyboard\_arrow\_down
This is how much time you get to compile your project on Overleaf. You may need additional time for longer or more complex projects. | | |
| Basic | 24x Basic | 24x Basic |
| Compile serverskeyboard\_arrow\_down
The servers used to compile your project. Compiles for users on paid plans always run on the fastest available servers. | | |
| Fast | Fastest | Fastest |
| Editing and collaboration | | |
| Ready-to-use templates | | |
| Feature included | Feature included | Feature included |
| Real-time track changes | | |
| \-Feature not included | Feature included | Feature included |
| Full document history | | |
| \-Feature not included | Feature included | Feature included |
| Advanced reference searchkeyboard\_arrow\_down
Find your references easily—search by author, title, year, or journal. | | |
| \-Feature not included | Feature included | Feature included |
| Symbol palettekeyboard\_arrow\_down
Insert math symbols into your document with the click of a button. | | |
| \-Feature not included | Feature included | Feature included |
| Integrations | | |
| Git | | |
| \-Feature not included | Feature included | Feature included |
| GitHub | | |
| \-Feature not included | Feature included | Feature included |
| Dropbox | | |
| \-Feature not included | Feature included | Feature included |
| Papers | | |
| \-Feature not included | Feature included | Feature included |
| Zotero | | |
| \-Feature not included | Feature included | Feature included |
| Mendeley | | |
| \-Feature not included | Feature included | Feature included |
| Support | | |
| Priority support | | |
| \-Feature not included | Feature included | Feature included |

### Larger discounts available
Chat with our sales team about larger discounts for groups of 50 or more.
[Contact sales](https://www.overleaf.com/for/contact-sales-enterprise-2)
| | Most popular
Group Standard | Group Professional | Organization |
| --- | --- | --- | --- |
| | Original price~$199~Current price$179per user / year$358 total per year | Original price~$399~Current price$359per user / year$718 total per year | forum |
| | For small teams and departments who want to write and collaborate easily in LaTeX. | For teams and organizations who want a streamlined sign-on process and our strongest cloud security. | For large institutions and organizations that need site-wide access or an on-premises solution. |
| | How many users do you need?
2keyboard\_arrow\_down
* 2 users
* 3 users
* 4 users
* 5 users
* 10 users
* 20 users
* 20+ users? [Contact sales](https://www.overleaf.com/for/contact-sales) to get the best discounts.
Apply educational discountGet a total of 40% off for groups using Overleaf for teaching
[Buy now](https://www.overleaf.com/user/subscription/new?planCode=group_collaborator_2_enterprise¤cy=USD&itm_campaign=groups) | How many users do you need?
2keyboard\_arrow\_down
* 2 users
* 3 users
* 4 users
* 5 users
* 10 users
* 20 users
* 20+ users? [Contact sales](https://www.overleaf.com/for/contact-sales) to get the best discounts.
Apply educational discountGet a total of 40% off for groups using Overleaf for teaching
[Buy now](https://www.overleaf.com/user/subscription/new?planCode=group_professional_2_enterprise¤cy=USD&itm_campaign=groups) | [Contact us](https://www.overleaf.com/for/contact-sales) |
| Number of collaboratorshelp | 10 per project | Unlimited | Unlimited |
| Number of projects | Unlimited | Unlimited | Unlimited |
| Compile timeouthelp | 24x Basic | 24x Basic | 24x Basic |
| Compile servershelp | Fastest | Fastest | Fastest |
| Administration and security | | | |
| User administrationhelp | Admin panel | Admin panel | Automatic user registration |
| User metrics | Feature included | Feature included | Feature included |
| Managed user accountshelp | \-Feature not included | Feature included | \-Feature not included |
| SSO integration | \-Feature not included | Feature included | Feature included |
| Site-wide option available | \-Feature not included | \-Feature not included | Feature included |
| Customer resource portal | \-Feature not included | \-Feature not included | Feature included |
| Editing and collaboration | | | |
| Ready-to-use templates | Feature included | Feature included | Feature included |
| Real-time track changes | Feature included | Feature included | Feature included |
| Full document history | Feature included | Feature included | Feature included |
| Advanced reference searchhelp | Feature included | Feature included | Feature included |
| Symbol palettehelp | Feature included | Feature included | Feature included |
| Integrations | | | |
| Git | Feature included | Feature included | Feature included |
| GitHub | Feature included | Feature included | Feature included |
| Dropbox | Feature included | Feature included | Feature included |
| Papers | Feature included | Feature included | Feature included |
| Zotero | Feature included | Feature included | Feature included |
| Mendeley | Feature included | Feature included | Feature included |
| Support | | | |
| Personalized onboarding | \-Feature not included | \-Feature not included | Feature included |
| Dedicated account manager | \-Feature not included | \-Feature not included | Feature included |
| Priority support | Feature included | Feature included | Feature included |
All prices displayed are in USD. Prices may be subject to additional VAT, depending on your country.
Mastercard acceptedVisa acceptedAmex acceptedPaypal accepted

### Larger discounts available
Chat with our sales team about larger discounts for groups of 50 or more.
[Contact sales](https://www.overleaf.com/for/contact-sales-enterprise-2)
Group Standard
Original price~$199~Current price
$179
per user / year
$358 total per year
Great for small teams and departments
* 
10 collaborators per project
* 
All premium features
* 
Longer compile timeout on faster servers
* 
User management
* 
User metrics
How many users do you need?
2keyboard\_arrow\_down
* 2 users
* 3 users
* 4 users
* 5 users
* 10 users
* 20 users
* 20+ users? [Contact sales](https://www.overleaf.com/for/contact-sales)
to get the best discounts.
Apply educational discountGet a total of 40% off for groups using Overleaf for teaching
[Buy now](https://www.overleaf.com/user/subscription/new?planCode=group_collaborator_2_enterprise¤cy=USD&itm_campaign=groups)
Group Professional
Original price~$399~Current price
$359
per user / year
$718 total per year
Everything in Group Standard, plus…
* 
Unlimited collaborators
* 
Managed user accounts
* 
SSO integration
How many users do you need?
2keyboard\_arrow\_down
* 2 users
* 3 users
* 4 users
* 5 users
* 10 users
* 20 users
* 20+ users? [Contact sales](https://www.overleaf.com/for/contact-sales)
to get the best discounts.
Apply educational discountGet a total of 40% off for groups using Overleaf for teaching
[Buy now](https://www.overleaf.com/user/subscription/new?planCode=group_professional_2_enterprise¤cy=USD&itm_campaign=groups)
Organization
forum
Everything in Group Professional, plus…
* 
Site-wide option available
* 
Customer resource portal
* 
Personalized onboarding
* 
Dedicated account manager
[Contact us](https://www.overleaf.com/for/contact-sales)
All prices displayed are in USD. Prices may be subject to additional VAT, depending on your country.
Mastercard acceptedVisa acceptedAmex acceptedPaypal accepted
Compare features
| Group Standard | Group Professional | Organization |
| --- | --- | --- |
| Number of collaboratorskeyboard\_arrow\_down
The number of people you can invite to work on a project with you. The limit is per project, so you can invite different people to each project. | | |
| 10 per project | Unlimited | Unlimited |
| Number of projects | | |
| Unlimited | Unlimited | Unlimited |
| Compile timeoutkeyboard\_arrow\_down
This is how much time you get to compile your project on Overleaf. You may need additional time for longer or more complex projects. | | |
| 24x Basic | 24x Basic | 24x Basic |
| Compile serverskeyboard\_arrow\_down
The servers used to compile your project. Compiles for users on paid plans always run on the fastest available servers. | | |
| Fastest | Fastest | Fastest |
| Administration and security | | |
| User administrationkeyboard\_arrow\_down
Group plan admins can easily add and remove users from a group. For site-wide plans, users are automatically upgraded when they register or add their email address to Overleaf (domain-based enrollment or SSO). | | |
| Admin panel | Admin panel | Automatic user registration |
| User metrics | | |
| Feature included | Feature included | Feature included |
| Managed user accountskeyboard\_arrow\_down
Managed Users gives you more control over your group’s use of Overleaf. It ensures tighter management of user access and deletion and allows you to keep control of your projects when someone leaves the group. | | |
| \-Feature not included | Feature included | \-Feature not included |
| SSO integration | | |
| \-Feature not included | Feature included | Feature included |
| Site-wide option available | | |
| \-Feature not included | \-Feature not included | Feature included |
| Customer resource portal | | |
| \-Feature not included | \-Feature not included | Feature included |
| Editing and collaboration | | |
| Ready-to-use templates | | |
| Feature included | Feature included | Feature included |
| Real-time track changes | | |
| Feature included | Feature included | Feature included |
| Full document history | | |
| Feature included | Feature included | Feature included |
| Advanced reference searchkeyboard\_arrow\_down
Find your references easily—search by author, title, year, or journal. | | |
| Feature included | Feature included | Feature included |
| Symbol palettekeyboard\_arrow\_down
Insert math symbols into your document with the click of a button. | | |
| Feature included | Feature included | Feature included |
| Integrations | | |
| Git | | |
| Feature included | Feature included | Feature included |
| GitHub | | |
| Feature included | Feature included | Feature included |
| Dropbox | | |
| Feature included | Feature included | Feature included |
| Papers | | |
| Feature included | Feature included | Feature included |
| Zotero | | |
| Feature included | Feature included | Feature included |
| Mendeley | | |
| Feature included | Feature included | Feature included |
| Support | | |
| Personalized onboarding | | |
| \-Feature not included | \-Feature not included | Feature included |
| Dedicated account manager | | |
| \-Feature not included | \-Feature not included | Feature included |
| Priority support | | |
| Feature included | Feature included | Feature included |
Billing periodYearlysave 20%Monthly
| | Free | Most popular
$0forever | Original price~$120~Current price$98per year
$10per month |
| | Great for getting started | Collaborate easily on your projects. Work on longer or more complex docs.
Student verification required |
| | [Try for free](https://www.overleaf.com/register)
[Try for free](https://www.overleaf.com/register) | [Buy now](https://www.overleaf.com/user/subscription/new?planCode=student-annual¤cy=USD&itm_campaign=plans&itm_content=table-header)
[Buy now](https://www.overleaf.com/user/subscription/new?planCode=student¤cy=USD&itm_campaign=plans&itm_content=table-header) [Try for free](https://www.overleaf.com/user/subscription/new?planCode=student_free_trial_7_days¤cy=USD&itm_campaign=plans&itm_content=table-header) |
| Number of collaboratorshelp | 1 per project | 6 per project |
| Number of projects | Unlimited | Unlimited |
| Compile timeouthelp | Basic | 24x Basic |
| Compile servershelp | Fast | Fastest |
| Editing and collaboration | | |
| Ready-to-use templates | Feature included | Feature included |
| Real-time track changes | \-Feature not included | Feature included |
| Full document history | \-Feature not included | Feature included |
| Advanced reference searchhelp | \-Feature not included | Feature included |
| Symbol palettehelp | \-Feature not included | Feature included |
| Integrations | | |
| Git | \-Feature not included | Feature included |
| GitHub | \-Feature not included | Feature included |
| Dropbox | \-Feature not included | Feature included |
| Papers | \-Feature not included | Feature included |
| Zotero | \-Feature not included | Feature included |
| Mendeley | \-Feature not included | Feature included |
| Support | | |
| Priority support | \-Feature not included | Feature included |
All prices displayed are in USD. Prices may be subject to additional VAT, depending on your country.
Mastercard acceptedVisa acceptedAmex acceptedPaypal accepted
**Want access to Overleaf premium features through your university?**[Request Overleaf Commons](https://www.overleaf.com/for/support-an-overleaf-university-subscription)
Free
$0
forever
$0
forever
Great for getting started
* 
1 collaborator per project
* 
Unlimited projects
* 
Basic compile timeout on fast servers
* 
Ready-to-use templates
[Try for free](https://www.overleaf.com/register)
[Try for free](https://www.overleaf.com/register)
Student
~$120~
$98
per year
$10
per month
Everything in Free, plus…
* 
6 collaborators per project
* 
Longer compile timeout on faster servers
* 
Real-time track-changes
* 
Full document history
* 
Advanced reference search
* 
Symbol palette
* 
Git, GitHub, Dropbox, Papers, Zotero, and Mendeley integrations
Student verification required
[Buy now](https://www.overleaf.com/user/subscription/new?planCode=student-annual¤cy=USD&itm_campaign=plans&itm_content=mobile-card)
Student verification required
[Buy now](https://www.overleaf.com/user/subscription/new?planCode=student¤cy=USD&itm_campaign=plans&itm_content=mobile-card)
[Try for free](https://www.overleaf.com/user/subscription/new?planCode=student_free_trial_7_days¤cy=USD&itm_campaign=plans&itm_content=mobile-card)
All prices displayed are in USD. Prices may be subject to additional VAT, depending on your country.
Mastercard acceptedVisa acceptedAmex acceptedPaypal accepted
**Want access to Overleaf premium features through your university?**[Request Overleaf Commons](https://www.overleaf.com/for/support-an-overleaf-university-subscription)
Compare features
| Free
$0/forever
$0/forever | Student
$98/per year
$10/per month |
| --- | --- |
| Number of collaboratorskeyboard\_arrow\_down
The number of people you can invite to work on a project with you. The limit is per project, so you can invite different people to each project. | | |
| 1 per project | 6 per project |
| Number of projects | | |
| Unlimited | Unlimited |
| Compile timeoutkeyboard\_arrow\_down
This is how much time you get to compile your project on Overleaf. You may need additional time for longer or more complex projects. | | |
| Basic | 24x Basic |
| Compile serverskeyboard\_arrow\_down
The servers used to compile your project. Compiles for users on paid plans always run on the fastest available servers. | | |
| Fast | Fastest |
| Editing and collaboration | | |
| Ready-to-use templates | | |
| Feature included | Feature included |
| Real-time track changes | | |
| \-Feature not included | Feature included |
| Full document history | | |
| \-Feature not included | Feature included |
| Advanced reference searchkeyboard\_arrow\_down
Find your references easily—search by author, title, year, or journal. | | |
| \-Feature not included | Feature included |
| Symbol palettekeyboard\_arrow\_down
Insert math symbols into your document with the click of a button. | | |
| \-Feature not included | Feature included |
| Integrations | | |
| Git | | |
| \-Feature not included | Feature included |
| GitHub | | |
| \-Feature not included | Feature included |
| Dropbox | | |
| \-Feature not included | Feature included |
| Papers | | |
| \-Feature not included | Feature included |
| Zotero | | |
| \-Feature not included | Feature included |
| Mendeley | | |
| \-Feature not included | Feature included |
| Support | | |
| Priority support | | |
| \-Feature not included | Feature included |
Add-ons for any plan
--------------------
Buy add-ons for any Overleaf plan (including the free plan) to unlock additional features.

### AI Assist
Annual discount
$21 per month
$12.50 per month, billed annually
AI Assist combines AI tools from Overleaf and Writefull to help you write faster, smarter and with confidence.
[Buy add-on](https://www.overleaf.com/user/subscription/new?planCode=assistant-annual&purchaseReferrer=plans-page&itm_campaign=plans)
[Buy add-on](https://www.overleaf.com/user/subscription/new?planCode=assistant&purchaseReferrer=plans-page&itm_campaign=plans)
[Learn more](https://www.overleaf.com/about/ai-features)
* Error Assist
* Language suggestions
* Table Generator
* Equation Generator
* Editing tools
* TeXGPT
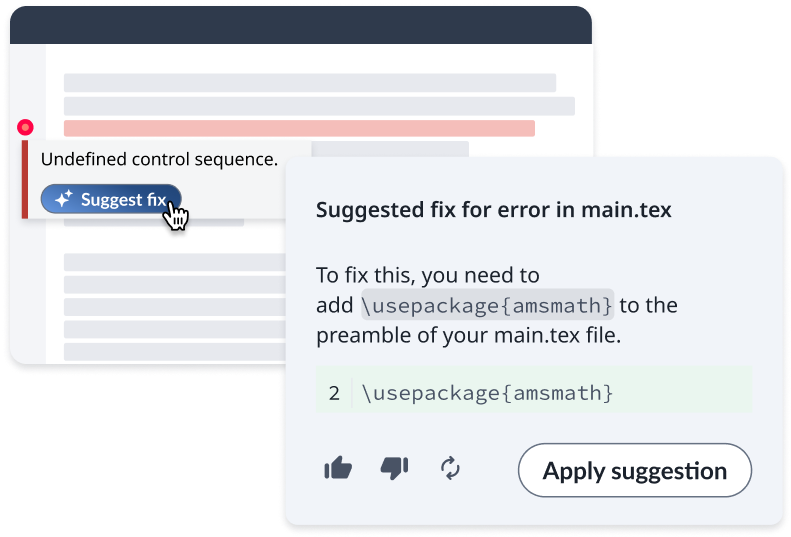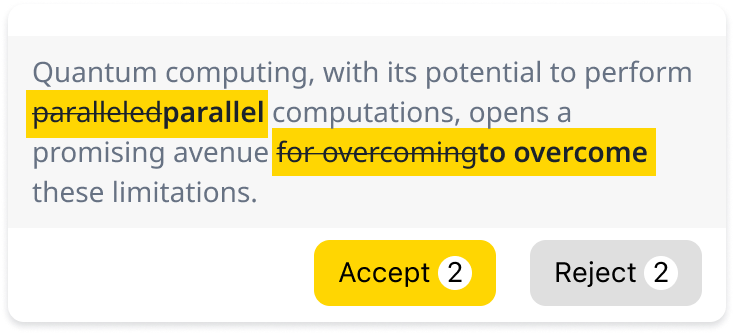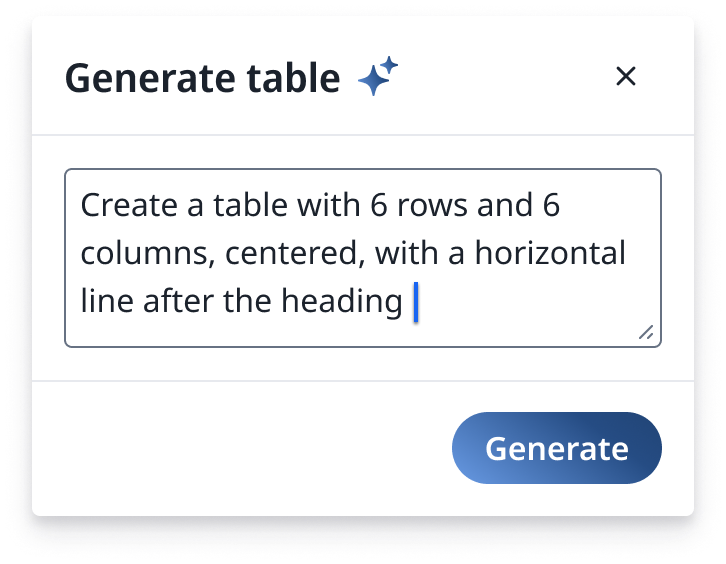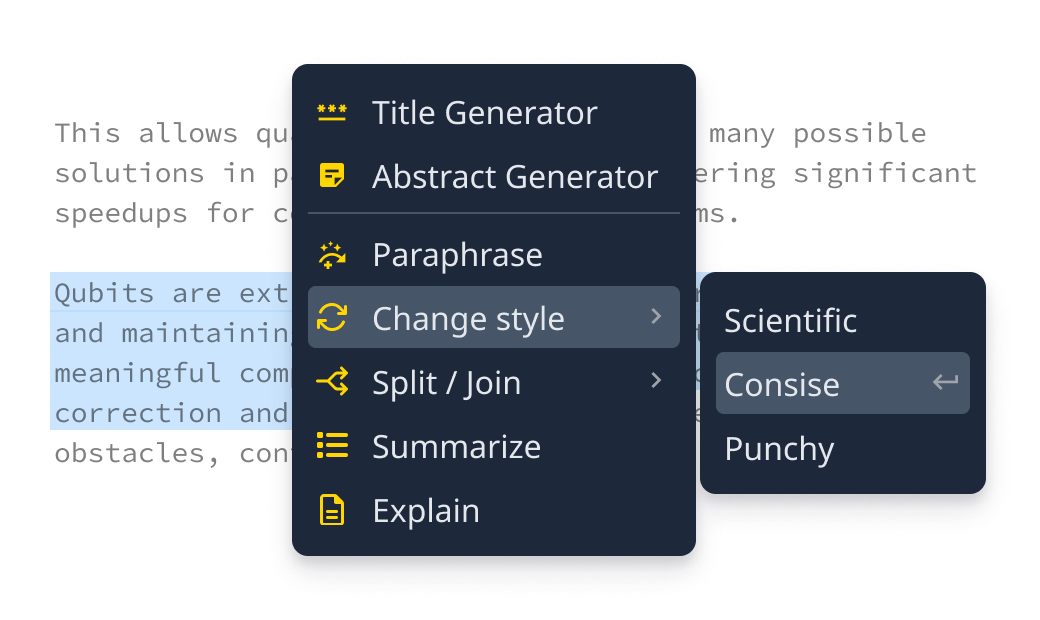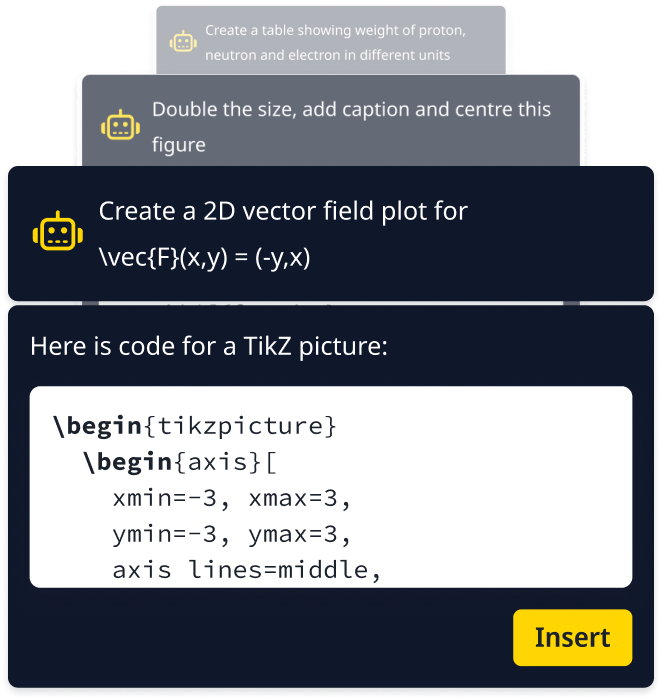
[Buy add-on](https://www.overleaf.com/user/subscription/new?planCode=assistant-annual&purchaseReferrer=plans-page&itm_campaign=plans)
[Buy add-on](https://www.overleaf.com/user/subscription/new?planCode=assistant&purchaseReferrer=plans-page&itm_campaign=plans)
[Learn more](https://www.overleaf.com/learn/how-to/AI_Assist)
Over 25 million users at research institutions and businesses worldwide love Overleaf

> Overleaf is indispensable for us. We use it in our research, thesis writing, project proposals, and manuscripts for publication. When it comes to writing, it’s our main tool.
>
> 
> With Overleaf, we now have a process for developing technical documentation which has virtually eliminated the time required to properly format and layout documents.
>
> 
> We are writing collaboratively right up until the last minute. We are faced with deadlines all the time, and Overleaf gives us the ability to polish right up until the last possible second.
>
> 
{frequently asked questions}Your questions answered
---------------------------------------------------
* [Managing your subscription](https://www.overleaf.com/user/subscription/plans#managingYourSubscription)
* [Overleaf individual plans](https://www.overleaf.com/user/subscription/plans#overleafIndividualPlans)
* [Overleaf group plans](https://www.overleaf.com/user/subscription/plans#overleafGroupPlans)
Can I change plans or cancel later?keyboard\_arrow\_down
Yes, you can do this at any time by going to **Account > Subscription** when logged in to Overleaf. You can change plans, switch between monthly and annual billing options, or cancel to downgrade to the free plan. When canceling, your subscription will continue until the end of the billing period.
If I change or cancel my Overleaf plan, will I lose my projects?keyboard\_arrow\_down
No. Changing or canceling your plan won’t affect your projects, the only change will be to the features available to you. You can see which features are available only on paid plans in the comparison table.
Can I pay by invoice or purchase order?keyboard\_arrow\_down
This is possible when you’re purchasing a group subscription for five or more people, or a site license. For individual subscriptions, we can only accept payment online via credit card, debit card, or PayPal.
How do I view/update the credit card being charged for my subscription?keyboard\_arrow\_down
You can view and update the card on file by going to Account > [Subscription](https://www.overleaf.com/user/subscription)
.
How does the free trial work?keyboard\_arrow\_down
You get full access to your chosen plan during your 7-day free trial, and there’s no obligation to continue beyond the trial. Your card will be charged at the end of your trial unless you cancel before then. To cancel, go to **Account > [Subscription](https://www.overleaf.com/user/subscription)
** when logged in to Overleaf (the trial will continue for the full 7 days).
What’s a collaborator on an Overleaf individual subscription?keyboard\_arrow\_down
A collaborator is someone you invite to work with you on a project. So, for example, on our Standard plan you can have up to 10 people collaborating with you on any given project.
The individual Standard plan has 10 project collaborators, does it mean that 10 people will be upgraded?keyboard\_arrow\_down
No. Only the subscriber’s account will be upgraded. An individual Standard subscription allows you to invite 10 people per project to edit the project with you. Your collaborators can access features such as the full document history and extended compile time, but **only** for the project(s) they’re working on with you. If your collaborators want access to those features on their own projects, they will need to purchase their own subscription. (If you work with the same people regularly, you might find a group subscription more cost effective.)
Do collaborators also have access to the editing and collaboration features I’ve paid for?keyboard\_arrow\_down
If you have an Overleaf subscription, then your project collaborators will have access to features like real-time track changes and document history, but **only** for the project(s) they’re working on with you. If your collaborators want access to those features on their own projects, they will need to purchase their own subscription. (If you work with the same people regularly, you might find a group subscription more cost effective.)
Can I purchase an individual plan on behalf of someone else?keyboard\_arrow\_down
Individual subscriptions must be purchased by the account that will be the end user. If you want to purchase a plan for someone else, you’ll need to provide them with relevant payment details to enable them to make the purchase.
Who is eligible for the Student plan?keyboard\_arrow\_down
As the name suggests, the Student plan is only for students at educational institutions. This includes graduate students.
Can I transfer an individual subscription to someone else?keyboard\_arrow\_down
No. Individual plans can’t be transferred.
What’s the difference between users and collaborators on an Overleaf group subscription?keyboard\_arrow\_down
On any of our group plans, the number of users refers to the number of people you can invite to join your group. All of these people will have access to the plan’s paid-for features across all their projects, such as real-time track changes and document history.
Collaborators are people that your group users may invite to work with them on their projects. So, for example, if you have the Group Standard plan, the users in your group can invite up to 10 people to work with them on a project. And if you have the Group Professional plan, your users can invite as many people to work with them as they want.
What is the benefit of purchasing an Overleaf Group plan?keyboard\_arrow\_down
Our Group subscriptions allow you to purchase access to our premium features for multiple people. They’re easy to manage, help save on paperwork, and allow groups of 5 or more to purchase via purchase order (PO). We also offer discounts on purchases of Group subscriptions for more than 20 users; just get in touch with our [Sales team](https://www.overleaf.com/for/contact-sales)
.
Who is eligible for the educational discount?keyboard\_arrow\_down
The educational discount for group subscriptions is for students or faculty who are using Overleaf primarily for teaching.
How do I add more licenses to my group subscription, and what will it cost?keyboard\_arrow\_down
You can add up to 20 licenses using the [subscription management page](https://www.overleaf.com/user/subscription)
accessed by going to Account > [Subscription](https://www.overleaf.com/user/subscription)
when logged into Overleaf. The cost per license will be prorated at the current per license rate, and will end with your existing renewal date.
If you need more than 20 licenses added to your subscription, please [contact the Sales team](https://www.overleaf.com/for/contact-sales)
.
How do I upgrade my plan from Group Standard to Group Professional?keyboard\_arrow\_down
You can upgrade your plan from Group Standard to Group Professional on the [subscription management page](https://www.overleaf.com/user/subscription)
.
Still have questions?Contact Supportarrow\_right\_alt
We only use cookies for essential purposes and to improve your experience on our site. You can find out more in our [cookie policy](https://www.overleaf.com/legal#Cookies)
.
Essential cookies onlyAccept all cookies
---
# Blog - Overleaf, Online LaTeX Editor
[Skip to content](https://www.overleaf.com/blog#main-content)
Blog
====
* January 29, 2026
[Accessible PDFs with LaTeX](https://www.overleaf.com/blog/accessible-pdfs-with-latex)
---------------------------------------------------------------------------------------
With the release of [TeX Live 2025](https://www.overleaf.com/blog/tex-live-2025-is-now-available)
from the LaTeX Tagging Project team, you can use LaTeX to generate tagged PDFs that are accessible. This is important if you’re at a university or government agency, where you may be required to create accessible documents. This is because two pieces of legislation—the [European Accessibility Act (EAA)](http://ec.europa.eu/social/main.jsp?catId=1202)
, which became effective in June 2025, and the [ADA Title II Update](https://www.ada.gov/resources/2024-03-08-web-rule/)
, which goes into effect April 2026—are making this a legal requirement. This requirement includes a lot of the content that is produced in Overleaf.
The LaTeX Tagging Project is specifically designed to produce the structural tags required by PDF/UA-1 (and the upcoming PDF/UA-2). If a user follows the LaTeX Project's current tagging recommendations, they are effectively building a document that is "PDF/UA-ready," which is the strongest way to meet the WCAG 2.1 AA legal mandate required by US and European legislation. You can stay up to date with the Project’s work [here](https://latex-project.org/)
.
* [accessibility](https://www.overleaf.com/blog/tagged/accessibility)
[Read morearrow\_right\_alt](https://www.overleaf.com/blog/accessible-pdfs-with-latex)
* January 22, 2026
[Overleaf 6.1.0 is available](https://www.overleaf.com/blog/overleaf-6-1-0-is-available)
-----------------------------------------------------------------------------------------
We are pleased to announce **Overleaf Server Pro 6.1.0**! This release includes new features and updates to the base image and installed packages, as well as internal dependencies. You can read the full release notes [here](https://docs.overleaf.com/on-premises/release-notes/release-notes-6.x.x#server-pro-6.1.0)
.
* [Server Pro](https://www.overleaf.com/blog/tagged/Server%20Pro)
* [product update](https://www.overleaf.com/blog/tagged/product%20update)
* [enterprise](https://www.overleaf.com/blog/tagged/enterprise)
[Read morearrow\_right\_alt](https://www.overleaf.com/blog/overleaf-6-1-0-is-available)
* November 19, 2025
[Introducing Overleaf’s new look](https://www.overleaf.com/blog/introducing-overleafs-new-look)
------------------------------------------------------------------------------------------------
We’re excited to announce that we're starting to roll out a new and improved design of the Overleaf editor.
From the beginning, Overleaf's goal has been to bring LaTeX to as many people as possible in an intuitive, user-friendly way. But over time, as we added more powerful features and integrations, our editor started to feel a bit crowded.
So, following extensive user feedback and testing, we've developed a cleaner, less cluttered interface that makes it easier to find and use the tools you need today, while making space for the new features you’ll love tomorrow.
We hope this redesign will ensure Overleaf remains the best place to write your research for years to come.
* [product update](https://www.overleaf.com/blog/tagged/product%20update)
[Read morearrow\_right\_alt](https://www.overleaf.com/blog/introducing-overleafs-new-look)
* November 18, 2025
[Overleaf 6.0.1 is available](https://www.overleaf.com/blog/overleaf-6-0-1-is-available)
-----------------------------------------------------------------------------------------
We are pleased to announce **Overleaf Server Pro 6.0.1**! This major release includes new features, security updates to the base image and installed packages, along with improvements and bugfixes. You can read the full release notes [here](https://docs.overleaf.com/on-premises/release-notes/release-notes-6.x.x#server-pro-6.0.1)
.
* [Server Pro](https://www.overleaf.com/blog/tagged/Server%20Pro)
* [product update](https://www.overleaf.com/blog/tagged/product%20update)
* [enterprise](https://www.overleaf.com/blog/tagged/enterprise)
[Read morearrow\_right\_alt](https://www.overleaf.com/blog/overleaf-6-0-1-is-available)
* September 4, 2025
[TeX Live 2025 is now available](https://www.overleaf.com/blog/tex-live-2025-is-now-available)
-----------------------------------------------------------------------------------------------
TeX Live 2025 is now available on Overleaf. This update will give you access to new and updated TeX-related programs, fonts, and macro packages. This post covers all the key information and important changes you need to know about.
* [tex](https://www.overleaf.com/blog/tagged/tex)
* [tex live](https://www.overleaf.com/blog/tagged/tex%20live)
* [feature](https://www.overleaf.com/blog/tagged/feature)
[Read morearrow\_right\_alt](https://www.overleaf.com/blog/tex-live-2025-is-now-available)
Popular Tags
------------
* [publishers](https://www.overleaf.com/blog/tagged/publishers)
* [events](https://www.overleaf.com/blog/tagged/events)
* [latex](https://www.overleaf.com/blog/tagged/latex)
* [tech](https://www.overleaf.com/blog/tagged/tech)
* [press](https://www.overleaf.com/blog/tagged/press)
* [features](https://www.overleaf.com/blog/tagged/features)
* [guides](https://www.overleaf.com/blog/tagged/guides)
* [institutions](https://www.overleaf.com/blog/tagged/institutions)
* [case studies](https://www.overleaf.com/blog/tagged/case%20studies)
* [advisors](https://www.overleaf.com/blog/tagged/advisors)
Sign up for a free account and receive regular updates
------------------------------------------------------
[Sign up](https://www.overleaf.com/register)
\\begin{now}
Discover why over 25 million people worldwide trust Overleaf with their work.
[Sign up for free](https://www.overleaf.com/register)
[Explore all plans](https://www.overleaf.com/user/subscription/plans)
We only use cookies for essential purposes and to improve your experience on our site. You can find out more in our [cookie policy](https://www.overleaf.com/legal#Cookies)
.
Essential cookies onlyAccept all cookies
---
# Contents - Overleaf, Online LaTeX Editor
[Skip to content](https://www.overleaf.com/learn/latex/Contents#main-content)
Search help library…searchclear
No Search Results
Contents
========
* [Documentation Home](https://www.overleaf.com/learn "Main Page")
* [Learn LaTeX in 30 minutes](https://www.overleaf.com/learn/latex/Learn_LaTeX_in_30_minutes "Learn LaTeX in 30 minutes")
Overleaf guides
---------------
* [Overleaf user documentation](https://docs.overleaf.com/)
* [Overleaf group administration](https://docs.overleaf.com/groups)
* [Overleaf Commons administration](https://docs.overleaf.com/commons)
* [Overleaf on-premises](https://docs.overleaf.com/on-premises)
LaTeX basics
------------
* [Creating your first LaTeX document](https://www.overleaf.com/learn/latex/Creating_a_document_in_LaTeX "Creating a document in LaTeX")
* [Paragraphs and new lines](https://www.overleaf.com/learn/latex/Paragraphs_and_new_lines "Paragraphs and new lines")
* [Bold, italics and underlining](https://www.overleaf.com/learn/latex/Bold%2C_italics_and_underlining "Bold, italics and underlining")
* [Lists](https://www.overleaf.com/learn/latex/Lists "Lists")
* [Errors](https://www.overleaf.com/learn/latex/Errors "Errors")
Mathematics
-----------
* [Mathematical expressions](https://www.overleaf.com/learn/latex/Mathematical_expressions "Mathematical expressions")
* [Subscripts and superscripts](https://www.overleaf.com/learn/latex/Subscripts_and_superscripts "Subscripts and superscripts")
* [Brackets and Parentheses](https://www.overleaf.com/learn/latex/Brackets_and_Parentheses "Brackets and Parentheses")
* [Matrices](https://www.overleaf.com/learn/latex/Matrices "Matrices")
* [Fractions and Binomials](https://www.overleaf.com/learn/latex/Fractions_and_Binomials "Fractions and Binomials")
* [Aligning equations](https://www.overleaf.com/learn/latex/Aligning_equations_with_amsmath "Aligning equations with amsmath")
* [Operators](https://www.overleaf.com/learn/latex/Operators "Operators")
* [Spacing in math mode](https://www.overleaf.com/learn/latex/Spacing_in_math_mode "Spacing in math mode")
* [Integrals, sums and limits](https://www.overleaf.com/learn/latex/Integrals%2C_sums_and_limits "Integrals, sums and limits")
* [Display style in math mode](https://www.overleaf.com/learn/latex/Display_style_in_math_mode "Display style in math mode")
* [List of Greek letters and math symbols](https://www.overleaf.com/learn/latex/List_of_Greek_letters_and_math_symbols "List of Greek letters and math symbols")
* [Mathematical fonts](https://www.overleaf.com/learn/latex/Mathematical_fonts "Mathematical fonts")
* [Using the Symbol Palette in Overleaf](https://www.overleaf.com/learn/how-to/Using_the_Symbol_Palette_in_Overleaf)
Figures and tables
------------------
* [Tables](https://www.overleaf.com/learn/latex/Tables "Tables")
* [Positioning Images and Tables](https://www.overleaf.com/learn/latex/Positioning_images_and_tables "Positioning images and tables")
* [Lists of Tables and Figures](https://www.overleaf.com/learn/latex/Lists_of_tables_and_figures "Lists of tables and figures")
* [Drawing Diagrams Directly in LaTeX](https://www.overleaf.com/learn/latex/Picture_environment "Picture environment")
* [TikZ package](https://www.overleaf.com/learn/latex/TikZ_package "TikZ package")
Document structure
------------------
* [Sections and chapters](https://www.overleaf.com/learn/latex/Sections_and_chapters "Sections and chapters")
* [Table of contents](https://www.overleaf.com/learn/latex/Table_of_contents "Table of contents")
* [Cross referencing sections, equations and floats](https://www.overleaf.com/learn/latex/Cross_referencing_sections%2C_equations_and_floats "Cross referencing sections, equations and floats")
* [Indices](https://www.overleaf.com/learn/latex/Indices "Indices")
* [Glossaries](https://www.overleaf.com/learn/latex/Glossaries "Glossaries")
* [Nomenclatures](https://www.overleaf.com/learn/latex/Nomenclatures "Nomenclatures")
* [Management in a large project](https://www.overleaf.com/learn/latex/Management_in_a_large_project "Management in a large project")
* [Multi-file LaTeX projects](https://www.overleaf.com/learn/latex/Multi-file_LaTeX_projects "Multi-file LaTeX projects")
* [Hyperlinks](https://www.overleaf.com/learn/latex/Hyperlinks "Hyperlinks")
Formatting
----------
* [Lengths in LaTeX](https://www.overleaf.com/learn/latex/Lengths_in_LaTeX "Lengths in LaTeX")
* [Headers and footers](https://www.overleaf.com/learn/latex/Headers_and_footers "Headers and footers")
* [Page numbering](https://www.overleaf.com/learn/latex/Page_numbering "Page numbering")
* [Paragraph formatting](https://www.overleaf.com/learn/latex/Paragraph_formatting "Paragraph formatting")
* [Line breaks and blank spaces](https://www.overleaf.com/learn/latex/Line_breaks_and_blank_spaces "Line breaks and blank spaces")
* [Text alignment](https://www.overleaf.com/learn/latex/Text_alignment "Text alignment")
* [Page size and margins](https://www.overleaf.com/learn/latex/Page_size_and_margins "Page size and margins")
* [Single sided and double sided documents](https://www.overleaf.com/learn/latex/Single_sided_and_double_sided_documents "Single sided and double sided documents")
* [Multiple columns](https://www.overleaf.com/learn/latex/Multiple_columns "Multiple columns")
* [Counters](https://www.overleaf.com/learn/latex/Counters "Counters")
* [Code listing](https://www.overleaf.com/learn/latex/Code_listing "Code listing")
* [Code Highlighting with minted](https://www.overleaf.com/learn/latex/Code_Highlighting_with_minted "Code Highlighting with minted")
* [Using colours in LaTeX](https://www.overleaf.com/learn/latex/Using_colours_in_LaTeX "Using colours in LaTeX")
* [Footnotes](https://www.overleaf.com/learn/latex/Footnotes "Footnotes")
* [Margin notes](https://www.overleaf.com/learn/latex/Margin_notes "Margin notes")
References and citations
------------------------
* [Bibliography management with bibtex](https://www.overleaf.com/learn/latex/Bibliography_management_with_bibtex "Bibliography management with bibtex")
* [Bibliography management with natbib](https://www.overleaf.com/learn/latex/Bibliography_management_with_natbib "Bibliography management with natbib")
* [Bibliography management with biblatex](https://www.overleaf.com/learn/latex/Bibliography_management_with_biblatex "Bibliography management with biblatex")
* [Bibtex bibliography styles](https://www.overleaf.com/learn/latex/Bibtex_bibliography_styles "Bibtex bibliography styles")
* [Natbib bibliography styles](https://www.overleaf.com/learn/latex/Natbib_bibliography_styles "Natbib bibliography styles")
* [Natbib citation styles](https://www.overleaf.com/learn/latex/Natbib_citation_styles "Natbib citation styles")
* [Biblatex bibliography styles](https://www.overleaf.com/learn/latex/Biblatex_bibliography_styles "Biblatex bibliography styles")
* [Biblatex citation styles](https://www.overleaf.com/learn/latex/Biblatex_citation_styles "Biblatex citation styles")
Fonts
-----
* [Font sizes, families, and styles](https://www.overleaf.com/learn/latex/Font_sizes%2C_families%2C_and_styles "Font sizes, families, and styles")
* [Font typefaces](https://www.overleaf.com/learn/latex/Font_typefaces "Font typefaces")
* [Supporting modern fonts with XƎLaTeX](https://www.overleaf.com/learn/latex/XeLaTeX "XeLaTeX")
Presentations
-------------
* [Beamer](https://www.overleaf.com/learn/latex/Beamer "Beamer")
* [Powerdot](https://www.overleaf.com/learn/latex/Powerdot "Powerdot")
* [Posters](https://www.overleaf.com/learn/latex/Posters "Posters")
Commands
--------
* [Commands](https://www.overleaf.com/learn/latex/Commands "Commands")
* [Environments](https://www.overleaf.com/learn/latex/Environments "Environments")
Languages
---------
* [Multilingual typesetting on Overleaf using polyglossia and fontspec](https://www.overleaf.com/learn/latex/Multilingual_typesetting_on_Overleaf_using_polyglossia_and_fontspec "Multilingual typesetting on Overleaf using polyglossia and fontspec")
* [Multilingual typesetting on Overleaf using babel and fontspec](https://www.overleaf.com/learn/latex/Multilingual_typesetting_on_Overleaf_using_babel_and_fontspec "Multilingual typesetting on Overleaf using babel and fontspec")
* [International language support](https://www.overleaf.com/learn/latex/International_language_support "International language support")
* [Quotations and quotation marks](https://www.overleaf.com/learn/latex/Typesetting_quotations "Typesetting quotations")
* [Arabic](https://www.overleaf.com/learn/latex/Arabic "Arabic")
* [Chinese](https://www.overleaf.com/learn/latex/Chinese "Chinese")
* [French](https://www.overleaf.com/learn/latex/French "French")
* [German](https://www.overleaf.com/learn/latex/German "German")
* [Greek](https://www.overleaf.com/learn/latex/Greek "Greek")
* [Italian](https://www.overleaf.com/learn/latex/Italian "Italian")
* [Japanese](https://www.overleaf.com/learn/latex/Japanese "Japanese")
* [Korean](https://www.overleaf.com/learn/latex/Korean "Korean")
* [Portuguese](https://www.overleaf.com/learn/latex/Portuguese "Portuguese")
* [Russian](https://www.overleaf.com/learn/latex/Russian "Russian")
* [Spanish](https://www.overleaf.com/learn/latex/Spanish "Spanish")
Field specific
--------------
* [Theorems and proofs](https://www.overleaf.com/learn/latex/Theorems_and_proofs "Theorems and proofs")
* [Chemistry formulae](https://www.overleaf.com/learn/latex/Chemistry_formulae "Chemistry formulae")
* [Feynman diagrams](https://www.overleaf.com/learn/latex/Feynman_diagrams "Feynman diagrams")
* [Molecular orbital diagrams](https://www.overleaf.com/learn/latex/Molecular_orbital_diagrams "Molecular orbital diagrams")
* [Chess notation](https://www.overleaf.com/learn/latex/Chess_notation "Chess notation")
* [Knitting patterns](https://www.overleaf.com/learn/latex/Knitting_patterns "Knitting patterns")
* [CircuiTikz package](https://www.overleaf.com/learn/latex/CircuiTikz_package "CircuiTikz package")
* [Pgfplots package](https://www.overleaf.com/learn/latex/Pgfplots_package "Pgfplots package")
* [Typesetting exams in LaTeX](https://www.overleaf.com/learn/latex/Typesetting_exams_in_LaTeX "Typesetting exams in LaTeX")
* [Attribute Value Matrices](https://www.overleaf.com/learn/latex/Attribute_Value_Matrices "Attribute Value Matrices")
Class files
-----------
* [Understanding packages and class files](https://www.overleaf.com/learn/latex/Understanding_packages_and_class_files "Understanding packages and class files")
* [List of packages and class files](https://www.overleaf.com/learn/latex/List_of_packages_and_class_files "List of packages and class files")
* [Writing your own package](https://www.overleaf.com/learn/latex/Writing_your_own_package "Writing your own package")
* [Writing your own class](https://www.overleaf.com/learn/latex/Writing_your_own_class "Writing your own class")
Advanced TeX/LaTeX
------------------
* [In-depth technical articles on TeX/LaTeX](https://www.overleaf.com/learn/latex/Articles "Articles")
We only use cookies for essential purposes and to improve your experience on our site. You can find out more in our [cookie policy](https://www.overleaf.com/legal#Cookies)
.
Essential cookies onlyAccept all cookies
---
# Templates - Journals, CVs, Presentations, Reports and More - Overleaf, Online LaTeX Editor
[Skip to content](https://www.overleaf.com/latex/templates#main-content)
{overleaf template gallery}LaTeX templates
==========================================
LaTeX templates for journal articles, academic papers, CVs and résumés, presentations, and more.
Search
Categories
----------
[\
\
Journal articles](https://www.overleaf.com/latex/templates/tagged/academic-journal)
Select from an array of journal templates and submit directly from Overleaf.
[\
\
Bibliographies](https://www.overleaf.com/latex/templates/tagged/bibliography)
Create bibliographies in LaTeX quickly and easily using packages like bibtex, natbib, and biblatex.
[\
\
Books](https://www.overleaf.com/latex/templates/tagged/book)
Book templates to write your next best seller—whether you’re writing a short story or a textbook.
[\
\
Calendars](https://www.overleaf.com/latex/templates/tagged/calendar)
Keep organized with this handy collection of LaTeX calendar templates.
[\
\
CVs and résumés](https://www.overleaf.com/latex/templates/tagged/cv)
Make the right first impression with our popular range of CV templates.
[\
\
Formal letters](https://www.overleaf.com/latex/templates/tagged/formal-letter)
Format formal letters fast with our range of LaTeX letter templates.
[\
\
Assignments](https://www.overleaf.com/latex/templates/tagged/homework)
LaTeX templates for homework assignments to use at school, college, and university.
[\
\
Newsletters](https://www.overleaf.com/latex/templates/tagged/newsletter)
Keep colleagues or contacts informed in style with one of our LaTeX newsletter templates.
[\
\
Posters](https://www.overleaf.com/latex/templates/tagged/poster)
Showcase your work with these eye-catching LaTeX poster templates.
[\
\
Presentations](https://www.overleaf.com/latex/templates/tagged/presentation)
Communicate more effectively with our selection of engaging presentation templates.
[\
\
Reports](https://www.overleaf.com/latex/templates/tagged/report)
Templates for producing project and lab reports, with guidelines to help you in the writing process.
[\
\
Theses](https://www.overleaf.com/latex/templates/tagged/thesis)
Templates to help you tackle the most important piece of work you’ll produce as a student.
Recent
------
[\
\
Qualification Paper in Ukrainian (Ferenc Rakoczi II Transcarpathian Hungarian University)](https://www.overleaf.com/latex/templates/qualification-paper-in-ukrainian-ferenc-rakoczi-ii-transcarpathian-hungarian-university/ndpqzhvjfjgj)
Шаблон для курсових і кваліфікаційних робіт українською мовою. Шаблон розроблено відповідно до вимог Закарпатського угорського університету ім. Ференца Ракоці II. https://kme.org.ua/uk/strukturni-pidrozdily/kafedri/kafedra-matematiki-ta-informatiki/
Кафедра математики і інформатики, Закарпатський угорський університет імені Ференца Ракоці ІІ
[\
\
Qualification Paper in Hungarian (Ferenc Rakoczi II Transcarpathian Hungarian University)](https://www.overleaf.com/latex/templates/qualification-paper-in-hungarian-ferenc-rakoczi-ii-transcarpathian-hungarian-university/xwmnrdjdvfcr)
Sablon a kurzus- és képesítési munkákhoz magyar nyelven. A sablon kidolgozása a II. Rákóczi Ferenc Kárpátaljai Magyar Egyetem előírásainak megfelelően történt. A részletes formázási útmutató itt található: https://kme.org.ua/hu/a-foiskola-egysegei/tanszekek/matematika-es-informatika-tanszek/
Matematika és Informatika Tanszék, II. Rákóczi Ferenc Kárpátaljai Magyar Egyetem
[\
\
2021 Math Thesis Template](https://www.overleaf.com/latex/templates/2021-math-thesis-template/rhffhzxntwht)
This is a variation on a standard template with changes made to comply with guidelines set forth by the UW-Madison Graduate School.
Sara Nagreen
[\
\
Thesis Template - Master's Degree in Engineering UTB](https://www.overleaf.com/latex/templates/thesis-template-masters-degree-in-engineering-utb/crcspmcdpdvj)
Template for Master's thesis in Engineering at the Technological University of Bolívar. https://www.utb.edu.co/la-utb/estatutos-y-reglamentos/ https://www.utb.edu.co/wp-content/uploads/2021/04/2020\_05\_14\_cac\_res\_05\_de\_2020\_-\_trabajos\_de\_grado\_facultad\_de\_ingenieria\_0.pdf
Edwin Puertas
[\
\
Plantilla de Trabajo de Grado - Maestría en Ingeniería UTB](https://www.overleaf.com/latex/templates/plantilla-de-trabajo-de-grado-maestria-en-ingenieria-utb/hxknrymhnhdw)
Plantilla pra trabajo de grado de Maestría en Ingeniería de la Universidad Tecnológica de Bolívar. https://www.utb.edu.co/la-utb/estatutos-y-reglamentos/ https://www.utb.edu.co/wp-content/uploads/2021/04/2020\_05\_14\_cac\_res\_05\_de\_2020\_-\_trabajos\_de\_grado\_facultad\_de\_ingenieria\_0.pdf
Edwin Puertas
[\
\
AI Agent Journal 2026 Submission Template](https://www.overleaf.com/latex/templates/ai-agent-journal-2026-submission-template/pzgvcjgzdrck)
Template for submission to AI Agent Journal 2026. See https://www.aiagentjournal.org for more details.
Alex M Tan
[![[TUST][MASTER]2024天津科技大学人工智能学院研究生生毕业论文0.3版](https://writelatex.s3.amazonaws.com/published_ver/49452.jpeg?X-Amz-Expires=14400&X-Amz-Date=20260227T134444Z&X-Amz-Algorithm=AWS4-HMAC-SHA256&X-Amz-Credential=AKIAWJBOALPNFPV7PVH5/20260227/us-east-1/s3/aws4_request&X-Amz-SignedHeaders=host&X-Amz-Signature=7a4c2b6a6e1650680664cdd498556155b61f3b6142d98688d47815502ebe58fb)\
\
\[TUST\]\[MASTER\]2024天津科技大学人工智能学院研究生生毕业论文0.3版](https://www.overleaf.com/latex/templates/tust-master-2024tian-jin-ke-ji-da-xue-ren-gong-zhi-neng-xue-yuan-yan-jiu-sheng-sheng-bi-ye-lun-wen-0-dot-3ban/zfbtsjtbfzhy)
根据天津科技大学研究生院发布的论文模版制作: https://yjs.tust.edu.cn/xwgz/xzzl/4121f8d5f1d447d4abd857586a040354.htm https://yjs.tust.edu.cn/docs//2025-12/d35c37c31a144468b163690f9d76a9ed.doc 针对模版中对于学硕和专硕的论文要求,制作天津科技大学人工智能学院硕士论文模版,beta版 作者:刘建征 在0.1版基础上有所修正 清除了0.2版中一些没用的东西,使用效果与0.2无差别。 修正了0.21版的一个无所谓的小错误,使用效果与0.21无差别。 0.22版中忘记修改readme.md了 在0.23版基础上进行了去隐私处理 在0.24版基础上进行了一些细节格式调整,包括参考文献标注以及标题间距
Marcus J.Z. Liu,Yu BaoKun
[\
\
University of Waterloo Thesis Template (v03.2026)](https://www.overleaf.com/latex/templates/university-of-waterloo-thesis-template-v03-dot-2026/qxqqzmbrcmpp)
University of Waterloo Thesis Template with revisions based on info found at https://uwaterloo.ca/graduate-studies-postdoctoral-affairs/current-students/thesis/thesis-formatting
IST Client Services
[\
\
Plantilla TFG - EPSC UCO](https://www.overleaf.com/latex/templates/plantilla-tfg-epsc-uco/qgzdnrczjqtv)
Plantilla genérica para Trabajos Fin de Grado de la Escuela Politécnica Superior de Córdoba (EPSC). Universidad de Córdoba (UCO). Versión 3.6
Eduardo Cañete Carmona
Featured
--------
[\
\
Modern Simple CV](https://www.overleaf.com/latex/templates/modern-simple-cv/kwrxbwthgrwr)
A modern simple (academic) CV template. With no colour, but a few different tabulars for visualizing your skills and cv events. The template has no colour, but adding logos to your events will still make it relatively colourful (and thus, not strictly classic, why I called it "modern"). You can play around with different fonts. The places where the changes can be made are indicated by comments. The fancy font for the name can be taken away, if you don't want it. The github repo is here: https://github.com/latex-ninja/modern-simple-cv
Sarah Lang
[\
\
Example Project](https://www.overleaf.com/latex/templates/example-project/qzykddzqhkwk)
An example LaTeX project for starting off your own article
Overleaf
[\
\
A quick guide to LaTeX](https://www.overleaf.com/latex/templates/a-quick-guide-to-latex/fghqpfgnxggz)
Know the LaTeX command you want to use but can't remember how to write it? Here we present a great tips sheet produced by Dave Richeson; it's pre-loaded in Overleaf so you can see how the commands work instantly. Simply click on the button above to open a version in Overleaf for editing (and to quickly copy and paste the commands you need!). For more comments visit this page on Dave's site, or if you'd like to work through a fuller introduction to LaTeX why not check out our free online course?
Example by Division by Zero
[\
\
Basic Academic Journal Article Template](https://www.overleaf.com/latex/templates/basic-academic-journal-article-template/hqyvzjmktytm)
This is a basic journal article template which includes metadata fields for multiple authors, affiliations and keywords. It is also set up to use the lineno package for line numbers; these can be turned on by adding the 'lineno' option to the documentclass command.
John Hammersley
[\
\
MSc or PhD Dissertation Template (Originally for the University of Malta)](https://www.overleaf.com/latex/templates/msc-or-phd-dissertation-template-originally-for-the-university-of-malta/xhnmbpvkmmqp)
A modern dissertation (or thesis) LaTeX template. Originally used during my D.Phil. at the University of Oxford. Now updated to be used by students at the University of Malta. Easily customizable, so trivial to change colours and logos for your own institution. Github repo: https://github.com/jp-um/university\_of\_malta\_LaTeX\_dissertation\_template Get in touch if you find anything untoward or have any questions (or want to buy me beer).
Dr Jean-Paul Ebejer
[\
\
HenriquesLab bioRxiv template Official](https://www.overleaf.com/latex/templates/henriqueslab-biorxiv-template/nyprsybwffws)
This is a gorgeous template for bioRxiv pre-prints. An example manuscript using it can be found here.
Ricardo Henriques
\\begin{now}
Discover why over 25 million people worldwide trust Overleaf with their work.
[Sign up for free](https://www.overleaf.com/register)
[Explore all plans](https://www.overleaf.com/user/subscription/plans)
We only use cookies for essential purposes and to improve your experience on our site. You can find out more in our [cookie policy](https://www.overleaf.com/legal#Cookies)
.
Essential cookies onlyAccept all cookies
---
# Positioning images and tables - Overleaf, Online LaTeX Editor
[Skip to content](https://www.overleaf.com/learn/latex/Positioning_images_and_tables#main-content)
Search help library…searchclear
No Search Results
Positioning images and tables
=============================
LaTeX is an editing tool that takes care of the format so you only have to worry about the contents of your document; nevertheless, better control of floating elements is sometimes necessary. This article explains how to position images and tables in a LaTeX document.
Contents
--------
* [1 Introduction](https://www.overleaf.com/learn/latex/Positioning_images_and_tables#Introduction)
* [2 Positioning images](https://www.overleaf.com/learn/latex/Positioning_images_and_tables#Positioning_images)
* [2.1 Basic positioning](https://www.overleaf.com/learn/latex/Positioning_images_and_tables#Basic_positioning)
* [2.2 The figure environment](https://www.overleaf.com/learn/latex/Positioning_images_and_tables#The_figure_environment)
* [2.3 Multiple images in one figure](https://www.overleaf.com/learn/latex/Positioning_images_and_tables#Multiple_images_in_one_figure)
* [2.4 Wrapping text around a figure](https://www.overleaf.com/learn/latex/Positioning_images_and_tables#Wrapping_text_around_a_figure)
* [3 Positioning tables](https://www.overleaf.com/learn/latex/Positioning_images_and_tables#Positioning_tables)
* [3.1 Basic positioning](https://www.overleaf.com/learn/latex/Positioning_images_and_tables#Basic_positioning_2)
* [3.2 The table environment](https://www.overleaf.com/learn/latex/Positioning_images_and_tables#The_table_environment)
* [3.3 Wrapping text around a table](https://www.overleaf.com/learn/latex/Positioning_images_and_tables#Wrapping_text_around_a_table)
* [4 Reference guide](https://www.overleaf.com/learn/latex/Positioning_images_and_tables#Reference_guide)
* [5 Further reading](https://www.overleaf.com/learn/latex/Positioning_images_and_tables#Further_reading)
Introduction
------------
The default alignment for images and tables is set to _left_
Lorem ipsum dolor sit amet, consectetuer adipiscing elit.
Etiam lobortis facilisis sem. Nullam nec mi et neque pharetra
sollicitudin.
\\includegraphics\[width=0.5\\textwidth\]{overleaf-logo}
Praesent imperdiet mi nec
ante. Donec ullamcorper, felis non sodales commodo, lectus velit
ultrices augue, a dignissim nibh lectus placerat pede.
Vivamus nunc nunc, molestie ut, ultricies
vel, semper in, velit. Ut porttitor.
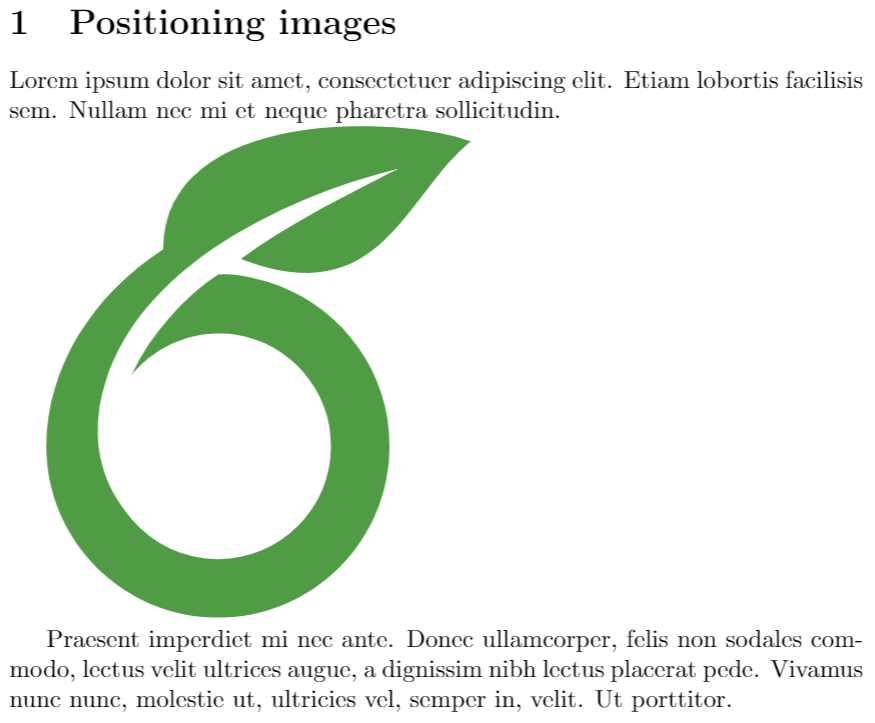
This is a simple example, for a description of this and other ways to include images in your LaTeX file see the article [Inserting Images](https://docs.overleaf.com/writing-and-editing/inserting-images "Inserting Images")
.
[Open an example in Overleaf](https://www.overleaf.com/project/new/template/19663?id=66518064&templateName=Example+of+positioning+tables+and+figures&latexEngine=pdflatex&texImage=texlive-full%3A2020.1&mainFile=)
Positioning images
------------------
### Basic positioning
To change the default alignment of an image from _left_ or _right_, an easy option is to add
\\usepackage\[export\]{adjustbox}
to the preamble of your file and then use an additional option in your image-importing statement
Lorem ipsum dolor sit amet, consectetuer adipiscing elit.
Etiam lobortis facilisis sem. Nullam nec mi et neque
pharetra sollicitudin.
\\includegraphics\[width=0.5\\textwidth, right\]{overleaf-logo}
Praesent imperdiet mi necante. Donec ullamcorper, felis
non sodales commodo, lectus velit ultrices augue,
a dignissim nibh lectus placerat pede. Vivamus nunc nunc,
molestie ut, ultriciesvel, semper in, velit. Ut porttitor.
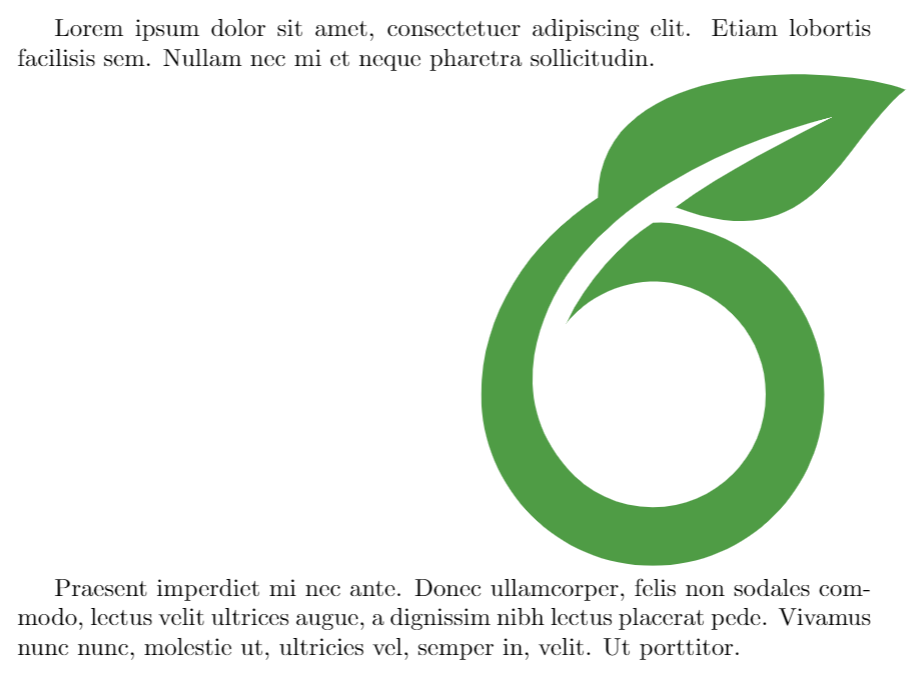
The package **adjustbox** enables an additional option in the `\includegraphics` command, in the example the picture is aligned to `right`. The available values are: _left_, _right_, _center_, _outer_ and _inner_, the last two are intended for two-sided documents.
[Open an example in Overleaf](https://www.overleaf.com/project/new/template/19663?id=66518064&templateName=Example+of+positioning+tables+and+figures&latexEngine=pdflatex&texImage=texlive-full%3A2020.1&mainFile=)
### The figure environment
The figure environment (see [Inserting Images](https://docs.overleaf.com/writing-and-editing/inserting-images "Inserting Images")
) is intended to provide automatic positioning.
Praesent in sapien. Lorem ipsum dolor sit amet, consectetuer adipiscing
elit. Duis fringilla tristique neque. Sed interdum libero ut metus.
Pellentesque placerat. Nam rutrum augue a leo. Morbi sed elit sit amet
ante lobortis sollicitudin.
\\begin{figure}\[h\]
\\includegraphics\[width=0.5\\textwidth, inner\]{overleaf-logo}
\\caption{Caption}
\\label{fig:figure2}
\\end{figure}
This environment uses a positioning parameter passed inside brackets, it can take the next values:
| Parameter | Position |
| --- | --- |
| h | Place the float _here_, i.e., _approximately_ at the same point it occurs in the source text (however, not _exactly_ at the spot) |
| t | Position at the _top_ of the page. |
| b | Position at the _bottom_ of the page. |
| p | Put on a special _page_ for floats only. |
| ! | Override internal parameters LaTeX uses for determining "good" float positions. |
| H | Places the float at precisely the location in the LaTeX code. Requires the `float` package. This is somewhat equivalent to h!. |
You can put more than one value in the parameter, for instance, if you write `[ht]` LaTeX will try to position the figure **here**, but if it's not possible (the space may be insufficient) then the figure will appear at the **top** of the page. It is recommended to use more than one positioning parameter to prevent unexpected results.
[Open an example in Overleaf](https://www.overleaf.com/project/new/template/19663?id=66518064&templateName=Example+of+positioning+tables+and+figures&latexEngine=pdflatex&texImage=texlive-full%3A2020.1&mainFile=)
### Multiple images in one figure
It is possible to insert several images in one figure, each one with its own reference and label
Praesent in sapien. Lorem ipsum dolor sit amet, consectetuer adipiscing elit. Duis fringilla tristique neque...
\\begin{figure}\[h\]
\\begin{subfigure}{0.5\\textwidth}
\\includegraphics\[width=0.9\\linewidth, height=6cm\]{overleaf-logo}
\\caption{Caption1}
\\label{fig:subim1}
\\end{subfigure}
\\begin{subfigure}{0.5\\textwidth}
\\includegraphics\[width=0.9\\linewidth, height=6cm\]{mesh}
\\caption{Caption 2}
\\label{fig:subim2}
\\end{subfigure}
\\caption{Caption for this figure with two images}
\\label{fig:image2}
\\end{figure}
Praesent blandit blandit mauris. Praesent lectus tellus, aliquet aliquam, luctus a, egestas a, turpis. Mauris lacinia lorem sit amet ipsum. Nunc quis urna dictum turpis accumsan semper.
First, you must import the package **subcaption** by adding to the preamble
\\usepackage{subcaption}
then you can use the environment `\subfigure` that takes one parameter, the width of the figure. This environment must be used inside a `figure` environment, captions and labels can be set to each _subfigure_.
[Open an example in Overleaf](https://www.overleaf.com/project/new/template/19663?id=66518064&templateName=Example+of+positioning+tables+and+figures&latexEngine=pdflatex&texImage=texlive-full%3A2020.1&mainFile=)
### Wrapping text around a figure
The package **wrapfig** provides a useful feature, text can be floated around the images.
Praesent in sapien. Lorem ipsum dolor sit amet, consectetuer
adipiscing elit. Duis fringilla tristique neque. Sed interdum
libero ut metus. Pellentesque placerat.
\\begin{wrapfigure}{l}{0.25\\textwidth}
\\includegraphics\[width=0.9\\linewidth\]{overleaf-logo}
\\caption{Caption1}
\\label{fig:wrapfig}
\\end{wrapfigure}
Praesent in sapien. Lorem ipsum dolor sit amet, consectetuer
adipiscing elit. Duis fringilla tristique neque. Sed interdum
First import the package _wrapfig_ by adding
\\usepackage{wrapfig}
to the preamble.
After that you can use the environment `wrapfig`, it takes two parameters that are passed inside braces: the alignement that can be _l_, _r_, _c_, _i_ or _o_; this letters stand for left, right, centre, inner and outer (the last two intended for two-sided documents). The second parameter is the width of the figure, in the example is 0.25 the width of the text. See the [reference guide](https://www.overleaf.com/learn/latex/Positioning_images_and_tables#Reference_guide)
for a list of possible length units.
[Open an example in Overleaf](https://www.overleaf.com/project/new/template/19663?id=66518064&templateName=Example+of+positioning+tables+and+figures&latexEngine=pdflatex&texImage=texlive-full%3A2020.1&mainFile=)
Positioning tables
------------------
Options for table positioning are similar to those available for figures.
### Basic positioning
Default position of the tabular environment is _centre_.
Praesent in sapien. Lorem ipsum dolor sit amet, consectetuer adipiscing elit. Duis fringilla tristique neque.
Sed interdum libero ut metus. Pellentesque placerat. Nam rutrum augue a leo. Morbi sed elit sit amet
ante lobortis sollicitudin.
\\arrayrulecolor\[HTML\]{DB5800}
\\begin{tabular}{ |s|p{2cm}|p{2cm}| }
\\hline
\\rowcolor{lightgray} \\multicolumn{3}{|c|}{Country List} \\\\
\\hline
Country Name or Area Name& ISO ALPHA 2 Code &ISO ALPHA 3 \\\\
\\hline
Afghanistan & AF &AFG \\\\
\\rowcolor{gray}
Aland Islands & AX & ALA \\\\
Albania &AL & ALB \\\\
Algeria &DZ & DZA \\\\
American Samoa & AS & ASM \\\\
Andorra & AD & \\cellcolor\[HTML\]{AA0044} AND \\\\
Angola & AO & AGO \\\\
\\hline
\\end{tabular}
Praesent in sapien. Lorem ipsum dolor sit amet, consectetuer adipiscing
elit. Duis fringilla tristique neque. Sed interdum libero ut metus.
Pellentesque placerat. Nam rutrum augue a leo. Morbi sed elit sit
amet ante lobortis sollicitudin.
[Open this code fragment in Overleaf](https://www.overleaf.com/docs?engine=&snip_name=Default+position+of+tabular&snip=%5Cdocumentclass%7Barticle%7D%0A%25Table-related+commands%0A%5Cusepackage%7Barray%7D%0A%5Cusepackage%5Btable%5D%7Bxcolor%7D%0A%5Csetlength%7B%5Carrayrulewidth%7D%7B1mm%7D%0A%5Csetlength%7B%5Ctabcolsep%7D%7B18pt%7D%0A%5Crenewcommand%7B%5Carraystretch%7D%7B1.5%7D%0A%5Cnewcolumntype%7Bs%7D%7B%3E%7B%5Ccolumncolor%5BHTML%5D%7BAAACED%7D%7D+p%7B3cm%7D%7D%0A%0A%5Cbegin%7Bdocument%7D%0APraesent+in+sapien.+Lorem+ipsum+dolor+sit+amet%2C+consectetuer+adipiscing+elit.+Duis+fringilla+tristique+neque.+%0ASed+interdum+libero+ut+metus.+Pellentesque+placerat.+Nam+rutrum+augue+a+leo.+Morbi+sed+elit+sit+amet+%0Aante+lobortis+sollicitudin.%0A%0A%5Carrayrulecolor%5BHTML%5D%7BDB5800%7D%0A%5Cbegin%7Btabular%7D%7B+%7Cs%7Cp%7B2cm%7D%7Cp%7B2cm%7D%7C++%7D%0A%5Chline%0A%5Crowcolor%7Blightgray%7D+%5Cmulticolumn%7B3%7D%7B%7Cc%7C%7D%7BCountry+List%7D+%5C%5C%0A%5Chline%0ACountry+Name+or+Area+Name%26+ISO+ALPHA+2+Code+%26ISO+ALPHA+3+%5C%5C%0A%5Chline%0AAfghanistan+%26+AF+%26AFG+%5C%5C%0A%5Crowcolor%7Bgray%7D%0AAland+Islands+%26+AX++%26+ALA+%5C%5C%0AAlbania++++%26AL+%26+ALB+%5C%5C%0AAlgeria+++%26DZ+%26+DZA+%5C%5C%0AAmerican+Samoa+%26+AS+%26+ASM+%5C%5C%0AAndorra+%26+AD+%26+%5Ccellcolor%5BHTML%5D%7BAA0044%7D+AND+%5C%5C%0AAngola+%26+AO+%26+AGO+%5C%5C%0A%5Chline%0A%5Cend%7Btabular%7D%0A%0APraesent+in+sapien.+Lorem+ipsum+dolor+sit+amet%2C+consectetuer+adipiscing+%0Aelit.+Duis+fringilla+tristique+neque.+Sed+interdum+libero+ut+metus.+%0APellentesque+placerat.+Nam+rutrum+augue+a+leo.+Morbi+sed+elit+sit+%0Aamet+ante+lobortis+sollicitudin.%0A%5Cend%7Bdocument%7D)
The following graphic shows the result of the code fragment above:
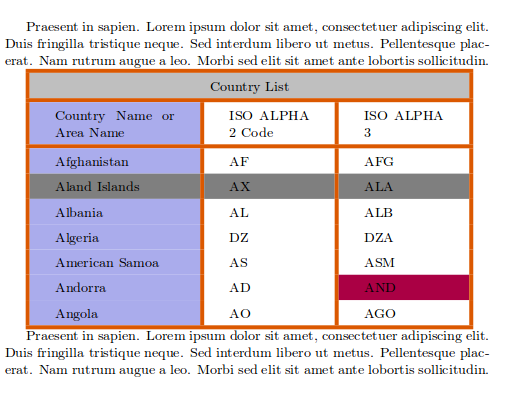
You can also [open a complete project example project in Overleaf.](https://www.overleaf.com/project/new/template/19663?id=66518064&templateName=Example+of+positioning+tables+and+figures&latexEngine=pdflatex&texImage=texlive-full%3A2020.1&mainFile=)
To learn about how to create tables see the [Tables](https://www.overleaf.com/learn/latex/Tables "Tables")
article.
### The table environment
The table environment is intended to automatically position tables so they fit nicely in the flow of your document.
Praesent in sapien. Lorem ipsum dolor sit amet, consectetuer
adipiscing elit. Duis fringilla tristique neque. Sed interdum
libero ut metus. Pellentesque placerat. Nam rutrum augue a leo.
Morbi sed elit sit amet ante lobortis sollicitudin.
\\begin{table}\[ht\]
\\arrayrulecolor\[HTML\]{DB5800}
\\centering
\\begin{tabular}{ |s|p{2cm}|p{2cm}| }
\\hline
\\rowcolor{lightgray} \\multicolumn{3}{|c|}{Country List} \\\\
\\hline
Country Name or Area Name& ISO ALPHA 2 Code &ISO ALPHA 3 \\\\
\\hline
Afghanistan & AF &AFG \\\\
\\rowcolor{gray}
Aland Islands & AX & ALA \\\\
Albania &AL & ALB \\\\
Algeria &DZ & DZA \\\\
American Samoa & AS & ASM \\\\
Andorra & AD & \\cellcolor\[HTML\]{AA0044} AND \\\\
Angola & AO & AGO \\\\
\\hline
\\end{tabular}
\\caption{Table inside a floating element}
\\label{table:ta}
\\end{table}
Praesent in sapien. Lorem ipsum dolor sit amet, consectetuer
adipiscing elit. Duis fringilla tristique neque. Sed interdum
libero ut metus. Pellentesque placerat. Nam rutrum augue a leo.
Morbi sed elit sit amet ante lobortis sollicitudin.
[Open this code fragment in Overleaf](https://www.overleaf.com/docs?engine=&snip_name=Default+position+of+tabular&snip=%5Cdocumentclass%7Barticle%7D%0A%25Table-related+commands%0A%5Cusepackage%7Barray%7D%0A%5Cusepackage%5Btable%5D%7Bxcolor%7D%0A%5Csetlength%7B%5Carrayrulewidth%7D%7B1mm%7D%0A%5Csetlength%7B%5Ctabcolsep%7D%7B18pt%7D%0A%5Crenewcommand%7B%5Carraystretch%7D%7B1.5%7D%0A%5Cnewcolumntype%7Bs%7D%7B%3E%7B%5Ccolumncolor%5BHTML%5D%7BAAACED%7D%7D+p%7B3cm%7D%7D%0A%0A%5Cbegin%7Bdocument%7D%0APraesent+in+sapien.+Lorem+ipsum+dolor+sit+amet%2C+consectetuer+%0Aadipiscing+elit.+Duis+fringilla+tristique+neque.+Sed+interdum+%0Alibero+ut+metus.+Pellentesque+placerat.+Nam+rutrum+augue+a+leo.%0AMorbi+sed+elit+sit+amet+ante+lobortis+sollicitudin.%0A%0A%5Cbegin%7Btable%7D%5Bht%5D%0A%5Carrayrulecolor%5BHTML%5D%7BDB5800%7D%0A%5Ccentering%0A%5Cbegin%7Btabular%7D%7B+%7Cs%7Cp%7B2cm%7D%7Cp%7B2cm%7D%7C++%7D%0A%5Chline%0A%5Crowcolor%7Blightgray%7D+%5Cmulticolumn%7B3%7D%7B%7Cc%7C%7D%7BCountry+List%7D+%5C%5C%0A%5Chline%0ACountry+Name+or+Area+Name%26+ISO+ALPHA+2+Code+%26ISO+ALPHA+3+%5C%5C%0A%5Chline%0AAfghanistan+%26+AF+%26AFG+%5C%5C%0A%5Crowcolor%7Bgray%7D%0AAland+Islands+%26+AX++%26+ALA+%5C%5C%0AAlbania++++%26AL+%26+ALB+%5C%5C%0AAlgeria+++%26DZ+%26+DZA+%5C%5C%0AAmerican+Samoa+%26+AS+%26+ASM+%5C%5C%0AAndorra+%26+AD+%26+%5Ccellcolor%5BHTML%5D%7BAA0044%7D+AND+%5C%5C%0AAngola+%26+AO+%26+AGO+%5C%5C%0A%5Chline%0A%5Cend%7Btabular%7D%0A%5Ccaption%7BTable+inside+a+floating+element%7D%0A%5Clabel%7Btable%3Ata%7D%0A%5Cend%7Btable%7D%0A%0APraesent+in+sapien.+Lorem+ipsum+dolor+sit+amet%2C+consectetuer+%0Aadipiscing+elit.+Duis+fringilla+tristique+neque.+Sed+interdum+%0Alibero+ut+metus.+Pellentesque+placerat.+Nam+rutrum+augue+a+leo.+%0AMorbi+sed+elit+sit+amet+ante+lobortis+sollicitudin.%0A%5Cend%7Bdocument%7D)
The following graphic shows the output produced by the Overleaf link:
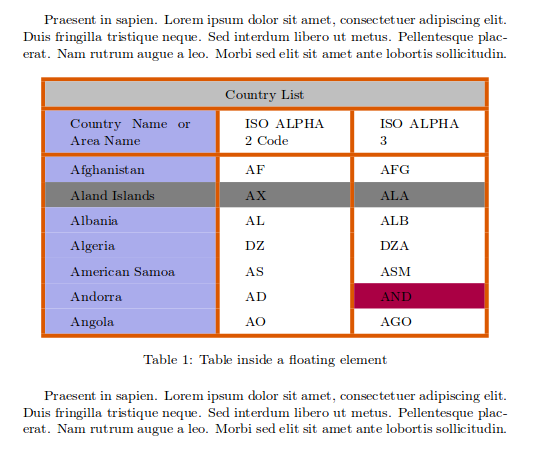
A position parameter, inside brackets, can be passed to the **table** environment. This parameter can take the next values:
| Parameter | Position |
| --- | --- |
| h | Place the float _here_, i.e., _approximately_ at the same point it occurs in the source text (however, not _exactly_ at the spot) |
| t | Position at the _top_ of the page. |
| b | Position at the _bottom_ of the page. |
| p | Put on a special _page_ for floats only. |
| ! | Override internal parameters LaTeX uses for determining "good" float positions. |
| H | Places the float at precisely the location in the LaTeX code. Requires the `float` package. This is somewhat equivalent to h!. |
You can set more than one value in the parameter, for instance, if you write `[ht]` LaTeX will try to position the table **here**, but if it's not possible (the space may be insufficient) then the table will appear at the **top** of the page. It is recommended to use more than one positioning parameter to prevent unexpected results.
Notice also the command `\centering`. This changes the alignment of the table within its container to _centre_ instead of the default _left_.
[Open an example in Overleaf](https://www.overleaf.com/project/new/template/19663?id=66518064&templateName=Example+of+positioning+tables+and+figures&latexEngine=pdflatex&texImage=texlive-full%3A2020.1&mainFile=)
### Wrapping text around a table
If your table don't take all available space and you want to put text next or before it, is possible with the package `wrapfig`.
First, import the package
\\usepackage{wrapfig}
then you can use the environment `wraptable` which takes two parameters: The first one is the alignment that can be `l`, `r`, `c`, `i` or `o` for left, right, centre, inner and outer respectively. The second one is the width of the table container, keep in mind that this latter parameter must be the same as the width of the table, otherwise things may not be properly aligned.
Praesent in sapien. Lorem ipsum dolor sit amet, consectetuer
adipiscing elit. Duis fringilla tristique neque. Sed interdum
libero ut metus. Pellentesque placerat. Nam rutrum augue a leo.
Morbi sed elit sit amet ante lobortis sollicitudin.
\\begin{wraptable}{r}{8cm}
\\arrayrulecolor\[HTML\]{DB5800}
\\centering
\\begin{tabular}{ |s|p{2cm}| }
\\hline
\\rowcolor{lightgray} \\multicolumn{2}{|c|}{Country List} \\\\
\\hline
Country Name or Area Name& ISO ALPHA 2 Code \\\\
\\hline
Afghanistan & AF \\\\
\\rowcolor{gray}
Aland Islands & AX \\\\
Albania &AL \\\\
Algeria &DZ \\\\
American Samoa & AS \\\\
Andorra & \\cellcolor\[HTML\]{AA0044} AD \\\\
Angola & AO \\\\
\\hline
\\end{tabular}
\\caption{Table inside a wraptable}
\\label{table:ta2}
\\end{wraptable}
Praesent in sapien. Lorem ipsum dolor sit amet, consectetuer
adipiscing elit. Duis fringilla tristique neque. Sed interdum
libero ut metus. Pellentesque placerat. Nam rutrum augue a leo.
Morbi sed elit sit amet ante lobortis sollicitudin...
[Open this `wrapfig` code fragment in Overleaf](https://www.overleaf.com/docs?engine=&snip_name=Example+of+wrapfig&snip=%5Cdocumentclass%7Barticle%7D%0A%5Cusepackage%7Bwrapfig%7D%0A%25Table-related+commands%0A%5Cusepackage%7Barray%7D%0A%5Cusepackage%5Btable%5D%7Bxcolor%7D%0A%5Csetlength%7B%5Carrayrulewidth%7D%7B1mm%7D%0A%5Csetlength%7B%5Ctabcolsep%7D%7B18pt%7D%0A%5Crenewcommand%7B%5Carraystretch%7D%7B1.5%7D%0A%5Cnewcolumntype%7Bs%7D%7B%3E%7B%5Ccolumncolor%5BHTML%5D%7BAAACED%7D%7D+p%7B3cm%7D%7D%0A%0A%5Cbegin%7Bdocument%7D%0APraesent+in+sapien.+Lorem+ipsum+dolor+sit+amet%2C+consectetuer+%0Aadipiscing+elit.+Duis+fringilla+tristique+neque.+Sed+interdum+%0Alibero+ut+metus.+Pellentesque+placerat.+Nam+rutrum+augue+a+leo.+%0AMorbi+sed+elit+sit+amet+ante+lobortis+sollicitudin.%0A%0A%5Cbegin%7Bwraptable%7D%7Br%7D%7B8cm%7D%0A%5Carrayrulecolor%5BHTML%5D%7BDB5800%7D%0A%5Ccentering%0A%5Cbegin%7Btabular%7D%7B+%7Cs%7Cp%7B2cm%7D%7C++%7D%0A%5Chline%0A%5Crowcolor%7Blightgray%7D+%5Cmulticolumn%7B2%7D%7B%7Cc%7C%7D%7BCountry+List%7D+%5C%5C%0A%5Chline%0ACountry+Name+or+Area+Name%26+ISO+ALPHA+2+Code+%5C%5C%0A%5Chline%0AAfghanistan+%26+AF+%5C%5C%0A%5Crowcolor%7Bgray%7D%0AAland+Islands+%26+AX+%5C%5C%0AAlbania++++%26AL++%5C%5C%0AAlgeria+++%26DZ+%5C%5C%0AAmerican+Samoa+%26+AS+%5C%5C%0AAndorra+%26+%5Ccellcolor%5BHTML%5D%7BAA0044%7D+AD+++%5C%5C%0AAngola+%26+AO+%5C%5C%0A%5Chline%0A%5Cend%7Btabular%7D%0A%5Ccaption%7BTable+inside+a+wraptable%7D%0A%5Clabel%7Btable%3Ata2%7D%0A%5Cend%7Bwraptable%7D%0A%0APraesent+in+sapien.+Lorem+ipsum+dolor+sit+amet%2C+consectetuer+%0Aadipiscing+elit.+Duis+fringilla+tristique+neque.+Sed+interdum+%0Alibero+ut+metus.+Pellentesque+placerat.+Nam+rutrum+augue+a+leo.+%0AMorbi+sed+elit+sit+amet+ante+lobortis+sollicitudin...%0APraesent+in+sapien.+Lorem+ipsum+dolor+sit+amet%2C+consectetuer+%0Aadipiscing+elit.+Duis+fringilla+tristique+neque.+Sed+interdum+%0Alibero+ut+metus.+Pellentesque+placerat.+Nam+rutrum+augue+a+leo.+%0AMorbi+sed+elit+sit+amet+ante+lobortis+sollicitudin...%0APraesent+in+sapien.+Lorem+ipsum+dolor+sit+amet%2C+consectetuer+%0Aadipiscing+elit.+Duis+fringilla+tristique+neque.+Sed+interdum+%0Alibero+ut+metus.+Pellentesque+placerat.+Nam+rutrum+augue+a+leo.+%0AMorbi+sed+elit+sit+amet+ante+lobortis+sollicitudin...%0APraesent+in+sapien.+Lorem+ipsum+dolor+sit+amet%2C+consectetuer+%0Aadipiscing+elit.+Duis+fringilla+tristique+neque.+Sed+interdum+%0Alibero+ut+metus.+Pellentesque+placerat.+Nam+rutrum+augue+a+leo.+%0AMorbi+sed+elit+sit+amet+ante+lobortis+sollicitudin...%0A%5Cend%7Bdocument%7D)
The following graphic shows the output produced by the Overleaf link:
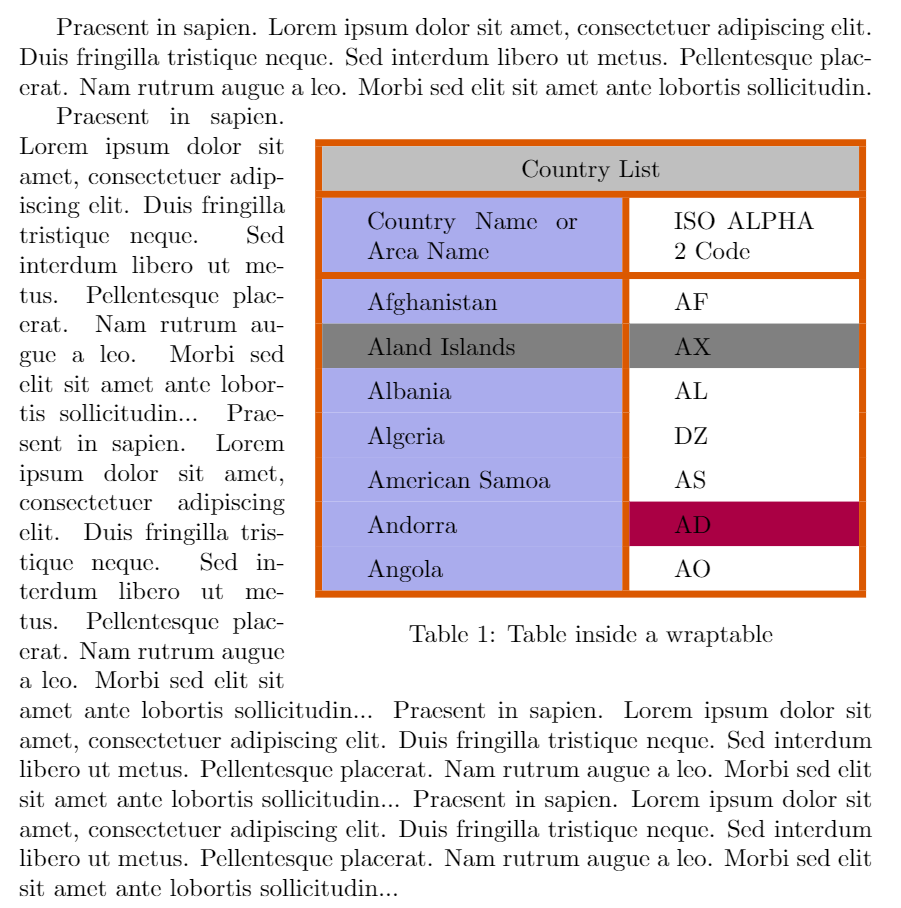
Reference guide
---------------
**LaTeX units and lengths**
| Abbreviation | Definition |
| --- | --- |
| pt | A point, is the default length unit. About 0.3515mm |
| mm | a millimetre |
| cm | a centimetre |
| in | an inch |
| ex | the height of an **x** in the current font |
| em | the width of an **m** in the current font |
| \\columnsep | distance between columns |
| \\columnwidth | width of the column |
| \\linewidth | width of the line in the current environment |
| \\paperwidth | width of the page |
| \\paperheight | height of the page |
| \\textwidth | width of the text |
| \\textheight | height of the text |
| \\unitlength | units of length in the _picture_ environment. |
Further reading
---------------
For more information see:
* [Tables](https://www.overleaf.com/learn/latex/Tables "Tables")
* [Inserting Images](https://docs.overleaf.com/writing-and-editing/inserting-images "Inserting Images")
* [Lists of tables and figures](https://www.overleaf.com/learn/latex/Lists_of_tables_and_figures "Lists of tables and figures")
* [Lengths in LaTeX](https://www.overleaf.com/learn/latex/Lengths_in_LaTeX "Lengths in LaTeX")
* [**floatrow** package for advanced caption managing of floating elements (tables and figures)](http://tug.ctan.org/tex-archive/macros/latex/contrib/floatrow/floatrow.pdf)
* [**sidecap** package documentation, for side-figure captions](ftp://ctan.tug.org/tex-archive/macros/latex/contrib/sidecap/sidecap.pdf)
We only use cookies for essential purposes and to improve your experience on our site. You can find out more in our [cookie policy](https://www.overleaf.com/legal#Cookies)
.
Essential cookies onlyAccept all cookies
---
# Natbib bibliography styles - Overleaf, Online LaTeX Editor
[Skip to content](https://www.overleaf.com/learn/latex/Natbib_bibliography_styles#main-content)
Search help library…searchclear
No Search Results
Natbib bibliography styles
==========================
Natbib styles
-------------
The next commands are the ones that set the bibliography style and import the bibliography file. See [Bibliography management with natbib](https://www.overleaf.com/learn/latex/Bibliography_management_with_natbib "Bibliography management with natbib")
for more information.
%in the preamble
%--------------------------------
\\usepackage{natbib}
\\bibliographystyle{stylename}
%--------------------------------
%Where the bibliography will be printed
\\bibliography{bibfile}
where _bibfile_ is the name of the bibliography .bib file and _stylename_ is one of the following:
| stylename | output |
| --- | --- |
| `dinat` | 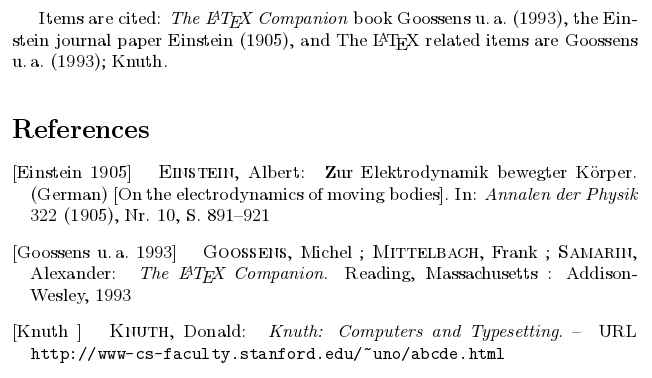 |
| `plainnat` | 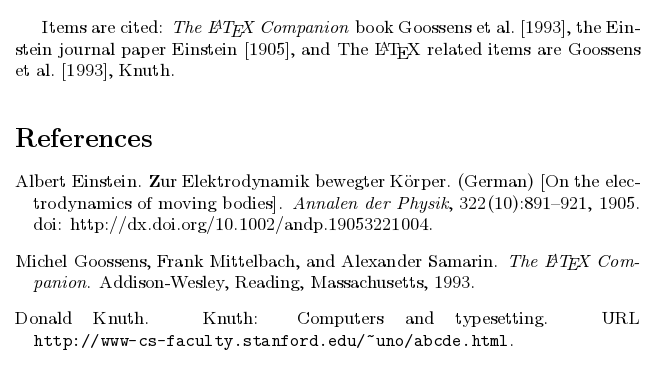 |
| `abbrvnat` | 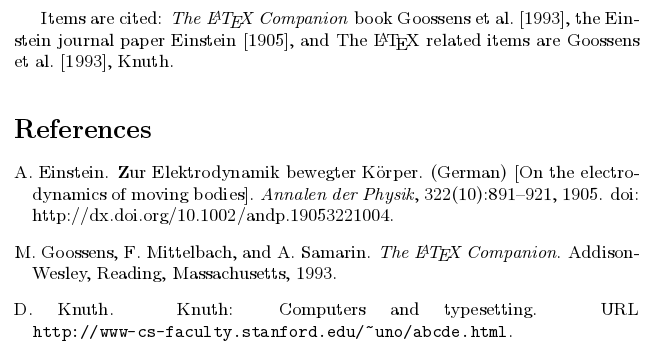 |
| `unsrtnat` | 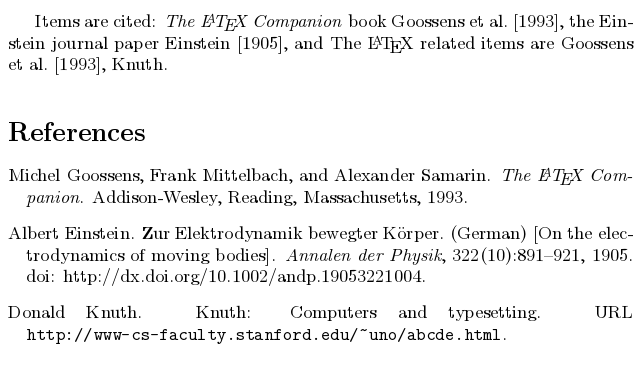 |
| `rusnat` | 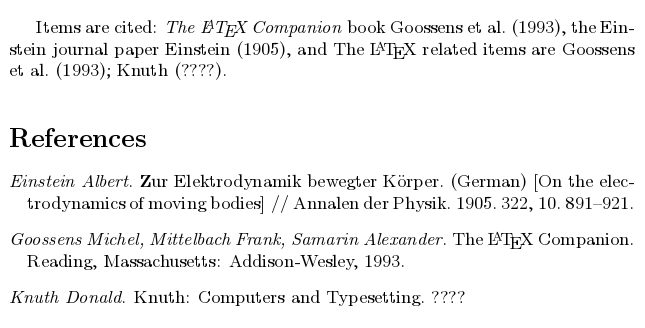 |
| `ksfh_nat` | 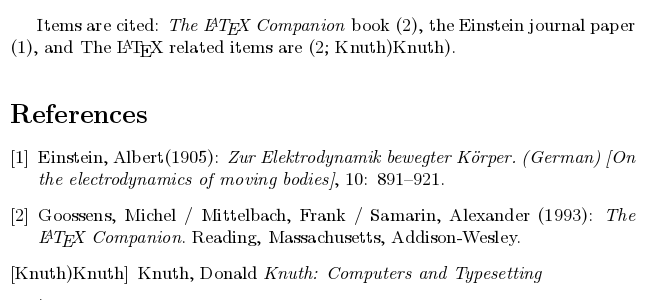 |
Further reading
---------------
* [Bibliography management with natbib](https://www.overleaf.com/learn/latex/Bibliography_management_with_natbib "Bibliography management with natbib")
* [Natbib citation styles](https://www.overleaf.com/learn/latex/Natbib_citation_styles "Natbib citation styles")
* [Natbib package documentation](http://mirrors.ibiblio.org/CTAN/macros/latex/contrib/natbib/natbib.pdf)
* [International language support](https://www.overleaf.com/learn/latex/International_language_support "International language support")
* [Management in a large project](https://www.overleaf.com/learn/latex/Management_in_a_large_project "Management in a large project")
* [Table of contents](https://www.overleaf.com/learn/latex/Table_of_contents "Table of contents")
We only use cookies for essential purposes and to improve your experience on our site. You can find out more in our [cookie policy](https://www.overleaf.com/legal#Cookies)
.
Essential cookies onlyAccept all cookies
---
# Mathematical fonts - Overleaf, Online LaTeX Editor
[Skip to content](https://www.overleaf.com/learn/latex/Mathematical_fonts#main-content)
Search help library…searchclear
No Search Results
Mathematical fonts
==================
Contents
--------
* [1 Introduction](https://www.overleaf.com/learn/latex/Mathematical_fonts#Introduction)
* [2 Capital letters-only font typefaces](https://www.overleaf.com/learn/latex/Mathematical_fonts#Capital_letters-only_font_typefaces)
* [3 Other mathematical fonts](https://www.overleaf.com/learn/latex/Mathematical_fonts#Other_mathematical_fonts)
* [4 Further reading](https://www.overleaf.com/learn/latex/Mathematical_fonts#Further_reading)
Introduction
------------
Some mathematical elements need to be typeset using fonts containing characters/symbols of a certain style; for example, it is customary to represent real numbers with a blackboard bold font (such as \\(\\mathbb{R}\\)), or topological spaces with calligraphic font (such as (\\(\\mathcal{T}\\)). This article shows how to use different font styles when typesetting mathematics, starting with the following example:
Let \\( \\mathcal{T} \\) be a topological space, a basis is defined as
\\\[\
\\mathcal{B} \= \\{B\_{\\alpha} \\in \\mathcal{T}\\, |\\, U \= \\bigcup B\_{\\alpha} \\forall U \\in \\mathcal{T} \\}\
\\\]
[Open this example in Overleaf](https://www.overleaf.com/docs?engine=pdflatex&snip_name=Maths+typeface+example&snip=%5Cdocumentclass%7Barticle%7D%0A%5Cbegin%7Bdocument%7D%0ALet+%5C%28+%5Cmathcal%7BT%7D+%5C%29+be+a+topological+space%2C+a+basis+is+defined+as%0A%5C%5B%0A+%5Cmathcal%7BB%7D+%3D+%5C%7BB_%7B%5Calpha%7D+%5Cin+%5Cmathcal%7BT%7D%5C%2C+%7C%5C%2C++U+%3D+%5Cbigcup+B_%7B%5Calpha%7D+%5Cforall+U+%5Cin+%5Cmathcal%7BT%7D+%5C%7D%0A%5C%5D%0A%5Cend%7Bdocument%7D)
This example produces the following output:

Use of some math font styles requires the line `\usepackage{amssymb}` to be added to the document preamble: see the [`amsfonts` package](https://ctan.org/pkg/amsfonts)
for further information.
Capital letters-only font typefaces
-----------------------------------
There are some font typefaces which support only a limited number of characters; these fonts usually denote some special sets. For instance, to display the R in blackboard bold typeface you can use `\(\mathbb{R}\)` to produce \\(\\mathbb{R}\\). The following example shows calligraphic, fraktur and blackboard bold typefaces:
\\documentclass{article}
\\usepackage{amsmath}
\\usepackage{amssymb}
\\begin{document}
\\begin{align\*}
RQSZ \\\\
\\mathcal{RQSZ} \\\\
\\mathfrak{RQSZ} \\\\
\\mathbb{RQSZ}
\\end{align\*}
\\end{document}
[Open this example in Overleaf](https://www.overleaf.com/docs?engine=pdflatex&snip_name=Using+different+math+fonts&snip=%5Cdocumentclass%7Barticle%7D%0A%5Cusepackage%7Bamsmath%7D%0A%5Cusepackage%7Bamssymb%7D%0A%5Cbegin%7Bdocument%7D%0A%5Cbegin%7Balign%2A%7D%0ARQSZ+%5C%5C%0A%5Cmathcal%7BRQSZ%7D+%5C%5C%0A%5Cmathfrak%7BRQSZ%7D+%5C%5C%0A%5Cmathbb%7BRQSZ%7D%0A%5Cend%7Balign%2A%7D%0A%5Cend%7Bdocument%7D)
This example produces the following output:
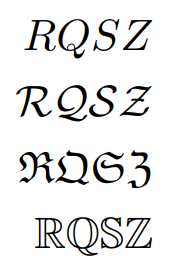
Other mathematical fonts
------------------------
It is possible to set a different font family for a complete mathematical expression:
\\begin{align\*}
3x^2 \\in R \\subset Q \\\\
\\mathnormal{3x^2 \\in R \\subset Q} \\\\
\\mathrm{3x^2 \\in R \\subset Q} \\\\
\\mathit{3x^2 \\in R \\subset Q} \\\\
\\mathbf{3x^2 \\in R \\subset Q} \\\\
\\mathsf{3x^2 \\in R \\subset Q} \\\\
\\mathtt{3x^2 \\in R \\subset Q}
\\end{align\*}
[Open this example in Overleaf](https://www.overleaf.com/docs?engine=pdflatex&snip_name=Using+a+font+family+for+mathematical+expressions&snip=%5Cdocumentclass%7Barticle%7D%0A%5Cusepackage%7Bamsmath%7D%0A%5Cusepackage%7Bamssymb%7D%0A%5Cbegin%7Bdocument%7D%0A%5Cbegin%7Balign%2A%7D%0A3x%5E2+%5Cin+R+%5Csubset+Q+%5C%5C%0A%5Cmathnormal%7B3x%5E2+%5Cin+R+%5Csubset+Q%7D+%5C%5C%0A%5Cmathrm%7B3x%5E2+%5Cin+R+%5Csubset+Q%7D+%5C%5C%0A%5Cmathit%7B3x%5E2+%5Cin+R+%5Csubset+Q%7D+%5C%5C%0A%5Cmathbf%7B3x%5E2+%5Cin+R+%5Csubset+Q%7D+%5C%5C%0A%5Cmathsf%7B3x%5E2+%5Cin+R+%5Csubset+Q%7D+%5C%5C%0A%5Cmathtt%7B3x%5E2+%5Cin+R+%5Csubset+Q%7D%0A%5Cend%7Balign%2A%7D%0A%5Cend%7Bdocument%7D)
This example produces the following output:
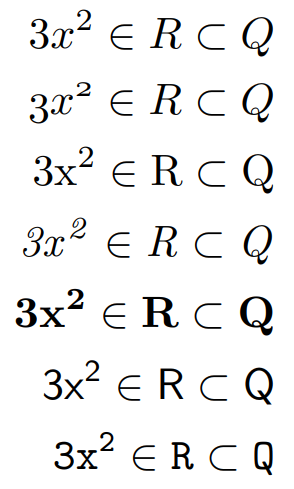
In this case, not only letters but all characters change their appearance; for example, `$\mathit{3x^2}$` italicises the entire expression to produce \\(\\mathit{3x^2}\\).
Further reading
---------------
For more information see
* [`amsfonts` package documentation](https://ctan.org/pkg/amsfonts)
* [Mathematical expressions](https://www.overleaf.com/learn/latex/Mathematical_expressions "Mathematical expressions")
* [Subscripts and superscripts](https://www.overleaf.com/learn/latex/Subscripts_and_superscripts "Subscripts and superscripts")
* [Bold, italics and underlining](https://www.overleaf.com/learn/latex/Bold%2C_italics_and_underlining "Bold, italics and underlining")
* [Font sizes, families, and styles](https://www.overleaf.com/learn/latex/Font_sizes%2C_families%2C_and_styles "Font sizes, families, and styles")
* [Font typefaces](https://www.overleaf.com/learn/latex/Font_typefaces "Font typefaces")
* [Text alignment](https://www.overleaf.com/learn/latex/Text_alignment "Text alignment")
* [The not so short introduction to LaTeX2ε](http://www.ctan.org/tex-archive/info/lshort/)
We only use cookies for essential purposes and to improve your experience on our site. You can find out more in our [cookie policy](https://www.overleaf.com/legal#Cookies)
.
Essential cookies onlyAccept all cookies
---
# Text alignment - Overleaf, Online LaTeX Editor
[Skip to content](https://www.overleaf.com/learn/latex/Text_alignment#main-content)
Search help library…searchclear
No Search Results
Text alignment
==============
Contents
--------
* [1 Introduction](https://www.overleaf.com/learn/latex/Text_alignment#Introduction)
* [2 The standard LaTeX commands and environments](https://www.overleaf.com/learn/latex/Text_alignment#The_standard_LaTeX_commands_and_environments)
* [3 Using the package ragged2e](https://www.overleaf.com/learn/latex/Text_alignment#Using_the_package_ragged2e)
* [4 Comparing \\raggedright (LaTeX) vs \\RaggedRight (ragged2e)](https://www.overleaf.com/learn/latex/Text_alignment#Comparing_\raggedright_(LaTeX)_vs_\RaggedRight_(ragged2e))
* [5 Environments for ragged-right (aligned-left) text](https://www.overleaf.com/learn/latex/Text_alignment#Environments_for_ragged-right_(aligned-left)_text)
* [6 Environments for ragged-left (right-aligned) text](https://www.overleaf.com/learn/latex/Text_alignment#Environments_for_ragged-left_(right-aligned)_text)
* [7 Environments to centre text](https://www.overleaf.com/learn/latex/Text_alignment#Environments_to_centre_text)
* [8 Fully justified text](https://www.overleaf.com/learn/latex/Text_alignment#Fully_justified_text)
* [9 Reference guide](https://www.overleaf.com/learn/latex/Text_alignment#Reference_guide)
* [10 Further reading](https://www.overleaf.com/learn/latex/Text_alignment#Further_reading)
Introduction
------------
By default, LaTeX typesets text as fully-justified, but occasionally left-aligned or "ragged right" text (for right-to-left languages) may be more appropriate—such as text within narrow columns. This article explains how to change text alignment for parts, or all, of your document using LaTeX's built-in features and the package `ragged2e`.
The standard LaTeX commands and environments
--------------------------------------------
LaTeX does have built-in commands for changing the typeset alignment of text:
* ragged-right (`\raggedright`)
* ragged-left (`\raggedleft`)
* centred (`\centering`)
together with corresponding environments:
* ragged-right (`flushleft` environment)
* ragged-left (`flushright` environment)
* centred (`centering` environment)
However, the [`ragged2e` package](https://ctan.org/pkg/ragged2e?lang=en)
provides some refinements which improve upon these standard LaTeX commands and environments.
Using the package ragged2e
--------------------------
To start with, here is an example using the `ragged2e` package and its `[document]` option to typeset the _entire document text_ as ragged-right (left-aligned). The sample code adds the line
\\usepackage\[document\]{ragged2e}
to the document preamble:
\\documentclass{article}
\\usepackage\[document\]{ragged2e}
\\begin{document}
\\section{Heading on Level 1 (section)}
Hello, here is some text without a meaning. This text should show what a printed text will look like at this place. If you read this text, you will get no information. Really? Is there no information? Is there a difference between this text and some nonsense like not at all! A blind text like this gives you information about the selected font, how the letters are written and an impression of the look.
\\end{document}
[Open this `ragged2e` example in Overleaf](https://www.overleaf.com/docs?engine=pdflatex&snip_name=Example+using+ragged2e+package&snip=%5Cdocumentclass%7Barticle%7D%0A%5Cusepackage%5Bdocument%5D%7Bragged2e%7D%0A%0A%5Cbegin%7Bdocument%7D%0A%5Csection%7BHeading+on+Level+1+%28section%29%7D%0AHello%2C+here+is+some+text+without+a+meaning.+This+text+should+show+what+a+printed+text+will+look+like+at+this+place.++If+you+read+this+text%2C+you+will+get+no+information.++Really%3F++Is+there+no+information%3F++Is+there+a+difference+between+this+text+and+some+nonsense+like+not+at+all%21++A+blind+text+like+this+gives+you+information+about+the+selected+font%2C+how+the+letters+are+written+and+an+impression+of+the+look.%0A%5Cend%7Bdocument%7D)
This example produces the following output:
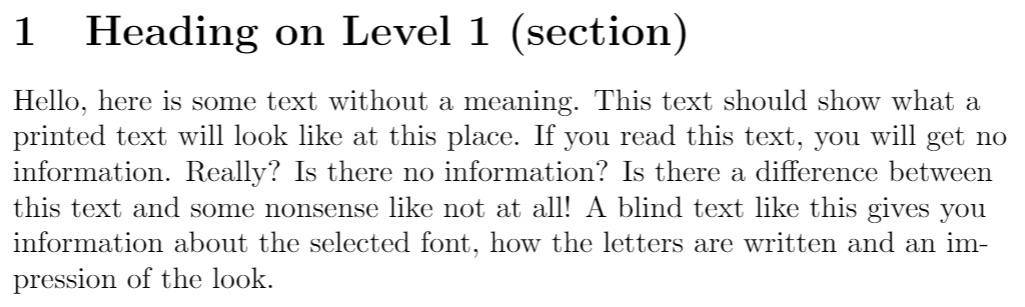
Comparing \\raggedright (LaTeX) vs \\RaggedRight (ragged2e)
-----------------------------------------------------------
The LaTeX command `\raggedright` sometimes produces results that appear to look "too ragged". The package `ragged2e` tackles this problem by allowing hyphenation when a line is too short, generating a more uniformly ragged text-edge. The following example shows ragged-right text produced via the LaTeX command `\raggedright` and, for comparison, the same text typeset using the `\RaggedRight` command provided by `ragged2e`:
\\documentclass{article}
\\usepackage\[english\]{babel}
\\usepackage{ragged2e}
\\usepackage{blindtext}
\\begin{document}
\\setlength{\\hsize}{0.9\\hsize}% emphasize effects
\\subsection\*{Left-aligned example with
\\texttt{\\string\\raggedright}\\\\ (standard \\LaTeX{} command)}
\\raggedright\\blindtext\[2\]\\par
\\subsection\*{Left-aligned example with \\texttt{\\string\\RaggedRight}\\\\ (\\texttt{ragged2e} command)}
\\RaggedRight\\blindtext\[2\]\\par
\\end{document}
[Open this example in Overleaf](https://www.overleaf.com/docs?engine=pdflatex&snip_name=Demonstrating+left-aligned+text&snip=%5Cdocumentclass%7Barticle%7D%0A%5Cusepackage%5Benglish%5D%7Bbabel%7D%0A%5Cusepackage%7Bragged2e%7D%0A%5Cusepackage%7Bblindtext%7D%0A%0A%5Cbegin%7Bdocument%7D%0A%5Csetlength%7B%5Chsize%7D%7B0.9%5Chsize%7D%25+emphasize+effects%0A%0A%5Csubsection%2A%7BLeft-aligned+example+with+%0A%5Ctexttt%7B%5Cstring%5Craggedright%7D%5C%5C+%28standard+%5CLaTeX%7B%7D+command%29%7D%0A%5Craggedright%5Cblindtext%5B2%5D%5Cpar%0A%0A%5Csubsection%2A%7BLeft-aligned+example+with+%5Ctexttt%7B%5Cstring%5CRaggedRight%7D%5C%5C+%28%5Ctexttt%7Bragged2e%7D+command%29%7D%0A%5CRaggedRight%5Cblindtext%5B2%5D%5Cpar+%0A%5Cend%7Bdocument%7D)
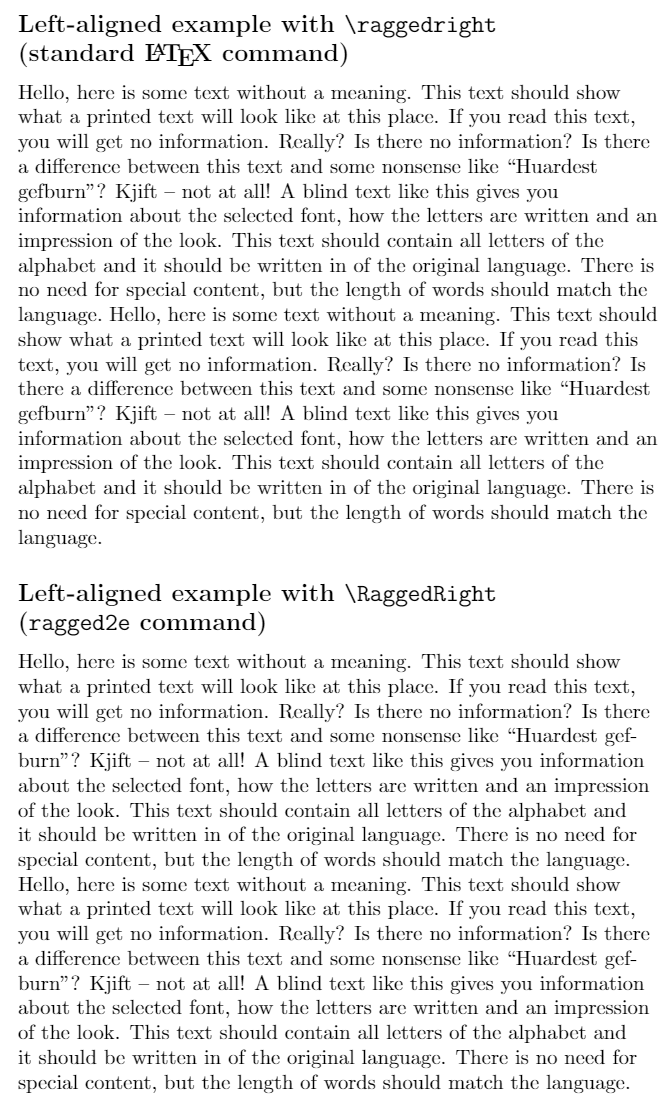
As discussed in the `ragged2e` [package documentation](https://mirror.ox.ac.uk/sites/ctan.org/macros/latex/contrib/ragged2e/ragged2e.pdf)
, `ragged2e` provides alternative commands and environments for modifying text alignment and we'll take a look at some of these.
Environments for ragged-right (aligned-left) text
-------------------------------------------------
The default LaTeX environment for producing ragged-right text is `flushleft`. The equivalent in `ragged2e` is called `FlushLeft` (note capitalization). The following example compares the output of those environments:
\\documentclass{article}
\\usepackage\[english\]{babel}
\\usepackage{ragged2e}
\\usepackage{blindtext}
\\begin{document}
\\setlength{\\hsize}{0.9\\hsize}% emphasize effects
\\subsection\*{\\texttt{flushleft} environment: (standard \\LaTeX{})}
\\begin{flushleft}
\\blindtext\[1\]
\\end{flushleft}
\\subsection\*{\\texttt{FlushLeft} environment: (\\texttt{ragged2e})}
\\begin{FlushLeft}
\\blindtext\[1\]
\\end{FlushLeft}
\\end{document}
[Open this example in Overleaf](https://www.overleaf.com/docs?engine=pdflatex&snip_name=Demonstrating+left-aligned+text&snip=%5Cdocumentclass%7Barticle%7D%0A%5Cusepackage%5Benglish%5D%7Bbabel%7D%0A%5Cusepackage%7Bragged2e%7D%0A%5Cusepackage%7Bblindtext%7D%0A%5Cbegin%7Bdocument%7D%0A%5Csetlength%7B%5Chsize%7D%7B0.9%5Chsize%7D%25+emphasize+effects%0A%0A%5Csubsection%2A%7B%5Ctexttt%7Bflushleft%7D+environment%3A+%28standard+%5CLaTeX%7B%7D%29%7D%0A%0A%5Cbegin%7Bflushleft%7D%0A%5Cblindtext%5B1%5D%0A%5Cend%7Bflushleft%7D%0A%0A%5Csubsection%2A%7B%5Ctexttt%7BFlushLeft%7D+environment%3A+%28%5Ctexttt%7Bragged2e%7D%29%7D%0A%0A%5Cbegin%7BFlushLeft%7D%0A%5Cblindtext%5B1%5D%0A%5Cend%7BFlushLeft%7D%0A%0A%5Cend%7Bdocument%7D)
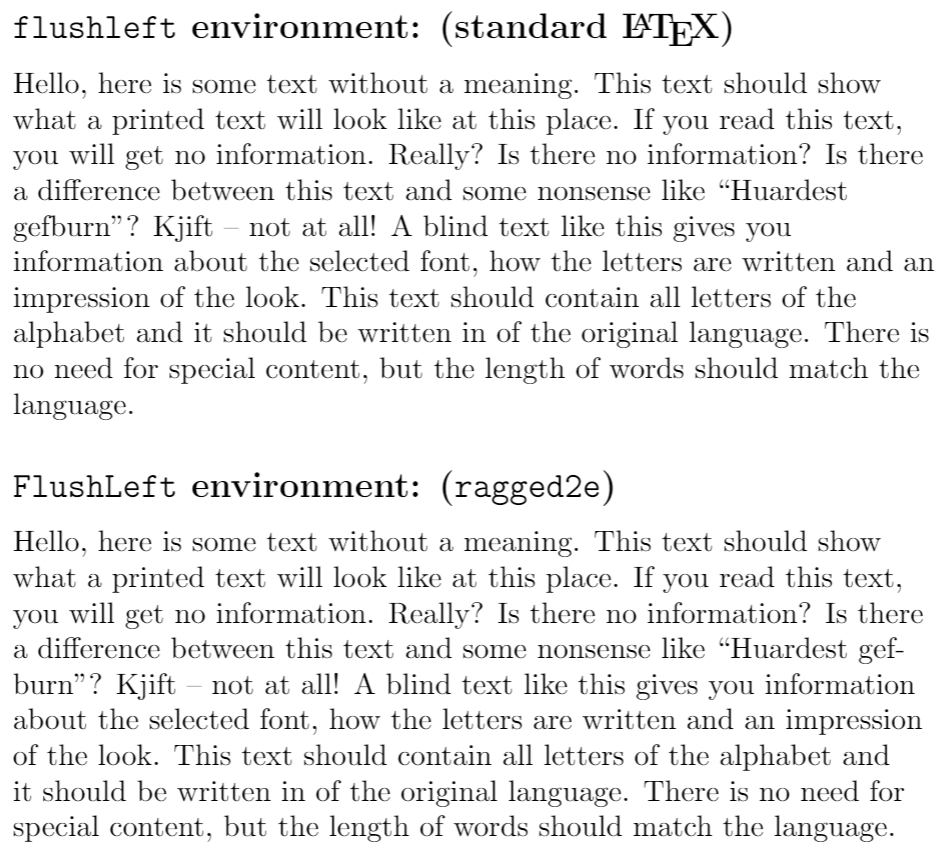
Environments for ragged-left (right-aligned) text
-------------------------------------------------
The default LaTeX environment for producing ragged-left (right-aligned) text is `flushright`. The equivalent in `ragged2e` is called `FlushRight` (note capitalization). The following example compares the output of those environments:
\\documentclass{article}
\\usepackage\[english\]{babel}
\\usepackage{ragged2e}
\\usepackage{blindtext}
\\begin{document}
\\setlength{\\hsize}{0.9\\hsize}% emphasize effects
\\subsection\*{\\texttt{flushright} environment: (standard \\LaTeX{})}
\\begin{flushright}
\\blindtext\[1\]
\\end{flushright}
\\subsection\*{\\texttt{FlushRight} environment: (\\texttt{ragged2e})}
\\begin{FlushRight}
\\blindtext\[1\]
\\end{FlushRight}
\\end{document}
[Open this example in Overleaf](https://www.overleaf.com/docs?engine=pdflatex&snip_name=Demonstrating+right-aligned+text&snip=%5Cdocumentclass%7Barticle%7D%0A%5Cusepackage%5Benglish%5D%7Bbabel%7D%0A%5Cusepackage%7Bragged2e%7D%0A%5Cusepackage%7Bblindtext%7D%0A%5Cbegin%7Bdocument%7D%0A%5Csetlength%7B%5Chsize%7D%7B0.9%5Chsize%7D%25+emphasize+effects%0A%0A%5Csubsection%2A%7B%5Ctexttt%7Bflushright%7D+environment%3A+%28standard+%5CLaTeX%7B%7D%29%7D%0A%0A%5Cbegin%7Bflushright%7D%0A%5Cblindtext%5B1%5D%0A%5Cend%7Bflushright%7D%0A%0A%5Csubsection%2A%7B%5Ctexttt%7BFlushRight%7D+environment%3A+%28%5Ctexttt%7Bragged2e%7D%29%7D%0A%0A%5Cbegin%7BFlushRight%7D%0A%5Cblindtext%5B1%5D%0A%5Cend%7BFlushRight%7D%0A%0A%5Cend%7Bdocument%7D)
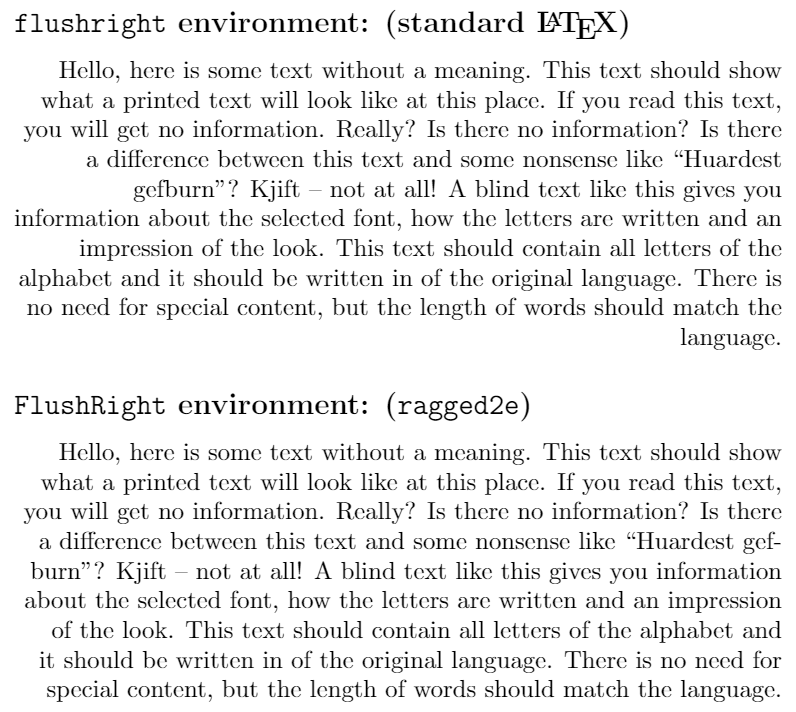
Environments to centre text
---------------------------
The default LaTeX environment for producing centred text is `center`. The equivalent in `ragged2e` is called `Center` (note capitalization). The following example compares the output of those environments:
\\documentclass{article}
\\usepackage\[english\]{babel}
\\usepackage{ragged2e}
\\usepackage{blindtext}
\\begin{document}
\\setlength{\\hsize}{0.9\\hsize}% emphasize effects
\\subsection\*{\\texttt{center} environment: (standard \\LaTeX{})}
\\begin{center}
\\blindtext\[1\]
\\end{center}
\\subsection\*{\\texttt{Center} environment: (\\texttt{ragged2e})}
\\begin{Center}
\\blindtext\[1\]
\\end{Center}
\\end{document}
[Open this example in Overleaf](https://www.overleaf.com/docs?engine=pdflatex&snip_name=Demonstrating+right-aligned+text&snip=%5Cdocumentclass%7Barticle%7D%0A%5Cusepackage%5Benglish%5D%7Bbabel%7D%0A%5Cusepackage%7Bragged2e%7D%0A%5Cusepackage%7Bblindtext%7D%0A%5Cbegin%7Bdocument%7D%0A%5Csetlength%7B%5Chsize%7D%7B0.9%5Chsize%7D%25+emphasize+effects%0A%0A%5Csubsection%2A%7B%5Ctexttt%7Bcenter%7D+environment%3A+%28standard+%5CLaTeX%7B%7D%29%7D%0A%0A%5Cbegin%7Bcenter%7D%0A%5Cblindtext%5B1%5D%0A%5Cend%7Bcenter%7D%0A%0A%5Csubsection%2A%7B%5Ctexttt%7BCenter%7D+environment%3A+%28%5Ctexttt%7Bragged2e%7D%29%7D%0A%5Cbegin%7BCenter%7D%0A%5Cblindtext%5B1%5D%0A%5Cend%7BCenter%7D%0A%5Cend%7Bdocument%7D)
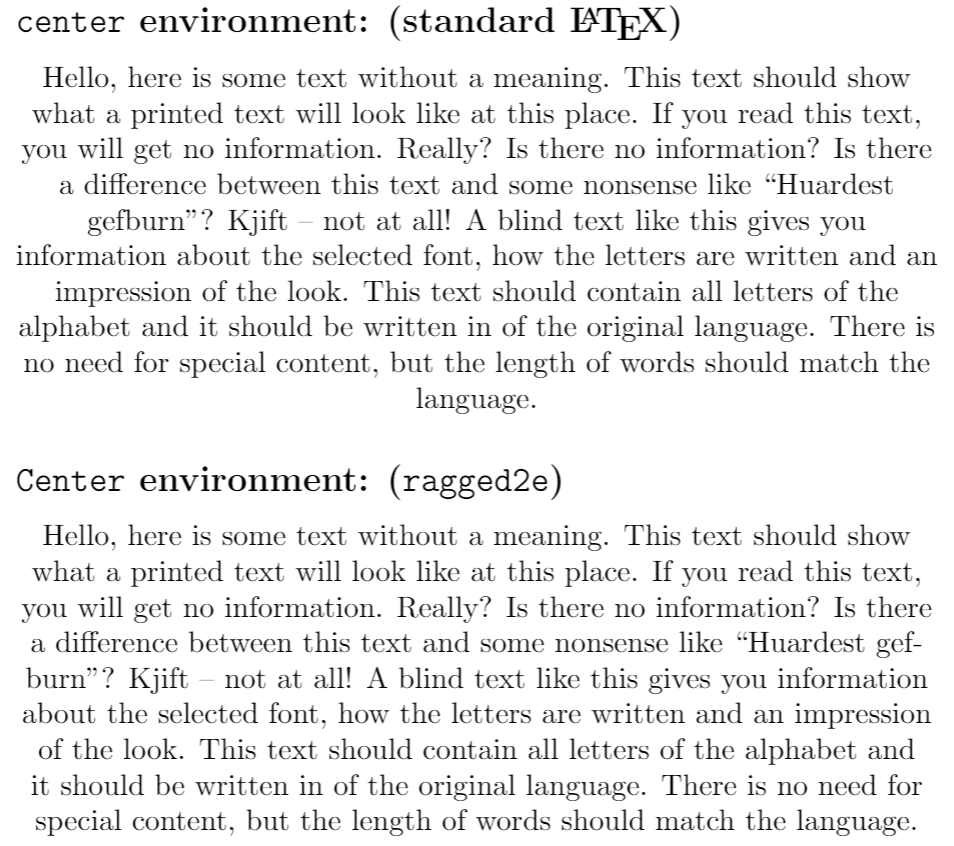
Fully justified text
--------------------
The package `ragged2e` provides the command `\justifying` which you can use as shown in the example below:
\\documentclass{article}
\\usepackage\[english\]{babel}
\\usepackage{ragged2e}
\\usepackage{blindtext}
\\begin{document}
\\setlength{\\hsize}{0.9\\hsize}% emphasize effects
\\Centering
\\blindtext\[1\]
\\vspace{5mm}
\\justifying
\\blindtext\[1\]
\\end{document}
[Open this example in Overleaf](https://www.overleaf.com/docs?engine=pdflatex&snip_name=Demonstrating+justification+with+ragged2e&snip=%5Cdocumentclass%7Barticle%7D%0A%5Cusepackage%5Benglish%5D%7Bbabel%7D%0A%5Cusepackage%7Bragged2e%7D%0A%5Cusepackage%7Bblindtext%7D%0A%5Cbegin%7Bdocument%7D%0A%5Csetlength%7B%5Chsize%7D%7B0.9%5Chsize%7D%25+emphasize+effects%0A%0A%5CCentering%0A%5Cblindtext%5B1%5D%0A%0A%5Cvspace%7B5mm%7D%0A%5Cjustifying%0A%5Cblindtext%5B1%5D+%0A%5Cend%7Bdocument%7D)
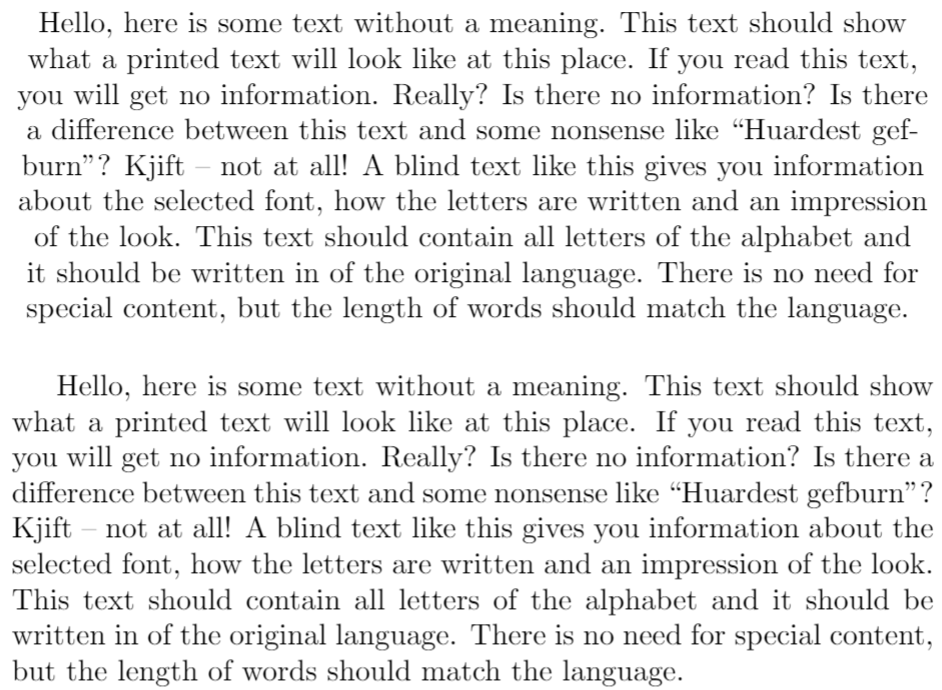
Reference guide
---------------
**Summary of environments and commands for text alignment**
| Alignment | Environment | Switch command | ragged2e environment | ragged2e switch command |
| --- | --- | --- | --- | --- |
| Left | `flushleft` | `\raggedright` | `FlushLeft` | `\RaggedRight` |
| Right | `flushright` | `\raggedleft` | `FlushRight` | `\RaggedLeft` |
| Centre | `center` | `\centering` | `Center` | `\Centering` |
| Fully justified | | | `justify` | `\justifying` |
Further reading
---------------
For more information see :
* [Paragraphs and new lines](https://www.overleaf.com/learn/latex/Paragraphs_and_new_lines "Paragraphs and new lines")
* [Paragraph formatting](https://www.overleaf.com/learn/latex/Paragraph_formatting "Paragraph formatting")
* [Bold, italics and underlining](https://www.overleaf.com/learn/latex/Bold%2C_italics_and_underlining "Bold, italics and underlining")
* [Font sizes, families, and styles](https://www.overleaf.com/learn/latex/Font_sizes%2C_families%2C_and_styles "Font sizes, families, and styles")
* [Font typefaces](https://www.overleaf.com/learn/latex/Font_typefaces "Font typefaces")
* [Supporting modern fonts with XeLaTeX](https://www.overleaf.com/learn/latex/XeLaTeX "XeLaTeX")
* [Line breaks and blank spaces](https://www.overleaf.com/learn/latex/Line_breaks_and_blank_spaces "Line breaks and blank spaces")
* [Lists](https://www.overleaf.com/learn/latex/Lists "Lists")
* [Sections and chapters](https://www.overleaf.com/learn/latex/Sections_and_chapters "Sections and chapters")
* [Multiple columns](https://www.overleaf.com/learn/latex/Multiple_columns "Multiple columns")
* [Single sided and double sided documents](https://www.overleaf.com/learn/latex/Single_sided_and_double_sided_documents "Single sided and double sided documents")
* [The not so short introduction to LaTeX2ε](http://www.ctan.org/tex-archive/info/lshort/)
* [The ragged2e package documentation](http://mirror.hmc.edu/ctan/macros/latex/contrib/ms/ragged2e.pdf)
We only use cookies for essential purposes and to improve your experience on our site. You can find out more in our [cookie policy](https://www.overleaf.com/legal#Cookies)
.
Essential cookies onlyAccept all cookies
---
# Integrals, sums and limits - Overleaf, Online LaTeX Editor
[Skip to content](https://www.overleaf.com/learn/latex/Integrals%2C_sums_and_limits#main-content)
Search help library…searchclear
No Search Results
Integrals, sums and limits
==========================
Contents
--------
* [1 Integrals](https://www.overleaf.com/learn/latex/Integrals%2C_sums_and_limits#Integrals)
* [2 Multiple integrals](https://www.overleaf.com/learn/latex/Integrals%2C_sums_and_limits#Multiple_integrals)
* [3 Sums and products](https://www.overleaf.com/learn/latex/Integrals%2C_sums_and_limits#Sums_and_products)
* [4 Limits](https://www.overleaf.com/learn/latex/Integrals%2C_sums_and_limits#Limits)
* [5 Examples](https://www.overleaf.com/learn/latex/Integrals%2C_sums_and_limits#Examples)
* [6 Further reading](https://www.overleaf.com/learn/latex/Integrals%2C_sums_and_limits#Further_reading)
Integrals
---------
Integral expression can be added using the `\int_{lower}^{upper}` command.
Note, that integral expression may seems a little different in inline and display math mode.
| LaTeX code | Output |
| --- | --- |
| `Integral \(\int_{a}^{b} x^2 \,dx\) inside text` | 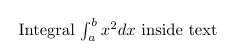 |
| `\[ \int_{a}^{b} x^2 \,dx \]` | 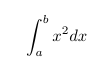 |
Multiple integrals
------------------
To obtain double/triple/multiple integrals and cyclic integrals you must use `amsmath` and `esint` (for cyclic integrals) packages.
| LaTeX code | Output |
| --- | --- |
| \\begin{gather\*} \\iint\_V \\mu(u,v) \\,du\\,dv \\\\ \\iiint\_V \\mu(u,v,w) \\,du\\,dv\\,dw \\\\ \\iiiint\_V \\mu(t,u,v,w) \\,dt\\,du\\,dv\\,dw \\\\ \\idotsint\_V \\mu(u\_1,\\dots,u\_k) \\,du\_1 \\dots du\_k \\end{gather\*} | 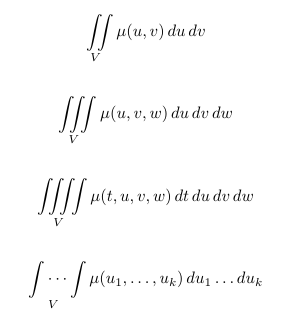 |
| \\\[ \\oint\_V f(s) \\,ds \\\] | 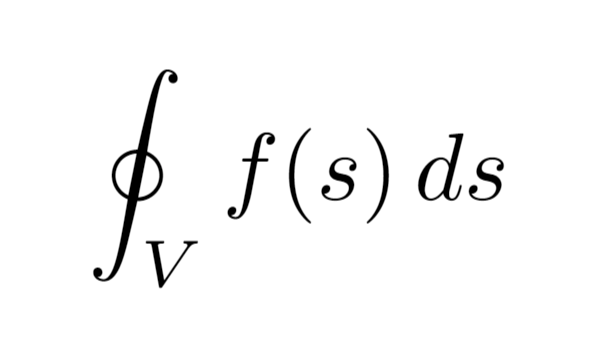 |
Sums and products
-----------------
Like integral, sum expression can be added using the `\sum_{lower}^{upper}` command.
| LaTeX code | Output |
| --- | --- |
| `Sum $\sum_{n=1}^{\infty} 2^{-n} = 1$ inside text` |  |
| `\[ \sum_{n=1}^{\infty} 2^{-n} = 1 \]` | 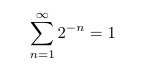 |
In similar way you can obtain expression with product of a sequence of factors using the `\prod_{lower}^{upper}` command.
| LaTeX code | Output |
| --- | --- |
| `Product $\prod_{i=a}^{b} f(i)$ inside text` | 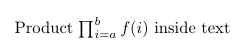 |
| `\[ \prod_{i=a}^{b} f(i) \]` |  |
Limits
------
Limit expression can be added using the `\lim_{lower}` command.
| LaTeX code | Output |
| --- | --- |
| `Limit $\lim_{x\to\infty} f(x)$ inside text` | 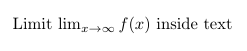 |
| `\[ \lim_{x\to\infty} f(x) \]` | 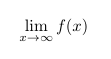 |
Examples
--------
Here is an example LaTeX document:
\\documentclass{article}
\\title{Integrals, Sums and Limits}
\\author{Overleaf}
\\date{}
\\usepackage{amsmath}
\\begin{document}
\\maketitle
\\section{Integrals}
Integral \\(\\int\_{a}^{b} x^2 dx\\) inside text.
\\medskip
The same integral on display:
\\\[\
\\int\_{a}^{b} x^2 \\,dx\
\\\]
and multiple integrals:
\\begin{gather\*}
\\iint\_V \\mu(u,v) \\,du\\,dv
\\\\
\\iiint\_V \\mu(u,v,w) \\,du\\,dv\\,dw
\\\\
\\iiiint\_V \\mu(t,u,v,w) \\,dt\\,du\\,dv\\,dw
\\\\
\\idotsint\_V \\mu(u\_1,\\dots,u\_k) \\,du\_1 \\dots du\_k
\\\\
\\oint\_V f(s) \\,ds
\\end{gather\*}
\\section{Sums and products}
Sum \\(\\sum\_{n\=1}^{\\infty} 2^{\-n} \= 1\\) inside text.
The same sum on display:
\\\[\
\\sum\_{n\=1}^{\\infty} 2^{\-n} \= 1\
\\\]
Product \\(\\prod\_{i\=a}^{b} f(i)\\) inside text.
The same product on display:
\\\[\
\\prod\_{i\=a}^{b} f(i)\
\\\]
\\section{Limits}
Limit \\(\\lim\_{x\\to\\infty} f(x)\\) inside text.
The same limit on display:
\\\[\
\\lim\_{x\\to\\infty} f(x)\
\\\]
\\end{document}
[Open this example in Overleaf](https://www.overleaf.com/docs?engine=lualatex&snip_name=Integrals%2C+Sums+and+Limits&snip=%5Cdocumentclass%7Barticle%7D%0A%5Ctitle%7BIntegrals%2C+Sums+and+Limits%7D%0A%5Cauthor%7BOverleaf%7D%0A%5Cdate%7B%7D%0A%5Cusepackage%7Bamsmath%7D%0A%0A%5Cbegin%7Bdocument%7D%0A%0A%5Cmaketitle%0A%0A%5Csection%7BIntegrals%7D%0A%0AIntegral+%5C%28%5Cint_%7Ba%7D%5E%7Bb%7D+x%5E2+dx%5C%29+inside+text.%0A%0A%5Cmedskip%0A%0AThe+same+integral+on+display%3A%0A%5C%5B%0A++++%5Cint_%7Ba%7D%5E%7Bb%7D+x%5E2+%5C%2Cdx%0A%5C%5D%0Aand+multiple+integrals%3A%0A%5Cbegin%7Bgather%2A%7D%0A++++%5Ciint_V+%5Cmu%28u%2Cv%29+%5C%2Cdu%5C%2Cdv%0A%5C%5C%0A++++%5Ciiint_V+%5Cmu%28u%2Cv%2Cw%29+%5C%2Cdu%5C%2Cdv%5C%2Cdw%0A%5C%5C%0A++++%5Ciiiint_V+%5Cmu%28t%2Cu%2Cv%2Cw%29+%5C%2Cdt%5C%2Cdu%5C%2Cdv%5C%2Cdw%0A%5C%5C%0A++++%5Cidotsint_V+%5Cmu%28u_1%2C%5Cdots%2Cu_k%29+%5C%2Cdu_1+%5Cdots+du_k%0A%5C%5C%0A++++%5Coint_V+f%28s%29+%5C%2Cds%0A%5Cend%7Bgather%2A%7D%0A%0A%5Csection%7BSums+and+products%7D%0A%0ASum+%5C%28%5Csum_%7Bn%3D1%7D%5E%7B%5Cinfty%7D+2%5E%7B-n%7D+%3D+1%5C%29+inside+text.%0A%0AThe+same+sum+on+display%3A%0A%5C%5B%0A++++%5Csum_%7Bn%3D1%7D%5E%7B%5Cinfty%7D+2%5E%7B-n%7D+%3D+1%0A%5C%5D%0A%0AProduct+%5C%28%5Cprod_%7Bi%3Da%7D%5E%7Bb%7D+f%28i%29%5C%29+inside+text.%0A%0AThe+same+product+on+display%3A%0A%5C%5B%0A++++%5Cprod_%7Bi%3Da%7D%5E%7Bb%7D+f%28i%29%0A%5C%5D%0A%0A%5Csection%7BLimits%7D%0A%0ALimit+%5C%28%5Clim_%7Bx%5Cto%5Cinfty%7D+f%28x%29%5C%29+inside+text.%0A%0AThe+same+limit+on+display%3A%0A%5C%5B%0A++++%5Clim_%7Bx%5Cto%5Cinfty%7D+f%28x%29%0A%5C%5D%0A%0A%5Cend%7Bdocument%7D)
Further reading
---------------
For more information see
* [Mathematical expressions](https://www.overleaf.com/learn/latex/Mathematical_expressions "Mathematical expressions")
* [Subscripts and superscripts](https://www.overleaf.com/learn/latex/Subscripts_and_superscripts "Subscripts and superscripts")
* [Fractions and Binomials](https://www.overleaf.com/learn/latex/Fractions_and_Binomials "Fractions and Binomials")
* [Display style in math mode](https://www.overleaf.com/learn/latex/Display_style_in_math_mode "Display style in math mode")
We only use cookies for essential purposes and to improve your experience on our site. You can find out more in our [cookie policy](https://www.overleaf.com/legal#Cookies)
.
Essential cookies onlyAccept all cookies
---
# List of Greek letters and math symbols - Overleaf, Online LaTeX Editor
[Skip to content](https://www.overleaf.com/learn/latex/List_of_Greek_letters_and_math_symbols#main-content)
Search help library…searchclear
No Search Results
List of Greek letters and math symbols
======================================
| | |
| --- | --- |
| Did you know? Overleaf has a symbol palette for users with premium accounts. Read more [here](https://www.overleaf.com/learn/how-to/Using_the_Symbol_Palette_in_Overleaf) .
Note that some of the symbols require loading of the `amssymb` package, and this information is shown when you hover on the symbol. | 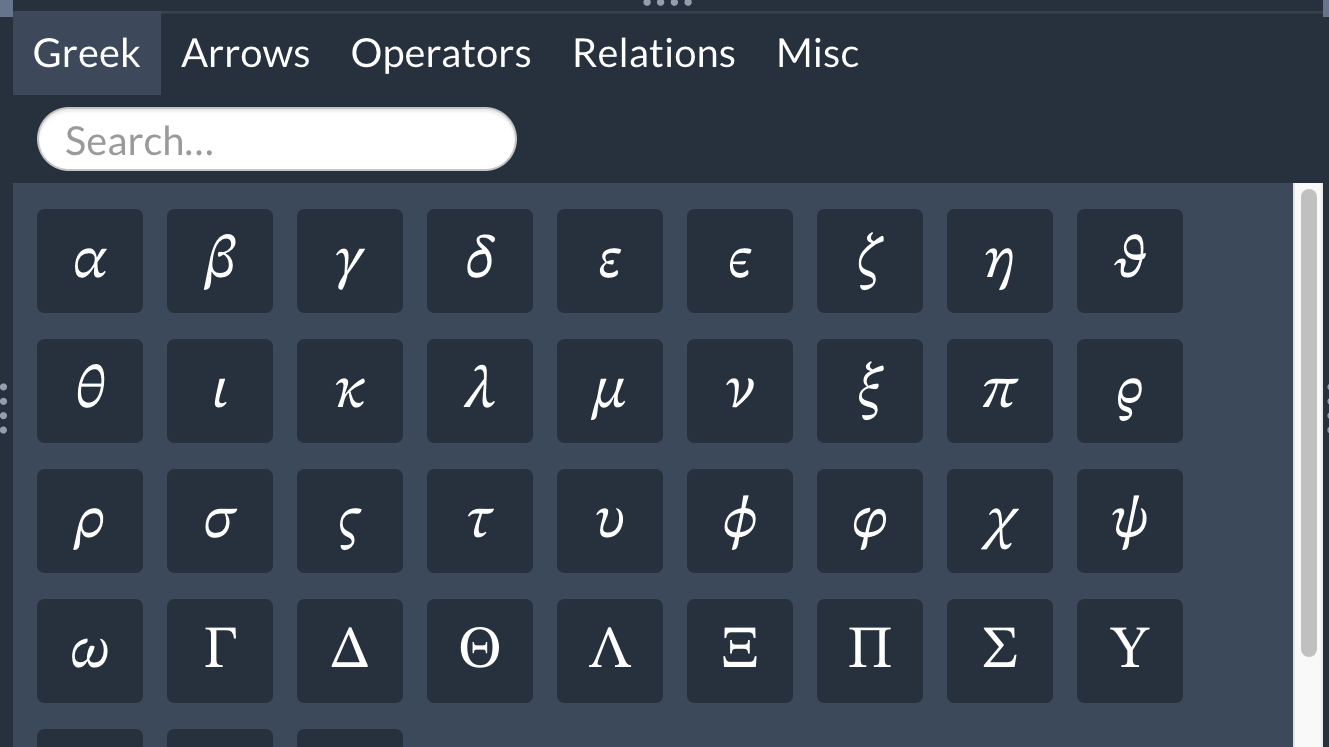 |
Contents
--------
* [1 Greek letters](https://www.overleaf.com/learn/latex/List_of_Greek_letters_and_math_symbols#Greek_letters)
* [2 Arrows](https://www.overleaf.com/learn/latex/List_of_Greek_letters_and_math_symbols#Arrows)
* [3 Miscellaneous symbols](https://www.overleaf.com/learn/latex/List_of_Greek_letters_and_math_symbols#Miscellaneous_symbols)
* [4 Binary Operation/Relation Symbols](https://www.overleaf.com/learn/latex/List_of_Greek_letters_and_math_symbols#Binary_Operation/Relation_Symbols)
* [5 Further reading](https://www.overleaf.com/learn/latex/List_of_Greek_letters_and_math_symbols#Further_reading)
Greek letters
-------------
| | | | |
| --- | --- | --- | --- |
| \\\[\\alpha A\\\] | `\alpha A` | \\\[\\nu N\\\] | `\nu N` |
| \\\[\\beta B\\\] | `\beta B` | \\\[\\xi \\Xi\\\] | `\xi \Xi` |
| \\\[\\gamma \\Gamma\\\] | `\gamma \Gamma` | \\\[o O\\;\\\] | `o O` |
| \\\[\\delta \\Delta\\\] | `\delta \Delta` | \\\[\\pi \\Pi\\\] | `\pi \Pi` |
| \\\[\\epsilon \\varepsilon E\\;\\\] | `\epsilon \varepsilon E` | \\\[\\rho\\varrho P\\;\\\] | `\rho \varrho P` |
| \\\[\\zeta Z\\\] | `\zeta Z` | \\\[\\sigma \\,\\! \\Sigma\\;\\\] | `\sigma \Sigma` |
| \\\[\\eta H\\\] | `\eta H` | \\\[\\tau T\\\] | `\tau T` |
| \\\[\\theta \\vartheta \\Theta\\\] | `\theta \vartheta \Theta` | \\\[\\upsilon \\Upsilon\\\] | `\upsilon \Upsilon` |
| \\\[\\iota I\\\] | `\iota I` | \\\[\\phi \\varphi \\Phi\\\] | `\phi \varphi \Phi` |
| \\\[\\kappa K\\\] | `\kappa K` | \\\[\\chi X\\\] | `\chi X` |
| \\\[\\lambda \\Lambda\\;\\\] | `\lambda \Lambda` | \\\[\\psi \\Psi\\\] | `\psi \Psi` |
| \\\[\\mu M\\\] | `\mu M` | \\\[\\omega \\Omega\\\] | `\omega \Omega` |
Arrows
------
| | | | | | |
| --- | --- | --- | --- | --- | --- |
| \\\[\\leftarrow\\\] | `\leftarrow` | \\\[\\Leftarrow\\\] | `\Leftarrow` |
| \\\[\\rightarrow\\\] | `\rightarrow` | \\\[\\Rightarrow\\;\\\] | `\Rightarrow` |
| \\\[\\leftrightarrow\\\] | `\leftrightarrow` | \\\[\\rightleftharpoons\\\] | `\rightleftharpoons` |
| \\\[\\uparrow\\\] | `\uparrow` | \\\[\\downarrow\\\] | `\downarrow` |
| \\\[\\Uparrow\\;\\\] | `\Uparrow` | \\\[\\Downarrow\\\] | `\Downarrow` |
| \\\[\\Leftrightarrow\\;\\\] | `\Leftrightarrow` | \\\[\\Updownarrow\\\] | `\Updownarrow` |
| \\\[\\mapsto\\\] | `\mapsto` | \\\[\\longmapsto\\;\\\] | `\longmapsto` |
| \\\[\\nearrow\\\] | `\nearrow` | \\\[\\searrow\\\] | `\searrow` |
| \\\[\\swarrow\\\] | `\swarrow` | \\\[\\nwarrow\\\] | `\nwarrow` |
| \\\[\\leftharpoonup \\\] | `\leftharpoonup` | \\\[\\rightharpoonup\\\] | `\rightharpoonup` |
| \\\[\\leftharpoondown \\\] | `\leftharpoondown` | \\\[\\rightharpoondown\\\] | `\rightharpoondown` | | |
Miscellaneous symbols
---------------------
| | | | |
| --- | --- | --- | --- |
| \\\[\\infty\\;\\;\\\] | `\infty` | \\\[\\forall\\;\\\] | `\forall` |
| \\\[\\Re\\\] | `\Re` | \\\[\\Im\\\] | `\Im` |
| \\\[\\nabla\\\] | `\nabla` | \\\[\\exists\\\] | `\exists` |
| \\\[\\partial\\\] | `\partial` | \\\[\\nexists\\\] | `\nexists` |
| \\\[\\emptyset\\\] | `\emptyset` | \\\[\\varnothing\\;\\\] | `\varnothing` |
| \\\[\\wp\\\] | `\wp` | \\\[\\complement\\\] | `\complement` |
| \\\[\\neg\\\] | `\neg` | \\\[\\cdots\\\] | `\cdots` |
| \\\[\\square \\\] | `\square` | \\\[\\surd \\\] | `\surd` |
| \\\[\\blacksquare\\\] | `\blacksquare` | \\\[\\triangle\\\] | `\triangle` |
Binary Operation/Relation Symbols
---------------------------------
| | | | |
| --- | --- | --- | --- |
| \\\[\\times\\\] | `\times` | \\\[\\cdot\\\] | `\cdot` |
| \\\[\\div\\\] | `\div` | \\\[\\cap\\\] | `\cap` |
| \\\[\\cup\\\] | `\cup` | \\\[\\neq\\;\\\] | `\neq` |
| \\\[\\leq\\\] | `\leq` | \\\[\\geq\\\] | `\geq` |
| \\\[\\in\\\] | `\in` | \\\[\\perp\\;\\\] | `\perp` |
| \\\[\\notin\\\] | `\notin` | \\\[\\subset\\\] | `\subset` |
| \\\[\\simeq\\\] | `\simeq` | \\\[\\approx\\\] | `\approx` |
| \\\[\\wedge\\\] | `\wedge` | \\\[\\vee\\\] | `\vee` |
| \\\[\\oplus\\;\\\] | `\oplus` | \\\[\\otimes\\\] | `\otimes` |
| \\\[\\Box\\\] | `\Box` | \\\[\\boxtimes\\\] | `\boxtimes` |
| \\\[\\equiv\\\] | `\equiv` | \\\[\\cong\\\] | `\cong` |
Further reading
---------------
For more information see:
* [The great, big list of LaTeX symbols](http://mirrors.ctan.org/info/symbols/comprehensive/symbols-a4.pdf)
* [Mathematical expressions](https://www.overleaf.com/learn/latex/Mathematical_expressions "Mathematical expressions")
* [Brackets and Parentheses](https://www.overleaf.com/learn/latex/Brackets_and_Parentheses "Brackets and Parentheses")
* [Integrals, sums and limits](https://www.overleaf.com/learn/latex/Integrals%2C_sums_and_limits "Integrals, sums and limits")
* [Mathematical fonts](https://www.overleaf.com/learn/latex/Mathematical_fonts "Mathematical fonts")
* [Spacing in math mode](https://www.overleaf.com/learn/latex/Spacing_in_math_mode "Spacing in math mode")
* [Aligning equations](https://www.overleaf.com/learn/latex/Aligning_equations_with_amsmath "Aligning equations with amsmath")
We only use cookies for essential purposes and to improve your experience on our site. You can find out more in our [cookie policy](https://www.overleaf.com/legal#Cookies)
.
Essential cookies onlyAccept all cookies
---
# Operators - Overleaf, Online LaTeX Editor
[Skip to content](https://www.overleaf.com/learn/latex/Operators#main-content)
Search help library…searchclear
No Search Results
Operators
=========
Characters in mathematical mode are usually shown in italics, but sometimes certain function names require different formatting which can be accomplished by using operators defined in LaTeX.
Contents
--------
* [1 Introduction](https://www.overleaf.com/learn/latex/Operators#Introduction)
* [2 Operators in different contexts](https://www.overleaf.com/learn/latex/Operators#Operators_in_different_contexts)
* [3 Defining your own operators](https://www.overleaf.com/learn/latex/Operators#Defining_your_own_operators)
* [4 Reference guide](https://www.overleaf.com/learn/latex/Operators#Reference_guide)
* [5 Further reading](https://www.overleaf.com/learn/latex/Operators#Further_reading)
Introduction
------------
Trigonometrical functions, logarithms, and others can be written in a document by means of some special commands, as demonstrated in the following example:
Examples of mathematical operators:
\\\[\
\\sin(a + b) \= \\sin a \\cos b + \\cos a \\sin b\
.\\\]
[Open this example in Overleaf](https://www.overleaf.com/docs?engine=pdflatex&snip_name=Mathematical+operators+example&snip=%5Cdocumentclass%7Barticle%7D%0A%5Cbegin%7Bdocument%7D%0AExamples+of+mathematical+operators%3A%0A%5C%5B%0A++++%5Csin%28a+%2B+b%29+%3D+%5Csin+a+%5Ccos+b+%2B+%5Ccos+a+%5Csin+b%0A.%5C%5D%0A%5Cend%7Bdocument%7D)
This example produces the following output:
[](https://www.overleaf.com/learn/latex/File%3ANewsincos.png)
The commands will print the name of the function in upright (Roman) text instead of italics.
Operators in different contexts
-------------------------------
Some operators can take parameters that are handled in a special way, for instance, limits.
\\documentclass{article}
\\usepackage{amsmath}
\\begin{document}
Testing notation for limits
\\\[\
\\lim\_{h \\to 0 } \\frac{f(x+h)-f(x)}{h}\
.\\\]
This operator changes when used alongside
text \\( \\lim\_{h \\to 0} (x\-h) \\).
\\end{document}
[Open this example in Overleaf](https://www.overleaf.com/docs?engine=pdflatex&snip_name=Mathematical+operators+example&snip=%5Cdocumentclass%7Barticle%7D%0A%5Cusepackage%7Bamsmath%7D%0A%5Cbegin%7Bdocument%7D%0ATesting+notation+for+limits%0A%5C%5B%0A++++%5Clim_%7Bh+%5Cto+0+%7D+%5Cfrac%7Bf%28x%2Bh%29-f%28x%29%7D%7Bh%7D%0A.%5C%5D%0AThis+operator+changes+when+used+alongside+%0Atext+%5C%28+%5Clim_%7Bh+%5Cto+0%7D+%28x-h%29+%5C%29.%0A%5Cend%7Bdocument%7D)
This example produces the following output:
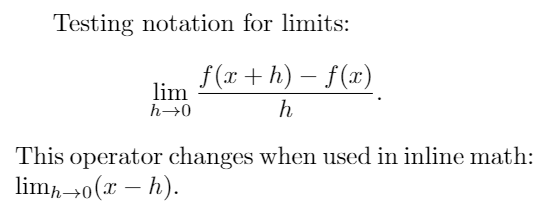
The package `amsmath` is needed for the macro `\to`; without this package, `\rightarrow` has to be used.
Notice how the limit declaration can include a subscript. See the [reference guide](https://www.overleaf.com/learn/latex/Operators#Reference_guide)
for a complete list of available operators.
Some languages may add or change some commands, check the [main page](https://www.overleaf.com/learn "Main Page")
for language-specific articles.
Defining your own operators
---------------------------
If you need to add a personalized operator to be displayed in Roman font instead of italics use `\DeclareMathOperator`
\\documentclass{article}
\\usepackage{amsmath}
\\DeclareMathOperator{\\arctg}{arctg}
\\begin{document}
User-defined operator for arctangent:
\\\[\
\\arctg \\frac{\\pi}{3} \= \\sqrt{3}\
.\\\]
\\end{document}
[Open this example in Overleaf](https://www.overleaf.com/docs?engine=pdflatex&snip_name=Example+defining+an+operator&snip=%5Cdocumentclass%7Barticle%7D%0A%5Cusepackage%7Bamsmath%7D%0A%5CDeclareMathOperator%7B%5Carctg%7D%7Barctg%7D%0A%5Cbegin%7Bdocument%7D%0AUser-defined+operator+for+arctangent%3A%0A%5C%5B%0A++++%5Carctg+%5Cfrac%7B%5Cpi%7D%7B3%7D+%3D+%5Csqrt%7B3%7D%0A.%5C%5D%0A%5Cend%7Bdocument%7D)
This example produces the following output:
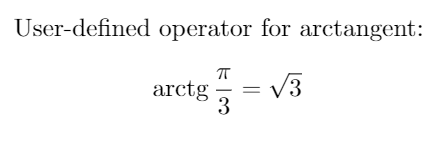
The command `\DeclareMathOperator` takes two parameters, the first one is the name of the new operator and the second one is the text to be displayed. For this command to work you have to import the package **amsmath** in the preamble with
\\usepackage{amsmath}
The command can be slightly modified if you need that your defined operator uses subscripts, as the `\lim` operator, in such case use `\DeclareMathOperator*`.
Reference guide
---------------
**Complete list of mathematical operators**
| Operator | Renders as |
| --- | --- |
| `\cos` | \\\[\\cos\\\] |
| `\csc` | \\\[\\csc\\\] |
| `\exp` | \\\[\\exp\\\] |
| `\ker` | \\\[\\ker\\\] |
| `\limsup` | \\\[\\limsup\\\] |
| `\min` | \\\[\\min\\\] |
| `\sinh` | \\\[\\sinh\\\] |
| `\arcsin` | \\\[\\arcsin\\\] |
| `\cosh` | \\\[\\cosh\\\] |
| `\deg` | \\\[\\deg\\\] |
| `\gcd` | \\\[\\gcd\\\] |
| `\lg` | \\\[\\lg\\\] |
| `\ln` | \\\[\\ln\\\] |
| `\Pr` | \\\[\\Pr\\\] |
| `\sup` | \\\[\\sup\\\] |
| `\arctan` | \\\[\\arctan\\\] |
| `\cot` | \\\[\\cot\\\] |
| `\det` | \\\[\\det\\\] |
| `\hom` | \\\[\\hom\\\] |
| `\lim` | \\\[\\lim\\\] |
| `\log` | \\\[\\log\\\] |
| `\sec` | \\\[\\sec\\\] |
| `\tan` | \\\[\\tan\\\] |
| `\arg` | \\\[\\arg\\\] |
| `\coth` | \\\[\\coth\\\] |
| `\dim` | \\\[\\dim\\\] |
| `\liminf` | \\\[\\liminf\\\] |
| `\max` | \\\[\\max\\\] |
| `\sin` | \\\[\\sin\\\] |
| `\tanh` | \\\[\\tanh\\\] |
Further reading
---------------
For more information see
* [Mathematical expressions](https://www.overleaf.com/learn/latex/Mathematical_expressions "Mathematical expressions")
* [Subscripts and superscripts](https://www.overleaf.com/learn/latex/Subscripts_and_superscripts "Subscripts and superscripts")
* [Fractions and Binomials](https://www.overleaf.com/learn/latex/Fractions_and_Binomials "Fractions and Binomials")
* [Spacing in math mode](https://www.overleaf.com/learn/latex/Spacing_in_math_mode "Spacing in math mode")
* [Integrals, sums and limits](https://www.overleaf.com/learn/latex/Integrals%2C_sums_and_limits "Integrals, sums and limits")
* [Display style in math mode](https://www.overleaf.com/learn/latex/Display_style_in_math_mode "Display style in math mode")
* [The not so short introduction to LaTeX2ε](http://www.ctan.org/tex-archive/info/lshort/)
We only use cookies for essential purposes and to improve your experience on our site. You can find out more in our [cookie policy](https://www.overleaf.com/legal#Cookies)
.
Essential cookies onlyAccept all cookies
---
# Bold, italics and underlining - Overleaf, Online LaTeX Editor
[Skip to content](https://www.overleaf.com/learn/latex/Bold%2C_italics_and_underlining#main-content)
Search help library…searchclear
No Search Results
Bold, italics and underlining
=============================
Contents
--------
* [1 Introduction](https://www.overleaf.com/learn/latex/Bold%2C_italics_and_underlining#Introduction)
* [2 Italicized text](https://www.overleaf.com/learn/latex/Bold%2C_italics_and_underlining#Italicized_text)
* [3 Bold text](https://www.overleaf.com/learn/latex/Bold%2C_italics_and_underlining#Bold_text)
* [4 Underlined text](https://www.overleaf.com/learn/latex/Bold%2C_italics_and_underlining#Underlined_text)
* [5 Emphasising text](https://www.overleaf.com/learn/latex/Bold%2C_italics_and_underlining#Emphasising_text)
* [6 Full set of examples](https://www.overleaf.com/learn/latex/Bold%2C_italics_and_underlining#Full_set_of_examples)
* [7 Further reading](https://www.overleaf.com/learn/latex/Bold%2C_italics_and_underlining#Further_reading)
Introduction
------------
Simple text formatting helps to highlight important concepts within a document and make it more readable. Using italics, bold or underlined words can change the perception of the reader.
In this article three basic text formatting tools will be explained: italics, bold and underline. Let's begin with an example:
Some of the \\textbf{greatest}
discoveries in \\underline{science}
were made by \\textbf{\\textit{accident}}.
[Open this LaTeX fragment in Overleaf.](https://www.overleaf.com/docs?engine=pdflatex&snip_name=text+formatting+example&snip=%5Cdocumentclass%7Barticle%7D%0A%5Cbegin%7Bdocument%7D%0ASome+of+the+%5Ctextbf%7Bgreatest%7D+%0Adiscoveries+in+%5Cunderline%7Bscience%7D+%0Awere+made+by+%5Ctextbf%7B%5Ctextit%7Baccident%7D%7D.%0A%5Cend%7Bdocument%7D)
The following graphic shows the output of this LaTeX code—the document preamble is added automatically by the Overleaf link:

As you can see, there are three basic commands and they can be nested to get combined effects.
Note: The original text-formatting commands from plain TeX, `\it` (italicize) and `\bf` (bold face) will still work in a LaTeX document but their use is discouraged and not recommended because they don't preserve previous styles. For example, when using those old commands you can't apply both italics and bold at the same time.
Italicized text
---------------
To make a text italic is straightforward, use the `\textit` (`\emph`) command:
Some of the greatest
discoveries in science
were made by \\textit{accident}.
[Open this LaTeX fragment in Overleaf.](https://www.overleaf.com/docs?engine=pdflatex&snip_name=italic+text+formatting+example&snip=%5Cdocumentclass%7Barticle%7D%0A%5Cbegin%7Bdocument%7D%0ASome+of+the+greatest+%0Adiscoveries+in+science+%0Awere+made+by+%5Ctextit%7Baccident%7D.%0A%5Cend%7Bdocument%7D)
The following graphic shows the output of this LaTeX code—the document preamble is added automatically by the Overleaf link:

Bold text
---------
To make a text bold use `\textbf` command:
Some of the \\textbf{greatest}
discoveries in science
were made by accident.
[Open this LaTeX fragment in Overleaf.](https://www.overleaf.com/docs?engine=pdflatex&snip_name=bold+text+formatting+example&snip=%5Cdocumentclass%7Barticle%7D%0A%5Cbegin%7Bdocument%7D%0ASome+of+the+%5Ctextbf%7Bgreatest%7D+%0Adiscoveries+in+science+%0Awere+made+by+accident.%0A%5Cend%7Bdocument%7D)
The following graphic shows the output of this LaTeX code—the document preamble is added automatically by the Overleaf link:

Underlined text
---------------
To underline text use the `\underline` command:
Some of the greatest
discoveries in \\underline{science}
were made by accident.
[Open this LaTeX fragment in Overleaf.](https://www.overleaf.com/docs?engine=pdflatex&snip_name=underline+text+formatting+example&snip=%5Cdocumentclass%7Barticle%7D%0A%5Cbegin%7Bdocument%7D%0ASome+of+the+greatest+%0Adiscoveries+in+%5Cunderline%7Bscience%7D+%0Awere+made+by+accident.%0A%5Cend%7Bdocument%7D)
The following graphic shows the output of this LaTeX code—the document preamble is added automatically by the Overleaf link:

Emphasising text
----------------
Text can be emphasized using the `\emph` command. Sometimes the `\emph` command behaves just as `\textit`, but is not exactly the same:
Some of the greatest \\emph{discoveries}
in science
were made by accident.
\\textit{Some of the greatest \\emph{discoveries}
in science
were made by accident.}
\\textbf{Some of the greatest \\emph{discoveries}
in science
were made by accident.}
[Open this LaTeX fragment in Overleaf.](https://www.overleaf.com/docs?engine=pdflatex&snip_name=emphasizing+text+formatting+example&snip=%5Cdocumentclass%7Barticle%7D%0A%5Cbegin%7Bdocument%7D%0ASome+of+the+greatest+%5Cemph%7Bdiscoveries%7D+%0Ain+science+%0Awere+made+by+accident.%0A%0A%5Ctextit%7BSome+of+the+greatest+%5Cemph%7Bdiscoveries%7D+%0Ain+science+%0Awere+made+by+accident.%7D%0A%0A%5Ctextbf%7BSome+of+the+greatest+%5Cemph%7Bdiscoveries%7D+%0Ain+science+%0Awere+made+by+accident.%7D%0A%5Cend%7Bdocument%7D)
The following graphic shows the output of this LaTeX code—the document preamble is added automatically by the Overleaf link:

What the `\emph` command actually does with its argument depends on the context—inside normal text the emphasized text is italicized, but this behaviour is reversed if used inside an italicized text—see example above. Moreover, some packages, e.g. [Beamer](https://www.overleaf.com/learn/latex/Beamer "Beamer")
, change the behaviour of the `\emph` command.
Full set of examples
--------------------
The following example collects the various code fragments contained in this article so that you can open them all together in Overleaf.
First example, bold, italics and underline:
Some of the \\textbf{greatest} discoveries in \\underline{science} were made by \\textbf{\\emph{accident}}.
\\vspace{1.5cm}
Example of italicized text:
Some of the greatest discoveries in science were made by \\emph{accident}.
\\vspace{1.5cm}
Example of boldface text:
Some of the \\textbf{greatest} discoveries in science were made by accident.
\\vspace{1.5cm}
Example of underlined text:
Some of the greatest discoveries in \\underline{science} were made by accident.
\\vspace{1.5cm}
Example of emphasized text in different contexts:
Some of the greatest \\emph{discoveries} in science were made by accident.
\\textit{Some of the greatest \\emph{discoveries} in science were made by accident.}
\\textbf{Some of the greatest \\emph{discoveries} in science were made by accident.}
[Open this LaTeX code in Overleaf.](https://www.overleaf.com/docs?engine=pdflatex&snip_name=text+formatting+example&snip=%5Cdocumentclass%7Barticle%7D%0A%5Ctitle%7BBold%2C+Italics+and+Underline%7D%0A%5Cauthor%7BAn+example+from+Overleaf%7D%0A%5Cbegin%7Bdocument%7D%0A%5Cmaketitle%0AFirst+example%2C+bold%2C+italics+and+underline%3A%0A%0ASome+of+the+%5Ctextbf%7Bgreatest%7D+discoveries+in+%5Cunderline%7Bscience%7D+were+made+by+%5Ctextbf%7B%5Cemph%7Baccident%7D%7D.%0A%0A%5Cvspace%7B1.5cm%7D%0A%0AExample+of+italicized+text%3A+%0A%0ASome+of+the+greatest+discoveries+in+science+were+made+by+%5Cemph%7Baccident%7D.%0A%0A%5Cvspace%7B1.5cm%7D%0A%0AExample+of+boldface+text%3A%0A%0ASome+of+the+%5Ctextbf%7Bgreatest%7D+discoveries+in+science+were+made+by+accident.%0A%0A%5Cvspace%7B1.5cm%7D%0A%0AExample+of+underlined+text%3A%0A%0ASome+of+the+greatest+discoveries+in+%5Cunderline%7Bscience%7D+were+made+by+accident.%0A%0A%5Cvspace%7B1.5cm%7D%0A%0AExample+of+emphasized+text+in+different+contexts%3A%0A%0ASome+of+the+greatest+%5Cemph%7Bdiscoveries%7D+in+science+were+made+by+accident.%0A%0A%5Ctextit%7BSome+of+the+greatest+%5Cemph%7Bdiscoveries%7D+in+science+were+made+by+accident.%7D%0A%0A%5Ctextbf%7BSome+of+the+greatest+%5Cemph%7Bdiscoveries%7D+in+science+were+made+by+accident.%7D%0A%5Cend%7Bdocument%7D)
Further reading
---------------
For more information see
* [Paragraphs and new lines](https://www.overleaf.com/learn/latex/Paragraphs_and_new_lines "Paragraphs and new lines")
* [Lists](https://www.overleaf.com/learn/latex/Lists "Lists")
* [Paragraph formatting](https://www.overleaf.com/learn/latex/Paragraph_formatting "Paragraph formatting")
* [Line breaks and blank spaces](https://www.overleaf.com/learn/latex/Line_breaks_and_blank_spaces "Line breaks and blank spaces")
* [The not so short introduction to LaTeX2ε](http://www.ctan.org/tex-archive/info/lshort/)
We only use cookies for essential purposes and to improve your experience on our site. You can find out more in our [cookie policy](https://www.overleaf.com/legal#Cookies)
.
Essential cookies onlyAccept all cookies
---
# Font typefaces - Overleaf, Online LaTeX Editor
[Skip to content](https://www.overleaf.com/learn/latex/Font_typefaces#main-content)
Search help library…searchclear
No Search Results
Font typefaces
==============
Contents
--------
* [1 Introduction](https://www.overleaf.com/learn/latex/Font_typefaces#Introduction)
* [2 Changing the default document fonts](https://www.overleaf.com/learn/latex/Font_typefaces#Changing_the_default_document_fonts)
* [3 Changing default font typeface](https://www.overleaf.com/learn/latex/Font_typefaces#Changing_default_font_typeface)
* [4 Reference guide](https://www.overleaf.com/learn/latex/Font_typefaces#Reference_guide)
* [5 Further reading](https://www.overleaf.com/learn/latex/Font_typefaces#Further_reading)
Introduction
------------
By default, LaTeX typesets documents using the \\(\\text{Computer Modern}\\) typeface family but you can use LaTeX packages to use different fonts according to your needs or preferences.
Changing the default document fonts
-----------------------------------
For example, by adding `\usepackage{tgbonum}` to the document preamble, LaTeX will use the TEX Gyre Bonum font family to typeset your document:
\\documentclass{article}
\\usepackage\[T1\]{fontenc}
\\usepackage{tgbonum}
\\begin{document}
This document is a sample document to test font
families and font typefaces.
This text uses a different font typeface
\\end{document}
[Open this example in Overleaf](https://www.overleaf.com/docs?engine=pdflatex&snip_name=Change+LaTeX+fonts&snip=%5Cdocumentclass%7Barticle%7D%0A%5Cusepackage%5BT1%5D%7Bfontenc%7D%0A%5Cusepackage%7Btgbonum%7D%0A%0A%5Cbegin%7Bdocument%7D%0AThis+document+is+a+sample+document+to+test+font+%0Afamilies+and+font+typefaces.%0A%0AThis+text+uses+a+different+font+typeface%0A%5Cend%7Bdocument%7D)
The following image shows the output produced by the example above:

Changing default font typeface
------------------------------
The font can also be changed for a specific element in the document.
\\documentclass{article}
\\usepackage\[T1\]{fontenc}
\\usepackage{tgbonum}
\\begin{document}
This document is a sample document to
test font families and font typefaces.
{\\fontfamily{qcr}\\selectfont
This text uses a different font typeface
}
\\end{document}
[Open this example in Overleaf](https://www.overleaf.com/docs?engine=pdflatex&snip_name=Change+LaTeX+fonts&snip=%5Cdocumentclass%7Barticle%7D%0A%5Cusepackage%5BT1%5D%7Bfontenc%7D%0A%5Cusepackage%7Btgbonum%7D%0A%0A%5Cbegin%7Bdocument%7D%0AThis+document+is+a+sample+document+to+%0Atest+font+families+and+font+typefaces.%0A%0A%7B%5Cfontfamily%7Bqcr%7D%5Cselectfont%0AThis+text+uses+a+different+font+typeface%0A%7D%0A%5Cend%7Bdocument%7D)
The following image shows the output produced by the example above:
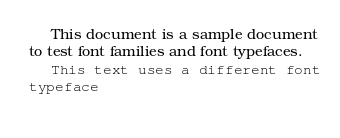
The command `\fontfamily{qcr}\selectfont` will set the _TeX gyre cursor_ font typeface, whose fontcode is `qcr`, for the text inside the braces. A lot more LaTeX font typefaces are available, see the [reference guide](https://www.overleaf.com/learn/latex/Font_typefaces#Reference_guide)
.
The popular LaTeX font typefaces are originated from four families:
* _Computer Modern_ (default in standard LaTeX classes): CM Roman, CM Sans Serif, CM Typewriter
* _Latin Modern_: LM Roman, LM Sans Serif, LM Typewriter, LM Dunhill
* _Post Script Fonts_: Times, Utopia/Fourier, Palatino, Bookman, Helvetica, Courier
* _TeX Gyre_
Reference guide
---------------
**Roman, Sans Serif and Typewriter typefaces**
| Font | "font package name" | "font code" | Example |
| --- | --- | --- | --- |
| Computer Modern Roman | | `cmr` |  |
| Latin Modern Roman | `lmodern` | `lmr` |  |
| Latin Modern Dunhill | `lmodern` | `lmdh` |  |
| TeX Gyre Termes | `tgtermes` | `qtm` | 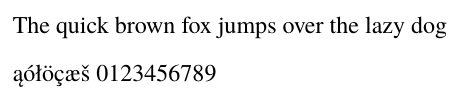 |
| TeX Gyre Pagella | `tgpagella` | `qpl` |  |
| TeX Gyre Bonum | `tgbonum` | `qbk` |  |
| TeX Gyre Schola | `tgschola` | `qcs` |  |
| Times | `mathptmx` | `ptm` | 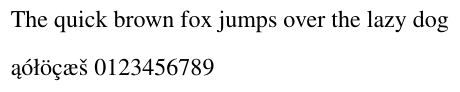 |
| Utopia / Fourier | `utopia` / `fourier` | `put` |  |
| Palatino | `palatino` | `ppl` |  |
| Bookman | `bookman` | `pbk` |  |
| Charter | `charter` | `bch` | 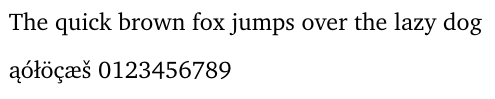 |
| Computer Modern Sans Serif | | `cmss` | 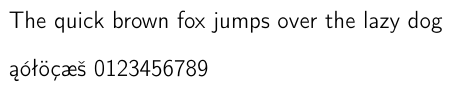 |
| Latin Modern Sans Serif | `lmodern` | `lmss` |  |
| TeX Gyre Adventor | `tgadventor` | `qag` |  |
| TeX Gyre Heros | `tgheros` | `qhv` |  |
| Helvetica | `helvet` | `phv` |  |
| Computer Modern Typewriter | | `cmtt` |  |
| Latin Modern Sans Typewriter | `lmodern` | `lmtt` |  |
| TeX Gyre Cursor | `tgcursor` | `qcr` |  |
| Courier | `courier` | `pcr` |  |
See also [The LaTeX Font Catalogue](https://tug.org/FontCatalogue/)
, though note that not all fonts listed in the catalogue are distributed with a license that allows them to be distributed as part of TeX Live, and therefore not all those fonts are available on Overleaf.
Further reading
---------------
For more information see:
* [The LaTeX Font Catalogue](https://tug.org/FontCatalogue/)
.
* [Bold, italics and underlining](https://www.overleaf.com/learn/latex/Bold%2C_italics_and_underlining "Bold, italics and underlining")
* [Font sizes, families, and styles](https://www.overleaf.com/learn/latex/Font_sizes%2C_families%2C_and_styles "Font sizes, families, and styles")
* [Supporting modern fonts with XeLaTeX](https://www.overleaf.com/learn/latex/XeLaTeX "XeLaTeX")
* [Paragraph formatting](https://www.overleaf.com/learn/latex/Paragraph_formatting "Paragraph formatting")
* [Line breaks and blank spaces](https://www.overleaf.com/learn/latex/Line_breaks_and_blank_spaces "Line breaks and blank spaces")
* [Multiple columns](https://www.overleaf.com/learn/latex/Multiple_columns "Multiple columns")
* [Single sided and double sided documents](https://www.overleaf.com/learn/latex/Single_sided_and_double_sided_documents "Single sided and double sided documents")
* [Management in a large project](https://www.overleaf.com/learn/latex/Management_in_a_large_project "Management in a large project")
* [Multi-file LaTeX projects](https://www.overleaf.com/learn/latex/Multi-file_LaTeX_projects "Multi-file LaTeX projects")
We only use cookies for essential purposes and to improve your experience on our site. You can find out more in our [cookie policy](https://www.overleaf.com/legal#Cookies)
.
Essential cookies onlyAccept all cookies
---
# Cross referencing sections, equations and floats - Overleaf, Online LaTeX Editor
[Skip to content](https://www.overleaf.com/learn/latex/Cross_referencing_sections%2C_equations_and_floats#main-content)
Search help library…searchclear
No Search Results
Cross referencing sections, equations and floats
================================================
If you need to insert cross-references to numbered elements in the document, (like equations, sections and figures) there are commands to automate it in LaTeX. This article explains how.
Contents
--------
* [1 Introduction](https://www.overleaf.com/learn/latex/Cross_referencing_sections%2C_equations_and_floats#Introduction)
* [2 Referencing sections and chapters](https://www.overleaf.com/learn/latex/Cross_referencing_sections%2C_equations_and_floats#Referencing_sections_and_chapters)
* [3 Referencing equations, figures and tables](https://www.overleaf.com/learn/latex/Cross_referencing_sections%2C_equations_and_floats#Referencing_equations,_figures_and_tables)
* [4 Referencing the page of an element](https://www.overleaf.com/learn/latex/Cross_referencing_sections%2C_equations_and_floats#Referencing_the_page_of_an_element)
* [5 Compiling documents with cross references](https://www.overleaf.com/learn/latex/Cross_referencing_sections%2C_equations_and_floats#Compiling_documents_with_cross_references)
* [6 Further reading](https://www.overleaf.com/learn/latex/Cross_referencing_sections%2C_equations_and_floats#Further_reading)
Introduction
------------
Below you can see a simple example of figures cross referenced by their figure caption numbers:
\\section{Introduction} \\label{introduction}
This is an introductory paragraph with some dummy text. This section will be referenced later.
\\begin{figure}\[h\]
\\centering
\\includegraphics\[width=0.3\\linewidth\]{overleaf-logo}
\\caption{This image will be referenced below.}
\\label{fig:leaf}
\\end{figure}
You can reference images; for instance, Figure \\ref{fig:leaf} shows the \\textit{Overleaf} logo.
The command `\label{ }` is used to set an identifier after the caption, that is later used in the command `\ref{ }` to set the reference.
[Open an example in Overleaf](https://www.overleaf.com/project/new/template/19401?id=65465598&templateName=Cross+referencing+example&latexEngine=&texImage=texlive-full%3A2020.1&mainFile=)
Referencing sections and chapters
---------------------------------
Below an example on how to reference a section
\\section{Introduction} \\label{introduction}
This is an introductory paragraph with some dummy text. This section will be referenced later.
\\begin{figure}\[h\]
\\centering
\\includegraphics\[width=0.3\\linewidth\]{overleaf-logo}
\\caption{This image will be referenced below.}
\\label{fig:leaf}
\\end{figure}
You can reference images; for instance, Figure \\ref{fig:leaf} shows the \\textit{Overleaf} logo.
\\vspace{0.5cm}
\\section{Math references} \\label{mathrefs}
As mentioned in section \\ref{introduction}, different elements can be referenced within a document.
Again, the commands `\label` and `\ref` are used for references. The _label_ is set after the `\section` statement, i.e. the `\label` command should be added after the counter number for the section has been generated. This also works on chapters, subsections and subsubsections. See [Sections and chapters](https://www.overleaf.com/learn/latex/Sections_and_chapters "Sections and chapters")
.
[Open an example in Overleaf](https://www.overleaf.com/project/new/template/19401?id=65465598&templateName=Cross+referencing+example&latexEngine=&texImage=texlive-full%3A2020.1&mainFile=)
Referencing equations, figures and tables
-----------------------------------------
At the [introduction](https://www.overleaf.com/learn/latex/Cross_referencing_sections%2C_equations_and_floats#Introduction)
an example of a image referenced was shown, below cross referencing equations is presented.
\\section{Math references} \\label{mathrefs}
As mentioned in section \\ref{introduction}, different elements can be referenced within a document.
\\subsection{Powers series} \\label{subsection}
\\begin{equation} \\label{eq:1}
\\sum\_{i=0}^{\\infty} a\_i x^i
\\end{equation}
Equation \\ref{eq:1} is a typical power series.
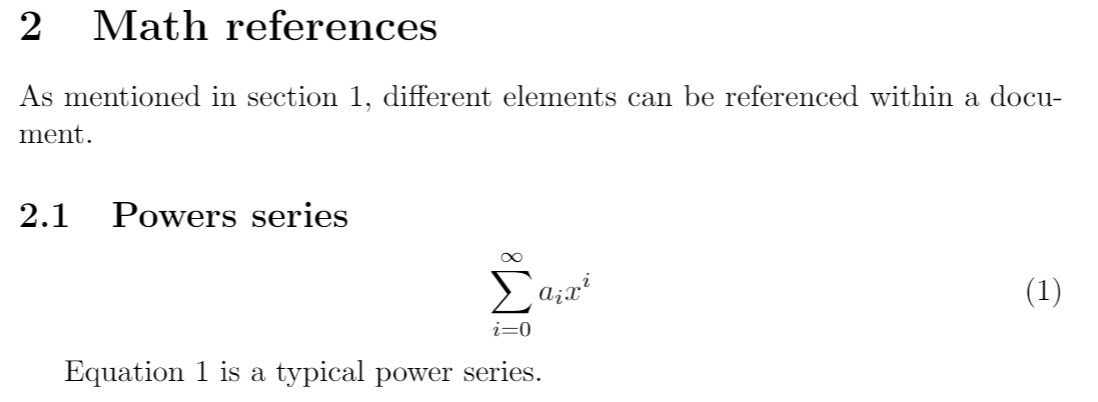
For further and more flexible examples with labels and references see
* [Aligning equations with amsmath](https://www.overleaf.com/learn/latex/Aligning_equations_with_amsmath "Aligning equations with amsmath")
* [Tables](https://www.overleaf.com/learn/latex/Tables "Tables")
* [Inserting Images](https://docs.overleaf.com/writing-and-editing/inserting-images "Inserting Images")
[Open an example in Overleaf](https://www.overleaf.com/project/new/template/19401?id=65465598&templateName=Cross+referencing+example&latexEngine=&texImage=texlive-full%3A2020.1&mainFile=)
Referencing the page of an element
----------------------------------
Elements usually are referenced by a number assigned to them, but if you need to, you can insert the page where they appear.
\\section{Math references} \\label{mathrefs}
As mentioned in section \\ref{introduction}, different elements can be referenced within a document.
\\subsection{Powers series} \\label{subsection}
\\begin{equation} \\label{eq:1}
\\sum\_{i=0}^{\\infty} a\_i x^i
\\end{equation}
Equation \\ref{eq:1} is a typical power series.
\\vspace{0.5cm}
%\\Blindtext
\\section{Last section}
In subsection \\ref{subsection} on page \\pageref{eq:1} an example of a power series was presented.

The command `\pageref` will insert the page where the element whose _label_ is used appears. In the example above the equation 1. This command can be used with all other numbered elements mentioned in this article.
[Open an example in Overleaf](https://www.overleaf.com/project/new/template/19401?id=65465598&templateName=Cross+referencing+example&latexEngine=&texImage=texlive-full%3A2020.1&mainFile=)
Compiling documents with cross references
-----------------------------------------
On Overleaf cross references work immediately, but for cross references to work properly in your local LaTeX distribution you must compile your document twice. There's also a command that can automatically do the job for all the references to work. For instance, if your document is saved as `main.tex`.
`latexmk -pdf main.tex`
generates the file `main.pdf` with all cross-references working. To change the output format use `-dvi` or `-ps`.
Further reading
---------------
For more information see:
* [Creating a document in LaTeX](https://www.overleaf.com/learn/latex/Creating_a_document_in_LaTeX "Creating a document in LaTeX")
* [Mathematical expressions](https://www.overleaf.com/learn/latex/Mathematical_expressions "Mathematical expressions")
* [Aligning equations with amsmath](https://www.overleaf.com/learn/latex/Aligning_equations_with_amsmath "Aligning equations with amsmath")
* [Inserting Images](https://docs.overleaf.com/writing-and-editing/inserting-images "Inserting Images")
* [Positioning images and tables](https://www.overleaf.com/learn/latex/Positioning_images_and_tables "Positioning images and tables")
* [Indices](https://www.overleaf.com/learn/latex/Indices "Indices")
* [Glossaries](https://www.overleaf.com/learn/latex/Glossaries "Glossaries")
* [Table of contents](https://www.overleaf.com/learn/latex/Table_of_contents "Table of contents")
* [Management in a large project](https://www.overleaf.com/learn/latex/Management_in_a_large_project "Management in a large project")
* [Multi-file LaTeX projects](https://www.overleaf.com/learn/latex/Multi-file_LaTeX_projects "Multi-file LaTeX projects")
* [Hyperlinks](https://www.overleaf.com/learn/latex/Hyperlinks "Hyperlinks")
* [Counters](https://www.overleaf.com/learn/latex/Counters "Counters")
* [The not so short introduction to LaTeX2ε](http://www.ctan.org/tex-archive/info/lshort/)
We only use cookies for essential purposes and to improve your experience on our site. You can find out more in our [cookie policy](https://www.overleaf.com/legal#Cookies)
.
Essential cookies onlyAccept all cookies
---
# Management in a large project - Overleaf, Online LaTeX Editor
[Skip to content](https://www.overleaf.com/learn/latex/Management_in_a_large_project#main-content)
Search help library…searchclear
No Search Results
Management in a large project
=============================
Contents
--------
* [1 Introduction](https://www.overleaf.com/learn/latex/Management_in_a_large_project#Introduction)
* [2 Inputting and including files](https://www.overleaf.com/learn/latex/Management_in_a_large_project#Inputting_and_including_files)
* [3 Preamble in a separate file](https://www.overleaf.com/learn/latex/Management_in_a_large_project#Preamble_in_a_separate_file)
* [4 Using the **import** package](https://www.overleaf.com/learn/latex/Management_in_a_large_project#Using_the_import_package)
* [5 Further reading](https://www.overleaf.com/learn/latex/Management_in_a_large_project#Further_reading)
Introduction
------------
In large projects, such as books, keeping parts of your document in several .tex files makes the task of correcting errors and making further changes easier. It's simpler to locate a specific word or element in a short file. For this purpose this article explains how to manage big projects.
Inputting and including files
-----------------------------
The standard tools to insert a LaTeX file into another are `\input` and `\include`.
`input` command
`\input{filename}`
Use this command in the document body to insert the contents of another file named `filename.tex`; this file should not contain any LaTeX preamble code (i.e. no `\documentclass`, `\begin{document}` or `\end{document}` ). LaTeX won't start a new page before processing the material in `filename.tex`. `\input` allows you to nest `\input` commands, in files that are already being inputted by the root file.
`include` command
`\include{filename}`
Use this command in the document body to insert the contents of another file named `filename.tex`; again this file should not contain any LaTeX preamble. LaTeX will start a new page before processing the material input from `filename.tex`. Make sure not to include the extension `.tex` in the filename, as this will stop the file from being input (the extension can optionally be included with `input` and `import`). It is not possible to nest `include` commands. Each file that gets `\include`d has its own .aux file storing information of created labels and contents for the table of contents, list of figures, etc. You can use `\includeonly` with a comma separated list of file names (make sure that there are no leading or trailing spaces). If you do this LaTeX will only process the files contained in that list. This can be used to enhance compilation speed if you're only working on a small part of a bigger document. Page numbers and cross references will however still work, as the .aux files of left out files will still be processed.
[Open an example of a large project on Overleaf](https://www.overleaf.com/project/new/template/20618?id=70769185&templateName=Managing+a+large+project+on+Overleaf&latexEngine=pdflatex&texImage=texlive-full%3A2020.1&mainFile=)
Preamble in a separate file
---------------------------
If the preamble of your document has many user-defined commands or term definitions for the [glossary](https://www.overleaf.com/learn/latex/Glossaries "Glossaries")
, you can put it in a separate file. The right way is to create a custom package, which is a file with the .sty extension. Let's see an example:
\\ProvidesPackage{example}
\\usepackage{amsmath}
\\usepackage{amsfonts}
\\usepackage{amssymb}
\\usepackage\[latin1\]{inputenc}
\\usepackage\[spanish, english\]{babel}
\\usepackage{graphicx}
\\usepackage{blindtext}
\\usepackage{textcomp}
\\usepackage{pgfplots}
\\pgfplotsset{width=10cm,compat=1.9}
%Header styles
\\usepackage{fancyhdr}
\\setlength{\\headheight}{15pt}
\\pagestyle{fancy}
\\renewcommand{\\chaptermark}\[1\]{\\markboth{#1}{}}
\\renewcommand{\\sectionmark}\[1\]{\\markright{#1}{}}
\\fancyhf{}
\\fancyhead\[LE,RO\]{\\thepage}
\\fancyhead\[RE\]{\\textbf{\\textit{\\nouppercase{\\leftmark}}}}
\\fancyhead\[LO\]{\\textbf{\\textit{\\nouppercase{\\rightmark}}}}
\\fancypagestyle{plain}{ %
\\fancyhf{} % remove everything
\\renewcommand{\\headrulewidth}{0pt} % remove lines as well
\\renewcommand{\\footrulewidth}{0pt}}
%makes available the commands \\proof, \\qedsymbol and \\theoremstyle
\\usepackage{amsthm}
%Ruler
\\newcommand{\\HRule}{\\rule{\\linewidth}{0.5mm}}
%Lemma definition and lemma counter
\\newtheorem{lemma}{Lemma}\[section\]
%Definition counter
\\theoremstyle{definition}
\\newtheorem{definition}{Definition}\[section\]
%Corolary counter
\\newtheorem{corolary}{Corolary}\[section\]
%Commands for naturals, integers, topology, hull, Ball, Disc, Dimension, boundary and a few more
\\newcommand{\\E}{{\\mathcal{E}}}
\\newcommand{\\F}{{\\mathcal{F}}}
...
%Example environment
\\theoremstyle{remark}
\\newtheorem{examle}{Example}
%Example counter
\\newcommand{\\reiniciar}{\\setcounter{example}{0}}
All the commands in this file could have been put in the preamble, but the main file would have become confusing because of this large amount of code, and to locate the actual body of the document in such large file would be a cumbersome task.
This file could also be put in a normal .tex file and imported with the command `import` (see the [next section](https://www.overleaf.com/learn/latex/Management_in_a_large_project#Importing_files)
), but a .sty file prevents possible errors if the file is accidentally imported more than once.
Notice that the first line of the example is
\\ProvidesPackage{example}
this means that we have to import this package as _example_ in the main file, i.e. with the command
\\usepackage{example}
as shown in the [introduction](https://www.overleaf.com/learn/latex/Management_in_a_large_project#Introduction)
.
_Note: A .sty file is far more flexible, it can be used to define your own macros and optional parameters can be passed, see [Writing your own package](https://www.overleaf.com/learn/latex/Writing_your_own_package "Writing your own package")
_.
[Open an example of a large project on Overleaf](https://www.overleaf.com/project/new/template/20618?id=70769185&templateName=Managing+a+large+project+on+Overleaf&latexEngine=pdflatex&texImage=texlive-full%3A2020.1&mainFile=)
Using the **import** package
----------------------------
As mentioned above The standard tools to insert a LaTeX file into another are `\input` and `\include`, but these are prone to errors if nested file importing is needed. For this reason you may want to consider the package **import**.
Below is an example of a book whose sections and user-defined commands are stored in separate files, and where the image files for each chapter are stored in separate folders along with the .tex file for each chapter.
\\documentclass\[a4paper,11pt\]{book}
\\usepackage{import}
\\usepackage{example}
\\usepackage{makeidx}
\\makeindex
\\begin{document}
\\frontmatter
\\import{./}{title.tex}
\\clearpage
\\thispagestyle{empty}
\\tableofcontents
\\mainmatter
\\chapter{First chapter}
\\import{sections/}{section1-1.tex}
\\import{sections/}{section1-2.tex}
\\chapter{Additional chapter}
\\import{sections/}{section2-1.tex}
\\chapter{Last chapter}
\\import{sections/}{section3-1.tex}
\\backmatter
\\import{./}{bibliography.tex}
\\end{document}
As you see, the example is a book with three chapters and several sections in a neat main file that pulls external files to generate the final document. The command `\frontmatter` in the book document class is used for the first pages of the document, the page numbering style is set to Roman numerals by this command; the command `\mainmatter` resets the page numbering and changes the style to Arabic, `\backmatter` disables the chapter numbering (suitable for the bibliography and appendices).
\\chapter{First chapter}
\\import{sections/}{section1-1.tex}
\\import{sections/}{section1-2.tex}
First, add this line to the preamble of your document:
\\usepackage{import}
Then use `\import{ }{ }`. The first parameter inside braces is the directory where the file is located, it can be relative to the current working directory or absolute. The second parameter is the name of the file to be imported
There is also available the command `\subimport` that has the same syntax, but if used in one of the files that are imported in the main file, the path will be relative to that sub-file. For instance, below is the contents of the file "section1-1.tex" that was imported in the previous example:
\\section{First section}
Below is a simple 3d plot
\\begin{figure}\[h\]
\\centering
\\subimport{img/}{plot1.tex}
\\caption{Caption}
\\label{fig:my\_label}
\\end{figure}
\[...\]
As you see, this file imports a [pgf plot](https://www.overleaf.com/learn/latex/Pgfplots_package "Pgfplots package")
file called "plot1.tex" that creates a 3d plot. This file is imported by
\\subimport{img/}{plot1.tex}
from the "img" folder, contained in the folder "sections".
If `\import` were used instead, the path _img/_ would be relative to the main file, instead of the folder "sections" where "section1-1.tex" is saved.
[Open an example of a large project on Overleaf](https://www.overleaf.com/project/new/template/20618?id=70769185&templateName=Managing+a+large+project+on+Overleaf&latexEngine=pdflatex&texImage=texlive-full%3A2020.1&mainFile=)
Further reading
---------------
For more information see:
* [Multi-file LaTeX projects](https://www.overleaf.com/learn/latex/Multi-file_LaTeX_projects "Multi-file LaTeX projects")
* [Cross referencing sections and equations](https://www.overleaf.com/learn/latex/Cross_referencing_sections_and_equations "Cross referencing sections and equations")
* [Indices](https://www.overleaf.com/learn/latex/Indices "Indices")
* [Glossaries](https://www.overleaf.com/learn/latex/Glossaries "Glossaries")
* [Hyperlinks](https://www.overleaf.com/learn/latex/Hyperlinks "Hyperlinks")
* [Page numbering](https://www.overleaf.com/learn/latex/Page_numbering "Page numbering")
* [Single sided and double sided documents](https://www.overleaf.com/learn/latex/Single_sided_and_double_sided_documents "Single sided and double sided documents")
* [Multiple columns](https://www.overleaf.com/learn/latex/Multiple_columns "Multiple columns")
* [Paragraph formatting](https://www.overleaf.com/learn/latex/Paragraph_formatting "Paragraph formatting")
* [Page size and margins](https://www.overleaf.com/learn/latex/Page_size_and_margins "Page size and margins")
* [Counters](https://www.overleaf.com/learn/latex/Counters "Counters")
* [Margin notes](https://www.overleaf.com/learn/latex/Margin_notes "Margin notes")
* [Bold, italics and underlining](https://www.overleaf.com/learn/latex/Bold%2C_italics_and_underlining "Bold, italics and underlining")
* [Font sizes, families, and styles](https://www.overleaf.com/learn/latex/Font_sizes%2C_families%2C_and_styles "Font sizes, families, and styles")
* [Font typefaces](https://www.overleaf.com/learn/latex/Font_typefaces "Font typefaces")
* [Supporting modern fonts with XeLaTeX](https://www.overleaf.com/learn/latex/XeLaTeX "XeLaTeX")
* [International language support](https://www.overleaf.com/learn/latex/International_language_support "International language support")
* [Font sizes, families, and styles](https://www.overleaf.com/learn/latex/Font_sizes%2C_families%2C_and_styles "Font sizes, families, and styles")
* [Writing your own package](https://www.overleaf.com/learn/latex/Writing_your_own_package "Writing your own package")
* [Writing your own class](https://www.overleaf.com/learn/latex/Writing_your_own_class "Writing your own class")
* [The not so short introduction to LaTeX2ε](http://www.ctan.org/tex-archive/info/lshort/)
* [`import` package documentation](ftp://sunsite.icm.edu.pl/pub/CTAN/macros/latex/contrib/import/import.pdf)
We only use cookies for essential purposes and to improve your experience on our site. You can find out more in our [cookie policy](https://www.overleaf.com/legal#Cookies)
.
Essential cookies onlyAccept all cookies
---
# Display style in math mode - Overleaf, Online LaTeX Editor
[Skip to content](https://www.overleaf.com/learn/latex/Display_style_in_math_mode#main-content)
Search help library…searchclear
No Search Results
Display style in math mode
==========================
Contents
--------
* [1 Introduction](https://www.overleaf.com/learn/latex/Display_style_in_math_mode#Introduction)
* [2 Overriding default mathematical styles](https://www.overleaf.com/learn/latex/Display_style_in_math_mode#Overriding_default_mathematical_styles)
* [3 Further reading](https://www.overleaf.com/learn/latex/Display_style_in_math_mode#Further_reading)
Introduction
------------
This article explains how to manually adjust the style of typeset mathematics—but we’ll start with a quick reminder of the visible differences between inline and display style math.
Typeset mathematics contained inline (within) with the text of a paragraph needs to take less space than the same math typeset outside the paragraph text as standalone, display-style, material. To see this in practice, let’s explain that the equation \\( f(x) = \\sum\_{i=0}^{n} \\frac{a\_i}{1+x} \\) may diverge or converge depending on the value of \\(x\\). We can also typeset \\(f(x)\\) outside the paragraph in display style:
\\\[ f(x) = \\sum\_{i=0}^{n} \\frac{a\_i}{1+x} \\\]
Even a cursory glance at the previous example reveals changes in the size and formatting of math symbols, such as \\(\\sum\\) and the placement of its limits, together with variations in size/positioning of superscripts, subscripts and fractions.
These mathematical typography issues are an interplay of typesetting algorithms built into TeX engines together with certain spacing parameters contained in math fonts. Those font parameters help fine-tune math typesetting according to the design characteristics of the math font(s) being used.
Overriding default mathematical styles
--------------------------------------
Occasionally you may want to change the default style used to typeset a piece of mathematics. For example, you might want to change inline math, such as \\(f(x) = \\frac{1}{1+x}\\), and include it in the paragraph but typeset in display style: \\(\\displaystyle f(x) = \\frac{1}{1+x}\\), although it does impact heavily on the line spacing.
TeX engines provide several commands which can be used to override the default style in which a piece of math is typeset:
* `\textstyle`: apply the style used for mathematics typeset in paragraphs
* `\displaystyle`: apply the style used for mathematics typeset on lines by themselves
* `\scriptstyle`: apply the style used for subscripts or superscripts
* `\scriptscriptstyle`: apply the style used for second-order subscripts or superscripts
The canonical example is taken from page 142 of the TeXBook, although we've replaced `$$` by LaTeX's preferred `\[` and `\]`:
\\\[\
a\_0+{1\\over a\_1+\
{1\\over a\_2+\
{1 \\over a\_3 + \
{1 \\over a\_4}}}}\
\\\]
By default, this is typeset as:
\\\[a\_0+{1\\over a\_1+{1\\over a\_2 +{1 \\over a\_3 + {1 \\over a\_4}}}}\\\]
The default typesetting style can be amended by using the `\displaystyle` command:
\\\[\
a\_0+{1\\over\\displaystyle a\_1+\
{1\\over\\displaystyle a\_2+\
{1 \\over\\displaystyle a\_3 + \
{1 \\over\\displaystyle a\_4}}}}\
\\\]
yielding
\\\[a\_0+{1\\over\\displaystyle a\_1+{1\\over\\displaystyle a\_2+{1 \\over\\displaystyle a\_3 +{1 \\over\\displaystyle a\_4}}}}\\\]
Here’s another example which demonstrates the effect of `\textstyle`, `\scriptstyle` and `\scriptscriptstyle`:
\\\[\
\\begin{align\*}\
f(x) \= \\sum\_{i\=0}^{n} \\frac{a\_i}{1+x} \\\\\
\\textstyle f(x) \= \\textstyle \\sum\_{i\=0}^{n} \\frac{a\_i}{1+x} \\\\\
\\scriptstyle f(x) \= \\scriptstyle \\sum\_{i\=0}^{n} \\frac{a\_i}{1+x} \\\\\
\\scriptscriptstyle f(x) \= \\scriptscriptstyle \\sum\_{i\=0}^{n} \\frac{a\_i}{1+x}\
\\end{align\*}\
\\\]
which renders as \\\[ \\begin{align\*} f(x) = \\sum\_{i=0}^{n} \\frac{a\_i}{1+x} \\\\ \\textstyle f(x) = \\textstyle \\sum\_{i=0}^{n} \\frac{a\_i}{1+x} \\\\ \\scriptstyle f(x) = \\scriptstyle \\sum\_{i=0}^{n} \\frac{a\_i}{1+x} \\\\ \\scriptscriptstyle f(x) = \\scriptscriptstyle \\sum\_{i=0}^{n} \\frac{a\_i}{1+x} \\end{align\*} \\\]
Here’s an example you can open in Overleaf:
\\documentclass{article}
\\usepackage{amsmath}
\\title{Exploring math display styles}
\\author{Overleaf team}
\\begin{document}
\\maketitle
Depending on the value of \\(x\\) the equation \\( f(x) \= \\sum\_{i\=0}^{n} \\frac{a\_i}{1+x} \\) may diverge or converge.
\\\[ f(x) \= \\sum\_{i\=0}^{n} \\frac{a\_i}{1+x} \\\]
\\vspace{1cm}
Inline maths elements can be set with a different style: \\(f(x) \= \\displaystyle \\frac{1}{1+x}\\). The same is true for display math material:
\\begin{align\*}
f(x) = \\sum\_{i=0}^{n} \\frac{a\_i}{1+x} \\\\
\\textstyle f(x) = \\sum\_{i=0}^{n} \\frac{a\_i}{1+x} \\\\
\\scriptstyle f(x) = \\sum\_{i=0}^{n} \\frac{a\_i}{1+x} \\\\
\\scriptscriptstyle f(x) = \\sum\_{i=0}^{n} \\frac{a\_i}{1+x}
\\end{align\*}
\\end{document}
[Open this example in Overleaf](https://www.overleaf.com/docs?engine=pdflatex&snip_name=Exploring+math+display+styles&snip=%5Cdocumentclass%7Barticle%7D%0A%5Cusepackage%7Bamsmath%7D%0A%5Ctitle%7BExploring+math+display+styles%7D%0A%5Cauthor%7BOverleaf+team%7D%0A%5Cbegin%7Bdocument%7D%0A%5Cmaketitle%0ADepending+on+the+value+of+%5C%28x%5C%29+the+equation+%5C%28+f%28x%29+%3D+%5Csum_%7Bi%3D0%7D%5E%7Bn%7D+%5Cfrac%7Ba_i%7D%7B1%2Bx%7D+%5C%29+may+diverge+or+converge.%0A%0A%5C%5B+f%28x%29+%3D+%5Csum_%7Bi%3D0%7D%5E%7Bn%7D+%5Cfrac%7Ba_i%7D%7B1%2Bx%7D+%5C%5D%0A%0A%5Cvspace%7B1cm%7D%0A%0AInline+maths+elements+can+be+set+with+a+different+style%3A+%5C%28f%28x%29+%3D+%5Cdisplaystyle+%5Cfrac%7B1%7D%7B1%2Bx%7D%5C%29.+The+same+is+true+for+display+math+material%3A%0A%0A%5Cbegin%7Balign%2A%7D%0Af%28x%29+%3D+%5Csum_%7Bi%3D0%7D%5E%7Bn%7D+%5Cfrac%7Ba_i%7D%7B1%2Bx%7D+%5C%5C%0A%5Ctextstyle+f%28x%29+%3D+%5Csum_%7Bi%3D0%7D%5E%7Bn%7D+%5Cfrac%7Ba_i%7D%7B1%2Bx%7D+%5C%5C%0A%5Cscriptstyle+f%28x%29+%3D+%5Csum_%7Bi%3D0%7D%5E%7Bn%7D+%5Cfrac%7Ba_i%7D%7B1%2Bx%7D+%5C%5C%0A%5Cscriptscriptstyle+f%28x%29+%3D+%5Csum_%7Bi%3D0%7D%5E%7Bn%7D+%5Cfrac%7Ba_i%7D%7B1%2Bx%7D%0A%5Cend%7Balign%2A%7D%0A%5Cend%7Bdocument%7D)
Further reading
---------------
For more information see
* [Mathematical expressions](https://www.overleaf.com/learn/latex/Mathematical_expressions "Mathematical expressions")
* [Subscripts and superscripts](https://www.overleaf.com/learn/latex/Subscripts_and_superscripts "Subscripts and superscripts")
* [Aligning equations with amsmath](https://www.overleaf.com/learn/latex/Aligning_equations_with_amsmath "Aligning equations with amsmath")
* [Spacing in math mode](https://www.overleaf.com/learn/latex/Spacing_in_math_mode "Spacing in math mode")
* [Integrals, sums and limits](https://www.overleaf.com/learn/latex/Integrals%2C_sums_and_limits "Integrals, sums and limits")
* [Mathematical fonts](https://www.overleaf.com/learn/latex/Mathematical_fonts "Mathematical fonts")
* [The not so short introduction to LaTeX2ε](http://www.ctan.org/tex-archive/info/lshort/)
We only use cookies for essential purposes and to improve your experience on our site. You can find out more in our [cookie policy](https://www.overleaf.com/legal#Cookies)
.
Essential cookies onlyAccept all cookies
---
# Brackets and Parentheses - Overleaf, Online LaTeX Editor
[Skip to content](https://www.overleaf.com/learn/latex/Brackets_and_Parentheses#main-content)
Search help library…searchclear
No Search Results
Brackets and Parentheses
========================
Contents
--------
* [1 Introduction](https://www.overleaf.com/learn/latex/Brackets_and_Parentheses#Introduction)
* [2 Some examples](https://www.overleaf.com/learn/latex/Brackets_and_Parentheses#Some_examples)
* [3 Controlling types and sizes](https://www.overleaf.com/learn/latex/Brackets_and_Parentheses#Controlling_types_and_sizes)
* [4 Reference guide](https://www.overleaf.com/learn/latex/Brackets_and_Parentheses#Reference_guide)
* [5 Further reading](https://www.overleaf.com/learn/latex/Brackets_and_Parentheses#Further_reading)
Introduction
------------
Parentheses and brackets are very common in mathematical formulas. You can easily control the size and style of brackets in LaTeX; this article explains how.
Here's an table of listing some common math braces and parentheses used in LaTeX:
| Type | LaTeX markup | Renders as |
| --- | --- | --- |
| Parentheses; round brackets | `(x+y)` | \\((x+y)\\) |
| Brackets; square brackets | `[x+y]` | \\(\[x+y\]\\) |
| Braces; curly brackets | `\{ x+y \}` | \\(\\{ x+y \\}\\) |
| Angle brackets | `\langle x+y \rangle` | \\(\\langle x+y\\rangle\\) |
| Pipes; vertical bars | `\|x+y\|` | \\(\\displaystyle\| x+y \|\\) |
| Double pipes | `\\|x+y\\|` | \\(\\\| x+y \\\|\\) |
Some examples
-------------
The size of brackets and parentheses can be manually set, or they can be resized dynamically in your document, as shown in the next example:
\\\[ \
F \= G \\left( \\frac{m\_1 m\_2}{r^2} \\right)\
\\\]
[Open this LaTeX fragment in Overleaf](https://www.overleaf.com/docs?engine=pdflatex&snip_name=brackets+and+parentheses+example+1&snip=%5Cdocumentclass%7Barticle%7D%0A%5Cbegin%7Bdocument%7D%0A%5C%5B+%0AF+%3D+G+%5Cleft%28+%5Cfrac%7Bm_1+m_2%7D%7Br%5E2%7D+%5Cright%29%0A%5C%5D%0A%5Cend%7Bdocument%7D)
The above example produces the following output:
\\\[ F = G \\left( \\frac{m\_1 m\_2}{r^2} \\right) \\\] Notice that to insert the parentheses or brackets, the `\left` and `\right` commands are used. Even if you are using only one bracket, _both_ commands are mandatory. `\left` and `\right` can dynamically adjust the size, as shown by the next example:
\\\[ \
\\left\[ \\frac{ N } { \\left( \\frac{L}{p} \\right) \- (m+n) } \\right\]\
\\\]
[Open this LaTeX fragment in Overleaf](https://www.overleaf.com/docs?engine=pdflatex&snip_name=brackets+and+parentheses+example+2&snip=%5Cdocumentclass%7Barticle%7D%0A%5Cbegin%7Bdocument%7D%0A%5C%5B+%0A+%5Cleft%5B++%5Cfrac%7B+N+%7D+%7B+%5Cleft%28+%5Cfrac%7BL%7D%7Bp%7D+%5Cright%29++-+%28m%2Bn%29+%7D++%5Cright%5D%0A%5C%5D%0A%5Cend%7Bdocument%7D)
The above example produces the following output:
\\\[\\left\[ \\frac{ N } { \\left( \\frac{L}{p} \\right) - (m+n) } \\right\]\\\]
When writing multi-line equations with the `align`, `align*` or `aligned` environments, the `\left` and `\right` commands must be balanced _on each line and on the same side of `&`_. Therefore the following code snippet will fail with errors:
\\begin{align\*}
y = 1 + & \\left( \\frac{1}{x} + \\frac{1}{x^2} + \\frac{1}{x^3} + \\ldots \\\\
& \\quad + \\frac{1}{x^{n-1}} + \\frac{1}{x^n} \\right)
\\end{align\*}
[Open this LaTeX fragment in Overleaf (with errors)](https://www.overleaf.com/docs?engine=pdflatex&snip_name=brackets+and+parentheses+example+with+errors&snip=%5Cdocumentclass%7Barticle%7D%0A%5Cusepackage%7Bamsmath%7D%0A%5Cbegin%7Bdocument%7D%0A%5Cbegin%7Balign%2A%7D%0Ay++%3D+1+%2B+%26+%5Cleft%28++%5Cfrac%7B1%7D%7Bx%7D+%2B+%5Cfrac%7B1%7D%7Bx%5E2%7D+%2B+%5Cfrac%7B1%7D%7Bx%5E3%7D+%2B+%5Cldots++%5C%5C%0A++%26+%5Cquad++%2B+%5Cfrac%7B1%7D%7Bx%5E%7Bn-1%7D%7D+%2B+%5Cfrac%7B1%7D%7Bx%5En%7D+%5Cright%29%0A%5Cend%7Balign%2A%7D%0A%5Cend%7Bdocument%7D)
The solution is to use "invisible" brackets to balance things out, i.e. adding a `\right.` at the end of the first line, and a `\left.` at the start of the second line after `&`:
\\begin{align\*}
y = 1 + & \\left( \\frac{1}{x} + \\frac{1}{x^2} + \\frac{1}{x^3} + \\ldots \\right. \\\\
&\\left. \\quad + \\frac{1}{x^{n-1}} + \\frac{1}{x^n} \\right)
\\end{align\*}
[Open this LaTeX fragment in Overleaf](https://www.overleaf.com/docs?engine=pdflatex&snip_name=brackets+and+parentheses+example+4&snip=%5Cdocumentclass%7Barticle%7D%0A%5Cusepackage%7Bamsmath%7D%0A%5Cbegin%7Bdocument%7D%0A%5Cbegin%7Balign%2A%7D%0Ay++%3D+1+%2B+%26+%5Cleft%28++%5Cfrac%7B1%7D%7Bx%7D+%2B+%5Cfrac%7B1%7D%7Bx%5E2%7D+%2B+%5Cfrac%7B1%7D%7Bx%5E3%7D+%2B+%5Cldots+%5Cright.+%5C%5C%0A++%26%5Cleft.+%5Cquad+%2B+%5Cfrac%7B1%7D%7Bx%5E%7Bn-1%7D%7D+%2B+%5Cfrac%7B1%7D%7Bx%5En%7D+%5Cright%29%0A%5Cend%7Balign%2A%7D%0A%5Cend%7Bdocument%7D)
The above example produces the following output:
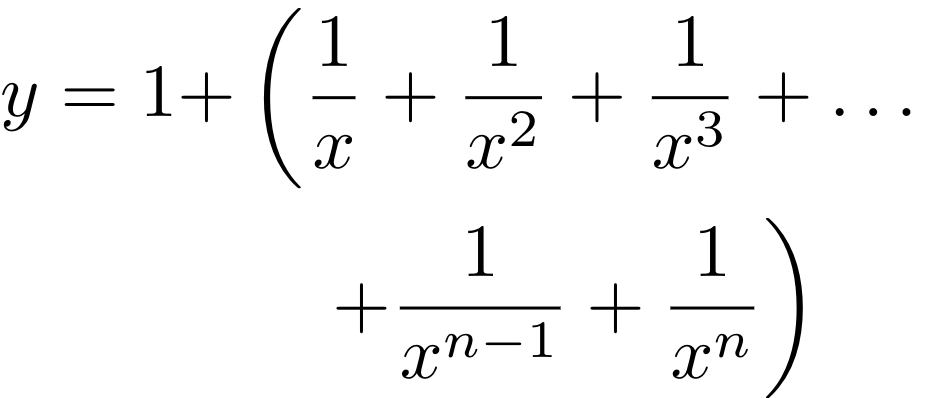
Controlling types and sizes
---------------------------
The size of the brackets can be controlled explicitly, as shown in this LaTeX code fragment:
\\\[\
\\Biggl \\langle 3x+7 \\biggr \\rangle\
\\\]
[Open this LaTeX fragment in Overleaf](https://www.overleaf.com/docs?engine=pdflatex&snip_name=brackets+and+parentheses+example+5&snip=%5Cdocumentclass%7Barticle%7D%0A%5Cbegin%7Bdocument%7D%0A%5C%5B%0A+%5CBiggl+%5Clangle+3x%2B7+%5Cbiggr+%5Crangle%0A%5C%5D%0A%5Cend%7Bdocument%7D)
The above example produces the following output:
\\\[\\Biggl \\langle 3x+7 \\biggr \\rangle\\\]
The commands `\Biggl` and `\biggr` establish the size of the delimiters `<` and `>` respectively, with the `l` or `r` indicating whether it's the left or the right parenthesis. For a complete list of parentheses and sizes see the [reference guide](https://www.overleaf.com/learn/latex/Brackets_and_Parentheses#Reference_guide)
.
Reference guide
---------------
| LaTeX markup | Renders as |
| --- | --- |
| `\bigl( \Bigl( \biggl( \Biggl(` | \\\[\\big( \\Big( \\bigg( \\Bigg(\\\] |
| `\bigr] \Bigr] \biggr] \Biggr]` | \\\[\\big\] \\Big\] \\bigg\] \\Bigg\]\\\] |
| `\bigl\{ \Bigl\{ \biggl\{ \Biggl\{` | \\\[\\big\\{ \\Big\\{ \\bigg\\{ \\Bigg\\{\\\] |
| `\bigl \langle \Bigl \langle \biggl \langle \Biggl \langle` | \\\[\\big \\langle \\Big \\langle \\bigg \\langle \\Bigg \\langle \\\] |
| `\bigr \rangle \Bigr \rangle \biggr \rangle \Biggr \rangle` | \\\[\\big \\rangle \\Big \\rangle \\bigg \\rangle \\Bigg \\rangle \\\] |
| `\big\| \Big\| \bigg\| \Bigg\|` | \\\[\\big\| \\; \\Big\| \\; \\bigg\| \\; \\Bigg\|\\\] |
| `\big\\| \Big\\| \bigg\\| \Bigg\\|` | \\\[\\big\\\| \\; \\Big\\\| \\; \\bigg\\\| \\; \\Bigg\\\|\\\] |
| `\bigl \lceil \Bigl \lceil \biggl \lceil \Biggl \lceil` | \\\[\\big \\lceil \\Big \\lceil \\bigg \\lceil \\Bigg \\lceil\\\] |
| `\bigr \rceil \Bigr \rceil \biggr \rceil \Biggr \rceil` | \\\[\\big \\rceil \\Big \\rceil \\bigg \\rceil \\Bigg \\rceil\\\] |
| `\bigl \lfloor \Bigl \lfloor \biggl \lfloor \Biggl \lfloor` | \\\[\\big \\lfloor \\Big \\lfloor \\bigg \\lfloor \\Bigg \\lfloor\\\] |
| `\bigr \rfloor \Bigr \rfloor \biggr \rfloor \Biggr \rfloor` | \\\[\\big \\rfloor \\Big \\rfloor \\bigg \\rfloor \\Bigg \\rfloor\\\] |
Further reading
---------------
* [Mathematical expressions](https://www.overleaf.com/learn/latex/Mathematical_expressions "Mathematical expressions")
* [Subscripts and superscripts](https://www.overleaf.com/learn/latex/Subscripts_and_superscripts "Subscripts and superscripts")
* [Aligning equations with amsmath](https://www.overleaf.com/learn/latex/Aligning_equations_with_amsmath "Aligning equations with amsmath")
* [Display style in math mode](https://www.overleaf.com/learn/latex/Display_style_in_math_mode "Display style in math mode")
* [Operators](https://www.overleaf.com/learn/latex/Operators "Operators")
* [The not so short introduction to LaTeX2ε](http://www.ctan.org/tex-archive/info/lshort/)
We only use cookies for essential purposes and to improve your experience on our site. You can find out more in our [cookie policy](https://www.overleaf.com/legal#Cookies)
.
Essential cookies onlyAccept all cookies
---
# Lists of tables and figures - Overleaf, Online LaTeX Editor
[Skip to content](https://www.overleaf.com/learn/latex/Lists_of_tables_and_figures#main-content)
Search help library…searchclear
No Search Results
Lists of tables and figures
===========================
Contents
--------
* [1 Introduction](https://www.overleaf.com/learn/latex/Lists_of_tables_and_figures#Introduction)
* [2 Changing the names](https://www.overleaf.com/learn/latex/Lists_of_tables_and_figures#Changing_the_names)
* [3 Further reading](https://www.overleaf.com/learn/latex/Lists_of_tables_and_figures#Further_reading)
Introduction
------------
A list of the tables and figures keep the information organized and provide easy access to a specific element. This article explains how to create a list of figures, a list of tables and how to change the default title in both of them.
Let's start with a basic example:
\\documentclass{article}
\\usepackage{graphicx}
\\graphicspath{ {figures/} }
\\usepackage{array}
\\begin{document}
\\thispagestyle{empty}
\\listoffigures
\\listoftables
\\newpage
\\pagenumbering{arabic}
Lorem ipsum dolor sit amet, consectetuer adipiscing
elit. Etiam lobortisfacilisis...
\\end{document}
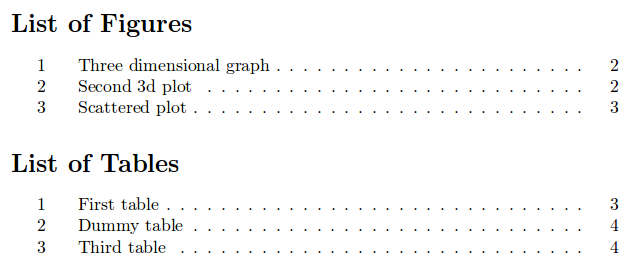
[Open an example on Overleaf](https://www.overleaf.com/project/new/template/20148?id=68603601&templateName=Lists+of+tables+and+figures&latexEngine=pdflatex&texImage=texlive-full%3A2020.1&mainFile=)
The commands `\listoffigures` and `\listoftables` are self explanatory, the first one generates the list of figures and the second one the list of tables. In this example there are two more relevant commands:
`\thispagestyle{empty}`
Removes the page numbering.
`\pagenumbering{arabic}`
Re-start the page numbering with Arabic-style numerals.
Changing the names
------------------
As shown in the following example, the default titles, "List of Tables" and "List of Figures", can be changed to any other text:
\\documentclass{article}
\\usepackage{graphicx}
\\usepackage{array}
\\graphicspath{ {figures/} }
\\renewcommand{\\listfigurename}{List of plots}
\\renewcommand{\\listtablename}{Tables}
\\begin{document}
\\thispagestyle{empty}
\\listoffigures
\\listoftables
\\clearpage
\\pagenumbering{arabic}
Lorem ipsum dolor sit amet, consectetuer adipiscing elit. Etiam lobortisfacilisis...
\\end{document}
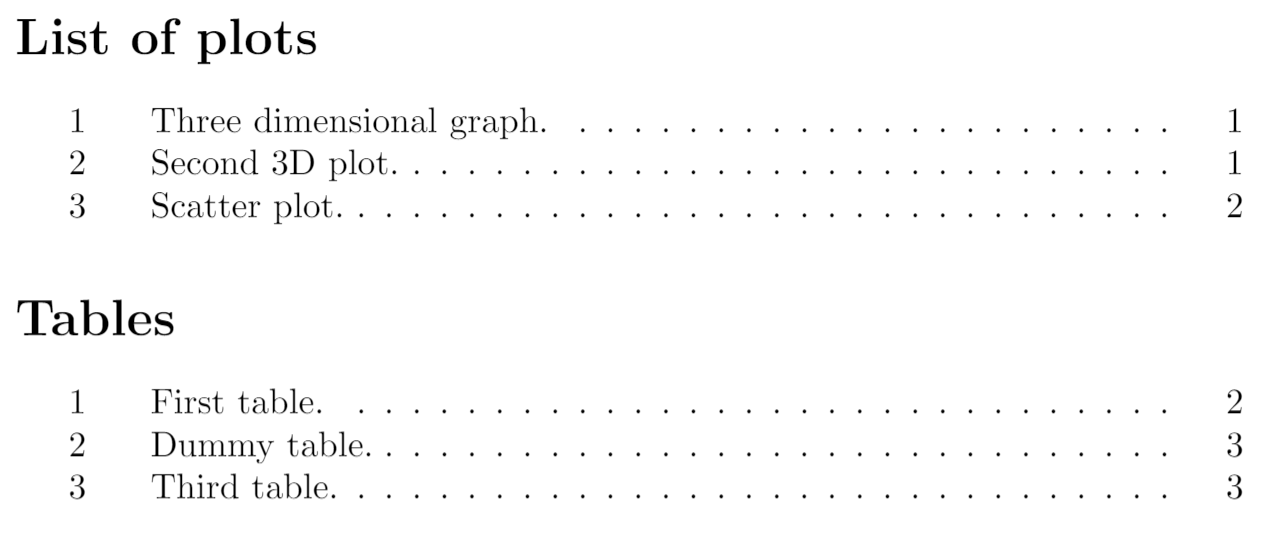
[Open an example on Overleaf](https://www.overleaf.com/project/new/template/20148?id=68603601&templateName=Lists+of+tables+and+figures&latexEngine=pdflatex&texImage=texlive-full%3A2020.1&mainFile=)
The commands that re-write the titles are:
* `\renewcommand{\listfigurename}{List of plots}` will write "List of plots" instead of "List of Figures".
* `\renewcommand{\listtablename}{Tables}` will write "Tables" instead of "List of Tables".
If you use the `babel` package in your document and you need to use any of the previous commands, put it inside the braces of `\addto\captionsenglish{ }`. Instead of `english` in `\captionenglish` write the name of the language you set in babel.
**Note**: your document may need to be compiled twice for the lists to be generated properly.
Further reading
---------------
For more information see:
* [Inserting Images](https://docs.overleaf.com/writing-and-editing/inserting-images "Inserting Images")
* [Tables](https://www.overleaf.com/learn/latex/Tables "Tables")
* [Positioning images and tables](https://www.overleaf.com/learn/latex/Positioning_images_and_tables "Positioning images and tables")
* [Sections and chapters](https://www.overleaf.com/learn/latex/Sections_and_chapters "Sections and chapters")
* [Table of contents](https://www.overleaf.com/learn/latex/Table_of_contents "Table of contents")
* [Indices](https://www.overleaf.com/learn/latex/Indices "Indices")
* [Glossaries](https://www.overleaf.com/learn/latex/Glossaries "Glossaries")
* [Page numbering](https://www.overleaf.com/learn/latex/Page_numbering "Page numbering")
* [Management in a large project](https://www.overleaf.com/learn/latex/Management_in_a_large_project "Management in a large project")
* [Multi-file LaTeX projects](https://www.overleaf.com/learn/latex/Multi-file_LaTeX_projects "Multi-file LaTeX projects")
* [Counters](https://www.overleaf.com/learn/latex/Counters "Counters")
* [The not so short introduction to LaTeX2ε](http://www.ctan.org/tex-archive/info/lshort/)
We only use cookies for essential purposes and to improve your experience on our site. You can find out more in our [cookie policy](https://www.overleaf.com/legal#Cookies)
.
Essential cookies onlyAccept all cookies
---
# Biblatex bibliography styles - Overleaf, Online LaTeX Editor
[Skip to content](https://www.overleaf.com/learn/latex/Biblatex_bibliography_styles#main-content)
Search help library…searchclear
No Search Results
Biblatex bibliography styles
============================
The next commands are the ones that set the bibliography style and import the bibliography file. See [Bibliography management with biblatex](https://www.overleaf.com/learn/latex/Bibliography_management_with_biblatex "Bibliography management with biblatex")
for more information.
%in the preamble
%--------------------------------
\\usepackage\[\
backend=biber,\
style=stylename,\
\]{biblatex}
\\addbibresource{bibfile}
%--------------------------------
%Where the bibliography will be printed
\\printbibliography
where _bibfile_ is the name of the bibliography .bib file and _stylename_ is one of the following:
| stylename | output |
| --- | --- |
| `numeric` | 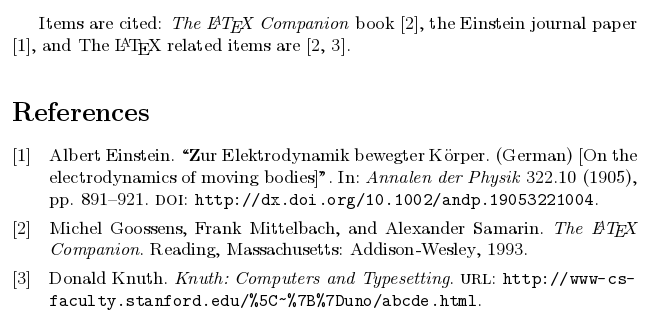 |
| `alphabetic` | 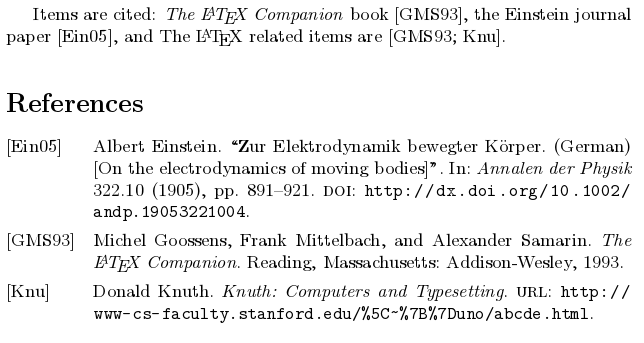 |
| `authoryear` | 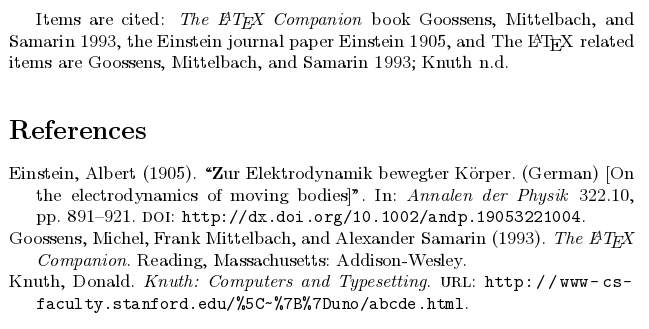 |
| `authortitle` | 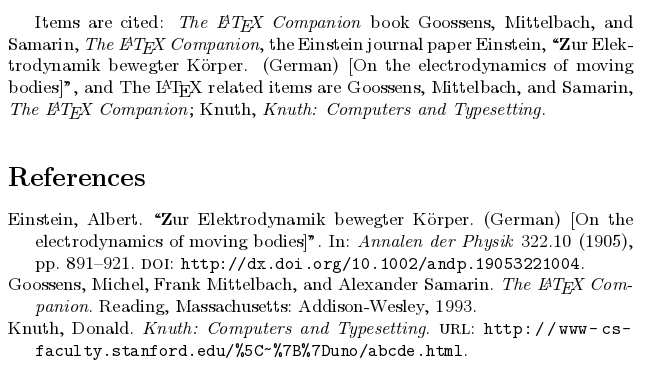 |
| `verbose` | 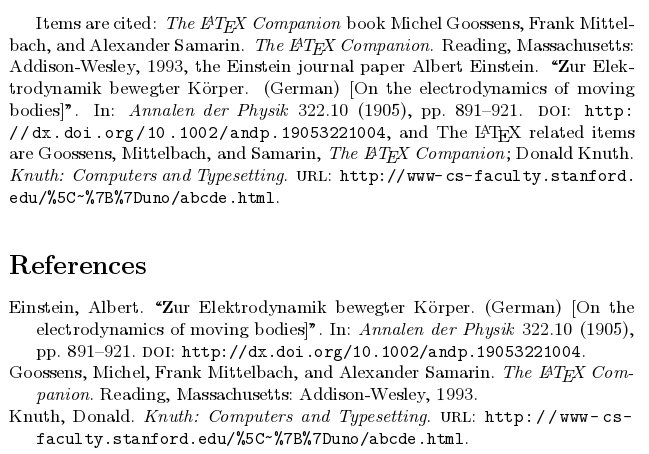 |
| `reading` | 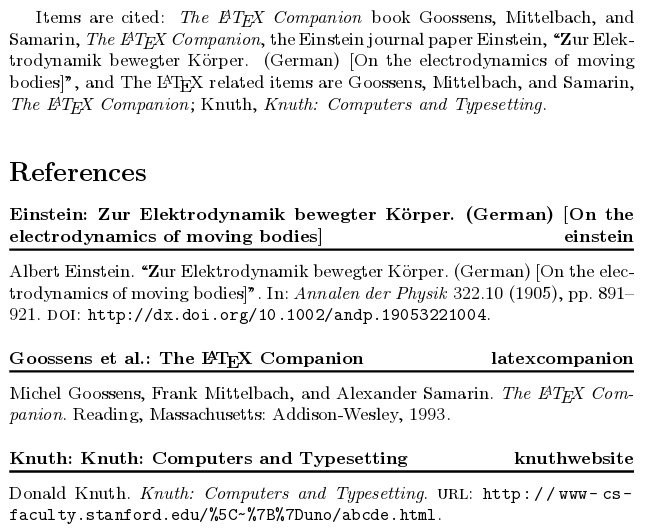 |
| `draft` | 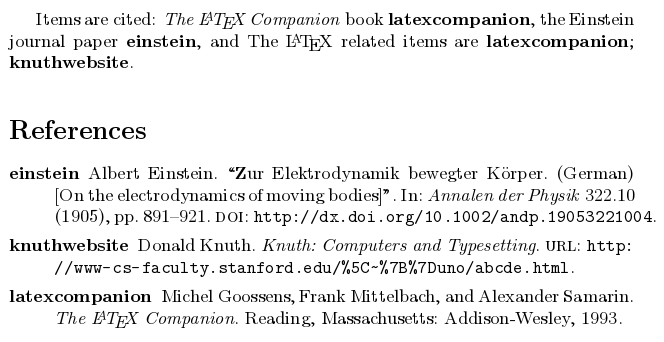 |
The `draft` style is intended for editing your document before the final version, since it makes easier to keep track of the cited sources.
There are some additional bibliography styles you can use in [Overleaf](http://www.overleaf.com/)
| stylename | output |
| --- | --- |
| `authoryear-icomp` | 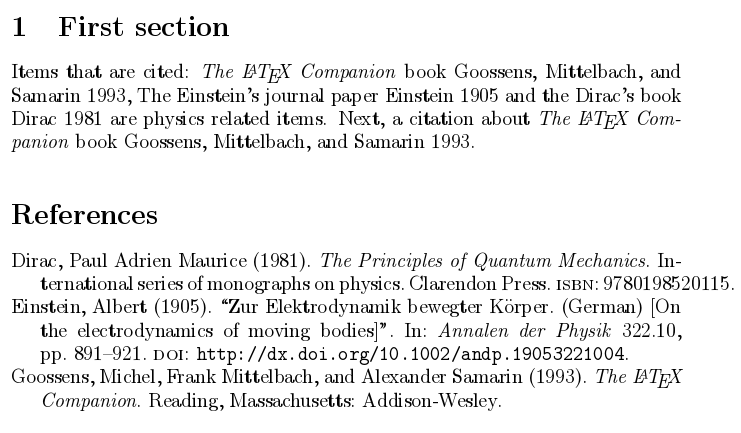 |
| `apa` | [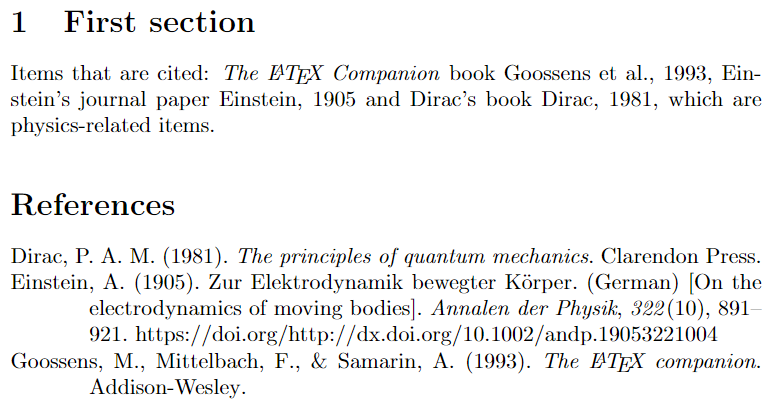](https://www.overleaf.com/learn/latex/File%3AApa7.png) |
| `bwl-FU` | 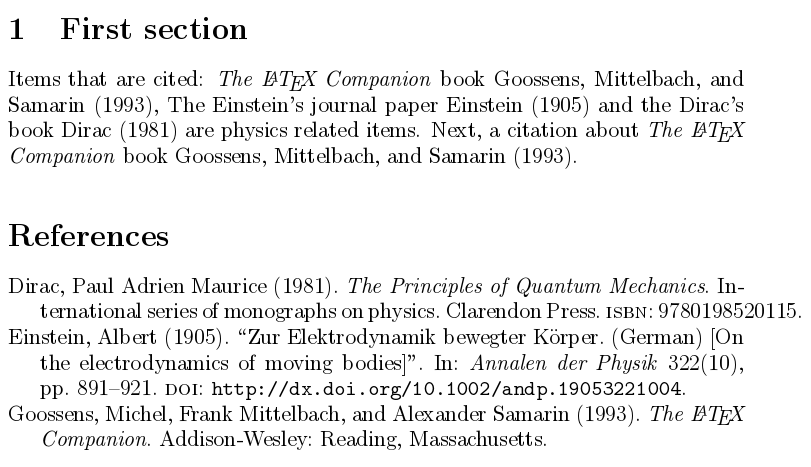 |
| `chem-acs` | 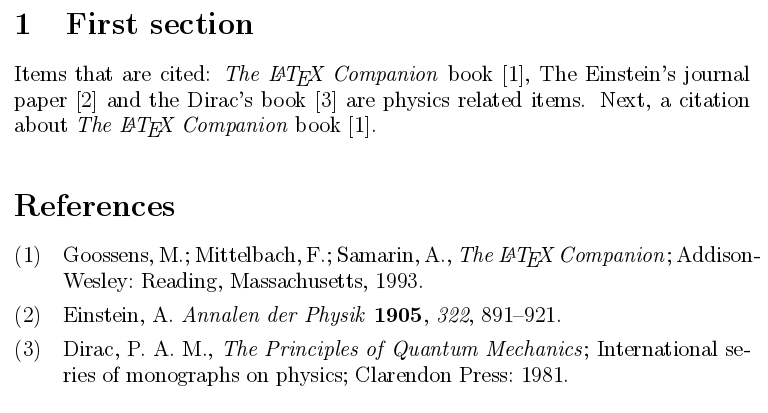 |
| `chem-angew` | 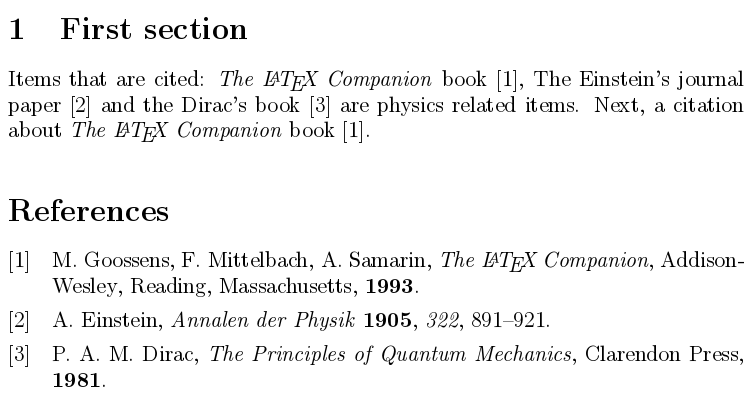 |
| `chem-biochem` | 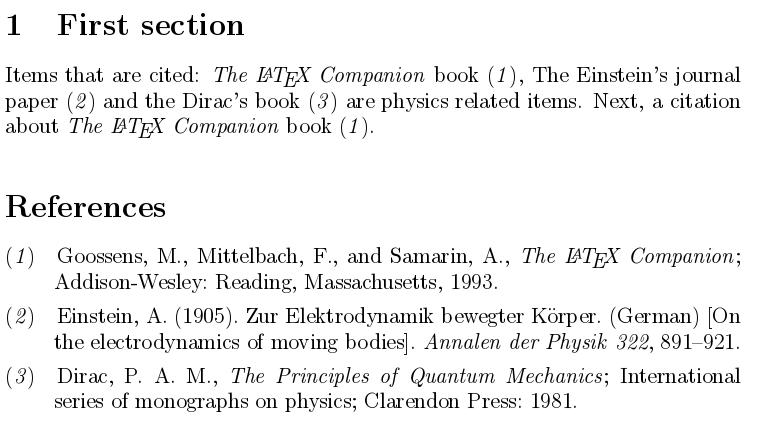 |
| `chem-rsc` | 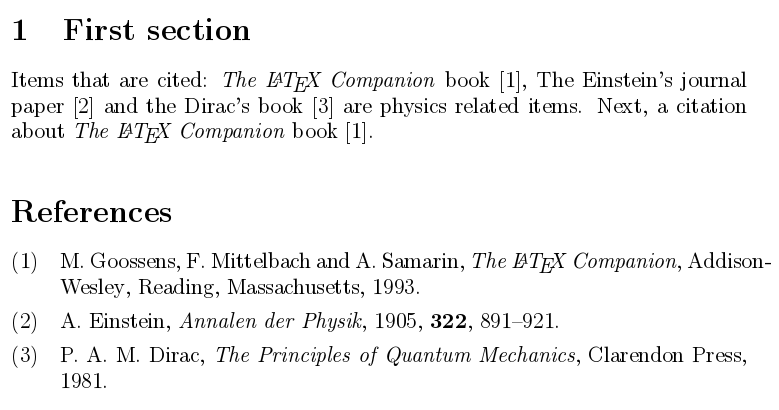 |
| `ieee` | 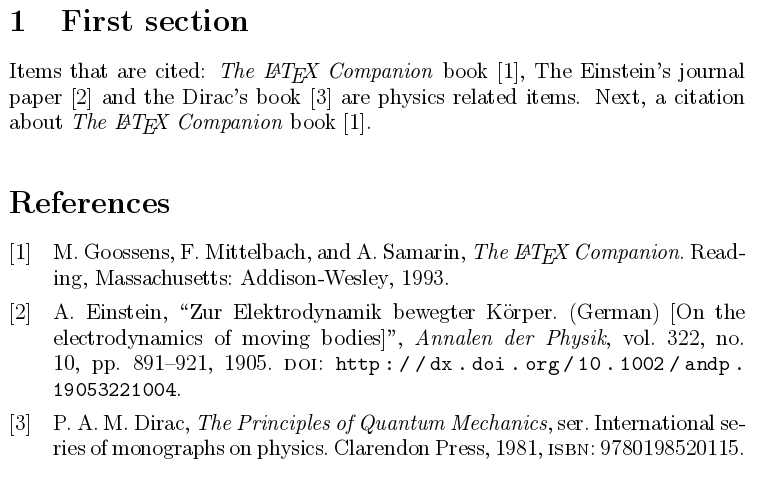 |
| `mla` | 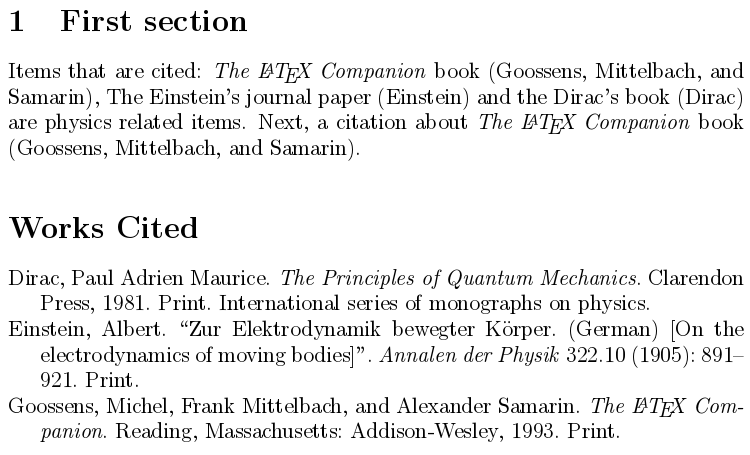 |
| `musuos` | 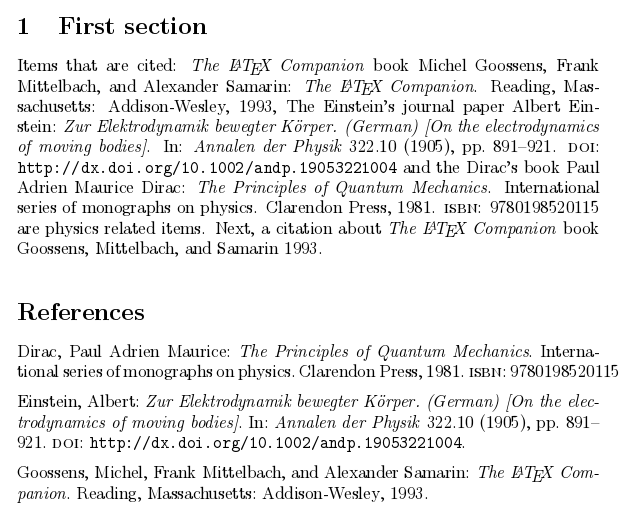 |
| `nature` | 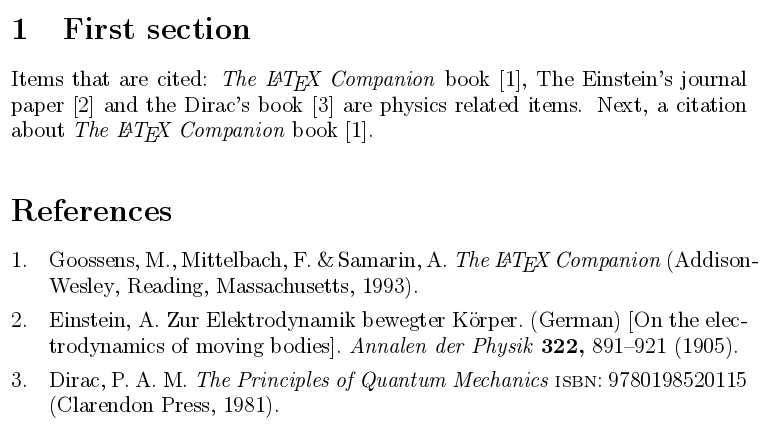 |
| `nejm` | 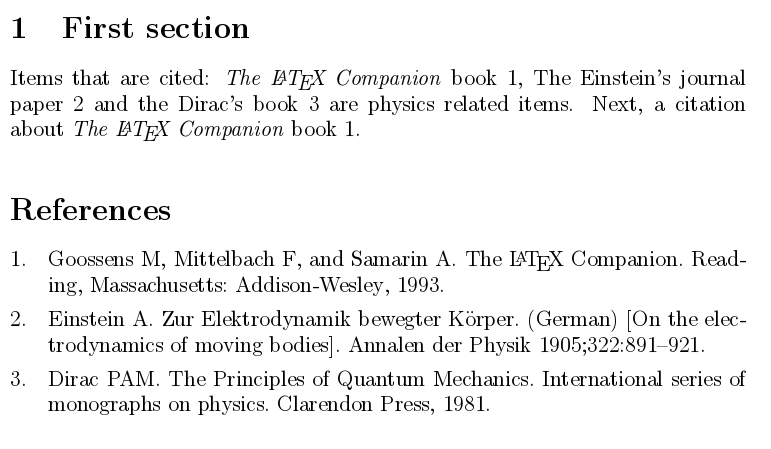 |
| `phys` | 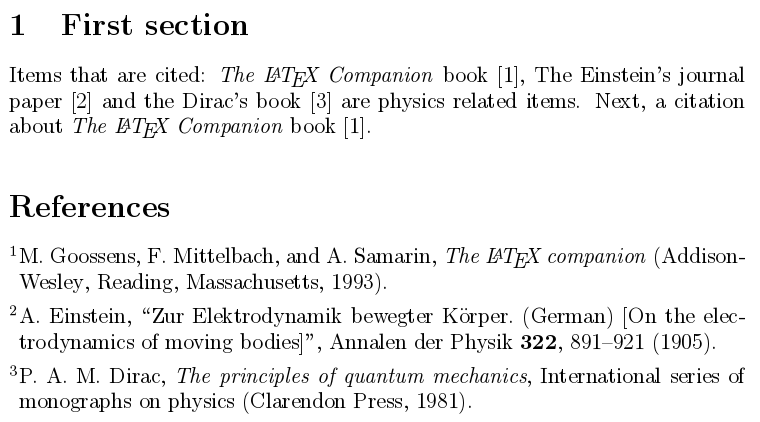 |
| `science` | 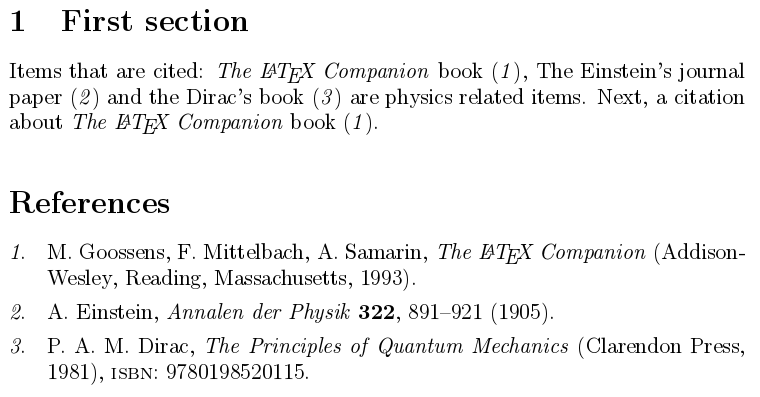 |
| `geschichtsfrkl` | 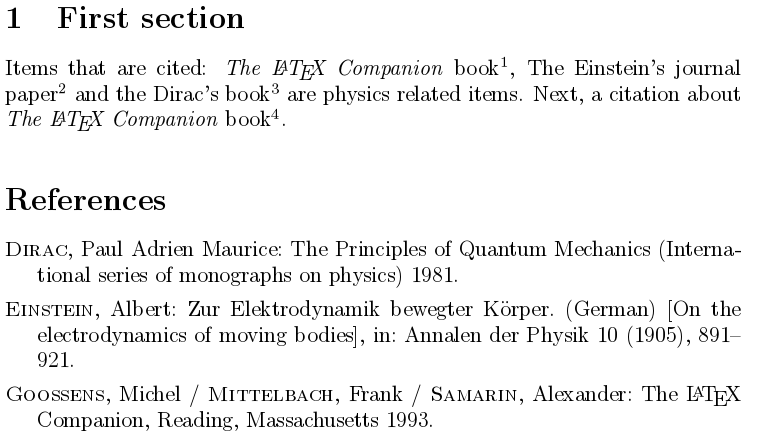 |
| `oscola` | 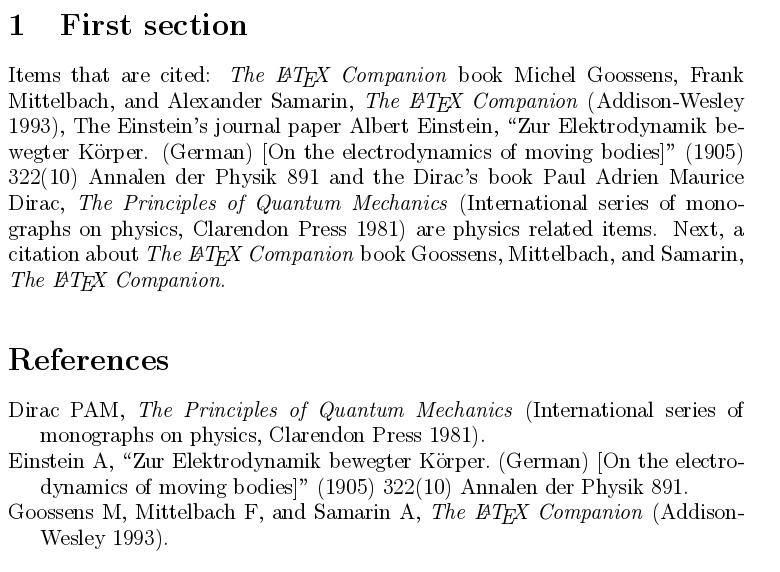 |
More styles can be found by [searching on CTAN](https://ctan.org/search?phrase=biblatex+styles)
.
Further reading
---------------
For more information see
* [Bibliography management in LaTeX](https://www.overleaf.com/learn/latex/Bibliography_management_in_LaTeX "Bibliography management in LaTeX")
* [Biblatex citation styles](https://www.overleaf.com/learn/latex/Biblatex_citation_styles "Biblatex citation styles")
* [Biblatex package documentation](http://linorg.usp.br/CTAN/macros/latex/contrib/biblatex/doc/biblatex.pdf)
* [Table of contents](https://www.overleaf.com/learn/latex/Table_of_contents "Table of contents")
* [Management in a large project](https://www.overleaf.com/learn/latex/Management_in_a_large_project "Management in a large project")
We only use cookies for essential purposes and to improve your experience on our site. You can find out more in our [cookie policy](https://www.overleaf.com/legal#Cookies)
.
Essential cookies onlyAccept all cookies
---
# Page size and margins - Overleaf, Online LaTeX Editor
[Skip to content](https://www.overleaf.com/learn/latex/Page_size_and_margins#main-content)
Search help library…searchclear
No Search Results
Page size and margins
=====================
Contents
--------
* [1 Introduction](https://www.overleaf.com/learn/latex/Page_size_and_margins#Introduction)
* [1.1 Example](https://www.overleaf.com/learn/latex/Page_size_and_margins#Example)
* [2 Paper size, orientation and margins](https://www.overleaf.com/learn/latex/Page_size_and_margins#Paper_size,_orientation_and_margins)
* [3 Fine tuning your LaTeX page dimensions](https://www.overleaf.com/learn/latex/Page_size_and_margins#Fine_tuning_your_LaTeX_page_dimensions)
* [3.1 Visualizing the layout](https://www.overleaf.com/learn/latex/Page_size_and_margins#Visualizing_the_layout)
* [3.2 Using the geometry package layout parameters](https://www.overleaf.com/learn/latex/Page_size_and_margins#Using_the_geometry_package_layout_parameters)
* [4 Reference guide](https://www.overleaf.com/learn/latex/Page_size_and_margins#Reference_guide)
* [5 Further reading](https://www.overleaf.com/learn/latex/Page_size_and_margins#Further_reading)
Introduction
------------
The page dimensions in a LaTeX document are highly configurable and the [`geometry` package](https://ctan.org/pkg/geometry?lang=en)
offers a simple way to change the length and layout of different elements such as the paper size, margins, footnote, header, orientation, etc.
### Example
Suppose you need to create a document using A4-sized paper with a text area which shouldn't exceed 6 inches wide and 8 inches high. You can easily create such a document by including this line in your LaTeX preamble:
\\usepackage\[a4paper, total={6in, 8in}\]{geometry}
The parameter values passed to the `geometry` package produce our required layout. In this case, `a4paper` establishes the desired A4 paper size and values supplied to the `total` parameter determine the size of the text area. Note that Overleaf uses a European LaTeX distribution, which produces documents in A4 size by default.
\\documentclass{article}
\\usepackage{blindtext}
\\usepackage\[a4paper, total={6in, 8in}\]{geometry}
\\begin{document}
\\section{Introduction}
This is a test document which uses A4-sized paper and the user-defined text area.
\\subsection{Some dummy text}
\\blindtext\[8\]
\\end{document}
[Open this example in Overleaf](https://www.overleaf.com/docs?engine=pdflatex&snip_name=Basic+geometry+package+example&snip=%5Cdocumentclass%7Barticle%7D%0A%5Cusepackage%7Bblindtext%7D%0A%5Cusepackage%5Ba4paper%2C+total%3D%7B6in%2C+8in%7D%5D%7Bgeometry%7D%0A%0A%5Cbegin%7Bdocument%7D%0A%5Csection%7BIntroduction%7D%0AThis+is+a+test+document+which+uses+A4-sized+paper+and+the+user-defined+text+area.+%0A%5Csubsection%7BSome+dummy+text%7D%0A%5Cblindtext%5B8%5D%0A%0A%5Cend%7Bdocument%7D)
Paper size, orientation and margins
-----------------------------------
Modifying a document's paper size, orientation and margins is a common requirement which can easily be achieved using the `geometry` package. There are two ways to set the desired values:
* provide them as parameters to the `\usepackage` statement as in the example above, or
* use the `\geometry` command in the preamble.
For example, let's create a document with legal paper size, landscape orientation and a 2 in margin:
\\usepackage\[legalpaper, landscape, margin=2in\]{geometry}
You can achieve the same thing in a slightly different way:
\\usepackage{geometry}
\\geometry{legalpaper, landscape, margin=2in}
As you see, the parameters are comma separated. For a complete list of predefined paper sizes, see the [reference guide](https://www.overleaf.com/learn/latex/Page_size_and_margins#Reference_guide)
. The second parameter is the orientation, its default value is `portrait`. Finally, each `margin` is set to `2in`.
Fine tuning your LaTeX page dimensions
--------------------------------------
### Visualizing the layout
The [`layout` package](https://ctan.org/pkg/layout?lang=en)
provides a very convenient solution to _visualizing_ the document's current layout—and the values of various LaTeX parameters which determine that layout. It provides two commands: `layout` and `layout*` which draw a graphic representing the current layout. The starred version (`layout*`) recalculates the internal values used to draw the graphic, which can be useful if you make changes to LaTeX's page-layout parameters. Here is an example:
\\documentclass{article}
\\usepackage{layout}
\\begin{document}
\\section{Default \\LaTeX{} layout}
Here's the default layout:
\\vspace{10pt}
\\layout
\\section{Make some changes}
Make changes to the margin paragraph settings and use the command \\verb|layout\*| to redraw the page layout diagram:
\\vspace{10pt}
\\setlength{\\marginparwidth}{0pt}
\\setlength{\\marginparsep}{0pt}
\\layout\*
\\end{document}
[Open this example in Overleaf to view the results!](https://www.overleaf.com/docs?engine=pdflatex&snip_name=Using+the+layout+package&snip=%5Cdocumentclass%7Barticle%7D%0A%5Cusepackage%7Blayout%7D%0A%5Cbegin%7Bdocument%7D%0A%5Csection%7BDefault+%5CLaTeX%7B%7D+layout%7D%0AHere%27s+the+default+layout%3A%0A%0A%5Cvspace%7B10pt%7D%0A%5Clayout%0A%5Csection%7BMake+some+changes%7D%0AMake+changes+to+the+margin+paragraph+settings+and+use+the+command+%5Cverb%7Clayout%2A%7C+to+redraw+the+page+layout+diagram%3A%0A%5Cvspace%7B10pt%7D%0A%5Csetlength%7B%5Cmarginparwidth%7D%7B0pt%7D%0A%5Csetlength%7B%5Cmarginparsep%7D%7B0pt%7D%0A%0A%5Clayout%2A%0A%5Cend%7Bdocument%7D)
The following image shows an example of the graphic produced by the `layout` package.
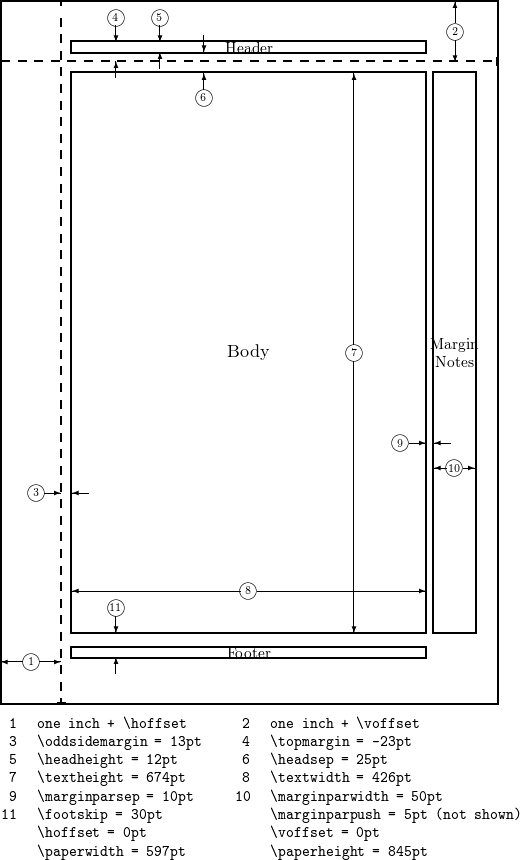
### Using the `geometry` package layout parameters
The `geometry` package provides an interface to change page dimensions using intuitively-named parameters which need to be written in the form `parameter=value`, using standard LaTeX units (mm, cm, pt, in). The following list makes reference to the page-layout graphic provided in the previous section.
`textwidth`
Corresponds to element 8 in the graphic.
`textheight`
Element 7 in the graphic.
`total`
Depends on other parameters, by default defines the dimensions of the Body, but can be combined with the `includehead`, `includefoot`, `includeheadfoot` and `includemp` commands to change the dimensions of Header, the Body, the Footer and the Margin Notes altogether.
`left`, `lmargin`, `inner`
These three parameters change the length of the left margin. Elements 1 and 3 in the graphic, combined.
`right`, `rmargin`, `outer`
These three parameters change the length of the right margin. Elements 9 and 10 in the graphic, combined.
`top`, `tmargin`
These two parameters represent elements 2 and 6 in the graphic, combined.
`bottom`, `bmargin`
These two parameters set the distance from the bottom edge of the document to its baseline.
`headheight`
Height of the header
`headsep`
Separation between header (baseline) and text body. Element 6 in the graphic.
`footnotesep`
Separation between the bottom of text body (baseline) and the top of footnote text.
`footskip`
Distance separation between baseline of last line of text and baseline of footer.
`marginparwidth`, `marginpar`
Width of the margin notes. Element 10 in the graphic.
The paper size can be set to any size you need by means of the command `papersize={⟨width⟩,⟨height⟩}`.
Let's see an example with some of the aforementioned options:
\\documentclass{article}
\\usepackage{blindtext}
\\usepackage{geometry}
\\geometry{
a4paper,
total={170mm,257mm},
left=20mm,
top=20mm,
}
\\begin{document}
\\section{Some dummy text}
\\blindtext\[10\]
\\end{document}
[Open this example in Overleaf](https://www.overleaf.com/docs?engine=pdflatex&snip_name=Using+the+geometry+package+layout+parameters&snip=%5Cdocumentclass%7Barticle%7D%0A%5Cusepackage%7Bblindtext%7D%0A%5Cusepackage%7Bgeometry%7D%0A+%5Cgeometry%7B%0A+a4paper%2C%0A+total%3D%7B170mm%2C257mm%7D%2C%0A+left%3D20mm%2C%0A+top%3D20mm%2C%0A+%7D%0A%5Cbegin%7Bdocument%7D%0A%5Csection%7BSome+dummy+text%7D%0A%5Cblindtext%5B10%5D%0A%5Cend%7Bdocument%7D)
This example produces the following output:
Here the text area, the left margin and the top margin are set. The right and bottom margins are automatically computed to fit the page.
Reference guide
---------------
| parameter | description | values |
| --- | --- | --- |
| papersize | Determines the size of the paper | a0paper, a1paper, a2paper, a3paper, a4paper, a5paper, a6paper,b0paper, b1paper, b2paper, b3paper, b4paper, b5paper, b6paper,c0paper, c1paper, c2paper, c3paper, c4paper, c5paper, c6paper,b0j, b1j, b2j, b3j, b4j, b5j, b6j,ansiapaper, ansibpaper, ansicpaper, ansidpaper, ansiepaper,letterpaper, executivepaper, legalpaper |
Further reading
---------------
For more information see:
* [Lengths in LaTeX](https://www.overleaf.com/learn/latex/Lengths_in_LaTeX "Lengths in LaTeX")
* [Headers and footers](https://www.overleaf.com/learn/latex/Headers_and_footers "Headers and footers")
* [Multiple columns](https://www.overleaf.com/learn/latex/Multiple_columns "Multiple columns")
* [Footnotes](https://www.overleaf.com/learn/latex/Footnotes "Footnotes")
* [Page numbering](https://www.overleaf.com/learn/latex/Page_numbering "Page numbering")
* [Text alignment](https://www.overleaf.com/learn/latex/Text_alignment "Text alignment")
* [Hyperlinks](https://www.overleaf.com/learn/latex/Hyperlinks "Hyperlinks")
* [Understanding packages and class files](https://www.overleaf.com/learn/latex/Understanding_packages_and_class_files "Understanding packages and class files")
* [Writing your own package](https://www.overleaf.com/learn/latex/Writing_your_own_package "Writing your own package")
* [Writing your own class](https://www.overleaf.com/learn/latex/Writing_your_own_class "Writing your own class")
* [The geometry package documentation](http://mirrors.ctan.org/macros/latex/contrib/geometry/geometry.pdf)
.
We only use cookies for essential purposes and to improve your experience on our site. You can find out more in our [cookie policy](https://www.overleaf.com/legal#Cookies)
.
Essential cookies onlyAccept all cookies
---
# Line breaks and blank spaces - Overleaf, Online LaTeX Editor
[Skip to content](https://www.overleaf.com/learn/latex/Line_breaks_and_blank_spaces#main-content)
Search help library…searchclear
No Search Results
Line breaks and blank spaces
============================
Breaking the document flow in LaTeX is not recommended unless you are [creating a macro](https://www.overleaf.com/learn/latex/Writing_your_own_package "Writing your own package")
. Anyway, sometimes is necessary to have more control over the layout of the document; and for this reason in this article is explained how to insert line breaks, page breaks and arbitrary blank spaces.
Contents
--------
* [1 Introduction](https://www.overleaf.com/learn/latex/Line_breaks_and_blank_spaces#Introduction)
* [2 Line breaks](https://www.overleaf.com/learn/latex/Line_breaks_and_blank_spaces#Line_breaks)
* [3 Page breaks](https://www.overleaf.com/learn/latex/Line_breaks_and_blank_spaces#Page_breaks)
* [4 Horizontal blank spaces](https://www.overleaf.com/learn/latex/Line_breaks_and_blank_spaces#Horizontal_blank_spaces)
* [5 Vertical blank spaces](https://www.overleaf.com/learn/latex/Line_breaks_and_blank_spaces#Vertical_blank_spaces)
* [6 Reference guide](https://www.overleaf.com/learn/latex/Line_breaks_and_blank_spaces#Reference_guide)
* [7 Further reading](https://www.overleaf.com/learn/latex/Line_breaks_and_blank_spaces#Further_reading)
Introduction
------------
The most standard way how to break lines is to create a new paragraph. This is done by leaving an empty line in the code.
\\documentclass{article}
\\begin{document}
This paragraph contains no information
and its purpose is to provide an example on how to start a new paragraph.
As you can see,
single line
break in the code
acts as a space in text.
However, leaving an empty line starts a new paragraph.
\\end{document}
[Open this example in Overleaf](https://www.overleaf.com/docs?engine=pdflatex&snip_name=New+paragraph&snip=%5Cdocumentclass%7Barticle%7D%0A%5Cbegin%7Bdocument%7D%0AThis+paragraph+contains+no+information%0Aand+its+purpose+is+to+provide+an+example+on+how+to+start+a+new+paragraph.%0AAs+you+can+see%2C%0Asingle+line%0Abreak+in+the+code%0Aacts+as+a+space+in+text.%0A%0AHowever%2C+leaving+an+empty+line+starts+a+new+paragraph.%0A%5Cend%7Bdocument%7D)

This is not the only command to insert line breaks, in the [next section](https://www.overleaf.com/learn/latex/Line_breaks_and_blank_spaces#Line_breaks)
two more will be presented.
Line breaks
-----------
As mentioned before, there's more than one way to insert line breaks.
\\documentclass{article}
\\usepackage\[utf8\]{inputenc}
\\begin{document}
Something in this document. This paragraph contains no information
and its purposes is to provide an example on how to insert white
spaces and lines breaks.\\\\
When a line break is inserted, the text is not indented, there
are a couple of extra commands do line breaks. \\newline
This paragraph provides no information whatsoever. We are exploring
line breaks. \\hfill \\break
And combining two commands
\\end{document}
[Open this example in Overleaf](https://www.overleaf.com/docs?engine=pdflatex&snip_name=Another+line+break+example&snip=%5Cdocumentclass%7Barticle%7D%0A%5Cusepackage%5Butf8%5D%7Binputenc%7D%0A%0A%5Cbegin%7Bdocument%7D%0ASomething+in+this+document.+This+paragraph+contains+no+information+%0Aand+its+purposes+is+to+provide+an+example+on+how+to+insert+white+%0Aspaces+and+lines+breaks.%5C%5C%0AWhen+a+line+break+is+inserted%2C+the+text+is+not+indented%2C+there+%0Aare+a+couple+of+extra+commands+do+line+breaks.+%5Cnewline%0AThis+paragraph+provides+no+information+whatsoever.+We+are+exploring+%0Aline+breaks.+%5Chfill+%5Cbreak%0AAnd+combining+two+commands%0A%5Cend%7Bdocument%7D)
There are three commands here that work the same in the example:
* `\\` (two backslashes)
* `\newline`
* `\hfill \break`
For more line-breaking commands see the [reference guide](https://www.overleaf.com/learn/latex/Line_breaks_and_blank_spaces#Reference_guide)
.
Page breaks
-----------
There are two commands to insert page breaks, `clearpage` and `newpage`. Below is an example using `clearpage`.
\\documentclass{article}
\\usepackage\[utf8\]{inputenc}
\\begin{document}
Something in this document. This paragraph contains no information and
its purposes is to provide an example on how to insert white spaces
and lines breaks.\\\\
When a line break is inserted, the text is not indented, there are a
couple of extra commands do line breaks. \\newline
This paragraph provides no information whatsoever. We are exploring
line breaks. \\hfill \\break
And combining two commands
...
...
\\begin{figure}
\\centering
\\includegraphics\[width=3cm\]{overleaf-logo}
\\caption{Overleaf logo}
\\end{figure}
Hello, here is some text without a meaning...
\\clearpage

If the command `\clearpage` is used, and there are stacked floating elements, such as tables or figures, they will be flushed out before starting the new page. In the example above the same image is inserted three times. Since the page break is inserted before all the figures are displayed, remaining images are inserted in an empty page before continuing with the text below the break point.
If this is not what you need, you can use `\newpage` instead.
\\documentclass{article}
\\usepackage\[utf8\]{inputenc}
\\begin{document}
\\documentclass{article}
\\usepackage\[utf8\]{inputenc}
\\begin{document}
Something in this document. This paragraph contains no information and
its purposes is to provide an example on how to insert white spaces
and lines breaks.\\\\
When a line break is inserted, the text is not indented, there are a
couple of extra commands do line breaks. \\newline
This paragraph provides no information whatsoever. We are exploring
line breaks. \\hfill \\break
And combining two commands
...
...
\\begin{figure}
\\centering
\\includegraphics\[width=3cm\]{overleaf-logo}
\\caption{Overleaf logo}
\\end{figure}
Hello, here is some text without a meaning...
\\newpage
In this case the images are placed in the new page trying to fit the text flow.
[Open in Overleaf](https://www.overleaf.com/project/new/template/19338?id=65200057&templateName=&latexEngine=&texImage=texlive-full%3A2020.1&mainFile=)
Horizontal blank spaces
-----------------------
Horizontal spaces of arbitrary length may be inserted with `\hspace`.
Horizontal \\hspace{1cm} spaces can be inserted manually. Useful
to control the fine-tuning in the layout of pictures.
Left Side \\hfill Right Side
[Open this example in Overleaf](https://www.overleaf.com/docs?engine=&snip_name=Horizontal+spaces&snip=%5Cdocumentclass%7Barticle%7D%0A%5Cbegin%7Bdocument%7D%0A%0AHorizontal+%5Chspace%7B1cm%7D+spaces+can+be+inserted+manually.+Useful+%0Ato+control+the+fine-tuning+in+the+layout+of+pictures.%0A%0ALeft+Side+%5Chfill+Right+Side%0A%0A%5Cend%7Bdocument%7D)
There are two commands that insert horizontal blank spaces in this example:
`\hspace{1cm}`
Inserts a horizontal space whose length is 1cm. Other [LaTeX units](https://www.overleaf.com/learn/latex/Lengths_in_LaTeX "Lengths in LaTeX")
can be used with this command.
`\hfill`
Inserts a blank space that will stretch accordingly to fill the space available.
The commands `\hrulefill` and `\dotfill` do the same as `\hfill` but instead of blank spaces they insert a horizontal ruler and a string of dots, respectively.
Vertical blank spaces
---------------------
Vertical blank spaces have the same syntax as horizontal ones.
Text at the top of the page. Text at the top of the page.
Text at the top of the page. Text at the top of the page.
Text at the top of the page. Text at the top of the page.
Text at the top of the page.
\\vspace{5mm} %5mm vertical space
This text still at the top, 5mm below the first paragraph.
\\vfill
Text at the bottom of the page.
[Open this example in Overleaf](https://www.overleaf.com/docs?engine=&snip_name=Vertical+blank+spaces&snip=%5Cdocumentclass%7Barticle%7D%0A%5Cbegin%7Bdocument%7D%0A%0AText+at+the+top+of+the+page.+Text+at+the+top+of+the+page.+%0AText+at+the+top+of+the+page.+Text+at+the+top+of+the+page.+%0AText+at+the+top+of+the+page.+Text+at+the+top+of+the+page.+%0AText+at+the+top+of+the+page.%0A%0A%5Cvspace%7B5mm%7D+%255mm+vertical+space%0A%0AThis+text+still+at+the+top%2C+5mm+below+the+first+paragraph.%0A%0A%5Cvfill%0A%0AText+at+the+bottom+of+the+page.%0A%0A%5Cend%7Bdocument%7D)

Let's see the two commands that insert vertical blank spaces.
`\vspace{5mm}`
Inserts a vertical spaces whose length is 5mm. Other [LaTeX units](https://www.overleaf.com/learn/latex/Lengths_in_LaTeX "Lengths in LaTeX")
can be used with this command.
`\vfill`
Inserts a blank space that will stretch accordingly to fill the vertical space available. That's why the line "Text at the bottom of the page." is moved to the bottom, and the rest of the space is filled in.
There are other three commands commonly used to insert vertical blank spaces
`\smallskip`
Adds a 3pt space plus or minus 1pt depending on other factors (document type, available space, etc)
`\medskip`
Adds a 6pt space plus or minus 2pt depending on other factors (document type, available space, etc)
`\bigskip`
Adds a 12pt space plus or minus 4pt depending on other factors (document type, available space, etc)
Reference guide
---------------
**Additional line-breaking commands**
* \\\\\*
(two backslashes and an asterisk)
breaks the line at the point of the command and additionally prohibits a page break after the forced line break.
* \\break
breaks the line without filling the current line. This will result in very bad formatting if you do not fill the line yourself. To fill the line, we can use it as given below.
* \\hfill\\break
This will produce the same result as _\\newline_ and _\\\\_.
Additionally, LaTeX provides the following advanced option for line break.
* \\linebreak\[number\]
It breaks the line at the point of the command. The _number_ provided as an argument represents the priority of the command in a range of 0 to 4. (0 means it will be easily ignored and 4 means do it anyway). When this line break option is used, LaTeX will try to produce the best line breaks possible.
Further reading
---------------
For more information see:
* [Lengths in LaTeX](https://www.overleaf.com/learn/latex/Lengths_in_LaTeX "Lengths in LaTeX")
* [Paragraphs and new lines](https://www.overleaf.com/learn/latex/Paragraphs_and_new_lines "Paragraphs and new lines")
* [Paragraph formatting](https://www.overleaf.com/learn/latex/Paragraph_formatting "Paragraph formatting")
* [Text alignment](https://www.overleaf.com/learn/latex/Text_alignment "Text alignment")
* [Bold, italics and underlining](https://www.overleaf.com/learn/latex/Bold%2C_italics_and_underlining "Bold, italics and underlining")
* [Lists](https://www.overleaf.com/learn/latex/Lists "Lists")
* [Single sided and double sided documents](https://www.overleaf.com/learn/latex/Single_sided_and_double_sided_documents "Single sided and double sided documents")
* [Multiple columns](https://www.overleaf.com/learn/latex/Multiple_columns "Multiple columns")
* [The not so short introduction to LaTeX2ε](http://www.ctan.org/tex-archive/info/lshort/)
We only use cookies for essential purposes and to improve your experience on our site. You can find out more in our [cookie policy](https://www.overleaf.com/legal#Cookies)
.
Essential cookies onlyAccept all cookies
---
# TikZ package - Overleaf, Online LaTeX Editor
[Skip to content](https://www.overleaf.com/learn/latex/TikZ_package#main-content)
Search help library…searchclear
No Search Results
TikZ package
============
Contents
--------
* [1 Introduction](https://www.overleaf.com/learn/latex/TikZ_package#Introduction)
* [2 Basic elements: points, lines and paths](https://www.overleaf.com/learn/latex/TikZ_package#Basic_elements:_points,_lines_and_paths)
* [3 Basic geometric shapes: Circles, ellipses and polygons](https://www.overleaf.com/learn/latex/TikZ_package#Basic_geometric_shapes:_Circles,_ellipses_and_polygons)
* [4 Diagrams](https://www.overleaf.com/learn/latex/TikZ_package#Diagrams)
* [5 Reference Guide](https://www.overleaf.com/learn/latex/TikZ_package#Reference_Guide)
* [6 Further reading](https://www.overleaf.com/learn/latex/TikZ_package#Further_reading)
Introduction
------------
[Ti_k_Z](https://en.wikipedia.org/wiki/PGF/TikZ)
is probably the most complex and powerful tool to create graphic elements in LaTeX. Starting with a simple example, this article introduces some basic concepts: drawing lines, dots, curves, circles, rectangles etc.
Firstly, load the `tikz` package by including the line `\usepackage{tikz}` in the preamble of your document, then draw a graphic using the `tikzpicture` environment.
\\documentclass{article}
\\usepackage{tikz}
\\begin{document}
\\begin{tikzpicture}
\\draw\[gray, thick\] (-1,2) -- (2,-4);
\\draw\[gray, thick\] (-1,-1) -- (2,2);
\\filldraw\[black\] (0,0) circle (2pt) node\[anchor=west\]{Intersection point};
\\end{tikzpicture}
\\end{document}
[Open this example in Overleaf](https://www.overleaf.com/docs?engine=pdflatex&snip_name=First+TikZ+example&snip=%5Cdocumentclass%7Barticle%7D%0A%5Cusepackage%7Btikz%7D%0A%5Cbegin%7Bdocument%7D%0A%5Cbegin%7Btikzpicture%7D%0A%5Cdraw%5Bgray%2C+thick%5D+%28-1%2C2%29+--+%282%2C-4%29%3B%0A%5Cdraw%5Bgray%2C+thick%5D+%28-1%2C-1%29+--+%282%2C2%29%3B%0A%5Cfilldraw%5Bblack%5D+%280%2C0%29+circle+%282pt%29+node%5Banchor%3Dwest%5D%7BIntersection+point%7D%3B%0A%5Cend%7Btikzpicture%7D%0A%5Cend%7Bdocument%7D)
This example produces the following output:
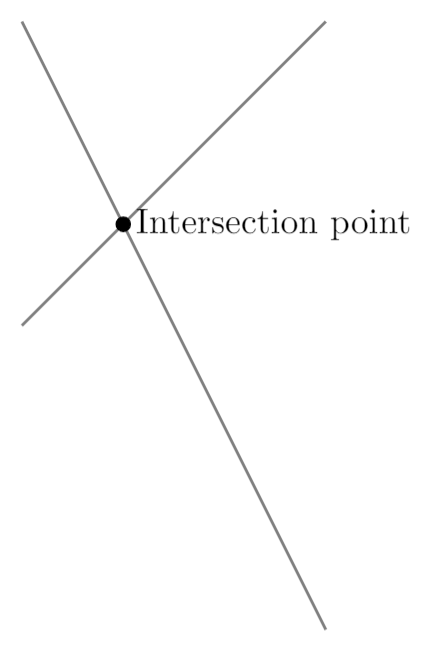
In this example two lines and one point are drawn. To add a line the command `\draw[gray, thick]` defines a graphic element whose _colour_ is `gray` and with a `thick` stroke. The line is actually defined by it's two endpoints, `(-1,2)` and `(2,-4)`, joined by `--`.
The _point_ is actually a `circle` drawn by `\filldraw[black]`, this command will not only draw the circle but fill it using black. In this command the centre point `(0,0)` and the radius `(2pt)` are declared. Next to the point is a `node`, which is actually a box containing the text `intersection point`, and anchored at the `west` of the point.
It's important to notice the semicolon `;` used at the end of each `draw` command.
Note: The `tikzfigure` environment can be enclosed inside a figure or similar environment. See the [Inserting Images](https://docs.overleaf.com/writing-and-editing/inserting-images "Inserting Images")
article for more information on this topic.
Basic elements: points, lines and paths
---------------------------------------
In this section we provide some examples showing how to create some basic graphic elements which can be combined to create more elaborate figures.
\\documentclass{article}
\\usepackage{tikz}
\\begin{document}
\\begin{tikzpicture}
\\draw (-2,0) -- (2,0);
\\filldraw \[gray\] (0,0) circle (2pt);
\\draw (-2,-2) .. controls (0,0) .. (2,-2);
\\draw (-2,2) .. controls (-1,0) and (1,0) .. (2,2);
\\end{tikzpicture}
\\end{document}
[Open this example in Overleaf](https://www.overleaf.com/docs?engine=pdflatex&snip_name=Second+TikZ+example&snip=%5Cdocumentclass%7Barticle%7D%0A%5Cusepackage%7Btikz%7D%0A%5Cbegin%7Bdocument%7D%0A%5Cbegin%7Btikzpicture%7D%0A%0A%5Cdraw+%28-2%2C0%29+--+%282%2C0%29%3B%0A%5Cfilldraw+%5Bgray%5D+%280%2C0%29+circle+%282pt%29%3B%0A%5Cdraw+%28-2%2C-2%29+..+controls+%280%2C0%29+..+%282%2C-2%29%3B%0A%5Cdraw+%28-2%2C2%29+..+controls+%28-1%2C0%29+and+%281%2C0%29+..+%282%2C2%29%3B%0A%0A%5Cend%7Btikzpicture%7D%0A%5Cend%7Bdocument%7D)
This example produces the following output:
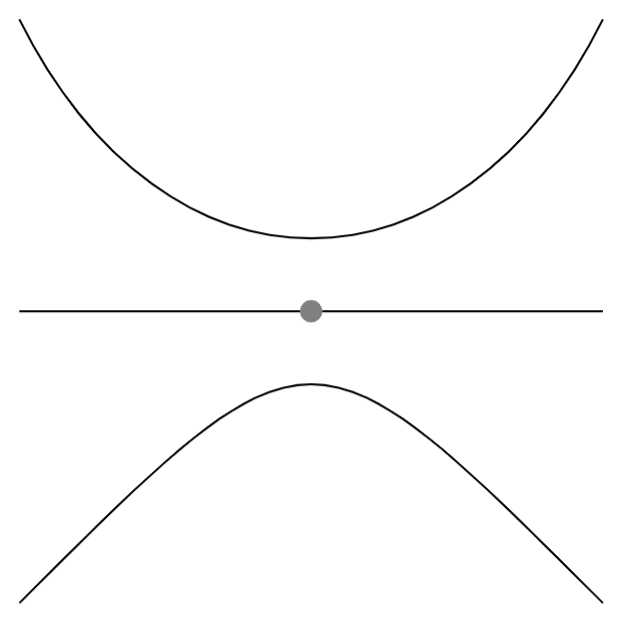
There are three basic commands in this example:
* **`\draw (-2,0) -- (2,0);`**: This defines a line whose endpoint are `(-2,0)` and `(2,0)`.
* **`\filldraw [gray] (0,0) circle (2pt);`**: The point is created as a very small `gray` `circle` centred at `(0,0)` and whose radius is `(2pt)`. The `\filldraw` command is used to draw elements and fill them with a specific colour. See the next section for more examples.
* **`\draw (-2,2) .. controls (-1,0) and (1,0) .. (2,2);`**: Draws a [Bézier curve](https://en.wikipedia.org/wiki/B%C3%A9zier_curve)
. There are 4 points defining it: `(-2,2)` and `(2,2)` are its endpoints, `(-1,0)` and `(1,0)` are [_control points_](https://en.wikipedia.org/wiki/Control_point_(mathematics))
that determine "how curved" it is. You can think of these two points as "attractor points".
Basic geometric shapes: Circles, ellipses and polygons
------------------------------------------------------
Geometric figures can be constructed from simpler elements so let's start with circles, ellipses and arcs.
\\documentclass{article}
\\usepackage{tikz}
\\begin{document}
\\begin{tikzpicture}
\\filldraw\[color=red!60, fill=red!5, very thick\](-1,0) circle (1.5);
\\fill\[blue!50\] (2.5,0) ellipse (1.5 and 0.5);
\\draw\[ultra thick, ->\] (6.5,0) arc (0:220:1);
\\end{tikzpicture}
\\end{document}
[Open this example in Overleaf](https://www.overleaf.com/docs?engine=pdflatex&snip_name=Third+TikZ+example&snip=%5Cdocumentclass%7Barticle%7D%0A%5Cusepackage%7Btikz%7D%0A%5Cbegin%7Bdocument%7D%0A%5Cbegin%7Btikzpicture%7D%0A%5Cfilldraw%5Bcolor%3Dred%2160%2C+fill%3Dred%215%2C+very+thick%5D%28-1%2C0%29+circle+%281.5%29%3B%0A%5Cfill%5Bblue%2150%5D+%282.5%2C0%29+ellipse+%281.5+and+0.5%29%3B%0A%5Cdraw%5Bultra+thick%2C+-%3E%5D+%286.5%2C0%29+arc+%280%3A220%3A1%29%3B%0A%5Cend%7Btikzpicture%7D%0A%5Cend%7Bdocument%7D)
This example produces the following output:
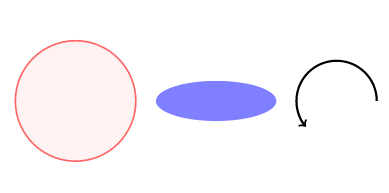
* **`\filldraw[color=red!60, fill=red!5, very thick](-1,0) circle (1.5);`**: This command was used in the previous section to draw a _point_, but in this instance there are some additional parameters inside the brackets. These are explained below:
* **`color=red!60`**: The colour of the ring around the circle is set to 60% red (lighter than "pure" red). See the [reference guide](https://www.overleaf.com/learn/latex/TikZ_package#Reference_guide)
for a list of the default colours available in LaTeX; also, see [Using colours in LaTeX](https://www.overleaf.com/learn/latex/Using_colours_in_LaTeX "Using colours in LaTeX")
to learn how to create your own colours.
* **`fill=red!5`**: The circle is filled with an even lighter shade of red.
* **`very thick`**: This parameter defines the thickness of the stroke. See the [reference guide](https://www.overleaf.com/learn/latex/TikZ_package#Reference_guide)
for a complete list of values.
* **`\fill[blue!50] (2.5,0) ellipse (1.5 and 0.5);`**: To create an ellipse you provide a centre point `(2.5,0)`, and two radii: horizontal and vertical (`1.5` and `0.5` respectively). Also notice the command `fill` instead of `draw` or filldraw, this is because, in this case, there's no need to control outer and inner colours.
* **`\draw[ultra thick, ->] (6.5,0) arc (0:220:1);`**: This command will draw an arc starting at `(6.5,0)`. The extra parameter `->` indicates that the arc will have an arrow at the end. In addition to the starting point you must provide three additional values: the starting and ending angles, and the radius; here, these three parameter values are provided in the format `(0:220:1)`.
In addition to curved geometric shapes you can also create elements that use straight lines, using a similar syntax:
\\documentclass{article}
\\usepackage{tikz}
\\begin{document}
\\begin{tikzpicture}
\\draw\[blue, very thick\] (0,0) rectangle (3,2);
\\draw\[orange, ultra thick\] (4,0) -- (6,0) -- (5.7,2) -- cycle;
\\end{tikzpicture}
\\end{document}
[Open this example in Overleaf](https://www.overleaf.com/docs?engine=pdflatex&snip_name=Fourth+TikZ+example&snip=%5Cdocumentclass%7Barticle%7D%0A%5Cusepackage%7Btikz%7D%0A%5Cbegin%7Bdocument%7D%0A%5Cbegin%7Btikzpicture%7D%0A%5Cdraw%5Bblue%2C+very+thick%5D+%280%2C0%29+rectangle+%283%2C2%29%3B%0A%5Cdraw%5Borange%2C+ultra+thick%5D+%284%2C0%29+--+%286%2C0%29+--+%285.7%2C2%29+--+cycle%3B%0A%5Cend%7Btikzpicture%7D%0A%5Cend%7Bdocument%7D)
This example produces the following output:

* **`\draw[blue, very thick] (0,0) rectangle (3,2);`**: Rectangles are created by the special command `rectangle`. You have to provide two points, the first one is where the "pencil" begins to draw the rectangle and the second one is the diagonally opposite corner point.
* **`\draw[orange, ultra thick] (4,0) -- (6,0) -- (5.7,2) -- cycle;`**: To draw a polygon we draw a _closed_ path of straight lines: a line from `(4,0)` to `(6,0)` and a line from `(6,0)` to `(5.7,2)`. The `cycle` instruction means that the start and end points should coincide to create a "closed" path (shape), which results in construction of the final line segment.
Diagrams
--------
Nodes are probably the most versatile elements in TikZ. We've already used one node in the introduction—to add some text to the figure. The next example uses nodes to create a diagram.
\\documentclass{article}
\\usepackage{tikz}
\\usetikzlibrary{positioning}
\\begin{document}
\\begin{tikzpicture}\[\
roundnode/.style={circle, draw=green!60, fill=green!5, very thick, minimum size=7mm},\
squarednode/.style={rectangle, draw=red!60, fill=red!5, very thick, minimum size=5mm},\
\]
%Nodes
\\node\[squarednode\] (maintopic) {2};
\\node\[roundnode\] (uppercircle) \[above=of maintopic\] {1};
\\node\[squarednode\] (rightsquare) \[right=of maintopic\] {3};
\\node\[roundnode\] (lowercircle) \[below=of maintopic\] {4};
%Lines
\\draw\[->\] (uppercircle.south) -- (maintopic.north);
\\draw\[->\] (maintopic.east) -- (rightsquare.west);
\\draw\[->\] (rightsquare.south) .. controls +(down:7mm) and +(right:7mm) .. (lowercircle.east);
\\end{tikzpicture}
\\end{document}
[Open this example in Overleaf](https://www.overleaf.com/docs?engine=pdflatex&snip_name=More+advanced+TikZ+example&snip=%5Cdocumentclass%7Barticle%7D%0A%5Cusepackage%7Btikz%7D%0A%5Cusetikzlibrary%7Bpositioning%7D%0A%5Cbegin%7Bdocument%7D%0A%5Cbegin%7Btikzpicture%7D%5B%0Aroundnode%2F.style%3D%7Bcircle%2C+draw%3Dgreen%2160%2C+fill%3Dgreen%215%2C+very+thick%2C+minimum+size%3D7mm%7D%2C%0Asquarednode%2F.style%3D%7Brectangle%2C+draw%3Dred%2160%2C+fill%3Dred%215%2C+very+thick%2C+minimum+size%3D5mm%7D%2C%0A%5D%0A%25Nodes%0A%5Cnode%5Bsquarednode%5D++++++%28maintopic%29++++++++++++++++++++++++++++++%7B2%7D%3B%0A%5Cnode%5Broundnode%5D++++++++%28uppercircle%29+++++++%5Babove%3Dof+maintopic%5D+%7B1%7D%3B%0A%5Cnode%5Bsquarednode%5D++++++%28rightsquare%29+++++++%5Bright%3Dof+maintopic%5D+%7B3%7D%3B%0A%5Cnode%5Broundnode%5D++++++++%28lowercircle%29+++++++%5Bbelow%3Dof+maintopic%5D+%7B4%7D%3B%0A%0A%25Lines%0A%5Cdraw%5B-%3E%5D+%28uppercircle.south%29+--+%28maintopic.north%29%3B%0A%5Cdraw%5B-%3E%5D+%28maintopic.east%29+--+%28rightsquare.west%29%3B%0A%5Cdraw%5B-%3E%5D+%28rightsquare.south%29+..+controls+%2B%28down%3A7mm%29+and+%2B%28right%3A7mm%29+..+%28lowercircle.east%29%3B%0A%5Cend%7Btikzpicture%7D%0A%5Cend%7Bdocument%7D)
This example produces the following output:
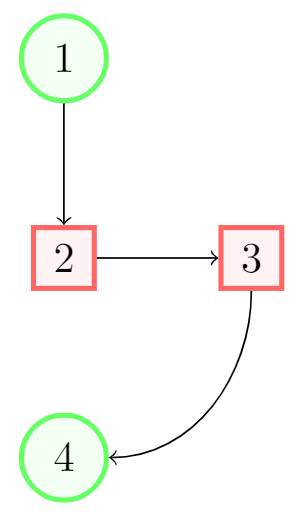
There are essentially three commands in this figure: A node definition, a node declaration and lines that join two nodes.
* **`roundnode/.style={circle, draw=green!60, fill=green!5, very thick, minimum size=7mm}`**: Passed as a parameter to the `tikzpicture` environment. It defines a node that will be referenced as `roundnode`: this node will be a circle whose outer ring will be drawn using the colour `green!60` and will be filled using `green!5`. The stroke will be `very thick` and its `minimum size` is `7mm`. The line below this defines a second rectangle-shaped node called `squarednode`, using similar parameters.
* **`\node[squarednode] (maintopic) {2};`**: This will create a `squarednode`, as defined in the previous command. This node will have an id of `maintopic` and will contain the number `2`. If you leave an empty space inside the braces no text will be displayed.
* **`[above=of maintopic]`**: Notice that all but the first node have an additional parameter that determines its position relative to other nodes. For instance, `[above=of maintopic]` means that this node should appear above the node named `maintopic`. For this positioning system to work you have to add `\usetikzlibrary{positioning}` to your preamble. Without the `positioning` library, you can use the syntax `above of=maintopic` instead, but the `positioning` syntax is more flexible and powerful: you can extend it to write `above=**3cm** of maintopic` i.e. control the actual distance from `maintopic`.
* **`\draw[->] (uppercircle.south) -- (maintopic.north);`**: An arrow-like straight line will be drawn. The syntax has been already explained in the [basic elements](https://www.overleaf.com/learn/latex/TikZ_package#Basic_elements:_points,_lines_and_paths)
section. The only difference is the manner in which we write the endpoints of the line: by referencing a node (this is why we named them) and a position relative to the node.
Reference Guide
---------------
Possible color and thickness parameters in the `tikz` package:
| parameter | values | picture |
| --- | --- | --- |
| color | white, black, red, green, blue, cyan, magenta, yellow |  |
| thickness | ultra thin, very thin, thin, thick, very thick, ultra thick |  |
More colours may be available in your LaTeX distribution. See [Using colours in LaTeX](https://www.overleaf.com/learn/latex/Using_colours_in_LaTeX "Using colours in LaTeX")
Further reading
---------------
For more information see:
* [Using colours in LaTeX](https://www.overleaf.com/learn/latex/Using_colours_in_LaTeX "Using colours in LaTeX")
* [Pgfplots package](https://www.overleaf.com/learn/latex/Pgfplots_package "Pgfplots package")
* [Inserting Images](https://docs.overleaf.com/writing-and-editing/inserting-images "Inserting Images")
* [Lists of tables and figures](https://www.overleaf.com/learn/latex/Lists_of_tables_and_figures "Lists of tables and figures")
* [Positioning images and tables](https://www.overleaf.com/learn/latex/Positioning_images_and_tables "Positioning images and tables")
* [Drawing diagrams directly in LaTeX](https://www.overleaf.com/learn/latex/Picture_environment "Picture environment")
* [The TikZ and PGF Packages Manual](http://mirrors.ctan.org/graphics/pgf/base/doc/pgfmanual.pdf)
* [TikZ and PGF examples at TeXample.net](http://www.texample.net/tikz/examples/all/)
We only use cookies for essential purposes and to improve your experience on our site. You can find out more in our [cookie policy](https://www.overleaf.com/legal#Cookies)
.
Essential cookies onlyAccept all cookies
---
# Margin notes - Overleaf, Online LaTeX Editor
[Skip to content](https://www.overleaf.com/learn/latex/Margin_notes#main-content)
Search help library…searchclear
No Search Results
Margin notes
============
Contents
--------
* [1 Introduction](https://www.overleaf.com/learn/latex/Margin_notes#Introduction)
* [2 The \\marginpar command](https://www.overleaf.com/learn/latex/Margin_notes#The_\marginpar_command)
* [2.1 Reversing placement of margin notes](https://www.overleaf.com/learn/latex/Margin_notes#Reversing_placement_of_margin_notes)
* [2.2 Commands affecting margin note typesetting](https://www.overleaf.com/learn/latex/Margin_notes#Commands_affecting_margin_note_typesetting)
* [2.3 Changing the typesetting of margin notes: ragged right and ragged left](https://www.overleaf.com/learn/latex/Margin_notes#Changing_the_typesetting_of_margin_notes:_ragged_right_and_ragged_left)
* [2.4 Example](https://www.overleaf.com/learn/latex/Margin_notes#Example)
* [2.5 The mparhack package: fixing the wrong margin](https://www.overleaf.com/learn/latex/Margin_notes#The_mparhack_package:_fixing_the_wrong_margin)
* [3 An alternative to \\marginpar: the marginnote package](https://www.overleaf.com/learn/latex/Margin_notes#An_alternative_to_\marginpar:_the_marginnote_package)
* [3.1 Example](https://www.overleaf.com/learn/latex/Margin_notes#Example_2)
* [4 Further reading](https://www.overleaf.com/learn/latex/Margin_notes#Further_reading)
Introduction
------------
This article explains how to create margin notes, a popular alternative to footnotes as a device for adding supplementary information to support the main text of a document. We also have a [help page on the `todonotes` package](https://www.overleaf.com/learn/latex/Questions/Can_I_add_inline_or_margin_comments_to_the_pdf%3F "Questions/Can I add inline or margin comments to the pdf?")
which provides alternative solutions to those presented in this article.
The `\marginpar` command
------------------------
Without loading any additional packages you can use the built-in LaTeX `\marginpar` command to add margin notes to your document. The general form of the `\marginpar` command is
`\marginpar[_left text_]{_right text_}`
where `_left text_` will be used if the margin note appears on the left of a document page and `_right text_` if appears on the right. To be more specific, marginal notes are normally put on the “outside” of the page—although the meaning of “outside” depends on the document class you are using and whether you have specified the `twoside` package option:
* `book` class (`\documentclass{book})` documents are two-sided by default (design)
* `report` class (`\documentclass{report}`) and `article` class (`\documentclass{article}`) documents are, by default, single-sided. To make them two-sided you have to specify the `twoside` option:
* `\documentclass[twoside]{report}`, or
* `\documentclass[twoside]{article}`
For single-sided documents, excluding right-to-left languages, such as Arabic, the “outside” is always the right-hand edge of the text and for two-sided documents it is the left-hand edge of the text for left-hand pages and the right-hand edge of the text for right-hand pages.
### Reversing placement of margin notes
The command `\reversemarginpar` reverses the side on which margin notes are typeset; its effect can be undone by the command `\normalmarginpar`. As stated in the LaTeX source code documentation “These commands have no effect for two-column output.”
### Commands affecting margin note typesetting
Typesetting of `\marginpar` notes makes use of several dimension commands which store values that can be changed, if required:
* `\marginparwidth`: determines the width of margin notes and thus the length of lines typeset in the margin note.
* `\marginparsep`: sets the gap (distance) between margin notes and the text of your document.
* `\marginparpush`: defines the minimum separation (vertical) distance between `\marginpar` notes.
### Changing the typesetting of margin notes: ragged right and ragged left
By default, the text of a margin note is typeset is a box which produces typeset lines of width `\marginparwidth`. This can result in unsightly gaps between typeset words as the TeX engine tries to find the “best” line breaks. You can use the commands `\raggedright` and `\raggedleft` to alter the typeset style of the text.
### Example
Here is an example which uses several `\marginpar` commands to demonstrate some of the features listed above. The example also loads the [`geometry`](https://ctan.org/pkg/geometry)
package to create a small page size and the [`hyperref`](https://ctan.org/pkg/hyperref)
package which provides the `\url` command used to credit the source of the text (in the footnote).
\\documentclass\[twoside\]{article} % Note: uses twoside option
\\usepackage\[a4paper, marginparwidth=75pt, total={10cm, 10cm}\]{geometry} % To create a small page
\\usepackage{hyperref} % To use the \\url command (in the footnote)
\\usepackage{marginnote}
\\begin{document}
\\section{Lorem Ipsum}
\\footnote{Source text: Wikipedia (\\url{https://en.wikipedia.org/wiki/Lorem\_ipsum})}But I must explain to you how all this mistaken idea of reprobating pleasure and extolling pain arose. To do so, I will give you a complete account of the system, and expound the actual teachings of the great explorer of the truth, the master-builder of human happiness. \\marginpar\[Note 1: text for left-hand side text\]{Note 1: text for right-hand side of pages, it is set justified.} No one rejects, dislikes or avoids pleasure itself, because it is pleasure, but because those who do not know how to pursue pleasure rationally encounter consequences that are extremely painful. Nor again is there anyone who loves or pursues or desires to obtain pain of itself, because it is pain, but occasionally circumstances occur in which toil and pain can procure him some great pleasure. \\marginpar\[Note 2: text for left-hand side text\]{\\raggedright Note 2: text for right-hand side of pages, it is not justified, but uses \\texttt{\\string\\raggedright}.} To take a trivial example, which of us ever undertakes laborious physical exercise, except to obtain some advantage from it? But who has any right to find fault with a man who chooses to enjoy a pleasure that has no annoying consequences, or one who avoids a pain that produces no resultant pleasure? \[33\] On the other hand, we denounce with righteous indignation and dislike men who are so beguiled and demoralized by the charms of pleasure of the moment, so blinded by desire, that they cannot foresee the pain and trouble that are bound to ensue; and equal blame belongs to those who fail in their duty through weakness of will, which is the same as saying through shrinking from toil and pain. These cases are perfectly simple and easy to distinguish. In a free hour, when our power of choice is untrammeled and when nothing prevents our being able to do what we like best, every pleasure is to be welcomed and every pain avoided. \\marginpar\[\\raggedleft Note 3: text for left-hand side of pages, it is not justified, but uses \\texttt{\\string\\raggedleft}\]{Note 3: text for left-hand side of pages}But in certain circumstances and owing to the claims of duty or the obligations of business it will frequently occur that pleasures have to be repudiated and annoyances accepted. The wise man therefore always holds in these matters to this principle of selection: he rejects pleasures to secure other greater pleasures, or else he endures pains to avoid worse pains.
\\end{document}
[Open this `\marginpar` example in Overleaf](https://www.overleaf.com/docs?engine=pdflatex&snip_name=An+example+of+the+marginpar+command&snip=%5Cdocumentclass%5Btwoside%5D%7Barticle%7D+%25+Note%3A+uses+twoside+option%0A%5Cusepackage%5Ba4paper%2C+marginparwidth%3D75pt%2C+total%3D%7B10cm%2C+10cm%7D%5D%7Bgeometry%7D+%25+To+create+a+small+page%0A%5Cusepackage%7Bhyperref%7D+%25+To+use+the+%5Curl+command+%28in+the+footnote%29%0A%5Cusepackage%7Bmarginnote%7D%0A%5Cbegin%7Bdocument%7D%0A%5Csection%7BLorem+Ipsum%7D%0A%5Cfootnote%7BSource+text%3A+Wikipedia+%28%5Curl%7Bhttps%3A%2F%2Fen.wikipedia.org%2Fwiki%2FLorem_ipsum%7D%29%7DBut+I+must+explain+to+you+how+all+this+mistaken+idea+of+reprobating+pleasure+and+extolling+pain+arose.+To+do+so%2C+I+will+give+you+a+complete+account+of+the+system%2C+and+expound+the+actual+teachings+of+the+great+explorer+of+the+truth%2C+the+master-builder+of+human+happiness.+%5Cmarginpar%5BNote+1%3A+text+for+left-hand+side+text%5D%7BNote+1%3A+text+for+right-hand+side+of+pages%2C+it+is+set+justified.%7D+No+one+rejects%2C+dislikes+or+avoids+pleasure+itself%2C+because+it+is+pleasure%2C+but+because+those+who+do+not+know+how+to+pursue+pleasure+rationally+encounter+consequences+that+are+extremely+painful.+Nor+again+is+there+anyone+who+loves+or+pursues+or+desires+to+obtain+pain+of+itself%2C+because+it+is+pain%2C+but+occasionally+circumstances+occur+in+which+toil+and+pain+can+procure+him+some+great+pleasure.++%5Cmarginpar%5BNote+2%3A+text+for+left-hand+side+text%5D%7B%5Craggedright+Note+2%3A+text+for+right-hand+side+of+pages%2C+it+is+not+justified%2C+but+uses+%5Ctexttt%7B%5Cstring%5Craggedright%7D.%7D+To+take+a+trivial+example%2C+which+of+us+ever+undertakes+laborious+physical+exercise%2C+except+to+obtain+some+advantage+from+it%3F+But+who+has+any+right+to+find+fault+with+a+man+who+chooses+to+enjoy+a+pleasure+that+has+no+annoying+consequences%2C+or+one+who+avoids+a+pain+that+produces+no+resultant+pleasure%3F+%5B33%5D+On+the+other+hand%2C+we+denounce+with+righteous+indignation+and+dislike+men+who+are+so+beguiled+and+demoralized+by+the+charms+of+pleasure+of+the+moment%2C+so+blinded+by+desire%2C+that+they+cannot+foresee+the+pain+and+trouble+that+are+bound+to+ensue%3B+and+equal+blame+belongs+to+those+who+fail+in+their+duty+through+weakness+of+will%2C+which+is+the+same+as+saying+through+shrinking+from+toil+and+pain.+These+cases+are+perfectly+simple+and+easy+to+distinguish.+In+a+free+hour%2C+when+our+power+of+choice+is+untrammeled+and+when+nothing+prevents+our+being+able+to+do+what+we+like+best%2C+every+pleasure+is+to+be+welcomed+and+every+pain+avoided.+%5Cmarginpar%5B%5Craggedleft+Note+3%3A+text+for+left-hand+side+of+pages%2C+it+is+not+justified%2C+but+uses+%5Ctexttt%7B%5Cstring%5Craggedleft%7D%5D%7BNote+3%3A+text+for+left-hand+side+of+pages%7DBut+in+certain+circumstances+and+owing+to+the+claims+of+duty+or+the+obligations+of+business+it+will+frequently+occur+that+pleasures+have+to+be+repudiated+and+annoyances+accepted.++The+wise+man+therefore+always+holds+in+these+matters+to+this+principle+of+selection%3A+he+rejects+pleasures+to+secure+other+greater+pleasures%2C+or+else+he+endures+pains+to+avoid+worse+pains.%0A%5Cend%7Bdocument%7D)
This example produces the following (two pages) of output:
Page 1:
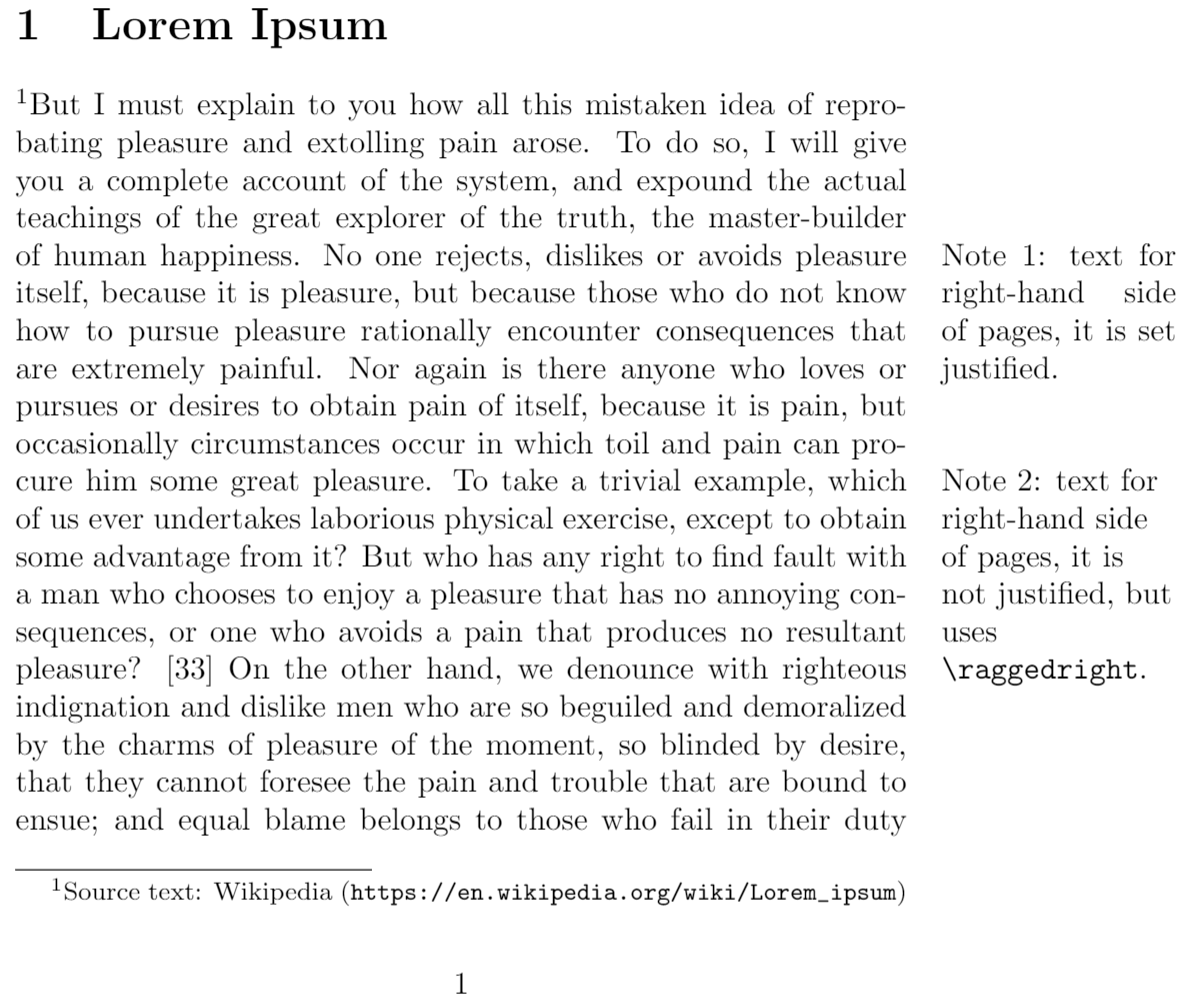
Page 2:
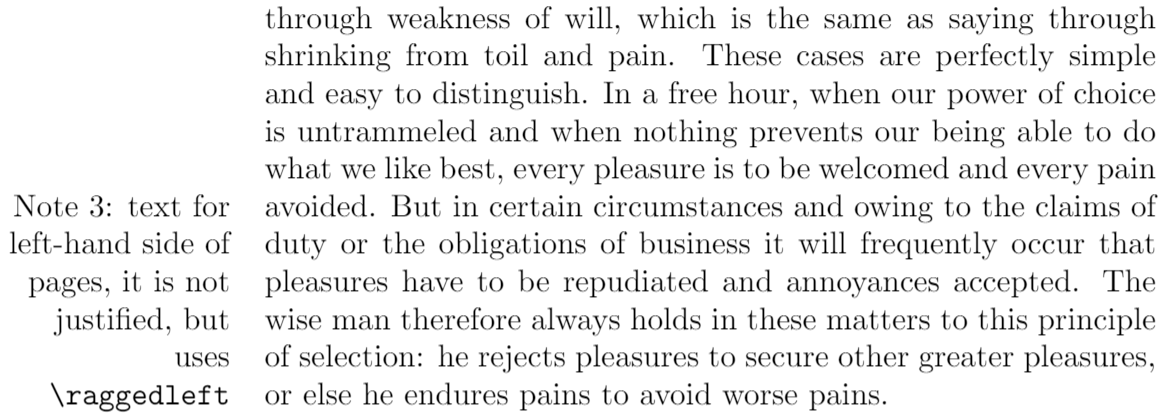
### The `mparhack` package: fixing the wrong margin
Internally, LaTeX processes margin notes as a type of “floating” component of your document—similar to the way LaTeX handles floating figures and tables. Due to being "floats", margin notes produced by `\marginpar` can occasionally appear in the wrong margin. The [`mparhack` package](https://mirror.ox.ac.uk/sites/ctan.org/macros/latex/contrib/mparhack/mparhack.pdf)
was written to fix this problem so it may be worth using it if you encounter that.
An alternative to `\marginpar`: the `marginnote` package
--------------------------------------------------------
The [`marginnote` package](https://www.ctan.org/pkg/marginnote)
offers a versatile alternative to the `\marginpar` command. `marginnote` implements margin notes using a non-float mechanism, which is different to how `\marginpar` works: `marginnote` resolves some problems but, as its documentation notes, it can introduce others.
### Example
The following example demonstrates the `\marginnote` command provided by the `marginnote` package:
\\documentclass{article}
\\usepackage\[a5paper, total={3in, 6in}\]{geometry} % to create a small page
\\usepackage{hyperref} % To use the \\url command (in the footnote)
\\usepackage{marginnote}
\\begin{document}
\\section{Lorem Ipsum}
\\footnote{Source text: Wikipedia (\\url{https://en.wikipedia.org/wiki/Lorem\_ipsum})}But I must explain to you how all this mistaken idea of reprobating pleasure and extolling pain arose. To do so, I will give you a complete account of the system, and expound the actual teachings of the great explorer of the truth, the master-builder of human happiness. \\marginnote{This is a margin note shifted 2cm, \\textit{down} the page, relative to the line in which it is typeset.}\[2cm\] No one rejects, dislikes or avoids pleasure itself, because it is pleasure, but because those who do not know how to pursue pleasure rationally encounter consequences that are extremely painful. Nor again is there anyone who loves or pursues or desires to obtain pain of itself, because it is pain, but occasionally circumstances occur in which toil and pain can procure him some great pleasure. \\reversemarginpar\\marginnote{This is another margin note but shifted 2cm \\textit{up} the page, relative to the line in which it is typeset. It is also in the left-hand margin.}\[-2cm\] To take a trivial example, which of us ever undertakes laborious physical exercise, except to obtain some advantage from it? But who has any right to find fault with a man who chooses to enjoy a pleasure that has no annoying consequences, or one who avoids a pain that produces no resultant pleasure? \[33\] On the other hand, we denounce with righteous indignation and dislike men who are so beguiled and demoralized by the charms of pleasure of the moment, so blinded by desire, that they cannot foresee the pain and trouble that are bound to ensue; and equal blame belongs to those who fail in their duty through weakness of will, which is the same as saying through shrinking from toil and pain. These cases are perfectly simple and easy to distinguish. In a free hour, when our power of choice is untrammeled and when nothing prevents our being able to do what we like best, every pleasure is to be welcomed and every pain avoided. But in certain circumstances and owing to the claims of duty or the obligations of business it will frequently occur that pleasures have to be repudiated and annoyances accepted. The wise man therefore always holds in these matters to this principle of selection: he rejects pleasures to secure other greater pleasures, or else he endures pains to avoid worse pains.
\\end{document}
[Open this example in Overleaf](https://www.overleaf.com/docs?engine=pdflatex&snip_name=Example+of+marginnote+package&snip=%5Cdocumentclass%7Barticle%7D%0A%5Cusepackage%5Ba5paper%2C+total%3D%7B3in%2C+6in%7D%5D%7Bgeometry%7D+%25+to+create+a+small+page%0A%5Cusepackage%7Bhyperref%7D+%25+To+use+the+%5Curl+command+%28in+the+footnote%29%0A%5Cusepackage%7Bmarginnote%7D%0A%5Cbegin%7Bdocument%7D%0A%5Csection%7BLorem+Ipsum%7D%0A%5Cfootnote%7BSource+text%3A+Wikipedia+%28%5Curl%7Bhttps%3A%2F%2Fen.wikipedia.org%2Fwiki%2FLorem_ipsum%7D%29%7DBut+I+must+explain+to+you+how+all+this+mistaken+idea+of+reprobating+pleasure+and+extolling+pain+arose.+To+do+so%2C+I+will+give+you+a+complete+account+of+the+system%2C+and+expound+the+actual+teachings+of+the+great+explorer+of+the+truth%2C+the+master-builder+of+human+happiness.+%5Cmarginnote%7BThis+is+a+margin+note+shifted+2cm%2C+%5Ctextit%7Bdown%7D+the+page%2C+relative+to+the+line+in+which+it+is+typeset.%7D%5B2cm%5D+No+one+rejects%2C+dislikes+or+avoids+pleasure+itself%2C+because+it+is+pleasure%2C+but+because+those+who+do+not+know+how+to+pursue+pleasure+rationally+encounter+consequences+that+are+extremely+painful.+Nor+again+is+there+anyone+who+loves+or+pursues+or+desires+to+obtain+pain+of+itself%2C+because+it+is+pain%2C+but+occasionally+circumstances+occur+in+which+toil+and+pain+can+procure+him+some+great+pleasure.+%5Creversemarginpar%5Cmarginnote%7BThis+is+another+margin+note+but+shifted+2cm+%5Ctextit%7Bup%7D+the+page%2C+relative+to+the+line+in+which+it+is+typeset.+It+is+also+in+the+left-hand+margin.%7D%5B-2cm%5D+To+take+a+trivial+example%2C+which+of+us+ever+undertakes+laborious+physical+exercise%2C+except+to+obtain+some+advantage+from+it%3F+But+who+has+any+right+to+find+fault+with+a+man+who+chooses+to+enjoy+a+pleasure+that+has+no+annoying+consequences%2C+or+one+who+avoids+a+pain+that+produces+no+resultant+pleasure%3F+%5B33%5D+On+the+other+hand%2C+we+denounce+with+righteous+indignation+and+dislike+men+who+are+so+beguiled+and+demoralized+by+the+charms+of+pleasure+of+the+moment%2C+so+blinded+by+desire%2C+that+they+cannot+foresee+the+pain+and+trouble+that+are+bound+to+ensue%3B+and+equal+blame+belongs+to+those+who+fail+in+their+duty+through+weakness+of+will%2C+which+is+the+same+as+saying+through+shrinking+from+toil+and+pain.+These+cases+are+perfectly+simple+and+easy+to+distinguish.+In+a+free+hour%2C+when+our+power+of+choice+is+untrammeled+and+when+nothing+prevents+our+being+able+to+do+what+we+like+best%2C+every+pleasure+is+to+be+welcomed+and+every+pain+avoided.+But+in+certain+circumstances+and+owing+to+the+claims+of+duty+or+the+obligations+of+business+it+will+frequently+occur+that+pleasures+have+to+be+repudiated+and+annoyances+accepted.+The+wise+man+therefore+always+holds+in+these+matters+to+this+principle+of+selection%3A+he+rejects+pleasures+to+secure+other+greater+pleasures%2C+or+else+he+endures+pains+to+avoid+worse+pains.%0A%5Cend%7Bdocument%7D)
This example produces the following output:
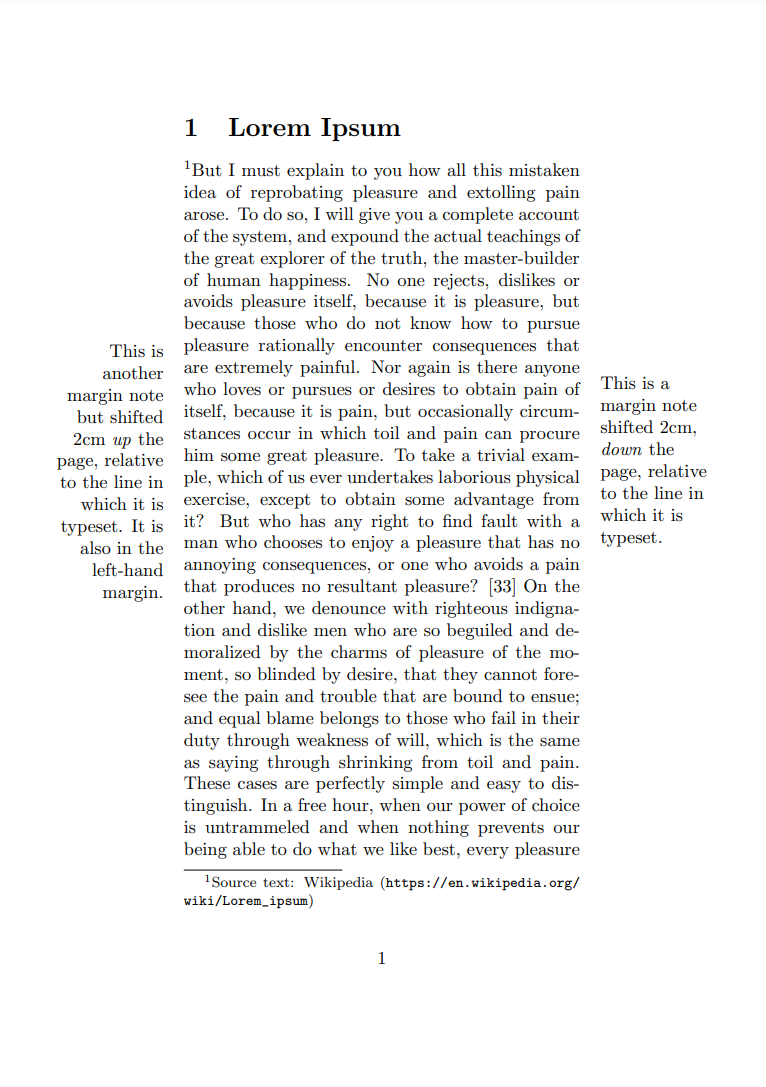
The above example also loads the `geometry` package to create a small page size and the `hyperref` package which provides the `\url` command used to credit the source of the text (in the footnote). After importing the `marginnote` package by writing `\usepackage{marginnote}` you can use the `\marginnote` command as shown by the two instances in the example text:
* `\marginnote{This is a margin note shifted 2cm, \textit{down} the page, relative to the line in which it is typeset.}[2cm]`
* `\marginnote{This is another margin note but shifted 2cm \textit{up} the page, relative to the line in which it is typeset. It is also in the left-hand margin.}[-2cm]`
In these examples we use a second parameter inside brackets `[ ]` which determines vertical alignment relative to the line where the command is used. The first `\margingnote` command uses `[2cm]` to shift the margin note 2cm _down the page_, the second one uses `[-2cm]` to shift the margin note 2cm _up the page_.
The second `\marginnote` command operates after a `\reversemarginpar` was used, causing it to be placed in the left-hand margin of this single-sided document:
\\reversemarginpar\\marginnote{This is another margin note but shifted 2cm \\textit{up} the page, relative to the line in which it is typeset. It is also in the left-hand margin.}\[-2cm\]
Further reading
---------------
For more information see
* [The `marginnote` package documentation](http://www.ctan.org/pkg/marginnote)
* [The `mparhack` package documentation](http://www.ctan.org/pkg/mparhack)
* [Page size and margins](https://www.overleaf.com/learn/latex/Page_size_and_margins "Page size and margins")
* [Footnotes](https://www.overleaf.com/learn/latex/Footnotes "Footnotes")
* [Lengths in LaTeX](https://www.overleaf.com/learn/latex/Lengths_in_LaTeX "Lengths in LaTeX")
* [Single sided and double sided documents](https://www.overleaf.com/learn/latex/Single_sided_and_double_sided_documents "Single sided and double sided documents")
* [Multiple columns](https://www.overleaf.com/learn/latex/Multiple_columns "Multiple columns")
* [Headers and footers](https://www.overleaf.com/learn/latex/Headers_and_footers "Headers and footers")
* [Paragraph formatting](https://www.overleaf.com/learn/latex/Paragraph_formatting "Paragraph formatting")
* [Bold, italics and underlining](https://www.overleaf.com/learn/latex/Bold%2C_italics_and_underlining "Bold, italics and underlining")
* [Font sizes, families, and styles](https://www.overleaf.com/learn/latex/Font_sizes%2C_families%2C_and_styles "Font sizes, families, and styles")
We only use cookies for essential purposes and to improve your experience on our site. You can find out more in our [cookie policy](https://www.overleaf.com/legal#Cookies)
.
Essential cookies onlyAccept all cookies
---
# Aligning equations with amsmath - Overleaf, Online LaTeX Editor
[Skip to content](https://www.overleaf.com/learn/latex/Aligning_equations_with_amsmath#main-content)
Search help library…searchclear
No Search Results
Aligning equations with amsmath
===============================
Contents
--------
* [1 Introduction](https://www.overleaf.com/learn/latex/Aligning_equations_with_amsmath#Introduction)
* [2 Writing a single equation](https://www.overleaf.com/learn/latex/Aligning_equations_with_amsmath#Writing_a_single_equation)
* [3 Displaying long equations](https://www.overleaf.com/learn/latex/Aligning_equations_with_amsmath#Displaying_long_equations)
* [4 Splitting and aligning an equation](https://www.overleaf.com/learn/latex/Aligning_equations_with_amsmath#Splitting_and_aligning_an_equation)
* [5 Aligning several equations](https://www.overleaf.com/learn/latex/Aligning_equations_with_amsmath#Aligning_several_equations)
* [6 Grouping and centering equations](https://www.overleaf.com/learn/latex/Aligning_equations_with_amsmath#Grouping_and_centering_equations)
* [7 Further reading](https://www.overleaf.com/learn/latex/Aligning_equations_with_amsmath#Further_reading)
Introduction
------------
The `amsmath` package provides a handful of options for displaying equations. You can choose the layout that better suits your document, even if the equations are really long, or if you have to include several equations in the same line.
The standard LaTeX tools for equations may lack some flexibility, causing overlapping or even trimming part of the equation when it's too long. We can surpass such difficulties by using the `amsmath` package, which can be added to preamble of your document using `\usepackage{amsmath}`.
Let's start with a basic example:
\\begin{equation} \\label{eq1}
\\begin{split}
A & = \\frac{\\pi r^2}{2} \\\\
& = \\frac{1}{2} \\pi r^2
\\end{split}
\\end{equation}
[Open this `amsmath` fragment in Overleaf](https://www.overleaf.com/docs?engine=&snip_name=amsmath+example&snip=%5Cdocumentclass%7Barticle%7D%0A%5Cusepackage%7Bamsmath%7D%0A%5Ctitle%7BAmsmath+example%7D%0A%5Cauthor%7BOverleaf%7D%0A%5Cdate%7BMay+2021%7D%0A%5Cbegin%7Bdocument%7D%0A%5Cmaketitle%0A%5Csection%7BIntroduction%7D%0A%5Cbegin%7Bequation%7D+%5Clabel%7Beq1%7D%0A%5Cbegin%7Bsplit%7D%0AA+%26+%3D+%5Cfrac%7B%5Cpi+r%5E2%7D%7B2%7D+%5C%5C%0A+%26+%3D+%5Cfrac%7B1%7D%7B2%7D+%5Cpi+r%5E2%0A%5Cend%7Bsplit%7D%0A%5Cend%7Bequation%7D%0A%5Cend%7Bdocument%7D)
The following graphic shows the output produced by the LaTeX code:
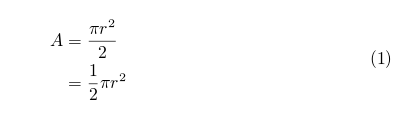
You have to wrap your equation in the `equation` environment if you want it to be numbered, use `equation*` (with an asterisk) otherwise. Inside the `equation` environment, use the `split` environment to split the equations into smaller pieces, these smaller pieces will be aligned accordingly. The double backslash works as a newline character. Use the ampersand character `&`, to set the points where the equations are vertically aligned.
Writing a single equation
-------------------------
To display a single equation, as mentioned in the introduction, you have to use the `equation*` or `equation` environment, depending on whether you want the equation to be numbered or not. Additionally, you might add a label for future reference within the document.
\\begin{equation} \\label{eu\_eqn}
e^{\\pi i} + 1 = 0
\\end{equation}
The beautiful equation \\ref{eu\_eqn} is known as the Euler equation.
[Open this `amsmath` fragment in Overleaf](https://www.overleaf.com/docs?engine=&snip_name=amsmath+example&snip=%5Cdocumentclass%7Barticle%7D%0A%5Cusepackage%7Bamsmath%7D%0A%5Ctitle%7BAmsmath+example%7D%0A%5Cauthor%7BOverleaf%7D%0A%5Cdate%7BMay+2021%7D%0A%5Cbegin%7Bdocument%7D%0A%25%5Cmaketitle%0A%25%5Csection%7BIntroduction%7D%0A%5Cbegin%7Bequation%7D+%5Clabel%7Beu_eqn%7D%0Ae%5E%7B%5Cpi+i%7D+%2B+1+%3D+0%0A%5Cend%7Bequation%7D%0A%0AThe+beautiful+equation+%5Cref%7Beu_eqn%7D+is+known+as+the+Euler+equation.%0A%5Cend%7Bdocument%7D)
The following graphic shows the output produced by the LaTeX code:

You can also [open a more complete example of the `amsmath` package in Overleaf.](https://www.overleaf.com/project/new/template/19716?id=66719097&templateName=Amsmath+example&latexEngine=pdflatex&texImage=texlive-full%3A2020.1&mainFile=)
Displaying long equations
-------------------------
For equations longer than a line use the `multline` environment. Insert a double backslash to set a point for the equation to be broken. The first part will be aligned to the left and the second part will be displayed in the next line and aligned to the right.
Again, the use of an asterisk \* in the environment name determines whether the equation is numbered or not.
\\begin{multline\*}
p(x) = 3x^6 + 14x^5y + 590x^4y^2 + 19x^3y^3\\\\
- 12x^2y^4 - 12xy^5 + 2y^6 - a^3b^3
\\end{multline\*}
[Open this multiline equation `amsmath` fragment in Overleaf](https://www.overleaf.com/docs?engine=&snip_name=amsmath+example&snip=%5Cdocumentclass%7Barticle%7D%0A%5Cusepackage%7Bamsmath%7D%0A%5Ctitle%7BAmsmath+example%7D%0A%5Cauthor%7BOverleaf%7D%0A%5Cdate%7BMay+2021%7D%0A%5Cbegin%7Bdocument%7D%0A%5Cmaketitle%0A%5Csection%7BIntroduction%7D%0A%5Cbegin%7Bmultline%2A%7D%0Ap%28x%29+%3D+3x%5E6+%2B+14x%5E5y+%2B+590x%5E4y%5E2+%2B+19x%5E3y%5E3%5C%5C+%0A-+12x%5E2y%5E4+-+12xy%5E5+%2B+2y%5E6+-+a%5E3b%5E3%0A%5Cend%7Bmultline%2A%7D%0A%5Cend%7Bdocument%7D)
The following graphic shows the output produced by the LaTeX code:
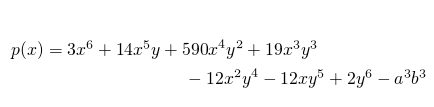
You can also [open a more complete example of the `amsmath` package in Overleaf.](https://www.overleaf.com/project/new/template/19716?id=66719097&templateName=Amsmath+example&latexEngine=pdflatex&texImage=texlive-full%3A2020.1&mainFile=)
Splitting and aligning an equation
----------------------------------
_Split_ is very similar to _multline_. Use the _split_ environment to break an equation and to align it in columns, just as if the parts of the equation were in a table. This environment must be used inside an _equation_ environment. For an example check the introduction of this document.
Aligning several equations
--------------------------
If there are several equations that you need to align vertically, the _align_ environment will do it:
\\begin{align\*}
2x - 5y &\= 8 \\\\
3x + 9y &\= -12
\\end{align\*}
[Open this `amsmath` fragment in Overleaf](https://www.overleaf.com/docs?engine=&snip_name=amsmath+example&snip=%5Cdocumentclass%7Barticle%7D%0A%5Cusepackage%7Bamsmath%7D%0A%5Ctitle%7BAmsmath+example%7D%0A%5Cauthor%7BOverleaf%7D%0A%5Cdate%7BMay+2021%7D%0A%5Cbegin%7Bdocument%7D%0A%5Cmaketitle%0A%5Csection%7BIntroduction%7D%0A%5Cbegin%7Balign%2A%7D+%0A2x+-+5y+%26%3D++8+%5C%5C+%0A3x+%2B+9y+%26%3D++-12%0A%5Cend%7Balign%2A%7D%0A%5Cend%7Bdocument%7D)
The following graphic shows the output produced by the LaTeX code:
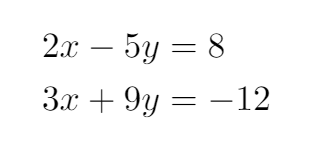
Usually the binary operators (`>`, `<` and `=`) are the ones aligned for a nice-looking document.
As mentioned before, the ampersand character `&` determines where the equations align. Let's check a more complex example:
\\begin{align\*}
x&\=y & w &\=z & a&\=b+c\\\\
2x&\=-y & 3w&\=\\frac{1}{2}z & a&\=b\\\\
-4 + 5x&\=2+y & w+2&\=-1+w & ab&\=cb
\\end{align\*}
[Open this `amsmath` fragment in Overleaf](https://www.overleaf.com/docs?engine=&snip_name=amsmath+example&snip=%5Cdocumentclass%7Barticle%7D%0A%5Cusepackage%7Bamsmath%7D%0A%5Ctitle%7BAmsmath+example%7D%0A%5Cauthor%7BOverleaf%7D%0A%5Cdate%7BMay+2021%7D%0A%5Cbegin%7Bdocument%7D%0A%5Cmaketitle%0A%5Csection%7BIntroduction%7D%0A%5Cbegin%7Balign%2A%7D%0Ax%26%3Dy+++++++++++%26++w+%26%3Dz++++++++++++++%26++a%26%3Db%2Bc%5C%5C%0A2x%26%3D-y+++++++++%26++3w%26%3D%5Cfrac%7B1%7D%7B2%7Dz+++%26++a%26%3Db%5C%5C%0A-4+%2B+5x%26%3D2%2By+++%26++w%2B2%26%3D-1%2Bw++++++++++%26++ab%26%3Dcb%0A%5Cend%7Balign%2A%7D%0A%5Cend%7Bdocument%7D)
The following graphic shows the output produced by the LaTeX code:
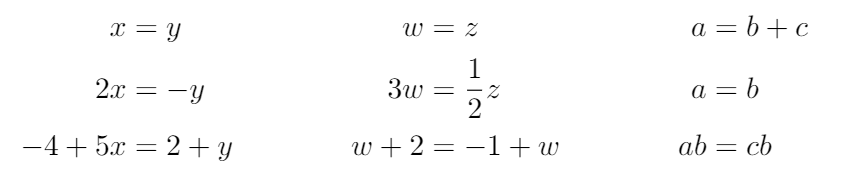
Here we arrange the equations in three columns. LaTeX assumes that each equation consists of two parts separated by an `&` and that each equation is separated from the one before by an `&`.
Again, use \* to toggle the equation numbering. When numbering is allowed, you can label each row individually.
Grouping and centering equations
--------------------------------
If you just need to display a set of consecutive equations, centered and with no alignment whatsoever, use the `gather` environment. The asterisk trick to set/unset the numbering of equations also works here.
\\begin{gather\*}
2x - 5y = 8 \\\\
3x^2 + 9y = 3a + c
\\end{gather\*}
[Open this `amsmath` fragment in Overleaf](https://www.overleaf.com/docs?engine=&snip_name=amsmath+example&snip=%5Cdocumentclass%7Barticle%7D%0A%5Cusepackage%7Bamsmath%7D%0A%5Ctitle%7BAmsmath+example%7D%0A%5Cauthor%7BOverleaf%7D%0A%5Cdate%7BMay+2021%7D%0A%5Cbegin%7Bdocument%7D%0A%5Cmaketitle%0A%5Csection%7BIntroduction%7D%0A%5Cbegin%7Bgather%2A%7D+%0A2x+-+5y+%3D++8+%5C%5C+%0A3x%5E2+%2B+9y+%3D++3a+%2B+c%0A%5Cend%7Bgather%2A%7D%0A%5Cend%7Bdocument%7D)
The following graphic shows the output produced by the LaTeX code:
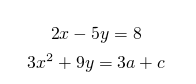
Further reading
---------------
For more information see
* [Mathematical expressions](https://www.overleaf.com/learn/latex/Mathematical_expressions "Mathematical expressions")
* [Brackets and Parentheses](https://www.overleaf.com/learn/latex/Brackets_and_Parentheses "Brackets and Parentheses")
* [Subscripts and superscripts](https://www.overleaf.com/learn/latex/Subscripts_and_superscripts "Subscripts and superscripts")
* [Spacing in math mode](https://www.overleaf.com/learn/latex/Spacing_in_math_mode "Spacing in math mode")
* [Display style in math mode](https://www.overleaf.com/learn/latex/Display_style_in_math_mode "Display style in math mode")
* [Mathematical fonts](https://www.overleaf.com/learn/latex/Mathematical_fonts "Mathematical fonts")
* [List of Greek letters and math symbols](https://www.overleaf.com/learn/latex/List_of_Greek_letters_and_math_symbols "List of Greek letters and math symbols")
* [Operators](https://www.overleaf.com/learn/latex/Operators "Operators")
* [Fractions and Binomials](https://www.overleaf.com/learn/latex/Fractions_and_Binomials "Fractions and Binomials")
* [amsmath package documentation](http://mirrors.ctan.org/macros/latex/required/amsmath/amsmath.pdf)
We only use cookies for essential purposes and to improve your experience on our site. You can find out more in our [cookie policy](https://www.overleaf.com/legal#Cookies)
.
Essential cookies onlyAccept all cookies
---
# Font sizes, families, and styles - Overleaf, Online LaTeX Editor
[Skip to content](https://www.overleaf.com/learn/latex/Font_sizes%2C_families%2C_and_styles#main-content)
Search help library…searchclear
No Search Results
Font sizes, families, and styles
================================
Contents
--------
* [1 Introduction](https://www.overleaf.com/learn/latex/Font_sizes%2C_families%2C_and_styles#Introduction)
* [2 Font sizes](https://www.overleaf.com/learn/latex/Font_sizes%2C_families%2C_and_styles#Font_sizes)
* [3 Font families](https://www.overleaf.com/learn/latex/Font_sizes%2C_families%2C_and_styles#Font_families)
* [4 Font styles](https://www.overleaf.com/learn/latex/Font_sizes%2C_families%2C_and_styles#Font_styles)
* [5 Putting it all together](https://www.overleaf.com/learn/latex/Font_sizes%2C_families%2C_and_styles#Putting_it_all_together)
* [6 Reference guide](https://www.overleaf.com/learn/latex/Font_sizes%2C_families%2C_and_styles#Reference_guide)
* [7 Further reading](https://www.overleaf.com/learn/latex/Font_sizes%2C_families%2C_and_styles#Further_reading)
Introduction
------------
LaTeX normally chooses the appropriate font and font size based on the logical structure of the document (e.g. sections). In some cases, you may want to set fonts and sizes by hand.
The following example shows how to use the smallest available font size in LaTeX (`\tiny`) and the small caps (`\textsc{...}`) font style:
This is a simple example, {\\tiny this will show different font sizes} and also \\textsc{different font styles}.
[Open this example in Overleaf](https://www.overleaf.com/docs?engine=pdflatex&snip_name=Font+sizes+and+styles&snip=%5Cdocumentclass%7Barticle%7D%0A%5Cbegin%7Bdocument%7D%0AThis+is+a+simple+example%2C+%7B%5Ctiny+this+will+show+different+font+sizes%7D+and+also+%5Ctextsc%7Bdifferent+font+styles%7D.%0A%5Cend%7Bdocument%7D)
The following image shows the output produced by the example above: 
Font sizes
----------
Font sizes are identified by special names, the actual size is not absolute but relative to the font size declared in the `\documentclass` statement (see [Creating a document in LaTeX](https://www.overleaf.com/learn/latex/Creating_a_document_in_LaTeX "Creating a document in LaTeX")
).
In the following example, `{\huge huge font size}` declares that the text inside the braces must be formatted in a _huge_ font size. For a complete list of available font sizes see the [reference guide](https://www.overleaf.com/learn/latex/Font_sizes%2C_families%2C_and_styles#Reference_guide)
.
In this example the {\\huge huge font size} is set and
the {\\footnotesize Foot note size also}. There's a fairly
large set of font sizes.
[Open this example in Overleaf](https://www.overleaf.com/docs?engine=pdflatex&snip_name=Huge+font+size&snip=%5Cdocumentclass%7Barticle%7D%0A%5Cbegin%7Bdocument%7D%0AIn+this+example+the+%7B%5Chuge+huge+font+size%7D+is+set+and+%0Athe+%7B%5Cfootnotesize+Foot+note+size+also%7D.+There%27s+a+fairly+%0Alarge+set+of+font+sizes.%0A%5Cend%7Bdocument%7D)
The following image shows the output produced by the example above: 
Font families
-------------
By default, in standard LaTeX classes the default style for text is usually a Roman (upright) serif font. To use other styles (**families**) such as sans serif, typewriter (monospace) etc. you need to use some specific LaTeX commands, as shown in the example below:
In this example, a command and a switch are used.
\\texttt{A command is used to change the style
of a sentence}.
\\sffamily
A switch changes the style from this point to
the end of the document unless another switch is used.
[Open this example in Overleaf](https://www.overleaf.com/docs?engine=pdflatex&snip_name=Choosing+type+styles&snip=%5Cdocumentclass%7Barticle%7D%0A%5Cbegin%7Bdocument%7D%0AIn+this+example%2C+a+command+and+a+switch+are+used.+%0A%5Ctexttt%7BA+command+is+used+to+change+the+style+%0Aof+a+sentence%7D.%0A%0A%5Csffamily%0AA+switch+changes+the+style+from+this+point+to+%0Athe+end+of+the+document+unless+another+switch+is+used.%0A%5Cend%7Bdocument%7D)
The following image shows the output produced by the example above:

You can set up the use of sans font as a default in a LaTeX document by using the command:
\\renewcommand{\\familydefault}{\\sfdefault}
Similarly, for using roman font as a default:
\\renewcommand{\\familydefault}{\\rmdefault}
Font styles
-----------
The most common font styles in LaTeX are [bold, italics and underlined](https://www.overleaf.com/learn/latex/Bold%2C_italics_and_underlining "Bold, italics and underlining")
, but there are a few more.
In the following example the `\textsl` command sets the text in a _slanted_ style which makes the text look a bit like _italics_, but not quite. See the [reference guide](https://www.overleaf.com/learn/latex/Font_sizes%2C_families%2C_and_styles#Reference_guide)
for a complete list of font styles.
Part of this text is written \\textsl{in a different
font style} to highlight it.
[Open this example in Overleaf](https://www.overleaf.com/docs?engine=pdflatex&snip_name=Using+slanted+text&snip=%5Cdocumentclass%7Barticle%7D%0A%5Cbegin%7Bdocument%7D%0APart+of+this+text+is+written+%5Ctextsl%7Bin+a+different+%0Afont+style%7D+to+highlight+it.%0A%5Cend%7Bdocument%7D)
The following image shows the output produced by the example above:

If you want to go back to "normal" font style (default for the LaTeX class you are using), this can be done by using the `\textnormal{...}` command or the `\normalfont` switch command.
Putting it all together
-----------------------
The following example combines together the various LaTeX code fragments used in this article.
\\documentclass{article}
\\begin{document}
%Example of different font sizes and types
This is a simple example, {\\tiny this will show different font sizes} and also \\textsc{different font styles}.
\\vspace{1cm}
%Example of different font sizes and types
In this example the {\\huge huge font size} is set and the {\\footnotesize Foot note size also}. There's a fairly large set of font sizes.
\\vspace{1cm}
%Example of different font sizes and types
In this example, a command and a switch are used. \\texttt{A command is used to change the style of a sentence}.
\\sffamily
A switch changes the style from this point to the end of the document unless another switch is used.
\\rmfamily
\\vspace{1cm}
%Example of different font sizes and types
Part of this text is written \\textsl{in different font style} to highlight it.
\\end{document}
[Open this example in Overleaf](https://www.overleaf.com/docs?engine=pdflatex&snip_name=Example+using+font+styles%2C+sizes+and+famlies&snip=%5Cdocumentclass%7Barticle%7D%0A%5Cbegin%7Bdocument%7D%0A%25Example+of+different+font+sizes+and+types%0AThis+is+a+simple+example%2C+%7B%5Ctiny+this+will+show+different+font+sizes%7D+and+also+%5Ctextsc%7Bdifferent+font+styles%7D.+%0A%0A%5Cvspace%7B1cm%7D%0A%0A%25Example+of+different+font+sizes+and+types%0AIn+this+example+the+%7B%5Chuge+huge+font+size%7D+is+set+and+the+%7B%5Cfootnotesize+Foot+note+size+also%7D.+There%27s+a+fairly+large+set+of+font+sizes.%0A%0A%5Cvspace%7B1cm%7D%0A%0A%25Example+of+different+font+sizes+and+types%0AIn+this+example%2C+a+command+and+a+switch+are+used.+%5Ctexttt%7BA+command+is+used+to+change+the+style+of+a+sentence%7D.%0A%0A%5Csffamily%0AA+switch+changes+the+style+from+this+point+to+the+end+of+the+document+unless+another+switch+is+used.%0A%5Crmfamily%0A%0A%5Cvspace%7B1cm%7D%0A%0A%25Example+of+different+font+sizes+and+types%0APart+of+this+text+is+written+%5Ctextsl%7Bin+different+font+style%7D+to+highlight+it.%0A%5Cend%7Bdocument%7D)
Reference guide
---------------
**Font sizes**
| Command | Output |
| --- | --- |
| \\tiny |  |
| \\scriptsize |  |
| \\footnotesize |  |
| \\small |  |
| \\normalsize |  |
| \\large |  |
| \\Large |  |
| \\LARGE |  |
| \\huge |  |
| \\Huge |  |
**Default font families**
| typeface = family | command | switch command | output |
| --- | --- | --- | --- |
| serif (roman) | `\textrm{Sample Text 0123}` | `\rmfamily` |  |
| sans serif | `\textsf{Sample Text 0123}` | `\sffamily` |  |
| typewriter (monospace) | `\texttt{Sample Text 0123}` | `\ttfamily` |  |
**Font styles**
| style | command | switch command | output |
| --- | --- | --- | --- |
| medium | `\textmd{Sample Text 0123}` | `\mdseries` |  |
| bold | `\textbf{Sample Text 0123}` | `\bfseries` |  |
| upright | `\textup{Sample Text 0123}` | `\upshape` |  |
| italic | `\textit{Sample Text 0123}` | `\itshape` |  |
| slanted | `\textsl{Sample Text 0123}` | `\slshape` |  |
| small caps | `\textsc{Sample Text 0123}` | `\scshape` |  |
Further reading
---------------
For more information see:
* [Font typefaces](https://www.overleaf.com/learn/latex/Font_typefaces "Font typefaces")
* [Supporting modern fonts with XeLaTeX](https://www.overleaf.com/learn/latex/XeLaTeX "XeLaTeX")
* [Bold, italics and underlining](https://www.overleaf.com/learn/latex/Bold%2C_italics_and_underlining "Bold, italics and underlining")
* [Text alignment](https://www.overleaf.com/learn/latex/Text_alignment "Text alignment")
* [Multiple columns](https://www.overleaf.com/learn/latex/Multiple_columns "Multiple columns")
* [Paragraph formatting](https://www.overleaf.com/learn/latex/Paragraph_formatting "Paragraph formatting")
* [Line breaks and blank spaces](https://www.overleaf.com/learn/latex/Line_breaks_and_blank_spaces "Line breaks and blank spaces")
* [International language support](https://www.overleaf.com/learn/latex/International_language_support "International language support")
* [The not so short introduction to LaTeX2ε](http://www.ctan.org/tex-archive/info/lshort/)
We only use cookies for essential purposes and to improve your experience on our site. You can find out more in our [cookie policy](https://www.overleaf.com/legal#Cookies)
.
Essential cookies onlyAccept all cookies
---
# Indices - Overleaf, Online LaTeX Editor
[Skip to content](https://www.overleaf.com/learn/latex/Indices#main-content)
Search help library…searchclear
No Search Results
Indices
=======
In some big documents, for example books, it is customary to make an alphabetic list containing the main terms. With LaTeX and the support program **imakeidx**, an index can be generated quite easily.
Contents
--------
* [1 Introduction](https://www.overleaf.com/learn/latex/Indices#Introduction)
* [2 Indices on Overleaf](https://www.overleaf.com/learn/latex/Indices#Indices_on_Overleaf)
* [3 Entries and sub-entries](https://www.overleaf.com/learn/latex/Indices#Entries_and_sub-entries)
* [4 Formatting the Index](https://www.overleaf.com/learn/latex/Indices#Formatting_the_Index)
* [4.1 Using style files](https://www.overleaf.com/learn/latex/Indices#Using_style_files)
* [5 Including the index in the table of contents](https://www.overleaf.com/learn/latex/Indices#Including_the_index_in_the_table_of_contents)
* [6 Reference guide](https://www.overleaf.com/learn/latex/Indices#Reference_guide)
* [6.1 Parameters for the \\makeindex command](https://www.overleaf.com/learn/latex/Indices#Parameters_for_the_\makeindex_command)
* [6.2 Keys to create style files](https://www.overleaf.com/learn/latex/Indices#Keys_to_create_style_files)
* [7 Further reading](https://www.overleaf.com/learn/latex/Indices#Further_reading)
Introduction
------------
Let's see a simple working example.
\\documentclass{article}
\\usepackage\[T1\]{fontenc}
\\usepackage{imakeidx}
\\makeindex
\\begin{document}
\\section{Introduction}
In this example, several keywords\\index{keywords} will be used
which are important and deserve to appear in the Index\\index{Index}.
Terms like generate\\index{generate} and some\\index{others} will
also show up.
\\printindex
\\end{document}
[Open this example in Overleaf](https://www.overleaf.com/docs?engine=pdflatex&snip_name=Index+example&snip=%5Cdocumentclass%7Barticle%7D%0A%5Cusepackage%5BT1%5D%7Bfontenc%7D%0A%5Cusepackage%7Bimakeidx%7D%0A%5Cmakeindex%0A%0A%5Cbegin%7Bdocument%7D%0A%5Csection%7BIntroduction%7D%0AIn+this+example%2C+several+keywords%5Cindex%7Bkeywords%7D+will+be+used+%0Awhich+are+important+and+deserve+to+appear+in+the+Index%5Cindex%7BIndex%7D.%0A%0ATerms+like+generate%5Cindex%7Bgenerate%7D+and+some%5Cindex%7Bothers%7D+will+%0Aalso+show+up.+%0A%0A%5Cprintindex%0A%5Cend%7Bdocument%7D)
The following image shows the output produced by the example above:
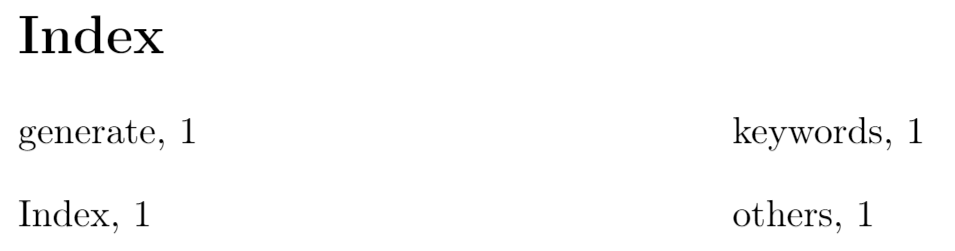
First, the package is included in the preamble by the line
\\usepackage{imakeidx}
Then the command `\makeindex` is mandatory for the index to work and can take some parameters to customize its appearance, in the next sections this will be clear.
To add an entry to the index the command `\index{}` is used, where the word to be added is inserted as the parameter. Be careful, this won't print the word in the current position but only in the index.
Finally, the command `\printindex` will actually render the index. If you are using a special localization by means of the `babel` package, the title will be translated accordingly.
Note: instead of `imakeidx`, the package `makeidx` may be imported but offers less customizations possibilities.
Indices on Overleaf
-------------------
When adding an index to a project on Overleaf, it is **important to note** that for the index to compile properly, the main `.tex` file needs to be in the root directory of the project, _outside of any folders_. This ensures that the auxiliary files needed to generate the index are cached in a way that they are accessible to the compiler.
Entries and sub-entries
-----------------------
As mentioned in the previous section, the command `\index` will add the word passed to it to the index, but this is not the only way it can be used.
\\documentclass{article}
\\usepackage\[T1\]{fontenc}
\\usepackage{imakeidx}
\\makeindex
\\begin{document}
\\section{Introduction}
In this example, several keywords\\index{keywords} will be used
which are important and deserve to appear in the Index\\index{Index}.
Terms like generate\\index{generate} and some\\index{others} will also
show up. Terms in the index can also be nested \\index{Index!nested}
\\clearpage
\\section{Second section}
This second section\\index{section} may include some special word,
and expand the ones already used\\index{keywords!used}.
\\printindex
\\end{document}
[Open this example in Overleaf](https://www.overleaf.com/docs?engine=pdflatex&snip_name=Index+example+2&snip=%5Cdocumentclass%7Barticle%7D%0A%5Cusepackage%5BT1%5D%7Bfontenc%7D%0A%5Cusepackage%7Bimakeidx%7D%0A%5Cmakeindex%0A%0A%5Cbegin%7Bdocument%7D%0A%5Csection%7BIntroduction%7D%0AIn+this+example%2C+several+keywords%5Cindex%7Bkeywords%7D+will+be+used+%0Awhich+are+important+and+deserve+to+appear+in+the+Index%5Cindex%7BIndex%7D.%0A%0ATerms+like+generate%5Cindex%7Bgenerate%7D+and+some%5Cindex%7Bothers%7D+will+also+%0Ashow+up.+Terms+in+the+index+can+also+be+nested+%5Cindex%7BIndex%21nested%7D%0A%0A%5Cclearpage%0A%0A%5Csection%7BSecond+section%7D%0AThis+second+section%5Cindex%7Bsection%7D+may+include+some+special+word%2C+%0Aand+expand+the+ones+already+used%5Cindex%7Bkeywords%21used%7D.%0A%0A%5Cprintindex%0A%5Cend%7Bdocument%7D)
The following image shows the output produced by the example above:
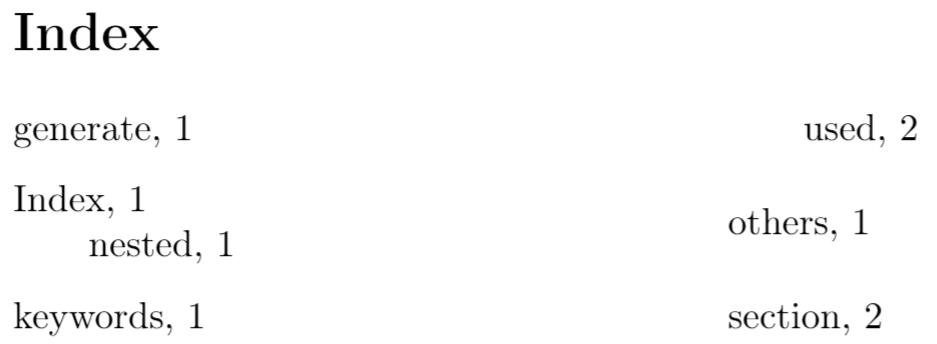
It is a common practice to extend terms in the index to include special adjectives. For instance, the word _Field_ may have a special meaning if preceded by the adjective _finite_ or followed by _of characteristic 0_, and it may be a bit cumbersome to add different types of _Field_as separate entries in the index. For such cases, you can add an exclamation mark "!" that will add the terms after this mark as sub entries of the primary word _Field_.
In the example, the word "Index" has the word "nested" as sub-entry.
Formatting the Index
--------------------
Simple formatting for the index, such as changing the index title, adding several columns and changing the column width can be easily done passing optional values to `\makeindex`:
\\documentclass{article}
\\usepackage\[T1\]{fontenc}
\\usepackage{imakeidx}
\\makeindex\[columns=3, title=Alphabetical Index\]
\\begin{document}
\\section{Introduction}
In this example, several keywords\\index{keywords} will be used which
are important and deserve to appear in the Index\\index{Index}.
Terms like generate\\index{generate} and some\\index{others} will also
show up. Terms in the index can also be nested \\index{Index!nested}
\\clearpage
\\section{Second section}
This second section\\index{section} may include some special word,
and expand the ones already used\\index{keywords!used}.
\\printindex
\\end{document}
[Open this example in Overleaf](https://www.overleaf.com/docs?engine=pdflatex&snip_name=Index+example+3&snip=%5Cdocumentclass%7Barticle%7D%0A%5Cusepackage%5BT1%5D%7Bfontenc%7D%0A%5Cusepackage%7Bimakeidx%7D%0A%5Cmakeindex%5Bcolumns%3D3%2C+title%3DAlphabetical+Index%5D%0A%0A%5Cbegin%7Bdocument%7D%0A%5Csection%7BIntroduction%7D%0AIn+this+example%2C+several+keywords%5Cindex%7Bkeywords%7D+will+be+used+which+%0Aare+important+and+deserve+to+appear+in+the+Index%5Cindex%7BIndex%7D.%0A%0ATerms+like+generate%5Cindex%7Bgenerate%7D+and+some%5Cindex%7Bothers%7D+will+also+%0Ashow+up.+Terms+in+the+index+can+also+be+nested+%5Cindex%7BIndex%21nested%7D%0A%0A%5Cclearpage%0A%0A%5Csection%7BSecond+section%7D%0AThis+second+section%5Cindex%7Bsection%7D+may+include+some+special+word%2C+%0Aand+expand+the+ones+already+used%5Cindex%7Bkeywords%21used%7D.%0A%0A%5Cprintindex%0A%5Cend%7Bdocument%7D)
The following image shows the output produced by the example above:
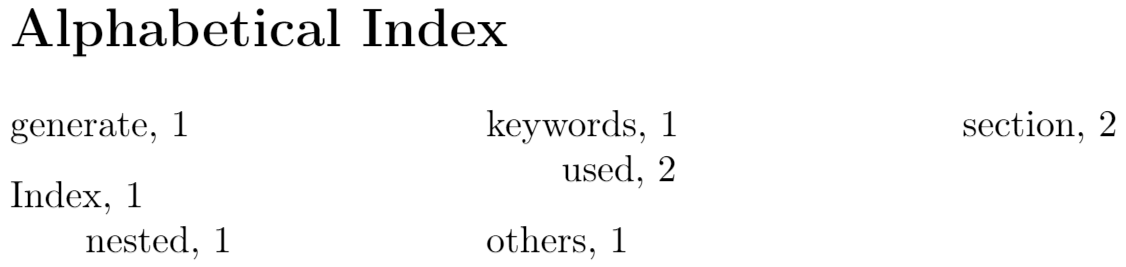
In this example, the index is presented in a three-column format with the parameter `columns=3`, and the title is changed to "Alphabetical Index" by `title=Alphabetical Index`; these parameters are passed to `\makeindex` in the preamble. See the [reference guide](https://www.overleaf.com/learn/latex/Indices#Reference_guide)
for a list of available parameters and their description.
### Using style files
For further customization of the index one can use a style file. Style files inform `makeindex` about the intended format of the final output. Style files contain a list of `` pairs. For instance, if one needs to group the terms in the index by their initial letter and align the page numbers to the right, the next style file will do the job:
headings\_flag 1
heading\_prefix "\\n\\\\centering\\\\large\\\\sffamily\\\\bfseries%
\\\\noindent\\\\textbf{"heading\_suffix "}\\\\par\\\\nopagebreak\\n"
item\_0 "\\n \\\\item \\\\small "
delim\_0 " \\\\hfill "
delim\_1 " \\\\hfill "
delim\_2 " \\\\hfill "
The keys change different elements in the index output:
* `headings_flag 1` enables grouping inserting the group header (symbols, numbers or letters) before a new group.
* `heading_prefix` formats the header to insert before a new letter begins. It uses regular formatting commands for the font family, font height and alignment, but the backslashes must be escaped using a double backslash instead of one.
* `item_0` is what will be inserted between two primary items.
* `delim_*` is the delimiter to be inserted between the key and the first page number.
For a full list of keys and values to use in a .ist file see [The table included in the reference guide](https://www.overleaf.com/learn/latex/Indices#Keys_to_create_styles_files)
.
Assume the previous file is saved as "example\_style.ist". To use it in the document we add the parameter `options= -s example_style.ist` to the `\makeindex` command.
\\documentclass{article}
\\usepackage\[utf8\]{inputenc}
\\usepackage\[T1\]{fontenc}
\\usepackage{imakeidx}
\\makeindex\[columns=3, title=Alphabetical Index, \
options= -s example\_style.ist\]
\\begin{document}
\\tableofcontents
\\section{Introduction}
In this example, several keywords\\index{keywords} will be used which are important and deserve to appear in the Index\\index{Index}.
Terms like generate\\index{generate}, a great\\index{great} list and som other\\index{others} terms that might be important\\index{important}
will also show up. Terms in the index can also be nested \\index{Index!nested}
\\clearpage
\\section{Second section}
This second section\\index{section} may include some special word, and expand the ones already used\\index{keywords!used}.
\\printindex
\\end{document}
[Open an example using an index style file on Overleaf](https://www.overleaf.com/project/new/template/20614?id=70756423&templateName=Using+an+index+style+file&latexEngine=pdflatex&texImage=texlive-full%3A2020.1&mainFile=)
The following image shows the output produced by the example above:
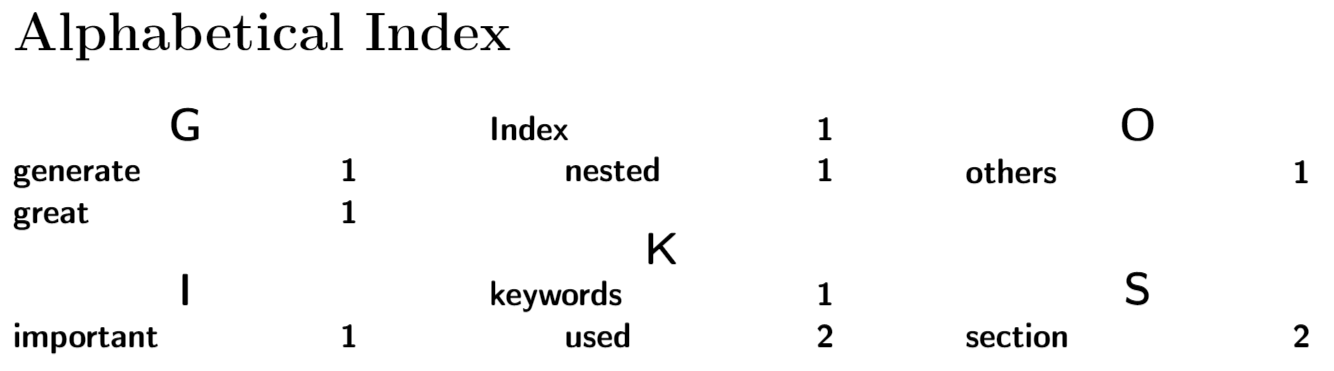
Including the index in the table of contents
--------------------------------------------
By default, the index is not included in the table of contents, this can be easily adjusted.
\\documentclass{article}
\\usepackage\[T1\]{fontenc}
\\usepackage{imakeidx}
\\makeindex\[columns=3, title=Alphabetical Index, intoc\]
\\begin{document}
\\tableofcontents
\\section{Introduction}
In this example, several keywords\\index{keywords} will be
used which are important and deserve to appear in the
Index\\index{Index}.
Terms like generate\\index{generate} and some\\index{others}
will also show up. Terms in the index can also be
nested \\index{Index!nested}
\\clearpage
\\section{Second section}
This second section\\index{section} may include some special
word, and expand the ones already used\\index{keywords!used}.
\\printindex
\\end{document}
[Open this example in Overleaf](https://www.overleaf.com/docs?engine=pdflatex&snip_name=Index+example+3&snip=%5Cdocumentclass%7Barticle%7D%0A%5Cusepackage%5BT1%5D%7Bfontenc%7D%0A%5Cusepackage%7Bimakeidx%7D%0A%5Cmakeindex%5Bcolumns%3D3%2C+title%3DAlphabetical+Index%2C+intoc%5D%0A%0A%5Cbegin%7Bdocument%7D%0A%5Ctableofcontents%0A%0A%5Csection%7BIntroduction%7D%0AIn+this+example%2C+several+keywords%5Cindex%7Bkeywords%7D+will+be+%0Aused+which+are+important+and+deserve+to+appear+in+the+%0AIndex%5Cindex%7BIndex%7D.%0A%0ATerms+like+generate%5Cindex%7Bgenerate%7D+and+some%5Cindex%7Bothers%7D+%0Awill+also+show+up.+Terms+in+the+index+can+also+be+%0Anested+%5Cindex%7BIndex%21nested%7D%0A%0A%5Cclearpage%0A%0A%5Csection%7BSecond+section%7D%0AThis+second+section%5Cindex%7Bsection%7D+may+include+some+special+%0Aword%2C+and+expand+the+ones+already+used%5Cindex%7Bkeywords%21used%7D.%0A%0A%5Cprintindex%0A%5Cend%7Bdocument%7D)
The following image shows the output produced by the example above:
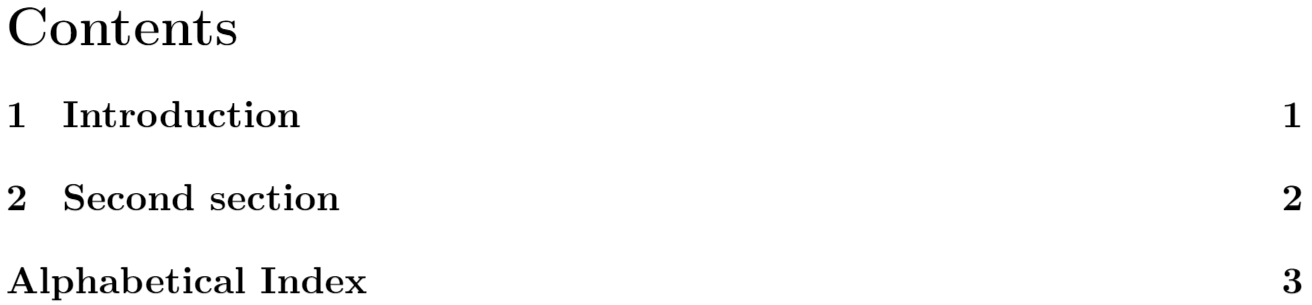
By adding the parameter `intoc` to the command `\makeindex` the inclusion of the index title into the table of contents is enabled.
Reference guide
---------------
### Parameters for the `\makeindex` command
`title`
Title to be typeset at the beginning of the specific index. An example is presented in [formatting the index](https://www.overleaf.com/learn/latex/Indices#Formatting_the_index)
.
`intoc`
If this option is passed, the index title is put in the [table of contents](https://www.overleaf.com/learn/latex/Table_of_contents "Table of contents")
.
`columns`
Uses the syntax _key=value_, the value must be an integer representing the number of columns. The default value is 2.
`columnsep`
Specifies units that represent the separation between the columns. The syntax must be _key=value_, for example _columnsep=2em_.
`columnseprule`
If option is passed, a vertical ruler will be rendered between the columns.
### Keys to create style files
The next table shows the keys, default values and descriptions to create .ist style files.
| key | Description |
| --- | --- |
| `actual ` | '@'
Symbol indicating that the next entry is to appear in the output file. |
| `arg_close ` | '}'
Closing delimiter for the index entry argument. |
| `arg_open ` | '{'
Opening delimiter for the index entry argument. |
| `encap ` | '
Symbol indicating that the rest of the argument list is to be used as the encapsulating command for the page number. |
| `escape ` | '\\\\'
Symbol which escapes the following letter, unless its preceding symbol is itself an escape symbol. Note: quote is used to escape the letter which immediately follows it, but if it is preceded by an escape symbol, it is treated as an ordinary character. These two symbols must be distinct. |
| `keyword ` | "\\\\indexentry"
Command which tells makeindex that its argument is an index entry. |
| `level ` | '!'
Delimiter denoting a new level of subitem. |
| `quote ` | '"'
Note: quote is used to escape the letter which immediately follows it, but if it is preceded by an escape symbol, it is treated as an ordinary character. These two symbols must be distinct. |
| `range_close ` | ')'
Closing delimiter indicating the end of an explicit page range. |
| `range_open ` | '('
Opening delimiter indicating the beginning of an explicit page range. |
| `preamble ` | "\\\\begin{theindex}\\n"
Preamble of the output file. |
| `postamble ` | "\\n\\n\\\\end{theindex}\\n"
Postamble of the output file. |
| `setpage_prefix ` | "\\n \\\\setcounter{page}{"
Prefix of the command which sets the starting page number. |
| `setpage_suffix ` | "}\\n"
Suffix of the command which sets the starting page number. |
| `group_skip ` | "\\n\\n \\\\indexspace\\n"
Vertical space to be inserted before a new group begins. |
| `headings_flag ` | 0
Flag indicating treatment of new group headers, which are inserted before a new group (symbols, numbers, and the 26 letters): positive values cause an uppercase letter to be inserted between prefix and suffix, and negative values cause a lowercase letter to be inserted (default is 0, which produces no header). |
| `heading_prefix ` | ""
Header prefix to be inserted before a new letter begins. |
| `symhead_positive ` | "Symbols"
Heading for symbols to be inserted if headings\_flag is positive. |
| `symhead_negative ` | "symbols"
Heading for symbols to be inserted if headings\_flag is negative. |
| `numhead_positive ` | "Numbers"
Heading for numbers to be inserted if headings\_flag is positive. |
| `numhead_negative ` | "numbers"
Heading for numbers to be inserted if headings\_flag is negative. |
| `item_0 ` | "\\n \\\\item "
Command to be inserted between two primary (level 0) items. |
| `item_1 ` | "\\n \\\\subitem "
Command to be inserted between two secondary (level 1) items. |
| `item_2 ` | "\\n \\\\subsubitem "
Command to be inserted between two level 2 items. |
| `item_01 ` | "\\n \\\\subitem "
Command to be inserted between a level 0 item and a level 1 item. |
| `item_x1 ` | "\\n \\\\subitem "
Command to be inserted between a level 0 item and a level 1 item, where the level 0 item does not have associated page numbers. |
| `item_12 ` | "\\n \\\\subsubitem "
Command to be inserted between a level 1 item and a level 2 item. |
| `item_x2 ` | "\\n \\\\subsubitem "
Command to be inserted between a level 1 item and a level 2 item, where the level 1 item does not have associated page numbers. |
| `delim_0 ` | ", "
Delimiter to be inserted between a level 0 key and its first page number (default: comma followed by a blank). |
| `delim_1 ` | ", "
Delimiter to be inserted between a level 1 key and its first page number (default: comma followed by a blank). |
| `delim_2 ` | ", "
Delimiter to be inserted between a level 2 key and its first page number (default: comma followed by a blank). |
| `delim_n ` | ", "
Delimiter to be inserted between two page numbers for the same key in any level (default: comma followed by a blank). |
| `delim_r ` | "--"
Delimiter to be inserted between the starting and ending page numbers of a range. |
| `delim_t ` | ""
Delimiter to be inserted at the end of a page list. This delimiter does not effect entries which have no associated page list. |
| `encap_prefix ` | "\\\\"
First part of prefix for the command which encapsulates the page number. |
| `encap_infix ` | "{"
Second part of prefix for the command which encapsulates the page number. |
| `encap_suffix ` | "}".
Suffix for the command which encapsulates the page number. |
| `line_max ` | 72
Maximum length of a line in the output, beyond which a line wraps. |
| `indent_space ` | "\\t\\t"
Space to be inserted in front of a wrapped line (default: two tabs). |
| `indent_length ` | 16
Length of indent\_space (default: 16, equivalent to 2 tabs). |
Further reading
---------------
For more information see:
* [Glossaries](https://www.overleaf.com/learn/latex/Glossaries "Glossaries")
* [Lists of tables and figures](https://www.overleaf.com/learn/latex/Lists_of_tables_and_figures "Lists of tables and figures")
* [Table of contents](https://www.overleaf.com/learn/latex/Table_of_contents "Table of contents")
* [Sections and chapters](https://www.overleaf.com/learn/latex/Sections_and_chapters "Sections and chapters")
* [Hyperlinks](https://www.overleaf.com/learn/latex/Hyperlinks "Hyperlinks")
* [International language support](https://www.overleaf.com/learn/latex/International_language_support "International language support")
* [Cross referencing sections and equations](https://www.overleaf.com/learn/latex/Cross_referencing_sections_and_equations "Cross referencing sections and equations")
* [Management in a large project](https://www.overleaf.com/learn/latex/Management_in_a_large_project "Management in a large project")
* [Multi-file LaTeX projects](https://www.overleaf.com/learn/latex/Multi-file_LaTeX_projects "Multi-file LaTeX projects")
* [imakeidx package documentation](http://mirror.math.ku.edu/tex-archive/macros/latex/contrib/imakeidx/imakeidx.pdf)
We only use cookies for essential purposes and to improve your experience on our site. You can find out more in our [cookie policy](https://www.overleaf.com/legal#Cookies)
.
Essential cookies onlyAccept all cookies
---
# Nomenclatures - Overleaf, Online LaTeX Editor
[Skip to content](https://www.overleaf.com/learn/latex/Nomenclatures#main-content)
Search help library…searchclear
No Search Results
Nomenclatures
=============
Contents
--------
* [1 Introduction](https://www.overleaf.com/learn/latex/Nomenclatures#Introduction)
* [2 Basic Syntax](https://www.overleaf.com/learn/latex/Nomenclatures#Basic_Syntax)
* [3 Grouping](https://www.overleaf.com/learn/latex/Nomenclatures#Grouping)
* [4 Adding units for physical constants](https://www.overleaf.com/learn/latex/Nomenclatures#Adding_units_for_physical_constants)
* [5 Sorting the Entries](https://www.overleaf.com/learn/latex/Nomenclatures#Sorting_the_Entries)
* [6 Further Reading](https://www.overleaf.com/learn/latex/Nomenclatures#Further_Reading)
Introduction
------------
A list of abbreviations and symbols is common in many scientific documents. These types of lists can be created with LaTeX by means on the `nomencl` package. This article explains how to create nomenclatures, customizing the ordering and subgrouping of the symbols.
Nomenclature entries work pretty much like index entries:
\\documentclass{article}
\\usepackage{nomencl}
\\makenomenclature
\\begin{document}
Here is an example:
\\nomenclature{\\(c\\)}{Speed of light in a vacuum}
\\nomenclature{\\(h\\)}{Planck constant}
\\printnomenclature
\\end{document}
[Open this `nomencl` example in Overleaf](https://www.overleaf.com/docs?engine=pdflatex&snip_name=nomencl+package+example&snip=%5Cdocumentclass%7Barticle%7D%0A%5Cusepackage%7Bnomencl%7D%0A%5Cmakenomenclature%0A%0A%5Cbegin%7Bdocument%7D%0AHere+is+an+example%3A%0A%5Cnomenclature%7B%5C%28c%5C%29%7D%7BSpeed+of+light+in+a+vacuum%7D%0A%5Cnomenclature%7B%5C%28h%5C%29%7D%7BPlanck+constant%7D%0A%0A%5Cprintnomenclature%0A%5Cend%7Bdocument%7D)
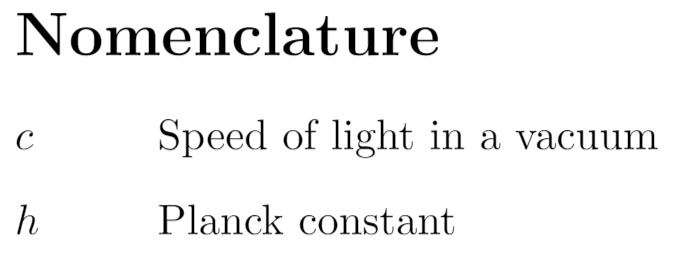
As usual the package is imported in the preamble by `\usepackage{nomencl}`. The three basic commands to produce the nomenclatures are:
* `\makenomenclature`. Usually put right after importing the package.
* `\nomenclature`. Used to define the nomenclature entries themselves. Takes two arguments, the symbol and the corresponding description.
* `\printnomenclatures`. This command will print the nomenclatures list.
Basic Syntax
------------
Additional options can be used when importing the `nomencl` package. The next example shows how to add the nomenclature to the table of contents and how to change the default language:
\\documentclass{article}
\\usepackage\[spanish\]{babel}
\\usepackage\[intoc, spanish\]{nomencl}
\\makenomenclature
\\begin{document}
\\tableofcontents
\\section{Primera Sección}
Lorem ipsum dolor sit amet, consectetuer adipiscing elit. Etiam lobortisfacilisis sem. Nullam nec mi et neque pharetra sollicitudin. Praesent imperdie...
\\nomenclature{\\(c\\)}{Speed of light in a vacuum}
\\nomenclature{\\(h\\)}{Planck constant}
\\printnomenclature
\\end{document}
[Open this `nomencl` example in Overleaf](https://www.overleaf.com/docs?engine=pdflatex&snip_name=nomencl+package+example&snip=%5Cdocumentclass%7Barticle%7D%0A%5Cusepackage%5Bspanish%5D%7Bbabel%7D%0A%5Cusepackage%5Bintoc%2C+spanish%5D%7Bnomencl%7D%0A%5Cmakenomenclature%0A%0A%5Cbegin%7Bdocument%7D%0A%5Ctableofcontents%0A%0A%5Csection%7BPrimera+Secci%C3%B3n%7D%0A%0ALorem+ipsum+dolor+sit+amet%2C+consectetuer+adipiscing+elit.+Etiam+lobortisfacilisis+sem.+Nullam+nec+mi+et+neque+pharetra+sollicitudin.+Praesent+imperdie...%0A%0A%5Cnomenclature%7B%5C%28c%5C%29%7D%7BSpeed+of+light+in+a+vacuum%7D%0A%5Cnomenclature%7B%5C%28h%5C%29%7D%7BPlanck+constant%7D%0A%0A%5Cprintnomenclature%0A%5Cend%7Bdocument%7D)
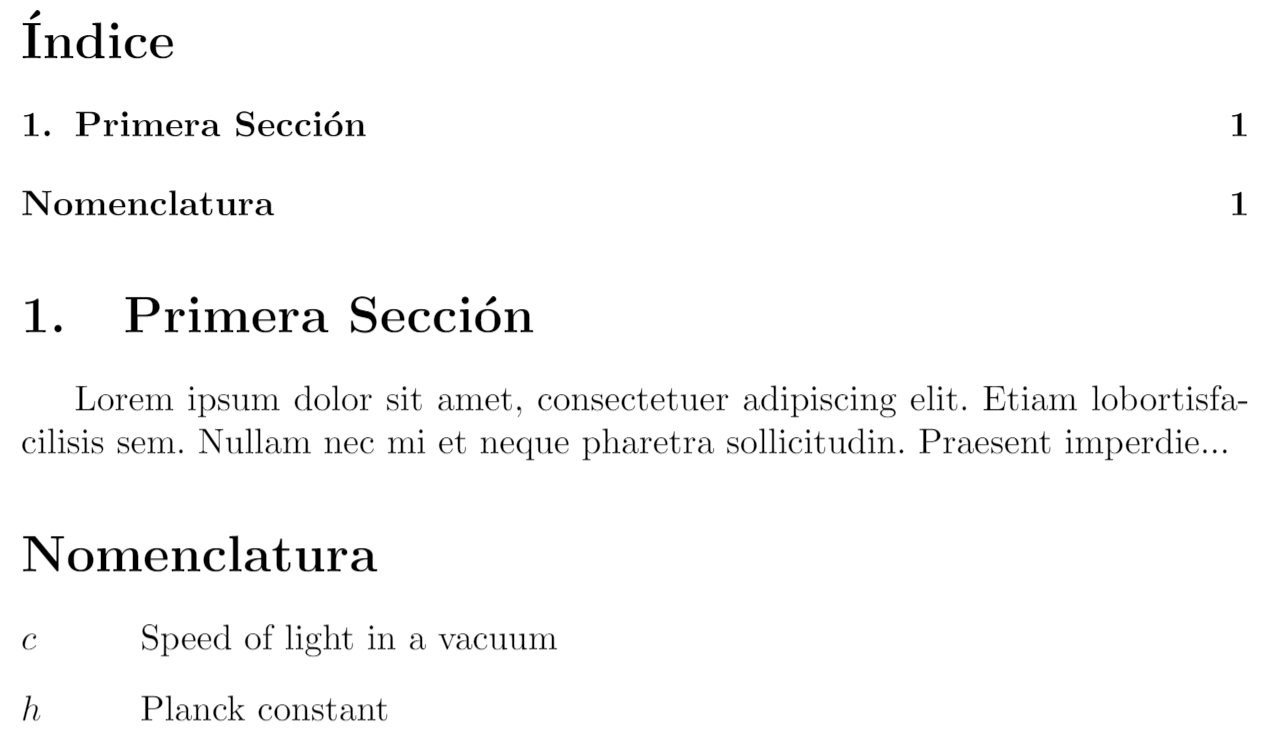
The additional options used here in when importing the package are:
* `intoc` Adds the **Nomenclature** to the table of contents.
* `spanish` Changes the language, translating the default title _Nomenclatures_ accordingly. The supported languages are: `croatian`, `danish`, `english`, `french`, `german`, `italian`, `polish`, `portuguese`, `russian`, `spanish` and `ukranian`.
Other useful features of the `nomencl` package are the possibility of manually setting the nomenclature title, and adding an additional annotation.
\\documentclass{article}
\\usepackage{nomencl}
\\makenomenclature
\\renewcommand{\\nomname}{List of Symbols}
\\renewcommand{\\nompreamble}{The next list describes several symbols that will be later used within the body of the document}
\\begin{document}
Here is an example:
\\nomenclature{\\(c\\)}{Speed of light in a vacuum}
\\nomenclature{\\(h\\)}{Planck constant}
\\printnomenclature
\\end{document}
[Open this `nomencl` example in Overleaf](https://www.overleaf.com/docs?engine=pdflatex&snip_name=nomencl+package+example&snip=%5Cdocumentclass%7Barticle%7D%0A%5Cusepackage%7Bnomencl%7D%0A%5Cmakenomenclature%0A%0A%5Crenewcommand%7B%5Cnomname%7D%7BList+of+Symbols%7D%0A%0A%5Crenewcommand%7B%5Cnompreamble%7D%7BThe+next+list+describes+several+symbols+that+will+be+later+used+within+the+body+of+the+document%7D%0A%0A%5Cbegin%7Bdocument%7D%0AHere+is+an+example%3A%0A%0A%5Cnomenclature%7B%5C%28c%5C%29%7D%7BSpeed+of+light+in+a+vacuum%7D%0A%5Cnomenclature%7B%5C%28h%5C%29%7D%7BPlanck+constant%7D%0A%0A%5Cprintnomenclature%0A%5Cend%7Bdocument%7D)
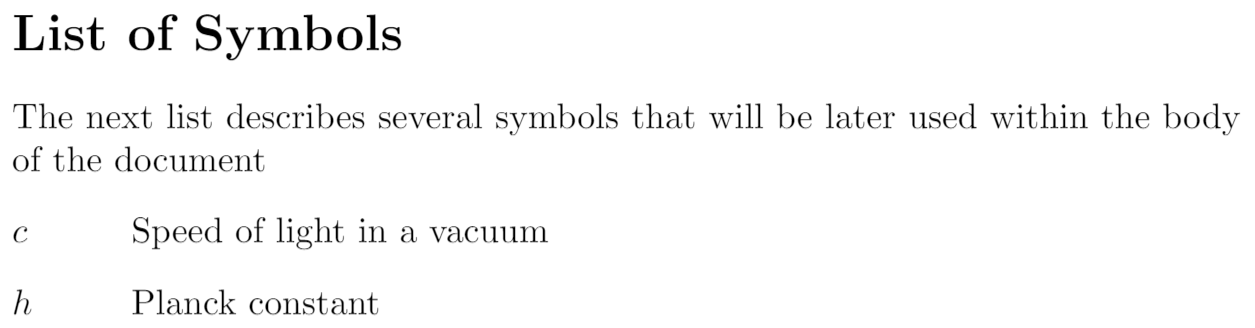
The line
\\renewcommand{\\nomname}{List of Symbols}
changes the default title.
The command
\\renewcommand{\\nompreamble}{The next list...}
inserts some text in between the title and the list symbols.
Grouping
--------
To group the symbols depending on their type some additional work is needed. We add a prefix to each symbol and use the `etoolbox` package to compare the prefixes.
\\documentclass{article}
\\usepackage{amssymb}
\\usepackage{nomencl}
\\makenomenclature
%% This code creates the groups
% -----------------------------------------
\\usepackage{etoolbox}
\\renewcommand\\nomgroup\[1\]{%
\\item\[\\bfseries\
\\ifstrequal{#1}{P}{Physics constants}{%\
\\ifstrequal{#1}{N}{Number sets}{%\
\\ifstrequal{#1}{O}{Other symbols}{}}}%\
\]}
% -----------------------------------------
\\begin{document}
Here is an example:
\\nomenclature\[P\]{\\(c\\)}{Speed of light in a vacuum}
\\nomenclature\[P\]{\\(h\\)}{Planck constant}
\\nomenclature\[P\]{\\(G\\)}{Gravitational constant}
\\nomenclature\[N\]{\\(\\mathbb{R}\\)}{Real numbers}
\\nomenclature\[N\]{\\(\\mathbb{C}\\)}{Complex numbers}
\\nomenclature\[N\]{\\(\\mathbb{H}\\)}{Quaternions}
\\nomenclature\[O\]{\\(V\\)}{Constant volume}
\\nomenclature\[O\]{\\(\\rho\\)}{Friction index}
\\printnomenclature
\\end{document}
[Open this `nomencl` example in Overleaf](https://www.overleaf.com/docs?engine=pdflatex&snip_name=nomencl+package+example&snip=%5Cdocumentclass%7Barticle%7D%0A%5Cusepackage%7Bamssymb%7D%0A%5Cusepackage%7Bnomencl%7D%0A%5Cmakenomenclature%0A%0A%25%25+This+code+creates+the+groups%0A%25+-----------------------------------------%0A%5Cusepackage%7Betoolbox%7D%0A%5Crenewcommand%5Cnomgroup%5B1%5D%7B%25%0A++%5Citem%5B%5Cbfseries%0A++%5Cifstrequal%7B%231%7D%7BP%7D%7BPhysics+constants%7D%7B%25%0A++%5Cifstrequal%7B%231%7D%7BN%7D%7BNumber+sets%7D%7B%25%0A++%5Cifstrequal%7B%231%7D%7BO%7D%7BOther+symbols%7D%7B%7D%7D%7D%25%0A%5D%7D%0A%25+-----------------------------------------%0A%0A%5Cbegin%7Bdocument%7D%0AHere+is+an+example%3A%0A%0A%5Cnomenclature%5BP%5D%7B%5C%28c%5C%29%7D%7BSpeed+of+light+in+a+vacuum%7D%0A%5Cnomenclature%5BP%5D%7B%5C%28h%5C%29%7D%7BPlanck+constant%7D%0A%5Cnomenclature%5BP%5D%7B%5C%28G%5C%29%7D%7BGravitational+constant%7D%0A%5Cnomenclature%5BN%5D%7B%5C%28%5Cmathbb%7BR%7D%5C%29%7D%7BReal+numbers%7D%0A%5Cnomenclature%5BN%5D%7B%5C%28%5Cmathbb%7BC%7D%5C%29%7D%7BComplex+numbers%7D%0A%5Cnomenclature%5BN%5D%7B%5C%28%5Cmathbb%7BH%7D%5C%29%7D%7BQuaternions%7D%0A%5Cnomenclature%5BO%5D%7B%5C%28V%5C%29%7D%7BConstant+volume%7D%0A%5Cnomenclature%5BO%5D%7B%5C%28%5Crho%5C%29%7D%7BFriction+index%7D%0A%0A%5Cprintnomenclature%0A%5Cend%7Bdocument%7D)
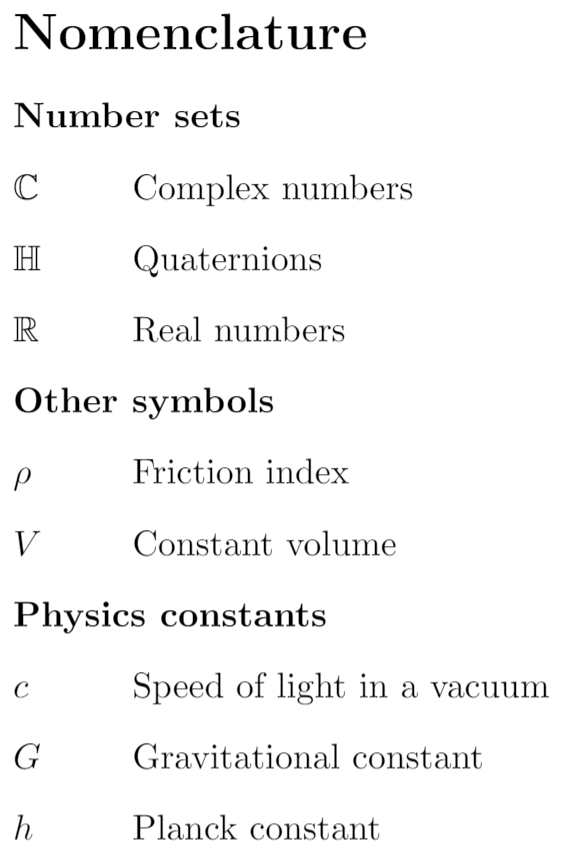
Some extra groups are added. The code for this is not that simple, it uses the command `\ifstrequal{}{}{}{}`, the first two arguments are the strings to compare, if they are equal the term is added to the group, otherwise the next nested condition is checked.
Notice that now each `\nomenclature` command has an additional argument, the prefix, inside brackets; which is used in the grouping code.
If `etoolbox` is not available one can use the `ifthen` package instead, which provides the conditional `\ifthenelse{}{}{}`, but the syntax is slightly more complex:
\\usepackage{ifthen}
\\renewcommand{\\nomgroup}\[1\]{%
\\item\[\\bfseries\
\\ifthenelse{\\equal{#1}{P}}{Physics constants}{%\
\\ifthenelse{\\equal{#1}{O}}{Other symbols}{%\
\\ifthenelse{\\equal{#1}{N}}{Number sets}{}}}%\
\]}
This will produce the same nomenclature groups.
Adding units for physical constants
-----------------------------------
Another interesting feature is using the `siunitx` package to add units, aligning them to the right of the corresponding entries. For this, one has to define the `nomunit` macro as shown in the following example:
\\documentclass{article}
\\usepackage{amssymb}
\\usepackage{nomencl}
\\usepackage{siunitx}
\\usepackage{hyperref}
\\makenomenclature
\\hypersetup{
colorlinks=true,
urlcolor=blue,
}
%% This will add the subgroups
%----------------------------------------------
\\usepackage{etoolbox}
\\renewcommand\\nomgroup\[1\]{%
\\item\[\\bfseries\
\\ifstrequal{#1}{A}{Physics Constants}{%\
\\ifstrequal{#1}{B}{Number Sets}{%\
\\ifstrequal{#1}{C}{Other Symbols}{}}}%\
\]}
%----------------------------------------------
%% This will add the units
%----------------------------------------------
\\newcommand{\\nomunit}\[1\]{%
\\renewcommand{\\nomentryend}{\\hspace\*{\\fill}#1}}
%----------------------------------------------
\\title{Nomenclatures Example}
\\author{Overleaf Team}
\\date{\\today}
\\begin{document}
\\maketitle
\\noindent This is an example to show how the \\texttt{nomencl} package works, with units typeset via the \\texttt{siunitx} package. \\href{https://www.nist.gov/pml/fundamental-physical-constants}{NIST} was referenced to provide the values of physical constants, and their corresponding units---links are provided via the \\texttt{hyperref} package:
\\nomenclature\[A, 02\]{\\(c\\)}{\\href{https://physics.nist.gov/cgi-bin/cuu/Value?c}
{Speed of light in a vacuum}
\\nomunit{\\SI{299792458}{\\meter\\per\\second}}}
\\nomenclature\[A, 03\]{\\(h\\)}{\\href{https://physics.nist.gov/cgi-bin/cuu/Value?h}
{Planck constant}
\\nomunit{\\SI\[group-digits=false\]{6.62607015e-34}{\\joule\\per\\hertz}}}
\\nomenclature\[A, 01\]{\\(G\\)}{\\href{https://physics.nist.gov/cgi-bin/cuu/Value?bg}
{Gravitational constant}
\\nomunit{\\SI\[group-digits=false\]{6.67430e-11}{\\meter\\cubed\\per\\kilogram\\per\\second\\squared}}}
\\nomenclature\[B, 03\]{\\(\\mathbb{R}\\)}{Real numbers}
\\nomenclature\[B, 02\]{\\(\\mathbb{C}\\)}{Complex numbers}
\\nomenclature\[B, 01\]{\\(\\mathbb{H}\\)}{Quaternions}
\\nomenclature\[C\]{\\(V\\)}{Constant volume}
\\nomenclature\[C\]{\\(\\rho\\)}{Friction index}
\\printnomenclature
\\end{document}
[Open in Overleaf (example using `nomencl` and `siunitx` packages).](https://www.overleaf.com/docs?engine=pdflatex&snip_name=More+advanced+nomencl+package+example&snip=%5Cdocumentclass%7Barticle%7D%0A%5Cusepackage%7Bamssymb%7D%0A%5Cusepackage%7Bnomencl%7D%0A%5Cusepackage%7Bsiunitx%7D%0A%5Cusepackage%7Bhyperref%7D%0A%5Cmakenomenclature%0A%5Chypersetup%7B%0A++++colorlinks%3Dtrue%2C%0A++++urlcolor%3Dblue%2C%0A%7D%0A%25%25+This+will+add+the+subgroups%0A%25----------------------------------------------%0A%5Cusepackage%7Betoolbox%7D%0A%5Crenewcommand%5Cnomgroup%5B1%5D%7B%25%0A++%5Citem%5B%5Cbfseries%0A++%5Cifstrequal%7B%231%7D%7BA%7D%7BPhysics+Constants%7D%7B%25%0A++%5Cifstrequal%7B%231%7D%7BB%7D%7BNumber+Sets%7D%7B%25%0A++%5Cifstrequal%7B%231%7D%7BC%7D%7BOther+Symbols%7D%7B%7D%7D%7D%25%0A%5D%7D%0A%25----------------------------------------------%0A%0A%25%25+This+will+add+the+units%0A%25----------------------------------------------%0A%5Cnewcommand%7B%5Cnomunit%7D%5B1%5D%7B%25%0A%5Crenewcommand%7B%5Cnomentryend%7D%7B%5Chspace%2A%7B%5Cfill%7D%231%7D%7D%0A%25----------------------------------------------%0A%0A%5Ctitle%7BNomenclatures+Example%7D%0A%5Cauthor%7BOverleaf+Team%7D%0A%5Cdate%7B%5Ctoday%7D%0A%0A%5Cbegin%7Bdocument%7D%0A%5Cmaketitle%0A%0A%5Cnoindent+This+is+an+example+to+show+how+the+%5Ctexttt%7Bnomencl%7D+package+works%2C+with+units+typeset+via+the+%5Ctexttt%7Bsiunitx%7D+package.+%5Chref%7Bhttps%3A%2F%2Fwww.nist.gov%2Fpml%2Ffundamental-physical-constants%7D%7BNIST%7D+was+referenced+to+provide+the+values+of+physical+constants%2C+and+their+corresponding+units---links+are+provided+via+the+%5Ctexttt%7Bhyperref%7D+package%3A%0A%0A%5Cnomenclature%5BA%2C+02%5D%7B%5C%28c%5C%29%7D%7B%5Chref%7Bhttps%3A%2F%2Fphysics.nist.gov%2Fcgi-bin%2Fcuu%2FValue%3Fc%7D%0A%7BSpeed+of+light+in+a+vacuum%7D%0A%5Cnomunit%7B%5CSI%7B299792458%7D%7B%5Cmeter%5Cper%5Csecond%7D%7D%7D%0A%5Cnomenclature%5BA%2C+03%5D%7B%5C%28h%5C%29%7D%7B%5Chref%7Bhttps%3A%2F%2Fphysics.nist.gov%2Fcgi-bin%2Fcuu%2FValue%3Fh%7D%0A%7BPlanck+constant%7D%0A%5Cnomunit%7B%5CSI%5Bgroup-digits%3Dfalse%5D%7B6.62607015e-34%7D%7B%5Cjoule%5Cper%5Chertz%7D%7D%7D%0A%5Cnomenclature%5BA%2C+01%5D%7B%5C%28G%5C%29%7D%7B%5Chref%7Bhttps%3A%2F%2Fphysics.nist.gov%2Fcgi-bin%2Fcuu%2FValue%3Fbg%7D%0A%7BGravitational+constant%7D+%0A%5Cnomunit%7B%5CSI%5Bgroup-digits%3Dfalse%5D%7B6.67430e-11%7D%7B%5Cmeter%5Ccubed%5Cper%5Ckilogram%5Cper%5Csecond%5Csquared%7D%7D%7D%0A%5Cnomenclature%5BB%2C+03%5D%7B%5C%28%5Cmathbb%7BR%7D%5C%29%7D%7BReal+numbers%7D%0A%5Cnomenclature%5BB%2C+02%5D%7B%5C%28%5Cmathbb%7BC%7D%5C%29%7D%7BComplex+numbers%7D%0A%5Cnomenclature%5BB%2C+01%5D%7B%5C%28%5Cmathbb%7BH%7D%5C%29%7D%7BQuaternions%7D%0A%5Cnomenclature%5BC%5D%7B%5C%28V%5C%29%7D%7BConstant+volume%7D%0A%5Cnomenclature%5BC%5D%7B%5C%28%5Crho%5C%29%7D%7BFriction+index%7D%0A%0A%5Cprintnomenclature%0A%0A%5Cend%7Bdocument%7D)
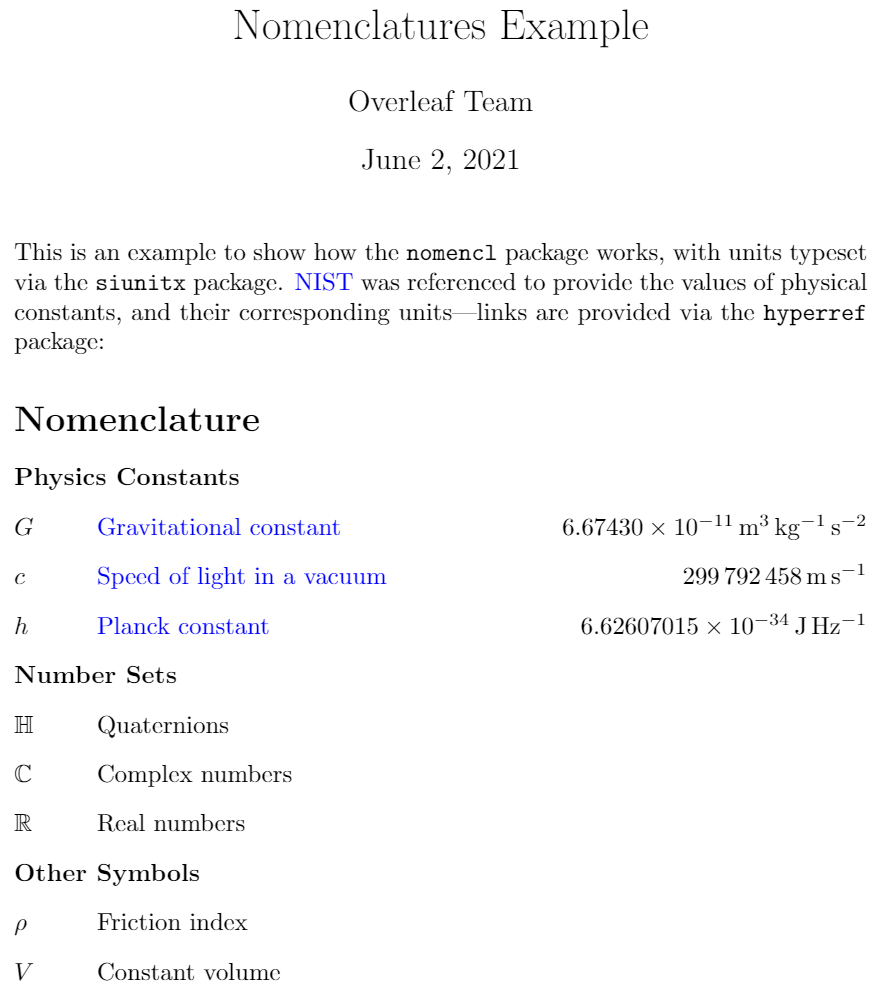
Sorting the Entries
-------------------
This is the default sorting order:
\\documentclass{article}
\\usepackage{nomencl}
\\makenomenclature
\\begin{document}
Here is an example:
\\nomenclature{\\(+a\\)}{Operator}
\\nomenclature{\\(2a\\)}{Number}
\\nomenclature{\\(:a\\)}{Punctuation symbol}
\\nomenclature{\\(Aa\\)}{Uppercase letter}
\\nomenclature{\\(aa\\)}{Lowercase letter}
\\nomenclature{\\(\\alpha\\)}{Greek character}
\\printnomenclature
\\end{document}
[Open this `nomencl` example in Overleaf](https://www.overleaf.com/docs?engine=pdflatex&snip_name=nomencl+default+sort+order&snip=%5Cdocumentclass%7Barticle%7D%0A%5Cusepackage%7Bnomencl%7D%0A%0A%5Cmakenomenclature%0A%0A%5Cbegin%7Bdocument%7D%0AHere+is+an+example%3A%0A%0A%5Cnomenclature%7B%5C%28%2Ba%5C%29%7D%7BOperator%7D%0A%5Cnomenclature%7B%5C%282a%5C%29%7D%7BNumber%7D%0A%5Cnomenclature%7B%5C%28%3Aa%5C%29%7D%7BPunctuation+symbol%7D%0A%5Cnomenclature%7B%5C%28Aa%5C%29%7D%7BUppercase+letter%7D%0A%5Cnomenclature%7B%5C%28aa%5C%29%7D%7BLowercase+letter%7D%0A%5Cnomenclature%7B%5C%28%5Calpha%5C%29%7D%7BGreek+character%7D%0A%0A%5Cprintnomenclature%0A%0A%5Cend%7Bdocument%7D)
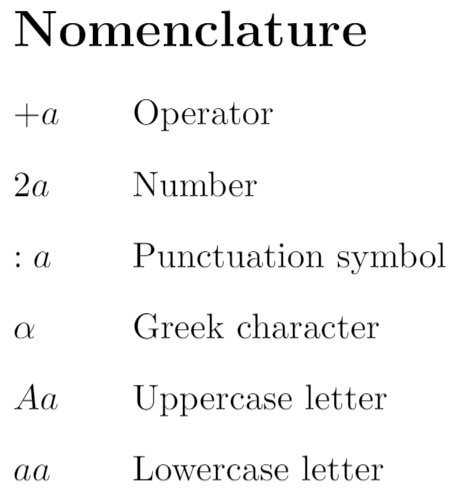
Notice that the Greek character showed up before the alphabetic characters because of the backslash `\` in `\alpha`.
Just like for grouping, it is possible to use a prefix to manually sort the nomenclature entries:
\\documentclass{article}
\\usepackage{nomencl}
\\makenomenclature
\\begin{document}
Here is an example:
\\nomenclature\[06\]{\\(+a\\)}{Operator}
\\nomenclature\[03\]{\\(2a\\)}{Number}
\\nomenclature\[05\]{\\(:a\\)}{Punctuation symbol}
\\nomenclature\[04\]{\\(Aa\\)}{Uppercase letter}
\\nomenclature\[01\]{\\(aa\\)}{Lowercase letter}
\\nomenclature\[02\]{\\(\\alpha\\)}{Greek character}
\\printnomenclature
\\end{document}
[Open this `nomencl` example in Overleaf](https://www.overleaf.com/docs?engine=pdflatex&snip_name=Sorting+nomencl+entries&snip=%5Cdocumentclass%7Barticle%7D%0A%5Cusepackage%7Bnomencl%7D%0A%0A%5Cmakenomenclature%0A%0A%5Cbegin%7Bdocument%7D%0AHere+is+an+example%3A%0A%0A%5Cnomenclature%5B06%5D%7B%5C%28%2Ba%5C%29%7D%7BOperator%7D%0A%5Cnomenclature%5B03%5D%7B%5C%282a%5C%29%7D%7BNumber%7D%0A%5Cnomenclature%5B05%5D%7B%5C%28%3Aa%5C%29%7D%7BPunctuation+symbol%7D%0A%5Cnomenclature%5B04%5D%7B%5C%28Aa%5C%29%7D%7BUppercase+letter%7D%0A%5Cnomenclature%5B01%5D%7B%5C%28aa%5C%29%7D%7BLowercase+letter%7D%0A%5Cnomenclature%5B02%5D%7B%5C%28%5Calpha%5C%29%7D%7BGreek+character%7D%0A%0A%5Cprintnomenclature%0A%0A%5Cend%7Bdocument%7D)
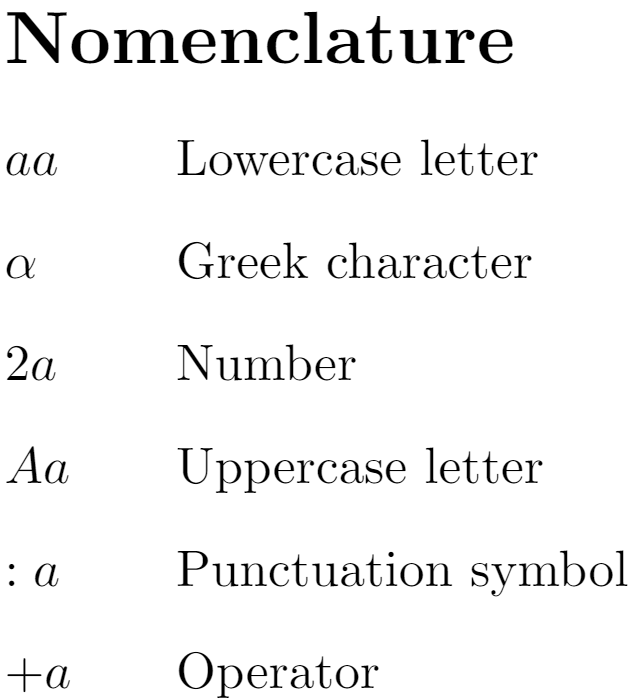
The number inside the brackets determines the order to print the corresponding symbol. One can also combine grouping and manually sorting:
\\documentclass{article}
\\usepackage{amssymb}
\\usepackage{nomencl}
\\makenomenclature
\\usepackage{etoolbox}
\\renewcommand\\nomgroup\[1\]{%
\\item\[\\bfseries\
\\ifstrequal{#1}{A}{Physics Constants}{%\
\\ifstrequal{#1}{B}{Number Sets}{%\
\\ifstrequal{#1}{C}{Other Symbols}{}}}%\
\]}
\\begin{document}
Here is an example:
\\nomenclature\[A, 02\]{\\(c\\)}{Speed of light in a vacuum}
\\nomenclature\[A, 03\]{\\(h\\)}{Planck constant}
\\nomenclature\[A, 01\]{\\(G\\)}{Gravitational constant}
\\nomenclature\[B, 03\]{\\(\\mathbb{R}\\)}{Real numbers}
\\nomenclature\[B, 02\]{\\(\\mathbb{C}\\)}{Complex numbers}
\\nomenclature\[B, 01\]{\\(\\mathbb{H}\\)}{Octonions}
\\nomenclature\[C\]{\\(V\\)}{Constant volume}
\\nomenclature\[C\]{\\(\\rho\\)}{Friction index}
\\printnomenclature
\\end{document}
[Open this `nomencl` example in Overleaf](https://www.overleaf.com/docs?engine=pdflatex&snip_name=Grouping+and+sorting+with+nomencl&snip=%5Cdocumentclass%7Barticle%7D%0A%5Cusepackage%7Bamssymb%7D%0A%5Cusepackage%7Bnomencl%7D%0A%5Cmakenomenclature%0A%0A%5Cusepackage%7Betoolbox%7D%0A%5Crenewcommand%5Cnomgroup%5B1%5D%7B%25%0A++%5Citem%5B%5Cbfseries%0A++%5Cifstrequal%7B%231%7D%7BA%7D%7BPhysics+Constants%7D%7B%25%0A++%5Cifstrequal%7B%231%7D%7BB%7D%7BNumber+Sets%7D%7B%25%0A++%5Cifstrequal%7B%231%7D%7BC%7D%7BOther+Symbols%7D%7B%7D%7D%7D%25%0A%5D%7D%0A%0A%5Cbegin%7Bdocument%7D%0AHere+is+an+example%3A%0A%0A%5Cnomenclature%5BA%2C+02%5D%7B%5C%28c%5C%29%7D%7BSpeed+of+light+in+a+vacuum%7D%0A%5Cnomenclature%5BA%2C+03%5D%7B%5C%28h%5C%29%7D%7BPlanck+constant%7D%0A%5Cnomenclature%5BA%2C+01%5D%7B%5C%28G%5C%29%7D%7BGravitational+constant%7D%0A%5Cnomenclature%5BB%2C+03%5D%7B%5C%28%5Cmathbb%7BR%7D%5C%29%7D%7BReal+numbers%7D%0A%5Cnomenclature%5BB%2C+02%5D%7B%5C%28%5Cmathbb%7BC%7D%5C%29%7D%7BComplex+numbers%7D%0A%5Cnomenclature%5BB%2C+01%5D%7B%5C%28%5Cmathbb%7BH%7D%5C%29%7D%7BOctonions%7D%0A%5Cnomenclature%5BC%5D%7B%5C%28V%5C%29%7D%7BConstant+volume%7D%0A%5Cnomenclature%5BC%5D%7B%5C%28%5Crho%5C%29%7D%7BFriction+index%7D%0A%0A%5Cprintnomenclature%0A%0A%5Cend%7Bdocument%7D)
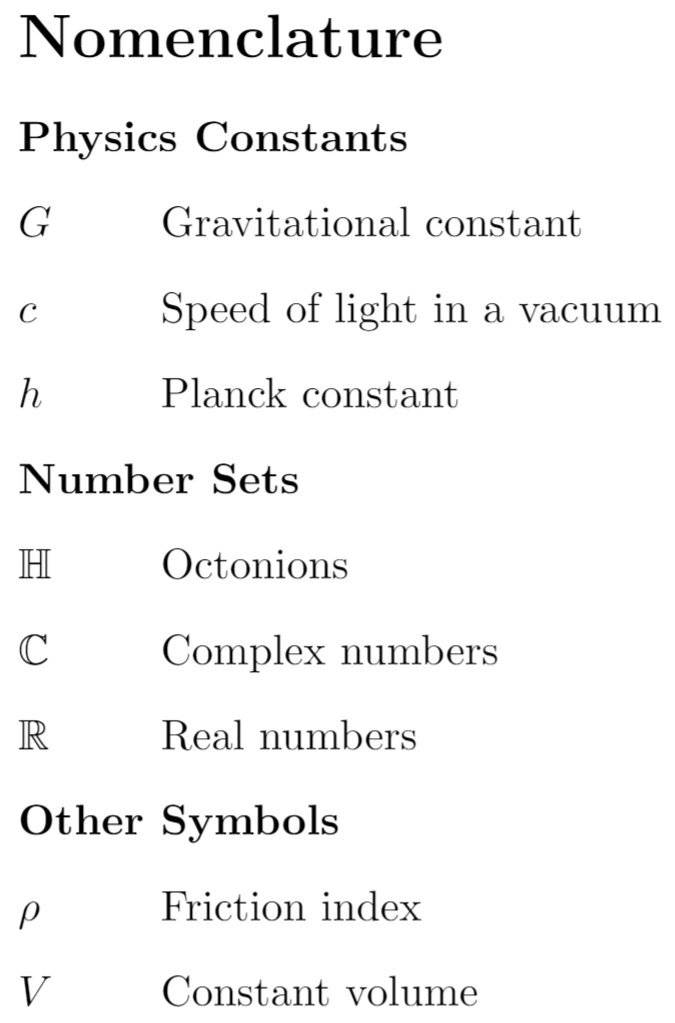
Notice that the capital letters used for grouping are different from the ones used in the example at previous section, because that letter is used to sort the groups.
Further Reading
---------------
For more information see:
* [Glossaries](https://www.overleaf.com/learn/latex/Glossaries "Glossaries")
* [Multi-file LaTeX projects](https://www.overleaf.com/learn/latex/Multi-file_LaTeX_projects "Multi-file LaTeX projects")
* [Text alignment](https://www.overleaf.com/learn/latex/Text_alignment "Text alignment")
* [Bold, italics and underlining](https://www.overleaf.com/learn/latex/Bold%2C_italics_and_underlining "Bold, italics and underlining")
* [Mathematical expressions](https://www.overleaf.com/learn/latex/Mathematical_expressions "Mathematical expressions")
* [Creating and Redefining Macros](https://www.overleaf.com/learn/latex/Commands "Commands")
* [`nomencl` package documentation](http://mirror.jmu.edu/pub/CTAN/macros/latex/contrib/nomencl/nomencl.pdf)
* [`ifthen` package documentation](http://texdoc.net/texmf-dist/doc/latex/base/ifthen.pdf)
* [`etoolbox` package documentation](http://mirror.math.ku.edu/tex-archive/macros/latex/contrib/etoolbox/etoolbox.pdf)
We only use cookies for essential purposes and to improve your experience on our site. You can find out more in our [cookie policy](https://www.overleaf.com/legal#Cookies)
.
Essential cookies onlyAccept all cookies
---
# Single sided and double sided documents - Overleaf, Online LaTeX Editor
[Skip to content](https://www.overleaf.com/learn/latex/Single_sided_and_double_sided_documents#main-content)
Search help library…searchclear
No Search Results
Single sided and double sided documents
=======================================
Contents
--------
* [1 Introduction](https://www.overleaf.com/learn/latex/Single_sided_and_double_sided_documents#Introduction)
* [2 Creating two-sided documents](https://www.overleaf.com/learn/latex/Single_sided_and_double_sided_documents#Creating_two-sided_documents)
* [2.1 Overleaf example to explore document layout](https://www.overleaf.com/learn/latex/Single_sided_and_double_sided_documents#Overleaf_example_to_explore_document_layout)
* [3 Further reading](https://www.overleaf.com/learn/latex/Single_sided_and_double_sided_documents#Further_reading)
Introduction
------------
LaTeX is shipped with a number of “standard” classes which can be used for creating different types of document, including: `article`, `book`, `report`, `letter`, `slides` and `proc` (for conference proceedings). LaTeX also provides the `minimal` class for debugging purposes or as a basis for writing your own class file. Many additional document classes are published in the [Overleaf template Gallery](https://www.overleaf.com/latex/templates)
, or can be [downloaded from CTAN](https://ctan.org/topic/class)
.
Creating two-sided documents
----------------------------
To create a two-sided document pass the `twoside` option to the `\documentclass` declaration; for example:
\\documentclass\[twoside\]{article}
**Note**:
* The `book` class is two-sided by default so you do not need to add the `twoside` option.
* The `slides` class does not support the `twoside` option—perhaps because it would not make sense for presentation slides to do that.
### Overleaf example to explore document layout
The following example provides a small Overleaf project which uses the `layout` package to create graphics that show the initial (_default_) document layout for your preferred document class. Those default values can be changed by loading packages, such as `geometry`, which change the default values of LaTeX's page-layout parameters. See the articles [Page size and margins](https://www.overleaf.com/learn/latex/Page_size_and_margins "Page size and margins")
and [A visual guide to LaTeX’s page layout parameters](https://www.overleaf.com/learn/latex/Articles/A_visual_guide_to_LaTeX%E2%80%99s_page_layout_parameters "Articles/A visual guide to LaTeX’s page layout parameters")
for further information.
For two-sided documents, the `book` class, and others using the use the `twoside` option, the example will create separate graphics for the left-hand and right-hand pages. On opening the project you’ll see the left- and right-hand pages for `\documentclass[twoside]{article}`.
% Choose the document class whose layout you want to visualize: uncomment
% the one you want, comment out the others.
% \\documentclass\[a4paper\]{article} %Produces one page (based on A4 paper size)
% \\documentclass\[a4paper\]{report} %Produces one page (based on A4 paper size)
% \\documentclass\[twoside,a4paper\]{report} %Produces two pages (based on A4 paper size)
% \\documentclass\[a4paper\]{book} %Produces two pages (based on A4 paper size)
% \\documentclass\[a4paper\]{letter} %Produces one page (based on A4 paper size)
% \\documentclass\[twoside, a4paper\]{letter} %Produces two pages (based on A4 paper size)
\\documentclass\[twoside,a4paper\]{article} %Produces two pages (based on A4 paper size)
\\usepackage{layout}
\\begin{document}
\\layout
\\end{document}
[Open this project to explore the layout of standard LaTeX document classes.](https://www.overleaf.com/docs?engine=pdflatex&snip_name=document+class+layout&snip=%25+Choose+the+document+class+whose+layout+you+want+to+visualize%3A+uncomment%0A%25+the+one+you+want%2C+comment+out+the+others.%0A%25+%5Cdocumentclass%5Ba4paper%5D%7Barticle%7D+%25Produces+one+page+%28based+on+A4+paper+size%29%0A%25+%5Cdocumentclass%5Ba4paper%5D%7Breport%7D+%25Produces+one+page+%28based+on+A4+paper+size%29%0A%25+%5Cdocumentclass%5Btwoside%2Ca4paper%5D%7Breport%7D+%25Produces+two+pages+%28based+on+A4+paper+size%29%0A%25+%5Cdocumentclass%5Ba4paper%5D%7Bbook%7D+%25Produces+two+pages+%28based+on+A4+paper+size%29%0A%25+%5Cdocumentclass%5Ba4paper%5D%7Bletter%7D+%25Produces+one+page+%28based+on+A4+paper+size%29%0A%25+%5Cdocumentclass%5Btwoside%2C+a4paper%5D%7Bletter%7D+%25Produces+two+pages+%28based+on+A4+paper+size%29%0A%5Cdocumentclass%5Btwoside%2Ca4paper%5D%7Barticle%7D+%25Produces+two+pages+%28based+on+A4+paper+size%29%0A%5Cusepackage%7Blayout%7D%0A%5Cbegin%7Bdocument%7D%0A%5Clayout%0A%5Cend%7Bdocument%7D)
This example produces graphics such as those shown in the following image. Note that the image below has been cropped/edited for clarity of presentation in this article.
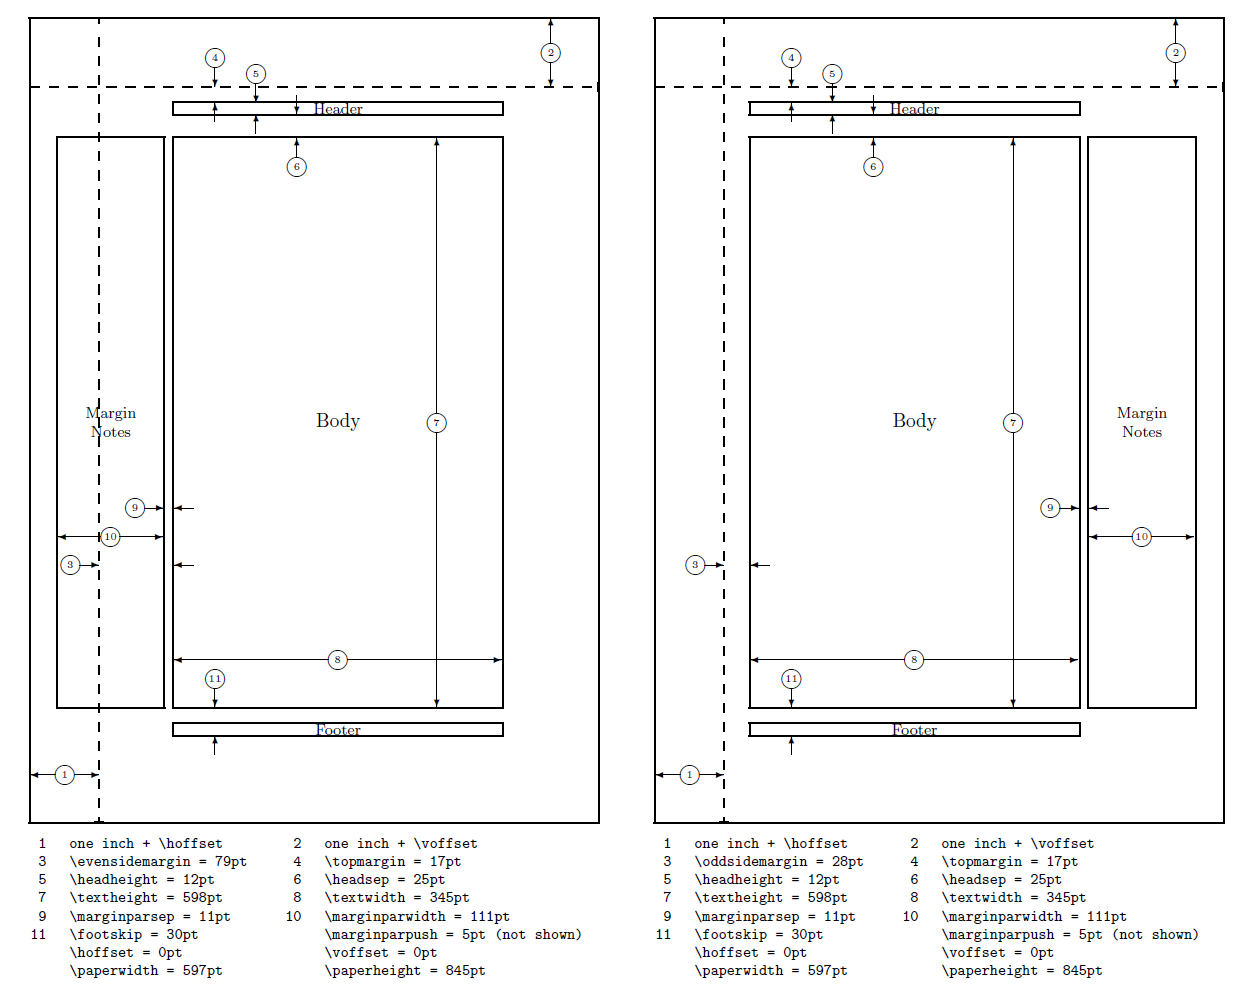
Further reading
---------------
* [`geometry` package documentation](https://ctan.org/pkg/geometry?lang=en)
* [A visual guide to LaTeX’s page layout parameters](https://www.overleaf.com/learn/latex/Articles/A_visual_guide_to_LaTeX%E2%80%99s_page_layout_parameters "Articles/A visual guide to LaTeX’s page layout parameters")
* [Page size and margins](https://www.overleaf.com/learn/latex/Page_size_and_margins "Page size and margins")
* [Footnotes](https://www.overleaf.com/learn/latex/Footnotes "Footnotes")
* [Margin notes](https://www.overleaf.com/learn/latex/Margin_notes "Margin notes")
* [Headers and footers](https://www.overleaf.com/learn/latex/Headers_and_footers "Headers and footers")
* [Sections and chapters](https://www.overleaf.com/learn/latex/Sections_and_chapters "Sections and chapters")
* [Management in a large project](https://www.overleaf.com/learn/latex/Management_in_a_large_project "Management in a large project")
* [Multi-file LaTeX projects](https://www.overleaf.com/learn/latex/Multi-file_LaTeX_projects "Multi-file LaTeX projects")
* [Text alignment](https://www.overleaf.com/learn/latex/Text_alignment "Text alignment")
* [Font sizes, families, and styles](https://www.overleaf.com/learn/latex/Font_sizes%2C_families%2C_and_styles "Font sizes, families, and styles")
* [Inserting Images](https://docs.overleaf.com/writing-and-editing/inserting-images "Inserting Images")
* [Positioning images and tables](https://www.overleaf.com/learn/latex/Positioning_images_and_tables "Positioning images and tables")
We only use cookies for essential purposes and to improve your experience on our site. You can find out more in our [cookie policy](https://www.overleaf.com/legal#Cookies)
.
Essential cookies onlyAccept all cookies
---
# Matrices - Overleaf, Online LaTeX Editor
[Skip to content](https://www.overleaf.com/learn/latex/Matrices#main-content)
Search help library…searchclear
No Search Results
Matrices
========
Contents
--------
* [1 amsmath matrix environments](https://www.overleaf.com/learn/latex/Matrices#amsmath_matrix_environments)
* [2 Inline matrices](https://www.overleaf.com/learn/latex/Matrices#Inline_matrices)
* [3 Further reading](https://www.overleaf.com/learn/latex/Matrices#Further_reading)
`amsmath` matrix environments
-----------------------------
The `amsmath` package provides commands to typeset matrices with different delimiters. Once you have loaded `\usepackage{amsmath}` in your preamble, you can use the following environments in your math environments:
| Type | LaTeX markup | Renders as |
| --- | --- | --- |
| Plain | `\begin{matrix} 1 & 2 & 3\\ a & b & c \end{matrix}` | \\(\\begin{matrix}1 & 2 & 3\\\\a & b & c\\end{matrix}\\) |
| Parentheses; round brackets | `\begin{pmatrix} 1 & 2 & 3\\ a & b & c \end{pmatrix}` | \\(\\begin{pmatrix}1 & 2 & 3\\\\a & b & c\\end{pmatrix}\\) |
| Brackets; square brackets | `\begin{bmatrix} 1 & 2 & 3\\ a & b & c \end{bmatrix}` | \\(\\begin{bmatrix}1 & 2 & 3\\\\a & b & c\\end{bmatrix}\\) |
| Braces; curly brackets | `\begin{Bmatrix} 1 & 2 & 3\\ a & b & c \end{Bmatrix}` | \\(\\begin{Bmatrix}1 & 2 & 3\\\\a & b & c\\end{Bmatrix}\\) |
| Pipes | `\begin{vmatrix} 1 & 2 & 3\\ a & b & c \end{vmatrix}` | \\(\\begin{vmatrix}1 & 2 & 3\\\\a & b & c\\end{vmatrix}\\) |
| Double pipes | `\begin{Vmatrix} 1 & 2 & 3\\ a & b & c \end{Vmatrix}` | \\(\\begin{Vmatrix}1 & 2 & 3\\\\a & b & c\\end{Vmatrix}\\) |
If you need to create matrices with different [delimiters](https://www.overleaf.com/learn/latex/Brackets_and_Parentheses "Brackets and Parentheses")
, you can add them manually to a plain `matrix`. For example:
| LaTeX markup | Renders as |
| --- | --- |
| `\left\lceil \begin{matrix} 1 & 2 & 3\\ a & b & c \end{matrix} \right\rceil` | \\(\\left\\lceil\\begin{matrix}1 & 2 & 3\\\\a & b & c\\end{matrix}\\right\\rceil\\) |
| `\left\langle \begin{matrix} 1 & 2 & 3\\ a & b & c \end{matrix} \right\rvert` | \\(\\left\\langle\\begin{matrix}1 & 2 & 3\\\\a & b & c\\end{matrix}\\right\\rvert\\) |
| `\left\langle \begin{matrix} 1 & 2 & 3\\ a & b & c \end{matrix} \right\rangle` | \\(\\left\\langle\\begin{matrix}1 & 2 & 3\\\\a & b & c\\end{matrix}\\right\\rangle\\) |
Inline matrices
---------------
When typesetting inline math, the usual `matrix` environments above may look too big. It may be better to use `smallmatrix` in such situations, although you will need to provide your own [delimiters](https://www.overleaf.com/learn/latex/Brackets_and_Parentheses "Brackets and Parentheses")
.
\\documentclass{article}
\\usepackage{amsmath}
\\begin{document}
\\noindent Trying to typeset an inline matrix here:
$\\begin{pmatrix}
a & b\\\\
c & d
\\end{pmatrix}$,
but it looks too big, so let's try
$\\big(\\begin{smallmatrix}
a & b\\\\
c & d
\\end{smallmatrix}\\big)$
instead.
\\end{document}
[Open this `smallmatrix` example in Overleaf](https://www.overleaf.com/docs?engine=pdflatex&snip_name=amsmath+matrix+example&snip=%5Cdocumentclass%7Barticle%7D%0A%5Cusepackage%7Bamsmath%7D%0A%5Cbegin%7Bdocument%7D%0A%5Cnoindent+Trying+to+typeset+an+inline+matrix+here%3A%0A+%24%5Cbegin%7Bpmatrix%7D%0A++a+%26+b%5C%5C+%0A++c+%26+d%0A%5Cend%7Bpmatrix%7D%24%2C++%0Abut+it+looks+too+big%2C+so+let%27s+try+%0A%24%5Cbig%28%5Cbegin%7Bsmallmatrix%7D%0A++a+%26+b%5C%5C%0A++c+%26+d%0A%5Cend%7Bsmallmatrix%7D%5Cbig%29%24+%0Ainstead.%0A%5Cend%7Bdocument%7D)
The following image shows the output produced by the example above:

The `mathtools` package provides `psmallmatrix`, `bsmallmatrix` etc environments for convenience.
Further reading
---------------
* [Mathematical expressions](https://www.overleaf.com/learn/latex/Mathematical_expressions "Mathematical expressions")
* [Brackets and Parentheses](https://www.overleaf.com/learn/latex/Brackets_and_Parentheses "Brackets and Parentheses")
* [Aligning equations with amsmath](https://www.overleaf.com/learn/latex/Aligning_equations_with_amsmath "Aligning equations with amsmath")
* [Display style in math mode](https://www.overleaf.com/learn/latex/Display_style_in_math_mode "Display style in math mode")
* [The not so short introduction to LaTeX2ε](http://www.ctan.org/tex-archive/info/lshort/)
* [amsmath package documentation](http://texdoc.net/pkg/amsmath)
* [mathtools package documentation](http://texdoc.net/pkg/mathtools)
We only use cookies for essential purposes and to improve your experience on our site. You can find out more in our [cookie policy](https://www.overleaf.com/legal#Cookies)
.
Essential cookies onlyAccept all cookies
---
# Table of contents - Overleaf, Online LaTeX Editor
[Skip to content](https://www.overleaf.com/learn/latex/Table_of_contents#main-content)
Search help library…searchclear
No Search Results
Table of contents
=================
In a LaTeX document the table of contents can be automatically generated, and modified to fit a specific style, this article explain how
Introduction
------------
To create the table of contents is straightforward, the command `\tableofcontents` does the job. Sections, subsections and chapters are included in the table of contents. To manually add entries, for example when you want an unnumbered section, use the command `\addcontentsline` as shown in the following example:
\\documentclass{article}
\\usepackage{blindtext}
\\usepackage{titlesec}
\\title{Sections and Chapters}
\\author{Gubert Farnsworth}
\\date{ }
\\begin{document}
\\maketitle
\\tableofcontents
\\section{Introduction}
This is the first section.
\\blindtext
\\addcontentsline{toc}{section}{Unnumbered Section}
\\section\*{Unnumbered Section}
\\blindtext
\\section{Second Section}
\\blindtext
\\end{document}
[Open this example in Overleaf](https://www.overleaf.com/docs?engine=pdflatex&snip_name=Table+of+contents+example&snip=%5Cdocumentclass%7Barticle%7D%0A%5Cusepackage%7Bblindtext%7D%0A%5Cusepackage%7Btitlesec%7D%0A%5Ctitle%7BSections+and+Chapters%7D%0A%5Cauthor%7BGubert+Farnsworth%7D%0A%5Cdate%7B+%7D%0A%5Cbegin%7Bdocument%7D%0A%0A%5Cmaketitle%0A%0A%5Ctableofcontents%0A%0A%5Csection%7BIntroduction%7D%0A%0AThis+is+the+first+section.%0A%0A%5Cblindtext%0A%0A%5Caddcontentsline%7Btoc%7D%7Bsection%7D%7BUnnumbered+Section%7D%0A%5Csection%2A%7BUnnumbered+Section%7D%0A%0A%5Cblindtext%0A%0A%5Csection%7BSecond+Section%7D%0A%0A%5Cblindtext%0A%5Cend%7Bdocument%7D)
This example produces the following output:
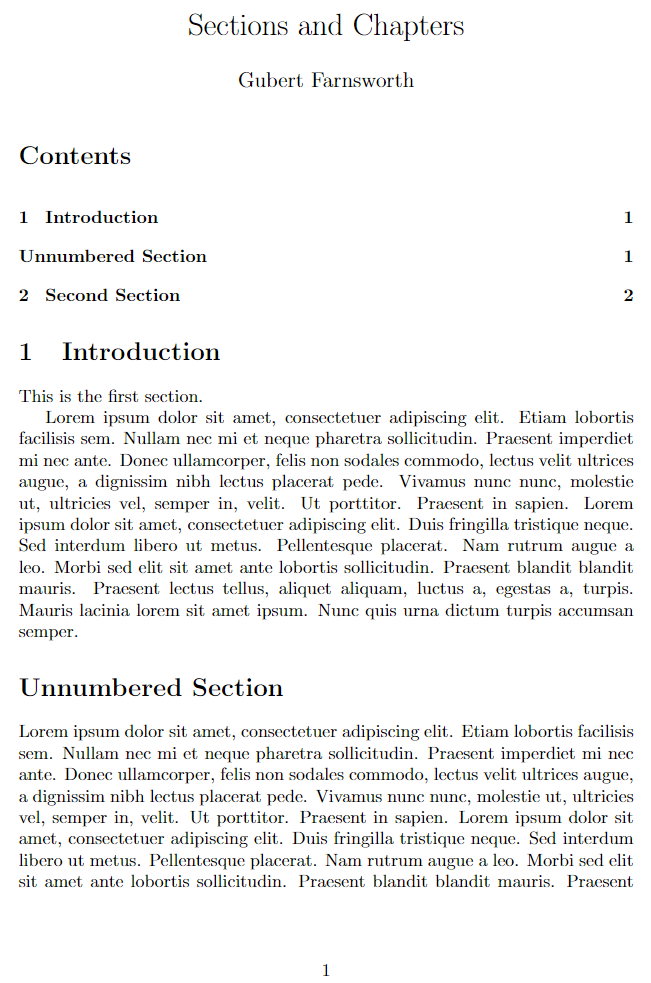
Change the title of the table of contents
-----------------------------------------
The default title for the table of contents is **Contents**; it can be changed into whatever you need as the following example demonstrates:
\\documentclass{article}
\\title{Sections and Chapters}
\\author{Gubert Farnsworth}
\\date{ }
\\renewcommand\*\\contentsname{Summary}
\\begin{document}
\\maketitle
\\tableofcontents
\\section{Introduction}
This is the first section.
Lorem ipsum dolor sit amet, consectetuer adipiscing
elit. Etiam lobortisfacilisis sem. Nullam nec mi et
neque pharetra sollicitudin. Praesent imperdietmi nec ante.
Donec ullamcorper, felis non sodales...
\\addcontentsline{toc}{section}{Unnumbered Section}
\\section\*{Unnumbered Section}
Lorem ipsum dolor sit amet, consectetuer adipiscing elit.
Etiam lobortis facilisissem. Nullam nec mi et neque pharetra
sollicitudin. Praesent imperdiet mi necante...
\\section{Second Section}
Lorem ipsum dolor sit amet, consectetuer adipiscing elit.
Etiam lobortis facilisissem. Nullam nec mi et neque pharetra
sollicitudin. Praesent imperdiet mi necante...
\\end{document}
[Open this example in Overleaf](https://www.overleaf.com/docs?engine=pdflatex&snip_name=How+to+change+title+of+table+of+contents&snip=%5Cdocumentclass%7Barticle%7D%0A%5Ctitle%7BSections+and+Chapters%7D%0A%5Cauthor%7BGubert+Farnsworth%7D%0A%5Cdate%7B+%7D%0A%5Crenewcommand%2A%5Ccontentsname%7BSummary%7D%0A%5Cbegin%7Bdocument%7D%0A%5Cmaketitle%0A%5Ctableofcontents%0A%5Csection%7BIntroduction%7D%0A+++%0AThis+is+the+first+section.%0A++++++%0ALorem++ipsum++dolor++sit++amet%2C++consectetuer++adipiscing++%0Aelit.+++Etiam++lobortisfacilisis+sem.++Nullam+nec+mi+et+%0Aneque+pharetra+sollicitudin.++Praesent+imperdietmi+nec+ante.+%0ADonec+ullamcorper%2C+felis+non+sodales...%0A+++++++%0A%5Caddcontentsline%7Btoc%7D%7Bsection%7D%7BUnnumbered+Section%7D%0A%5Csection%2A%7BUnnumbered+Section%7D%0A%0ALorem+ipsum+dolor+sit+amet%2C+consectetuer+adipiscing+elit.++%0AEtiam+lobortis+facilisissem.++Nullam+nec+mi+et+neque+pharetra+%0Asollicitudin.++Praesent+imperdiet+mi+necante...%0A%0A%5Csection%7BSecond+Section%7D%0A+++++++%0ALorem+ipsum+dolor+sit+amet%2C+consectetuer+adipiscing+elit.++%0AEtiam+lobortis+facilisissem.++Nullam+nec+mi+et+neque+pharetra+%0Asollicitudin.++Praesent+imperdiet+mi+necante...%0A%5Cend%7Bdocument%7D)
This example produces the following output:
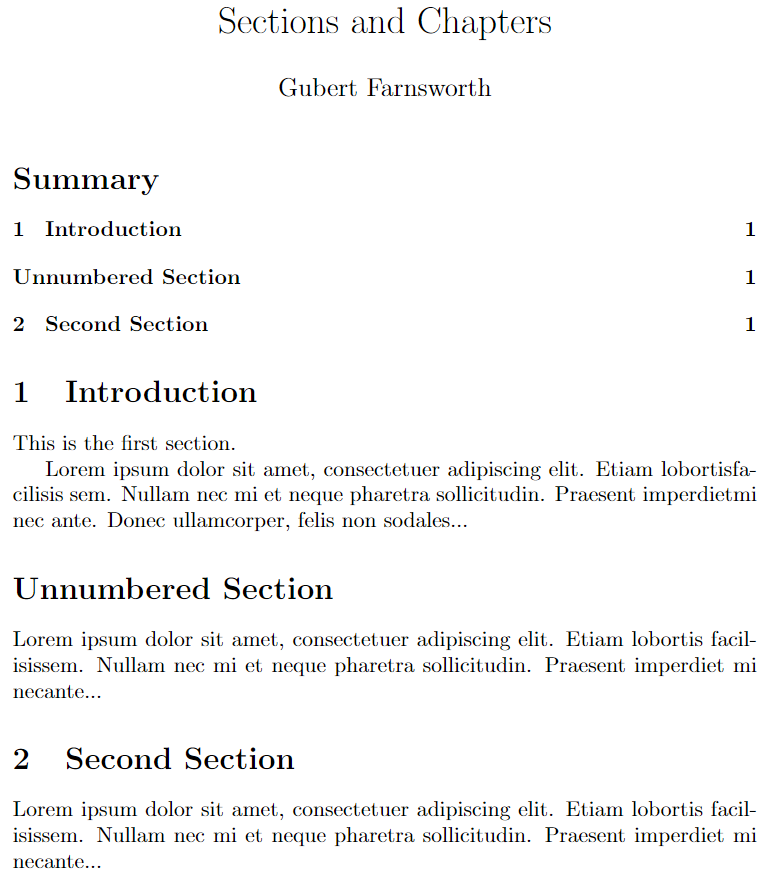
The line `\renewcommand*\contentsname{Summary}` will write "Summary" instead of the default value. If you are using the package _babel_ for [international language support](https://www.overleaf.com/learn/latex/International_language_support "International language support")
, the aforementioned command must be placed inside the braces of
\\addto\\captionsenglish{ }
Instead of English in `\captionenglish` write the name of the language you set in babel.
Further reading
---------------
For more information see:
* [Creating a document in LaTeX](https://www.overleaf.com/learn/latex/Creating_a_document_in_LaTeX "Creating a document in LaTeX")
* [Bold, italics and underlining](https://www.overleaf.com/learn/latex/Bold%2C_italics_and_underlining "Bold, italics and underlining")
* [International language support](https://www.overleaf.com/learn/latex/International_language_support "International language support")
* [Cross referencing sections and equations](https://www.overleaf.com/learn/latex/Cross_referencing_sections_and_equations "Cross referencing sections and equations")
* [Indices](https://www.overleaf.com/learn/latex/Indices "Indices")
* [Glossaries](https://www.overleaf.com/learn/latex/Glossaries "Glossaries")
* [Management in a large project](https://www.overleaf.com/learn/latex/Management_in_a_large_project "Management in a large project")
* [Multi-file LaTeX projects](https://www.overleaf.com/learn/latex/Multi-file_LaTeX_projects "Multi-file LaTeX projects")
* [Hyperlinks](https://www.overleaf.com/learn/latex/Hyperlinks "Hyperlinks")
* [Page numbering](https://www.overleaf.com/learn/latex/Page_numbering "Page numbering")
* [Single sided and double sided documents](https://www.overleaf.com/learn/latex/Single_sided_and_double_sided_documents "Single sided and double sided documents")
* [Multiple columns](https://www.overleaf.com/learn/latex/Multiple_columns "Multiple columns")
* [Counters](https://www.overleaf.com/learn/latex/Counters "Counters")
* [Font sizes, families, and styles](https://www.overleaf.com/learn/latex/Font_sizes%2C_families%2C_and_styles "Font sizes, families, and styles")
We only use cookies for essential purposes and to improve your experience on our site. You can find out more in our [cookie policy](https://www.overleaf.com/legal#Cookies)
.
Essential cookies onlyAccept all cookies
---
# Natbib citation styles - Overleaf, Online LaTeX Editor
[Skip to content](https://www.overleaf.com/learn/latex/Natbib_citation_styles#main-content)
Search help library…searchclear
No Search Results
Natbib citation styles
======================
Natbib uses the citation style associated with the corresponding [bibliography style](https://www.overleaf.com/learn/latex/Bibliography_styles%23Natbib_styles "Bibliography styles")
if no specific citation commands are declared. There are some additional commands to control some punctuation parameters. See the example below:
\\documentclass{article}
\\usepackage\[utf8\]{inputenc}
\\usepackage\[english\]{babel}
%Import the natbib package and sets a bibliography and citation styles
\\usepackage{natbib}
\\bibliographystyle{abbrvnat}
\\setcitestyle{authoryear,open={((},close={))}} %Citation-related commands
\\title{Natbib Example}
\\author{Overleaf team}
\\begin{document}
\\maketitle
\\section{First Section}
This document is an example with two cited items: \\textit{The \\LaTeX\\ Companion} book \\cite\[see\]\[chap 2\]{latexcompanion} and Einstein's journal paper \\citep{einstein}.
%Imports the bibliography file "sample.bib"
\\bibliography{sample}
\\end{document}
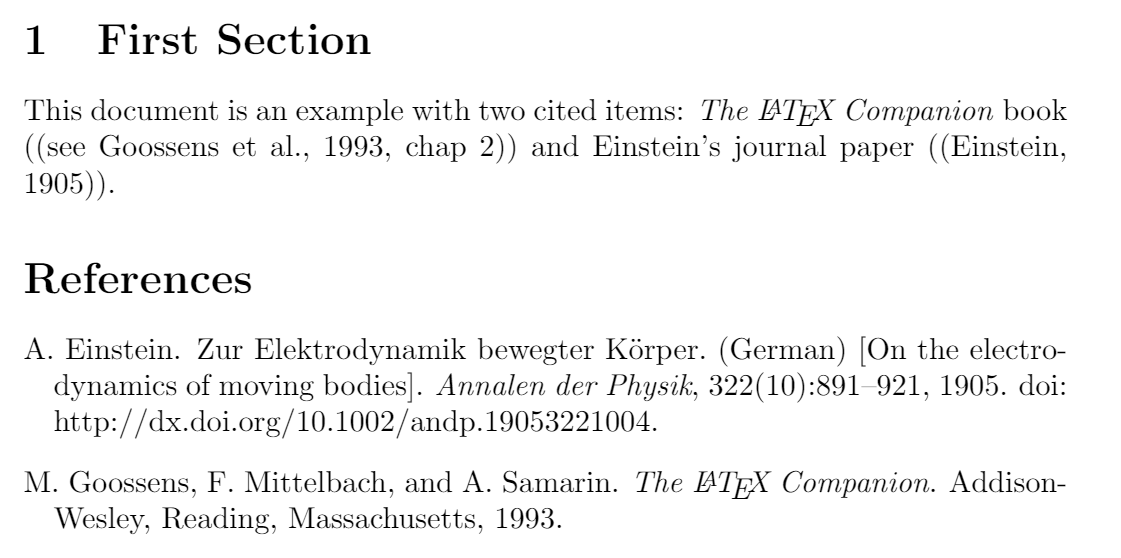
The specific command to format the citation style is:
\\setcitestyle{authoryear, open={((},close={))}
The parameters, comma-separated, tell LaTeX to use the _authoryear_ citation mode and use double parentheses as opening and closing marks. The various parameters that can be passed to this command are the following:
* Citation mode: `authoryear`, `numbers` or `super`.
* Brackets: `round` or `square`. You can manually set any other opening and closing characters with `open={char}` adn `close={char}`.
* Citation separator: `semicolon`, `comma`.
* Separator between author and year: `aysep{char}`.
* Separator between years with common author: `yysep={char}`.
* Text before post-note: `notesep={text}`.
The are other additional citation commands depending on the citation mode. For instance, in the example above the command `\cite[see][chap 2]{latexcompanion}` takes two extra parameters; the first optional parameter _see_ is printed before the citation mark and the second optional parameter _chap 2_ is printed after the citation mark. Below a table describing some additional citation commands:
| command | description |
| --- | --- |
| `\citet{}` | Textual citation |
| `\citep{}` | Parenthetical citation |
| `\citet*{}` | Same as `\citet` but if there are several authors, all names are printed |
| `\citep*{}` | The same as `\citep` but if there are several authors, all names are printed |
| `\citeauthor{}` | Prints only the name of the authors(s) |
| `\citeyear{}` | Prints only the year of the publication. |
For more information about the rest of the commands in this example see [Bibliography management with natbib](https://www.overleaf.com/learn/latex/Bibliography_management_with_natbib "Bibliography management with natbib")
[Open an example of the `natbib` package in Overleaf](https://www.overleaf.com/project/new/template/19422?id=65532643&templateName=Natbib+citation+styles+example&latexEngine=&texImage=texlive-full%3A2020.1&mainFile=)
Further reading
---------------
* [Bibliography management with natbib](https://www.overleaf.com/learn/latex/Bibliography_management_with_natbib "Bibliography management with natbib")
* [Natbib bibliography styles](https://www.overleaf.com/learn/latex/Natbib_bibliography_styles "Natbib bibliography styles")
* [Natbib package documentation](http://mirrors.ibiblio.org/CTAN/macros/latex/contrib/natbib/natbib.pdf)
* [International language support](https://www.overleaf.com/learn/latex/International_language_support "International language support")
* [Management in a large project](https://www.overleaf.com/learn/latex/Management_in_a_large_project "Management in a large project")
* [Table of contents](https://www.overleaf.com/learn/latex/Table_of_contents "Table of contents")
We only use cookies for essential purposes and to improve your experience on our site. You can find out more in our [cookie policy](https://www.overleaf.com/legal#Cookies)
.
Essential cookies onlyAccept all cookies
---
# Fractions and Binomials - Overleaf, Online LaTeX Editor
[Skip to content](https://www.overleaf.com/learn/latex/Fractions_and_Binomials#main-content)
Search help library…searchclear
No Search Results
Fractions and Binomials
=======================
Contents
--------
* [1 Introduction](https://www.overleaf.com/learn/latex/Fractions_and_Binomials#Introduction)
* [2 Displaying fractions](https://www.overleaf.com/learn/latex/Fractions_and_Binomials#Displaying_fractions)
* [3 Text-style fractions](https://www.overleaf.com/learn/latex/Fractions_and_Binomials#Text-style_fractions)
* [4 Size and spacing within typeset mathematics](https://www.overleaf.com/learn/latex/Fractions_and_Binomials#Size_and_spacing_within_typeset_mathematics)
* [5 Continued fractions](https://www.overleaf.com/learn/latex/Fractions_and_Binomials#Continued_fractions)
* [6 A final example](https://www.overleaf.com/learn/latex/Fractions_and_Binomials#A_final_example)
* [7 Further reading](https://www.overleaf.com/learn/latex/Fractions_and_Binomials#Further_reading)
Introduction
------------
This article explains how to typeset fractions and binomial coefficients, starting with the following example which uses the [`amsmath` package](https://ctan.org/pkg/amsmath?lang=en)
:
\\documentclass{article}
\\usepackage{amsmath}
\\begin{document}
The binomial coefficient, \\(\\binom{n}{k}\\), is defined by the expression:
\\\[\
\\binom{n}{k} \= \\frac{n!}{k!(n\-k)!}\
\\\]
\\end{document}
[Open this example in Overleaf.](https://www.overleaf.com/docs?engine=pdflatex&snip_name=Fractions+and+Binomials&snip=%5Cdocumentclass%7Barticle%7D%0A%5Cusepackage%7Bamsmath%7D%0A%5Cbegin%7Bdocument%7D%0AThe+binomial+coefficient%2C+%5C%28%5Cbinom%7Bn%7D%7Bk%7D%5C%29%2C+is+defined+by+the+expression%3A%0A%5C%5B%0A++++%5Cbinom%7Bn%7D%7Bk%7D+%3D+%5Cfrac%7Bn%21%7D%7Bk%21%28n-k%29%21%7D%0A%5C%5D%0A%5Cend%7Bdocument%7D)
The [`amsmath` package](https://ctan.org/pkg/amsmath?lang=en)
is loaded by adding the following line to the document preamble:
\\usepackage{amsmath}
Here is the output produced:

Displaying fractions
--------------------
The visual appearance of fractions will change depending on whether they appear inline, as part of a paragraph, or typeset as standalone material displayed on their own line. The next example demonstrates those changes to visual appearance:
\\documentclass{article}
% Using the geometry package to reduce
% the width of help article graphics
\\usepackage\[textwidth=8cm\]{geometry}
\\begin{document}
Fractions can be used inline within the paragraph text, for
example \\(\\frac{1}{2}\\), or displayed on their own line,
such as this:
\\\[\\frac{1}{2}\\\]
\\end{document}
[Open this example in Overleaf.](https://www.overleaf.com/docs?engine=pdflatex&snip_name=Inline+and+display+of+fractions+and+binomials&snip=%5Cdocumentclass%7Barticle%7D%0A%25+Using+the+geometry+package+to+reduce%0A%25+the+width+of+help+article+graphics%0A%5Cusepackage%5Btextwidth%3D8cm%5D%7Bgeometry%7D%0A%5Cbegin%7Bdocument%7D%0AFractions+can+be+used+inline+within+the+paragraph+text%2C+for+%0Aexample+%5C%28%5Cfrac%7B1%7D%7B2%7D%5C%29%2C+or+displayed+on+their+own+line%2C+%0Asuch+as+this%3A%0A%5C%5B%5Cfrac%7B1%7D%7B2%7D%5C%5D%0A%5Cend%7Bdocument%7D)
This example produces the following output:
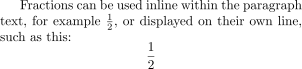
* **Note**: More information on inline and display versions of mathematics can be found in the Overleaf article [Display style in math mode](https://www.overleaf.com/learn/latex/Display_style_in_math_mode "Display style in math mode")
.
Our example fraction is typeset using the `\frac` command (`\frac{1}{2}`) which has the general form `\frac{_numerator_}{_denominator_}`.
Text-style fractions
--------------------
The following example demonstrates typesetting text-only fractions by using the `\text{...}` command provided by the `amsmath` package. The `\text{...}` command is used to prevent LaTeX typesetting the text as regular mathematical content.
\\documentclass{article}
% Using the geometry package to reduce
% the width of help article graphics
\\usepackage\[textwidth=8cm\]{geometry}
\\usepackage{amsmath}% For the \\text{...} command
\\begin{document}
We use the \\texttt{amsmath} package command
\\verb|\\text{...}| to create text-only fractions
like this:
\\\[\\frac{\\text{numerator}}{\\text{denominator}}\\\]
Without the \\verb|\\text{...}| command the result
looks like this:
\\\[\\frac{numerator}{denominator}\\\]
\\end{document}
[Open this example in Overleaf.](https://www.overleaf.com/docs?engine=pdflatex&snip_name=Text+fractions&snip=%5Cdocumentclass%7Barticle%7D%0A%25+Using+the+geometry+package+to+reduce%0A%25+the+width+of+help+article+graphics%0A%5Cusepackage%5Btextwidth%3D8cm%5D%7Bgeometry%7D%0A%5Cusepackage%7Bamsmath%7D%25+For+the+%5Ctext%7B...%7D+command%0A%5Cbegin%7Bdocument%7D%0AWe+use+the+%5Ctexttt%7Bamsmath%7D+package+command%0A%5Cverb%7C%5Ctext%7B...%7D%7C+to+create+text-only+fractions%0Alike+this%3A%0A%0A%5C%5B%5Cfrac%7B%5Ctext%7Bnumerator%7D%7D%7B%5Ctext%7Bdenominator%7D%7D%5C%5D%0A%0AWithout+the+%5Cverb%7C%5Ctext%7B...%7D%7C+command+the+result+%0Alooks+like+this%3A%0A%0A%5C%5B%5Cfrac%7Bnumerator%7D%7Bdenominator%7D%5C%5D%0A%5Cend%7Bdocument%7D)
This example produces the following output:
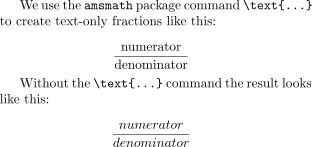
Size and spacing within typeset mathematics
-------------------------------------------
The size and spacing of mathematical material typeset by LaTeX is [determined by algorithms](https://tug.org/TUGboat/tb27-1/tb86jackowski.pdf)
which apply size and positioning data contained inside the fonts used to typeset mathematics.
Occasionally, it may be necessary, or desirable, to override the default mathematical styles—size and spacing of math elements—chosen by LaTeX, a topic discussed in the Overleaf help article [Display style in math mode](https://www.overleaf.com/learn/latex/Display_style_in_math_mode#Overriding_default_mathematical_styles)
.
To summarize, the default style(s) used to typeset mathematics can be changed by the following commands:
* `\textstyle`: apply the style used for mathematics typeset in paragraphs;
* `\displaystyle`: apply the style used for mathematics typeset on lines by themselves;
* `\scriptstyle`: apply the style used for subscripts or superscripts;
* `\scriptscriptstyle`: apply the style used for second-order subscripts or superscripts;
which are demonstrated in the next example.
\\documentclass{article}
% Using the geometry package to reduce
% the width of help article graphics
\\usepackage\[textwidth=9.5cm\]{geometry}
\\begin{document}
Fractions typeset within a paragraph typically look like this: \\(\\frac{3x}{2}\\). You can force \\LaTeX{} to use the larger display style, such as \\( \\displaystyle \\frac{3x}{2} \\), which also has an effect on line spacing. The size of maths in a paragraph can also be reduced: \\(\\scriptstyle \\frac{3x}{2}\\) or \\(\\scriptscriptstyle \\frac{3x}{2}\\). For the \\verb|\\scriptscriptstyle| example note the reduction in spacing: characters are moved closer to the \\textit{vinculum} (the line separating numerator and denominator).
Equally, you can change the style of mathematics normally typeset in display style:
\\\[f(x)=\\frac{P(x)}{Q(x)}\\quad \\textrm{and}\\quad \\textstyle f(x)=\\frac{P(x)}{Q(x)}\\quad \\textrm{and}\\quad \\scriptstyle f(x)=\\frac{P(x)}{Q(x)}\\\]
\\end{document}
[Open this example in Overleaf](https://www.overleaf.com/docs?engine=pdflatex&snip_name=Changing+default+math+styles&snip=%5Cdocumentclass%7Barticle%7D%0A%25+Using+the+geometry+package+to+reduce%0A%25+the+width+of+help+article+graphics%0A%5Cusepackage%5Btextwidth%3D9.5cm%5D%7Bgeometry%7D%0A%5Cbegin%7Bdocument%7D%0A%0AFractions+typeset+within+a+paragraph+typically+look+like+this%3A+%5C%28%5Cfrac%7B3x%7D%7B2%7D%5C%29.+You+can+force+%5CLaTeX%7B%7D+to+use+the+larger+display+style%2C+such+as+%5C%28+%5Cdisplaystyle+%5Cfrac%7B3x%7D%7B2%7D+%5C%29%2C+which+also+has+an+effect+on+line+spacing.+The+size+of+maths+in+a+paragraph+can+also+be+reduced%3A+%5C%28%5Cscriptstyle+%5Cfrac%7B3x%7D%7B2%7D%5C%29+or+%5C%28%5Cscriptscriptstyle+%5Cfrac%7B3x%7D%7B2%7D%5C%29.+For+the+%5Cverb%7C%5Cscriptscriptstyle%7C+example+note+the+reduction+in+spacing%3A+characters+are+moved+closer+to+the+%5Ctextit%7Bvinculum%7D+%28the+line+separating+numerator+and+denominator%29.%0A%0AEqually%2C+you+can+change+the+style+of+mathematics+normally+typeset+in+display+style%3A%0A%0A%5C%5Bf%28x%29%3D%5Cfrac%7BP%28x%29%7D%7BQ%28x%29%7D%5Cquad+%5Ctextrm%7Band%7D%5Cquad+%5Ctextstyle+f%28x%29%3D%5Cfrac%7BP%28x%29%7D%7BQ%28x%29%7D%5Cquad+%5Ctextrm%7Band%7D%5Cquad+%5Cscriptstyle+f%28x%29%3D%5Cfrac%7BP%28x%29%7D%7BQ%28x%29%7D%5C%5D%0A%5Cend%7Bdocument%7D)
This example produces the following output:
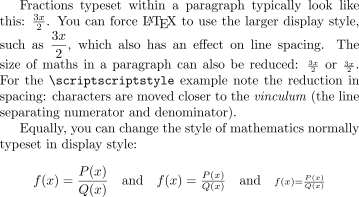
Continued fractions
-------------------
Fractions can be nested to obtain more complex expressions. The second pair of fractions displayed in the following example both use the `\cfrac` command, designed specifically to produce continued fractions. To use `\cfrac` you must load the [`amsmath` package](https://ctan.org/pkg/amsmath?lang=en)
in the document preamble.
\\documentclass{article}
% Using the geometry package to reduce
% the width of help article graphics
\\usepackage\[textwidth=9.5cm\]{geometry}
% Load amsmath to access the \\cfrac{...}{...} command
\\usepackage{amsmath}
\\begin{document}
Fractions can be nested but, in this example, note how the default math styles, as used in the denominator, don't produce ideal results...
\\\[ \\frac{1+\\frac{a}{b}}{1+\\frac{1}{1+\\frac{1}{a}}} \\\]
\\noindent ...so we use \\verb|\\displaystyle| to improve typesetting:
\\\[ \\frac{1+\\frac{a}{b}} {\\displaystyle 1+\\frac{1}{1+\\frac{1}{a}}} \\\]
Here is an example which uses the \\texttt{amsmath} \\verb|\\cfrac| command:
\\\[\
a\_0+\\cfrac{1}{a\_1+\\cfrac{1}{a\_2+\\cfrac{1}{a\_3+\\cdots}}}\
\\\]
Here is another example, derived from the \\texttt{amsmath} documentation, which demonstrates left
and right placement of the numerator using \\verb|\\cfrac\[l\]| and \\verb|\\cfrac\[r\]| respectively:
\\\[\
\\cfrac\[l\]{1}{\\sqrt{2}+\
\\cfrac\[r\]{1}{\\sqrt{2}+\
\\cfrac{1}{\\sqrt{2}+\\dotsb}}}\
\\\]
\\end{document}
[Open this example in Overleaf.](https://www.overleaf.com/docs?engine=pdflatex&snip_name=Example+of+continued+fractions&snip=%5Cdocumentclass%7Barticle%7D%0A%25+Using+the+geometry+package+to+reduce%0A%25+the+width+of+help+article+graphics%0A%5Cusepackage%5Btextwidth%3D9.5cm%5D%7Bgeometry%7D%0A%25+Load+amsmath+to+access+the+%5Ccfrac%7B...%7D%7B...%7D+command%0A%5Cusepackage%7Bamsmath%7D%0A%5Cbegin%7Bdocument%7D%0AFractions+can+be+nested+but%2C+in+this+example%2C+note+how+the+default+math+styles%2C+as+used+in+the+denominator%2C+don%27t+produce+ideal+results...%0A%0A%5C%5B+%5Cfrac%7B1%2B%5Cfrac%7Ba%7D%7Bb%7D%7D%7B1%2B%5Cfrac%7B1%7D%7B1%2B%5Cfrac%7B1%7D%7Ba%7D%7D%7D+%5C%5D%0A%0A%5Cnoindent+...so+we+use+%5Cverb%7C%5Cdisplaystyle%7C+to+improve+typesetting%3A%0A%0A%5C%5B+%5Cfrac%7B1%2B%5Cfrac%7Ba%7D%7Bb%7D%7D+%7B%5Cdisplaystyle+1%2B%5Cfrac%7B1%7D%7B1%2B%5Cfrac%7B1%7D%7Ba%7D%7D%7D+%5C%5D%0A%0AHere+is+an+example+which+uses+the+%5Ctexttt%7Bamsmath%7D+%5Cverb%7C%5Ccfrac%7C+command%3A%0A%0A%5C%5B%0A++a_0%2B%5Ccfrac%7B1%7D%7Ba_1%2B%5Ccfrac%7B1%7D%7Ba_2%2B%5Ccfrac%7B1%7D%7Ba_3%2B%5Ccdots%7D%7D%7D%0A%5C%5D%0A%0AHere+is+another+example%2C+derived+from+the+%5Ctexttt%7Bamsmath%7D+documentation%2C+which+demonstrates+left%0Aand+right+placement+of+the+numerator+using+%5Cverb%7C%5Ccfrac%5Bl%5D%7C+and+%5Cverb%7C%5Ccfrac%5Br%5D%7C+respectively%3A%0A%5C%5B%0A%5Ccfrac%5Bl%5D%7B1%7D%7B%5Csqrt%7B2%7D%2B%0A%5Ccfrac%5Br%5D%7B1%7D%7B%5Csqrt%7B2%7D%2B%0A%5Ccfrac%7B1%7D%7B%5Csqrt%7B2%7D%2B%5Cdotsb%7D%7D%7D%0A%5C%5D%0A%5Cend%7Bdocument%7D)
This example produces the following output:
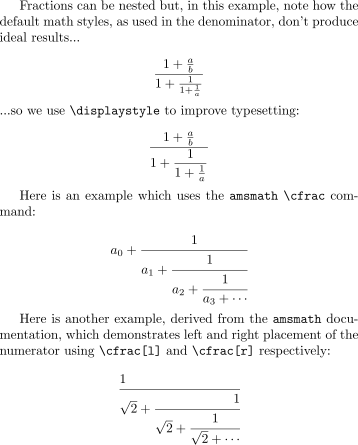
A final example
---------------
This example demonstrates a more complex continued fraction:
\\documentclass{article}
\\usepackage{amsmath}
\\begin{document}
\\newcommand\*{\\contfrac}\[2\]{%
{
\\rlap{$\\dfrac{1}{\\phantom{#1}}$}%
\\genfrac{}{}{0pt}{0}{}{#1+#2}%
}
}
\\\[\
a\_0 +\
\\contfrac{a\_1}{\
\\contfrac{a\_2}{\
\\contfrac{a\_3}{\
\\genfrac{}{}{0pt}{0}{}{\\ddots}\
}}}\
\\\]
\\end{document}
[Open this example in Overleaf.](https://www.overleaf.com/docs?engine=pdflatex&snip_name=A+more+complex+continued+fraction&snip=%5Cdocumentclass%7Barticle%7D%0A%5Cusepackage%7Bamsmath%7D%0A%5Cbegin%7Bdocument%7D%0A%5Cnewcommand%2A%7B%5Ccontfrac%7D%5B2%5D%7B%25%0A%7B%0A++%5Crlap%7B%24%5Cdfrac%7B1%7D%7B%5Cphantom%7B%231%7D%7D%24%7D%25%0A++%5Cgenfrac%7B%7D%7B%7D%7B0pt%7D%7B0%7D%7B%7D%7B%231%2B%232%7D%25%0A%7D%0A%7D%0A%5C%5B%0A++a_0+%2B%0A++%5Ccontfrac%7Ba_1%7D%7B%0A++%5Ccontfrac%7Ba_2%7D%7B%0A++%5Ccontfrac%7Ba_3%7D%7B%0A++%5Cgenfrac%7B%7D%7B%7D%7B0pt%7D%7B0%7D%7B%7D%7B%5Cddots%7D%0A++%7D%7D%7D%0A%5C%5D%0A%0A%5Cend%7Bdocument%7D)
This example produces the following output:
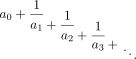
Further reading
---------------
For more information see:
* [Mathematical expressions](https://www.overleaf.com/learn/latex/Mathematical_expressions "Mathematical expressions")
* [Subscripts and superscripts](https://www.overleaf.com/learn/latex/Subscripts_and_superscripts "Subscripts and superscripts")
* [Brackets and Parentheses](https://www.overleaf.com/learn/latex/Brackets_and_Parentheses "Brackets and Parentheses")
* [Aligning equations with amsmath](https://www.overleaf.com/learn/latex/Aligning_equations_with_amsmath "Aligning equations with amsmath")
* [Operators](https://www.overleaf.com/learn/latex/Operators "Operators")
* [Mathematical fonts](https://www.overleaf.com/learn/latex/Mathematical_fonts "Mathematical fonts")
* [The not so short introduction to LaTeX2ε](http://www.ctan.org/tex-archive/info/lshort/)
We only use cookies for essential purposes and to improve your experience on our site. You can find out more in our [cookie policy](https://www.overleaf.com/legal#Cookies)
.
Essential cookies onlyAccept all cookies
---
# Mathematical expressions - Overleaf, Online LaTeX Editor
[Skip to content](https://www.overleaf.com/learn/latex/Mathematical_expressions#main-content)
Search help library…searchclear
No Search Results
Mathematical expressions
========================
Contents
--------
* [1 Introduction](https://www.overleaf.com/learn/latex/Mathematical_expressions#Introduction)
* [2 Mathematical modes](https://www.overleaf.com/learn/latex/Mathematical_expressions#Mathematical_modes)
* [2.1 Inline math mode](https://www.overleaf.com/learn/latex/Mathematical_expressions#Inline_math_mode)
* [2.2 Display math mode](https://www.overleaf.com/learn/latex/Mathematical_expressions#Display_math_mode)
* [3 Another example](https://www.overleaf.com/learn/latex/Mathematical_expressions#Another_example)
* [4 Reference guide](https://www.overleaf.com/learn/latex/Mathematical_expressions#Reference_guide)
* [5 Further reading](https://www.overleaf.com/learn/latex/Mathematical_expressions#Further_reading)
Introduction
------------
LaTeX's features for typesetting mathematics make it a compelling choice for writing technical documents. This article shows the most basic commands needed to get started with writing maths using LaTeX.
Writing basic equations in LaTeX is straightforward, for example:
\\documentclass{article}
\\begin{document}
The well known Pythagorean theorem \\(x^2 + y^2 \= z^2\\) was
proved to be invalid for other exponents.
Meaning the next equation has no integer solutions:
\\\[ x^n + y^n \= z^n \\\]
\\end{document}
[Open this example in Overleaf](https://www.overleaf.com/docs?engine=pdflatex&snip_name=Basic+math+example&snip=%5Cdocumentclass%7Barticle%7D%0A%5Cbegin%7Bdocument%7D%0A%0AThe+well+known+Pythagorean+theorem+%5C%28x%5E2+%2B+y%5E2+%3D+z%5E2%5C%29+was+%0Aproved+to+be+invalid+for+other+exponents.+%0AMeaning+the+next+equation+has+no+integer+solutions%3A%0A%0A%5C%5B+x%5En+%2B+y%5En+%3D+z%5En+%5C%5D%0A%0A%5Cend%7Bdocument%7D)

As you see, the way the equations are displayed depends on the delimiter, in this case `\[...\]` and `\(...\)`.
Mathematical modes
------------------
LaTeX allows two writing modes for mathematical expressions: the _inline_ math mode and _display_ math mode:
* _inline_ math mode is used to write formulas that are part of a paragraph
* _display_ math mode is used to write expressions that are not part of a paragraph, and are therefore put on separate lines
### Inline math mode
You can use any of these "delimiters" to typeset your math in inline mode:
* `\(...\)`
* `$...$`
* `\begin{math}...\end{math}`
They all work and the choice is a matter of taste, so let's see some examples.
\\documentclass{article}
\\begin{document}
\\noindent Standard \\LaTeX{} practice is to write inline math by enclosing it between \\verb|\\(...\\)|:
\\begin{quote}
In physics, the mass-energy equivalence is stated
by the equation \\(E\=mc^2\\), discovered in 1905 by Albert Einstein.
\\end{quote}
\\noindent Instead if writing (enclosing) inline math between \\verb|\\(...\\)| you can use \\texttt{\\$...\\$} to achieve the same result:
\\begin{quote}
In physics, the mass-energy equivalence is stated
by the equation $E\=mc^2$, discovered in 1905 by Albert Einstein.
\\end{quote}
\\noindent Or, you can use \\verb|\\begin{math}...\\end{math}|:
\\begin{quote}
In physics, the mass-energy equivalence is stated
by the equation \\begin{math}E=mc^2\\end{math}, discovered in 1905 by Albert Einstein.
\\end{quote}
\\end{document}
[Open this example in Overleaf](https://www.overleaf.com/docs?engine=pdflatex&snip_name=Basic+inline+math+example&snip=%5Cdocumentclass%7Barticle%7D%0A%5Cbegin%7Bdocument%7D%0A%0A%5Cnoindent+Standard+%5CLaTeX%7B%7D+practice+is+to+write+inline+math+by+enclosing+it+between+%5Cverb%7C%5C%28...%5C%29%7C%3A%0A%0A%5Cbegin%7Bquote%7D%0AIn+physics%2C+the+mass-energy+equivalence+is+stated+%0Aby+the+equation+%5C%28E%3Dmc%5E2%5C%29%2C+discovered+in+1905+by+Albert+Einstein.%0A%5Cend%7Bquote%7D%0A%0A%5Cnoindent+Instead+if+writing+%28enclosing%29+inline+math+between+%5Cverb%7C%5C%28...%5C%29%7C+you+can+use+%5Ctexttt%7B%5C%24...%5C%24%7D+to+achieve+the+same+result%3A%0A%0A%5Cbegin%7Bquote%7D%0AIn+physics%2C+the+mass-energy+equivalence+is+stated+%0Aby+the+equation+%24E%3Dmc%5E2%24%2C+discovered+in+1905+by+Albert+Einstein.%0A%5Cend%7Bquote%7D%0A%0A%5Cnoindent+Or%2C+you+can+use+%5Cverb%7C%5Cbegin%7Bmath%7D...%5Cend%7Bmath%7D%7C%3A%0A%0A%5Cbegin%7Bquote%7D%0AIn+physics%2C+the+mass-energy+equivalence+is+stated+%0Aby+the+equation+%5Cbegin%7Bmath%7DE%3Dmc%5E2%5Cend%7Bmath%7D%2C+discovered+in+1905+by+Albert+Einstein.%0A%5Cend%7Bquote%7D%0A%5Cend%7Bdocument%7D)
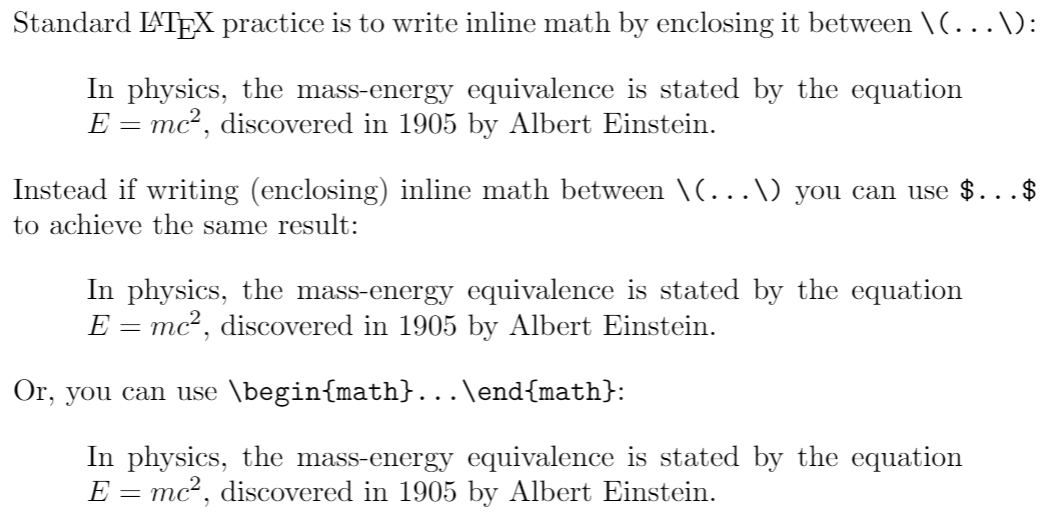
### Display math mode
Use one of these constructions to typeset maths in display mode:
* `\[...\]`
* `\begin{displaymath}...\end{displaymath}`
* `\begin{equation}...\end{equation}`
Display math mode has two versions which produce numbered or unnumbered equations. Let's look at a basic example:
\\documentclass{article}
\\begin{document}
The mass-energy equivalence is described by the famous equation
\\\[E\=mc^2\\\]
discovered in 1905 by Albert Einstein.
In natural units ($c$ = 1), the formula expresses the identity
\\begin{equation}
E=m
\\end{equation}
\\end{document}
[Open this example in Overleaf](https://www.overleaf.com/docs?engine=pdflatex&snip_name=Basic+math+example&snip=%5Cdocumentclass%7Barticle%7D%0A%5Cbegin%7Bdocument%7D%0AThe+mass-energy+equivalence+is+described+by+the+famous+equation%0A%0A%5C%5BE%3Dmc%5E2%5C%5D%0A%0Adiscovered+in+1905+by+Albert+Einstein.+%0AIn+natural+units+%28%24c%24+%3D+1%29%2C+the+formula+expresses+the+identity%0A%0A%5Cbegin%7Bequation%7D%0AE%3Dm%0A%5Cend%7Bequation%7D%0A%5Cend%7Bdocument%7D)
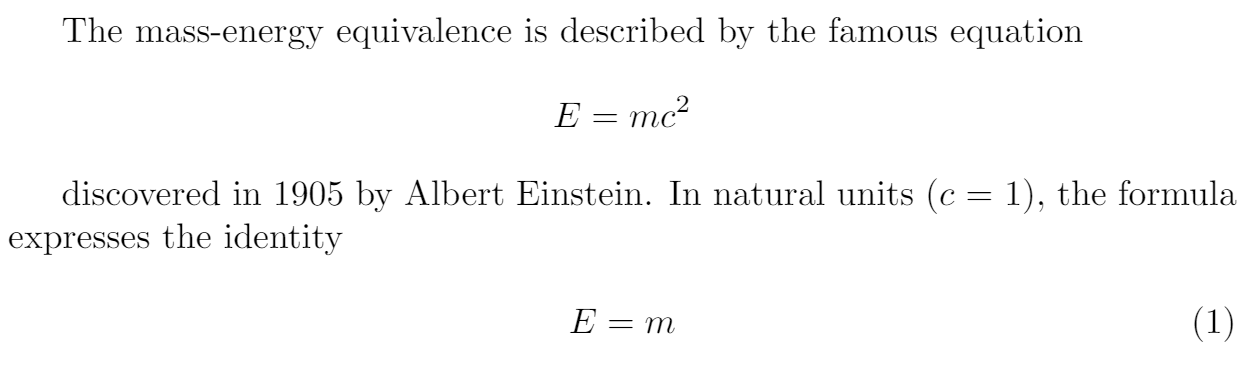
Another example
---------------
The following example uses the `equation*` environment which is provided by the `amsmath` package—see the [`amsmath` article](https://www.overleaf.com/learn/latex/Aligning_equations "Aligning equations")
for more information.
\\documentclass{article}
\\usepackage{amsmath} % for the equation\* environment
\\begin{document}
This is a simple math expression \\(\\sqrt{x^2+1}\\) inside text.
And this is also the same:
\\begin{math}
\\sqrt{x^2+1}
\\end{math}
but by using another command.
This is a simple math expression without numbering
\\\[\\sqrt{x^2+1}\\\]
separated from text.
This is also the same:
\\begin{displaymath}
\\sqrt{x^2+1}
\\end{displaymath}
\\ldots and this:
\\begin{equation\*}
\\sqrt{x^2+1}
\\end{equation\*}
\\end{document}
[Open this example in Overleaf](https://www.overleaf.com/docs?engine=pdflatex&snip_name=Typesetting+maths+example&snip=%5Cdocumentclass%7Barticle%7D%0A%5Cusepackage%7Bamsmath%7D+%25+for+the+equation%2A+environment%0A%5Cbegin%7Bdocument%7D%0A%0AThis+is+a+simple+math+expression+%5C%28%5Csqrt%7Bx%5E2%2B1%7D%5C%29+inside+text.+%0AAnd+this+is+also+the+same%3A+%0A%5Cbegin%7Bmath%7D%0A%5Csqrt%7Bx%5E2%2B1%7D%0A%5Cend%7Bmath%7D%0Abut+by+using+another+command.%0A%0AThis+is+a+simple+math+expression+without+numbering%0A%5C%5B%5Csqrt%7Bx%5E2%2B1%7D%5C%5D+%0Aseparated+from+text.%0A%0AThis+is+also+the+same%3A%0A%5Cbegin%7Bdisplaymath%7D%0A%5Csqrt%7Bx%5E2%2B1%7D%0A%5Cend%7Bdisplaymath%7D%0A%0A%5Cldots+and+this%3A%0A%5Cbegin%7Bequation%2A%7D%0A%5Csqrt%7Bx%5E2%2B1%7D%0A%5Cend%7Bequation%2A%7D%0A%0A%5Cend%7Bdocument%7D)
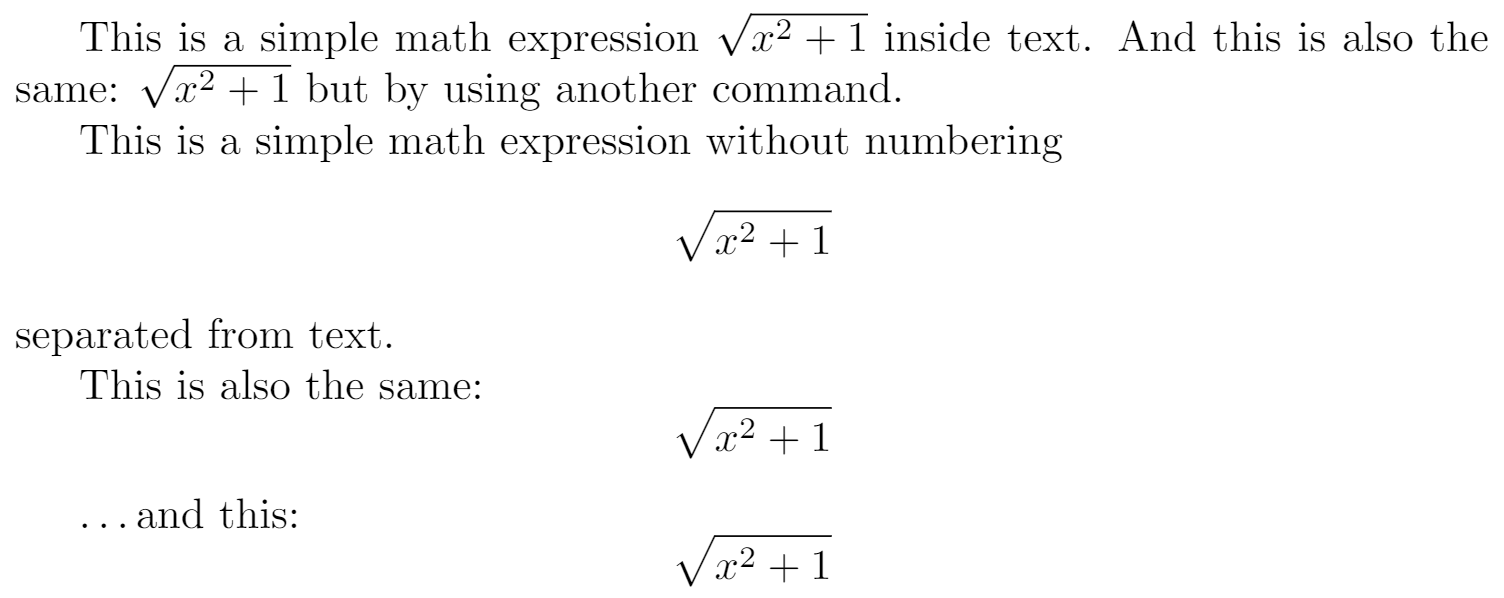
Reference guide
---------------
Below is a table with some common maths symbols. For a more complete list see the [List of Greek letters and math symbols](https://www.overleaf.com/learn/latex/List_of_Greek_letters_and_math_symbols "List of Greek letters and math symbols")
:
| description | code | examples |
| --- | --- | --- |
| Greek letters | `\alpha \beta \gamma \rho \sigma \delta \epsilon` | \\\[ \\alpha \\ \\beta \\ \\gamma \\ \\rho \\ \\sigma \\ \\delta \\ \\epsilon \\\] |
| Binary operators | `\times \otimes \oplus \cup \cap` | \\\[ \\times \\ \\otimes \\ \\oplus \\ \\cup \\ \\cap\\\] |
| Relation operators | `< > \subset \supset \subseteq \supseteq` | \\\[ < \\ >\\ \\subset \\ \\supset \\ \\subseteq \\ \\supseteq\\\] |
| Others | `\int \oint \sum \prod` | \\\[\\int \\ \\oint \\ \\sum \\ \\prod\\\] |
Different classes of mathematical symbols are characterized by different formatting (for example, variables are italicized, but [operators](https://www.overleaf.com/learn/latex/Operators "Operators")
are not) and different [spacing](https://www.overleaf.com/learn/latex/Spacing_in_math_mode "Spacing in math mode")
.
Further reading
---------------
The mathematics mode in LaTeX is very flexible and powerful, there is much more that can be done with it:
* [Subscripts and superscripts](https://www.overleaf.com/learn/latex/Subscripts_and_superscripts "Subscripts and superscripts")
* [Brackets and Parentheses](https://www.overleaf.com/learn/latex/Brackets_and_Parentheses "Brackets and Parentheses")
* [Fractions and Binomials](https://www.overleaf.com/learn/latex/Fractions_and_Binomials "Fractions and Binomials")
* [Aligning Equations](https://www.overleaf.com/learn/latex/Aligning_equations "Aligning equations")
* [Operators](https://www.overleaf.com/learn/latex/Operators "Operators")
* [Spacing in math mode](https://www.overleaf.com/learn/latex/Spacing_in_math_mode "Spacing in math mode")
* [Integrals, sums and limits](https://www.overleaf.com/learn/latex/Integrals%2C_sums_and_limits "Integrals, sums and limits")
* [Display style in math mode](https://www.overleaf.com/learn/latex/Display_style_in_math_mode "Display style in math mode")
* [List of Greek letters and math symbols](https://www.overleaf.com/learn/latex/List_of_Greek_letters_and_math_symbols "List of Greek letters and math symbols")
* [Mathematical fonts](https://www.overleaf.com/learn/latex/Mathematical_fonts "Mathematical fonts")
We only use cookies for essential purposes and to improve your experience on our site. You can find out more in our [cookie policy](https://www.overleaf.com/legal#Cookies)
.
Essential cookies onlyAccept all cookies
---
# Lists - Overleaf, Online LaTeX Editor
[Skip to content](https://www.overleaf.com/learn/latex/Lists#main-content)
Search help library…searchclear
No Search Results
Lists
=====
Contents
--------
* [1 Three ways to insert lists in Overleaf](https://www.overleaf.com/learn/latex/Lists#Three_ways_to_insert_lists_in_Overleaf)
* [2 Introduction](https://www.overleaf.com/learn/latex/Lists#Introduction)
* [3 Examples of basic lists](https://www.overleaf.com/learn/latex/Lists#Examples_of_basic_lists)
* [3.1 The itemize environment for bulleted (unordered) lists](https://www.overleaf.com/learn/latex/Lists#The_itemize_environment_for_bulleted_(unordered)_lists)
* [3.2 The enumerate environment for numbered (ordered) lists](https://www.overleaf.com/learn/latex/Lists#The_enumerate_environment_for_numbered_(ordered)_lists)
* [3.3 The description environment](https://www.overleaf.com/learn/latex/Lists#The_description_environment)
* [4 Changing the label of individual entries](https://www.overleaf.com/learn/latex/Lists#Changing_the_label_of_individual_entries)
* [5 Nested lists](https://www.overleaf.com/learn/latex/Lists#Nested_lists)
* [5.1 Nested lists: label style](https://www.overleaf.com/learn/latex/Lists#Nested_lists:_label_style)
* [5.1.1 Nested enumerate lists: number format](https://www.overleaf.com/learn/latex/Lists#Nested_enumerate_lists:_number_format)
* [5.1.2 Nested itemize lists: bullet style](https://www.overleaf.com/learn/latex/Lists#Nested_itemize_lists:_bullet_style)
* [6 Customizing lists](https://www.overleaf.com/learn/latex/Lists#Customizing_lists)
* [6.1 Customizing lists: changing labels](https://www.overleaf.com/learn/latex/Lists#Customizing_lists:_changing_labels)
* [6.1.1 Standard label-generation commands](https://www.overleaf.com/learn/latex/Lists#Standard_label-generation_commands)
* [6.1.2 Counter variables for enumerate](https://www.overleaf.com/learn/latex/Lists#Counter_variables_for_enumerate)
* [6.1.3 Examples: customizing labels of enumerate lists](https://www.overleaf.com/learn/latex/Lists#Examples:_customizing_labels_of_enumerate_lists)
* [6.1.3.1 Practical example](https://www.overleaf.com/learn/latex/Lists#Practical_example)
* [6.1.3.2 Printing counter variables](https://www.overleaf.com/learn/latex/Lists#Printing_counter_variables)
* [6.1.3.3 Non-practical (fun) example](https://www.overleaf.com/learn/latex/Lists#Non-practical_(fun)_example)
* [6.2 Customizing lists: changing the layout](https://www.overleaf.com/learn/latex/Lists#Customizing_lists:_changing_the_layout)
* [6.2.1 LaTeX list parameters](https://www.overleaf.com/learn/latex/Lists#LaTeX_list_parameters)
* [6.2.2 Creating a custom list using the list environment](https://www.overleaf.com/learn/latex/Lists#Creating_a_custom_list_using_the_list_environment)
* [6.3 Using the enumitem package to modify and create lists](https://www.overleaf.com/learn/latex/Lists#Using_the_enumitem_package_to_modify_and_create_lists)
* [6.3.1 enumitem package option shortlabels](https://www.overleaf.com/learn/latex/Lists#enumitem_package_option_shortlabels)
* [6.3.2 Modifying a standard list](https://www.overleaf.com/learn/latex/Lists#Modifying_a_standard_list)
* [6.3.3 Creating a new list with enumitem](https://www.overleaf.com/learn/latex/Lists#Creating_a_new_list_with_enumitem)
* [6.3.3.1 Using \\setlist to configure a custom list created with enumitem](https://www.overleaf.com/learn/latex/Lists#Using_\setlist_to_configure_a_custom_list_created_with_enumitem)
* [6.3.4 Lists for lawyers: nesting lists to an arbitrary depth](https://www.overleaf.com/learn/latex/Lists#Lists_for_lawyers:_nesting_lists_to_an_arbitrary_depth)
* [6.3.5 Custom bullets using the enumitem package and MetaPost](https://www.overleaf.com/learn/latex/Lists#Custom_bullets_using_the_enumitem_package_and_MetaPost)
* [6.3.5.1 Example 1: auto-sizing bullet points](https://www.overleaf.com/learn/latex/Lists#Example_1:_auto-sizing_bullet_points)
* [6.3.5.2 Example 2: funky custom bullets](https://www.overleaf.com/learn/latex/Lists#Example_2:_funky_custom_bullets)
* [7 Other features of the enumitem package](https://www.overleaf.com/learn/latex/Lists#Other_features_of_the_enumitem_package)
Three ways to insert lists in Overleaf
--------------------------------------
Overleaf provides 3 ways to create lists using LaTeX:
1. Use **Insert Bulleted List** () or **Insert Numbered List** () on the editor toolbar to insert lists into **Visual Editor** or **Code Editor**.
2. [Paste a formatted list into **Visual Editor**](https://www.overleaf.com/learn/how-to/How_to_paste_formatted_content_into_Overleaf#pasteformattedlist)
.
3. Write your own LaTeX code using **Code Editor**.
Options 1 and 2 are designed to automatically generate the LaTeX code necessary for typesetting lists. However, for those who want to write their own LaTeX code, option 3 might be the preferred choice. It offers the greatest flexibility and is the primary focus of this article.
Introduction
------------
This article provides an introduction to typesetting, and customizing, various types of list in LaTeX:
* the `itemize` environment for creating a bulleted (unordered) list
* the `enumerate` environment for creating a numbered (ordered) list
* the `description` environment for creating a list of descriptions
Typesetting lists is a large topic because LaTeX lists are _extremely_ configurable, enabling creation of an enormous variety of list types and structures. We’ll survey and demonstrate some methods you can use to [configure and customize your lists](https://www.overleaf.com/learn/latex/Lists#Customizing_lists)
.
Examples of basic lists
-----------------------
### The `itemize` environment for bulleted (unordered) lists
Unordered (bulleted) lists are produced by the `itemize` environment, where each list entry starts by using the `\item` command, which also generates the bullet symbol.
Lists are easy to create:
\\begin{itemize}
\\item List entries start with the \\verb|\\item| command.
\\item Individual entries are indicated with a black dot, a so-called bullet.
\\item The text in the entries may be of any length.
\\end{itemize}
[Open this example in Overleaf.](https://www.overleaf.com/docs?engine=pdflatex&snip_name=Basic+unordered+list+example&snip=%5Cdocumentclass%7Barticle%7D%0A%5Cbegin%7Bdocument%7D%0ALists+are+easy+to+create%3A%0A%5Cbegin%7Bitemize%7D%0A++%5Citem+List+entries+start+with+the+%5Cverb%7C%5Citem%7C+command.%0A++%5Citem+Individual+entries+are+indicated+with+a+black+dot%2C+a+so-called+bullet.%0A++%5Citem+The+text+in+the+entries+may+be+of+any+length.%0A%5Cend%7Bitemize%7D%0A%5Cend%7Bdocument%7D)
This example produces the following output:
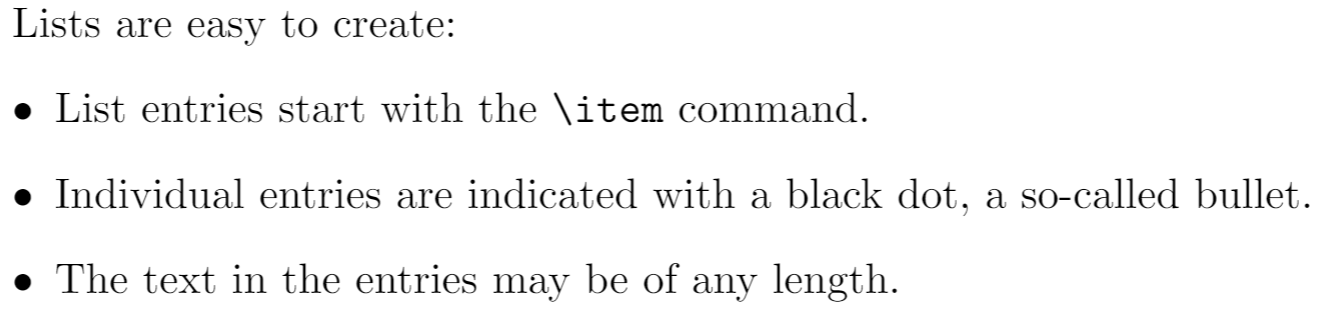
### The `enumerate` environment for numbered (ordered) lists
Numbered (ordered) lists have the same syntax but use the `enumerate` environment: each entry must be preceded by the control sequence `\item`, which will automatically generate numbers to label the item. These numbers start at 1 with every use of the `enumerate` environment—note that this, default, LaTeX numbering behaviour can be changed/controlled via the [`enumitem` package](https://ctan.org/pkg/enumitem)
.
Numbered (ordered) lists are easy to create:
\\begin{enumerate}
\\item Items are numbered automatically.
\\item The numbers start at 1 with each use of the \\texttt{enumerate} environment.
\\item Another entry in the list
\\end{enumerate}
[Open this example in Overleaf.](https://www.overleaf.com/docs?engine=pdflatex&snip_name=Basic+ordered+list+example&snip=%5Cdocumentclass%7Barticle%7D%0A%5Cbegin%7Bdocument%7D%0ANumbered+%28ordered%29+lists+are+easy+to+create%3A%0A%5Cbegin%7Benumerate%7D%0A++%5Citem+Items+are+numbered+automatically.%0A++%5Citem+The+numbers+start+at+1+with+each+use+of+the+%5Ctexttt%7Benumerate%7D+environment.%0A++%5Citem+Another+entry+in+the+list%0A%5Cend%7Benumerate%7D%0A%5Cend%7Bdocument%7D)
This example produces the following output:
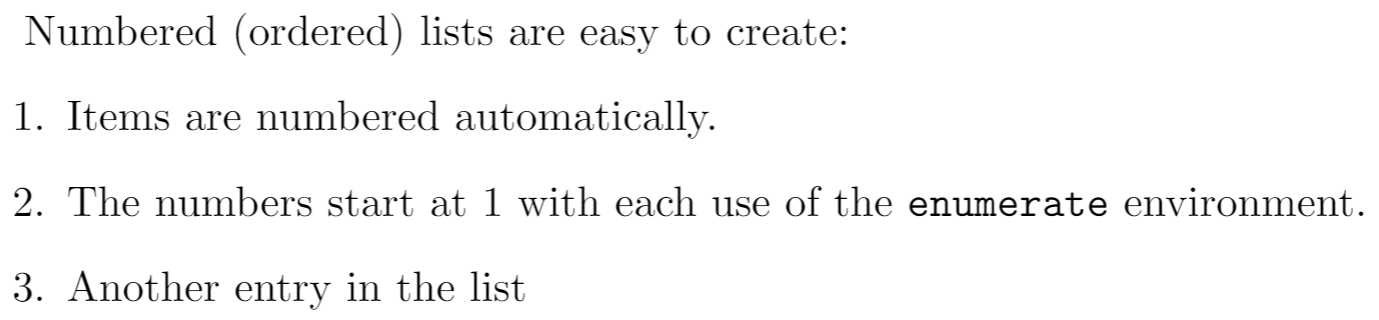
### The `description` environment
The following example demonstrates the `description` environment. The (optional) label for each entry is enclosed in square brackets after the `\item` command:
\\item\[label text\] Text of your description goes here...
We also use the `blindtext` package to generate some dummy English text in the third entry. To obtain English we need to use the `babel` package with the language option `[english]`:
\\usepackage\[english\]{babel}
Here is the example:
\\documentclass{article}
\\usepackage\[english\]{babel} % To obtain English text with the blindtext package
\\usepackage{blindtext}
\\begin{document}
\\begin{description}
\\item This is an entry \\textit{without} a label.
\\item\[Something short\] A short one-line description.
\\item\[Something long\] A much longer description. \\blindtext\[1\]
\\end{description}
\\end{document}
[Open this example in Overleaf.](https://www.overleaf.com/docs?engine=pdflatex&snip_name=Basic+description+list+example&snip=%5Cdocumentclass%7Barticle%7D%0A%5Cusepackage%5Benglish%5D%7Bbabel%7D+%25+To+obtain+English+text+with+the+blindtext+package%0A%5Cusepackage%7Bblindtext%7D%0A%5Cbegin%7Bdocument%7D%0A%0A%5Cbegin%7Bdescription%7D%0A+++%5Citem+This+is+an+entry+%5Ctextit%7Bwithout%7D+a+label.%0A+++%5Citem%5BSomething+short%5D+A+short+one-line+description.%0A+++%5Citem%5BSomething+long%5D+A+much+longer+description.+%5Cblindtext%5B1%5D%0A%5Cend%7Bdescription%7D%0A%5Cend%7Bdocument%7D)
This example produces the following output:
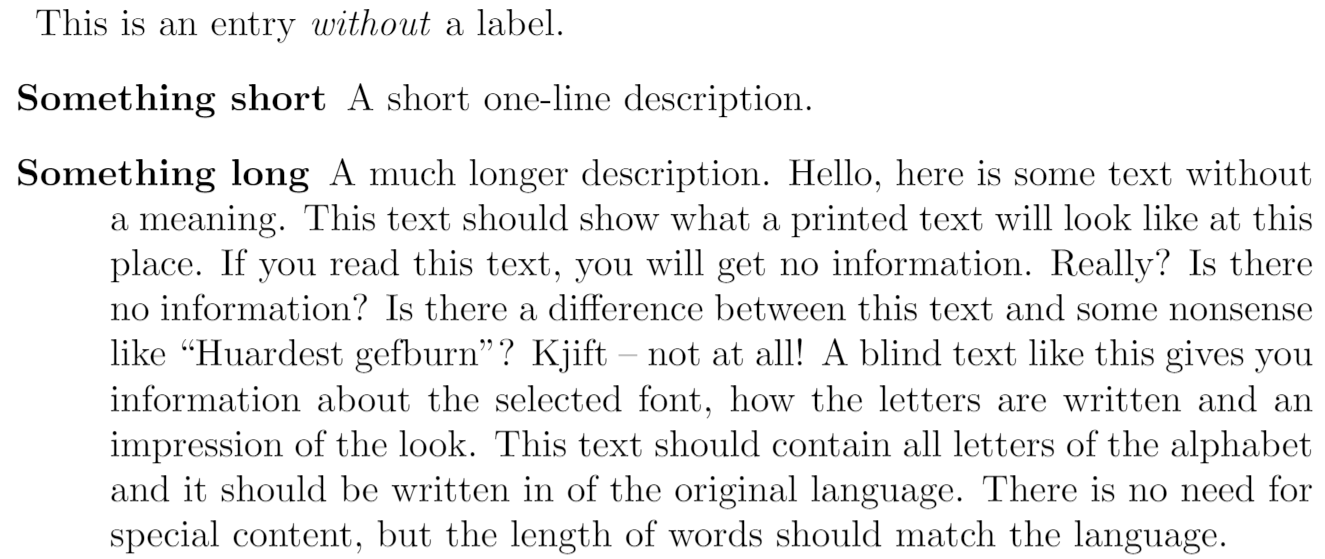
Changing the label of individual entries
----------------------------------------
As shown in the `description` environment example, the `\item` command takes an optional parameter, in square brackets. You can use this feature within `itemize` and `enumerate` environments to change the default label of individual entries in your list:
\\item\[label text\] Text of your entry goes here...
The `label text` will be used to produce the label for this entry.
Change the labels using \\verb|\\item\[label text\]| in an \\texttt{itemize} environment
\\begin{itemize}
\\item This is my first point
\\item Another point I want to make
\\item\[!\] A point to exclaim something!
\\item\[$\\blacksquare$\] Make the point fair and square.
\\item\[NOTE\] This entry has no bullet
\\item\[\] A blank label?
\\end{itemize}
\\vspace{10pt}
Change the labels using \\verb|\\item\[label text\]| in an \\texttt{enumerate} environment
\\begin{enumerate}
\\item This is my first point
\\item Another point I want to make
\\item\[!\] A point to exclaim something!
\\item\[$\\blacksquare$\] Make the point fair and square.
\\item\[NOTE\] This entry has no bullet
\\item\[\] A blank label?
\\end{enumerate}
[Open this example in Overleaf.](https://www.overleaf.com/docs?engine=pdflatex&snip_name=Changing+list+labels&snip=%5Cdocumentclass%7Barticle%7D%0A%5Cusepackage%7Bamssymb%7D%25+to+access+%24%5Cblacksquare%24%0A%5Cbegin%7Bdocument%7D%0AChange+the+labels+using+%5Cverb%7C%5Citem%5Blabel+text%5D%7C+in+an+%5Ctexttt%7Bitemize%7D+environment%0A%5Cbegin%7Bitemize%7D%0A++%5Citem+This+is+my+first+point%0A++%5Citem+Another+point+I+want+to+make+%0A++%5Citem%5B%21%5D+A+point+to+exclaim+something%21%0A++%5Citem%5B%24%5Cblacksquare%24%5D+Make+the+point+fair+and+square.%0A++%5Citem%5BNOTE%5D+This+entry+has+no+bullet%0A++%5Citem%5B%5D+A+blank+label%3F%0A%5Cend%7Bitemize%7D%0A%0A%5Cvspace%7B10pt%7D%0A%0AChange+the+labels+using+%5Cverb%7C%5Citem%5Blabel+text%5D%7C+in+an+%5Ctexttt%7Benumerate%7D+environment%0A%5Cbegin%7Benumerate%7D%0A++%5Citem+This+is+my+first+point%0A++%5Citem+Another+point+I+want+to+make+%0A++%5Citem%5B%21%5D+A+point+to+exclaim+something%21%0A++%5Citem%5B%24%5Cblacksquare%24%5D+Make+the+point+fair+and+square.%0A++%5Citem%5BNOTE%5D+This+entry+has+no+bullet%0A++%5Citem%5B%5D+A+blank+label%3F%0A%5Cend%7Benumerate%7D%0A%5Cend%7Bdocument%7D)
This example produces the following output:
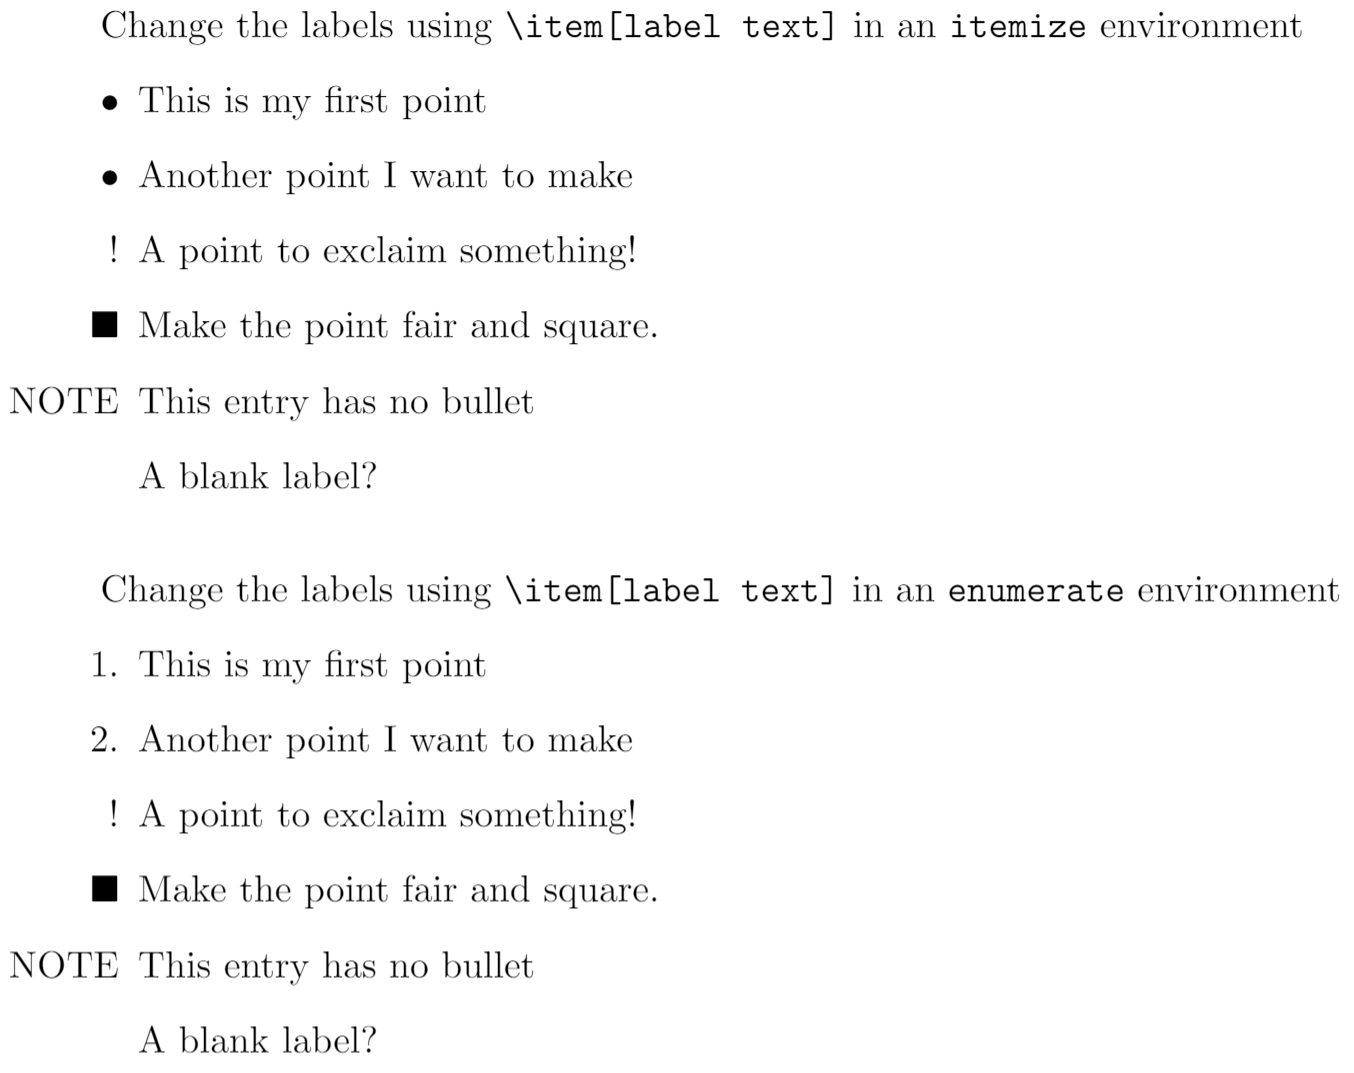
Nested lists
------------
In LaTeX you can insert a list inside another list. The above list types may be included within one another, either mixed or of one type, to a depth of 4 levels.
\\begin{enumerate}
\\item The labels consists of sequential numbers
\\begin{itemize}
\\item The individual entries are indicated with a black dot, a so-called bullet
\\item The text in the entries may be of any length
\\begin{description}
\\item\[Note:\] I would like to describe something here
\\item\[Caveat!\] And give a warning here
\\end{description}
\\end{itemize}
\\item The numbers starts at 1 with each use of the \\texttt{enumerate} environment
\\end{enumerate}
[Open this example in Overleaf.](https://www.overleaf.com/docs?engine=pdflatex&snip_name=Basic+nested+list+example&snip=%5Cdocumentclass%7Barticle%7D%0A%5Cbegin%7Bdocument%7D%0A%5Cbegin%7Benumerate%7D%0A+++%5Citem+The+labels+consists+of+sequential+numbers%0A+++%5Cbegin%7Bitemize%7D%0A+++++%5Citem+The+individual+entries+are+indicated+with+a+black+dot%2C+a+so-called+bullet%0A+++++%5Citem+The+text+in+the+entries+may+be+of+any+length%0A+++++%5Cbegin%7Bdescription%7D%0A+++++%5Citem%5BNote%3A%5D+I+would+like+to+describe+something+here%0A+++++%5Citem%5BCaveat%21%5D+And+give+a+warning+here%0A+++++%5Cend%7Bdescription%7D%0A+++%5Cend%7Bitemize%7D%0A+++%5Citem+The+numbers+starts+at+1+with+each+use+of+the+%5Ctexttt%7Benumerate%7D+environment%0A%5Cend%7Benumerate%7D%0A%5Cend%7Bdocument%7D)
This example produces the following output:
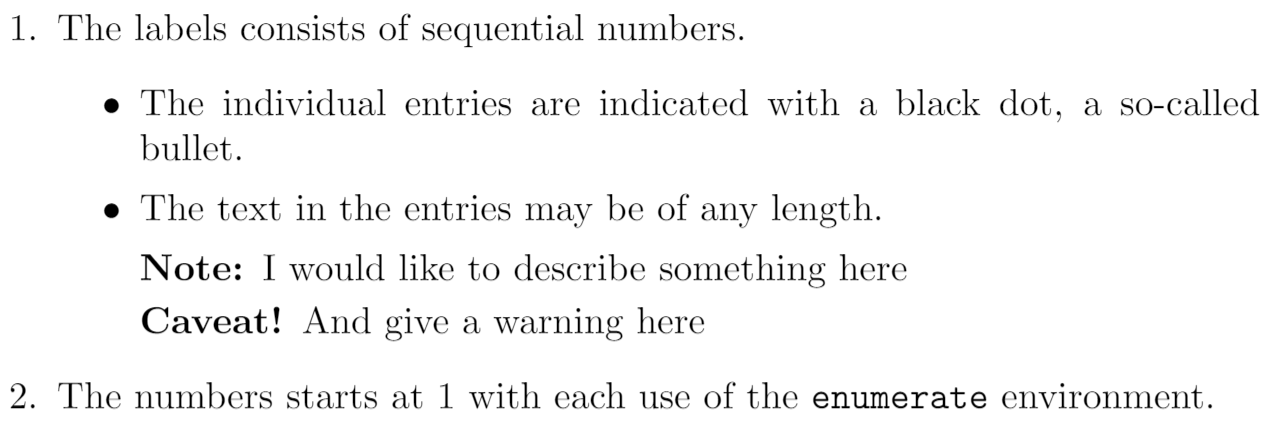
### Nested lists: label style
The label style of nested list entries changes according to its depth in the list. For nested `itemize` lists the bullet type changes; for `enumerate` lists the number format changes with increasing depth of entry. Both are limited to a depth of 4 levels.
#### Nested `enumerate` lists: number format
\\begin{enumerate}
\\item First level item
\\item First level item
\\begin{enumerate}
\\item Second level item
\\item Second level item
\\begin{enumerate}
\\item Third level item
\\item Third level item
\\begin{enumerate}
\\item Fourth level item
\\item Fourth level item
\\end{enumerate}
\\end{enumerate}
\\end{enumerate}
\\end{enumerate}
[Open this example in Overleaf.](https://www.overleaf.com/docs?engine=pdflatex&snip_name=Basic+nested+ordered+list+example&snip=%5Cdocumentclass%7Barticle%7D%0A%5Cbegin%7Bdocument%7D%0A%5Cbegin%7Benumerate%7D%0A+++%5Citem+First+level+item%0A+++%5Citem+First+level+item%0A+++%5Cbegin%7Benumerate%7D%0A+++++%5Citem+Second+level+item%0A+++++%5Citem+Second+level+item%0A+++++%5Cbegin%7Benumerate%7D%0A+++++++%5Citem+Third+level+item%0A+++++++%5Citem+Third+level+item%0A+++++++%5Cbegin%7Benumerate%7D%0A+++++++++%5Citem+Fourth+level+item%0A+++++++++%5Citem+Fourth+level+item%0A+++++++%5Cend%7Benumerate%7D%0A+++++%5Cend%7Benumerate%7D%0A+++%5Cend%7Benumerate%7D%0A+%5Cend%7Benumerate%7D%0A%5Cend%7Bdocument%7D)
This example produces the following output:
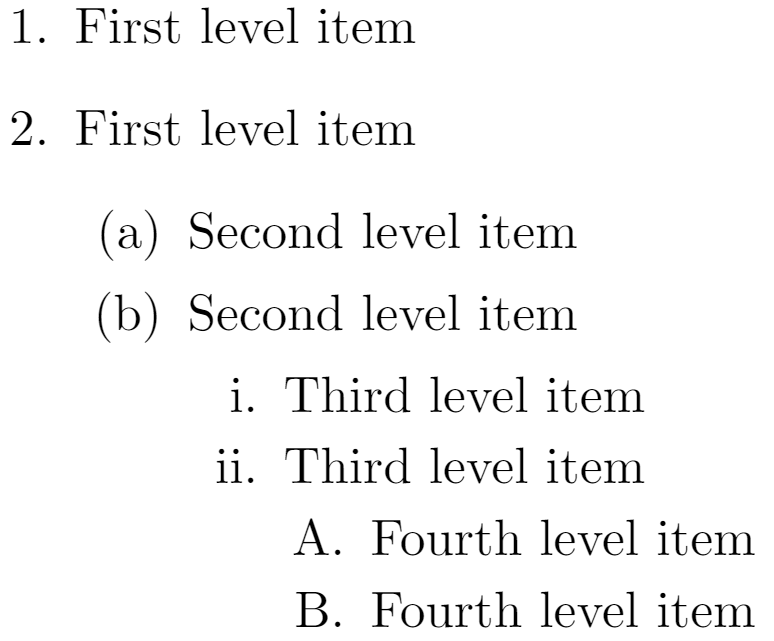
#### Nested `itemize` lists: bullet style
The bullet style changes depending on the depth of the nested lists:
\\begin{itemize}
\\item First level item
\\item First level item
\\begin{itemize}
\\item Second level item
\\item Second level item
\\begin{itemize}
\\item Third level item
\\item Third level item
\\begin{itemize}
\\item Fourth level item
\\item Fourth level item
\\end{itemize}
\\end{itemize}
\\end{itemize}
\\end{itemize}
[Open this example in Overleaf.](https://www.overleaf.com/docs?engine=pdflatex&snip_name=Basic+nested+ordered+list+example&snip=%5Cdocumentclass%7Barticle%7D%0A%5Cbegin%7Bdocument%7D%0A%5Cbegin%7Bitemize%7D%0A+++%5Citem+First+level+item%0A+++%5Citem+First+level+item%0A+++%5Cbegin%7Bitemize%7D%0A+++++%5Citem+Second+level+item%0A+++++%5Citem+Second+level+item%0A+++++%5Cbegin%7Bitemize%7D%0A+++++++%5Citem+Third+level+item%0A+++++++%5Citem+Third+level+item%0A+++++++%5Cbegin%7Bitemize%7D%0A+++++++++%5Citem+Fourth+level+item%0A+++++++++%5Citem+Fourth+level+item%0A+++++++%5Cend%7Bitemize%7D%0A+++++%5Cend%7Bitemize%7D%0A+++%5Cend%7Bitemize%7D%0A+%5Cend%7Bitemize%7D%0A%5Cend%7Bdocument%7D)
This example produces the following output:
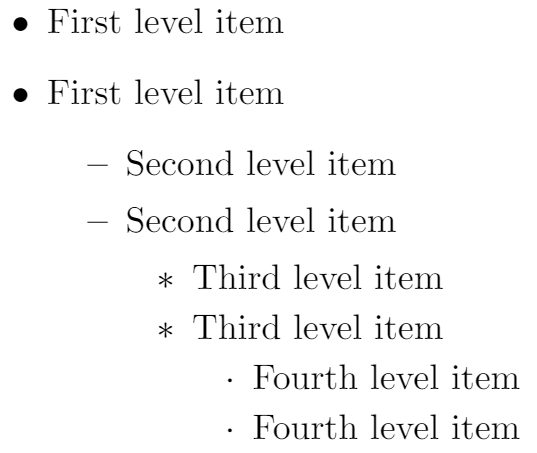
Customizing lists
-----------------
LaTeX’s lists are _highly_ configurable, providing plenty of scope for the creation of many different types of customized list. You can either make direct modifications to LaTeX’s standard list types or, _preferably_, use the highly versatile [enumitem package](https://ctan.org/pkg/enumitem)
to do it for you.
CTAN hosts a number of [list-related packages](https://ctan.org/topic/list)
which may be worth investigating if you have particular customization requirements. In addition, tex.stackexchange provides a wealth of [list-related questions](https://tex.stackexchange.com/questions/tagged/lists)
with answers that provide useful insights and great examples!
We’ll start with some examples which modify list labels then move on to customization of list layouts.
### Customizing lists: changing labels
Firstly, we show how to change list labelling without using the [enumitem package](https://ctan.org/pkg/enumitem)
.
#### Standard label-generation commands
Custom lists can be produced by using the [enumitem](https://ctan.org/pkg/enumitem)
package or direct modification of the standard lists. Here, we’ll give a summary of some standard LaTeX commands, counter variables and list parameters that you may need to be aware of.
The following table shows the LaTeX commands used for label-generation at each level of the `itemize` and `enumerate` list environments:
| | | |
| --- | --- | --- |
| **Level** | **`enumerate`** label commands | **`itemize`** label commands |
| Level 1 | `\labelenumi` | `\labelitemi` |
| Level 2 | `\labelenumii` | `\labelitemii` |
| Level 3 | `\labelenumiii` | `\labelitemiii` |
| Level 4 | `\labelenumiv` | `\labelitemiv` |
#### Counter variables for enumerate
The `enumerate` list environment also uses four _counter_ variables which keep track of the current label value for each level:
| | |
| --- | --- |
| **Level** | **`enumerate`** counter variable |
| Level 1 | `enumi` |
| Level 2 | `enumii` |
| Level 3 | `enumiii` |
| Level 4 | `enumiv` |
#### Examples: customizing labels of `enumerate` lists
You can configure LaTeX’s standard labelling by using `\renewcommand` to redefine the label-generating commands and, for the `enumerate` environment, you can also use the appropriate counter variable.
Here are some examples which do this without using the `enumitem` package.
##### Practical example
\\documentclass{article}
\\begin{document}
\\renewcommand{\\labelenumii}{\\arabic{enumi}.\\arabic{enumii}}
\\renewcommand{\\labelenumiii}{\\arabic{enumi}.\\arabic{enumii}.\\arabic{enumiii}}
\\renewcommand{\\labelenumiv}{\\arabic{enumi}.\\arabic{enumii}.\\arabic{enumiii}.\\arabic{enumiv}}
\\begin{enumerate}
\\item One
\\item Two
\\item Three
\\begin{enumerate}
\\item Three point one
\\begin{enumerate}
\\item Three point one, point one
\\begin{enumerate}
\\item Three point one, point one, point one
\\item Three point one, point one, point two
\\end{enumerate}
\\end{enumerate}
\\end{enumerate}
\\item Four
\\item Five
\\end{enumerate}
\\end{document}
[Open this example in Overleaf.](https://www.overleaf.com/docs?engine=pdflatex&snip_name=Configuring+list+layout&snip=%5Cdocumentclass%7Barticle%7D%0A%5Cbegin%7Bdocument%7D%0A%5Crenewcommand%7B%5Clabelenumii%7D%7B%5Carabic%7Benumi%7D.%5Carabic%7Benumii%7D%7D%0A%5Crenewcommand%7B%5Clabelenumiii%7D%7B%5Carabic%7Benumi%7D.%5Carabic%7Benumii%7D.%5Carabic%7Benumiii%7D%7D%0A%5Crenewcommand%7B%5Clabelenumiv%7D%7B%5Carabic%7Benumi%7D.%5Carabic%7Benumii%7D.%5Carabic%7Benumiii%7D.%5Carabic%7Benumiv%7D%7D%0A%0A%5Cbegin%7Benumerate%7D%0A%5Citem+One%0A%5Citem+Two%0A%5Citem+Three%0A%5Cbegin%7Benumerate%7D%0A++++%5Citem+Three+point+one%0A++++%5Cbegin%7Benumerate%7D%0A++++%5Citem+Three+point+one%2C+point+one%0A++++++++%5Cbegin%7Benumerate%7D%0A++++++++%5Citem+Three+point+one%2C+point+one%2C+point+one%0A++++++++%5Citem+Three+point+one%2C+point+one%2C+point+two%0A++++++++%5Cend%7Benumerate%7D%0A++++%5Cend%7Benumerate%7D%0A%5Cend%7Benumerate%7D%0A%5Citem+Four%0A%5Citem+Five%0A%5Cend%7Benumerate%7D%0A%0A%5Cend%7Bdocument%7D)
This example produces the following output:
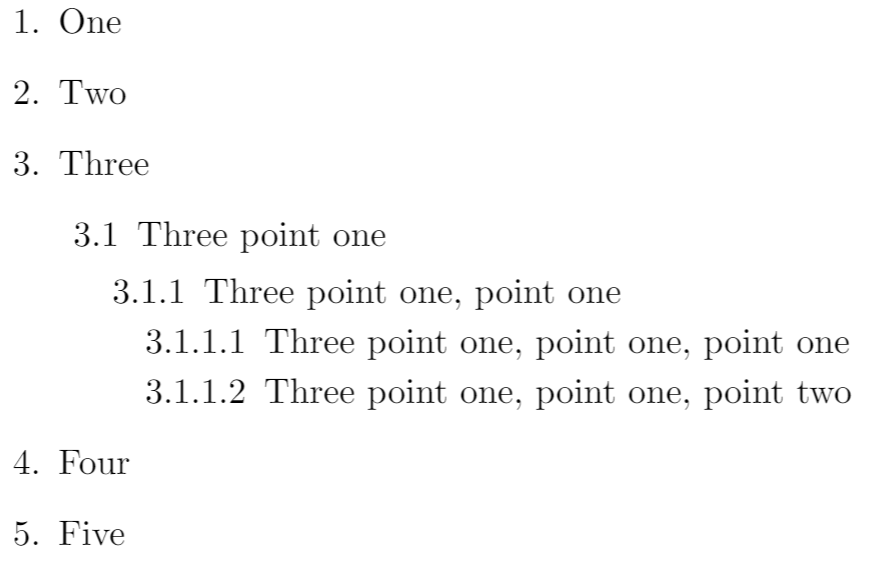
##### Printing counter variables
In the previous example, the command `\arabic` was used to typeset the current value of various label _counter variables_. Note that “Arabic numerals”, and use of the command `\arabic`, refers to the digits 0 to 9: see this [Arabic numerals article on Wikipedia](https://en.wikipedia.org/wiki/Arabic_numerals)
for further background.
In general, a _counter variable_ can be printed in various formats by using one of the following 5 commands:
* `\arabic{_counter variable_}`
* `\roman{_counter variable_}`
* `\Roman{_counter variable_}`
* `\Alph{_counter variable_}`
* `\alph{_counter variable_}`
For example:
\\documentclass{article}
\\begin{document}
\\begin{verbatim}
\\newcounter{foo}
\\setcounter{foo}{5}
\\end{verbatim}
\\newcounter{foo}
\\setcounter{foo}{5}
\\begin{itemize}
\\item \\verb|\\arabic{foo}| produces \\arabic{foo}
\\item \\verb|\\roman{foo}| produces \\roman{foo}
\\item \\verb|\\Roman{foo}| produces \\Roman{foo}
\\item \\verb|\\Alph{foo}| produces \\Alph{foo}
\\item \\verb|\\alph{foo}| produces \\alph{foo}
\\end{itemize}
\\end{document}
[Open this example in Overleaf.](https://www.overleaf.com/docs?engine=pdflatex&snip_name=Configuring+list+layout&snip=%5Cdocumentclass%7Barticle%7D%0A%5Cbegin%7Bdocument%7D%0A%5Cbegin%7Bverbatim%7D%0A%5Cnewcounter%7Bfoo%7D%0A%5Csetcounter%7Bfoo%7D%7B5%7D++++%0A%5Cend%7Bverbatim%7D%0A%5Cnewcounter%7Bfoo%7D%0A%5Csetcounter%7Bfoo%7D%7B5%7D+%0A%0A%5Cbegin%7Bitemize%7D%0A%5Citem+%5Cverb%7C%5Carabic%7Bfoo%7D%7C+produces+%5Carabic%7Bfoo%7D%0A%5Citem+%5Cverb%7C%5Croman%7Bfoo%7D%7C+produces+%5Croman%7Bfoo%7D+%0A%5Citem+%5Cverb%7C%5CRoman%7Bfoo%7D%7C+produces+%5CRoman%7Bfoo%7D%0A%5Citem+%5Cverb%7C%5CAlph%7Bfoo%7D%7C+produces+%5CAlph%7Bfoo%7D%0A%5Citem+%5Cverb%7C%5Calph%7Bfoo%7D%7C+produces+%5Calph%7Bfoo%7D%0A%5Cend%7Bitemize%7D%0A%0A%5Cend%7Bdocument%7D)
This example produces the following output:
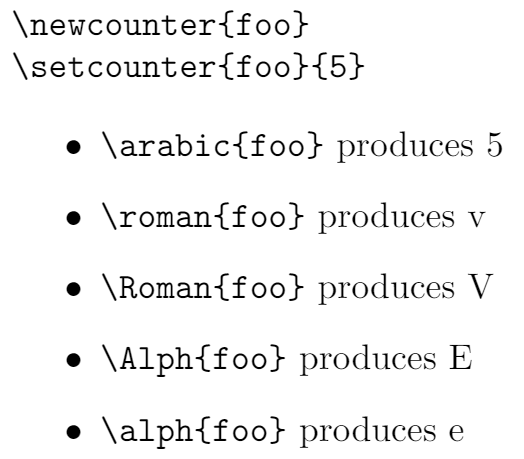
##### Non-practical (fun) example
This example typesets emoji using an OpenType colour font so it will _only work in LuaLaTeX_. See the Overleaf article [An overview of technologies supporting the use of colour emoji fonts in LaTeX](https://www.overleaf.com/learn/latex/Articles/An_overview_of_technologies_supporting_the_use_of_colour_emoji_fonts_in_LaTeX "Articles/An overview of technologies supporting the use of colour emoji fonts in LaTeX")
for more information on typesetting emoji.
Although this a just a fun example, using LuaLaTeX, it demonstrates customizing all four label-generation commands, and using the label-counter variables, to create some unusual labelling... Click the “Open in Overleaf” link to see the full code.
\\renewcommand{\\labelenumi}{\\duck{enumi}}
\\renewcommand{\\labelenumii}{\\duck{enumi}.\\duckegg{enumii}}
\\renewcommand{\\labelenumiii}{\\duck{enumi}.\\duckegg{enumii}.\\duckegg{enumiii}}
\\renewcommand{\\labelenumiv}{\\duck{enumi}.\\duckegg{enumii}.\\duckegg{enumiii}.\\duckchick{enumiv}}
\\begin{enumerate}
\\item A duck
\\item More ducks
\\item A flurry of ducks
\\begin{enumerate}
\\item Ducks and eggs
\\begin{enumerate}
\\item Do I see...
\\item Ducks and pre-ducks
\\begin{enumerate}
\\item Awww...
\\item So cute!
\\end{enumerate}
\\end{enumerate}
\\end{enumerate}
\\item Back to ducks
\\item Again
\\end{enumerate}
[To see the **_full code_**, open this LuaLaTeX example in Overleaf.](https://www.overleaf.com/docs?engine=lualatex&snip_name=Fun+example+of+configuring+a+list&snip=%5Cdocumentclass%7Barticle%7D%0A%5Cusepackage%7Bfontspec%7D%0A%5Cbegin%7Bdocument%7D%0A%5Cnewfontfamily%5Cemojifont%5BRenderer%3DHarfbuzz%2CSizeFeatures%3D%7BSize%3D6%7D%5D%7BNotoColorEmoji.ttf%7D%0A%0A%5Cnewcount%5Cduckcount%0A%5Cnewcount%5Ceggcount%0A%5Cnewcount%5Cchickcount%0A%0A%5Cdef%5Cduck%231%7B%25%0A%5Cduckcount%3D%5Cvalue%7B%231%7D%25%0A%5Cloop%7B%5Cemojifont%5CUchar%221F986%7D%25%0A%5Cadvance%5Cduckcount+by+-1%0A%5Cunless%5Cifnum%5Cduckcount%3D0+%0A%5Crepeat%7D%0A%0A%5Cdef%5Cduckegg%231%7B%25%0A%5Ceggcount%3D%5Cvalue%7B%231%7D%25%0A%5Cloop%7B%5Cemojifont%5CUchar%221F95A%7D%25%0A%5Cadvance%5Ceggcount+by+-1%0A%5Cunless%5Cifnum%5Ceggcount%3D0+%0A%5Crepeat%7D%0A%0A%5Cdef%5Cduckchick%231%7B%25%0A%5Cchickcount%3D%5Cvalue%7B%231%7D%25%0A%5Cloop%7B%5Cemojifont%5CUchar%221F424%7D%25%0A%5Cadvance%5Cchickcount+by+-1%0A%5Cunless%5Cifnum%5Cchickcount%3D0+%0A%5Crepeat%7D%0A%5Crenewcommand%7B%5Clabelenumi%7D%7B%5Cduck%7Benumi%7D%7D%0A%5Crenewcommand%7B%5Clabelenumii%7D%7B%5Cduck%7Benumi%7D.%5Cduckegg%7Benumii%7D%7D%0A%5Crenewcommand%7B%5Clabelenumiii%7D%7B%5Cduck%7Benumi%7D.%5Cduckegg%7Benumii%7D.%5Cduckegg%7Benumiii%7D%7D%0A%5Crenewcommand%7B%5Clabelenumiv%7D%7B%5Cduck%7Benumi%7D.%5Cduckegg%7Benumii%7D.%5Cduckegg%7Benumiii%7D.%5Cduckchick%7Benumiv%7D%7D+%0A%0A%5Cbegin%7Benumerate%7D%0A%5Citem+A+duck%0A%5Citem+More+ducks%0A%5Citem+A+flurry+of+ducks%0A%5Cbegin%7Benumerate%7D%0A++++%5Citem+Ducks+and+eggs%0A++++%5Cbegin%7Benumerate%7D%0A++++%5Citem+Do+I+see...+%0A++++%5Citem+Ducks+and+pre-ducks+%0A+++++++%5Cbegin%7Benumerate%7D%0A+++++++%5Citem+Awww...%0A+++++++%5Citem+So+cute%21%0A+++++++%5Cend%7Benumerate%7D%0A++++%5Cend%7Benumerate%7D%0A%5Cend%7Benumerate%7D%0A%5Citem+Back+to+ducks%0A%5Citem+Again%0A%5Cend%7Benumerate%7D%0A%5Cend%7Bdocument%7D)
This example produces the following output
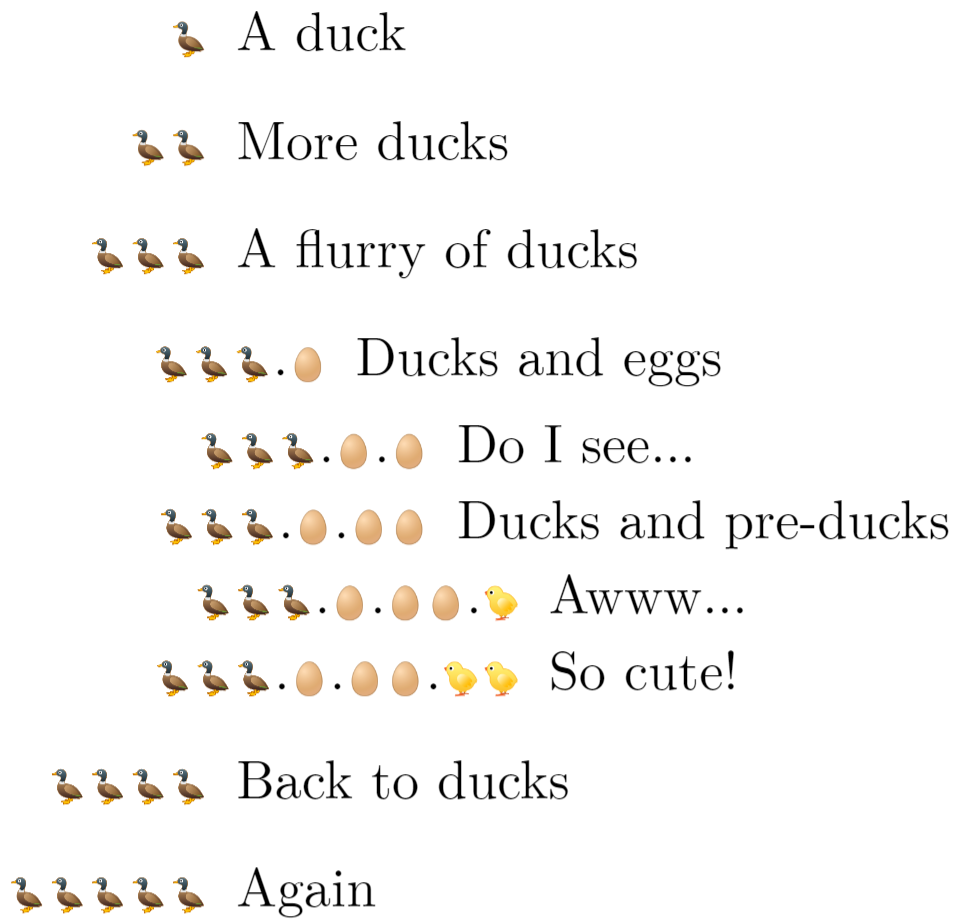
### Customizing lists: changing the layout
In addition to customizing labels, it is possible to modify list spacing and layout, but first we need to know the various LaTeX parameters which determine typesetting and layout of lists.
#### LaTeX list parameters
You can use the [layouts package](https://ctan.org/pkg/layouts?lang=en)
to generate a diagram which displays the LaTeX list parameters:
\\documentclass{article}
\\usepackage{layouts}
\\begin{document}
\\begin{figure}
\\listdiagram
\\caption{The \\LaTeX{} parameters which define typesetting and layout of lists.}
\\end{figure}
\\end{document}
[Open this example in Overleaf.](https://www.overleaf.com/docs?engine=pdflatex&snip_name=Using+the+layout+package+to+view+list+structures&snip=%5Cdocumentclass%7Barticle%7D%0A%5Cusepackage%7Blayouts%7D%0A%5Cbegin%7Bdocument%7D%0A%5Cbegin%7Bfigure%7D%0A%5Clistdiagram%0A%5Ccaption%7BThe+%5CLaTeX%7B%7D+parameters+which+define+typesetting+and+layout+of+lists.%7D+%0A%5Cend%7Bfigure%7D%0A%5Cend%7Bdocument%7D)
This example produces the following output:
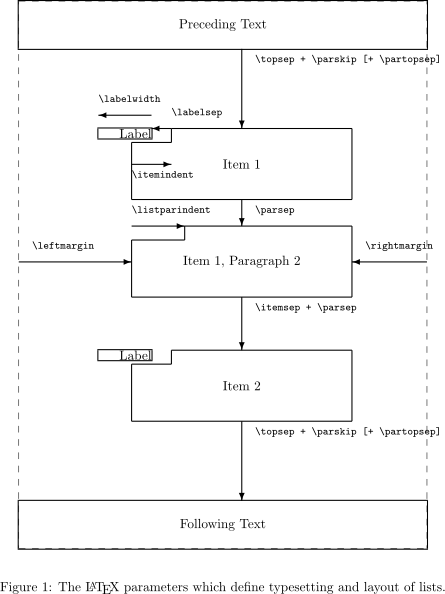
The meaning of these parameters is described in [the list section of the LaTeX2e unofficial reference manual](https://tug.org/texinfohtml/latex2e.html#list)
so we won’t reproduce it here.
#### Creating a custom list using the `list` environment
LaTeX provides the generic `list` environment which provides a framework for creating your own list type(s). Using the information contained in the diagram above, the following example is a slightly modified version of one contained in the [list section](https://tug.org/texinfohtml/latex2e.html#list)
of the [LaTeX2e unofficial reference manual](https://tug.org/texinfohtml/latex2e.html)
\\documentclass{article}
\\begin{document}
\\newcounter{boxlblcounter}
\\newcommand{\\makeboxlabel}\[1\]{\\fbox{#1.}\\hfill}% \\hfill fills the label box
\\newenvironment{boxlabel}
{\\begin{list}
{\\arabic{boxlblcounter}}
{\\usecounter{boxlblcounter}
\\setlength{\\labelwidth}{3em}
\\setlength{\\labelsep}{0em}
\\setlength{\\itemsep}{2pt}
\\setlength{\\leftmargin}{1.5cm}
\\setlength{\\rightmargin}{2cm}
\\setlength{\\itemindent}{0em}
\\let\\makelabel\=\\makeboxlabel
}
}
{\\end{list}}
\\newcommand{\\randomtext}{Hello, here is some text without a meaning. Hello, here is some text without a meaning. Hello, here is some text without a meaning.}
\\noindent\\randomtext
\\begin{boxlabel}
\\item \\randomtext
\\item \\randomtext
\\item \\randomtext
\\end{boxlabel}
\\end{document}
[Open this example in Overleaf.](https://www.overleaf.com/docs?engine=pdflatex&snip_name=Using+the+list+environment&snip=%5Cdocumentclass%7Barticle%7D%0A%5Cbegin%7Bdocument%7D%0A%5Cnewcounter%7Bboxlblcounter%7D++%0A%5Cnewcommand%7B%5Cmakeboxlabel%7D%5B1%5D%7B%5Cfbox%7B%231.%7D%5Chfill%7D%25+%5Chfill+fills+the+label+box%0A%5Cnewenvironment%7Bboxlabel%7D%0A++%7B%5Cbegin%7Blist%7D%0A++++%7B%5Carabic%7Bboxlblcounter%7D%7D%0A++++%7B%5Cusecounter%7Bboxlblcounter%7D%0A+++++%5Csetlength%7B%5Clabelwidth%7D%7B3em%7D%0A+++++%5Csetlength%7B%5Clabelsep%7D%7B0em%7D%0A+++++%5Csetlength%7B%5Citemsep%7D%7B2pt%7D%0A+++++%5Csetlength%7B%5Cleftmargin%7D%7B1.5cm%7D%0A+++++%5Csetlength%7B%5Crightmargin%7D%7B2cm%7D%0A+++++%5Csetlength%7B%5Citemindent%7D%7B0em%7D+%0A+++++%5Clet%5Cmakelabel%3D%5Cmakeboxlabel%0A++++%7D%0A++%7D%0A%7B%5Cend%7Blist%7D%7D%0A%0A%5Cnewcommand%7B%5Crandomtext%7D%7BHello%2C+here+is+some+text+without+a+meaning.+Hello%2C+here+is+some+text+without+a+meaning.+Hello%2C+here+is+some+text+without+a+meaning.%7D%0A%0A%5Cnoindent%5Crandomtext%0A%0A%5Cbegin%7Bboxlabel%7D%0A%5Citem+%5Crandomtext%0A%5Citem+%5Crandomtext%0A%5Citem+%5Crandomtext%0A%5Cend%7Bboxlabel%7D%0A%5Cend%7Bdocument%7D)
This example produces the following output:
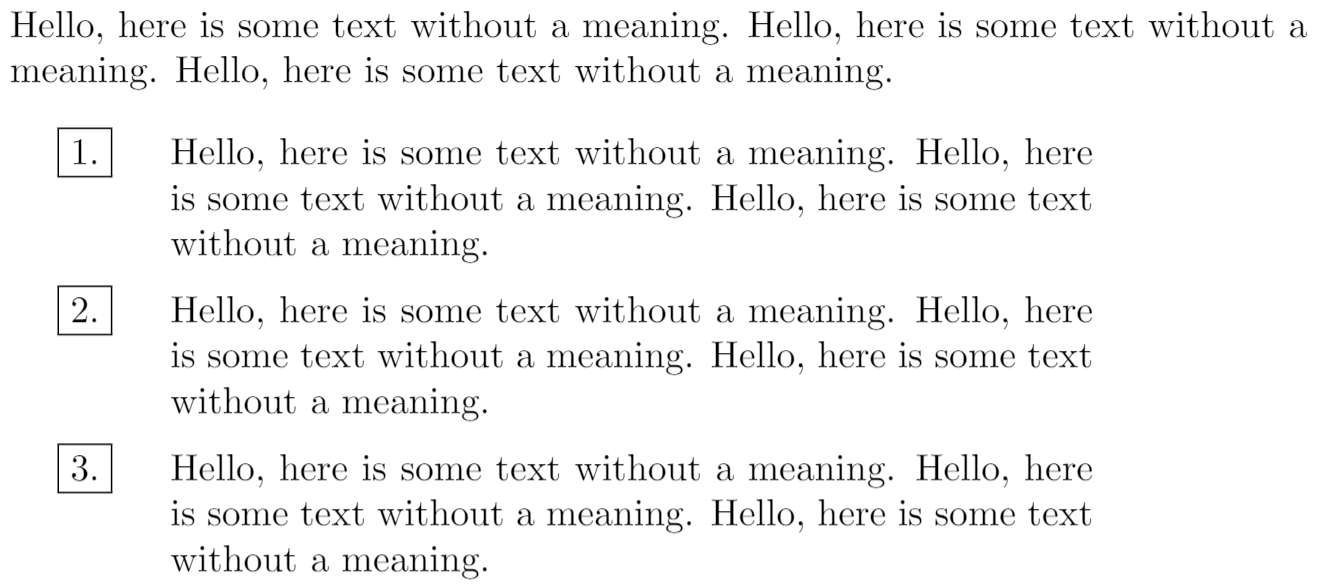
### Using the `enumitem` package to modify and create lists
The [`enumitem` package](https://ctan.org/pkg/enumitem?lang=en)
is the recommended method for modifying standard LaTeX lists or creating your own custom list formats. `enumitem` provides a _wealth_ of features so we can’t cover all of them but we can provide a few basic examples to help get you get started. Anyone wishing to explore this versatile package in more depth is _strongly_ encouraged to browse tex.stackexchange for [questions, answers (and examples) relating to the `enumitem` package](https://tex.stackexchange.com/questions/tagged/enumitem)
, and to read the [package documentation](http://mirrors.ctan.org/macros/latex/contrib/enumitem/enumitem.pdf)
.
#### `enumitem` package option `shortlabels`
The `enumitem` provides an optional configuration parameter called `shortlabels` which you use via
\\usepackage\[shortlabels\]{enumitem}
The `shortlabels` option mimics the behaviour of the `enumerate` package, providing a concise method for defining the numbering scheme of enumerate environments. See the [`enumerate` package documentation](https://ctan.org/pkg/enumerate?lang=en)
for further information.
#### Modifying a standard list
With reference to the [LaTeX parameters diagram](https://www.overleaf.com/learn/latex/Lists#LaTeX_list_parameters)
we can use `enumitem` to easily customize a standard LaTeX list, such as `itemize`:
\\documentclass{article}
\\usepackage{enumitem}
\\begin{document}
\\newcommand{\\randomtext}{Hello, here is some text without a meaning. Hello, here is some text without a meaning.}
\\section\*{Using LaTeX's default settings for \\texttt{itemize}}
\\randomtext
\\begin{itemize}
\\item \\randomtext
\\begin{itemize}
\\item \\randomtext
\\begin{itemize}
\\item \\randomtext
\\end{itemize}
\\item \\randomtext
\\end{itemize}
\\item \\randomtext
\\end{itemize}
\\section\*{Using a custom \\texttt{itemize} via \\texttt{enumitem}}
\\subsection\*{Note the effect of left and right margin settings}
\\randomtext
\\begin{itemize}\[leftmargin=30pt, rightmargin=2cm\]
\\item \\randomtext
\\begin{itemize}
\\item \\randomtext
\\begin{itemize}
\\item \\randomtext
\\end{itemize}
\\item \\randomtext
\\end{itemize}
\\item \\randomtext
\\end{itemize}
\\end{document}
[Open this `enumitem` example in Overleaf.](https://www.overleaf.com/docs?engine=pdflatex&snip_name=Modifying+a+LaTeX+list+with+enumitem&snip=%5Cdocumentclass%7Barticle%7D%0A%5Cusepackage%7Benumitem%7D%0A%0A%5Cbegin%7Bdocument%7D%0A%0A%5Cnewcommand%7B%5Crandomtext%7D%7BHello%2C+here+is+some+text+without+a+meaning.+Hello%2C+here+is+some+text+without+a+meaning.%7D%0A%0A%5Csection%2A%7BUsing+LaTeX%27s+default+settings+for+%5Ctexttt%7Bitemize%7D%7D%0A%0A%5Crandomtext%0A%0A%5Cbegin%7Bitemize%7D%0A%5Citem+%5Crandomtext%0A+++%5Cbegin%7Bitemize%7D%0A++++++%5Citem+%5Crandomtext%0A++++++++%5Cbegin%7Bitemize%7D%0A++++++++%5Citem+%5Crandomtext%0A++++++++%5Cend%7Bitemize%7D%0A+++%5Citem+%5Crandomtext%0A+++%5Cend%7Bitemize%7D%0A%5Citem+%5Crandomtext%0A%5Cend%7Bitemize%7D%0A%0A%5Csection%2A%7BUsing+a+custom+%5Ctexttt%7Bitemize%7D+via+%5Ctexttt%7Benumitem%7D%7D%0A%0A%5Csubsection%2A%7BNote+the+effect+of+left+and+right+margin+settings%7D%0A%0A%5Crandomtext%0A%0A%5Cbegin%7Bitemize%7D%5Bleftmargin%3D30pt%2C+rightmargin%3D2cm%5D%0A%5Citem+%5Crandomtext%0A+++%5Cbegin%7Bitemize%7D%0A++++++%5Citem+%5Crandomtext%0A++++++++%5Cbegin%7Bitemize%7D%0A++++++++%5Citem+%5Crandomtext%0A++++++++%5Cend%7Bitemize%7D%0A+++%5Citem+%5Crandomtext%0A+++%5Cend%7Bitemize%7D%0A%5Citem+%5Crandomtext%0A%5Cend%7Bitemize%7D%0A%0A%5Cend%7Bdocument%7D)
This example produces the following output:
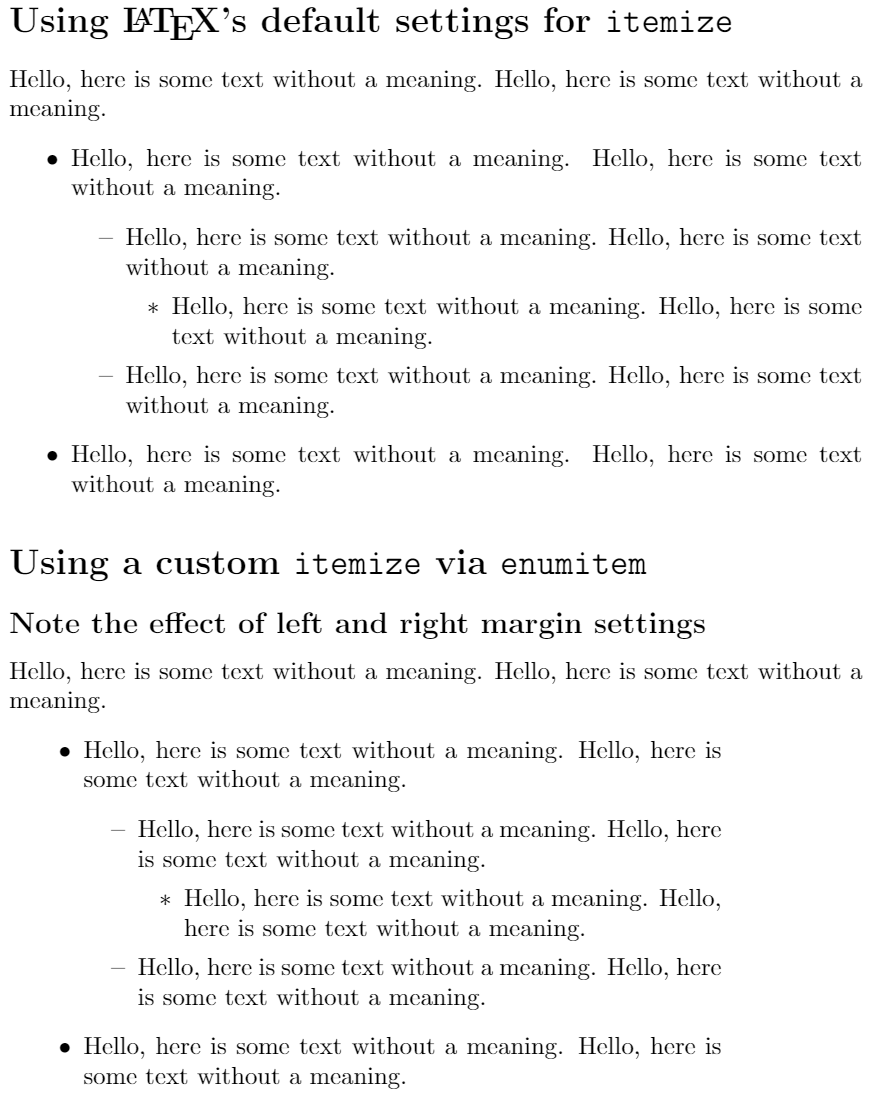
#### Creating a new list with `enumitem`
To create a new list type with `enumitem` you use the `\newlist` command which requires 3 arguments:
\\newlist{name}{list-type}{max-depth}
* **`name`**: the name of your list, to be used as an environment:
\\begin{name}
...
\\end{name}
* **`list-type`** this has to be one of the standard LaTeX list types:
* `enumerate`
* `itemize`
* `description`
* **`max-depth`**: the maximum depth to which this list will be nested. **NOTE** for lists which exceed LaTeX’s default nesting limit of 4, you must also issue the command `\setlistdepth{_integer_}` where `_integer_` is the maximum nesting depth you intend to use. See the [Lists for lawyers](https://www.overleaf.com/learn/latex/Lists#Lists_for_lawyers:_nesting_lists_to_an_arbitrary_depth)
example for a demonstration of that.
After you have created the new list you can configure it with the `\setlist` command.
##### Using `\setlist` to configure a custom list created with `enumitem`
In this example we’ll create a new list called `myitems` which is based on `enumerate`. We’ll set [`**max-depth**`](https://www.overleaf.com/learn/latex/Lists#maxdepth)
to 3:
\\newlist{myitems}{enumerate}{3}
A minimum requirement is using the `\setlist` command to define labels for this custom list. One way to do that, for enumerate-based lists, is to use the counter variables created by the `enumitem` package—those counter variables use the `**name**` of your list: `myitems` in our example.
Here is how we use the corresponding counter variables within our label configuration:
* `myitems**i**` for the level 1 entries
* `myitems**ii**` for the level 2 entries
* `myitems**iii**` for the level 3 entries
If we had more than 3 levels, the corresponding counter variables would be called `myitems**iv**` (level 4), `myitems**v**` (level 5) and so forth, continuing the use of lower-case Roman numerals.
In addition to the labels, we’ll also set some values for `leftmargin` and `rightmargin` (see the [LaTeX parameters diagram](https://www.overleaf.com/learn/latex/Lists#LaTeX_list_parameters)
).
\\documentclass{article}
\\usepackage{enumitem}
\\begin{document}
\\newcommand{\\randomtext}{Hello, here is some text without a meaning. Hello, here is some text without a meaning.}
\\newcommand{\\shortrandomtext}{Hello, here is some text.}
% Create a custom list based on enumerate
% It is called "myitems"
% We'll create a list that is 3 levels deep
\\newlist{myitems}{enumerate}{3}
% Configure the behaviour of level 1 entries
% NOTE: we use the list counter "myitemsi"
\\setlist\[myitems, 1\]
{label=\\arabic{myitemsi}., %1., 2., 3., ...
leftmargin=\\parindent,
rightmargin=10pt
}
% Configure the behaviour of level 2 entries
% NOTE: we use the list counter "myitemsii"
\\setlist\[myitems, 2\]
{label=\\arabic{myitemsi}.\\arabic{myitemsii}, %1.1, 1.2, 1.3...
leftmargin=15pt,
rightmargin=15pt}
% Configure the behaviour of level 3 entries
% NOTE: we use the list counter "myitemsiii"
\\setlist\[myitems, 3\]
% Use a label of 1.1:(a), 1.1:(b) etc
{label=\\arabic{myitemsi}.\\arabic{myitemsii}:\\kern1.5pt(\\alph{myitemsiii}),
leftmargin=30pt,
rightmargin=30pt}
\\randomtext
\\begin{myitems}
\\item \\randomtext
\\begin{myitems}
\\item \\randomtext
\\begin{myitems}
\\item \\randomtext
\\item \\randomtext
\\end{myitems}
\\item \\shortrandomtext
\\item \\shortrandomtext
\\end{myitems}
\\item \\randomtext
\\end{myitems}
\\end{document}
[Open this `enumitem` example in Overleaf.](https://www.overleaf.com/docs?engine=pdflatex&snip_name=Create+a+custom+list+with+enumitem&snip=%5Cdocumentclass%7Barticle%7D%0A%5Cusepackage%7Benumitem%7D%0A%5Cbegin%7Bdocument%7D%0A%0A%5Cnewcommand%7B%5Crandomtext%7D%7BHello%2C+here+is+some+text+without+a+meaning.+Hello%2C+here+is+some+text+without+a+meaning.%7D%0A%0A%5Cnewcommand%7B%5Cshortrandomtext%7D%7BHello%2C+here+is+some+text.%7D%0A%25+Create+a+custom+list+based+on+enumerate%0A%25+It+is+called+%22myitems%22%0A%25+We%27ll+create+a+list+that+is+3+levels+deep%0A%5Cnewlist%7Bmyitems%7D%7Benumerate%7D%7B3%7D%0A%0A%25+Configure+the+behaviour+of+level+1+entries%0A%25+NOTE%3A+we+use+the+list+counter+%22myitemsi%22%0A%5Csetlist%5Bmyitems%2C+1%5D%0A%7Blabel%3D%5Carabic%7Bmyitemsi%7D.%2C+%251.%2C+2.%2C+3.%2C+...%0Aleftmargin%3D%5Cparindent%2C%0Arightmargin%3D10pt%0A%7D%0A%0A%25+Configure+the+behaviour+of+level+2+entries%0A%25+NOTE%3A+we+use+the+list+counter+%22myitemsii%22%0A%5Csetlist%5Bmyitems%2C+2%5D%0A%7Blabel%3D%5Carabic%7Bmyitemsi%7D.%5Carabic%7Bmyitemsii%7D%2C+%251.1%2C+1.2%2C+1.3...%0Aleftmargin%3D15pt%2C%0Arightmargin%3D15pt%7D%0A%0A%25+Configure+the+behaviour+of+level+3+entries%0A%25+NOTE%3A+we+use+the+list+counter+%22myitemsiii%22%0A%5Csetlist%5Bmyitems%2C+3%5D%0A%25+Use+a+label+of+1.1%3A%3Ckern%3E%28a%29%2C+1.1%3A%3Ckern%3E%28b%29+etc++%0A%7Blabel%3D%5Carabic%7Bmyitemsi%7D.%5Carabic%7Bmyitemsii%7D%3A%5Ckern1.5pt%28%5Calph%7Bmyitemsiii%7D%29%2C%0Aleftmargin%3D30pt%2C%0Arightmargin%3D30pt%7D%0A%0A%5Crandomtext%0A%5Cbegin%7Bmyitems%7D%0A%5Citem+%5Crandomtext%0A++++%5Cbegin%7Bmyitems%7D%0A++++%5Citem+%5Crandomtext%0A++++++++%5Cbegin%7Bmyitems%7D%0A++++++++%5Citem+%5Crandomtext%0A++++++++%5Citem+%5Crandomtext%0A++++++++%5Cend%7Bmyitems%7D%0A++++%5Citem+%5Cshortrandomtext%0A++++%5Citem+%5Cshortrandomtext%0A++++%5Cend%7Bmyitems%7D%0A%5Citem+%5Crandomtext%0A%5Cend%7Bmyitems%7D%0A%5Cend%7Bdocument%7D)
This example produces the following output:
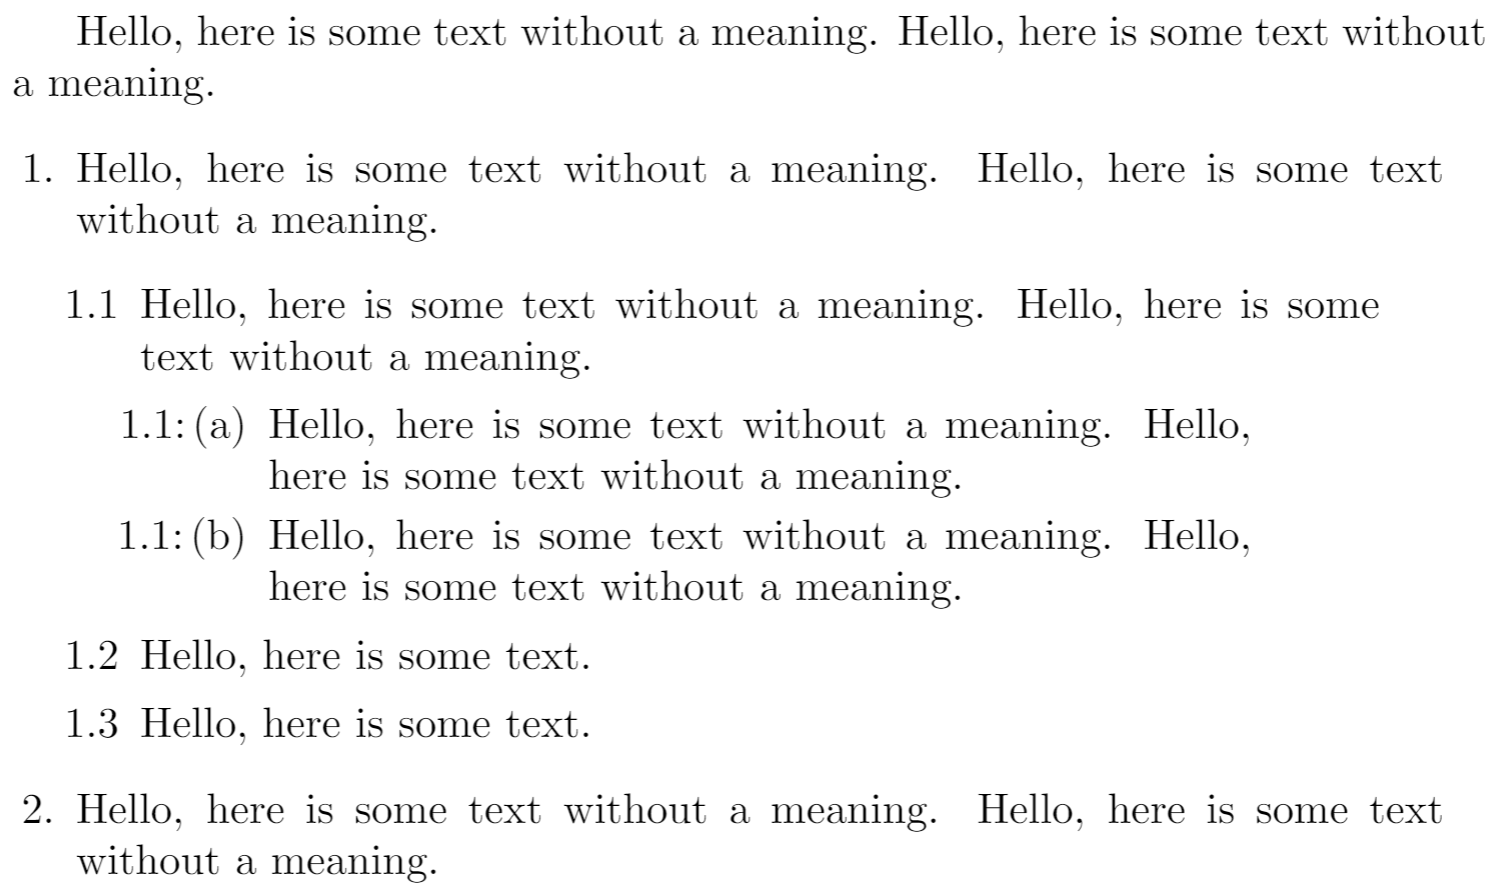
#### Lists for lawyers: nesting lists to an arbitrary depth
The `enumitem` package lets you create lists which can be nested to an arbitrary depth, removing LaTeX’s limit of 4. Anyone preparing contracts with complex (deeply nested) clause structures might benefit from this, although the nested code does look a little intimidating...
\\documentclass{article}
\\usepackage{enumitem}
\\begin{document}
\\newlist{contract}{enumerate}{10}
\\setlist\[contract\]{label\*=\\arabic\*.}
\\setlistdepth{10}
\\section\*{Custom list nested to 10 levels deep!}
\\begin{contract}
\\item Level 1
\\begin{contract}
\\item Level 2
\\begin{contract}
\\item Level 3
\\begin{contract}
\\item Level 4
\\begin{contract}
\\item Level 5
\\begin{contract}
\\item Level 6
\\begin{contract}
\\item Level 7
\\begin{contract}
\\item Level 8
\\begin{contract}
\\item Level 9
\\begin{contract}
\\item Level 10
\\end{contract}
\\end{contract}
\\end{contract}
\\end{contract}
\\end{contract}
\\end{contract}
\\end{contract}
\\end{contract}
\\end{contract}
\\end{contract}
\\end{document}
[Open this `enumitem` example in Overleaf.](https://www.overleaf.com/docs?engine=pdflatex&snip_name=Using+the+enumitem+package+to+create+deeply+nested+lists&snip=%5Cdocumentclass%7Barticle%7D%0A%5Cusepackage%7Benumitem%7D%0A%0A%5Cbegin%7Bdocument%7D%0A%0A%5Cnewlist%7Bcontract%7D%7Benumerate%7D%7B10%7D%0A%5Csetlist%5Bcontract%5D%7Blabel%2A%3D%5Carabic%2A.%7D%0A%5Csetlistdepth%7B10%7D+%0A%0A%5Csection%2A%7BCustom+list+nested+to+10+levels+deep%21%7D%0A%0A%5Cbegin%7Bcontract%7D%0A%5Citem+Level+1%0A+%5Cbegin%7Bcontract%7D%0A+%5Citem+Level+2%0A+++%5Cbegin%7Bcontract%7D%0A+++%5Citem+Level+3%0A+++++%5Cbegin%7Bcontract%7D%0A+++++%5Citem+Level+4%0A+++++++%5Cbegin%7Bcontract%7D%0A+++++++%5Citem+Level+5%0A++++++++%5Cbegin%7Bcontract%7D%0A++++++++%5Citem+Level+6%0A+++++++++%5Cbegin%7Bcontract%7D%0A+++++++++%5Citem+Level+7%0A++++++++++%5Cbegin%7Bcontract%7D%0A++++++++++%5Citem+Level+8%0A+++++++++++%5Cbegin%7Bcontract%7D%0A+++++++++++%5Citem+Level+9%0A++++++++++++%5Cbegin%7Bcontract%7D%0A++++++++++++%5Citem+Level+10%0A++++++++++%5Cend%7Bcontract%7D%0A+++++++++%5Cend%7Bcontract%7D%0A++++++++%5Cend%7Bcontract%7D%0A+++++++%5Cend%7Bcontract%7D%0A++++++%5Cend%7Bcontract%7D%0A+++++%5Cend%7Bcontract%7D%0A++++%5Cend%7Bcontract%7D%0A+++%5Cend%7Bcontract%7D%0A++%5Cend%7Bcontract%7D%0A+%5Cend%7Bcontract%7D%0A%5Cend%7Bdocument%7D)
This example produces the following output:
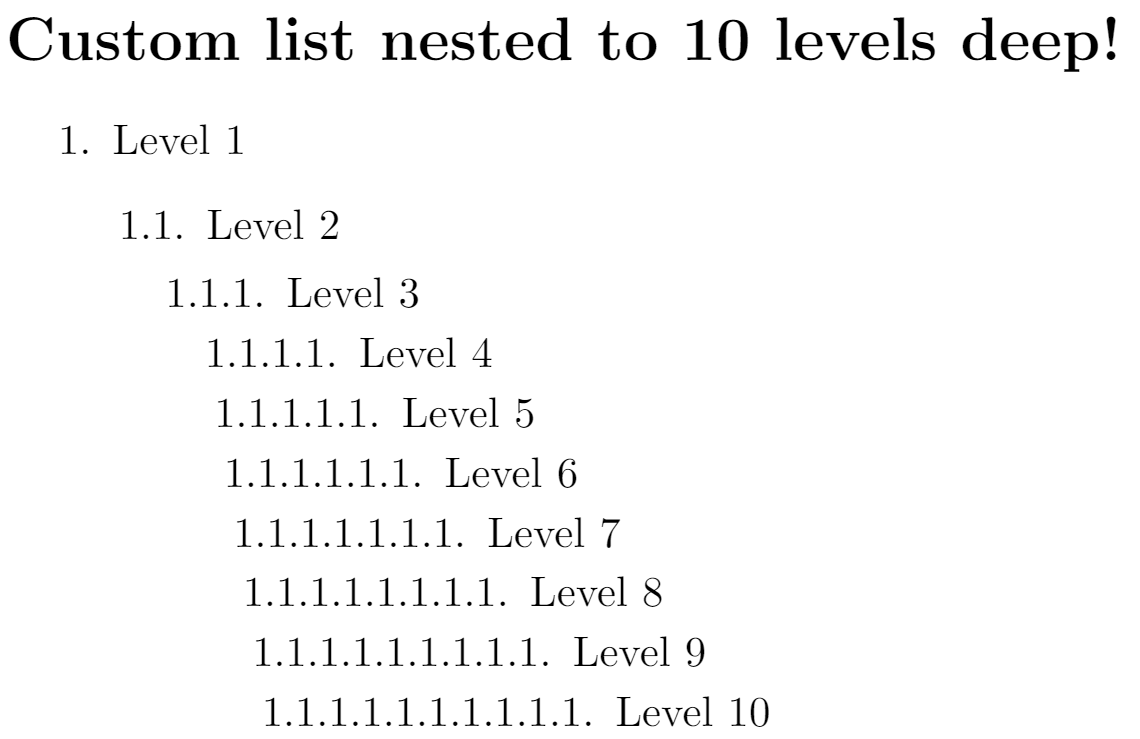
#### Custom bullets using the `enumitem` package and MetaPost
The following examples only work with LuaLaTeX and are designed to give a suggestion of some possibilities—of course, substitute MetaPost with your preferred drawing application/tool!
These examples use the `luamplib` package and also demonstrate expandable commands, such as `\the` and `\directlua`, can be used within the MetaPost code.
##### Example 1: auto-sizing bullet points
This example produces bullet points that reduce in size as the list depth increases. Click on the “Open in Overleaf” link to run the example and view the full code.
% Declare a new itemize-based list via enumitem
\\newlist{myEnumerate}{itemize}{6}
% The nosep option removes all vertical spacing
% the label=\\protect\\mpbullet causes all bullets to be
% drawn by a macro that uses MetaPost code. \\protect
% is required as noted in the enumitem manual
\\setlist\[myEnumerate\]{nosep,label=\\protect\\mpbullet}
\\setlistdepth{6}
\\begin{myEnumerate}
\\item Level 1
\\begin{myEnumerate}
\\item Level 2
\\begin{myEnumerate}
\\item Level 3
\\begin{myEnumerate}
\\item Level 4
\\begin{myEnumerate}
\\item Level 5
\\begin{myEnumerate}
\\item Level 6
\\end{myEnumerate}
\\end{myEnumerate}
\\end{myEnumerate}
\\end{myEnumerate}
\\end{myEnumerate}
\\end{myEnumerate}
[To see the **_full code_**, open this LuaLaTeX example in Overleaf.](https://www.overleaf.com/docs?engine=lualatex&snip_name=Using+MetaPost+with+the+enumitem+package&snip=%5Cdocumentclass%7Barticle%7D%0A%5Cusepackage%7Bluamplib%7D%0A%5Cusepackage%7Benumitem%7D%0A%5Ceverymplib%7Bbeginfig%280%29%3B%7D%0A%5Ceveryendmplib%7Bendfig%3B%7D%0A%0A%5Cbegin%7Bdocument%7D%0A%0AThis+list+configuration+example+uses+MetaPost+code+that+contains+Lua+code+via+%5Cverb%7C%5Cdirectlua%7C.+Bullets+are+created+by+MetaPost+code%2C+size+is+calculated+from+the+depth+of+the+entry.%0A%0A%25+It+is+convenient+to+use+%5Clet%5Cmpdepth%5C%40listdepth%3A+makes+it+%0A%25+easier+to+use+in+MetaPost+code%0A%0A%5Ccatcode%60%40%3D11%0A%5Clet%5Cmpdepth%5C%40listdepth%0A%5Ccatcode%60%40%3D12%0A%0A%5Cnewcommand%7B%5Cmpbullet%7D%7B%25%0A%5Cbegin%7Bmplibcode%7D%25%0Adraw+%280%2C0%29..%280%2C-%5Cdirectlua%7Btex.print%28%5Cthe%5Cmpdepth%2F2%29%7D%29+withpen+pencircle+scaled+2pt+withcolor+white%3B%0Adrawdot%280%2C0%29+withpen+pencircle+scaled+%5Cdirectlua%7Btex.print%285%2Fmath.sqrt%28%5Cthe%5Cmpdepth%29%29%7Dbp%3B%0A%5Cend%7Bmplibcode%7D%7D%0A%25+Declare+a+new+itemize-based+list+via+enumitem%0A%5Cnewlist%7BmyEnumerate%7D%7Bitemize%7D%7B6%7D%0A%0A%25+The+nosep+option+removes+all+vertical+spacing%0A%25+the+label%3D%5Cprotect%5Cmpbullet+causes+all+bullets+to+be+%0A%25+drawn+by+a+macro+that+uses+MetaPost+code.+%5Cprotect%0A%25+is+required+as+noted+in+the+enumitem+manual+%0A%0A%5Csetlist%5BmyEnumerate%5D%7Bnosep%2Clabel%3D%5Cprotect%5Cmpbullet%7D%0A%5Csetlistdepth%7B6%7D%0A%0A%5Cbegin%7BmyEnumerate%7D%0A%5Citem+Level+1%0A++%5Cbegin%7BmyEnumerate%7D%0A+++%5Citem+Level+2%0A++++%5Cbegin%7BmyEnumerate%7D%0A+++++%5Citem+Level+3%0A++++++%5Cbegin%7BmyEnumerate%7D%0A+++++++%5Citem+Level+4%0A++++++++%5Cbegin%7BmyEnumerate%7D%0A+++++++++%5Citem+Level+5%0A++++++++++%5Cbegin%7BmyEnumerate%7D%0A+++++++++++%5Citem+Level+6%0A+++++++++++%5Cend%7BmyEnumerate%7D%0A++++++++%5Cend%7BmyEnumerate%7D%0A+++++++%5Cend%7BmyEnumerate%7D%0A++++%5Cend%7BmyEnumerate%7D%0A+++%5Cend%7BmyEnumerate%7D%0A%5Cend%7BmyEnumerate%7D%0A%5Cend%7Bdocument%7D)
This example produces the following output:
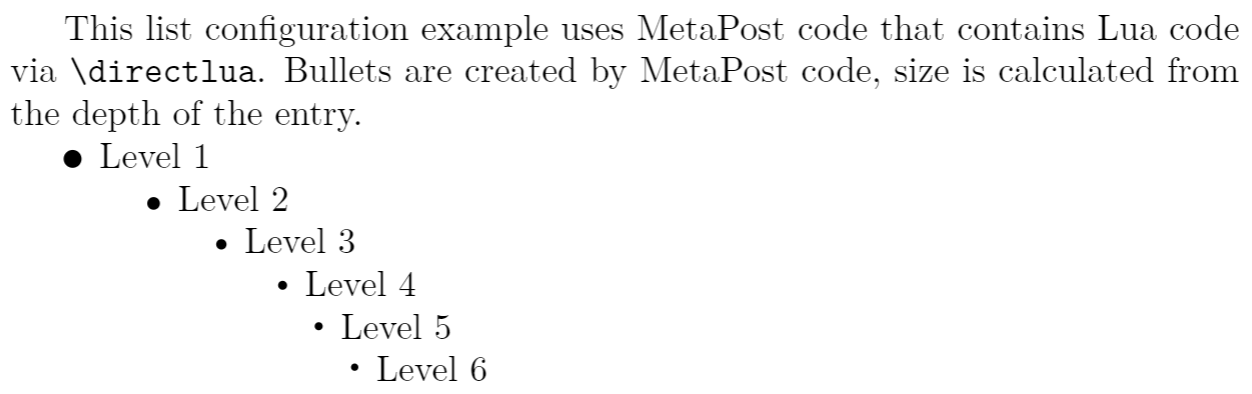
##### Example 2: funky custom bullets
This example was inspired by an [example on tex.stackexchange](https://tex.stackexchange.com/a/313337)
which Overleaf has modified to create custom bullets using MetaPost code. Click on the “Open in Overleaf” link to run the example and view the full code.
\\newlist{todolist}{itemize}{2}
\\begin{itemize}
\\item Start thinking about what we hope to achieve
\\begin{todolist}
\\item\[\\mpdot\] Identify objectives
\\item\[\\mpyingyang\] Balance environmental impact
\\item\[\\mpsquare{0}{5}{0}\] Implement plans
\\begin{todolist}
\\item\[\\mpsquare{-0.5}{4}{0}\] Stage 1 plans
\\item\[\\mpsquare{-0.5}{4}{-20}\] Stage 2 plans
\\item\[\\mpsquare{-0.5}{4}{-40}\] Stage 3 plans
\\item\[\\mpsquare{-0.5}{4}{-60}\] Stage 4 plans
\\end{todolist}
\\end{todolist}
\\end{itemize}
[To see the **_full code_**, open this LuaLaTeX example in Overleaf.](https://www.overleaf.com/docs?engine=lualatex&snip_name=Second+example+using+MetaPost+with+the+enumitem+package&snip=%5Cdocumentclass%7Barticle%7D%0A%5Cusepackage%7Benumitem%7D%0A%5Cusepackage%7Bluamplib%7D%0A%5Ceverymplib%7Bbeginfig%280%29%3B%7D%0A%5Ceveryendmplib%7Bendfig%3B%7D%0A%0A%5Cbegin%7Bdocument%7D%0A%0A%5Cnewcommand%7B%5Cmpyingyang%7D%7B%25%0A%5Clower1.5pt%5Chbox%7B%5Cbegin%7Bmplibcode%7D%25%0Apath+p%3B%0Ap%3A%3D%28-1%2C0%29..%280%2C-1%29..%281%2C0%29%3B%0Afill+%28p%7Bup%7D..%7Bdown%7D%280%2C0%29%7Bdown%7D..%7Bup%7Dcycle%29+scaled+0.15cm%3B%0Adraw+%28p..%280%2C1%29..cycle%29+scaled+0.15cm+%3B%0A%5Cend%7Bmplibcode%7D%7D%25%0A%7D%25%0A%5Cnewcommand%7B%5Cmpdot%7D%7B%25%0A%5Clower1.5pt%5Chbox%7B%5Cbegin%7Bmplibcode%7D%25%0Adrawdot%280%2C0%29+withpen+pencircle+scaled+2bp%3B%0Adraw+fullcircle+scaled+0.2cm%3B%0Adraw+fullcircle+scaled+0.3cm%3B%0A%5Cend%7Bmplibcode%7D%7D%25%0A%7D%25%0A%5Cnewcommand%7B%5Cmpsquare%7D%5B3%5D%7B%25%0A%5Clower%231pt%5Chbox%7B%5Cbegin%7Bmplibcode%7D%25%0Adraw+unitsquare+rotated+%233+scaled+%232pt%3B%0A%5Cend%7Bmplibcode%7D%25%0A%7D%7D%25%0A%5Cnewlist%7Btodolist%7D%7Bitemize%7D%7B2%7D%0A%0A%5Cbegin%7Bitemize%7D%0A++%5Citem+Start+thinking+about+what+we+hope+to+achieve%0A++%5Cbegin%7Btodolist%7D%0A++%5Citem%5B%5Cmpdot%5D+Identify+objectives%0A++%5Citem%5B%5Cmpyingyang%5D+Balance+environmental+impact+%0A++%5Citem%5B%5Cmpsquare%7B0%7D%7B5%7D%7B0%7D%5D+Implement+plans%0A++++%5Cbegin%7Btodolist%7D%0A++++%5Citem%5B%5Cmpsquare%7B-0.5%7D%7B4%7D%7B0%7D%5D+Stage+1+plans%0A++++%5Citem%5B%5Cmpsquare%7B-0.5%7D%7B4%7D%7B-20%7D%5D+Stage+2+plans%0A++++%5Citem%5B%5Cmpsquare%7B-0.5%7D%7B4%7D%7B-40%7D%5D+Stage+3+plans%0A++++%5Citem%5B%5Cmpsquare%7B-0.5%7D%7B4%7D%7B-60%7D%5D+Stage+4+plans%0A++++%5Cend%7Btodolist%7D%0A++%5Cend%7Btodolist%7D%0A%5Cend%7Bitemize%7D%0A%5Cend%7Bdocument%7D)
This example produces the following output:
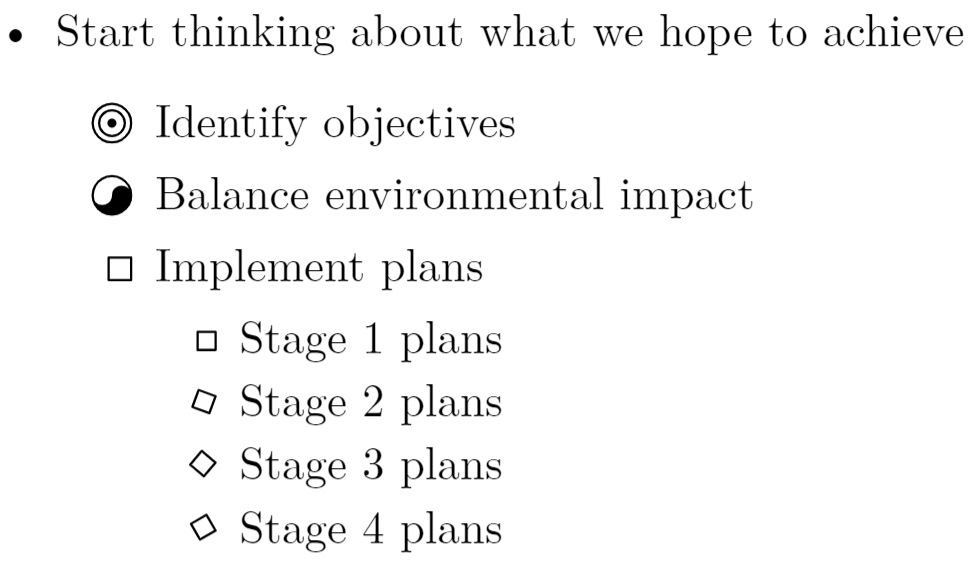
Other features of the `enumitem` package
----------------------------------------
As noted, the `enumitem` package is extremely versatile and provides numerous features for using and customizing lists. For example, features we have not covered include:
* referencing list entries: for example, see this [tex.stackexchane question and example](https://tex.stackexchange.com/questions/524822/help-for-formatting-the-ref-of-nested-enumerate)
* controlling `enumerate` list numbering:
* set the starting number of the first item
* continue numbering of different `enumerate` lists
And many more! Browse [tex.stackexchange to find many great examples](https://tex.stackexchange.com/questions/tagged/enumitem)
of what you can do via `enumitem`—and, of course, [read the package documentation](https://ctan.org/pkg/enumitem)
.
We only use cookies for essential purposes and to improve your experience on our site. You can find out more in our [cookie policy](https://www.overleaf.com/legal#Cookies)
.
Essential cookies onlyAccept all cookies
---
# Page numbering - Overleaf, Online LaTeX Editor
[Skip to content](https://www.overleaf.com/learn/latex/Page_numbering#main-content)
Search help library…searchclear
No Search Results
Page numbering
==============
Document page numbers can be typeset using a particular _style_, such as using Arabic or Roman numerals, and typeset at a particular page _location_—usually within headers or footers. This article shows how the style and location of page numbers can be changed:
* the _style_ of page numbers can be changed by the `\pagenumbering` command;
* the _location_ of page numbers can be changed using the [`fancyhdr` package](https://ctan.org/pkg/fancyhdr?lang=en)
.
Contents
--------
* [1 Setting the style of page numbers](https://www.overleaf.com/learn/latex/Page_numbering#Setting_the_style_of_page_numbers)
* [1.1 Example to demonstrate page number styles](https://www.overleaf.com/learn/latex/Page_numbering#Example_to_demonstrate_page_number_styles)
* [2 Book class: using two styles of page number](https://www.overleaf.com/learn/latex/Page_numbering#Book_class:_using_two_styles_of_page_number)
* [3 Article class: using two styles of page number](https://www.overleaf.com/learn/latex/Page_numbering#Article_class:_using_two_styles_of_page_number)
* [4 Customizing page numbers with the fancyhdr package](https://www.overleaf.com/learn/latex/Page_numbering#Customizing_page_numbers_with_the_fancyhdr_package)
Setting the style of page numbers
---------------------------------
The style of page numbers can be changed using the command
\\pagenumbering{⟨style⟩}
where `⟨style⟩` is one of
* `arabic`: use Arabic numerals (1, 2, 3, ...)
* `alph`: use lowercase letters (a, b, c, ...)
* `Alph`: use uppercase letters (A, B, C, ...)
* `roman`: use lowercase roman numerals (i, ii, iii, ...)
* `Roman`: use uppercase roman numerals (I, II, III, ...)
### Example to demonstrate page number styles
The following example typesets a table of contents followed by 5 pages, each of which demonstrates one of the `⟨style⟩` options for page numbers. Internally, LaTeX uses a so-called _counter_ to record the current page number. A counter is the name of a LaTeX variable used to store an integer value—see the [Overleaf Counters article](https://www.overleaf.com/learn/latex/Counters "Counters")
for more detail and examples.
\\begin{document}
% Insert a table of contents
\\tableofcontents
\\newpage
\\section{Uppercase Roman}
\\pagenumbering{Roman}% Capital 'R': uppercase Roman numerals
\\blindtext\[1\]
\\newpage
\\section{Lowercase Roman} % lowercase Roman numerals
\\pagenumbering{roman}
\\blindtext\[1\]
\\newpage
\\section{Arabic numbers}
\\pagenumbering{arabic} % Arabic/Indic page numbers
\\blindtext\[1\]
\\newpage
\\section{Lowercase alphabetic}
\\pagenumbering{alph} % Lowercase alphabetic page "numbers"
\\blindtext\[1\]
\\newpage
\\section{Uppercase alphabetic}
\\pagenumbering{Alph} % Uppercase alphabetic page "numbers"
\\blindtext\[1\]
\\end{document}
[Open this example in Overleaf](https://www.overleaf.com/docs?engine=pdflatex&snip_name=Demonstrating+page+number+styles&snip=%5Cdocumentclass%7Barticle%7D%0A%25+Use+a+small+page+size+to+avoid+%0A%25+needing+lots+of+text+to+create+%0A%25+several+pages%0A%5Cusepackage%5Bincludefoot%2C%0Apaperheight%3D10cm%2C%0Apaperwidth%3D10cm%2C%0Atextwidth%3D9cm%2C%0Atextheight%3D8cm%5D%7Bgeometry%7D%0A%5Cusepackage%7Bblindtext%7D%0A%5Cbegin%7Bdocument%7D%0A%25+Insert+a+table+of+contents%0A%5Ctableofcontents%0A%5Cnewpage%0A%5Csection%7BUppercase+Roman%7D%0A%5Cpagenumbering%7BRoman%7D%25+Capital+%27R%27%3A+uppercase+Roman+numerals%0A%5Cblindtext%5B1%5D%0A%5Cnewpage%0A%5Csection%7BLowercase+Roman%7D+%25+lowercase+Roman+numerals%0A%5Cpagenumbering%7Broman%7D%0A%5Cblindtext%5B1%5D%0A%5Cnewpage%0A%5Csection%7BArabic+numbers%7D%0A%5Cpagenumbering%7Barabic%7D+%25+Arabic%2FIndic+page+numbers%0A%5Cblindtext%5B1%5D%0A%5Cnewpage%0A%5Csection%7BLowercase+alphabetic%7D%0A%5Cpagenumbering%7Balph%7D+%25+Lowercase+alphabetic+page+%22numbers%22%0A%5Cblindtext%5B1%5D%0A%5Cnewpage%0A%5Csection%7BUppercase+alphabetic%7D%0A%5Cpagenumbering%7BAlph%7D+%25+Uppercase+alphabetic+page+%22numbers%22%0A%5Cblindtext%5B1%5D%0A%5Cend%7Bdocument%7D)
The next graphic shows the table of contents produced by this document. Note how the `\pagenumbering` command has reset the starting page number to the initial value for each style: `i` for the `roman` style, `A` for the `Alph` style, `I` for the `Roman` style and so forth:
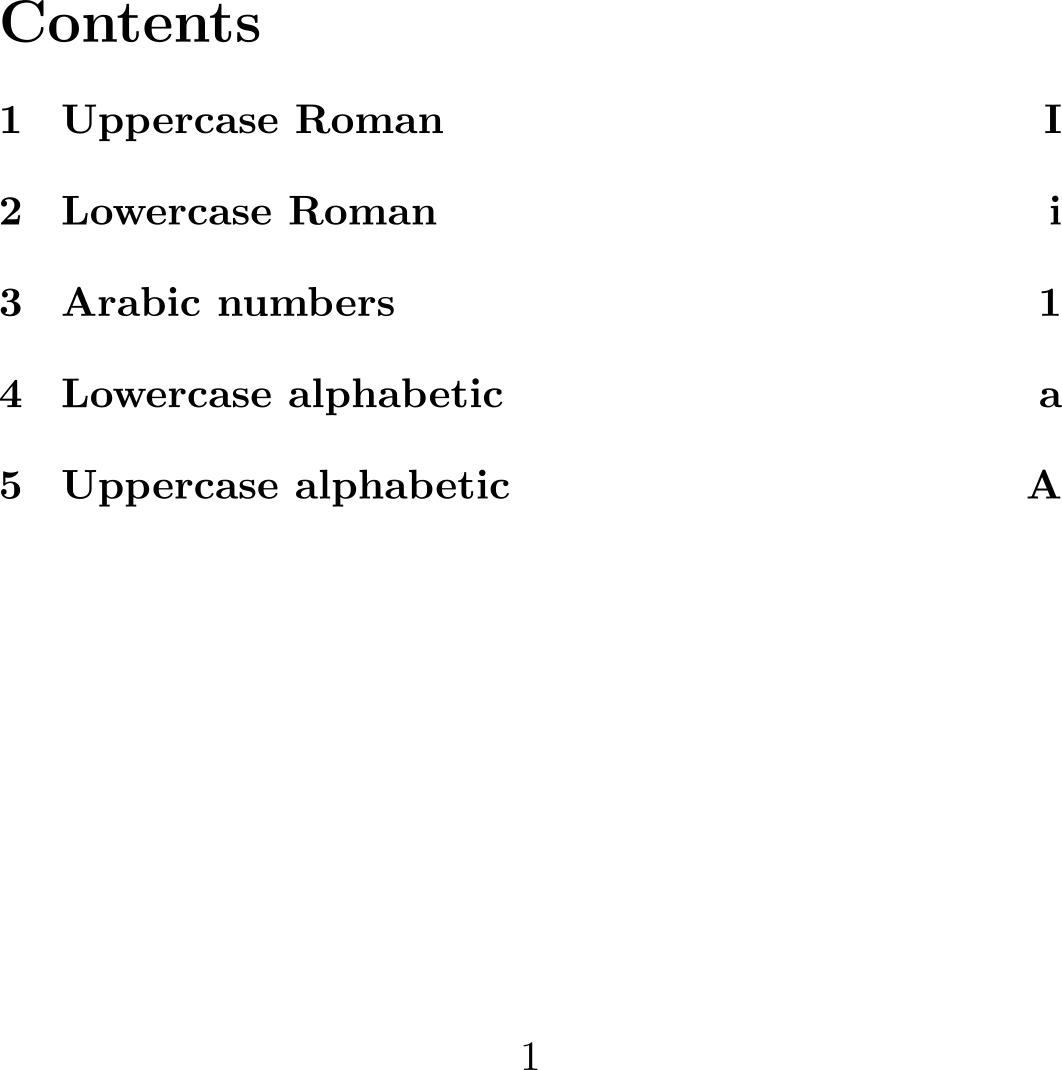
Here are two sample pages produced by this example; the first image shows page numbers as uppercase Roman numbers, the second demonstrates page numbers as uppercase letters:
Book class: using two styles of page number
-------------------------------------------
The [first few pages of a book](https://en.wikipedia.org/wiki/Book_design#Structure)
, which include the copyright page, title or half-title page, any Foreword or Preface and table of contents, are collectively called the _preliminary_ pages, or prelims for short—another term for those pages is [_front matter_](https://en.wikipedia.org/wiki/Book_design#Front_matter)
. Traditionally, prelim pages are numbered using lowercase Roman numerals with the main (body) pages being numbered using Arabic numerals. The `book` document class contains commands to assist with this, as the following example demonstrates.
\\documentclass{book}
% The emptypage package prevents page numbers and
% headings from appearing on empty pages.
\\usepackage{emptypage}
\\begin{document}
\\frontmatter %Use lowercase Roman numerals for page numbers
\\chapter\*{Foreword}
\\addcontentsline{toc}{chapter}{Foreword}
The Foreword is written by someone who is not the book's author.
\\chapter\*{Preface}
\\addcontentsline{toc}{chapter}{Preface}
The Preface is written by the book's author.
\\tableofcontents
\\mainmatter % Now Use Arabic numerals for page numbers
\\chapter{First Chapter}
This will be an empty chapter...
\\section{First section}
Some text would be good.
\\chapter{The second chapter}
\\end{document}
[Open this example in Overleaf](https://www.overleaf.com/docs?engine=pdflatex&snip_name=Example+page+numbers+in+book+class&snip=%5Cdocumentclass%7Bbook%7D%0A%25+The+emptypage+package+prevents+page+numbers+and%0A%25+headings+from+appearing+on+empty+pages.%0A%5Cusepackage%7Bemptypage%7D%0A%5Cbegin%7Bdocument%7D%0A%5Cfrontmatter+%25Use+lowercase+Roman+numerals+for+page+numbers%0A%5Cchapter%2A%7BForeword%7D%0A%5Caddcontentsline%7Btoc%7D%7Bchapter%7D%7BForeword%7D%0AThe+Foreword+is+written+by+someone+who+is+not+the+book%27s+author.%0A%0A%5Cchapter%2A%7BPreface%7D%0A%5Caddcontentsline%7Btoc%7D%7Bchapter%7D%7BPreface%7D%0AThe+Preface+is+written+by+the+book%27s+author.%0A%0A%5Ctableofcontents%0A%0A%5Cmainmatter+%25+Now+Use+Arabic+numerals+for+page+numbers%0A%0A%5Cchapter%7BFirst+Chapter%7D%0AThis+will+be+an+empty+chapter...%0A%5Csection%7BFirst+section%7D%0ASome+text+would+be+good.%0A%5Cchapter%7BThe+second+chapter%7D%0A%5Cend%7Bdocument%7D)
The table of contents produced by this example demonstrates the use of Roman numerals for the front matter and Arabic numerals for the main (body) matter:
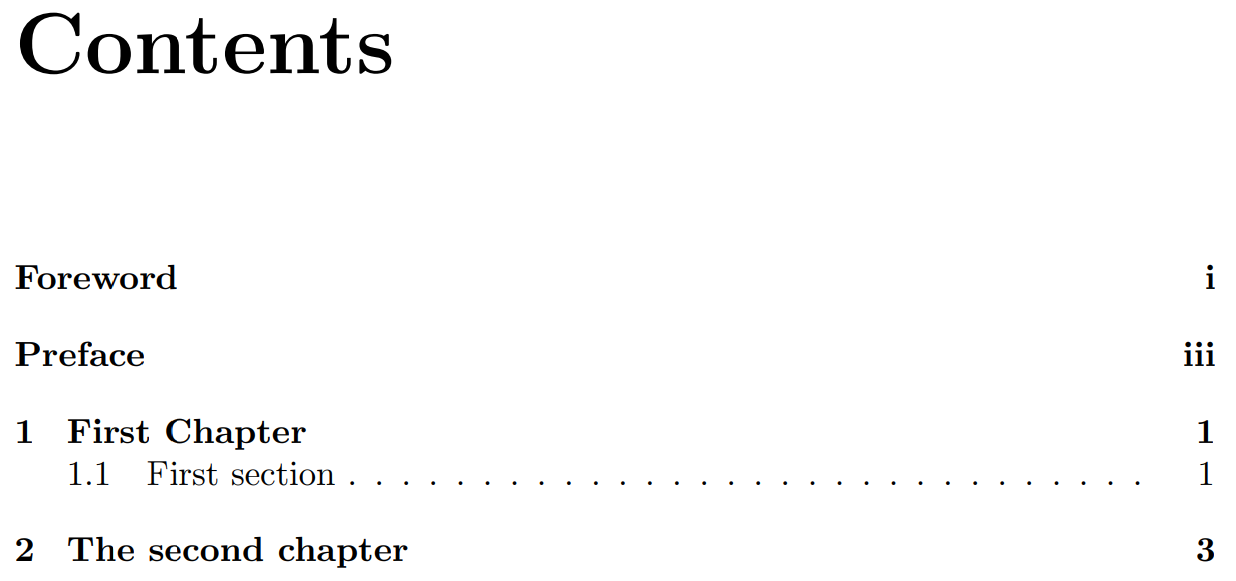
The commands that control the page numbering are:
* `\frontmatter`: Pages after this command and before the command `\mainmatter`, will be numbered with lowercase Roman numerals.
* `\mainmatter`: This will restart the page counter and change the style to Arabic numbers.
Article class: using two styles of page number
----------------------------------------------
As noted above, the current page number is stored in a [LaTeX counter variable](https://www.overleaf.com/learn/latex/Counters%23Introduction_to_LaTeX_counters "Counters")
which is called `page`. The value stored in `page`, or any other counter variable, can be set to a specific value using the `\setcounter` command:
\\setcounter{⟨countvar⟩}{⟨intval⟩}
where the counter variable `⟨countvar⟩` is set to the value `⟨intval⟩`. For example, to set the `page` counter to `3` you would write
\\setcounter{page}{3}
Other commands to change counter variables include `\addtocounter` and `\stepcounter`:
\\addtocounter{⟨countvar⟩}{⟨increment⟩}
\\stepcounter{⟨countvar⟩}
* `\addtocounter{⟨countvar⟩}{⟨increment⟩}` adds an amount `⟨increment⟩` to the counter variable `⟨countvar⟩`. **Note**: `⟨increment⟩` can be positive, to increase the counter value, or negative to decrease it.
* `\steptocounter{⟨countvar⟩}` adds 1 to the counter variable `⟨countvar⟩`
This hypothetical example modifies the page counter to plan a table of contents, including sections that haven't been written and whose page count is estimated. It also uses `\pagenumbering{roman}` and `\pagenumbering{Arabic}` to set the stye of page numbers.
\\documentclass{article}
\\pagenumbering{roman}
\\begin{document}
\\section\*{Guest Foreword (TBD)}
\\addcontentsline{toc}{section}{Foreword: 4 pages (TBD)}
To be written: Allowing 4 pages.
\\newpage
\\setcounter{page}{5}
\\section\*{Introduction (2 pages)}
\\addcontentsline{toc}{section}{Introduction: 2 pages (TBD)}
To be written: 2 pages allowed.
\\newpage
\\addtocounter{page}{1}
\\section\*{Strategy summary (2 pages)}
\\addcontentsline{toc}{section}{Strategy summary: 2 pages (TBD)}
To be written: 2 pages.
\\newpage
\\stepcounter{page}
\\tableofcontents
\\newpage
\\pagenumbering{arabic}
\\section{Level 1 heading}
Some text on this page.
\\newpage
\\section{Another Level 1 heading}
\\end{document}
[Open this example in Overleaf.](https://www.overleaf.com/docs?engine=pdflatex&snip_name=Mixing+page+number+formats+in+the+article+class&snip=%5Cdocumentclass%7Barticle%7D%0A%5Cpagenumbering%7Broman%7D%0A%5Cbegin%7Bdocument%7D%0A%0A%5Csection%2A%7BGuest+Foreword+%28TBD%29%7D%0A%5Caddcontentsline%7Btoc%7D%7Bsection%7D%7BForeword%3A+4+pages+%28TBD%29%7D%0ATo+be+written%3A+Allowing+4+pages.%0A%5Cnewpage+%0A%5Csetcounter%7Bpage%7D%7B5%7D%0A%0A%5Csection%2A%7BIntroduction+%282+pages%29%7D%0A%5Caddcontentsline%7Btoc%7D%7Bsection%7D%7BIntroduction%3A+2+pages+%28TBD%29%7D%0ATo+be+written%3A+2+pages+allowed.%0A%5Cnewpage%0A%5Caddtocounter%7Bpage%7D%7B1%7D%0A%0A%5Csection%2A%7BStrategy+summary+%282+pages%29%7D%0A%5Caddcontentsline%7Btoc%7D%7Bsection%7D%7BStrategy+summary%3A+2+pages+%28TBD%29%7D%0ATo+be+written%3A+2+pages.%0A%5Cnewpage%0A%5Cstepcounter%7Bpage%7D%0A%0A%5Ctableofcontents%0A%0A%5Cnewpage%0A%5Cpagenumbering%7Barabic%7D%0A%0A%5Csection%7BLevel+1+heading%7D%0ASome+text+on+this+page.%0A%5Cnewpage%0A%5Csection%7BAnother+Level+1+heading%7D%0A%5Cend%7Bdocument%7D)
This example produces the following table of contents, showing the results of altering the value of the `page` counter:
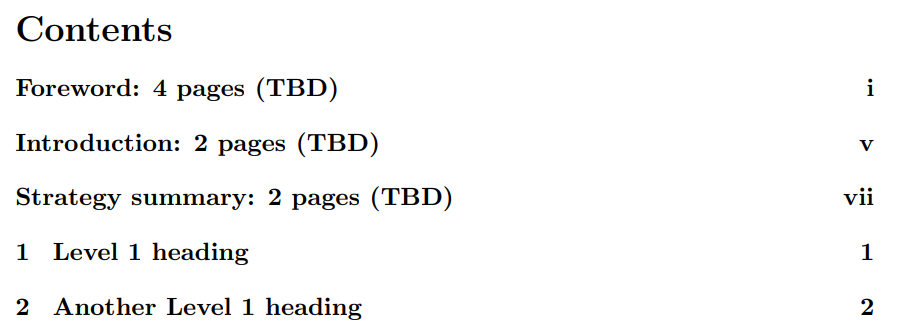
Customizing page numbers with the `fancyhdr` package
----------------------------------------------------
The `fancyhdr` package can be used to customize the location and format of page numbers; for example, placing them at specific positions within the header or footer. The Overleaf article [Headers and footers](https://www.overleaf.com/learn/latex/Headers_and_footers "Headers and footers")
explores this in detail, with many examples we won't reproduce here.
Here we'll give one example of writing the current page number in the context of the total page count, such as `Page X of Y` where Y is the total number of document pages obtained using the [`lastpage` package](https://ctan.org/pkg/lastpage?lang=en)
.
\\documentclass{article}
% Use a small page size to avoid
% needing lots of text to create
% several pages
\\usepackage\[includefoot,\
paperheight=10cm,\
paperwidth=10cm,\
textwidth=9cm,\
textheight=8cm\]{geometry}
\\usepackage{blindtext}
\\usepackage{lastpage}
\\usepackage{fancyhdr}
\\pagestyle{fancy}
\\fancyhf{} % clear existing header/footer entries
% Place Page X of Y on the right-hand
% side of the footer
\\fancyfoot\[R\]{Page \\thepage \\hspace{1pt} of \\pageref{LastPage}}
\\begin{document}
% Insert a table of contents
\\tableofcontents
\\newpage
\\section{One}
\\blindtext\[1\]
\\newpage
\\section{Two}
\\blindtext\[1\]
\\newpage
\\section{Three}
\\blindtext\[1\]
\\newpage
\\section{Four}
\\blindtext\[1\]
\\newpage
\\section{Five}
\\blindtext\[1\]
\\end{document}
[Open this example in Overleaf.](https://www.overleaf.com/docs?engine=pdflatex&snip_name=Modifying+page+numbers+with+fancyhdr&snip=%5Cdocumentclass%7Barticle%7D%0A%25+Use+a+small+page+size+to+avoid+%0A%25+needing+lots+of+text+to+create+%0A%25+several+pages%0A%5Cusepackage%5Bincludefoot%2C%0Apaperheight%3D10cm%2C%0Apaperwidth%3D10cm%2C%0Atextwidth%3D9cm%2C%0Atextheight%3D8cm%5D%7Bgeometry%7D%0A%5Cusepackage%7Bblindtext%7D%0A%5Cusepackage%7Blastpage%7D%0A%5Cusepackage%7Bfancyhdr%7D%0A%5Cpagestyle%7Bfancy%7D%0A%5Cfancyhf%7B%7D+%25+clear+existing+header%2Ffooter+entries%0A%25+Place+Page+X+of+Y+on+the+right-hand%0A%25+side+of+the+footer%0A%5Cfancyfoot%5BR%5D%7BPage+%5Cthepage+%5Chspace%7B1pt%7D+of+%5Cpageref%7BLastPage%7D%7D%0A%5Cbegin%7Bdocument%7D%0A%25+Insert+a+table+of+contents%0A%5Ctableofcontents%0A%5Cnewpage%0A%5Csection%7BOne%7D%0A%5Cblindtext%5B1%5D%0A%5Cnewpage%0A%5Csection%7BTwo%7D%0A%5Cblindtext%5B1%5D%0A%5Cnewpage%0A%5Csection%7BThree%7D%0A%5Cblindtext%5B1%5D%0A%5Cnewpage%0A%5Csection%7BFour%7D%0A%5Cblindtext%5B1%5D%0A%5Cnewpage%0A%5Csection%7BFive%7D%0A%5Cblindtext%5B1%5D%0A%5Cend%7Bdocument%7D)
The following image shows one of the pages produced by this example—note `Page 3 of 6` on the right-hand side of the footer:
We only use cookies for essential purposes and to improve your experience on our site. You can find out more in our [cookie policy](https://www.overleaf.com/legal#Cookies)
.
Essential cookies onlyAccept all cookies
---
# Bibtex bibliography styles - Overleaf, Online LaTeX Editor
[Skip to content](https://www.overleaf.com/learn/latex/Bibtex_bibliography_styles#main-content)
Search help library…searchclear
No Search Results
Bibtex bibliography styles
==========================
Contents
--------
* [1 Introduction and example](https://www.overleaf.com/learn/latex/Bibtex_bibliography_styles#Introduction_and_example)
* [2 Table of stylename values](https://www.overleaf.com/learn/latex/Bibtex_bibliography_styles#Table_of_stylename_values)
* [3 Further reading](https://www.overleaf.com/learn/latex/Bibtex_bibliography_styles#Further_reading)
Introduction and example
------------------------
When using [BiBTeX](https://www.overleaf.com/learn/latex/Bibliography_management_with_bibtex "Bibliography management with bibtex")
, the bibliography style is set and the bibliography file is imported with the following two commands:
\\bibliographystyle{stylename}
\\bibliography{bibfile}
where `bibfile` is the name of the bibliography `.bib` file, without the extension, and `stylename` is one of values shown in the [table below](https://www.overleaf.com/learn/latex/Bibtex_bibliography_styles#Table_of_stylename_values)
.
Here is an example that you can open in Overleaf—the `.bib` file is created for you:
\\documentclass\[a4paper,10pt\]{article}
\\usepackage\[english\]{babel}
%Includes "References" in the table of contents
\\usepackage\[nottoc\]{tocbibind}
%Title, date an author of the document
\\title{Bibliography management: BibTeX}
\\author{Overleaf}
%Begining of the document
\\begin{document}
\\maketitle
\\tableofcontents
\\medskip
\\section{First Section}
This document is an example of BibTeX using in bibliography management. Three items are cited: \\textit{The \\LaTeX\\ Companion} book \\cite{latexcompanion}, the Einstein journal paper \\cite{einstein}, and the Donald Knuth's website \\cite{knuthwebsite}. The \\LaTeX\\ related items are \\cite{latexcompanion,knuthwebsite}.
\\medskip
%Sets the bibliography style to UNSRT and imports the
%bibliography file "sample.bib".
\\bibliographystyle{unsrt}
\\bibliography{sample}
\\end{document}
[Open in Overleaf (a suitable .bib file is generated)](https://www.overleaf.com/docs?engine=&snip_name[]=main.tex&snip[]=%5Cdocumentclass%5Ba4paper%2C10pt%5D%7Barticle%7D%0A%5Cusepackage%5Benglish%5D%7Bbabel%7D%0A%25Includes+%22References%22+in+the+table+of+contents%0A%5Cusepackage%5Bnottoc%5D%7Btocbibind%7D%0A%0A%25Title%2C+date+an+author+of+the+document%0A%5Ctitle%7BBibliography+management%3A+BibTeX%7D%0A%5Cauthor%7BOverleaf%7D%0A%0A%25Begining+of+the+document%0A%5Cbegin%7Bdocument%7D%0A%0A%5Cmaketitle%0A%0A%5Ctableofcontents%0A%0A%5Cmedskip%0A%0A%5Csection%7BFirst+Section%7D%0AThis+document+is+an+example+of+BibTeX+using+in+bibliography+management.+Three+items+are+cited%3A+%5Ctextit%7BThe+%5CLaTeX%5C+Companion%7D+book+%5Ccite%7Blatexcompanion%7D%2C+the+Einstein+journal+paper+%5Ccite%7Beinstein%7D%2C+and+the+Donald+Knuth%27s+website+%5Ccite%7Bknuthwebsite%7D.+The+%5CLaTeX%5C+related+items+are+%5Ccite%7Blatexcompanion%2Cknuthwebsite%7D.+%0A%0A%5Cmedskip%0A%0A%25Sets+the+bibliography+style+to+UNSRT+and+imports+the+%0A%25bibliography+file+%22sample.bib%22.%0A%5Cbibliographystyle%7Bunsrt%7D%0A%5Cbibliography%7Bsample%7D%0A%5Cend%7Bdocument%7D&snip_name[]=sample.bib&snip[]=%40article%7Beinstein%2C%0A++author+%3D+++++++%22Albert+Einstein%22%2C%0A++title+%3D++++++++%22%7BZur+Elektrodynamik+bewegter+K%7B%5C%22o%7Drper%7D.+%28%7BGerman%7D%29%0A+++++++++++++++++%5B%7BOn%7D+the+electrodynamics+of+moving+bodies%5D%22%2C%0A++journal+%3D++++++%22Annalen+der+Physik%22%2C%0A++volume+%3D+++++++%22322%22%2C%0A++number+%3D+++++++%2210%22%2C%0A++pages+%3D++++++++%22891--921%22%2C%0A++year+%3D+++++++++%221905%22%2C%0A++DOI+%3D++++++++++%22http%3A%2F%2Fdx.doi.org%2F10.1002%2Fandp.19053221004%22%0A%7D%0A%0A%40book%7Blatexcompanion%2C%0A++++author++++%3D+%22Michel+Goossens+and+Frank+Mittelbach+and+Alexander+Samarin%22%2C%0A++++title+++++%3D+%22The+%5CLaTeX%5C+Companion%22%2C%0A++++year++++++%3D+%221993%22%2C%0A++++publisher+%3D+%22Addison-Wesley%22%2C%0A++++address+++%3D+%22Reading%2C+Massachusetts%22%0A%7D%0A+%0A%40misc%7Bknuthwebsite%2C%0A++++author++++%3D+%22Donald+Knuth%22%2C%0A++++title+++++%3D+%22Knuth%3A+Computers+and+Typesetting%22%2C%0A++++url+++++++%3D+%22http%3A%2F%2Fwww-cs-faculty.stanford.edu%2F%5C%7E%7B%7Duno%2Fabcde.html%22%0A%7D&main_document=main.tex)
Table of `stylename` values
---------------------------
| stylename | output |
| --- | --- |
| `abbrv` | 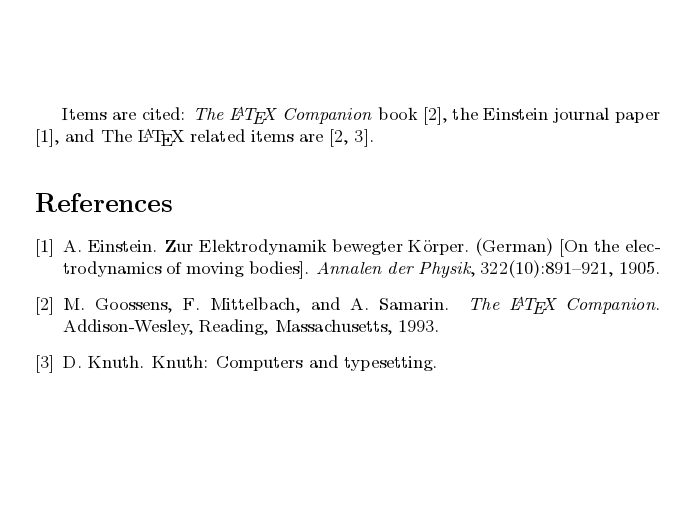 |
| `acm` | 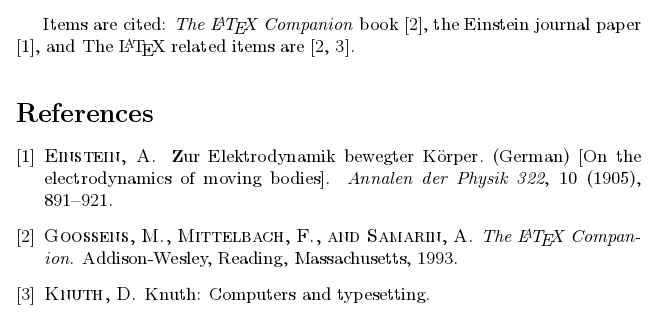 |
| `alpha` | 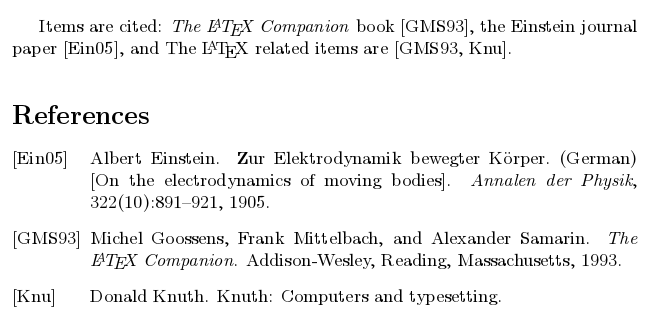 |
| `apalike` | 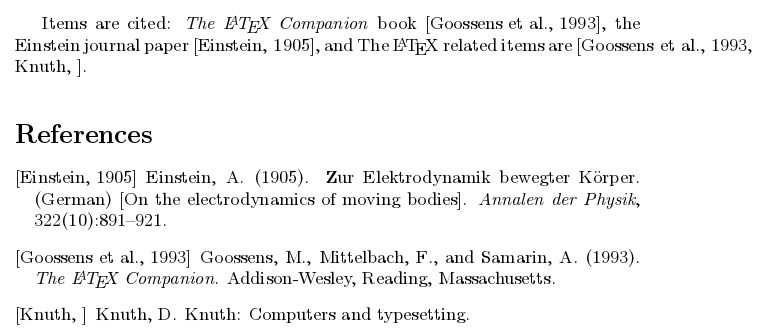 |
| `ieeetr` | 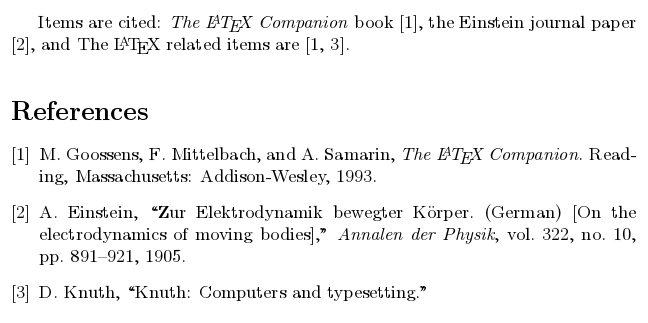 |
| `plain` | 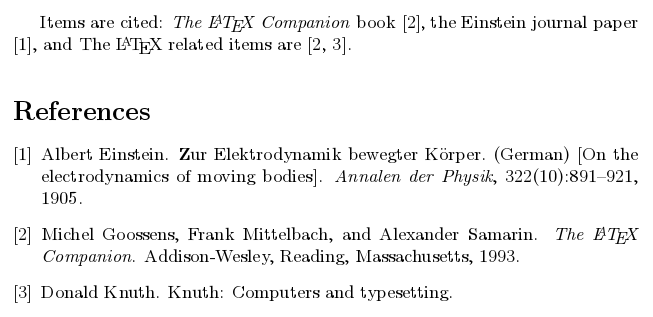 |
| `siam` | 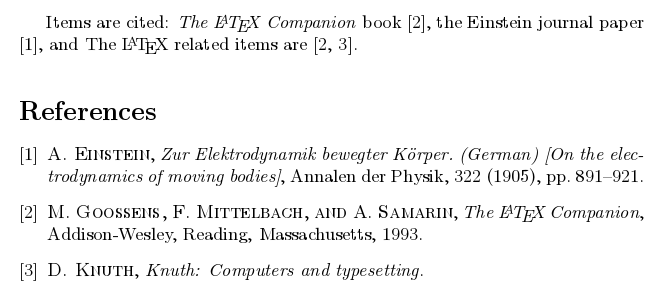 |
| `unsrt` | 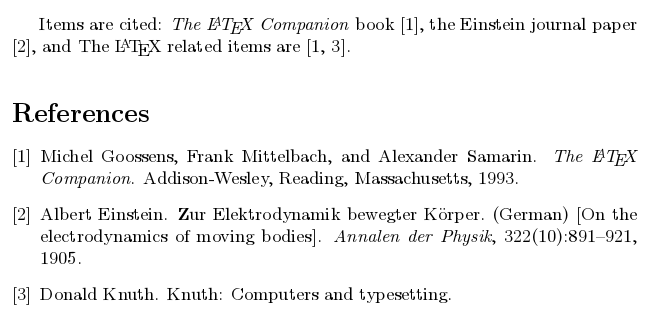 |
Further reading
---------------
For more information see:
* [Bibliography management with bibtex](https://www.overleaf.com/learn/latex/Bibliography_management_with_bibtex "Bibliography management with bibtex")
* [BibTeX documentation at CTAN web site](http://www.ctan.org/tex-archive/biblio/bibtex/contrib/doc/)
* [tocbind package documentation](ftp://ftp.tex.ac.uk/tex-archive/macros/latex/contrib/tocbibind/tocbibind.pdf)
* [Bibliography management with natbib](https://www.overleaf.com/learn/latex/Bibliography_management_with_natbib "Bibliography management with natbib")
* [Bibliography management with biblatex](https://www.overleaf.com/learn/latex/Bibliography_management_with_biblatex "Bibliography management with biblatex")
* [Table of contents](https://www.overleaf.com/learn/latex/Table_of_contents "Table of contents")
* [Management in a large project](https://www.overleaf.com/learn/latex/Management_in_a_large_project "Management in a large project")
* [Multi-file LaTeX projects](https://www.overleaf.com/learn/latex/Multi-file_LaTeX_projects "Multi-file LaTeX projects")
We only use cookies for essential purposes and to improve your experience on our site. You can find out more in our [cookie policy](https://www.overleaf.com/legal#Cookies)
.
Essential cookies onlyAccept all cookies
---
# Glossaries - Overleaf, Online LaTeX Editor
[Skip to content](https://www.overleaf.com/learn/latex/Glossaries#main-content)
Search help library…searchclear
No Search Results
Glossaries
==========
Contents
--------
* [1 Introduction](https://www.overleaf.com/learn/latex/Glossaries#Introduction)
* [2 Terms and Acronyms](https://www.overleaf.com/learn/latex/Glossaries#Terms_and_Acronyms)
* [2.1 Terms](https://www.overleaf.com/learn/latex/Glossaries#Terms)
* [2.2 Acronyms](https://www.overleaf.com/learn/latex/Glossaries#Acronyms)
* [3 Changing the title of the Glossary](https://www.overleaf.com/learn/latex/Glossaries#Changing_the_title_of_the_Glossary)
* [4 Show the glossary in the table of contents](https://www.overleaf.com/learn/latex/Glossaries#Show_the_glossary_in_the_table_of_contents)
* [5 Compiling the glossary](https://www.overleaf.com/learn/latex/Glossaries#Compiling_the_glossary)
* [6 Reference guide](https://www.overleaf.com/learn/latex/Glossaries#Reference_guide)
* [7 Further reading](https://www.overleaf.com/learn/latex/Glossaries#Further_reading)
Introduction
------------
When writing a document that contains some field-specific concepts it might be convenient to add a glossary. A glossary is a list of terms in a particular domain of knowledge with definitions for those terms. This article explains how to create one.
**Important advisory note**: Your project’s [main file](https://docs.overleaf.com/getting-started/recompiling-your-project/the-main-document "Set Main Document")
should always be in the root directory (outside of any folders), to ensure that all of the compilation steps will be run in the correct directory and to ensure that the required auxiliary files are available, for instance, when creating a glossary or adding an index.
Let's start with a simple example.
\\documentclass{article}
\\usepackage\[utf8\]{inputenc}
\\usepackage{glossaries}
\\makeglossaries
\\newglossaryentry{latex}
{
name=latex,
description={Is a markup language specially suited
for scientific documents}
}
\\newglossaryentry{maths}
{
name=mathematics,
description={Mathematics is what mathematicians do}
}
\\title{How to create a glossary}
\\author{ }
\\date{ }
\\begin{document}
\\maketitle
The \\Gls{latex} typesetting markup language is specially suitable
for documents that include \\gls{maths}.
\\clearpage
\\printglossaries
\\end{document}
[Open this example in Overleaf](https://www.overleaf.com/docs?engine=pdflatex&snip_name=Glossaries+example&snip=%5Cdocumentclass%7Barticle%7D%0A%5Cusepackage%5Butf8%5D%7Binputenc%7D%0A%5Cusepackage%7Bglossaries%7D%0A%0A%5Cmakeglossaries%0A%0A%5Cnewglossaryentry%7Blatex%7D%0A%7B%0A++++name%3Dlatex%2C%0A++++description%3D%7BIs+a+markup+language+specially+suited+%0A++++for+scientific+documents%7D%0A%7D%0A%0A%5Cnewglossaryentry%7Bmaths%7D%0A%7B%0A++++name%3Dmathematics%2C%0A++++description%3D%7BMathematics+is+what+mathematicians+do%7D%0A%7D%0A%0A%5Ctitle%7BHow+to+create+a+glossary%7D%0A%5Cauthor%7B+%7D%0A%5Cdate%7B+%7D%0A%0A%5Cbegin%7Bdocument%7D%0A%5Cmaketitle%0A%0AThe+%5CGls%7Blatex%7D+typesetting+markup+language+is+specially+suitable+%0Afor+documents+that+include+%5Cgls%7Bmaths%7D.+%0A%0A%5Cclearpage%0A%0A%5Cprintglossaries%0A%0A%5Cend%7Bdocument%7D)
The following image shows the Glossary produced by the example above:
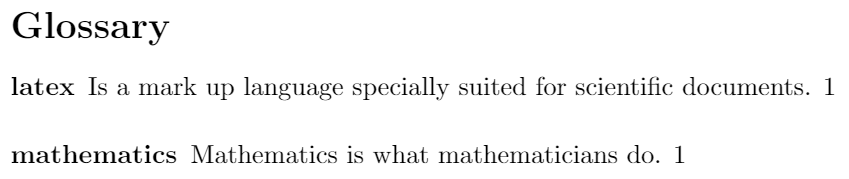
To create a glossary the package `glossaries` has to be imported. This is accomplished by the line
\\usepackage{glossaries}
in the preamble. The command `\makeglossaries` must be written before the first glossary entry.
Each glossary entry is created by the command `\newglossaryentry` which takes two parameters, then each entry can be referenced later in the document by the command `\gls`. See the subsection about [terms](https://www.overleaf.com/learn/latex/Glossaries#Terms)
for a more complete description.
The command `\printglossaries` is the one that will actually render the list of words and definitions typed in each entry, with the title "Glossary". In this case it's shown at the end of the document, but `\printglossaries` can be used in any other location.
Terms and Acronyms
------------------
Usually there are two types of entries in a glossary: terms and their definitions, or acronyms and their meaning. This two types can be printed separately in your LaTeX document.
\\documentclass{article}
\\usepackage\[utf8\]{inputenc}
\\usepackage\[acronym\]{glossaries}
\\makeglossaries
\\newglossaryentry{latex}
{
name=latex,
description={Is a mark up language specially suited for
scientific documents}
}
\\newglossaryentry{maths}
{
name=mathematics,
description={Mathematics is what mathematicians do}
}
\\newglossaryentry{formula}
{
name=formula,
description={A mathematical expression}
}
\\newacronym{gcd}{GCD}{Greatest Common Divisor}
\\newacronym{lcm}{LCM}{Least Common Multiple}
\\begin{document}
The \\Gls{latex} typesetting markup language is specially suitable
for documents that include \\gls{maths}. \\Glspl{formula} are
rendered properly an easily once one gets used to the commands.
Given a set of numbers, there are elementary methods to compute
its \\acrlong{gcd}, which is abbreviated \\acrshort{gcd}. This
process is similar to that used for the \\acrfull{lcm}.
\\clearpage
\\printglossary\[type=\\acronymtype\]
\\printglossary
\\end{document}
[Open this example in Overleaf](https://www.overleaf.com/docs?engine=pdflatex&snip_name=Glossaries+Terms+and+Acronyms+example&snip=%5Cdocumentclass%7Barticle%7D%0A%5Cusepackage%5Butf8%5D%7Binputenc%7D%0A%5Cusepackage%5Bacronym%5D%7Bglossaries%7D%0A%0A%5Cmakeglossaries%0A%0A%5Cnewglossaryentry%7Blatex%7D%0A%7B%0A++++++++name%3Dlatex%2C%0A++++++++description%3D%7BIs+a+mark+up+language+specially+suited+for+%0Ascientific+documents%7D%0A%7D%0A%0A%5Cnewglossaryentry%7Bmaths%7D%0A%7B%0A++++++++name%3Dmathematics%2C%0A++++++++description%3D%7BMathematics+is+what+mathematicians+do%7D%0A%7D%0A%0A%5Cnewglossaryentry%7Bformula%7D%0A%7B%0A++++++++name%3Dformula%2C%0A++++++++description%3D%7BA+mathematical+expression%7D%0A%7D%0A%0A%5Cnewacronym%7Bgcd%7D%7BGCD%7D%7BGreatest+Common+Divisor%7D%0A%0A%5Cnewacronym%7Blcm%7D%7BLCM%7D%7BLeast+Common+Multiple%7D%0A%0A%5Cbegin%7Bdocument%7D%0A%0AThe+%5CGls%7Blatex%7D+typesetting+markup+language+is+specially+suitable+%0Afor+documents+that+include+%5Cgls%7Bmaths%7D.+%5CGlspl%7Bformula%7D+are+%0Arendered+properly+an+easily+once+one+gets+used+to+the+commands.%0A%0AGiven+a+set+of+numbers%2C+there+are+elementary+methods+to+compute+%0Aits+%5Cacrlong%7Bgcd%7D%2C+which+is+abbreviated+%5Cacrshort%7Bgcd%7D.+This+%0Aprocess+is+similar+to+that+used+for+the+%5Cacrfull%7Blcm%7D.%0A%0A%5Cclearpage%0A%0A%5Cprintglossary%5Btype%3D%5Cacronymtype%5D%0A%0A%5Cprintglossary%0A%0A%5Cend%7Bdocument%7D)
The following image shows part of the output produced by the example above:
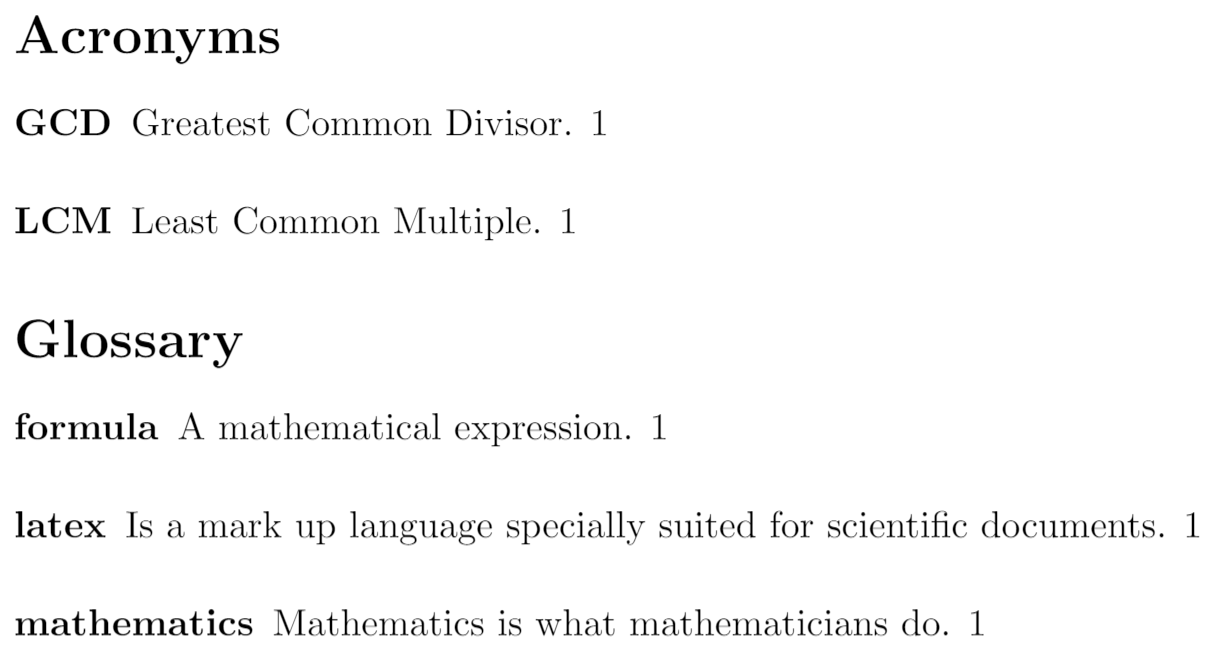
The following subsections explain how to create each of the list types.
### Terms
As seen in the [introduction](https://www.overleaf.com/learn/latex/Glossaries#Introduction)
, terms are defined by means of the command `\newglossaryentry`
\\documentclass{article}
\\usepackage{glossaries}
\\makeglossaries
\\newglossaryentry{maths}
{
name=mathematics,
description={Mathematics is what mathematicians do}
}
\\newglossaryentry{latex}
{
name=latex,
description={Is a markup language specially suited for
scientific documents}
}
\\newglossaryentry{formula}
{
name=formula,
description={A mathematical expression}
}
\\begin{document}
The \\Gls{latex} typesetting markup language is specially suitable
for documents that include \\gls{maths}. \\Glspl{formula} are rendered
properly an easily once one gets used to the commands.
\\clearpage
\\printglossary
\\end{document}
[Open this example in Overleaf](https://www.overleaf.com/docs?engine=pdflatex&snip_name=Another+Glossary+example&snip=%5Cdocumentclass%7Barticle%7D%0A%5Cusepackage%7Bglossaries%7D%0A%0A%5Cmakeglossaries%0A%0A%0A%5Cnewglossaryentry%7Bmaths%7D%0A%7B%0A++++name%3Dmathematics%2C%0A++++description%3D%7BMathematics+is+what+mathematicians+do%7D%0A%7D%0A%0A%5Cnewglossaryentry%7Blatex%7D%0A%7B%0A++++name%3Dlatex%2C%0A++++description%3D%7BIs+a+markup+language+specially+suited+for+%0Ascientific+documents%7D%0A%7D%0A%0A%0A%5Cnewglossaryentry%7Bformula%7D%0A%7B%0A++++name%3Dformula%2C%0A++++description%3D%7BA+mathematical+expression%7D%0A%7D%0A%0A%5Cbegin%7Bdocument%7D%0A%0AThe+%5CGls%7Blatex%7D+typesetting+markup+language+is+specially+suitable+%0Afor+documents+that+include+%5Cgls%7Bmaths%7D.+%5CGlspl%7Bformula%7D+are+rendered+%0Aproperly+an+easily+once+one+gets+used+to+the+commands.%0A%0A%5Cclearpage%0A%0A%5Cprintglossary%0A%0A%5Cend%7Bdocument%7D)
The following image shows the Glossary created by the example above:
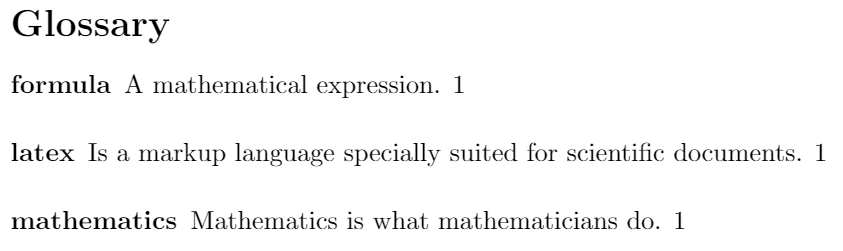
Let's see in more detail the syntax of each parameter passed to the command `\newglossaryentry`. The first term defined in the example is "mathematics".
* `maths`. This first parameter is the label of this term and is used to reference it within the document with `gls`
* `name=mathematics`. Includes The word to be defined, in this case "mathematics". It's recommended to write it in lowercase letters and singular form.
* `description={Mathematics is what mathematicians do}`. Inside the braces is the definition of the current term.
After you have defined the terms, to use them while you are typing your LaTeX file use one of the commands describe below:
`\gls{ }`
To print the term, lowercase. For example, `\gls{maths}` prints _mathematics_ when used.
`\Gls{ }`
The same as _\\gls_ but the first letter will be printed in uppercase. Example: `\Gls{maths}` prints _Mathematics_
`\glspl{ }`
The same as _\\gls_ but the term is put in its plural form. For instance, `\glspl{formula}` will write _formulas_ in your final document.
`\Glspl{ }`
The same as _\\Gls_ but the term is put in its plural form. For example, `\Glspl{formula}` renders as _Formulas_.
Finally, to print the glossary use the command
\\printglossary
### Acronyms
An acronym is a word formed from the initial letters in a phrase. Below is an example of acronyms in LaTeX
\\documentclass{article}
\\usepackage\[acronym\]{glossaries}
\\makeglossaries
\\newacronym{gcd}{GCD}{Greatest Common Divisor}
\\newacronym{lcm}{LCM}{Least Common Multiple}
\\begin{document}
Given a set of numbers, there are elementary methods to compute
its \\acrlong{gcd}, which is abbreviated \\acrshort{gcd}. This process
is similar to that used for the \\acrfull{lcm}.
\\clearpage
\\printglossary\[type=\\acronymtype\]
\\end{document}
[Open this example in Overleaf](https://www.overleaf.com/docs?engine=pdflatex&snip_name=Another+Glossary+example&snip=%5Cdocumentclass%7Barticle%7D%0A%5Cusepackage%5Bacronym%5D%7Bglossaries%7D%0A%0A%5Cmakeglossaries%0A%0A%5Cnewacronym%7Bgcd%7D%7BGCD%7D%7BGreatest+Common+Divisor%7D%0A%0A%5Cnewacronym%7Blcm%7D%7BLCM%7D%7BLeast+Common+Multiple%7D%0A%0A%5Cbegin%7Bdocument%7D%0AGiven+a+set+of+numbers%2C+there+are+elementary+methods+to+compute+%0Aits+%5Cacrlong%7Bgcd%7D%2C+which+is+abbreviated+%5Cacrshort%7Bgcd%7D.+This+process+%0Ais+similar+to+that+used+for+the+%5Cacrfull%7Blcm%7D.%0A%0A%5Cclearpage%0A%0A%5Cprintglossary%5Btype%3D%5Cacronymtype%5D%0A%0A%5Cend%7Bdocument%7D)
The following image shows part of the output produced by the example above:
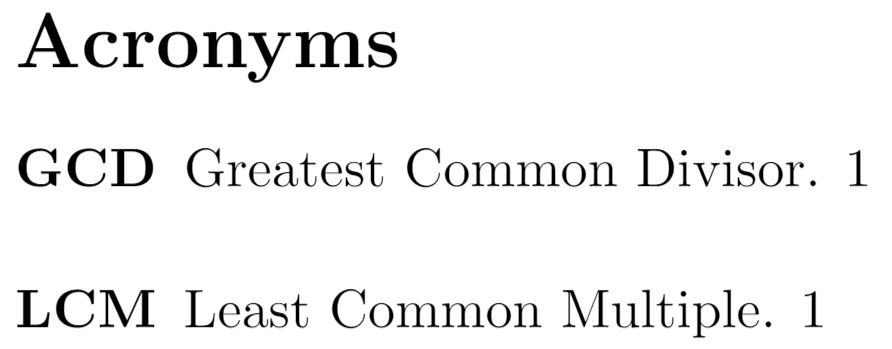
To use acronyms an additional parameter must be used when importing the **glossaries** package. The line to be added to the preamble is
\\usepackage\[acronym\]{glossaries}
Once this line is added, the command `\newacronym` will declare a new acronym. For the sake of an example, below is a description of the command `\newacronym{gcd}{GCD}{Greatest Common Divisor}`
* `gcd` is the label, used latter in the document to reference this acronym.
* `GCD` the acronym itself. Usually acronyms are written in capital letters.
* `Greatest Common Divisor` is the phrase this acronym is used for.
After the acronyms have been included in the preamble, they can be used by means on the next commands:
`\acrlong{ }`
Displays the phrase which the acronyms stands for. Put the label of the acronym inside the braces. In the example, `\acrlong{gcd}` prints _Greatest Common Divisor_.
`\acrshort{ }`
Prints the acronym whose label is passed as parameter. For instance, `\acrshort{gcd}` renders as _GCD_.
`\acrfull{ }`
Prints both, the acronym and its definition. In the example the output of `\acrfull{lcm}` is _Least Common Multiple (LCM)_.
To print the list of acronyms use the command
\\printglossary\[type=\\acronymtype\]
The acronyms list needs a temporary file generated by `\printglossary` to work, thereby you must add said command right before the line `\printglossary[type=\acronymtype]` and compile your document, once you've compiled your document for the first time you can remove the line `\printglossary`.
Changing the title of the Glossary
----------------------------------
If you want to change the default title of the glossary for something else, this is straightforward, two parameters must be added when printing the glossary. Below is an example.
\\documentclass{article}
\\usepackage{glossaries}
\\makeglossaries
\\newglossaryentry{maths}
{
name=mathematics,
description={Mathematics is what mathematicians do}
}
\\newglossaryentry{latex}
{
name=latex,
description={Is a markup language specially suited for
scientific documents}
}
\\newglossaryentry{formula}
{
name=formula,
description={A mathematical expression}
}
\\begin{document}
The \\Gls{latex} typesetting markup language is specially suitable
for documents that include \\gls{maths}. \\Glspl{formula} are rendered
properly an easily once one gets used to the commands.
\\clearpage
\\printglossary\[title=Special Terms, toctitle=List of terms\]
\\end{document}
[Open this example in Overleaf](https://www.overleaf.com/docs?engine=pdflatex&snip_name=Another+Glossary+example&snip=%5Cdocumentclass%7Barticle%7D%0A%5Cusepackage%7Bglossaries%7D%0A%0A%5Cmakeglossaries%0A%0A%0A%5Cnewglossaryentry%7Bmaths%7D%0A%7B%0A++++name%3Dmathematics%2C%0A++++description%3D%7BMathematics+is+what+mathematicians+do%7D%0A%7D%0A%0A%5Cnewglossaryentry%7Blatex%7D%0A%7B%0A++++name%3Dlatex%2C%0A++++description%3D%7BIs+a+markup+language+specially+suited+for+%0Ascientific+documents%7D%0A%7D%0A%0A%0A%5Cnewglossaryentry%7Bformula%7D%0A%7B%0A++++name%3Dformula%2C%0A++++description%3D%7BA+mathematical+expression%7D%0A%7D%0A%0A%5Cbegin%7Bdocument%7D%0A%0AThe+%5CGls%7Blatex%7D+typesetting+markup+language+is+specially+suitable+%0Afor+documents+that+include+%5Cgls%7Bmaths%7D.+%5CGlspl%7Bformula%7D+are+rendered+%0Aproperly+an+easily+once+one+gets+used+to+the+commands.%0A%0A%5Cclearpage%0A%0A%5Cprintglossary%5Btitle%3DSpecial+Terms%2C+toctitle%3DList+of+terms%5D%0A%0A%5Cend%7Bdocument%7D)
The following image shows part of the output produced by the example above:
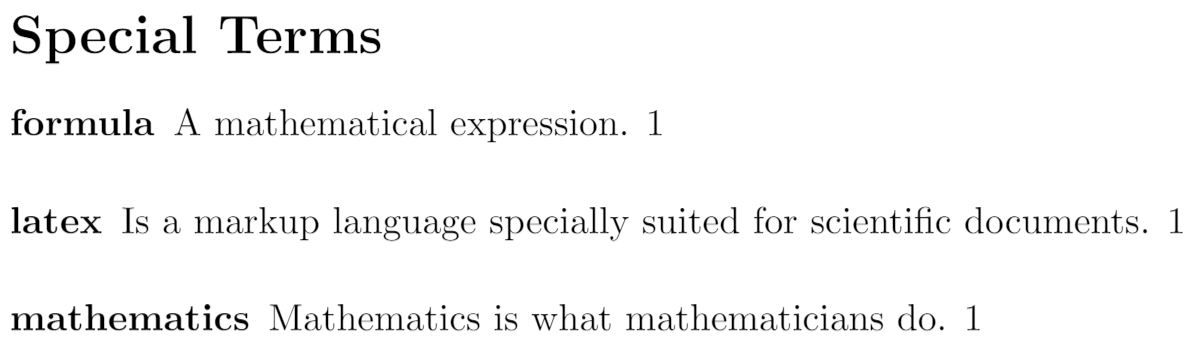
Notice that the command `\printglossary` has two comma-separated parameters:
* `title=Special Terms` is the title to be displayed on top of the glossary.
* `toctitle=List of terms` this is the entry to be displayed in the table of contents. See the [next section](https://www.overleaf.com/learn/latex/Glossaries#Show_the_glossary_in_the_table_of_contents)
.
Show the glossary in the table of contents
------------------------------------------
For the glossary to show up in the table of contents put
\\usepackage\[toc\]{glossaries}
in the preamble of your document
\\documentclass{article}
\\usepackage\[toc\]{glossaries}
\\makeglossaries
\\newglossaryentry{maths}
{
name=mathematics,
description={Mathematics is what mathematicians do}
}
\\newglossaryentry{latex}
{
name=latex,
description={Is a markup language specially suited for
scientific documents}
}
\\newglossaryentry{formula}
{
name=formula,
description={A mathematical expression}
}
\\begin{document}
\\tableofcontents
\\section{First Section}
The \\Gls{latex} typesetting markup language is specially suitable
for documents that include \\gls{maths}. \\Glspl{formula} are rendered
properly an easily once one gets used to the commands.
\\clearpage
\\printglossary\[title=Special Terms, toctitle=List of terms\]
\\end{document}
[Open this example in Overleaf](https://www.overleaf.com/docs?engine=pdflatex&snip_name=Another+Glossary+example&snip=%5Cdocumentclass%7Barticle%7D%0A%5Cusepackage%5Btoc%5D%7Bglossaries%7D%0A%0A%5Cmakeglossaries%0A%0A%5Cnewglossaryentry%7Bmaths%7D%0A%7B%0A++++name%3Dmathematics%2C%0A++++description%3D%7BMathematics+is+what+mathematicians+do%7D%0A%7D%0A%0A%5Cnewglossaryentry%7Blatex%7D%0A%7B%0A++++name%3Dlatex%2C%0A++++description%3D%7BIs+a+markup+language+specially+suited+for+%0Ascientific+documents%7D%0A%7D%0A%0A%0A%5Cnewglossaryentry%7Bformula%7D%0A%7B%0A++++name%3Dformula%2C%0A++++description%3D%7BA+mathematical+expression%7D%0A%7D%0A%0A%5Cbegin%7Bdocument%7D%0A%0A%5Ctableofcontents%0A%0A%5Csection%7BFirst+Section%7D+%0AThe+%5CGls%7Blatex%7D+typesetting+markup+language+is+specially+suitable+%0Afor+documents+that+include+%5Cgls%7Bmaths%7D.+%5CGlspl%7Bformula%7D+are+rendered+%0Aproperly+an+easily+once+one+gets+used+to+the+commands.%0A%0A%5Cclearpage%0A%0A%5Cprintglossary%5Btitle%3DSpecial+Terms%2C+toctitle%3DList+of+terms%5D%0A%0A%5Cend%7Bdocument%7D)
The following image shows the content of the 2 pages produced by the example above. Note how the command
\\printglossary\[title=Special Terms, toctitle=List of terms\]
produces different titles for the table of contents ("List of terms") and the corresponding heading used in the text ("Special Terms"):
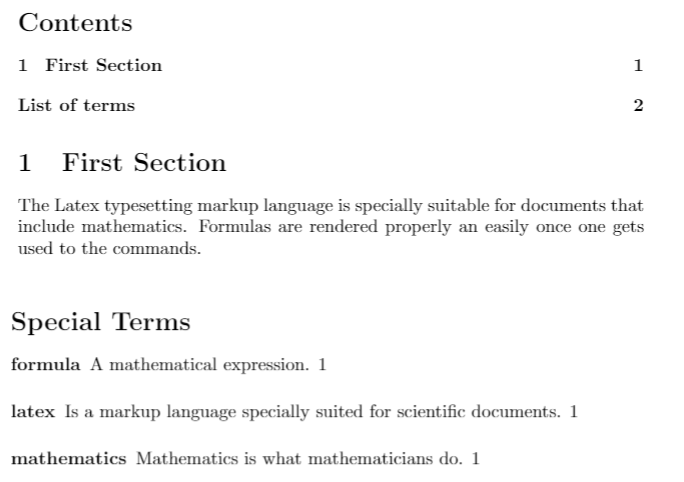
Compiling the glossary
----------------------
To compile a document that contains a glossary in [Overleaf](http://overleaf.com/)
you don't have to do anything special, but if you add new terms to the glossary once you compiled it, make sure to click on _Clear cached files_ first under logs option).
If you are compiling the document, for instance one called `glossaries.tex`, using pdflatex **on your local machine**, you have to use these commands:
`pdflatex glossaries.tex`
`makeglossaries glossaries`
`pdflatex glossaries.tex`
Reference guide
---------------
**Styles available for glossaries**
The command `\setglossarystyle{style}` must be inserted before `\printglossaries`. Below a list of available styles:
* list. Writes the defined term in boldface font
* altlist. Inserts newline after the term and indents the description.
* listgroup. Group the terms based on the first letter.
* listhypergroup. Adds hyperlinks at the top of the index.
Further reading
---------------
For more information see:
* [Indices](https://www.overleaf.com/learn/latex/Indices "Indices")
* [Lists of tables and figures](https://www.overleaf.com/learn/latex/Lists_of_tables_and_figures "Lists of tables and figures")
* [Table of contents](https://www.overleaf.com/learn/latex/Table_of_contents "Table of contents")
* [Sections and chapters](https://www.overleaf.com/learn/latex/Sections_and_chapters "Sections and chapters")
* [Hyperlinks](https://www.overleaf.com/learn/latex/Hyperlinks "Hyperlinks")
* [International language support](https://www.overleaf.com/learn/latex/International_language_support "International language support")
* [Cross referencing sections and equations](https://www.overleaf.com/learn/latex/Cross_referencing_sections_and_equations "Cross referencing sections and equations")
* [Management in a large project](https://www.overleaf.com/learn/latex/Management_in_a_large_project "Management in a large project")
* [Multi-file LaTeX projects](https://www.overleaf.com/learn/latex/Multi-file_LaTeX_projects "Multi-file LaTeX projects")
* [Glossary article on WikiBooks](http://en.wikibooks.org/wiki/LaTeX/Glossary)
* [The glossaries package: a guide for beginners](http://theoval.cmp.uea.ac.uk/~nlct/latex/packages/glossaries/glossariesbegin.html)
We only use cookies for essential purposes and to improve your experience on our site. You can find out more in our [cookie policy](https://www.overleaf.com/legal#Cookies)
.
Essential cookies onlyAccept all cookies
---
# Hyperlinks - Overleaf, Online LaTeX Editor
[Skip to content](https://www.overleaf.com/learn/latex/Hyperlinks#main-content)
Search help library…searchclear
No Search Results
Hyperlinks
==========
LaTeX is a great tool for printable professional-looking documents, but can be also used to generate PDF files with excellent navigation tools. This article describes how to create hyperlinks in your document, and how to set up LaTeX documents to be viewed with a PDF-reader.
Contents
--------
* [1 Introduction](https://www.overleaf.com/learn/latex/Hyperlinks#Introduction)
* [2 Styles and colours](https://www.overleaf.com/learn/latex/Hyperlinks#Styles_and_colours)
* [3 Linking web addresses](https://www.overleaf.com/learn/latex/Hyperlinks#Linking_web_addresses)
* [4 Linking local files](https://www.overleaf.com/learn/latex/Hyperlinks#Linking_local_files)
* [5 Inserting links manually](https://www.overleaf.com/learn/latex/Hyperlinks#Inserting_links_manually)
* [6 PDF-specific options](https://www.overleaf.com/learn/latex/Hyperlinks#PDF-specific_options)
* [7 Reference guide](https://www.overleaf.com/learn/latex/Hyperlinks#Reference_guide)
* [8 Further reading](https://www.overleaf.com/learn/latex/Hyperlinks#Further_reading)
Introduction
------------
Let's start with a minimal working example, by simply importing the **hyperref** package all [cross-referenced elements](https://www.overleaf.com/learn/latex/Cross_referencing_sections_and_equations "Cross referencing sections and equations")
become hyperlinked.
\\documentclass{book}
\\usepackage{blindtext}
\\usepackage{hyperref}
\\title{Example of Hyperlinks}
\\author{Overleaf}
\\begin{document}
\\frontmatter
\\tableofcontents
\\clearpage
\\addcontentsline{toc}{chapter}{Foreword}
{\\huge {\\bf Foreword}}
\\Blindtext
\\clearpage
\\addcontentsline{toc}{chapter}{Dummy entry}
{\\huge {\\bf Dummy entry}}
\\Blindtext
\\mainmatter
\\chapter{First Chapter}
This will be an empty chapter
\\begin{equation}
\\label{eq:1}
\\sum\_{i=0}^{\\infty} a\_i x^i
\\end{equation}
The equation \\ref{eq:1} shows a sum that is divergent. This formula will be used later on page \\pageref{second}.
\\Blindtext
\\clearpage
\\section{Second section} \\label{second}
\\blindtext
\\Blinddocument
\\end{document}
[Open this `hyperref` example in Overleaf](https://www.overleaf.com/docs?engine=pdflatex&snip_name=Basic+hyperref+example&snip=%5Cdocumentclass%7Bbook%7D%0A%5Cusepackage%7Bblindtext%7D%0A%5Cusepackage%7Bhyperref%7D%0A%0A%5Ctitle%7BExample+of+Hyperlinks%7D%0A%5Cauthor%7BOverleaf%7D%0A%0A%5Cbegin%7Bdocument%7D%0A%0A%5Cfrontmatter%0A%5Ctableofcontents%0A%5Cclearpage%0A%0A%5Caddcontentsline%7Btoc%7D%7Bchapter%7D%7BForeword%7D%0A%7B%5Chuge+%7B%5Cbf+Foreword%7D%7D%0A%0A%5CBlindtext%0A%5Cclearpage%0A%0A%5Caddcontentsline%7Btoc%7D%7Bchapter%7D%7BDummy+entry%7D%0A%7B%5Chuge+%7B%5Cbf+Dummy+entry%7D%7D%0A%0A%5CBlindtext%0A%5Cmainmatter%0A%0A%5Cchapter%7BFirst+Chapter%7D%0A%0AThis+will+be+an+empty+chapter%0A%0A%5Cbegin%7Bequation%7D%0A%5Clabel%7Beq%3A1%7D%0A%5Csum_%7Bi%3D0%7D%5E%7B%5Cinfty%7D+a_i+x%5Ei%0A%5Cend%7Bequation%7D%0A%0AThe+equation+%5Cref%7Beq%3A1%7D+shows+a+sum+that+is+divergent.+This+formula+will+be+used+later+on+page+%5Cpageref%7Bsecond%7D.%0A%0A%5CBlindtext%0A%5Cclearpage%0A%0A%5Csection%7BSecond+section%7D+%5Clabel%7Bsecond%7D%0A%0A%5Cblindtext%0A%5CBlinddocument%0A%5Cend%7Bdocument%7D)
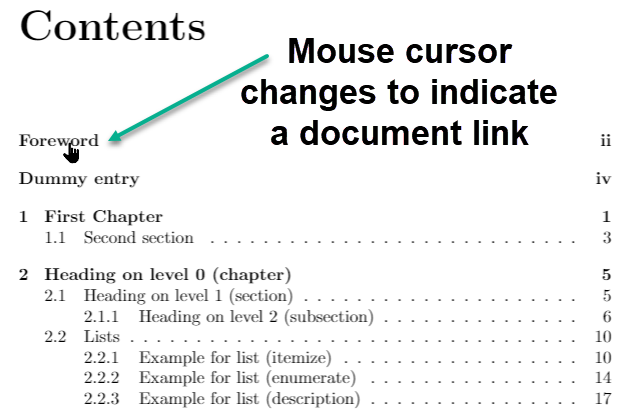
The lines in the table of contents become links to the corresponding pages in the document by simply adding in the preamble of the document the line
\\usepackage{hyperref}
One must be careful when importing `hyperref`: usually, it has to be the last package to be imported—but there might be some exceptions to this rule.
Styles and colours
------------------
The default formatting for links can be changed so the information in your documents is more clearly presented. Below you can see an example:
\\documentclass{book}
\\usepackage{hyperref}
\\hypersetup{
colorlinks=true,
linkcolor=blue,
filecolor=magenta,
urlcolor=cyan,
pdftitle={Overleaf Example},
pdfpagemode=FullScreen,
}
\\urlstyle{same}
\\begin{document}
\\tableofcontents
\\chapter{First Chapter}
This will be an empty chapter and I will put some text here
\\begin{equation}
\\label{eq:1}
\\sum\_{i=0}^{\\infty} a\_i x^i
\\end{equation}
The equation \\ref{eq:1} shows a sum that is divergent. This formula
will later be used in the page \\pageref{second}.
For further references see \\href{http://www.overleaf.com}{Something
Linky} or go to the next url: \\url{http://www.overleaf.com} or open
the next file \\href{run:./file.txt}{File.txt}
It's also possible to link directly any word or
\\hyperlink{thesentence}{any sentence} in your document.
\\end{document}
[Open an example of the `hyperref` package in Overleaf](https://www.overleaf.com/project/new/template/19606?id=64789057&templateName=Another+hyperref+example&latexEngine=pdflatex&texImage=texlive-full%3A2020.1&mainFile=main.tex)
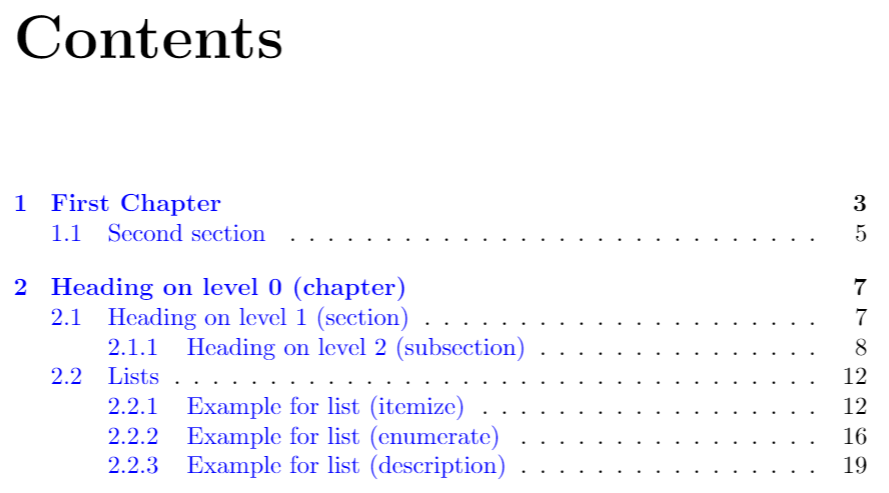
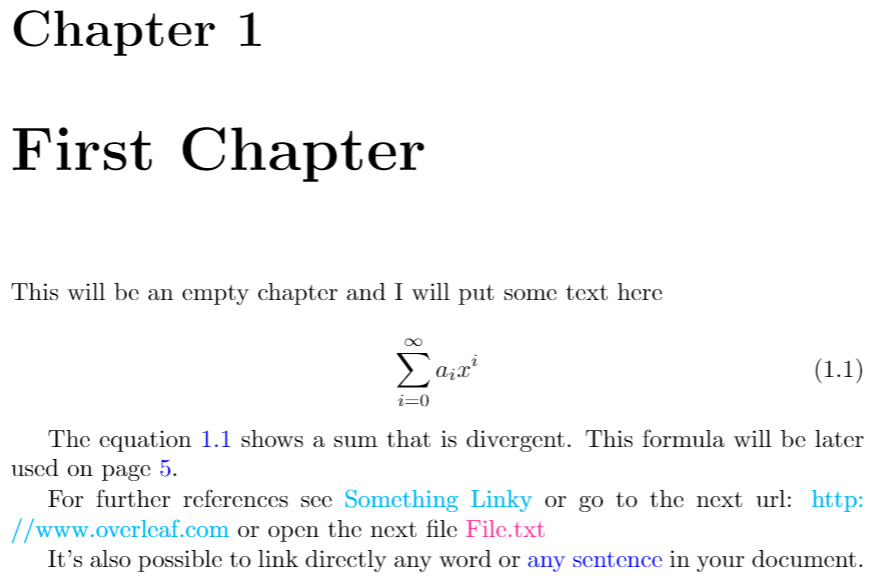
This is a complete example, it will be fully explained in the rest of the article. Below is a description of the commands related to the colour and styling of the links.
`\hypersetup{ ... }`
This will set the options to configure the behaviour of the links within the document. Every parameter must be comma-separated and the syntax must be in the format _parameter=value_.
`colorlinks=true`
Links will be coloured, the default colour is red.
`linkcolor=blue`
Internal links, those generated by cross-referenced elements, are displayed in blue.
`filecolor=magenta`
Links to local files will be shown in magenta colour (see [linking local files](https://www.overleaf.com/learn/latex/Hyperlinks#Linking_local_files)
).
`urlcolor=cyan`
Links to web sites are set to cyan colour (see [linking web addresses](https://www.overleaf.com/learn/latex/Hyperlinks#Linking_web_addresses)
).
`urlstyle{same}`
Default settings print links in mono-style spaced fonts, this command changes that and displays the links in the same style as the rest of the text.
Linking web addresses
---------------------
Links to a web address or email can added to a LaTeX file using the `\url` command to display the actual link or `\href` to use a hidden link and show a word/sentence instead.
For further references see \\href{http://www.overleaf.com}{Something Linky}
or go to the next url: \\url{http://www.overleaf.com}

There are two commands in the example that generate a link in the final document:
`\href{http://www.overleaf.com}{Something Linky}`
There are two parameters passed to this command, the first one is the url to the link, `http://www.overleaf.com` in this case, and the second one is the clickable text to be shown, _Something Linky_.
`\url{http://www.overleaf.com}`
This command will show the url passed as parameter and make it into a link, useful if you will print the document.
[Open an example of the hyperref package in Overleaf](https://www.overleaf.com/project/new/template/19606?id=64789057&templateName=Hyperref+Example+2&latexEngine=pdflatex&texImage=texlive-full%3A2020.1&mainFile=main.tex)
Linking local files
-------------------
The commands `\href` and `\url` presented in the previous section can be used to open local files
For further references see \\href{http://www.overleaf.com}{Something Linky}
or go to the next url: \\url{http://www.overleaf.com} or open the next
file \\href{run:./file.txt}{File.txt}

The command `\href{run:./file.txt}{File.txt}` prints the text `File.txt` that links to a local file called `file.txt` located in the current working directory. Notice the text `run:` before the path to the file.
The file path follows the conventions of UNIX systems, using `.` to refer the current directory and `..` for the previous directory.
The command `\url{}` can also be used, with the same syntax described for the path, but it's reported to have some problems.
[Open an example of the hyperref package in Overleaf](https://www.overleaf.com/project/new/template/19606?id=64789057&templateName=Hyperref+Example+2&latexEngine=pdflatex&texImage=texlive-full%3A2020.1&mainFile=main.tex)
Inserting links manually
------------------------
It was mentioned before that all cross-referenced elements become links once **hyperref** is imported, thus we can use `\label` anywhere in the document and refer later those labels to create links. This is not the only manner to insert hyperlinks manually.
It's also possible to link directly any word
or \\hyperlink{thesentence}{any sentence} in you document.
If you read this text, you will get no information. Really?
Is there no information?
For instance \\hypertarget{thesentence}{this sentence}.

There are two commands to create user-defined links.
`\hypertarget{thesentence}{this sentence}`
The first parameter passed inside braces to this command is a unique identifier for this sentence. The second parameter is the text "this sentence", and will be printed normally (depending on the value of _anchorcolor_, see the [reference guide](https://www.overleaf.com/learn/latex/Hyperlinks#Reference_guide)
), but when a link pointing to the identifier "thesentence" is clicked the PDF file will scroll to this point.
`\hyperlink{thesentence}{any sentence}`
This command prints the text "any sentence" as a clickable element that redirects to the point whose identifier is "thesentence".
[Open an example of the hyperref package in Overleaf](https://www.overleaf.com/project/new/template/19606?id=64789057&templateName=Hyperref+Example+2&latexEngine=pdflatex&texImage=&mainFile=main.tex)
PDF-specific options
--------------------
Links in a document are created having in mind a document that will be read in PDF format. The PDF file can be further personalized to add additional information and change the way the PDF viewer displays it. Below an example:
\\hypersetup{
colorlinks=true,
linkcolor=blue,
filecolor=magenta,
urlcolor=cyan,
pdftitle={Overleaf Example},
pdfpagemode=FullScreen,
}
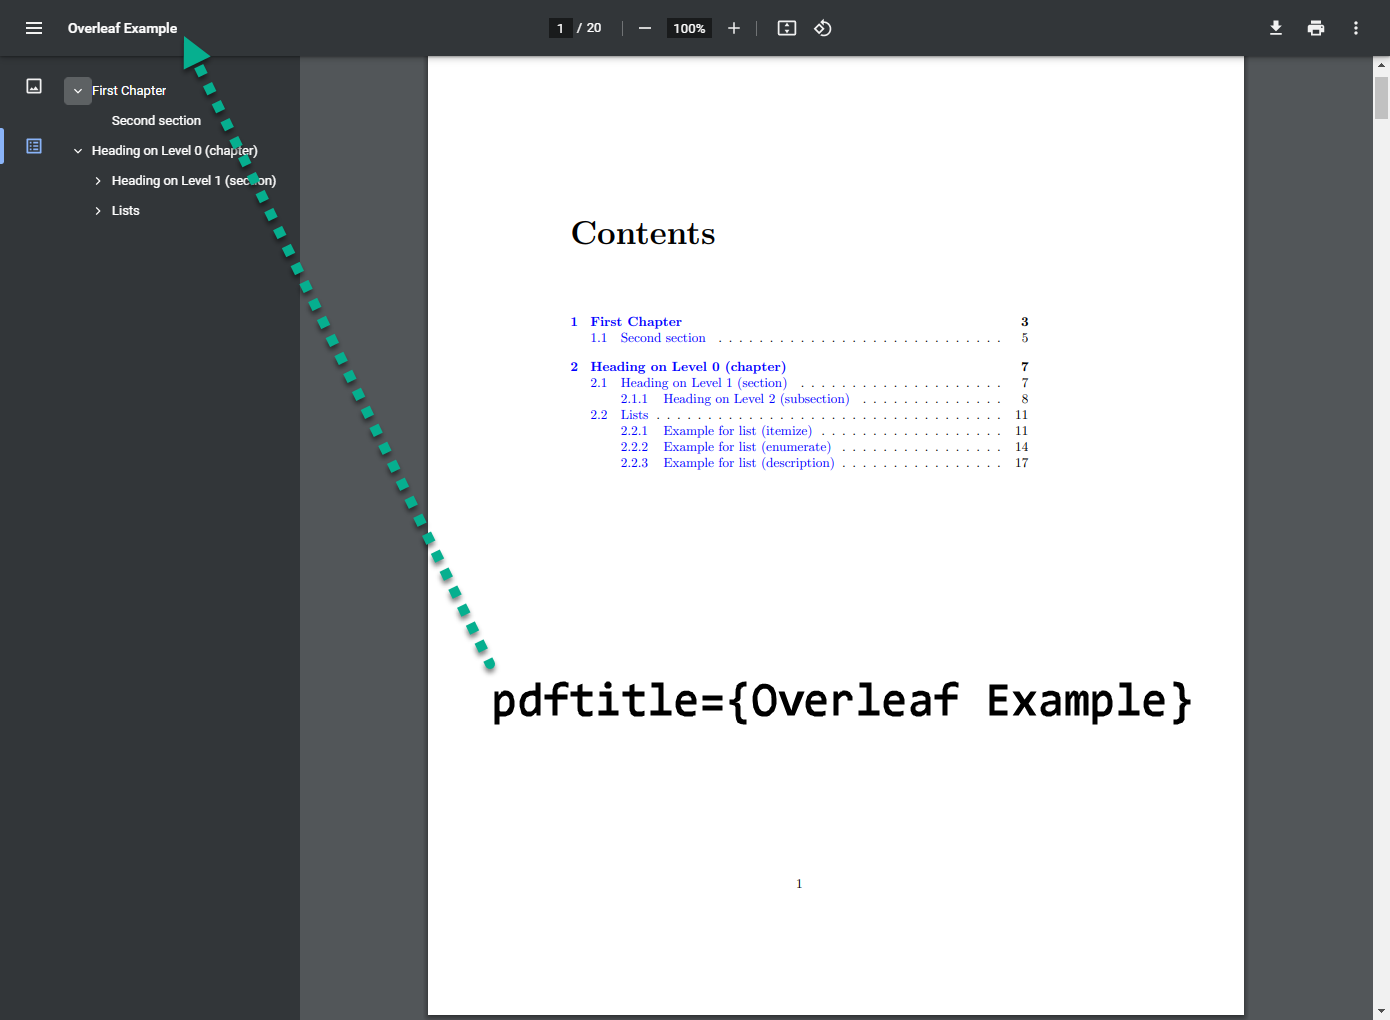
Using the command `\hypersetup`, described in the section [styles and colours](https://www.overleaf.com/learn/latex/Hyperlinks#Styles_and_colours)
, accepts extra parameters to set up the final PDF file.
`pdftitle={Overleaf Example}`
Is the title of the PDF output file, to be displayed in the title bar of the window. In the example is "Overleaf Example".
`pdfpagemode=FullScreen`
The document will be opened in full screen mode by the PDF reader.
See the [reference guide](https://www.overleaf.com/learn/latex/Hyperlinks#Reference_guide)
for a full list of options that can be passed to `\hypersetup`.
[Open an example of the hyperref package in Overleaf](https://www.overleaf.com/project/new/template/19606?id=64789057&templateName=Hyperref+Example+2&latexEngine=pdflatex&texImage=texlive-full%3A2020.1&mainFile=main.tex)
Reference guide
---------------
**Linking style options**
| Option | Default value | Description |
| --- | --- | --- |
| `hyperindex` | true | Makes the page numbers of index entries into hyperlinks |
| `linktocpage` | false | Makes the page numbers instead of the text to be link in the Table of contents. |
| `breaklinks` | false | Allows links to be broken into multiple lines. |
| `colorlinks` | false | Colours the text for links and anchors, these colours will appear in the printed version |
| `linkcolor` | red | Colour for normal internal links |
| `anchorcolor` | black | Colour for anchor (target) text |
| `citecolor` | green | Colour for bibliographical citations |
| `filecolor` | cyan | Colour for links that open local files |
| `urlcolor` | magenta | Colour for linked URLs |
| `frenchlinks` | false | Use small caps instead of colours for links |
**PDF-specific options**
| Option | Default value | Description |
| --- | --- | --- |
| `bookmarks` | true | Acrobat bookmarks are written, similar to the table of contents. |
| `bookmarksopen` | false | Bookmarks are shown with all sub-trees expanded. |
| `citebordercolor` | 0 1 0 | Colour of the box around citations in RGB format. |
| `filebordercolor` | 0 .5 .5 | Colour of the box around links to files in RGB format. |
| `linkbordercolor` | 1 0 0 | Colour of the box around normal links in RGB format. |
| `menubordercolor` | 1 0 0 | Colour of the box around menu links in RGB format. |
| `urlbordercolor` | 0 1 1 | Colour of the box around links to URLs in RGB format. |
| `pdfpagemode` | empty | Determines how the file is opened. Possibilities are UseThumbs (Thumbnails), UseOutlines (Bookmarks) and FullScreen. |
| `pdftitle` | | Sets the document title. |
| `pdfauthor` | | Sets the document Author. |
| `pdfstartpage` | 1 | Determines on which page the PDF file is opened. |
Further reading
---------------
For more information see
* [Table of contents](https://www.overleaf.com/learn/latex/Table_of_contents "Table of contents")
* [Sections and chapters](https://www.overleaf.com/learn/latex/Sections_and_chapters "Sections and chapters")
* [Cross referencing sections and equations](https://www.overleaf.com/learn/latex/Cross_referencing_sections_and_equations "Cross referencing sections and equations")
* [Using colours in LaTeX](https://www.overleaf.com/learn/latex/Using_colours_in_LaTeX "Using colours in LaTeX")
* [Management in a large project](https://www.overleaf.com/learn/latex/Management_in_a_large_project "Management in a large project")
* [Hyperref manual](http://repositorios.cpai.unb.br/ctan/macros/latex/contrib/hyperref/doc/manual.pdf)
* [Hyperlinks article on wikibooks](http://en.wikibooks.org/wiki/LaTeX/Hyperlinks)
We only use cookies for essential purposes and to improve your experience on our site. You can find out more in our [cookie policy](https://www.overleaf.com/legal#Cookies)
.
Essential cookies onlyAccept all cookies
---
# Lengths in LaTeX - Overleaf, Online LaTeX Editor
[Skip to content](https://www.overleaf.com/learn/latex/Lengths_in_LaTeX#main-content)
Search help library…searchclear
No Search Results
Lengths in LaTeX
================
Contents
--------
* [1 Units](https://www.overleaf.com/learn/latex/Lengths_in_LaTeX#Units)
* [2 Lengths](https://www.overleaf.com/learn/latex/Lengths_in_LaTeX#Lengths)
* [3 Using lengths as units](https://www.overleaf.com/learn/latex/Lengths_in_LaTeX#Using_lengths_as_units)
* [4 Further reading](https://www.overleaf.com/learn/latex/Lengths_in_LaTeX#Further_reading)
In LaTeX there are a lot of lengths determining various dimensions of prepared documents. For example, specified dimension parameters characterize [fonts](https://www.overleaf.com/learn/latex/Font_sizes_and_kinds "Font sizes and kinds")
, [pages](https://www.overleaf.com/learn/latex/Page_size_and_margins "Page size and margins")
, or [paragraphs](https://www.overleaf.com/learn/latex/Paragraph_formatting "Paragraph formatting")
.
Units
-----
Below a description of available units in LaTeX.
| Abbreviation | Value |
| --- | --- |
| **pt** | a point is approximately 1/72.27 inch, that means about 0.0138 inch or 0.3515 mm (exactly point is defined as 1/864 of American _printer’s foot_ that is 249/250 of English foot) |
| **mm** | a millimeter |
| **cm** | a centimeter |
| **in** | inch |
| **ex** | roughly the height of an 'x' (lowercase) in the current font (it depends on the font used) |
| **em** | roughly the width of an 'M' (uppercase) in the current font (it depends on the font used) |
| **mu** | math unit equal to 1/18 em, where em is taken from the math symbols family |
| **sp** | so-called "special points", a low-level unit of measure where 65536sp=1pt |
Below an example that shows the difference between ex and em units.
\\documentclass\[twocolumn\]{article}
\\usepackage{blindtext}
\\usepackage{graphicx}
\\setlength{\\columnsep}{1in}
\\begin{document}
A width of \\texttt{10ex} produces:
\\includegraphics\[width=10ex\]{overleaf-logo}
\\vspace{5mm}
A width of \\texttt{10em} produces:
\\includegraphics\[width=10em\]{overleaf-logo}
\\end{document}
[Open an example in Overleaf](https://www.overleaf.com/project/new/template/19506?id=65960656&templateName=Length+types+and+values+in+LaTeX&latexEngine=pdflatex&texImage=texlive-full%3A2020.1&mainFile=)
Lengths
-------
Lengths are units of distance relative to some document elements. Lengths can be changed by the command:
\\setlength{\\lengthname}{value\_in\_specified\_unit}
For example, in a two-column document the column separation can be set to 1 inch by:
\\setlength{\\columnsep}{1in}
Below is a table with some of the most common lengths and their description
| Length | Description |
| --- | --- |
| `\baselineskip` | Vertical distance between lines in a paragraph |
| `\columnsep` | Distance between columns |
| `\columnwidth` | The width of a column |
| `\evensidemargin` | Margin of even pages, commonly used in two-sided documents such as books |
| `\linewidth` | Width of the line in the current environment. |
| `\oddsidemargin` | Margin of odd pages, commonly used in two-sided documents such as books |
| `\paperwidth` | Width of the page |
| `\paperheight` | Height of the page |
| `\parindent` | Paragraph indentation |
| `\parskip` | Vertical space between paragraphs |
| `\tabcolsep` | Separation between columns in a table (tabular environment) |
| `\textheight` | Height of the text area in the page |
| `\textwidth` | Width of the text area in the page |
| `\topmargin` | Length of the top margin |
[Open an example in Overleaf](https://www.overleaf.com/project/new/template/19506?id=65960656&templateName=Length+types+and+values+in+LaTeX&latexEngine=pdflatex&texImage=texlive-full%3A2020.1&mainFile=)
Using lengths as units
----------------------
Default lengths can be set to any desired value up to a maximum of approximately 16384pt (or 5.75 metres), a hard-coded limit built into TeX engines. LaTeX's length parameters can also be used as units to set the dimensions of other LaTeX elements. For instance, you can set an image to have a width of one quarter the total text width:
\\includegraphics\[width=0.25\\textwidth\]{overleaf-logo}
\[...\]
In the command `\includegraphics` the width is set to 0.25 the width of the entire text area (see [Inserting Images](https://docs.overleaf.com/writing-and-editing/inserting-images "Inserting Images")
for more information about this command). You can use any length and multiply it by any factor.
[Open an example in Overleaf](https://www.overleaf.com/project/new/template/19506?id=65960656&templateName=Length+types+and+values+in+LaTeX&latexEngine=pdflatex&texImage=texlive-full%3A2020.1&mainFile=)
Further reading
---------------
For more information see [the article about lengths on wikibooks](http://en.wikibooks.org/wiki/LaTeX/Lengths)
.
We only use cookies for essential purposes and to improve your experience on our site. You can find out more in our [cookie policy](https://www.overleaf.com/legal#Cookies)
.
Essential cookies onlyAccept all cookies
---
# Subscripts and superscripts - Overleaf, Online LaTeX Editor
[Skip to content](https://www.overleaf.com/learn/latex/Subscripts_and_superscripts#main-content)
Search help library…searchclear
No Search Results
Subscripts and superscripts
===========================
Contents
--------
* [1 Introduction](https://www.overleaf.com/learn/latex/Subscripts_and_superscripts#Introduction)
* [2 More detailed examples](https://www.overleaf.com/learn/latex/Subscripts_and_superscripts#More_detailed_examples)
* [3 Operators using subscripts and superscripts](https://www.overleaf.com/learn/latex/Subscripts_and_superscripts#Operators_using_subscripts_and_superscripts)
* [4 Open all code fragments in Overleaf](https://www.overleaf.com/learn/latex/Subscripts_and_superscripts#Open_all_code_fragments_in_Overleaf)
* [5 Reference guide](https://www.overleaf.com/learn/latex/Subscripts_and_superscripts#Reference_guide)
* [6 Further reading](https://www.overleaf.com/learn/latex/Subscripts_and_superscripts#Further_reading)
Introduction
------------
The use of superscripts and subscripts is very common in mathematical expressions involving exponents, indexes, and in some special operators. This article explains how to write superscripts and subscripts in simple expressions, integrals, summations and so forth.
Definite integrals are some of the most common mathematical expressions, so let's see an example:
\\\[ \\int\\limits\_0^1 x^2 + y^2 \\ dx \\\]
[Open this example in Overleaf.](https://www.overleaf.com/docs?engine=pdflatex&snip_name=Superscripts+example&snip=%5Cdocumentclass%7Barticle%7D%0A%5Cbegin%7Bdocument%7D%0A%5C%5B+%5Cint%5Climits_0%5E1+x%5E2+%2B+y%5E2+%5C+dx+%5C%5D%0A%5Cend%7Bdocument%7D)
This LaTeX code produces:
\\\[ \\int\\limits\_0^1 x^2 + y^2 \\ dx \\\]
By convention, superscripts and subscripts in LaTeX are created using the characters `^` and `_` respectively; for example, the exponents applied to \\(x\\) and \\(y\\) in the code fragment above. Those characters can also be used with mathematical symbols, such as the integral (`\int`) included in the example above where `_` is used to set the lower limit and the `^` for the upper limit.
The command `\limits` changes the way the limits are displayed in the integral, if not present the limits would be next to the integral symbol instead of being on top and bottom:
\\\[ \\int\_0^1 x^2 + y^2 \\ dx \\\]
[Open this example in Overleaf.](https://www.overleaf.com/docs?engine=pdflatex&snip_name=Superscripts+example&snip=%5Cdocumentclass%7Barticle%7D%0A%5Cbegin%7Bdocument%7D%0A%5C%5B+%5Cint_0%5E1+x%5E2+%2B+y%5E2+%5C+dx+%5C%5D%0A%5Cend%7Bdocument%7D)
This LaTeX code produces:
\\\[ \\int\_0^1 x^2 + y^2 \\ dx \\\]
More detailed examples
----------------------
The symbols `_` and `^` can also be combined in the same expression, for example:
\\\[ a\_1^2 + a\_2^2 \= a\_3^2 \\\]
[Open this example in Overleaf.](https://www.overleaf.com/docs?engine=pdflatex&snip_name=Superscripts+example+2&snip=%5Cdocumentclass%7Barticle%7D%0A%5Cbegin%7Bdocument%7D%0A%5C%5B+a_1%5E2+%2B+a_2%5E2+%3D+a_3%5E2+%5C%5D%0A%5Cend%7Bdocument%7D)
This LaTeX code produces:
\\\[ a\_1^2 + a\_2^2 = a\_3^2 \\\]
If the expression contains long superscripts or subscripts, these need to be collected in braces, as LaTeX normally applies the mathematical commands `^` and `_` only to the following character:
\\\[ x^{2 \\alpha} \- 1 \= y\_{ij} + y\_{ij} \\\]
[Open this example in Overleaf.](https://www.overleaf.com/docs?engine=pdflatex&snip_name=Superscripts+example+3&snip=%5Cdocumentclass%7Barticle%7D%0A%5Cbegin%7Bdocument%7D%0A%5C%5B+x%5E%7B2+%5Calpha%7D+-+1+%3D+y_%7Bij%7D+%2B+y_%7Bij%7D++%5C%5D%0A%5Cend%7Bdocument%7D)
This LaTeX code produces:
\\\[ x^{2 \\alpha} - 1 = y\_{ij} + y\_{ij} \\\]
Subscripts and superscripts can be nested and combined in various ways. When nesting subscripts/superscripts, however, remember that each command must refer to a single element; this can be a single letter or number, as in the examples above, or a more complex mathematical expression collected in braces or brackets. For example:
\\\[ (a^n)^{r+s} \= a^{nr+ns} \\\]
[Open this example in Overleaf.](https://www.overleaf.com/docs?engine=pdflatex&snip_name=Superscripts+example+4&snip=%5Cdocumentclass%7Barticle%7D%0A%5Cbegin%7Bdocument%7D%0A%5C%5B+%28a%5En%29%5E%7Br%2Bs%7D+%3D+a%5E%7Bnr%2Bns%7D++%5C%5D%0A%5Cend%7Bdocument%7D)
This LaTeX code produces:
\\\[ (a^n)^{r+s} = a^{nr+ns} \\\]
Operators using subscripts and superscripts
-------------------------------------------
Some mathematical operators may require subscripts and superscripts. The most frequent cases are those of the integral `\int` (check the [introduction](https://www.overleaf.com/learn/latex/Subscripts_and_superscripts#Introduction)
) and the summation (`\sum`) operators, whose bounds are typeset precisely with subscripts and superscripts.
\\\[ \\sum\_{i\=1}^{\\infty} \\frac{1}{n^s} \
\= \\prod\_p \\frac{1}{1 \- p^{\-s}} \\\]
[Open this example in Overleaf.](https://www.overleaf.com/docs?engine=pdflatex&snip_name=Superscripts+example+5&snip=%5Cdocumentclass%7Barticle%7D%0A%5Cbegin%7Bdocument%7D%0A%5C%5B+%5Csum_%7Bi%3D1%7D%5E%7B%5Cinfty%7D+%5Cfrac%7B1%7D%7Bn%5Es%7D+%0A%3D+%5Cprod_p+%5Cfrac%7B1%7D%7B1+-+p%5E%7B-s%7D%7D+%5C%5D%0A%5Cend%7Bdocument%7D)
This LaTeX code produces:
\\\[ \\sum\_{i=1}^{\\infty} \\frac{1}{n^s} = \\prod\_p \\frac{1}{1 - p^{-s}} \\\]
For other frequently used operators that require subscripts/superscripts check the [reference guide](https://www.overleaf.com/learn/latex/Subscripts_and_superscripts#Reference_guide)
.
Open all code fragments in Overleaf
-----------------------------------
Use the link provided below to open all the examples above as a single Overleaf project:
Here are some examples of simple usage of subscripts and superscripts:
\\\[ \\int\\limits\_0^1 x^2 + y^2 \\ dx \\\]
\\vspace{1cm}
Using superscript and subscripts in the same expression
\\\[ a\_1^2 + a\_2^2 \= a\_3^2 \\\]
\\vspace{1cm}
Longer subscripts and superscripts:
\\\[ x^{2 \\alpha} \- 1 \= y\_{ij} + y\_{ij} \\\]
\\vspace{1cm}
Nested subscripts and superscripts
\\\[ (a^n)^{r+s} \= a^{nr+ns} \\\]
\\vspace{1cm}
Example of a mathematical equation with subscripts and superscripts
\\\[ \\sum\_{i\=1}^{\\infty} \\frac{1}{n^s} \= \\prod\_p \\frac{1}{1 \- p^{\-s}} \\\]
\\vspace{1cm}
Squared root usage
\\\[ \\sqrt\[4\]{4ac} \= \\sqrt{4ac}\\sqrt{4ac} \\\]
[Open all the examples above as a single Overleaf project.](https://www.overleaf.com/docs?engine=pdflatex&snip_name=Superscripts+example+6&snip=%5Cdocumentclass%7Barticle%7D%0A%5Ctitle%7BSubscripts+and+Superscripts%7D%0A%5Cauthor%7BExamples+from+Overleaf%7D%0A%5Cbegin%7Bdocument%7D%0A%5Cmaketitle%0AHere+are+some+examples+of+simple+usage+of+subscripts+and+superscripts%3A%0A%0A%5C%5B+%5Cint%5Climits_0%5E1+x%5E2+%2B+y%5E2+%5C+dx+%5C%5D%0A%0A%5Cvspace%7B1cm%7D%0A%0AUsing+superscript+and+subscripts+in+the+same+expression%0A%0A%5C%5B+a_1%5E2+%2B+a_2%5E2+%3D+a_3%5E2+%5C%5D%0A%0A%5Cvspace%7B1cm%7D%0A%0ALonger+subscripts+and+superscripts%3A%0A%0A%5C%5B+x%5E%7B2+%5Calpha%7D+-+1+%3D+y_%7Bij%7D+%2B+y_%7Bij%7D++%5C%5D%0A%0A%5Cvspace%7B1cm%7D%0A%0ANested+subscripts+and+superscripts%0A%0A%5C%5B+%28a%5En%29%5E%7Br%2Bs%7D+%3D+a%5E%7Bnr%2Bns%7D+%5C%5D%0A%0A%5Cvspace%7B1cm%7D%0A%0AExample+of+a+mathematical+equation+with+subscripts+and+superscripts%0A%0A%5C%5B+%5Csum_%7Bi%3D1%7D%5E%7B%5Cinfty%7D+%5Cfrac%7B1%7D%7Bn%5Es%7D+%3D+%5Cprod_p+%5Cfrac%7B1%7D%7B1+-+p%5E%7B-s%7D%7D+%5C%5D%0A%0A%5Cvspace%7B1cm%7D%0A%0ASquared+root+usage%0A%0A%5C%5B+%5Csqrt%5B4%5D%7B4ac%7D+%3D+%5Csqrt%7B4ac%7D%5Csqrt%7B4ac%7D+%5C%5D%0A%5Cend%7Bdocument%7D)
Reference guide
---------------
Additional examples and operators
| LaTeX markup | Renders as |
| --- | --- |
| `a_{n_i}` | a n i {\\displaystyle a\_{n\_{i}}}  |
| `\int_{i=1}^n` | ∫ i \= 1 n {\\displaystyle \\int \_{i=1}^{n}}  |
| `\sum_{i=1}^{\infty}` | ∑ i \= 1 ∞ {\\displaystyle \\sum \_{i=1}^{\\infty }}  |
| `\prod_{i=1}^n` | ∏ i \= 1 n {\\displaystyle \\prod \_{i=1}^{n}}  |
| `\cup_{i=1}^n` | ∪ i \= 1 n {\\displaystyle \\cup \_{i=1}^{n}}  |
| `\cap_{i=1}^n` | ∩ i \= 1 n {\\displaystyle \\cap \_{i=1}^{n}}  |
| `\oint_{i=1}^n` | ∮ i \= 1 n {\\displaystyle \\oint \_{i=1}^{n}}  |
| `\coprod_{i=1}^n` | ∐ i \= 1 n {\\displaystyle \\coprod \_{i=1}^{n}}  |
There are also `bigcup` and `bigcap` commands similar to `cup` and `cap` but those are used for larger expressions.
Further reading
---------------
For more information see
* [List of Greek letters and math symbols](https://www.overleaf.com/learn/latex/List_of_Greek_letters_and_math_symbols "List of Greek letters and math symbols")
* [Operators](https://www.overleaf.com/learn/latex/Operators "Operators")
* [Integrals, sums and limits](https://www.overleaf.com/learn/latex/Integrals%2C_sums_and_limits "Integrals, sums and limits")
* [Mathematical fonts](https://www.overleaf.com/learn/latex/Mathematical_fonts "Mathematical fonts")
* [Brackets and Parentheses](https://www.overleaf.com/learn/latex/Brackets_and_Parentheses "Brackets and Parentheses")
* [The Great, Big list of LaTeX Symbols](http://www.rpi.edu/dept/arc/training/latex/LaTeX_symbols.pdf)
(a full list of available mathematical symbols in the **amssymb** package)
* [The not so short introduction to LaTeX2ε](http://www.ctan.org/tex-archive/info/lshort/)
* [Aligning equations with amsmath](https://www.overleaf.com/learn/latex/Aligning_equations_with_amsmath "Aligning equations with amsmath")
We only use cookies for essential purposes and to improve your experience on our site. You can find out more in our [cookie policy](https://www.overleaf.com/legal#Cookies)
.
Essential cookies onlyAccept all cookies
---
# Multiple columns - Overleaf, Online LaTeX Editor
[Skip to content](https://www.overleaf.com/learn/latex/Multiple_columns#main-content)
Search help library…searchclear
No Search Results
Multiple columns
================
Contents
--------
* [1 Introduction](https://www.overleaf.com/learn/latex/Multiple_columns#Introduction)
* [2 Column separation](https://www.overleaf.com/learn/latex/Multiple_columns#Column_separation)
* [3 Unbalanced columns](https://www.overleaf.com/learn/latex/Multiple_columns#Unbalanced_columns)
* [4 Inserting floating elements](https://www.overleaf.com/learn/latex/Multiple_columns#Inserting_floating_elements)
* [5 Inserting vertical rulers](https://www.overleaf.com/learn/latex/Multiple_columns#Inserting_vertical_rulers)
* [6 Further reading](https://www.overleaf.com/learn/latex/Multiple_columns#Further_reading)
Introduction
------------
Two-column documents can be easily created by passing the parameter `\twocolumn` to the document class statement. If you need more flexibility in the column layout, or to create a document with multiple columns, the package `multicol` provides a set of commands for that. This article explains how use the `multicol` package, starting with this basic example:
\\documentclass{article}
\\usepackage{blindtext}
\\usepackage{multicol}
\\title{Multicols Demo}
\\author{Overleaf}
\\date{April 2021}
\\begin{document}
\\maketitle
\\begin{multicols}{3}
\[\
\\section{First Section}\
All human things are subject to decay. And when fate summons, Monarchs must obey.\
\]
\\blindtext\\blindtext
\\end{multicols}
\\end{document}
[Open this `multicols` example in Overleaf](https://www.overleaf.com/docs?engine=pdflatex&snip_name=multicols+package+demo&snip=%5Cdocumentclass%7Barticle%7D%0A%5Cusepackage%7Bblindtext%7D%0A%5Cusepackage%7Bmulticol%7D%0A%5Ctitle%7BMulticols+Demo%7D%0A%5Cauthor%7BOverleaf%7D%0A%5Cdate%7BApril+2021%7D%0A%0A%5Cbegin%7Bdocument%7D%0A%5Cmaketitle%0A%0A%5Cbegin%7Bmulticols%7D%7B3%7D%0A%5B%0A%5Csection%7BFirst+Section%7D%0AAll+human+things+are+subject+to+decay.+And+when+fate+summons%2C+Monarchs+must+obey.%0A%5D%0A%5Cblindtext%5Cblindtext%0A%5Cend%7Bmulticols%7D%0A%0A%5Cend%7Bdocument%7D)
To import the package, the line
\\usepackage{multicol}
is added to the preamble. Once the package is imported, the environment `multicols` can be used. The environment takes two parameters:
* Number of columns. This parameter must be passed inside braces, and its value is 3 in the example.
* "Header text", which is inserted in between square brackets. This is optional and will be displayed on top of the multicolumn text. Any LaTeX command can be used here, except for floating elements such as figures and tables. In the example, the section title and a small paragraph are set here.
The text enclosed inside the tags `\begin{multicols}` and `\end{multicols}` is printed in multicolumn format.
Column separation
-----------------
The column separation is determined by `\columnsep`. See the example below:
\\documentclass{article}
\\usepackage{blindtext}
\\usepackage{multicol}
\\setlength{\\columnsep}{1cm}
\\title{Second multicols Demo}
\\author{Overleaf}
\\date{April 2021}
\\begin{document}
\\maketitle
\\begin{multicols}{2}
\[\
\\section{First Section}\
All human things are subject to decay. And when fate summons, Monarchs must obey.\
\]
\\blindtext\\blindtext
\\end{multicols}
\\end{document}
[Open this `multicols` example in Overleaf](https://www.overleaf.com/docs?engine=pdflatex&snip_name=multicols+package+demo&snip=%5Cdocumentclass%7Barticle%7D%0A%5Cusepackage%7Bblindtext%7D%0A%5Cusepackage%7Bmulticol%7D%0A%5Csetlength%7B%5Ccolumnsep%7D%7B1cm%7D%0A%5Ctitle%7BSecond+multicols+Demo%7D%0A%5Cauthor%7BOverleaf%7D%0A%5Cdate%7BApril+2021%7D%0A%0A%5Cbegin%7Bdocument%7D%0A%5Cmaketitle%0A%0A%5Cbegin%7Bmulticols%7D%7B2%7D%0A%5B%0A%5Csection%7BFirst+Section%7D%0AAll+human+things+are+subject+to+decay.+And+when+fate+summons%2C+Monarchs+must+obey.%0A%5D%0A%5Cblindtext%5Cblindtext%0A%5Cend%7Bmulticols%7D%0A%0A%5Cend%7Bdocument%7D)
Here, the command `\setlength{\columnsep}{1cm}` sets the column separation to 1cm. See [Lengths in LaTeX](https://www.overleaf.com/learn/latex/Lengths_in_LaTeX "Lengths in LaTeX")
for a list of available units.
Unbalanced columns
------------------
In the default `multicols` environment the columns are balanced so each one contains the same amount of text. This default format can be changed by the starred environment `multicols*`:
\\documentclass{article}
\\usepackage{blindtext}
\\usepackage{multicol}
\\setlength{\\columnsep}{1cm}
\\title{Second multicols Demo}
\\author{Overleaf}
\\date{April 2021}
\\begin{document}
\\maketitle
\\begin{multicols\*}{3}
\[\
\\section{First Section}\
All human things are subject to decay. And when fate summons, Monarchs must obey.\
\]
\\blindtext\\blindtext
\\end{multicols\*}
\\end{document}
[Open this `multicols` example in Overleaf](https://www.overleaf.com/docs?engine=pdflatex&snip_name=multicols+package+demo&snip=%5Cdocumentclass%7Barticle%7D%0A%5Cusepackage%7Bblindtext%7D%0A%5Cusepackage%7Bmulticol%7D%0A%5Csetlength%7B%5Ccolumnsep%7D%7B1cm%7D%0A%5Ctitle%7BSecond+multicols+Demo%7D%0A%5Cauthor%7BOverleaf%7D%0A%5Cdate%7BApril+2021%7D%0A%5Cbegin%7Bdocument%7D%0A%5Cmaketitle%0A%5Cbegin%7Bmulticols%2A%7D%7B3%7D%0A%5B%0A%5Csection%7BFirst+Section%7D%0AAll+human+things+are+subject+to+decay.+And+when+fate+summons%2C+Monarchs+must+obey.%0A%5D%0A%5Cblindtext%5Cblindtext%0A%5Cend%7Bmulticols%2A%7D%0A%0A%5Cend%7Bdocument%7D)
If you open this example on Overleaf you'll see that the text is printed in a column till the end of the page is reached, then the in continues in the next column, and so on.
Inserting floating elements
---------------------------
Floating elements (tables and figures) can be inserted in a multicolumn document with `wrapfig` and `wraptable`. The following LaTeX code fragment, which is not a complete LaTeX document, shows how to use floating elements. Please use the link below the code to open a full LaTeX document that you can compile on Overleaf.
\\begin{multicols}{2}
\[\
\\section{First Section}\
All human things are subject to decay. And when fate summons, Monarchs must obey.\
\]
Hello, here is some text without a meaning. This text should show what
a printed text will look like at this place.
If you read this text, you will get no information. Really? Is there
no information? Is there.
\\vfill
\\begin{wrapfigure}{l}{0.7\\linewidth}
\\includegraphics\[width=\\linewidth\]{overleaf-logo}
\\caption{This is the Overleaf logo}
\\end{wrapfigure}
A blind text like this gives you information about the selected font, how
the letters are written and an impression of the look. This text should
contain all...
\\begin{wraptable}{l}{0.7\\linewidth}
\\centering
\\begin{tabular}{|c|c|}
\\hline
Name & ISO \\\\
\\hline
Afghanistan & AF \\\\
Aland Islands & AX \\\\
Albania &AL \\\\
Algeria &DZ \\\\
American Samoa & AS \\\\
Andorra & AD \\\\
Angola & AO \\\\
\\hline
\\end{tabular}
\\caption{Table, floating element}
\\label{table:ta}
\\end{wraptable}
\\end{multicols}
[Open this `multicols` example in an Overleaf LaTeX project](https://www.overleaf.com/project/new/template/19510?id=65969509&templateName=A+multicols+demo&latexEngine=pdflatex&texImage=texlive-full%3A2020.1&mainFile=)
Floats in the **multicol** package are poorly supported in the current version. Elements inserted with the conventional `figure*` and `table*` environments will show up only at the top or bottom of the next page after they are inserted, and will break the layout. The example presented here is a workaround, but you may expect some rough edges. For instance, if the float width is set to `\linewidth` it causes a weird text overlapping. This said, below is a brief description of the commands:
* `\usepackage{wrapfig}`. Put this line in the preamble to import the package **wrapfig**
* The environment `wrapfigure` will insert a figure wrapped in the text. For more information and further examples about this environment see [Positioning images and tables](https://www.overleaf.com/learn/latex/Positioning_images_and_tables "Positioning images and tables")
.
* The environment `wraptable` is the equivalent to _wrapfigure_ but for tables. See [Positioning images and tables](https://www.overleaf.com/learn/latex/Positioning_images_and_tables "Positioning images and tables")
for more information.
Inserting vertical rulers
-------------------------
A vertical ruler can be inserted as column separator to may improve readability in some documents:
\\documentclass{article}
\\usepackage{blindtext}
\\usepackage{multicol}
\\usepackage{color}
\\setlength{\\columnseprule}{1pt}
\\def\\columnseprulecolor{\\color{blue}}
\\begin{document}
\\begin{multicols}{3}
\[\
\\section{First Section}\
All human things are subject to decay. And when fate summons, Monarchs must obey.\
\]
Hello, here is some text without a meaning. This text should show what
a printed text will look like at this place.
If you read this text, you will get no information. Really? Is there
no information? Is there.
\\columnbreak
\\blindtext
This will be in a new column, here is some text without a meaning. This text
should show what a printed text will look like at this place.
If you read this text, you will get no information. Really? Is there
no information? Is there...
\\end{multicols}
\\blindtext
\\end{document}
[Open this `multicols` example in Overleaf](https://www.overleaf.com/docs?engine=pdflatex&snip_name=multicols+package+demo&snip=%5Cdocumentclass%7Barticle%7D%0A%5Cusepackage%7Bblindtext%7D%0A%5Cusepackage%7Bmulticol%7D%0A%5Cusepackage%7Bcolor%7D%0A%5Csetlength%7B%5Ccolumnseprule%7D%7B1pt%7D%0A%5Cdef%5Ccolumnseprulecolor%7B%5Ccolor%7Bblue%7D%7D%0A%0A%5Cbegin%7Bdocument%7D%0A%0A%5Cbegin%7Bmulticols%7D%7B3%7D%0A%5B%0A%5Csection%7BFirst+Section%7D%0AAll+human+things+are+subject+to+decay.+And+when+fate+summons%2C+Monarchs+must+obey.%0A%5D%0AHello%2C+here+is+some+text+without+a+meaning.++This+text+should+show+what+%0Aa+printed+text+will+look+like+at+this+place.%0A%0AIf+you+read+this+text%2C+you+will+get+no+information.++Really%3F++Is+there+%0Ano+information%3F++Is+there.%0A%0A%5Ccolumnbreak%0A%5Cblindtext%0AThis+will+be+in+a+new+column%2C+here+is+some+text+without+a+meaning.++This+text+%0Ashould+show+what+a+printed+text+will+look+like+at+this+place.%0A%0AIf+you+read+this+text%2C+you+will+get+no+information.++Really%3F++Is+there+%0Ano+information%3F++Is+there...%0A%5Cend%7Bmulticols%7D%0A%0A%5Cblindtext%0A%0A%5Cend%7Bdocument%7D)
If you open this example on Overleaf you will see the column separator can be set to a specific colour also. Below a description of each command:
`\usepackage{color}`.
This line is inserted in the preamble to enable the use of several colours within the document.
`\setlength{\columnseprule}{1pt}`
This determines the width of the ruler to be used as column separator, it's set to 0 by default. In the example a column whose width is 1pt is printed.
`\def\columnseprulecolor{\color{blue}}`
The colour of the separator ruler is set to _blue_. See the article about [using colours in LaTeX](https://www.overleaf.com/learn/latex/Using_colours_in_LaTeX "Using colours in LaTeX")
for more information on colour manipulation.
`\columnbreak`
This command inserts a column breakpoint. In this case, the behaviour of the text is different from what you may expect. The column break is inserted, then the paragraphs before the breakpoint are evenly distributed to fill all available space. In the example, the second paragraph is at the bottom of the column and a blank space is inserted in between the second and the first paragraphs.
Further reading
---------------
For more information see:
* [Paragraphs and new lines](https://www.overleaf.com/learn/latex/Paragraphs_and_new_lines "Paragraphs and new lines")
* [Bold, italics and underlining](https://www.overleaf.com/learn/latex/Bold%2C_italics_and_underlining "Bold, italics and underlining")
* [Lists](https://www.overleaf.com/learn/latex/Lists "Lists")
* [Inserting Images](https://docs.overleaf.com/writing-and-editing/inserting-images "Inserting Images")
* [Tables](https://www.overleaf.com/learn/latex/Tables "Tables")
* [Positioning images and tables](https://www.overleaf.com/learn/latex/Positioning_images_and_tables "Positioning images and tables")
* [Lengths in LaTeX](https://www.overleaf.com/learn/latex/Lengths_in_LaTeX "Lengths in LaTeX")
* [Paragraph formatting](https://www.overleaf.com/learn/latex/Paragraph_formatting "Paragraph formatting")
* [Page size and margins](https://www.overleaf.com/learn/latex/Page_size_and_margins "Page size and margins")
* [Single sided and double sided documents](https://www.overleaf.com/learn/latex/Single_sided_and_double_sided_documents "Single sided and double sided documents")
* [Using colours in LaTeX](https://www.overleaf.com/learn/latex/Using_colours_in_LaTeX "Using colours in LaTeX")
* [Footnotes](https://www.overleaf.com/learn/latex/Footnotes "Footnotes")
* [Margin notes](https://www.overleaf.com/learn/latex/Margin_notes "Margin notes")
* [**multicols** package documentation](http://mirrors.ctan.org/macros/latex/required/tools/multicol.pdf)
.
We only use cookies for essential purposes and to improve your experience on our site. You can find out more in our [cookie policy](https://www.overleaf.com/legal#Cookies)
.
Essential cookies onlyAccept all cookies
---
# Footnotes - Overleaf, Online LaTeX Editor
[Skip to content](https://www.overleaf.com/learn/latex/Footnotes#main-content)
Search help library…searchclear
No Search Results
Footnotes
=========
Contents
--------
* [1 Introduction to LaTeX’s main footnote commands](https://www.overleaf.com/learn/latex/Footnotes#Introduction_to_LaTeX%E2%80%99s_main_footnote_commands)
* [1.1 The \\footnote command](https://www.overleaf.com/learn/latex/Footnotes#The_\footnote_command)
* [1.1.1 Example: using the \\footnote command](https://www.overleaf.com/learn/latex/Footnotes#Example:_using_the_\footnote_command)
* [1.2 Storing the current footnote marker value: LaTeX counters](https://www.overleaf.com/learn/latex/Footnotes#Storing_the_current_footnote_marker_value:_LaTeX_counters)
* [1.3 The \\footnotemark and \\footnotetext commands](https://www.overleaf.com/learn/latex/Footnotes#The_\footnotemark_and_\footnotetext_commands)
* [1.3.1 Example: using \\footnotemark and \\footnotetext](https://www.overleaf.com/learn/latex/Footnotes#Example:_using_\footnotemark_and_\footnotetext)
* [1.4 Other LaTeX footnote commands](https://www.overleaf.com/learn/latex/Footnotes#Other_LaTeX_footnote_commands)
* [2 Examples and applications of footnotes](https://www.overleaf.com/learn/latex/Footnotes#Examples_and_applications_of_footnotes)
* [2.1 Footnotes with multiple references](https://www.overleaf.com/learn/latex/Footnotes#Footnotes_with_multiple_references)
* [2.2 Changing the numbering style](https://www.overleaf.com/learn/latex/Footnotes#Changing_the_numbering_style)
* [2.3 Footnotes in minipage environments](https://www.overleaf.com/learn/latex/Footnotes#Footnotes_in_minipage_environments)
* [2.4 Changing minipage footnote markers](https://www.overleaf.com/learn/latex/Footnotes#Changing_minipage_footnote_markers)
* [3 Footnotes in tables](https://www.overleaf.com/learn/latex/Footnotes#Footnotes_in_tables)
* [3.1 Should you use footnotes in tables?](https://www.overleaf.com/learn/latex/Footnotes#Should_you_use_footnotes_in_tables?)
* [3.2 Example: \\footnote does not work in the tabular environment](https://www.overleaf.com/learn/latex/Footnotes#Example:_\footnote_does_not_work_in_the_tabular_environment)
* [3.3 Example from LaTeX2e unofficial reference manual](https://www.overleaf.com/learn/latex/Footnotes#Example_from_LaTeX2e_unofficial_reference_manual)
* [3.4 Example: table footnotes via the tablefootnote package](https://www.overleaf.com/learn/latex/Footnotes#Example:_table_footnotes_via_the_tablefootnote_package)
* [4 Table notes: an alternative to footnotes](https://www.overleaf.com/learn/latex/Footnotes#Table_notes:_an_alternative_to_footnotes)
* [4.1 Example: creating table notes using the threeparttable package](https://www.overleaf.com/learn/latex/Footnotes#Example:_creating_table_notes_using_the_threeparttable_package)
* [4.2 Discussions on tex.stackexchange](https://www.overleaf.com/learn/latex/Footnotes#Discussions_on_tex.stackexchange)
* [5 Further reading](https://www.overleaf.com/learn/latex/Footnotes#Further_reading)
Introduction to LaTeX’s main footnote commands
----------------------------------------------
According to Wikipedia, footnotes were invented by an English printer called [Richard Jugge](https://en.wikipedia.org/wiki/Note_(typography)#History)
(_c._1514–1577). This time-honoured literary device is supported by LaTeX and in this help article we explain the main footnote-related commands and provide a range of examples to demonstrate their use.
### The `\footnote` command
The `\footnote` command is the core LaTeX command for creating footnotes and takes two forms:
* `\footnote{_text for footnote_}`: This inserts an (automatically-generated) superscript number, called the footnote _marker_, into the document text and also creates the corresponding footnote at the bottom of the page, containing the corresponding footnote _marker_ and `_text for footnote_`.
* `\footnote[_number_]{_text for footnote_}`: This form of the command uses the optional value `_number_` to create the superscript footnote _marker_; it also inserts the corresponding footnote at the bottom of the page, containing the identifying footnote marker (`_number_`) and `_text for footnote_`.
#### Example: using the `\footnote` command
Here is an example which demonstrates the two variants of `\footnote`:
* `\footnote{Automatically generated footnote markers work fine!}` automatically typesets the numeric (superscript) value (1) for the footnote marker, whereas
* `\footnote[42]{...is that the answer to everything?}` uses 42 as the value of the footnote marker and, as you may observe, it does not increment the integer used for auto-creation of markers: the third footnote has a marker value of 2.
I'm writing to demonstrate use of automatically-generated footnote markers\\footnote{Automatically generated footnote markers work fine!} and footnotes which use a marker value provided to the command\\footnote\[42\]{...is that the answer to everything?}.
Now, I will use another automatically-generated footnote marker\\footnote{Now, footnote markers are 1, 42, but then back to 2? That will be confusing if the automatically-generated number also reaches 42!}.
[Open this example in Overleaf](https://www.overleaf.com/docs?engine=pdflatex&snip_name=Demonstrating+the+footnote+command&snip=%5Cdocumentclass%7Barticle%7D%0A%25+Using+the+geometry+package+with+a+small%0A%25+page+size+to+create+the+article+graphic%0A%5Cusepackage%5Bpaperheight%3D6in%2C%0A+++paperwidth%3D5in%2C%0A+++top%3D10mm%2C%0A+++bottom%3D20mm%2C%0A+++left%3D10mm%2C%0A+++right%3D10mm%5D%7Bgeometry%7D%0A%5Cbegin%7Bdocument%7D%0AI%27m+writing+to+demonstrate+use+of+automatically-generated+footnote+markers%5Cfootnote%7BAutomatically+generated+footnote+markers+work+fine%21%7D+and+footnotes+which+use+a+marker+value+provided+to+the+command%5Cfootnote%5B42%5D%7B...is+that+the+answer+to+everything%3F%7D.+%0A%0ANow%2C+I+will+use+another+automatically-generated+footnote+marker%5Cfootnote%7BNow%2C+footnote+markers+are+1%2C+42%2C+but+then+back+to+2%3F+That+will+be+confusing+if+the+automatically-generated+number+also+reaches+42%21%7D.%0A%5Cend%7Bdocument%7D)
This example produces the following output:
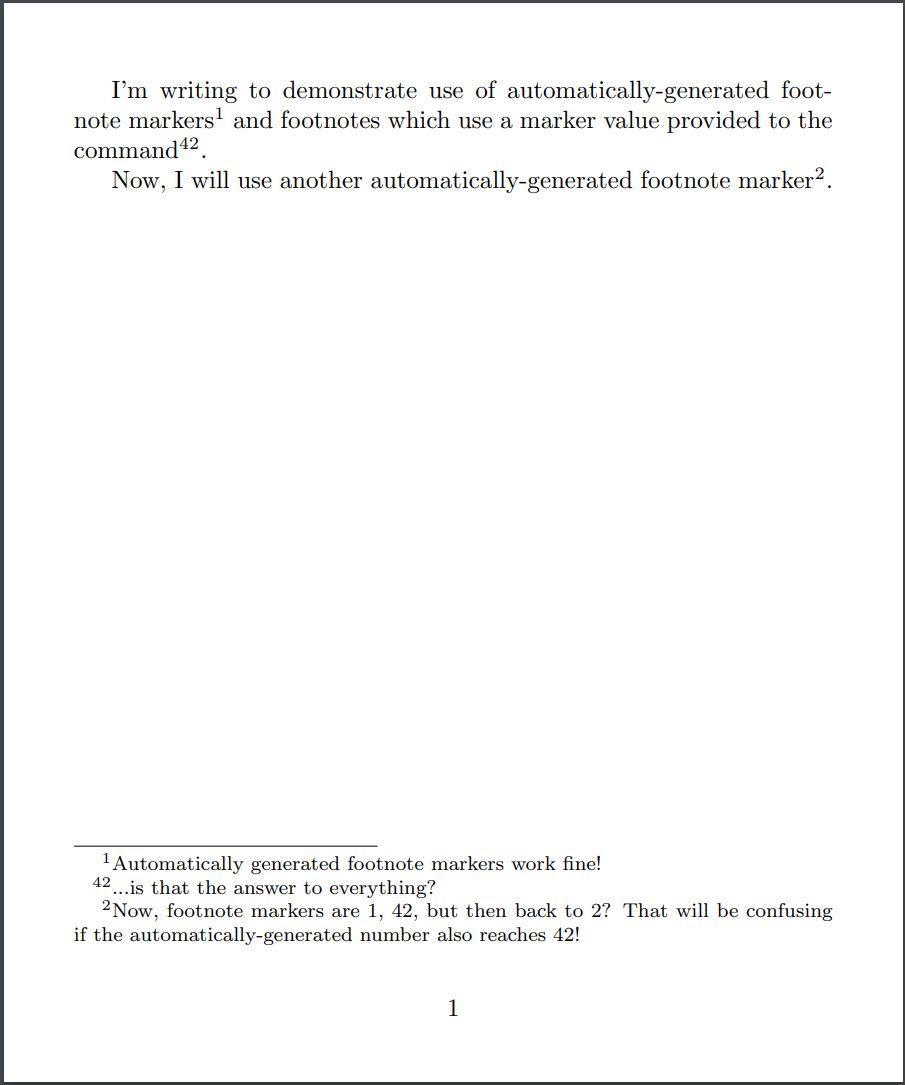
### Storing the current footnote marker value: LaTeX counters
LaTeX uses so-called [_counter variables_](https://www.overleaf.com/learn/latex/Counters "Counters")
to store the current value of footnote markers. In practice, LaTeX provides and uses two counter variables according to where the footnote is being used:
* `footnote`: the counter variable for footnotes within the main document text
* `mpfootnote`: the counter variable for footnotes within a `minipage` environment
Each time the `\footnote{_text_}` version of that command is used, the corresponding counter variable is incremented by 1. With the `\footnote[_number_]{_text_}` version, the corresponding counter variable is _not_ incremented.
You can create additional counter variables and use them for producing footnotes, as demonstrated in the [example below](https://www.overleaf.com/learn/latex/Footnotes#Example_from_LaTeX2e_unofficial_reference_manual)
.
### The `\footnotemark` and `\footnotetext` commands
In addition to `\footnote`, LaTeX provides the commands:
* `\footnotemark` which typesets the footnote marker, and
* `\footnotetext` which typesets the footnote text
Both commands take an _optional_ argument enclosed in square brackets (`[...]`):
* `\footnotemark[_number_]`: typesets a footnote marker at the point the command is used but does not create/typeset a corresponding footnote at the bottom of the page.
* `[_number_]` is the _optional_ argument, specifying that the value `_number_` should be used for the footnote marker.
* If you use this command _without_ the optional argument, writing it as `\footnotemark`, this form of the command generates the footnote marker using an internal LaTeX variable called a [counter variable](https://www.overleaf.com/learn/latex/Counters "Counters")
—which is incremented by 1 when the optional `_number_` value is _not_ provided.
* `\footnotetext[_number_]{_text for footnote_}`: typesets the footnote text (`_text for footnote_`) corresponding to the marker produced by the previous `\footnotemark`.
* `[_number_]` is the _optional_ argument which specifies the corresponding footnote marker for the `_text for footnote_`.
* If you use this command _without_ the optional `_number_` argument, i.e. writing it as `\footnotetext{_text for footnote_}`, this form of the command generates a footnote whose marker corresponds to the most recent `\footnotemark`.
#### Example: using `\footnotemark` and `\footnotetext`
The `\footnotemark` and `\footnotetext` commands are often used together to construct footnotes in tables, or other locations, where the standard `\footnote` command does not work, or is not the best/optimal solution—some applications are demonstrated in this article (see [here](https://www.overleaf.com/learn/latex/Footnotes#Example_from_LaTeX2e_unofficial_reference_manual)
and [here](https://www.overleaf.com/learn/latex/Footnotes#Footnotes_with_multiple_references)
).
I'm writing to test the \\verb|\\footnotemark| and \\verb|\\footnotetext| commands.
You can insert a footnote marker using the \\verb|\\footnotemark|\\footnotemark{}
command and later, when you're ready, typeset the footnote text by writing
\\verb|\\footnotetext{Here's the footnote.}|. \\footnotetext{Here's the footnote.}
Let's do one more to see the result\\footnotemark{} which I'll comment on within the
footnote\\footnotetext{Specifically, I'd write comments in this one.}.
[Open this example in Overleaf](https://www.overleaf.com/docs?engine=pdflatex&snip_name=footnotemark+and+footnotetext+demo&snip=%5Cdocumentclass%7Barticle%7D%0A%25+Using+the+geometry+package+with+a+small%0A%25+page+size+to+create+the+article+graphic%0A%5Cusepackage%5Bpaperheight%3D6in%2C%0A+++paperwidth%3D5in%2C%0A+++top%3D10mm%2C%0A+++bottom%3D20mm%2C%0A+++left%3D10mm%2C%0A+++right%3D10mm%5D%7Bgeometry%7D%0A%5Cbegin%7Bdocument%7D%0AI%27m+writing+to+test+the+%5Cverb%7C%5Cfootnotemark%7C+and+%5Cverb%7C%5Cfootnotetext%7C+commands.+%0AYou+can+insert+a+footnote+marker+using+the+%5Cverb%7C%5Cfootnotemark%7C%5Cfootnotemark%7B%7D%0Acommand+and+later%2C+when+you%27re+ready%2C+typeset+the+footnote+text+by+writing+%0A%5Cverb%7C%5Cfootnotetext%7BHere%27s+the+footnote.%7D%7C.+%5Cfootnotetext%7BHere%27s+the+footnote.%7D%0A%0ALet%27s+do+one+more+to+see+the+result%5Cfootnotemark%7B%7D+which+I%27ll+comment+on+within+the%0Afootnote%5Cfootnotetext%7BSpecifically%2C+I%27d+write+comments+in+this+one.%7D.%0A%5Cend%7Bdocument%7D)
This example produces the following output:
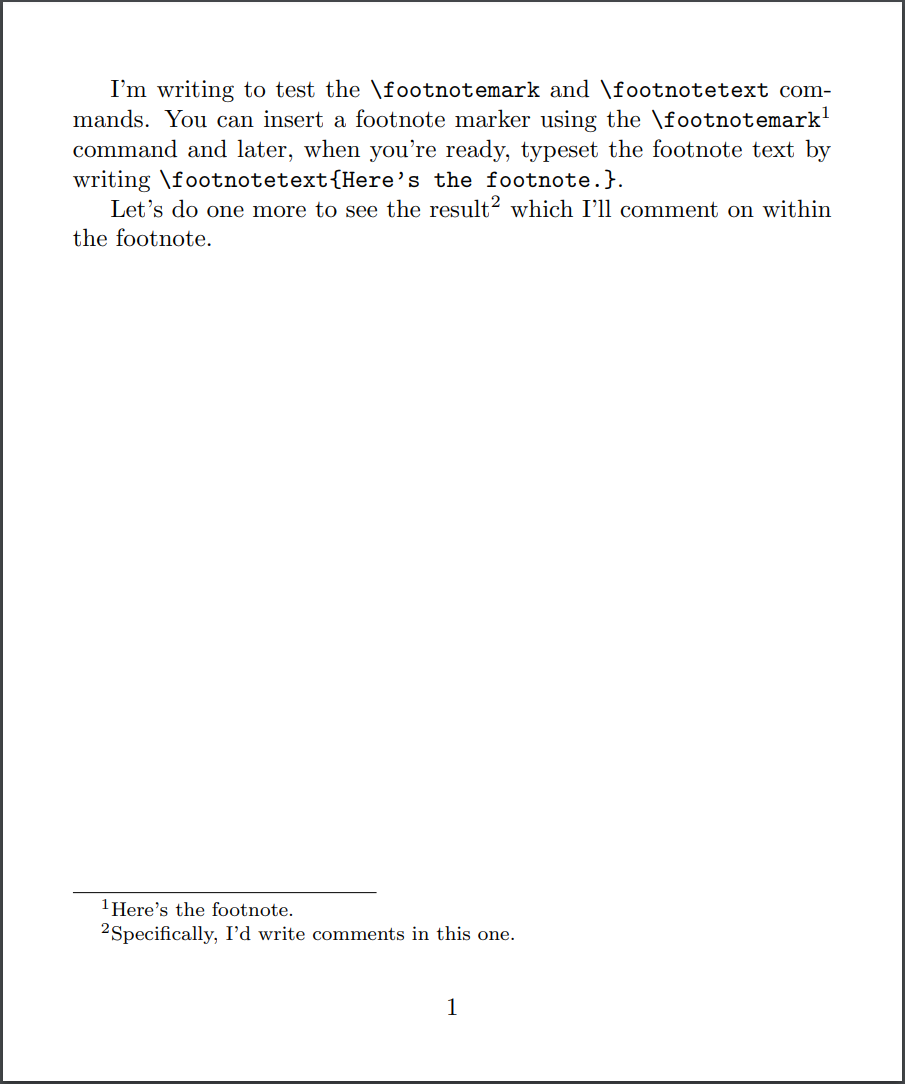
### Other LaTeX footnote commands
In addition to the commands we have explored:
* `\footnote[_number_]{_text for footnote_}`
* `\footnotemark[_number_]`
* `\footnotetext[_number_]{_text for footnote_}`
LaTeX provides several additional footnote-related commands that we’ll list but not explore in any detail. The following descriptions are taken from the LaTeX2e source code documentation:
* `\footnotesize`: Size-changing command for footnotes.
* `\footins`: Space between main text and footnotes. The rule separating footnotes from text occurs in this space. This space lies above the strut of height `\footnotesep` which is at the beginning of the first footnote.
* `\footnoterule`: Macro to draw the rule separating footnotes from text. It is executed right after a `\vspace` of `\skip\footins`. It should take zero vertical space—i.e., it should to a negative skip to compensate for any positive space it occupies.
* `\footnotesep`: The height of a strut placed at the beginning of every footnote.
Examples and applications of footnotes
--------------------------------------
### Footnotes with multiple references
The following example demonstrates one way to make multiple references to the same footnote. By using `\footnotemark[\value{footnote}]` you can insert a superscript corresponding to the _current_ value of the `footnote` [counter](https://www.overleaf.com/learn/latex/Counters "Counters")
but without incrementing the `footnote` counter value (for more information on counters, see [this Overleaf help article](https://www.overleaf.com/learn/latex/Counters "Counters")
).
I'm writing to test\\footnote{Footnotes work fine!} several footnote features.
You can insert the footnote marker\\footnotemark{} using the \\verb|\\footnotemark|
command and later use the \\verb|\\footnotetext| command to typeset the footnote
text by writing \\verb|\\footnotetext{Text of second footnote.}|
\\footnotetext{Text of second footnote.}.
I can use the same footnote\\footnotemark{} more than
once\\footnotemark\[\\value{footnote}\].
\\footnotetext{A footnote with two references.}
[Open this example in Overleaf](https://www.overleaf.com/docs?engine=pdflatex&snip_name=Two+references+to+footnotes&snip=%5Cdocumentclass%7Barticle%7D%0A%25+Using+the+geometry+package+with+a+small%0A%25+page+size+to+create+the+article+graphic%0A%5Cusepackage%5Bpaperheight%3D6in%2C%0A+++paperwidth%3D5in%2C%0A+++top%3D10mm%2C%0A+++bottom%3D20mm%2C%0A+++left%3D10mm%2C%0A+++right%3D10mm%5D%7Bgeometry%7D%0A%5Cbegin%7Bdocument%7D%0AI%27m+writing+to+test%5Cfootnote%7BFootnotes+work+fine%21%7D+several+footnote+features.+%0AYou+can+insert+the+footnote+marker%5Cfootnotemark%7B%7D+using+the+%5Cverb%7C%5Cfootnotemark%7C%0Acommand+and+later+use+the+%5Cverb%7C%5Cfootnotetext%7C+command+to+typeset+the+footnote%0Atext+by+writing+%5Cverb%7C%5Cfootnotetext%7BText+of+second+footnote.%7D%7C%0A%5Cfootnotetext%7BText+of+second+footnote.%7D.%0A%0AI+can+use+the+same+footnote%5Cfootnotemark%7B%7D+more+than+%0Aonce%5Cfootnotemark%5B%5Cvalue%7Bfootnote%7D%5D.%0A%0A%5Cfootnotetext%7BA+footnote+with+two+references.%7D%0A%5Cend%7Bdocument%7D)
This example produces the following output:
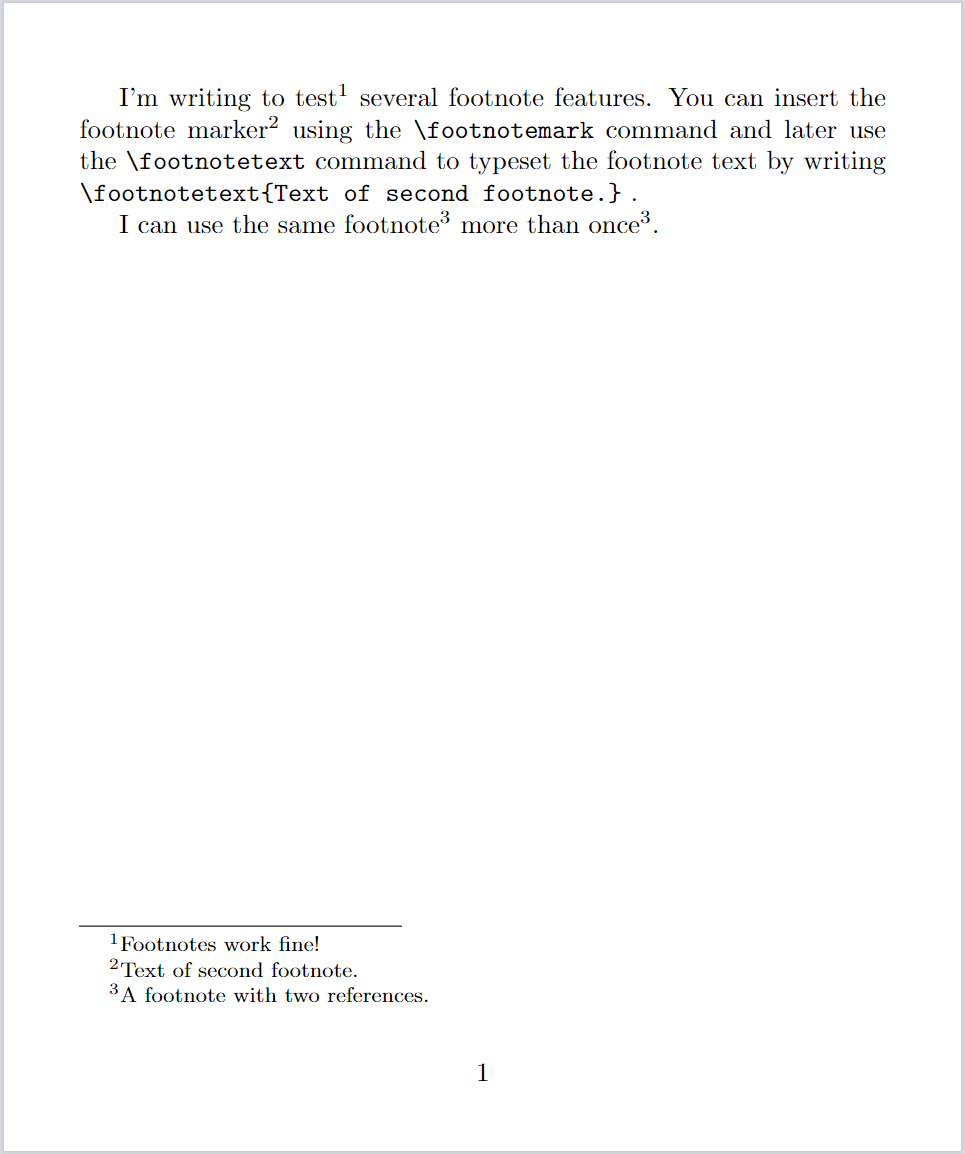
### Changing the numbering style
The current value of the footnote number is stored in a LaTeX variable called the `footnote` [_counter_](https://www.overleaf.com/learn/latex/Counters "Counters")
and can be typeset by the command `\thefootnote`. You can change the typeset format of footnote markers by modifying the `\thefootnote` command; for example, `\renewcommand{\thefootnote}{\roman{footnote}}` will typeset markers in lowercase Roman numerals. You can use `\renewcommand{\thefootnote}{...}` in the preamble to change the numbering style of footnotes in the main document text.
Other possible marker styles are:
* `\arabic{_counter variable_}`: typeset `_counter variable_` in Arabic numerals.
* `\Roman{_counter variable_}`: typeset `_counter variable_` in uppercase Roman numerals.
* `\alph{_counter variable_}`: typeset `_counter variable_` in lowercase Alphabetic characters.
* `\Alph{_counter variable_}`: typeset `_counter variable_` in uppercase Alphabetic characters.
* `\fnsymbol{_counter variable_}`: typeset `_counter variable_` using a [set of 9 special symbols](https://www.overleaf.com/learn/latex/Counters%23Accessing_and_printing_counter_values#.5Cfnsymbol.7Bsomecounter.7D)
.
For background information on creating, using and modifying counters see [this Overleaf article on counters](https://www.overleaf.com/learn/latex/Counters%23Accessing_and_printing_counter_values "Counters")
.
Here is an example using `\renewcommand{\thefootnote}{\roman{footnote}}`:
I'm writing to test\\footnote{Footnotes work fine!} several footnote features.
You can insert the footnote marker\\footnotemark{} using the \\verb|\\footnotemark|
command and later use the \\verb|\\footnotetext| command to typeset the footnote
text by writing \\verb|\\footnotetext{Text of second footnote.}|
\\footnotetext{Text of second footnote.}.
I can use the same footnote\\footnotemark{} more than
once\\footnotemark\[\\value{footnote}\].
\\footnotetext{A footnote with two references.}
\\renewcommand{\\thefootnote}{\\roman{footnote}}
Now a footnote marker using lowercase Roman numerals\\footnote{This footnote marker uses lowercase Roman numerals.}.
[Open this example in Overleaf](https://www.overleaf.com/docs?engine=pdflatex&snip_name=Changing+footnote+numbering+style&snip=%5Cdocumentclass%7Barticle%7D%0A%25+Using+the+geometry+package+with+a+small%0A%25+page+size+to+create+the+article+graphic%0A%5Cusepackage%5Bpaperheight%3D6in%2C%0A+++paperwidth%3D5in%2C%0A+++top%3D10mm%2C%0A+++bottom%3D20mm%2C%0A+++left%3D10mm%2C%0A+++right%3D10mm%5D%7Bgeometry%7D%0A%5Cbegin%7Bdocument%7D%0AI%27m+writing+to+test%5Cfootnote%7BFootnotes+work+fine%21%7D+several+footnote+features.+%0AYou+can+insert+the+footnote+marker%5Cfootnotemark%7B%7D+using+the+%5Cverb%7C%5Cfootnotemark%7C%0Acommand+and+later+use+the+%5Cverb%7C%5Cfootnotetext%7C+command+to+typeset+the+footnote%0Atext+by+writing+%5Cverb%7C%5Cfootnotetext%7BText+of+second+footnote.%7D%7C%0A%5Cfootnotetext%7BText+of+second+footnote.%7D.%0A%0AI+can+use+the+same+footnote%5Cfootnotemark%7B%7D+more+than+%0Aonce%5Cfootnotemark%5B%5Cvalue%7Bfootnote%7D%5D.%0A%0A%5Cfootnotetext%7BA+footnote+with+two+references.%7D%0A%0A%5Crenewcommand%7B%5Cthefootnote%7D%7B%5Croman%7Bfootnote%7D%7D%0ANow+a+footnote+marker+using+lowercase+Roman+numerals%5Cfootnote%7BThis+footnote+marker+uses+lowercase+Roman+numerals.%7D.%0A%5Cend%7Bdocument%7D)
This example produces the following output:
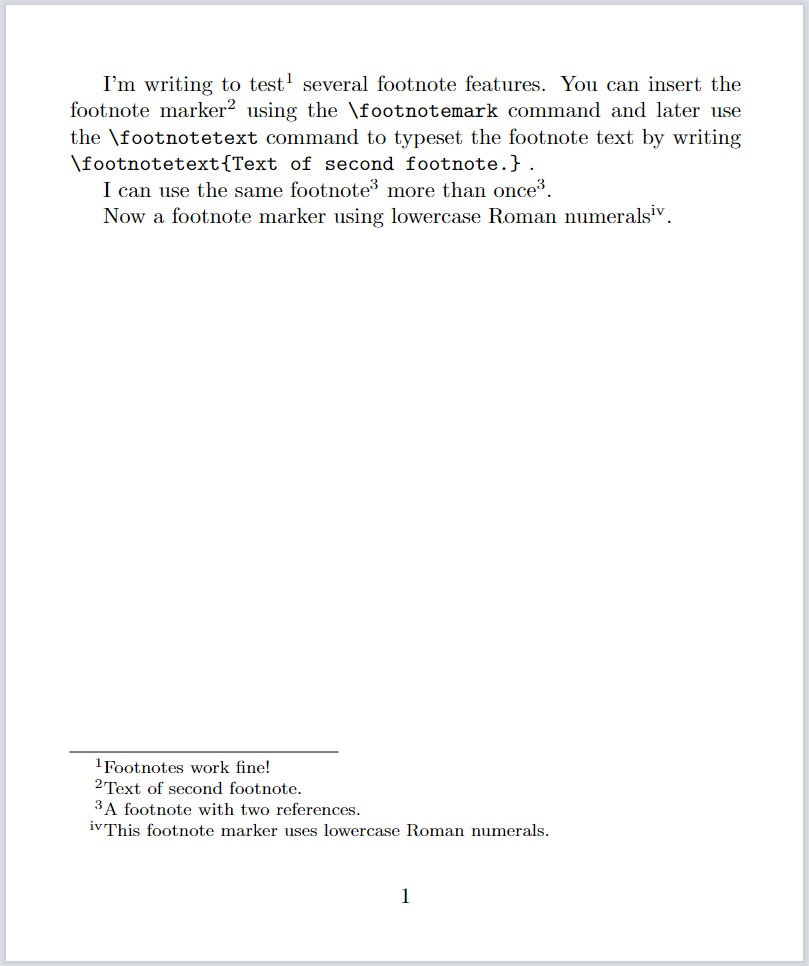
### Footnotes in `minipage` environments
Footnotes within a `minipage` environment behave differently because the commands `\footnote` and `\footnotetext` are temporarily redefined so that footnotes are:
* placed at the bottom of the `minipage`, not the main document page
* labled/numbered using a scheme different to in-text footnotes—in a `minipage` the footnotes use a counter called `mpfootnote`
Here's an example of footnotes in a `minipage`:
This is the start of a paragraph of text just before we switch to a \\texttt{minipage} environment. This is an in-page footnote\\footnote{Footnote before a minipage}.
\\vspace{10pt}
\\begin{minipage}{0.7\\textwidth}
This is text in a \\texttt{minipage} environment. Here is the first \\texttt{minipage} footnote\\footnote{First minipage footnote.}. And another \\texttt{minipage} footnote\\footnote{Second minipage footnote.}.
\\end{minipage}
\\vspace{10pt}
This is the start of a standard paragraph of text just after we finished a \\texttt{minipage} environment. This is an in-page footnote\\footnote{Footnote after a minipage}.
[Open this example in Overleaf](https://www.overleaf.com/docs?engine=pdflatex&snip_name=Footnotes+in+a+minipage&snip=%5Cdocumentclass%7Barticle%7D%0A%25+Using+the+geometry+package+with+a+small%0A%25+page+size+to+create+the+article+graphic%0A%5Cusepackage%5Bpaperheight%3D6in%2C%0A+++paperwidth%3D5in%2C%0A+++top%3D10mm%2C%0A+++bottom%3D20mm%2C%0A+++left%3D10mm%2C%0A+++right%3D10mm%5D%7Bgeometry%7D%0A%5Cbegin%7Bdocument%7D%0AThis+is+the+start+of+a+paragraph+of+text+just+before+we+switch+to+a+%5Ctexttt%7Bminipage%7D+environment.+This+is+an+in-page+footnote%5Cfootnote%7BFootnote+before+a+minipage%7D.%0A%0A%5Cvspace%7B10pt%7D%0A%5Cbegin%7Bminipage%7D%7B0.7%5Ctextwidth%7D%0AThis+is+text+in+a+%5Ctexttt%7Bminipage%7D+environment.+Here+is+the+first+%5Ctexttt%7Bminipage%7D+footnote%5Cfootnote%7BFirst+minipage+footnote.%7D.+And+another+%5Ctexttt%7Bminipage%7D+footnote%5Cfootnote%7BSecond+minipage+footnote.%7D.%0A%5Cend%7Bminipage%7D%0A%5Cvspace%7B10pt%7D%0A%0AThis+is+the+start+of+a+standard+paragraph+of+text+just+after+we+finished+a+%5Ctexttt%7Bminipage%7D+environment.+This+is+an+in-page+footnote%5Cfootnote%7BFootnote+after+a+minipage%7D.%0A%5Cend%7Bdocument%7D)
This example produces the following output:
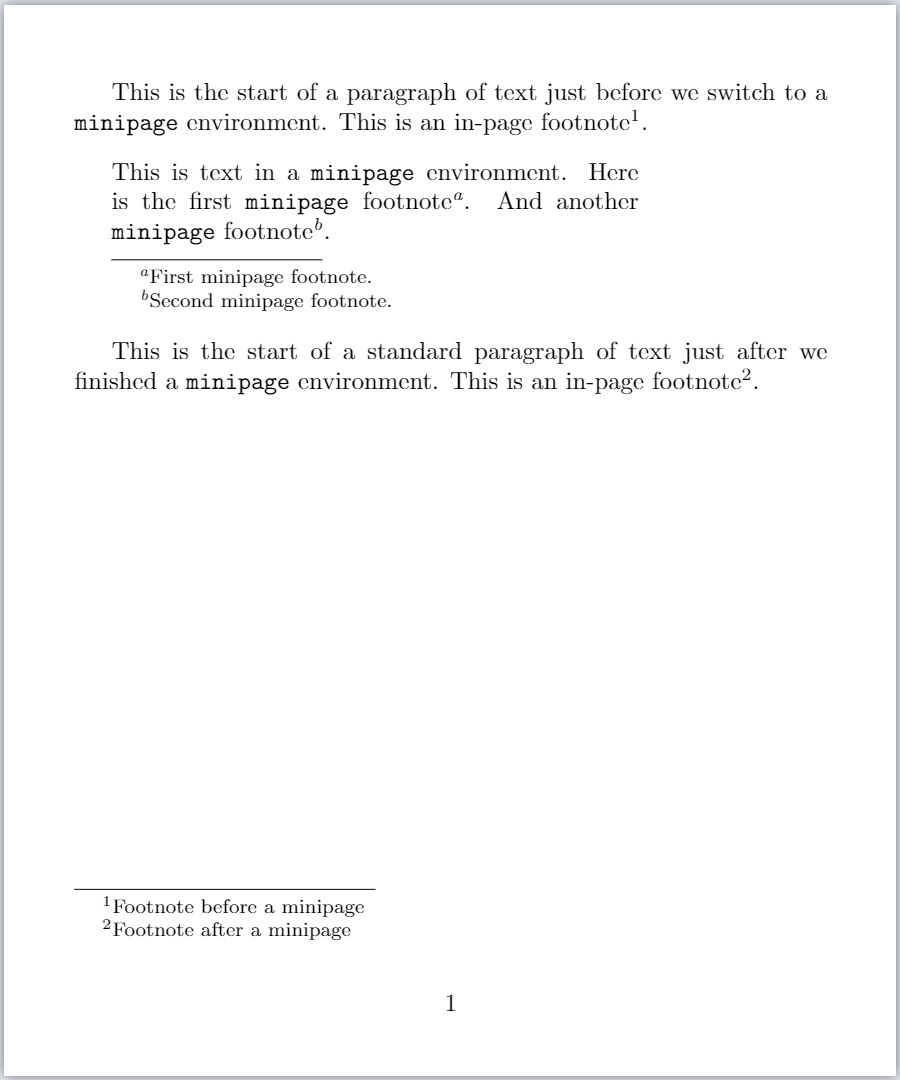
### Changing minipage footnote markers
As shown by the example above, within a `minipage` footnote markers are lowercase letters; however, the `\renewcommand` can be used to redefine how the `mpfootnote` counter value is typeset. For example, to typeset `minipage` footnote markers as Arabic digits:
\\renewcommand{\\thempfootnote}{\\arabic{mpfootnote}}
as show in the following example:
\\renewcommand{\\thempfootnote}{\\arabic{mpfootnote}}
\\begin{minipage}{0.7\\textwidth}
This is text in a \\texttt{minipage} environment. Here is the first \\texttt{minipage} footnote\\footnote{First minipage footnote.}. And another \\texttt{minipage} footnote\\footnote{Second minipage footnote.}.
\\end{minipage}
[Open this example in Overleaf](https://www.overleaf.com/docs?engine=pdflatex&snip_name=Changing+minipage+footnote+marker&snip=%5Cdocumentclass%7Barticle%7D%0A%25+Using+the+geometry+package+with+a+small%0A%25+page+size+to+create+the+article+graphic%0A%5Cusepackage%5Bpaperheight%3D6in%2C%0A+++paperwidth%3D5in%2C%0A+++top%3D10mm%2C%0A+++bottom%3D20mm%2C%0A+++left%3D10mm%2C%0A+++right%3D10mm%5D%7Bgeometry%7D%0A%5Cbegin%7Bdocument%7D%0A%5Crenewcommand%7B%5Cthempfootnote%7D%7B%5Carabic%7Bmpfootnote%7D%7D%0A%5Cbegin%7Bminipage%7D%7B0.7%5Ctextwidth%7D%0AThis+is+text+in+a+%5Ctexttt%7Bminipage%7D+environment.+Here+is+the+first+%5Ctexttt%7Bminipage%7D+footnote%5Cfootnote%7BFirst+minipage+footnote.%7D.+And+another+%5Ctexttt%7Bminipage%7D+footnote%5Cfootnote%7BSecond+minipage+footnote.%7D.%0A%5Cend%7Bminipage%7D%0A%5Cend%7Bdocument%7D)
This example produces the following output:
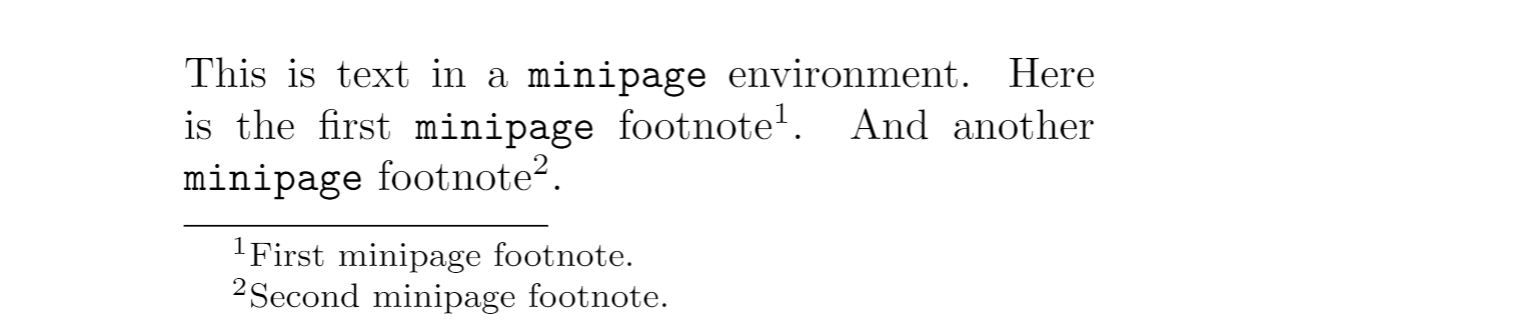
Footnotes in tables
-------------------
The following sections examine a number of topics related to using footnotes in tables.
### Should you use footnotes in tables?
The [Frequently Asked Question List for TeX](https://texfaq.org/)
has an entry for [footnotes in tables](https://texfaq.org/FAQ-footintab)
which comments that using footnotes in tables is not considered to be typographic best practice: ideally, _table notes_ should be used instead of _table footnotes_. The use of table notes or table footnotes may be defined by document class/style files you are required to use, or the choice may be yours: either way, LaTeX provides a range of solutions you can use.
### Example: `\footnote` does not work in the `tabular` environment
The `\footnote` command does not work inside a tabular environment, as the following example demonstrates. Note this example uses the `hologo` LaTeX package to typeset the names of various TeX engines.
\\begin{table}
\\centering
\\begin{tabular}{lcc}
\\midrule
\\TeX{} engine & Native UTF-8 support & Unicode math support\\\\
\\midrule
\\hologo{pdfTeX} & No\\footnote{Some UTF-8 support via \\LaTeX{} kernel commands.} & No\\\\
\\Hologo{XeTeX} & Yes & Yes\\\\
\\Hologo{LuaTeX} & Yes & Yes\\\\
\\midrule
\\end{tabular}
\\caption\[\\TeX{} engine features\]{%
\\TeX{} engine feature comparison\\footnote{Draft version. Additional feature comparisons will be added.}.}
\\end{table}
[Open this example in Overleaf](https://www.overleaf.com/docs?engine=pdflatex&snip_name=Example+of+table+footnotes+not+working&snip=%5Cdocumentclass%7Barticle%7D%0A%25+Using+the+geometry+package+with+a+small%0A%25+page+size+to+create+the+article+graphic%0A%5Cusepackage%5Bpaperheight%3D6in%2C%0A+++paperwidth%3D5in%2C%0A+++top%3D10mm%2C%0A+++bottom%3D20mm%2C%0A+++left%3D10mm%2C%0A+++right%3D10mm%5D%7Bgeometry%7D%0A%5Cusepackage%7Bhologo%7D+%25+for+TeX+engine+logos%0A%5Cusepackage%7Bbooktabs%7D+%25+for+nice+tables%0A%5Cbegin%7Bdocument%7D%0A%5Cbegin%7Btable%7D%0A++%5Ccentering%0A++++%5Cbegin%7Btabular%7D%7Blcc%7D%0A+++++%5Cmidrule+%0A+++++%5CTeX%7B%7D+engine+%26+Native+UTF-8+support+%26+Unicode+math+support%5C%5C%0A+++++%5Cmidrule%0A+++++++%5Chologo%7BpdfTeX%7D+%26+No%5Cfootnote%7BSome+UTF-8+support+via+%5CLaTeX%7B%7D+kernel+commands.%7D+%26+No%5C%5C%0A+++++++%5CHologo%7BXeTeX%7D+%26+Yes+%26+Yes%5C%5C%0A+++++++%5CHologo%7BLuaTeX%7D+%26+Yes+%26+Yes%5C%5C%0A+++++++%5Cmidrule+%0A+++++%5Cend%7Btabular%7D%0A++++%5Ccaption%5B%5CTeX%7B%7D+engine+features%5D%7B%25%0A++++++%5CTeX%7B%7D+engine+feature+comparison%5Cfootnote%7BDraft+version.+Additional+feature+comparisons+will+be+added.%7D.%7D%0A%5Cend%7Btable%7D%0A%5Cend%7Bdocument%7D)
This example produces the following output, showing the presence of footnote marks in the table cell and caption, but there is no corresponding footnote text:
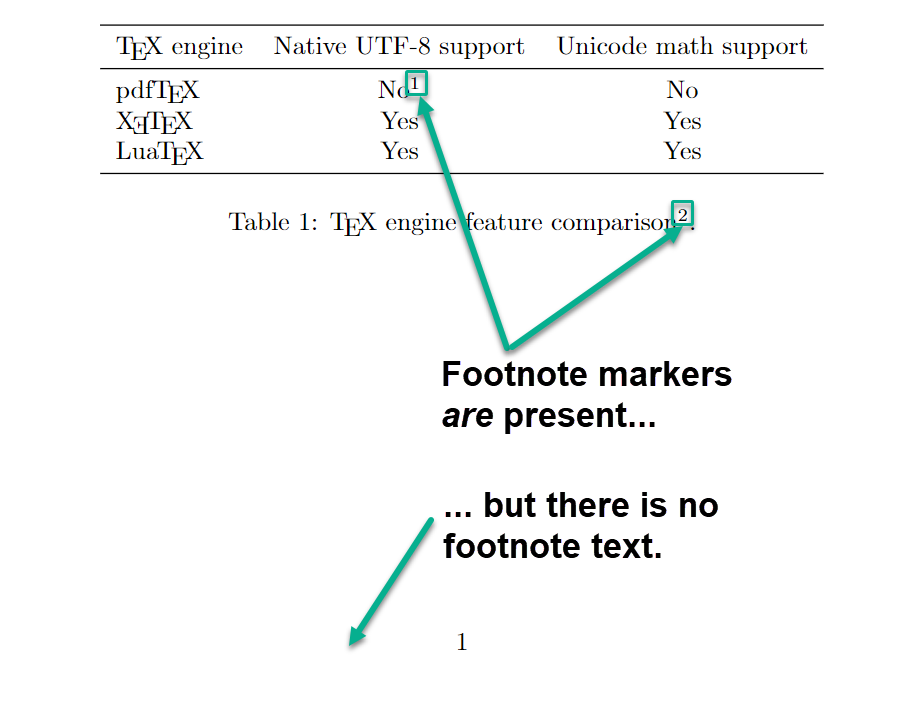
A partial solution is to place the `tabular` inside a `minipage` environment:
\\begin{minipage}{\\textwidth}
\\centering
\\begin{tabular}{lcc}
\\midrule
\\TeX{} engine & Native UTF-8 support & Unicode math support\\\\
\\midrule
\\hologo{pdfTeX} & No\\footnote{Some UTF-8 support via \\LaTeX{} kernel commands.} & No\\\\
\\Hologo{XeTeX} & Yes & Yes\\\\
\\Hologo{LuaTeX} & Yes & Yes\\\\
\\midrule
\\end{tabular}
\\end{minipage}
[Open this example in Overleaf](https://www.overleaf.com/docs?engine=pdflatex&snip_name=Example+of+tabular+in+a+minipage&snip=%5Cdocumentclass%7Barticle%7D%0A%25+Using+the+geometry+package+with+a+small%0A%25+page+size+to+create+the+article+graphic%0A%5Cusepackage%5Bpaperheight%3D6in%2C%0A+++paperwidth%3D5in%2C%0A+++top%3D10mm%2C%0A+++bottom%3D20mm%2C%0A+++left%3D10mm%2C%0A+++right%3D10mm%5D%7Bgeometry%7D%0A%5Cusepackage%7Bhologo%7D+%25+for+TeX+engine+logos%0A%5Cusepackage%7Bbooktabs%7D+%25+for+nice+tables%0A%5Cbegin%7Bdocument%7D%0A%5Cbegin%7Bminipage%7D%7B%5Ctextwidth%7D%0A++%5Ccentering%0A++++%5Cbegin%7Btabular%7D%7Blcc%7D%0A+++++%5Cmidrule+%0A+++++%5CTeX%7B%7D+engine+%26+Native+UTF-8+support+%26+Unicode+math+support%5C%5C%0A+++++%5Cmidrule%0A+++++++%5Chologo%7BpdfTeX%7D+%26+No%5Cfootnote%7BSome+UTF-8+support+via+%5CLaTeX%7B%7D+kernel+commands.%7D+%26+No%5C%5C%0A+++++++%5CHologo%7BXeTeX%7D+%26+Yes+%26+Yes%5C%5C%0A+++++++%5CHologo%7BLuaTeX%7D+%26+Yes+%26+Yes%5C%5C%0A+++++++%5Cmidrule+%0A+++++%5Cend%7Btabular%7D%0A%5Cend%7Bminipage%7D%0A%5Cend%7Bdocument%7D)
This example produces the following output:
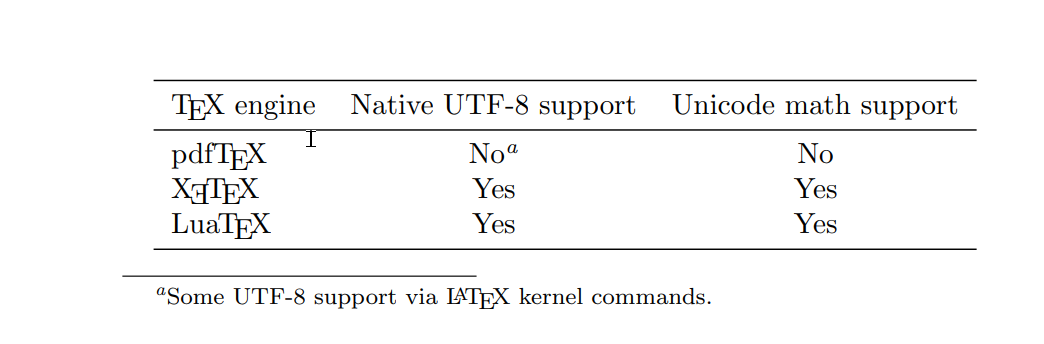
Note that you can also write `\renewcommand{\thempfootnote}{\arabic{mpfootnote}}` to have the `minipage` table footnote markers typeset as Arabic digits rather than lowercase letters.
### Example from LaTeX2e unofficial reference manual
The [LaTeX2e unofficial reference manual](https://latexref.xyz/index.html)
has an interesting example in the section [Footnotes in a table](https://latexref.xyz/Footnotes-in-a-table.html)
. Normally, table footnotes within a `minipage` are placed at the bottom of the `minipage`, as the examples above have shown. The following example, from the [LaTeX2e unofficial reference manual](https://latexref.xyz/Footnotes-in-a-table.html)
uses the `\footnotemark` and `\footnotetext` commands, together with a new counter (`mpFootnoteValueSaver`) to ensure the table footnotes appear at the bottom of the document page, to be included as part of the document’s standard footnotes.
When the table is typeset, the LaTeX code `\setcounter{mpFootnoteValueSaver}{\value{footnote}}` sets the value of `mpFootnoteValueSaver` to be the current `footnote` counter value; this ensures footnotes produced within the table use marker values that are synchronized with the main document footnote sequence (numbering). After the table is typeset, note how the `mpFootnoteValueSaver` is incremented by 1 through the code `\stepcounter{mpFootnoteValueSaver}`.
\\newcounter{mpFootnoteValueSaver}
\\begin{center}
\\begin{minipage}{\\textwidth}
\\setcounter{mpFootnoteValueSaver}{\\value{footnote}} \\centering
\\begin{tabular}{l|l}
\\textsc{Woman} &\\textsc{Relationship} \\\\ \\hline
Mona &Attached\\footnotemark \\\\
Diana Villiers &Eventual wife \\\\
Christine Hatherleigh Wood &Fiance\\footnotemark
\\end{tabular}
\\end{minipage}% percent sign keeps footnote text close to minipage
\\stepcounter{mpFootnoteValueSaver}%
\\footnotetext\[\\value{mpFootnoteValueSaver}\]{%
Little is known other than her death.}%
\\stepcounter{mpFootnoteValueSaver}%
\\footnotetext\[\\value{mpFootnoteValueSaver}\]{%
Relationship is unresolved in XXI.}
\\end{center}
[Open this example in Overleaf](https://www.overleaf.com/docs?engine=pdflatex&snip_name=Example+of+custom+table+footnotes&snip=%5Cdocumentclass%7Barticle%7D%0A%25+Using+the+geometry+package+with+a+small%0A%25+page+size+to+create+the+article+graphic%0A%5Cusepackage%5Bpaperheight%3D6in%2C%0A+++paperwidth%3D5in%2C%0A+++top%3D10mm%2C%0A+++bottom%3D20mm%2C%0A+++left%3D10mm%2C%0A+++right%3D10mm%5D%7Bgeometry%7D%0A%5Cusepackage%7Bhologo%7D+%25+for+TeX+engine+logos%0A%5Cusepackage%7Bbooktabs%7D+%25+for+nice+tables%0A%5Cbegin%7Bdocument%7D%0A%5Cnewcounter%7BmpFootnoteValueSaver%7D%0A%5Cbegin%7Bcenter%7D%0A++%5Cbegin%7Bminipage%7D%7B%5Ctextwidth%7D%0A++++%5Csetcounter%7BmpFootnoteValueSaver%7D%7B%5Cvalue%7Bfootnote%7D%7D+%5Ccentering%0A+++++%5Cbegin%7Btabular%7D%7Bl%7Cl%7D%0A+++++++%5Ctextsc%7BWoman%7D+++++++++++++%26%5Ctextsc%7BRelationship%7D+%5C%5C+%5Chline+%0A+++++++Mona+++++++++++++++++++++++%26Attached%5Cfootnotemark++%5C%5C+%0A+++++++Diana+Villiers+++++++++++++%26Eventual+wife++%5C%5C++%0A+++++++Christine+Hatherleigh+Wood+%26Fiance%5Cfootnotemark+%0A+++++%5Cend%7Btabular%7D%0A++%5Cend%7Bminipage%7D%25++percent+sign+keeps+footnote+text+close+to+minipage%0A++%5Cstepcounter%7BmpFootnoteValueSaver%7D%25%0A++++%5Cfootnotetext%5B%5Cvalue%7BmpFootnoteValueSaver%7D%5D%7B%25%0A++++++Little+is+known+other+than+her+death.%7D%25%0A++%5Cstepcounter%7BmpFootnoteValueSaver%7D%25%0A++++%5Cfootnotetext%5B%5Cvalue%7BmpFootnoteValueSaver%7D%5D%7B%25%0A++++++Relationship+is+unresolved+in+XXI.%7D%0A%5Cend%7Bcenter%7D%0A%5Cend%7Bdocument%7D)
This example produces the following output:
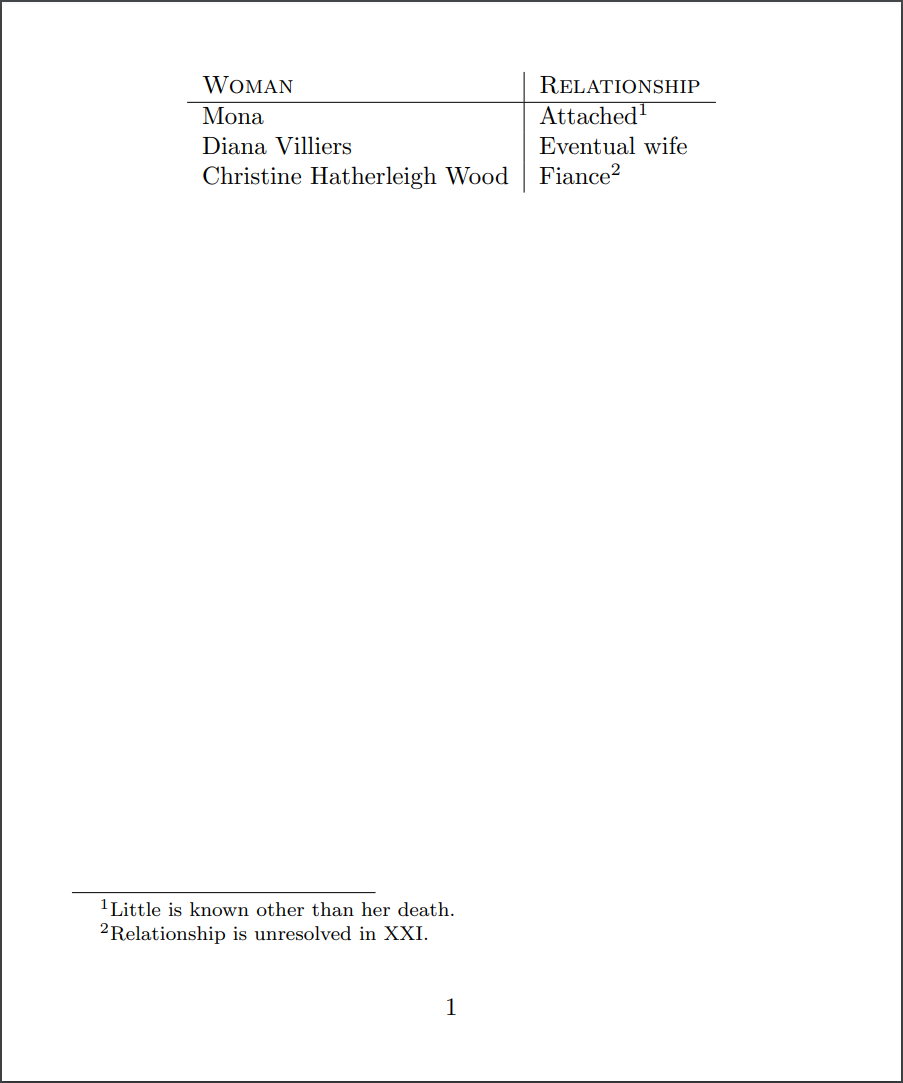
### Example: table footnotes via the `tablefootnote` package
One option is the [`tablefootnote` package](https://ctan.org/pkg/tablefootnote?lang=en)
which is [mentioned on tex.stackexchange](https://tex.stackexchange.com/a/35669)
and referenced in the Frequently Asked Question List for TeX [entry for footnotes in tables](https://texfaq.org/FAQ-footintab)
. The following example demonstrates the `tablefootnote` package:
\\documentclass{article}
% Using the geometry package with a small
% page size to create the article graphic
\\usepackage\[paperheight=6in,\
paperwidth=5in,\
top=10mm,\
bottom=20mm,\
left=10mm,\
right=10mm\]{geometry}
\\usepackage{hologo} % for TeX engine logos
\\usepackage{booktabs} % for nice tables
\\usepackage{tablefootnote} % for table footnotes
\\begin{document}
\\begin{table}
\\centering
\\begin{tabular}{lcc}
\\midrule
\\TeX{} engine & Native UTF-8 support & Unicode math support\\\\
\\midrule
\\hologo{pdfTeX} & No\\tablefootnote{Some UTF-8 support via \\LaTeX{} kernel commands.} & No\\\\
\\Hologo{XeTeX} & Yes & Yes\\\\
\\Hologo{LuaTeX} & Yes & Yes\\\\
\\midrule
\\end{tabular}
\\caption\[\\TeX{} engine features\]{%
\\TeX{} engine feature comparison\\tablefootnote{Draft version. Additional feature comparisons will be added.}.}
\\end{table}
\\end{document}
[Open this `\tablefootnote` package example in Overleaf](https://www.overleaf.com/docs?engine=pdflatex&snip_name=Example+of+tablefootnote+package&snip=%5Cdocumentclass%7Barticle%7D%0A%25+Using+the+geometry+package+with+a+small%0A%25+page+size+to+create+the+article+graphic%0A%5Cusepackage%5Bpaperheight%3D6in%2C%0A+++paperwidth%3D5in%2C%0A+++top%3D10mm%2C%0A+++bottom%3D20mm%2C%0A+++left%3D10mm%2C%0A+++right%3D10mm%5D%7Bgeometry%7D%0A%5Cusepackage%7Bhologo%7D+%25+for+TeX+engine+logos%0A%5Cusepackage%7Bbooktabs%7D+%25+for+nice+tables%0A%5Cusepackage%7Btablefootnote%7D+%25+for+table+footnotes%0A%5Cbegin%7Bdocument%7D%0A%5Cbegin%7Btable%7D%0A++%5Ccentering%0A++++%5Cbegin%7Btabular%7D%7Blcc%7D%0A+++++%5Cmidrule+%0A+++++%5CTeX%7B%7D+engine+%26+Native+UTF-8+support+%26+Unicode+math+support%5C%5C%0A+++++%5Cmidrule%0A+++++++%5Chologo%7BpdfTeX%7D+%26+No%5Ctablefootnote%7BSome+UTF-8+support+via+%5CLaTeX%7B%7D+kernel+commands.%7D+%26+No%5C%5C%0A+++++++%5CHologo%7BXeTeX%7D+%26+Yes+%26+Yes%5C%5C%0A+++++++%5CHologo%7BLuaTeX%7D+%26+Yes+%26+Yes%5C%5C%0A+++++++%5Cmidrule+%0A+++++%5Cend%7Btabular%7D%0A++++%5Ccaption%5B%5CTeX%7B%7D+engine+features%5D%7B%25%0A++++++%5CTeX%7B%7D+engine+feature+comparison%5Ctablefootnote%7BDraft+version.+Additional+feature+comparisons+will+be+added.%7D.%7D%0A%5Cend%7Btable%7D%0A%5Cend%7Bdocument%7D)
This example produces the following output:
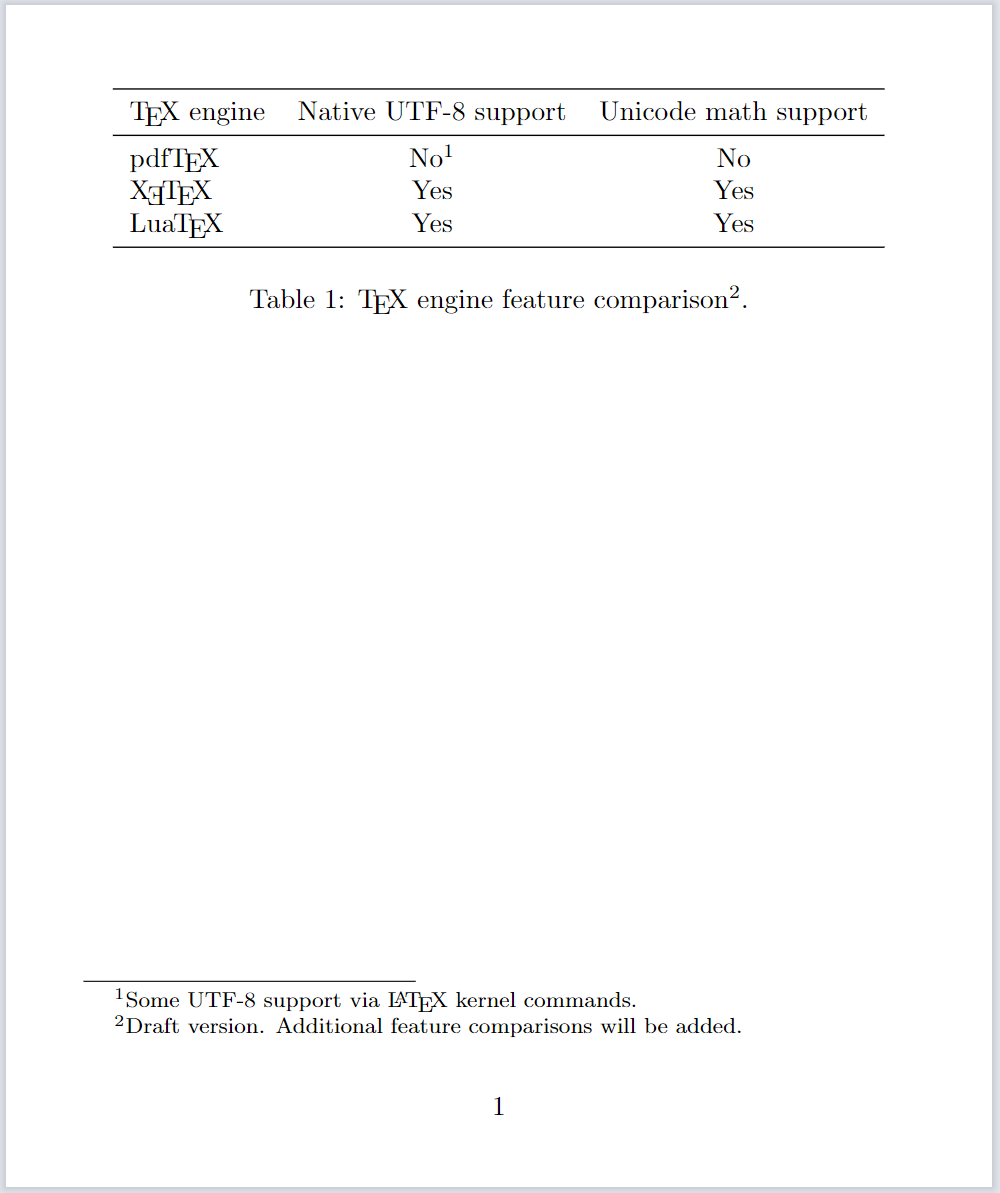
Table notes: an alternative to footnotes
----------------------------------------
The [`threeparttable` package](https://ctan.org/pkg/threeparttable)
provides a mechanism to create table _notes_—an alternative to using footnotes in tables. The [`threeparttabl**ex**` package](https://ctan.org/pkg/threeparttablex)
implements a table notes facility for use with the [longtable package](https://ctan.org/pkg/longtable)
.
### Example: creating table notes using the `threeparttable` package
The [threeparttable package documentation](http://mirrors.ctan.org/macros/latex/contrib/threeparttable/threeparttable.pdf)
is very brief, so we won't repeat it here but instead we'll provide an example of its use:
\\begin{table}
\\begin{threeparttable}\[b\]
\\caption\[\\TeX{} engine features\]{\\TeX{} engine feature comparison\\tnote{1}}
\\centering
\\begin{tabular}{lcc}
\\midrule
\\TeX{} engine & Native UTF-8 support & Unicode math support\\\\
\\midrule
\\hologo{pdfTeX} & No\\tnote{2}& No\\\\
\\Hologo{XeTeX} & Yes & Yes\\\\
\\Hologo{LuaTeX} & Yes & Yes\\\\
\\midrule
\\end{tabular}
\\begin{tablenotes}
\\item \[1\] This is an early draft.
\\item \[2\] Some UTF-8 support via \\LaTeX{} kernel commands.
\\end{tablenotes}
\\end{threeparttable}
\\end{table}
[Open this `threeparttable` example in Overleaf](https://www.overleaf.com/docs?engine=pdflatex&snip_name=threeparttable+package+example&snip=%5Cdocumentclass%7Barticle%7D%0A%25+Using+the+geometry+package+with+a+small%0A%25+page+size+to+create+the+article+graphic%0A%5Cusepackage%5Bpaperheight%3D6in%2C%0A+++paperwidth%3D5in%2C%0A+++top%3D10mm%2C%0A+++bottom%3D20mm%2C%0A+++left%3D10mm%2C%0A+++right%3D10mm%5D%7Bgeometry%7D%0A%5Cusepackage%7Bhologo%7D+%25+for+TeX+engine+logos%0A%5Cusepackage%7Bbooktabs%7D+%25+for+nice+tables%0A%5Cusepackage%7Bthreeparttable%7D+%25+to+use+table+notes%0A%5Cbegin%7Bdocument%7D%0A%5Cbegin%7Btable%7D%0A++%5Cbegin%7Bthreeparttable%7D%5Bb%5D%0A+++%5Ccaption%5B%5CTeX%7B%7D+engine+features%5D%7B%5CTeX%7B%7D+engine+feature+comparison%5Ctnote%7B1%7D%7D%0A+++%5Ccentering%0A+++%5Cbegin%7Btabular%7D%7Blcc%7D%0A+++++%5Cmidrule+%0A+++++%5CTeX%7B%7D+engine+%26+Native+UTF-8+support+%26+Unicode+math+support%5C%5C%0A+++++%5Cmidrule%0A+++++++%5Chologo%7BpdfTeX%7D+%26+No%5Ctnote%7B2%7D%26+No%5C%5C%0A+++++++%5CHologo%7BXeTeX%7D+%26+Yes+%26+Yes%5C%5C%0A+++++++%5CHologo%7BLuaTeX%7D+%26+Yes+%26+Yes%5C%5C%0A+++++++%5Cmidrule+%0A+++++%5Cend%7Btabular%7D%0A+++++%5Cbegin%7Btablenotes%7D%0A+++++++%5Citem+%5B1%5D+This+is+an+early+draft.%0A+++++++%5Citem+%5B2%5D+Some+UTF-8+support+via+%5CLaTeX%7B%7D+kernel+commands.%0A+++++%5Cend%7Btablenotes%7D%0A++%5Cend%7Bthreeparttable%7D%0A%5Cend%7Btable%7D%0A%5Cend%7Bdocument%7D)
This example produces the following output
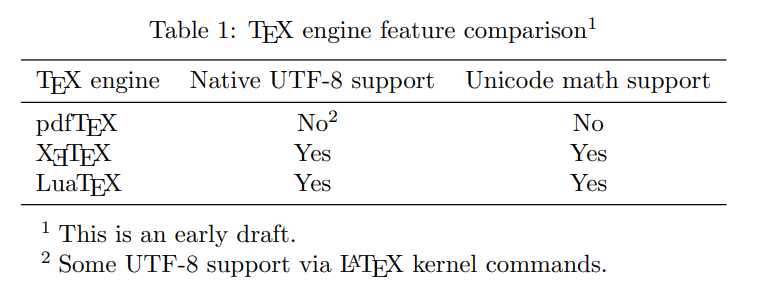
### Discussions on tex.stackexchange
Table footnotes are also discussed on tex.stackexchange and various solutions outlined in threads, such as the following, which readers may be interested to explore:
* [footnotes for tables in LaTeX](https://stackoverflow.com/questions/2888817/footnotes-for-tables-in-latex)
, and
* [footnote in table](https://tex.stackexchange.com/questions/35615/footnote-in-table/35669)
.
Further reading
---------------
For more information see:
* [Margin notes](https://www.overleaf.com/learn/latex/Margin_notes "Margin notes")
* [Page size and margins](https://www.overleaf.com/learn/latex/Page_size_and_margins "Page size and margins")
* [Headers and footers](https://www.overleaf.com/learn/latex/Headers_and_footers "Headers and footers")
* [Hyperlinks](https://www.overleaf.com/learn/latex/Hyperlinks "Hyperlinks")
* [Counters](https://www.overleaf.com/learn/latex/Counters "Counters")
* [Lists](https://www.overleaf.com/learn/latex/Lists "Lists")
* [Font sizes, families, and styles](https://www.overleaf.com/learn/latex/Font_sizes%2C_families%2C_and_styles "Font sizes, families, and styles")
* [Bold, italics and underlining](https://www.overleaf.com/learn/latex/Bold%2C_italics_and_underlining "Bold, italics and underlining")
* [Font typefaces](https://www.overleaf.com/learn/latex/Font_typefaces "Font typefaces")
* [Line breaks and blank spaces](https://www.overleaf.com/learn/latex/Line_breaks_and_blank_spaces "Line breaks and blank spaces")
* [Management in a large project](https://www.overleaf.com/learn/latex/Management_in_a_large_project "Management in a large project")
* [Multi-file LaTeX projects](https://www.overleaf.com/learn/latex/Multi-file_LaTeX_projects "Multi-file LaTeX projects")
* [The not so short introduction to LaTeX2ε](http://www.ctan.org/tex-archive/info/lshort/)
We only use cookies for essential purposes and to improve your experience on our site. You can find out more in our [cookie policy](https://www.overleaf.com/legal#Cookies)
.
Essential cookies onlyAccept all cookies
---
# Multi-file LaTeX projects - Overleaf, Online LaTeX Editor
[Skip to content](https://www.overleaf.com/learn/latex/Multi-file_LaTeX_projects#main-content)
Search help library…searchclear
No Search Results
Multi-file LaTeX projects
=========================
Contents
--------
* [1 Introduction](https://www.overleaf.com/learn/latex/Multi-file_LaTeX_projects#Introduction)
* [2 Notes on \\documentclass in Overleaf .tex files](https://www.overleaf.com/learn/latex/Multi-file_LaTeX_projects#Notes_on_\documentclass_in_Overleaf_.tex_files)
* [3 The subfiles package](https://www.overleaf.com/learn/latex/Multi-file_LaTeX_projects#The_subfiles_package)
* [3.1 The main file](https://www.overleaf.com/learn/latex/Multi-file_LaTeX_projects#The_main_file)
* [3.2 The subfiles](https://www.overleaf.com/learn/latex/Multi-file_LaTeX_projects#The_subfiles)
* [4 The standalone package](https://www.overleaf.com/learn/latex/Multi-file_LaTeX_projects#The_standalone_package)
* [4.1 The main file](https://www.overleaf.com/learn/latex/Multi-file_LaTeX_projects#The_main_file_2)
* [4.2 The subfiles](https://www.overleaf.com/learn/latex/Multi-file_LaTeX_projects#The_subfiles_2)
* [5 Further reading](https://www.overleaf.com/learn/latex/Multi-file_LaTeX_projects#Further_reading)
Introduction
------------
In [large LaTeX documents](https://www.overleaf.com/learn/latex/Management_in_a_large_project "Management in a large project")
one usually has several `.tex` files, one for each chapter or section, and then they are joined together to generate a single output. This helps to keep everything organized and makes easier to debug the document, but as the document gets larger the compilation takes longer. This can be frustrating since one is usually only interested in working in a particular file each time.
The natural approach to overcome this is to compile each file separately. There are two main packages that allow compilation of single files in a multi-file project. The choice you make depends on what you need.
* With [the **subfiles** package](https://www.overleaf.com/learn/latex/Multi-file_LaTeX_projects#The_subfiles_package)
you can compile every subfile independently and each subfile will automatically use the preamble in the main file.
* With [the **standalone** package](https://www.overleaf.com/learn/latex/Multi-file_LaTeX_projects#The_standalone_package)
every subfile works as an independent file, subfiles can be latter joined in a main document that will pull the preambles from each one of them. Especially useful if you need to reuse the same file in more than one document, a tikz picture is a good example of this.
Notes on `\documentclass` in Overleaf `.tex` files
--------------------------------------------------
As demonstrated in the following video clip, even if you have set your project's main `.tex` file you can select another file to compile—provided it contains a `\documentclass` declaration. However, to ensure all elements of your project are compiled correctly—such as glossaries, accessing paths to `.bib` files etc.—we strongly recommend that you only compile files contained in the root directory of your project.
The `subfiles` package
----------------------
This package is suitable for most of the situations, it's really easy to use.
The examples in this section have the next hierarchical file structure:
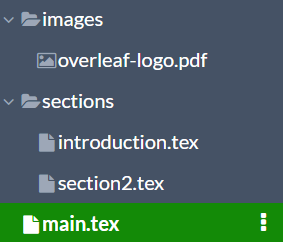
### The main file
In the main file two special commands are needed.
\\documentclass{article}
\\usepackage{graphicx}
\\graphicspath{{images/}}
\\usepackage{blindtext}
\\usepackage{subfiles} % Best loaded last in the preamble
\\title{Subfiles package example}
\\author{Overleaf}
\\date{ }
\\begin{document}
\\maketitle
\\section{Introduction}
\\subfile{sections/introduction}
\\section{Second section}
\\subfile{sections/section2}
\\end{document}
Per-file compilation requires the line
\\usepackage{subfiles}
in the preamble, this enables the `subfiles` package. Then each external sub-file must be imported with the command `\subfile{}`. In the example the files `introduction.tex` and `section2.tex` are imported into the main file from the `sections` folder. Notice that the file extension is not mandatory.
[Open a `subfiles` package example in Overleaf](https://www.overleaf.com/project/new/template/19626?id=66392908&templateName=Subfiles+package+example&latexEngine=pdflatex&texImage=texlive-full%3A2020.1&mainFile=)
### The subfiles
Once you have set up your main file, each subfile must have a special structure.
\\documentclass\[../main.tex\]{subfiles}
\\graphicspath{{\\subfix{../images/}}}
\\begin{document}
\\textbf{Hello world!}
\\begin{figure}\[bh\]
\\centering
\\includegraphics\[width=3cm\]{overleaf-logo}
\\label{fig:img1}
\\caption{Overleaf logo}
\\end{figure}
Hello, here is some text without a meaning...
\\end{document}
Now this file can be compiled as a standalone file, the document class and the rest of the preamble will be the same defined in the main document.
The first command here is
\\documentclass\[../main.tex\]{subfiles}
the parameter inside brackets, `../main.tex`, is the relative path to the main document. In this case the file `introduction.tex` is inside the folder `sections`, hence the file `main.tex` is one level up the current folder (this is what `../` means).
You will also need to use the `\subfix` command with the relative folder path when specifying `\graphicspath` in `introduction.tex`:
\\graphicspath{{\\subfix{../images/}}}
Then the actual contents is typed inside `\begin{document}` and `\end{document}`. Everything outside this environment will be ignored, or more specifically, will be considered as part of the preamble. Avoid leaving blank lines at the top and bottom of the file.
[Open a `subfiles` package example in Overleaf](https://www.overleaf.com/project/new/template/19626?id=66392908&templateName=Subfiles+package+example&latexEngine=pdflatex&texImage=texlive-full%3A2020.1&mainFile=)
The `standalone` package
------------------------
The package **standalone** provides the same functionality as **subfiles** and is more flexible, but the syntax is more complex and prone to errors. The main difference is that each subfile has its own preamble.
The examples in this section have the next hierarchical file structure:
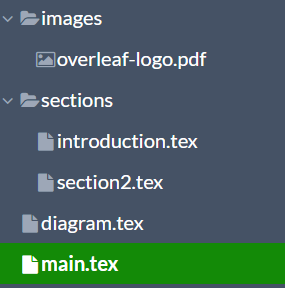
### The main file
The main file is very similar to that of any other project with multiple files.
\\documentclass{article}
\\usepackage\[subpreambles=true\]{standalone}
\\usepackage{import}
\\title{Standalone package example}
\\author{Overleaf}
\\date{May 2021}
\\begin{document}
\\maketitle
\\section{First section}
\\import{sections/}{introduction}
\\section{Second section}
\\import{sections/}{section2}
\\end{document}
The line
\\usepackage\[subpreambles=true\]{standalone}
enables the **standalone** package, it should be placed early in the document. The parameter inside brackets tells LaTeX to import the preamble from each subfile (packages are imported only once), if omitted, make sure you have all the necessary commands in the main document preamble for the subfiles to work. One must be careful because of possible incompatibilities in the different preambles.
In the body of the main document, each subfile is imported with `\import{}{}`. The standard `\input{}` command can also be used, but the one in this example is recommended to [manage large projects](https://www.overleaf.com/learn/latex/Management_in_a_large_project "Management in a large project")
because it prevents errors in nested files.
[Open an example of the `standalone` package in Overleaf](https://www.overleaf.com/project/new/template/19636?id=66440758&templateName=Standalone+package+example&latexEngine=pdflatex&texImage=&mainFile=)
### The subfiles
Each subfile must have its own preamble and import all packages needed to work as standalone document.
\\documentclass\[class=article, crop=false\]{standalone}
\\usepackage\[subpreambles=true\]{standalone}
\\usepackage{import}
\\usepackage{blindtext}
\\begin{document}
A TikZ figure will be rendered below this line
\\begin{figure}\[ht\]
\\centering
\\subimport{../}{diagram.tex}
\\label{fig:tikzexample}
\\caption{A nice simple diagram}
\\end{figure}
\\blindtext
\\end{document}
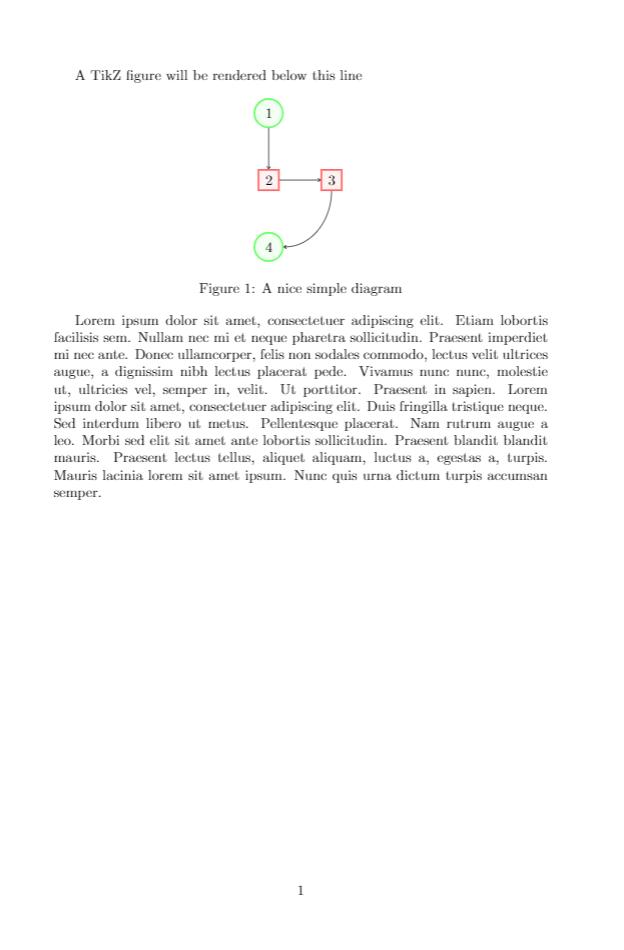
The first line in the subfile is
\\documentclass\[class=article, crop=false\]{standalone}
This declares that this is a file to be used with the **standalone** package, there are two optional parameters inside the brackets.
* `class=article`. Sets `article` as underlying class, any other class can be used: book, report, etc. (except beamer).
* `crop=false`. If this option is omitted the output will be cropped to a minimum size.
The next command is not mandatory
\\usepackage\[subpreambles=true\]{standalone}
but hast to be used in this example because there's a nested **standalone** file here. A [tikz picture](https://www.overleaf.com/learn/latex/TikZ_package "TikZ package")
is inserted with [`\subimport{../}{diagram.tex}`](https://www.overleaf.com/learn/latex/Management_in_a_large_project%23Importing_files "Management in a large project")
, you can see the contents of the file "diagram.tex" below:
\\documentclass{standalone}
\\usepackage{tikz}
\\usetikzlibrary{positioning}
\\begin{document}
\\begin{tikzpicture}\[\
roundnode/.style={circle, draw=green!60, fill=green!5, very thick, minimum size=7mm},\
squarednode/.style={rectangle, draw=red!60, fill=red!5, very thick, minimum size=5mm},\
\]
%Nodes
\\node\[squarednode\] (maintopic) {2};
\\node\[roundnode\] (uppercircle) \[above=of maintopic\] {1};
\\node\[squarednode\] (rightsquare) \[right=of maintopic\] {3};
\\node\[roundnode\] (lowercircle) \[below=of maintopic\] {4};
%Lines
\\draw\[->\] (uppercircle.south) -- (maintopic.north);
\\draw\[->\] (maintopic.east) -- (rightsquare.west);
\\draw\[->\] (rightsquare.south) .. controls +(down:7mm) and +(right:7mm) .. (lowercircle.east);
\\end{tikzpicture}
\\end{document}
[Open this Standalone TikZ example in Overleaf](https://www.overleaf.com/docs?engine=pdflatex&snip_name=Standalone+TikZ+example&snip=%5Cdocumentclass%7Bstandalone%7D%0A%5Cusepackage%7Btikz%7D%0A%5Cusetikzlibrary%7Bpositioning%7D%0A%5Cbegin%7Bdocument%7D%0A%0A%5Cbegin%7Btikzpicture%7D%5B%0Aroundnode%2F.style%3D%7Bcircle%2C+draw%3Dgreen%2160%2C+fill%3Dgreen%215%2C+very+thick%2C+minimum+size%3D7mm%7D%2C%0Asquarednode%2F.style%3D%7Brectangle%2C+draw%3Dred%2160%2C+fill%3Dred%215%2C+very+thick%2C+minimum+size%3D5mm%7D%2C%0A%5D%0A%25Nodes%0A%5Cnode%5Bsquarednode%5D++++++%28maintopic%29++++++++++++++++++++++++++++++%7B2%7D%3B%0A%5Cnode%5Broundnode%5D++++++++%28uppercircle%29+++++++%5Babove%3Dof+maintopic%5D+%7B1%7D%3B%0A%5Cnode%5Bsquarednode%5D++++++%28rightsquare%29+++++++%5Bright%3Dof+maintopic%5D+%7B3%7D%3B%0A%5Cnode%5Broundnode%5D++++++++%28lowercircle%29+++++++%5Bbelow%3Dof+maintopic%5D+%7B4%7D%3B%0A%0A%25Lines%0A%5Cdraw%5B-%3E%5D+%28uppercircle.south%29+--+%28maintopic.north%29%3B%0A%5Cdraw%5B-%3E%5D+%28maintopic.east%29+--+%28rightsquare.west%29%3B%0A%5Cdraw%5B-%3E%5D+%28rightsquare.south%29+..+controls+%2B%28down%3A7mm%29+and+%2B%28right%3A7mm%29+..+%28lowercircle.east%29%3B%0A%0A%5Cend%7Btikzpicture%7D%0A%5Cend%7Bdocument%7D)
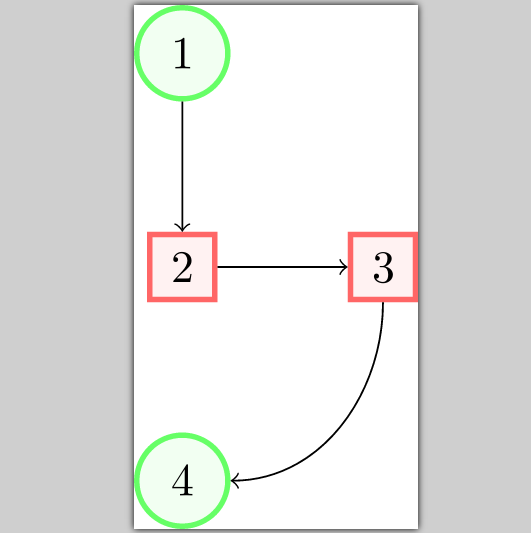
This is the main feature in **standalone**, you can import this file in any other document and recycle the code. For instance, this diagram can later be used in a presentation without further changes.
[Open an example of the `standalone` package in Overleaf](https://www.overleaf.com/project/new/template/19636?id=66440758&templateName=Standalone+package+example&latexEngine=pdflatex&texImage=&mainFile=)
Further reading
---------------
For more information see
* [Management in a large project](https://www.overleaf.com/learn/latex/Management_in_a_large_project "Management in a large project")
* [Cross referencing sections and equations](https://www.overleaf.com/learn/latex/Cross_referencing_sections_and_equations "Cross referencing sections and equations")
* [Indices](https://www.overleaf.com/learn/latex/Indices "Indices")
* [Glossaries](https://www.overleaf.com/learn/latex/Glossaries "Glossaries")
* [Hyperlinks](https://www.overleaf.com/learn/latex/Hyperlinks "Hyperlinks")
* [Page numbering](https://www.overleaf.com/learn/latex/Page_numbering "Page numbering")
* [Single sided and double sided documents](https://www.overleaf.com/learn/latex/Single_sided_and_double_sided_documents "Single sided and double sided documents")
* [Multiple columns](https://www.overleaf.com/learn/latex/Multiple_columns "Multiple columns")
* [Paragraph formatting](https://www.overleaf.com/learn/latex/Paragraph_formatting "Paragraph formatting")
* [Page size and margins](https://www.overleaf.com/learn/latex/Page_size_and_margins "Page size and margins")
* [Counters](https://www.overleaf.com/learn/latex/Counters "Counters")
* [Margin notes](https://www.overleaf.com/learn/latex/Margin_notes "Margin notes")
* [Bold, italics and underlining](https://www.overleaf.com/learn/latex/Bold%2C_italics_and_underlining "Bold, italics and underlining")
* [Font sizes, families, and styles](https://www.overleaf.com/learn/latex/Font_sizes%2C_families%2C_and_styles "Font sizes, families, and styles")
* [Font typefaces](https://www.overleaf.com/learn/latex/Font_typefaces "Font typefaces")
* [Supporting modern fonts with XeLaTeX](https://www.overleaf.com/learn/latex/XeLaTeX "XeLaTeX")
* [International language support](https://www.overleaf.com/learn/latex/International_language_support "International language support")
* [Font sizes, families, and styles](https://www.overleaf.com/learn/latex/Font_sizes%2C_families%2C_and_styles "Font sizes, families, and styles")
* [Compiling big projects](https://www.overleaf.com/learn/latex/Debugging_Compilation_timeout_errors%23Compiling_big_projects "Debugging Compilation timeout errors")
* [Inserting Images](https://docs.overleaf.com/writing-and-editing/inserting-images "Inserting Images")
* [TikZ package](https://www.overleaf.com/learn/latex/TikZ_package "TikZ package")
* [Writing your own package](https://www.overleaf.com/learn/latex/Writing_your_own_package "Writing your own package")
* [Writing your own class](https://www.overleaf.com/learn/latex/Writing_your_own_class "Writing your own class")
* [The **subfiles** package documentation](http://repositorios.cpai.unb.br/ctan/macros/latex/contrib/subfiles/subfiles.pdf)
* [The **standalone** package documentation](http://repositorios.cpai.unb.br/ctan/macros/latex/contrib/standalone/standalone.pdf)
We only use cookies for essential purposes and to improve your experience on our site. You can find out more in our [cookie policy](https://www.overleaf.com/legal#Cookies)
.
Essential cookies onlyAccept all cookies
---
# Picture environment - Overleaf, Online LaTeX Editor
[Skip to content](https://www.overleaf.com/learn/latex/Picture_environment#main-content)
Search help library…searchclear
No Search Results
Picture environment
===================
Contents
--------
* [1 Introduction](https://www.overleaf.com/learn/latex/Picture_environment#Introduction)
* [2 Creating a new picture](https://www.overleaf.com/learn/latex/Picture_environment#Creating_a_new_picture)
* [2.1 Define the size of the drawing units](https://www.overleaf.com/learn/latex/Picture_environment#Define_the_size_of_the_drawing_units)
* [2.2 Define the size of your picture](https://www.overleaf.com/learn/latex/Picture_environment#Define_the_size_of_your_picture)
* [2.2.1 Understanding the picture dimensions](https://www.overleaf.com/learn/latex/Picture_environment#Understanding_the_picture_dimensions)
* [2.3 Drawing graphics](https://www.overleaf.com/learn/latex/Picture_environment#Drawing_graphics)
* [2.4 Understanding the offset and origin](https://www.overleaf.com/learn/latex/Picture_environment#Understanding_the_offset_and_origin)
* [2.4.1 Example 1: Using the default origin](https://www.overleaf.com/learn/latex/Picture_environment#Example_1:_Using_the_default_origin)
* [2.4.2 Example 2: Shifting the origin by (1,1)](https://www.overleaf.com/learn/latex/Picture_environment#Example_2:_Shifting_the_origin_by_(1,1))
* [3 Examples of the picture environment](https://www.overleaf.com/learn/latex/Picture_environment#Examples_of_the_picture_environment)
* [3.1 Examples from the LaTeX2e unofficial reference manual](https://www.overleaf.com/learn/latex/Picture_environment#Examples_from_the_LaTeX2e_unofficial_reference_manual)
* [3.1.1 Example 1: the \\vector command](https://www.overleaf.com/learn/latex/Picture_environment#Example_1:_the_\vector_command)
* [3.1.2 Example 2: the \\qbezier, \\line, \\vector, \\thinlines and \\thicklines commands](https://www.overleaf.com/learn/latex/Picture_environment#Example_2:_the_\qbezier,_\line,_\vector,_\thinlines_and_\thicklines_commands)
* [3.1.3 Example 3: the \\multiput and \\linethickness commands](https://www.overleaf.com/learn/latex/Picture_environment#Example_3:_the_\multiput_and_\linethickness_commands)
* [3.2 Other examples](https://www.overleaf.com/learn/latex/Picture_environment#Other_examples)
* [3.2.1 A basic Bézier curve](https://www.overleaf.com/learn/latex/Picture_environment#A_basic_B%C3%A9zier_curve)
* [3.2.2 Ovals, lines and circles](https://www.overleaf.com/learn/latex/Picture_environment#Ovals,_lines_and_circles)
* [3.2.3 Combining lines, circles and text](https://www.overleaf.com/learn/latex/Picture_environment#Combining_lines,_circles_and_text)
* [3.2.4 Using arrows](https://www.overleaf.com/learn/latex/Picture_environment#Using_arrows)
* [4 Further reading](https://www.overleaf.com/learn/latex/Picture_environment#Further_reading)
Introduction
------------
LaTeX’s built-in `picture` environment can be used to create diagrams/figures—you don’t _need_ to load any external packages to use it, but packages such as [`pict2e`](https://ctan.org/pkg/pict2e?lang=en)
and [`picture`](https://ctan.org/pkg/picture)
have been written to enhance or improve its features.
This article provides a concise introduction to the `picture` environment and all examples use the [`pict2e` package](https://ctan.org/pkg/pict2e?lang=en)
. More extensive documentation and a range of helpful examples are readily available within the following resources:
* [LaTeX2e unofficial reference manual](https://latexref.xyz/picture.html)
* [The Not So Short Introduction to LaTeX2ε](https://tobi.oetiker.ch/lshort/lshort.pdf)
(see Chapter 5)
* [Wikibooks](https://en.wikibooks.org/wiki/LaTeX/Picture)
* [questions tagged `picture-mode` on tex.stackexchange](https://tex.stackexchange.com/questions/tagged/picture-mode)
* [`pict2e` package documentation](https://mirror.ox.ac.uk/sites/ctan.org/macros/latex/contrib/pict2e/pict2e.pdf)
When compared to powerful and sophisticated graphics tools such as [TikZ/PGF](https://en.wikipedia.org/wiki/PGF/TikZ)
, [MetaPost](https://tug.org/metapost.html)
, [PSTricks](https://ctan.org/topic/pstricks?lang=en)
or [Asymptote](https://ctan.org/pkg/asymptote?lang=en)
the `picture` environment may seem quite limited but, from time-to-time, it might be sufficient for what you need to do.
Creating a new picture
----------------------
Creating a new picture usually involves the following steps:
1. define the size of the drawing units you wish to use;
2. declare a `picture` environment which defines the picture size;
3. draw the individual graphic components using the `\put`, `\multiput` or `\qbezier` commands.
### Define the size of the drawing units
To create a picture you normally start by setting the _drawing units_ via the command `\unitlength`, which must be used outside a `picture` environment. For example, if you write
\\setlength{\\unitlength}{1cm}
the drawing units would be interpreted as multiples of 1cm. The default unit is 1pt.
### Define the size of your picture
The general form of the `picture` environment is as follows
\\begin{picture}(width, height)(Xoffset, Yoffset)
...
\\end{picture}
where
* `width` and `height` are values, in units of `\unitlength`, which define the size of the picture. LaTeX uses these values to create a box whose dimensions are
* box (picture) width = `width` × `\unitlength`
* box (picture) height = `height` × `\unitlength`
* `(Xoffset, Yoffset)` is an optional coordinate which sets the origin (bottom-left corner) of the picture, expressed as an _offset_ relative to the default location. `Xoffset` and `Yoffset` are also expressed in units determined by the current value of `\unitlength`.
Note that `Xoffset` and `Yoffset` do not affect the amount of space that LaTeX reserves; i.e., the box dimensions.
#### Understanding the picture dimensions
We’ll create two pictures, both using `\setlength{\unitlength}{1cm}` and each with a `width` and `height` of 3 units.
The first picture uses the default origin of `(0,0)`:
\\begin{picture}(3,3)
...
\\end{picture}
the second picture offsets (shifts) the origin by `(1,1)`:
\\begin{picture}(3,3)(1,1)
...
\\end{picture}
### Drawing graphics
Graphics are created using a sequence of `\put`, `\multiput`, or `\qbezier` commands which produce the individual “components” (or “objects”) from which the picture or illustration is constructed:
* `\put(x, y){_component_}` draws the `_component_` at location `(x, y)`.
* `\multiput(x, y)(dx, dy){n}{_component_}` draws the `_component_` `n` times: starting at location `(x, y)` and repeatedly translating by `(dx, dy)` to redraw the `_component_`.
* `\qbezier[n](x1, y1)(x, y)(x2, y2)`: draws a [quadratic Bézier curve](https://en.wikipedia.org/wiki/B%C3%A9zier_curve#Quadratic_B%C3%A9zier_curves)
where:
* `n` an optional integer which determines the number of points used plot/produce the curve
* `(x1, y1)` is the curve’s start point
* `(x2, y2)` is the curve’s end point
* `(x, y)` denotes the (quadratic) Bézier curve control point
A `_component_` is a graphical element usually produced using graphics primitives such as `\line`, `\oval`, `\circle`, `\vector` and so forth—see the [LaTeX2e unofficial reference manual](https://latexref.xyz/picture.html)
or [The Not So Short Introduction to LaTeX2ε](https://tobi.oetiker.ch/lshort/lshort.pdf)
(Chapter 5) for details of the available primitives.
**Note**: The [`pict2e` package](https://mirror.ox.ac.uk/sites/ctan.org/macros/latex/contrib/pict2e/pict2e.pdf)
extends the original `picture` environment to provide several commands for drawing Bézier curves: `\bezier`, `\qbezier`, `\cbezier` and `\qbeziermax`.
### Understanding the offset and origin
In the following examples the `\put` command is used to draw coloured dots which indicate key coordinates (positions) in the graphic. Both examples use LaTeX’s `\fbox` command to draw a border around the box LaTeX created to contain our picture, showing the _bounding box_ of the graphic.
##### Example 1: Using the default origin
\\documentclass{article}
\\usepackage\[pdftex\]{pict2e}
\\usepackage\[dvipsnames\]{xcolor}
\\begin{document}
\\setlength{\\unitlength}{1cm}
\\setlength{\\fboxsep}{0pt}
This is my picture\\fbox{%
\\begin{picture}(3,3)
\\put(0,0){{\\color{blue}\\circle\*{0.25}}\\hbox{\\kern3pt \\texttt{(0,0)}}}
\\put(3,3){{\\color{red}\\circle\*{0.25}}\\hbox{\\kern3pt \\texttt{(3,3)}}}
\\end{picture}}
\\end{document}
[Open this example in Overleaf](https://www.overleaf.com/docs?engine=pdflatex&snip_name=understanding+picture+dimensions+example+1&snip=%5Cdocumentclass%7Barticle%7D%0A%5Cusepackage%5Bpdftex%5D%7Bpict2e%7D%0A%5Cusepackage%5Bdvipsnames%5D%7Bxcolor%7D%0A%5Cbegin%7Bdocument%7D%0A%5Csetlength%7B%5Cunitlength%7D%7B1cm%7D%0A%5Csetlength%7B%5Cfboxsep%7D%7B0pt%7D%0A%0AThis+is+my+picture%5Cfbox%7B%25%0A%5Cbegin%7Bpicture%7D%283%2C3%29%0A%5Cput%280%2C0%29%7B%7B%5Ccolor%7Bblue%7D%5Ccircle%2A%7B0.25%7D%7D%5Chbox%7B%5Ckern3pt+%5Ctexttt%7B%280%2C0%29%7D%7D%7D%0A%5Cput%283%2C3%29%7B%7B%5Ccolor%7Bred%7D%5Ccircle%2A%7B0.25%7D%7D%5Chbox%7B%5Ckern3pt+%5Ctexttt%7B%283%2C3%29%7D%7D%7D%0A%5Cend%7Bpicture%7D%7D%0A%5Cend%7Bdocument%7D)
This example produces the following output:
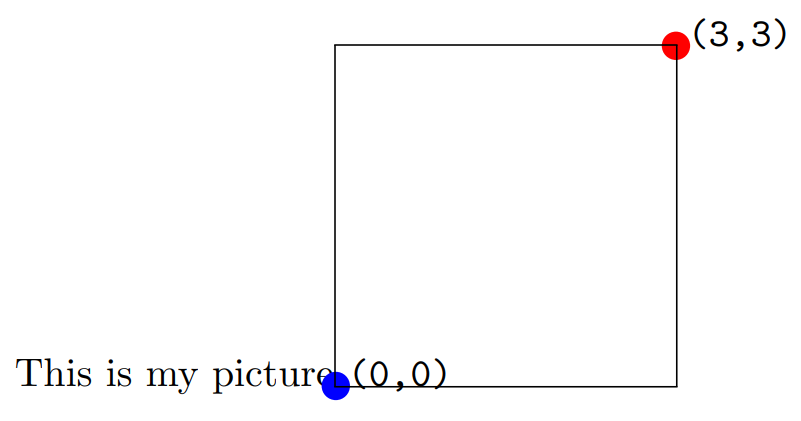
The `\fbox` command draws a border around the bounding box of the graphic, showing the space (area) reserved by LaTeX:
* picture width = `width` × `\unitlength` = 3 × 1cm = 3cm.
* picture height = `height` × `\unitlength` = 3 × 1cm = 3cm.
The first example shows that the origin, `(0,0)`, is at the point the `\begin{picture}` command was executed, immediately after the text “This is my picture”. In addition, the top-right corner is at position `(3,3)`, the `(width,height)` values provided to `\begin{picture}(3,3)`.
##### Example 2: Shifting the origin by `(1,1)`
\\documentclass{article}
\\usepackage\[pdftex\]{pict2e}
\\usepackage\[dvipsnames\]{xcolor}
\\begin{document}
\\setlength{\\unitlength}{1cm}
\\setlength{\\fboxsep}{0pt}
This is my picture\\fbox{%
\\begin{picture}(3,3)(1,1)
\\put(0,0){{\\color{blue}\\circle\*{0.25}}\\hbox{\\kern3pt\\texttt{(0,0)}}}
\\put(1,1){{\\color{orange}\\circle\*{0.25}}\\hbox{\\kern3pt\\texttt{(1,1)}}}
\\put(3,3){{\\color{red}\\circle\*{0.25}}\\hbox{\\kern3pt\\texttt{(3,3)}}}
\\put(4,4){{\\color{black}\\circle\*{0.25}}\\hbox{\\kern3pt\\texttt{(4,4)}}}
\\end{picture}}
\\end{document}
[Open this example in Overleaf](https://www.overleaf.com/docs?engine=pdflatex&snip_name=understanding+picture+dimensions+example+2&snip=%5Cdocumentclass%7Barticle%7D%0A%5Cusepackage%5Bpdftex%5D%7Bpict2e%7D%0A%5Cusepackage%5Bdvipsnames%5D%7Bxcolor%7D%0A%5Cbegin%7Bdocument%7D%0A%5Csetlength%7B%5Cunitlength%7D%7B1cm%7D%0A%5Csetlength%7B%5Cfboxsep%7D%7B0pt%7D%0A%0AThis+is+my+picture%5Cfbox%7B%25%0A%5Cbegin%7Bpicture%7D%283%2C3%29%281%2C1%29%0A%5Cput%280%2C0%29%7B%7B%5Ccolor%7Bblue%7D%5Ccircle%2A%7B0.25%7D%7D%5Chbox%7B%5Ckern3pt%5Ctexttt%7B%280%2C0%29%7D%7D%7D%0A%5Cput%281%2C1%29%7B%7B%5Ccolor%7Borange%7D%5Ccircle%2A%7B0.25%7D%7D%5Chbox%7B%5Ckern3pt%5Ctexttt%7B%281%2C1%29%7D%7D%7D%0A%5Cput%283%2C3%29%7B%7B%5Ccolor%7Bred%7D%5Ccircle%2A%7B0.25%7D%7D%5Chbox%7B%5Ckern3pt%5Ctexttt%7B%283%2C3%29%7D%7D%7D%0A%5Cput%284%2C4%29%7B%7B%5Ccolor%7Bblack%7D%5Ccircle%2A%7B0.25%7D%7D%5Chbox%7B%5Ckern3pt%5Ctexttt%7B%284%2C4%29%7D%7D%7D%0A%5Cend%7Bpicture%7D%7D%0A%5Cend%7Bdocument%7D)
This example produces the following output:
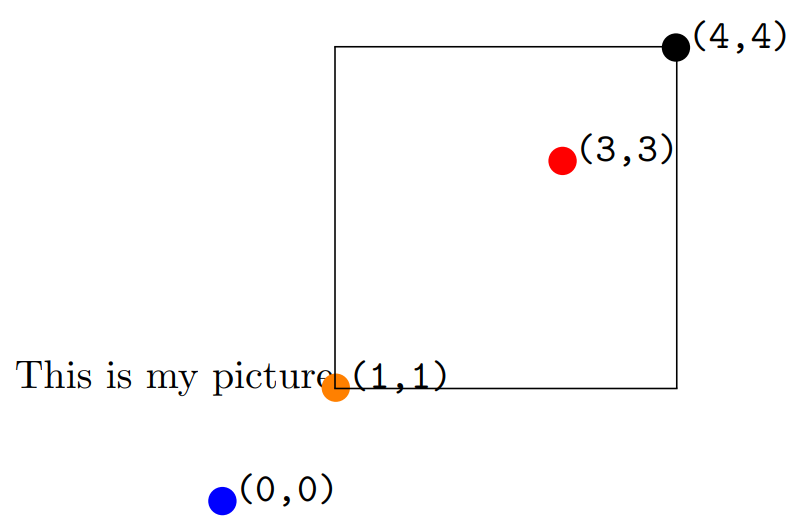
The second example shows the effects of shifting the origin and highlights some key points:
* the border created by `\fbox` shows that the bounding box of the graphic, the width and height of the box created by LaTeX, is _unaffected_ by shifting the origin: it is still determined by the `(width,height)` values provided to `\begin{picture}(3,3)(1,1)`
* picture width = `width` × `\unitlength` = 3 × 1cm = 3cm
* picture height = `height` × `\unitlength` = 3 × 1cm = 3cm
* the drawing elements are not restricted (clipped) to the area (bounding box dimensions) created by LaTeX. For example, the blue dot and `(0,0)` coordinate are drawn outside the boundary line produced by `\fbox`, which indicates the bounding box.
* It is up to the user to ensure the drawing elements stay within the bounding box and do not overlay any surrounding text.
* the origin, `(0,0)`, is _no longer_ located immediately after the text “This is my picture”, at the point the `\begin{picture}` command was executed: the origin is now shifted 1 unit to the left and 1 unit downwards
* the top-right corner is now at position `(4,4)`
Examples of the `picture` environment
-------------------------------------
### Examples from the LaTeX2e unofficial reference manual
The [LaTeX2e unofficial reference manual](https://latexref.xyz/picture.html)
contains a number of `picture` environment examples, some of which are reproduced here together with links which open them in Overleaf, allowing you to edit and explore the code.
#### Example 1: the `\vector` command
\\documentclass{article}
\\usepackage\[pdftex\]{pict2e}
\\begin{document}
\\setlength{\\unitlength}{1cm}
\\begin{picture}(6,6) % picture box will be 6cm wide by 6cm tall
\\put(0,0){\\vector(2,1){4}} % for every 2 over this vector goes 1 up
\\put(2,1){\\makebox(0,0)\[l\]{\\ first leg}}
\\put(4,2){\\vector(1,2){2}}
\\put(5,4){\\makebox(0,0)\[l\]{\\ second leg}}
\\put(0,0){\\vector(1,1){6}}
\\put(3,3){\\makebox(0,0)\[r\]{sum\\ }}
\\end{picture}
\\end{document}
[Open this example in Overleaf](https://www.overleaf.com/docs?engine=pdflatex&snip_name=picture+environment+example&snip=%5Cdocumentclass%7Barticle%7D%0A%5Cusepackage%5Bpdftex%5D%7Bpict2e%7D%0A%5Cbegin%7Bdocument%7D%0A%5Csetlength%7B%5Cunitlength%7D%7B1cm%7D%0A%5Cbegin%7Bpicture%7D%286%2C6%29++++++%25+picture+box+will+be+6cm+wide+by+6cm+tall%0A++%5Cput%280%2C0%29%7B%5Cvector%282%2C1%29%7B4%7D%7D++%25+for+every+2+over+this+vector+goes+1+up%0A++++%5Cput%282%2C1%29%7B%5Cmakebox%280%2C0%29%5Bl%5D%7B%5C+first+leg%7D%7D%0A++%5Cput%284%2C2%29%7B%5Cvector%281%2C2%29%7B2%7D%7D%0A++++%5Cput%285%2C4%29%7B%5Cmakebox%280%2C0%29%5Bl%5D%7B%5C+second+leg%7D%7D++%0A++%5Cput%280%2C0%29%7B%5Cvector%281%2C1%29%7B6%7D%7D%0A++++%5Cput%283%2C3%29%7B%5Cmakebox%280%2C0%29%5Br%5D%7Bsum%5C+%7D%7D++%0A%5Cend%7Bpicture%7D%0A%5Cend%7Bdocument%7D)
This example produces the following output:
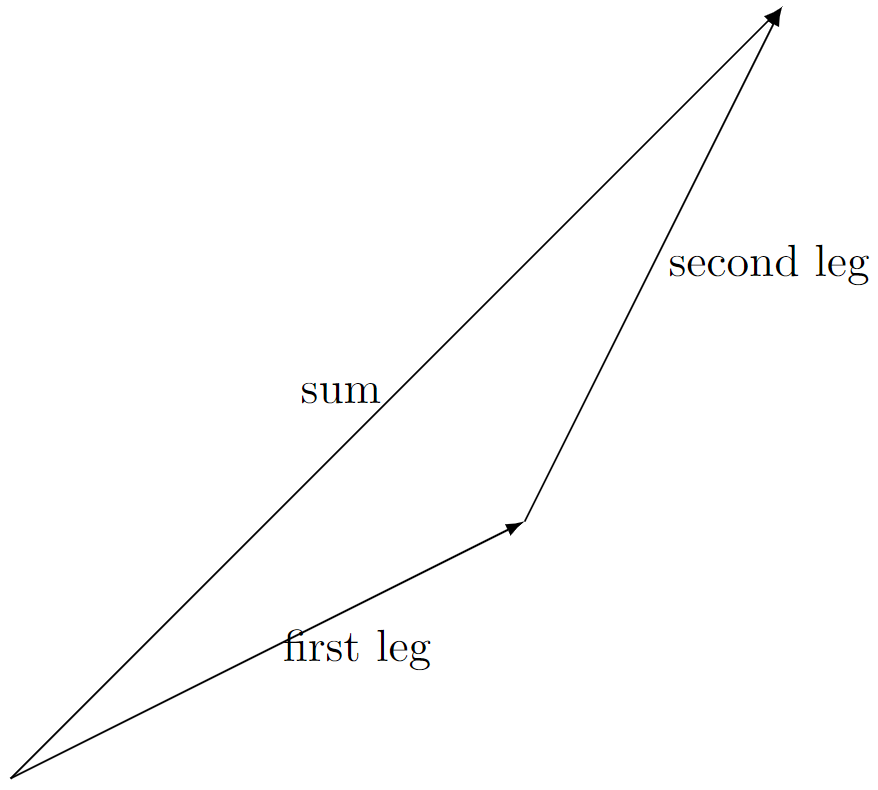
#### Example 2: the `\qbezier`, `\line`, `\vector`, `\thinlines` and `\thicklines` commands
Note how the `\qbezier` command _is not_ used within `\put{...}` whereas other primitive commands, such as `\line`, `\vector` _are_ used within `\put{...}`.
\\documentclass{article}
\\usepackage\[pdftex\]{pict2e}
\\begin{document}
\\setlength{\\unitlength}{1cm}
\\begin{picture}(8,4)
\\thinlines % Start with thin lines
\\put(0,0){\\vector(1,0){8}} % x axis
\\put(0,0){\\vector(0,1){4}} % y axis
\\put(2,0){\\line(0,1){3}} % left side
\\put(4,0){\\line(0,1){3.5}} % right side
\\thicklines % Use thicker lines for the \\qbezier commands
\\qbezier(2,3)(2.5,2.9)(3,3.25)
\\qbezier(3,3.25)(3.5,3.6)(4,3.5)
\\thinlines % Back to using thin lines
\\put(2,3){\\line(4,1){2}}
\\put(4.5,2.5){\\framebox{Trapezoidal Rule}}
\\end{picture}
\\end{document}
[Open this example in Overleaf](https://www.overleaf.com/docs?engine=pdflatex&snip_name=qbezier+picture+environment+example&snip=%5Cdocumentclass%7Barticle%7D%0A%5Cusepackage%5Bpdftex%5D%7Bpict2e%7D%0A%5Cbegin%7Bdocument%7D%0A%5Csetlength%7B%5Cunitlength%7D%7B1cm%7D%0A%5Cbegin%7Bpicture%7D%288%2C4%29%0A++%5Cthinlines+%25+Start+with+thin+lines%0A++%5Cput%280%2C0%29%7B%5Cvector%281%2C0%29%7B8%7D%7D++%25+x+axis%0A++%5Cput%280%2C0%29%7B%5Cvector%280%2C1%29%7B4%7D%7D++%25+y+axis%0A++%5Cput%282%2C0%29%7B%5Cline%280%2C1%29%7B3%7D%7D++++%25+left+side%0A++%5Cput%284%2C0%29%7B%5Cline%280%2C1%29%7B3.5%7D%7D++%25+right+side%0A++%5Cthicklines+%25+Use+thicker+lines+for+the+%5Cqbezier+commands%0A++%5Cqbezier%282%2C3%29%282.5%2C2.9%29%283%2C3.25%29%0A++%5Cqbezier%283%2C3.25%29%283.5%2C3.6%29%284%2C3.5%29%0A++%5Cthinlines+%25+Back+to+using+thin+lines%0A++%5Cput%282%2C3%29%7B%5Cline%284%2C1%29%7B2%7D%7D%0A++%5Cput%284.5%2C2.5%29%7B%5Cframebox%7BTrapezoidal+Rule%7D%7D%0A%5Cend%7Bpicture%7D%0A%5Cend%7Bdocument%7D)
This example produces the following output:
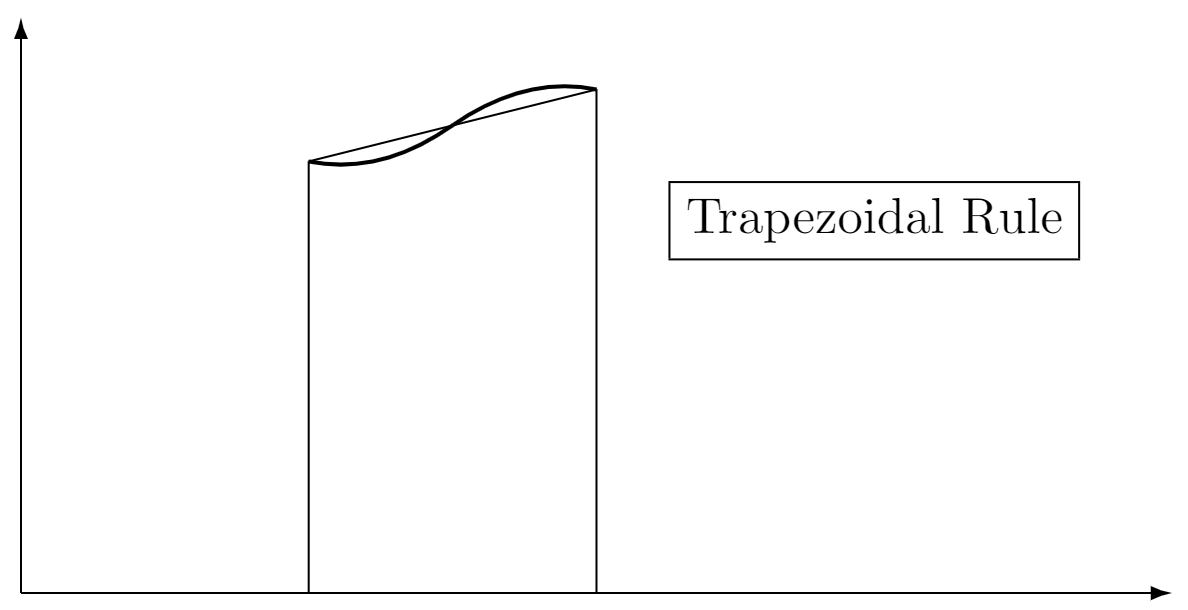
#### Example 3: the `\multiput` and `\linethickness` commands
\\documentclass{article}
\\usepackage\[pdftex\]{pict2e}
\\begin{document}
\\setlength{\\unitlength}{1cm}
\\thicklines
\\begin{picture}(10,10)
\\linethickness{0.05mm}
\\multiput(0,0)(1,0){10}{\\line(0,1){10}}
\\multiput(0,0)(0,1){10}{\\line(1,0){10}}
\\linethickness{0.5mm}
\\multiput(0,0)(5,0){3}{\\line(0,1){10}}
\\multiput(0,0)(0,5){3}{\\line(1,0){10}}
\\end{picture}
\\end{document}
[Open this example in Overleaf](https://www.overleaf.com/docs?engine=pdflatex&snip_name=multiput+command+picture+environment+example&snip=%5Cdocumentclass%7Barticle%7D%0A%5Cusepackage%5Bpdftex%5D%7Bpict2e%7D%0A%5Cbegin%7Bdocument%7D%0A%5Csetlength%7B%5Cunitlength%7D%7B1cm%7D%0A%5Cthicklines%0A%5Cbegin%7Bpicture%7D%2810%2C10%29%0A++%5Clinethickness%7B0.05mm%7D%0A++%5Cmultiput%280%2C0%29%281%2C0%29%7B10%7D%7B%5Cline%280%2C1%29%7B10%7D%7D+%0A++%5Cmultiput%280%2C0%29%280%2C1%29%7B10%7D%7B%5Cline%281%2C0%29%7B10%7D%7D%0A++%5Clinethickness%7B0.5mm%7D%0A++%5Cmultiput%280%2C0%29%285%2C0%29%7B3%7D%7B%5Cline%280%2C1%29%7B10%7D%7D%0A++%5Cmultiput%280%2C0%29%280%2C5%29%7B3%7D%7B%5Cline%281%2C0%29%7B10%7D%7D%0A%5Cend%7Bpicture%7D%0A%5Cend%7Bdocument%7D)
This example produces the following output:
### Other examples
#### A basic Bézier curve
The following example uses the `\qbezier` command to draw a Bézier curve:
\\qbezier(1,1)(5,5)(9,0.5)
Note the following:
* the `\qbezier` command is not used within a `\put` command
* the Bézier curve start point is `(1,1)`
* the Bézier curve end point is `(9,0.5)`
* the Bézier curve control point is `(5,5)`
* we do not use the optional integer which determines the number of points used plot/produce the Bézier curve
\\documentclass{article}
\\usepackage\[pdftex\]{pict2e}
\\begin{document}
\\setlength{\\unitlength}{0.8cm}
\\begin{picture}(10,5)
\\thicklines
\\qbezier(1,1)(5,5)(9,0.5)
\\put(2,1){{Bézier curve}}
\\end{picture}
\\end{document}
[Open this example in Overleaf](https://www.overleaf.com/docs?engine=pdflatex&snip_name=multiput+command+picture+environment+example&snip=%5Cdocumentclass%7Barticle%7D%0A%5Cusepackage%5Bpdftex%5D%7Bpict2e%7D%0A%5Cbegin%7Bdocument%7D%0A%5Csetlength%7B%5Cunitlength%7D%7B0.8cm%7D%0A%5Cbegin%7Bpicture%7D%2810%2C5%29%0A%5Cthicklines%0A%5Cqbezier%281%2C1%29%285%2C5%29%289%2C0.5%29%0A%5Cput%282%2C1%29%7B%7BB%C3%A9zier+curve%7D%7D%0A%5Cend%7Bpicture%7D%0A%5Cend%7Bdocument%7D)
This example produces the following output:
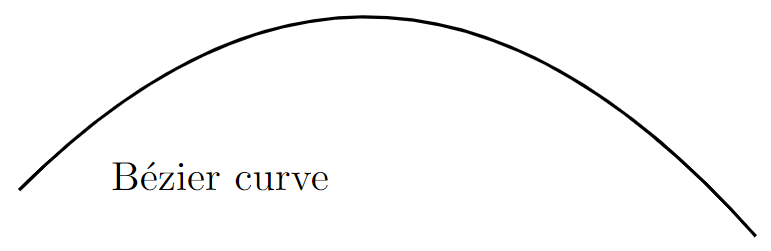
#### Ovals, lines and circles
The following example demonstrates the `\line`, `\circle` and `\oval` commands and—note how they _are_ all used within the `\put{...}` command:
\\documentclass{article}
\\usepackage\[pdftex\]{pict2e}
\\begin{document}
\\setlength{\\unitlength}{1cm}
\\thicklines
\\begin{picture}(10,6)
\\put(2,2.2){\\line(1,0){6}}
\\put(2,2.2){\\circle{2}}
\\put(6,2.2){\\oval(4,2)\[r\]}
\\end{picture}
\\end{document}
[Open this example in Overleaf](https://www.overleaf.com/docs?engine=pdflatex&snip_name=picture+environment+example&snip=%5Cdocumentclass%7Barticle%7D%0A%5Cusepackage%5Bpdftex%5D%7Bpict2e%7D%0A%5Cbegin%7Bdocument%7D%0A%5Csetlength%7B%5Cunitlength%7D%7B1cm%7D%0A%5Cthicklines%0A%5Cbegin%7Bpicture%7D%2810%2C6%29%0A%5Cput%282%2C2.2%29%7B%5Cline%281%2C0%29%7B6%7D%7D%0A%5Cput%282%2C2.2%29%7B%5Ccircle%7B2%7D%7D%0A%5Cput%286%2C2.2%29%7B%5Coval%284%2C2%29%5Br%5D%7D%0A%5Cend%7Bpicture%7D%0A%5Cend%7Bdocument%7D)
This example produces the following output:
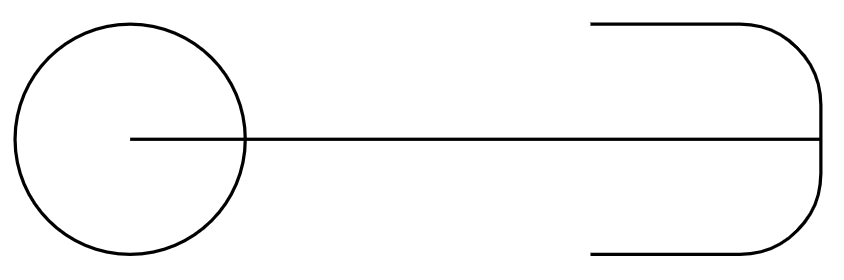
Below is a description of the commands:
* `\put(2,2.2){\line(1,0){6}}`: draws a line `6` units long using the “direction vector” `(1,0)`
* `\put(6,2.2){\oval(4,2)[r]}`: draws an oval centred in the point `(4,2)`. The parameter `[r]` is optional, you can use `r`, `l`, `t` and `b` to show the right, left, top or bottom part of the oval.
* `\put(2,2.2){\circle{2}}`: draws a circle centred at the point `(2,2.2)` and whose diameter is `2`.
#### Combining lines, circles and text
Different basic elements can be combined to create more complex pictures. In this example several lines and circles are combined to create a picture, together with text to label the points:
\\documentclass{article}
\\usepackage\[pdftex\]{pict2e}
\\begin{document}
\\setlength{\\unitlength}{0.8cm}
\\begin{picture}(12,4)
\\thicklines
\\put(8,3.3){{\\footnotesize $3$\-simplex}}
\\put(9,3){\\circle\*{0.1}}
\\put(8.3,2.9){$a\_2$}
\\put(8,1){\\circle\*{0.1}}
\\put(7.7,0.5){$a\_0$}
\\put(10,1){\\circle\*{0.1}}
\\put(9.7,0.5){$a\_1$}
\\put(11,1.66){\\circle\*{0.1}}
\\put(11.1,1.5){$a\_3$}
\\put(9,3){\\line(3,-2){2}}
\\put(10,1){\\line(3,2){1}}
\\put(8,1){\\line(1,0){2}}
\\put(8,1){\\line(1,2){1}}
\\put(10,1){\\line(-1,2){1}}
\\end{picture}
\\end{document}
[Open this example in Overleaf](https://www.overleaf.com/docs?engine=pdflatex&snip_name=understanding+picture+dimensions+example+1&snip=%5Cdocumentclass%7Barticle%7D%0A%5Cusepackage%5Bpdftex%5D%7Bpict2e%7D%0A%5Cbegin%7Bdocument%7D%0A%5Csetlength%7B%5Cunitlength%7D%7B0.8cm%7D%0A%5Cbegin%7Bpicture%7D%2812%2C4%29%0A%5Cthicklines%0A%5Cput%288%2C3.3%29%7B%7B%5Cfootnotesize+%243%24-simplex%7D%7D%0A%5Cput%289%2C3%29%7B%5Ccircle%2A%7B0.1%7D%7D%0A%5Cput%288.3%2C2.9%29%7B%24a_2%24%7D%0A%5Cput%288%2C1%29%7B%5Ccircle%2A%7B0.1%7D%7D%0A%5Cput%287.7%2C0.5%29%7B%24a_0%24%7D%0A%5Cput%2810%2C1%29%7B%5Ccircle%2A%7B0.1%7D%7D%0A%5Cput%289.7%2C0.5%29%7B%24a_1%24%7D%0A%5Cput%2811%2C1.66%29%7B%5Ccircle%2A%7B0.1%7D%7D%0A%5Cput%2811.1%2C1.5%29%7B%24a_3%24%7D%0A%5Cput%289%2C3%29%7B%5Cline%283%2C-2%29%7B2%7D%7D%0A%5Cput%2810%2C1%29%7B%5Cline%283%2C2%29%7B1%7D%7D%0A%5Cput%288%2C1%29%7B%5Cline%281%2C0%29%7B2%7D%7D%0A%5Cput%288%2C1%29%7B%5Cline%281%2C2%29%7B1%7D%7D%0A%5Cput%2810%2C1%29%7B%5Cline%28-1%2C2%29%7B1%7D%7D%0A%5Cend%7Bpicture%7D%0A%5Cend%7Bdocument%7D)
This example produces the following output:
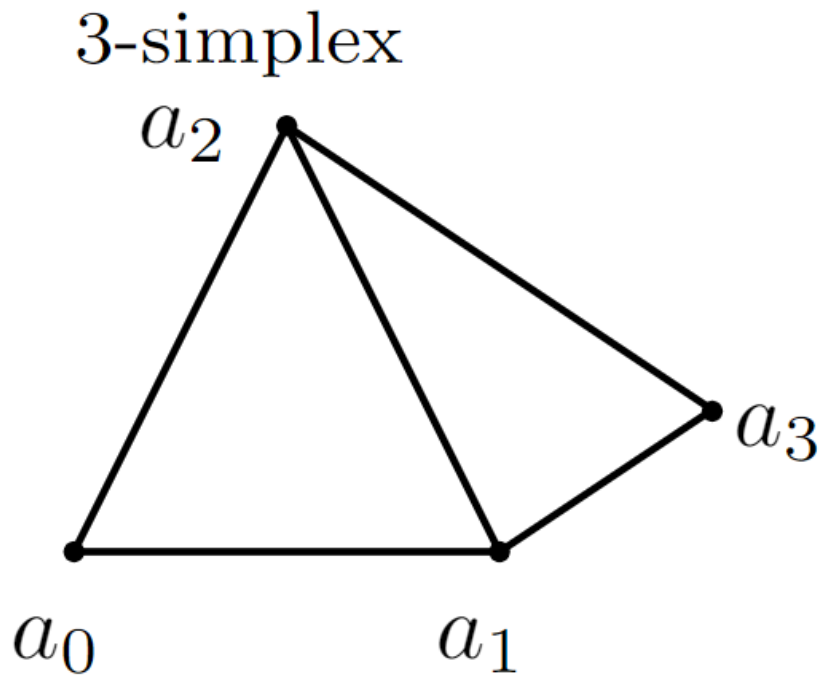
Here is a summary of some commands used:
* `\thicklines`: this increases the thickness of the lines. The `\thinlines` command has the opposite effect.
* `\put(8,3.3){{\footnotesize $3$-simplex}}`: the text “3-simplex” is inserted at the point `(8,3.3)`, the font size is set to `\footnotesize`. The same command is used to label each point.
* `\put(9,3){\circle*{0.1}}`: this draws a filled circle, centred at `(9,3)` with a small diameter of `0.1` (drawing unit) so it can be used as a point.
* `\put(10,1){\line(3,2){1}}`: creates a straight line starting at `(10,1)` and drawn in the direction of `(3,2)` with a length of 1 (drawing unit).
#### Using arrows
Arrows can also be used inside a `picture` environment so here is a second example:
\\documentclass{article}
\\usepackage\[pdftex\]{pict2e}
\\begin{document}
\\setlength{\\unitlength}{0.20mm}
\\begin{picture}(400,250)
\\put(75,10){\\line(1,0){130}}
\\put(75,50){\\line(1,0){130}}
\\put(75,200){\\line(1,0){130}}
\\put(120,200){\\vector(0,-1){150}}
\\put(190,200){\\vector(0,-1){190}}
\\put(97,120){$\\alpha$}
\\put(170,120){$\\beta$}
\\put(220,195){upper state}
\\put(220,45){lower state 1}
\\put(220,5){lower state 2}
\\end{picture}
\\end{document}
[Open this example in Overleaf](https://www.overleaf.com/docs?engine=pdflatex&snip_name=Example+of+arrows+in+LaTeX+picture+environment&snip=%5Cdocumentclass%7Barticle%7D%0A%5Cusepackage%5Bpdftex%5D%7Bpict2e%7D%0A%5Cbegin%7Bdocument%7D%0A%5Csetlength%7B%5Cunitlength%7D%7B0.20mm%7D%0A%5Cbegin%7Bpicture%7D%28400%2C250%29%0A%5Cput%2875%2C10%29%7B%5Cline%281%2C0%29%7B130%7D%7D%0A%5Cput%2875%2C50%29%7B%5Cline%281%2C0%29%7B130%7D%7D%0A%5Cput%2875%2C200%29%7B%5Cline%281%2C0%29%7B130%7D%7D%0A%5Cput%28120%2C200%29%7B%5Cvector%280%2C-1%29%7B150%7D%7D%0A%5Cput%28190%2C200%29%7B%5Cvector%280%2C-1%29%7B190%7D%7D%0A%5Cput%2897%2C120%29%7B%24%5Calpha%24%7D%0A%5Cput%28170%2C120%29%7B%24%5Cbeta%24%7D%0A%5Cput%28220%2C195%29%7Bupper+state%7D%0A%5Cput%28220%2C45%29%7Blower+state+1%7D%0A%5Cput%28220%2C5%29%7Blower+state+2%7D%0A%5Cend%7Bpicture%7D%0A%5Cend%7Bdocument%7D)
This example produces the following output:
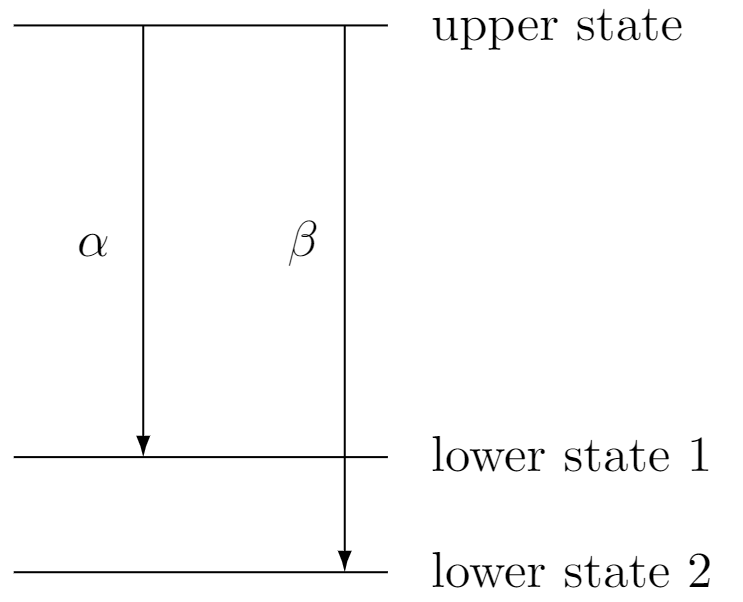
The `\vector` command uses the same syntax as `\line`:
* `\put(120,200){\vector(0,-1){150}}`: draws a vector whose start point is `(120,200)`, length is `150` and the drawing direction is `(0,-1)`.
Further reading
---------------
For more information see the following resources:
* [LaTeX2e unofficial reference manual](https://latexref.xyz/picture.html)
* [The Not So Short Introduction to LaTeX2ε](https://tobi.oetiker.ch/lshort/lshort.pdf)
(see Chapter 5)
* [Wikibooks](https://en.wikibooks.org/wiki/LaTeX/Picture)
* [questions tagged `picture-mode` on tex.stackexchange](https://tex.stackexchange.com/questions/tagged/picture-mode)
* [`pict2e` package documentation](https://mirror.ox.ac.uk/sites/ctan.org/macros/latex/contrib/pict2e/pict2e.pdf)
* [TikZ package](https://www.overleaf.com/learn/latex/TikZ_package "TikZ package")
* [Pgfplots package](https://www.overleaf.com/learn/latex/Pgfplots_package "Pgfplots package")
* [Positioning images and tables](https://www.overleaf.com/learn/latex/Positioning_images_and_tables "Positioning images and tables")
* [Lists of tables and figures](https://www.overleaf.com/learn/latex/Lists_of_tables_and_figures "Lists of tables and figures")
We only use cookies for essential purposes and to improve your experience on our site. You can find out more in our [cookie policy](https://www.overleaf.com/legal#Cookies)
.
Essential cookies onlyAccept all cookies
---
# Spacing in math mode - Overleaf, Online LaTeX Editor
[Skip to content](https://www.overleaf.com/learn/latex/Spacing_in_math_mode#main-content)
Search help library…searchclear
No Search Results
Spacing in math mode
====================
This article explains how to insert spaces of different widths in math mode.
Contents
--------
* [1 Introduction](https://www.overleaf.com/learn/latex/Spacing_in_math_mode#Introduction)
* [2 Spaces](https://www.overleaf.com/learn/latex/Spacing_in_math_mode#Spaces)
* [3 Operators spacing](https://www.overleaf.com/learn/latex/Spacing_in_math_mode#Operators_spacing)
* [4 User-defined binary and relational operators](https://www.overleaf.com/learn/latex/Spacing_in_math_mode#User-defined_binary_and_relational_operators)
* [5 Reference guide](https://www.overleaf.com/learn/latex/Spacing_in_math_mode#Reference_guide)
* [6 Further reading](https://www.overleaf.com/learn/latex/Spacing_in_math_mode#Further_reading)
Introduction
------------
Adjusting (La)TeX's default math mode spacing can be useful in certain situations; let's see an example:
\\documentclass{article}
\\usepackage{amssymb}
\\begin{document}
Assume we have the next sets
\\\[\
S \= \\{ z \\in \\mathbb{C}\\, |\\, |z| < 1 \\} \\quad \\textrm{and} \\quad S\_2\=\\partial{S}\
\\\]
\\end{document}
[Open this example in Overleaf](https://www.overleaf.com/docs?engine=pdflatex&snip_name=Math+mode+spacing+example&snip=%5Cdocumentclass%7Barticle%7D%0A%5Cusepackage%7Bamssymb%7D%0A%5Cbegin%7Bdocument%7D%0AAssume+we+have+the+next+sets%0A%5C%5B%0AS+%3D+%5C%7B+z+%5Cin+%5Cmathbb%7BC%7D%5C%2C+%7C%5C%2C+%7Cz%7C+%3C+1+%5C%7D+%5Cquad+%5Ctextrm%7Band%7D+%5Cquad+S_2%3D%5Cpartial%7BS%7D%0A%5C%5D%0A%5Cend%7Bdocument%7D)
This example produces the following output:

As you see in this example, a mathematical text can be explicitly spaced by means of some special commands.
Spaces
------
The example below contains a complete list of spaces inserted using various commands and demonstrates their effect on the typeset math.
\\documentclass{article}
\\usepackage{amsmath}
\\begin{document}
Spaces in mathematical mode.
\\begin{align\*}
f(x) &\= x^2\\! +3x\\! +2 \\\\
f(x) &\= x^2+3x+2 \\\\
f(x) &\= x^2\\, +3x\\, +2 \\\\
f(x) &\= x^2\\: +3x\\: +2 \\\\
f(x) &\= x^2\\; +3x\\; +2 \\\\
f(x) &\= x^2\\ +3x\\ +2 \\\\
f(x) &\= x^2\\quad +3x\\quad +2 \\\\
f(x) &\= x^2\\qquad +3x\\qquad +2
\\end{align\*}
\\end{document}
[Open this example in Overleaf](https://www.overleaf.com/docs?engine=pdflatex&snip_name=Math+mode+spacing+example&snip=%5Cdocumentclass%7Barticle%7D%0A%5Cusepackage%7Bamsmath%7D%0A%5Cbegin%7Bdocument%7D%0ASpaces+in+mathematical+mode.%0A%0A%5Cbegin%7Balign%2A%7D%0Af%28x%29+%26%3D+x%5E2%5C%21+%2B3x%5C%21+%2B2+%5C%5C%0Af%28x%29+%26%3D+x%5E2%2B3x%2B2+%5C%5C%0Af%28x%29+%26%3D+x%5E2%5C%2C+%2B3x%5C%2C+%2B2+%5C%5C%0Af%28x%29+%26%3D+x%5E2%5C%3A+%2B3x%5C%3A+%2B2+%5C%5C%0Af%28x%29+%26%3D+x%5E2%5C%3B+%2B3x%5C%3B+%2B2+%5C%5C%0Af%28x%29+%26%3D+x%5E2%5C+%2B3x%5C+%2B2+%5C%5C%0Af%28x%29+%26%3D+x%5E2%5Cquad+%2B3x%5Cquad+%2B2+%5C%5C%0Af%28x%29+%26%3D+x%5E2%5Cqquad+%2B3x%5Cqquad+%2B2%0A%5Cend%7Balign%2A%7D%0A%5Cend%7Bdocument%7D)
This example produces the following output:
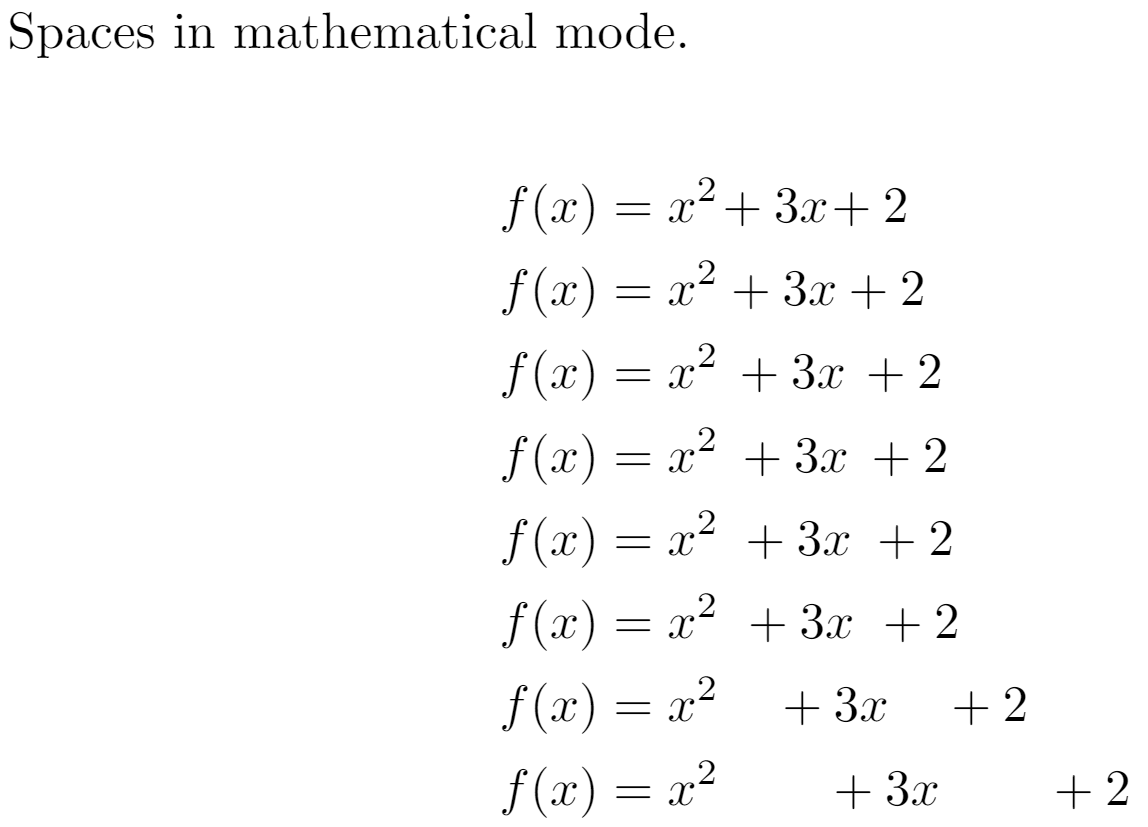
Check the [reference guide](https://www.overleaf.com/learn/latex/Spacing_in_math_mode#Reference_guide)
for a description of the commands.
**Note**: to see a description of the `align*` environment see [Aligning equations with amsmath](https://www.overleaf.com/learn/latex/Aligning_equations_with_amsmath "Aligning equations with amsmath")
Operators spacing
-----------------
Spacing around operators and relations in math mode are governed by specific skip widths:
* `\thinmuskip` (by default it is equal to 3 mu)
* `\medmuskip` (by default it is equal to 4 mu)
* `\thickmuskip` (by default it is equal to 5 mu)
\\begin{align\*}
3ax+4by=5cz\\\\
3ax<4by+5cz
\\end{align\*}
[Open this example in Overleaf](https://www.overleaf.com/docs?engine=pdflatex&snip_name=Math+mode+operator+spacing+example&snip=%5Cdocumentclass%7Barticle%7D%0A%5Cusepackage%7Bamsmath%7D%0A%5Cbegin%7Bdocument%7D%0A%5Cbegin%7Balign%2A%7D%0A3ax%2B4by%3D5cz%5C%5C%0A3ax%3C4by%2B5cz%0A%5Cend%7Balign%2A%7D%0A%5Cend%7Bdocument%7D)
This example produces the following output:
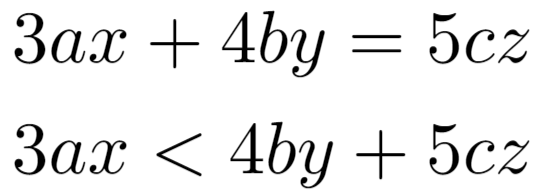
For relational operators, such as \\(<\\), \\(>\\) and \\(=\\), LaTeX establishes `\thickmuskip` space. But for binary operators such as \\(+\\), \\(-\\) and \\(\\times\\), the `\medmuskip` space is set. The difference is almost unnoticeable.
User-defined binary and relational operators
--------------------------------------------
You can force the spacing used in binary or relational operators, so you can [define your own](https://www.overleaf.com/learn/latex/Commands "Commands")
.
\\begin{align\*}
34x^2a \\mathbin{\\#} 13bc \\\\
34x^2a \\mathrel{\\#} 13bc
\\end{align\*}
[Open this example in Overleaf](https://www.overleaf.com/docs?engine=pdflatex&snip_name=Defining+your+own+math+operators&snip=%5Cdocumentclass%7Barticle%7D%0A%5Cusepackage%7Bamsmath%7D%0A%5Cbegin%7Bdocument%7D%0A%5Cbegin%7Balign%2A%7D%0A34x%5E2a+%5Cmathbin%7B%5C%23%7D+13bc+%5C%5C%0A34x%5E2a+%5Cmathrel%7B%5C%23%7D+13bc%0A%5Cend%7Balign%2A%7D%0A%5Cend%7Bdocument%7D)
This example produces the following output:
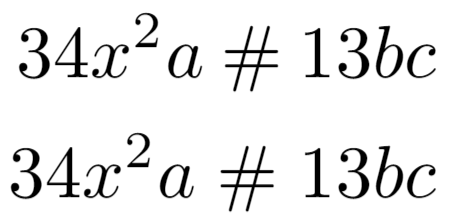
The previous example sets a particular spacing before and after `#` by using `\mathrel` (relational) and `\mathbin` (binary) commands.
Reference guide
---------------
**Description of spacing commands**
| LaTeX code | Description |
| --- | --- |
| `\quad` | space equal to the current font size (= 18 [mu](https://www.overleaf.com/learn/latex/Lengths_in_LaTeX "Lengths in LaTeX") ) |
| `\,` | 3/18 of `\quad` (= 3 mu) |
| `\:` | 4/18 of `\quad` (= 4 mu) |
| `\;` | 5/18 of `\quad` (= 5 mu) |
| `\!` | \-3/18 of `\quad` (= -3 mu) |
| `\` (space after backslash!) | equivalent of space in normal text |
| `\qquad` | twice of `\quad` (= 36 mu) |
Further reading
---------------
For more information see
* [Mathematical expressions](https://www.overleaf.com/learn/latex/Mathematical_expressions "Mathematical expressions")
* [Brackets and Parentheses](https://www.overleaf.com/learn/latex/Brackets_and_Parentheses "Brackets and Parentheses")
* [Aligning equations with amsmath](https://www.overleaf.com/learn/latex/Aligning_equations_with_amsmath "Aligning equations with amsmath")
* [Display style in math mode](https://www.overleaf.com/learn/latex/Display_style_in_math_mode "Display style in math mode")
* [List of Greek letters and math symbols](https://www.overleaf.com/learn/latex/List_of_Greek_letters_and_math_symbols "List of Greek letters and math symbols")
* [Mathematical fonts](https://www.overleaf.com/learn/latex/Mathematical_fonts "Mathematical fonts")
* [The not so short introduction to LaTeX2ε](http://www.ctan.org/tex-archive/info/lshort/)
We only use cookies for essential purposes and to improve your experience on our site. You can find out more in our [cookie policy](https://www.overleaf.com/legal#Cookies)
.
Essential cookies onlyAccept all cookies
---
# Sections and chapters - Overleaf, Online LaTeX Editor
[Skip to content](https://www.overleaf.com/learn/latex/Sections_and_chapters#main-content)
Search help library…searchclear
No Search Results
Sections and chapters
=====================
Contents
--------
* [1 Introduction](https://www.overleaf.com/learn/latex/Sections_and_chapters#Introduction)
* [2 Basic example](https://www.overleaf.com/learn/latex/Sections_and_chapters#Basic_example)
* [3 Document sectioning](https://www.overleaf.com/learn/latex/Sections_and_chapters#Document_sectioning)
* [4 Numbered and unnumbered sections](https://www.overleaf.com/learn/latex/Sections_and_chapters#Numbered_and_unnumbered_sections)
* [4.1 Unnumbered sections in the table of contents](https://www.overleaf.com/learn/latex/Sections_and_chapters#Unnumbered_sections_in_the_table_of_contents)
* [5 Document chapters and sections in a book/report](https://www.overleaf.com/learn/latex/Sections_and_chapters#Document_chapters_and_sections_in_a_book/report)
* [5.1 The report class](https://www.overleaf.com/learn/latex/Sections_and_chapters#The_report_class)
* [5.2 The book class](https://www.overleaf.com/learn/latex/Sections_and_chapters#The_book_class)
* [6 Customize chapters and sections](https://www.overleaf.com/learn/latex/Sections_and_chapters#Customize_chapters_and_sections)
* [6.1 titlesec commands](https://www.overleaf.com/learn/latex/Sections_and_chapters#titlesec_commands)
* [7 Further reading](https://www.overleaf.com/learn/latex/Sections_and_chapters#Further_reading)
Introduction
------------
Documents usually have some form of “logical structure”: division into chapters, sections, sub-sections etc. to organize their content. LaTeX supports the creation of a document structure and also enables customization of sectioning and numbering. The commands available to organize a document depend on the document class being used, although the simplest form of organization, sectioning, is available in all formats.
Basic example
-------------
Let’s begin with a basic example to demonstrate the `\section{_section title_}` command, which marks the beginning of a new section called `_section title_`. Section numbering is automatic and can be customized, or disabled.
\\documentclass{article}
\\usepackage{blindtext}
\\title{Sections and Chapters}
\\author{Overleaf}
\\date{\\today}
\\begin{document}
\\maketitle
\\section{Introduction}
This is the first section.
\\blindtext
\\section{Second Section}
This is the second section
\\blindtext
\\end{document}
[Open this example in Overleaf.](https://www.overleaf.com/docs?engine=pdflatex&snip_name=Basic+document+structure+example&snip=%5Cdocumentclass%7Barticle%7D%0A%5Cusepackage%7Bblindtext%7D%0A%0A%5Ctitle%7BSections+and+Chapters%7D%0A%5Cauthor%7BOverleaf%7D%0A%5Cdate%7B%5Ctoday%7D%0A%0A%5Cbegin%7Bdocument%7D%0A%5Cmaketitle%0A%5Csection%7BIntroduction%7D%0A%0AThis+is+the+first+section.%0A%0A%5Cblindtext%0A%0A%5Csection%7BSecond+Section%7D%0AThis+is+the+second+section%0A%0A%5Cblindtext%0A%5Cend%7Bdocument%7D)
This example produces the following output:
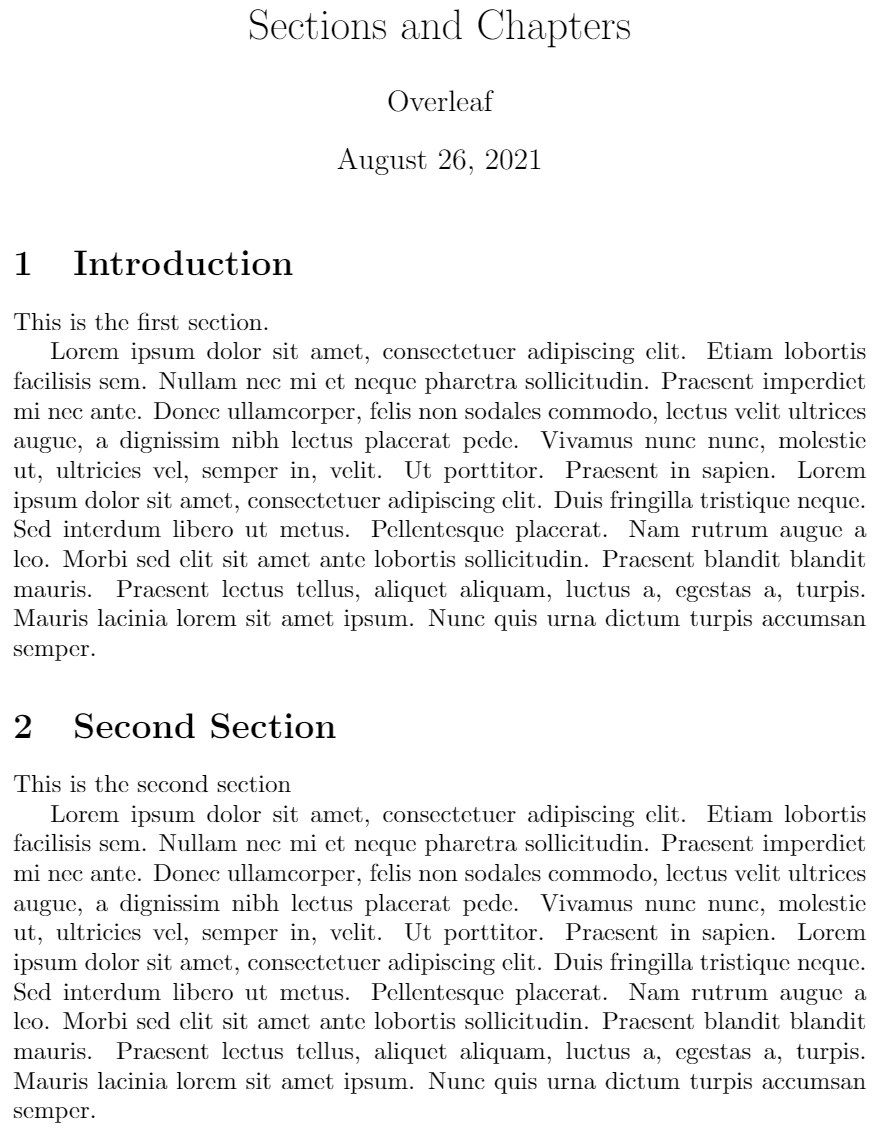
Document sectioning
-------------------
LaTeX can organize, number, and index chapters and sections of document. There are up to 7 levels of depth for defining sections depending on the document class:
| | |
| --- | --- |
| \-1 | `\part{part}` |
| 0 | `\chapter{chapter}` |
| 1 | `\section{section}` |
| 2 | `\subsection{subsection}` |
| 3 | `\subsubsection{subsubsection}` |
| 4 | `\paragraph{paragraph}` |
| 5 | `\subparagraph{subparagraph}` |
Usually, `\section` is the top-level document command in most documents. However, in reports or books, and similar long documents, this would be `\chapter` or `\part`.
Numbered and unnumbered sections
--------------------------------
To get an unnumbered chapter, section, subsection, etc. add an asterisk (`*`) at the end of the command, before the opening curly brace. These will not go into the table of contents. Here is our first example (above) but this time using `\section*` instead of `\section`:
\\documentclass{article}
\\usepackage{blindtext}
\\title{Sections and Chapters}
\\author{Overleaf}
\\date{\\today}
\\begin{document}
\\maketitle
\\section\*{Introduction}
This is the first section.
\\blindtext
\\section\*{Second Section}
This is the second section
\\blindtext
\\end{document}
[Open this example in Overleaf.](https://www.overleaf.com/docs?engine=pdflatex&snip_name=Example+with+unnumbered+sections&snip=%5Cdocumentclass%7Barticle%7D%0A%5Cusepackage%7Bblindtext%7D%0A%0A%5Ctitle%7BSections+and+Chapters%7D%0A%5Cauthor%7BOverleaf%7D%0A%5Cdate%7B%5Ctoday%7D%0A%0A%5Cbegin%7Bdocument%7D%0A%5Cmaketitle%0A%5Csection%2A%7BIntroduction%7D%0A%0AThis+is+the+first+section.%0A%0A%5Cblindtext%0A%0A%5Csection%2A%7BSecond+Section%7D%0AThis+is+the+second+section%0A%0A%5Cblindtext%0A%5Cend%7Bdocument%7D)
This example produces the following output:
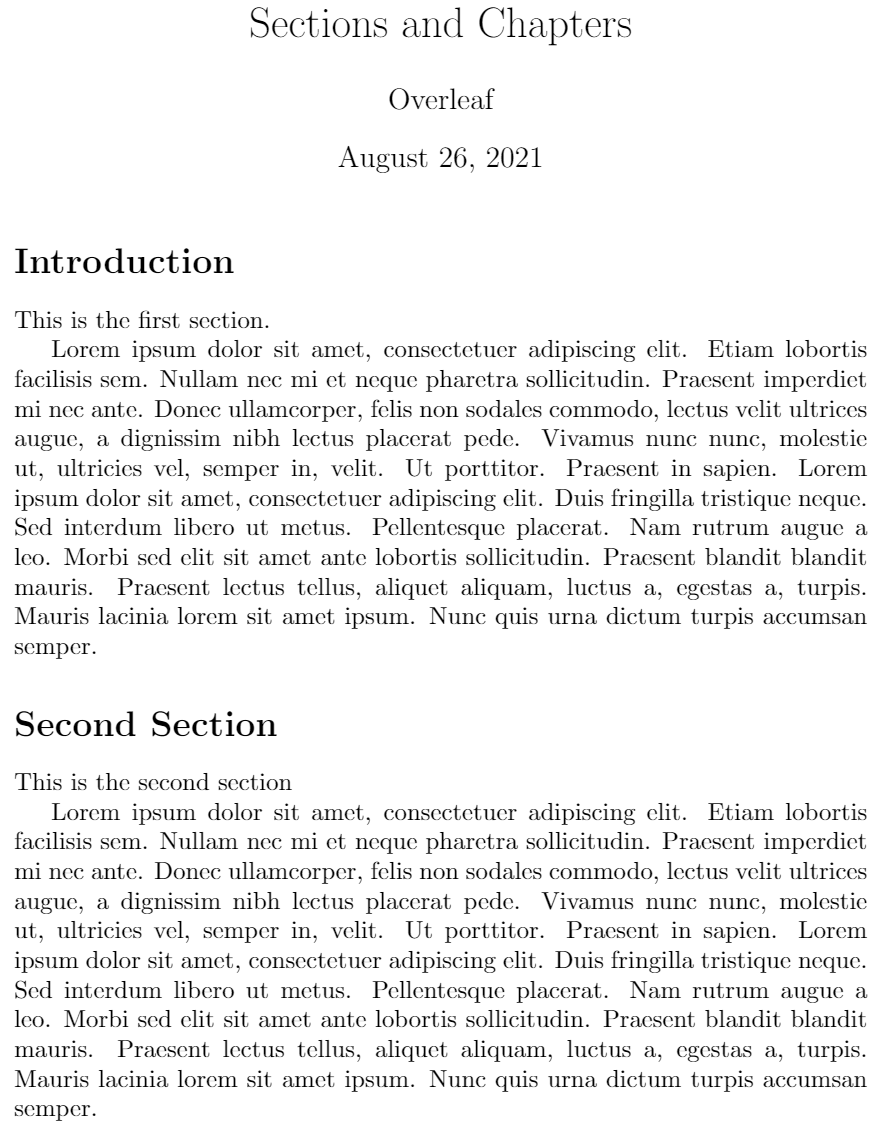
### Unnumbered sections in the table of contents
To add an unnumbered section to the table of contents, use the `\addcontentsline` command like this:
\\addcontentsline{toc}{section}{Title of the section}
Here is an example using `\addcontentsline` but see the article [Table of contents](https://www.overleaf.com/learn/latex/Table_of_contents "Table of contents")
for further information and examples.
\\documentclass{article}
\\title{Sections and Chapters}
\\author{Overleaf}
\\date{\\today}
\\begin{document}
\\maketitle
\\tableofcontents
\\newcommand\\shortlorem{Lorem ipsum dolor sit amet, consectetur adipiscing elit, sed do eiusmod tempor incididunt ut labore et dolore magna aliqua. Ut enim ad minim veniam, quis nostrud exercitation ullamco laboris nisi ut aliquip ex ea commodo consequat.}
\\section{Introduction}
This is the first section (numbered).
\\shortlorem
\\addcontentsline{toc}{section}{Unnumbered Section}
\\section\*{Unnumbered Section}
An unnumbered section
\\shortlorem
\\section{Second section}
The second numbered section.
\\shortlorem
\\end{document}
[Open this example in Overleaf.](https://www.overleaf.com/docs?engine=pdflatex&snip_name=Example+of+unnumbered+sections+in+the+TOC&snip=%5Cdocumentclass%7Barticle%7D%0A%5Ctitle%7BSections+and+Chapters%7D%0A%5Cauthor%7BOverleaf%7D%0A%5Cdate%7B%5Ctoday%7D%0A%0A%5Cbegin%7Bdocument%7D%0A%5Cmaketitle%0A%5Ctableofcontents%0A%0A%5Cnewcommand%5Cshortlorem%7BLorem+ipsum+dolor+sit+amet%2C+consectetur+adipiscing+elit%2C+sed+do+eiusmod+tempor+incididunt+ut+labore+et+dolore+magna+aliqua.+Ut+enim+ad+minim+veniam%2C+quis+nostrud+exercitation+ullamco+laboris+nisi+ut+aliquip+ex+ea+commodo+consequat.%7D%0A%0A%5Csection%7BIntroduction%7D%0AThis+is+the+first+section+%28numbered%29.%0A%0A%5Cshortlorem%0A%5Caddcontentsline%7Btoc%7D%7Bsection%7D%7BUnnumbered+Section%7D%0A%5Csection%2A%7BUnnumbered+Section%7D%0AAn+unnumbered+section%0A%0A%5Cshortlorem%0A%0A%5Csection%7BSecond+section%7D%0AThe+second+numbered+section.%0A%0A%5Cshortlorem%0A%5Cend%7Bdocument%7D)
This example produces the following output:
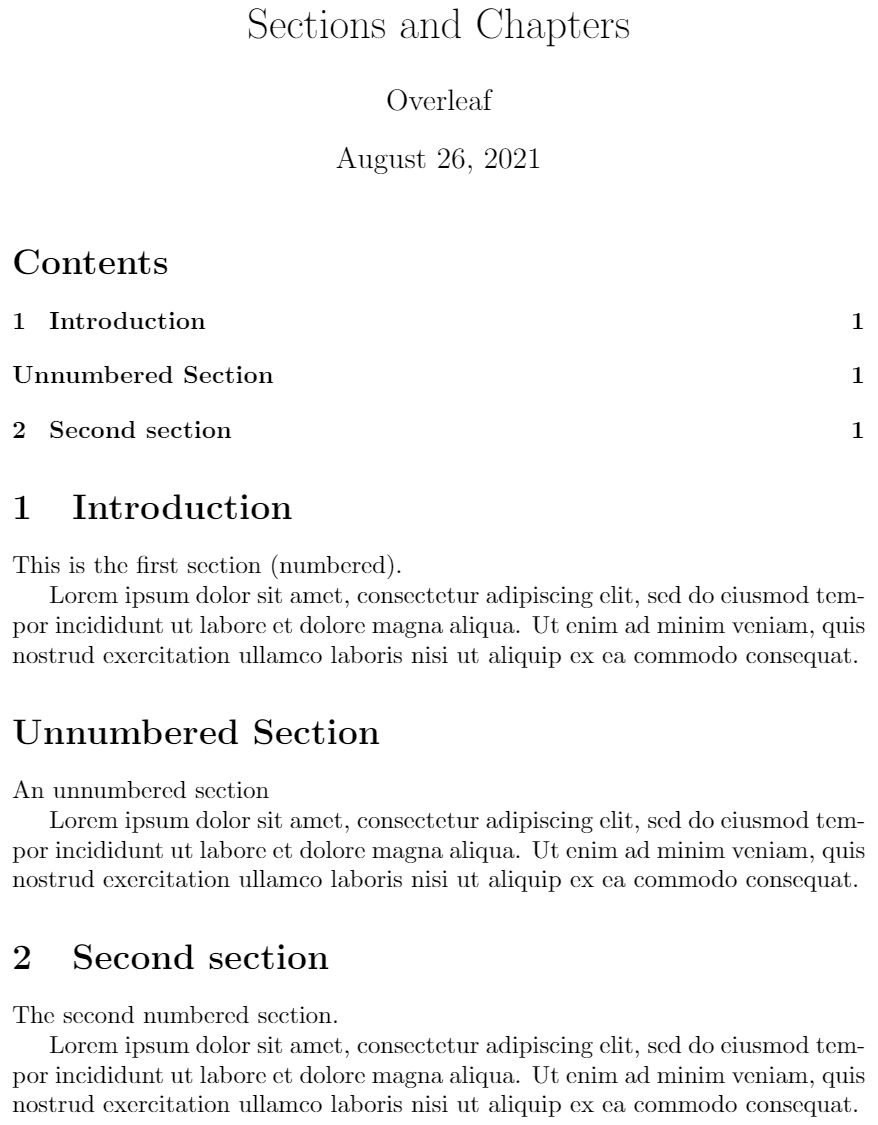
Document chapters and sections in a book/report
-----------------------------------------------
As mentioned before, `\chapter` can be used in books and reports.
### The `report` class
Below you can see an example `report` using text taken the Overleaf article [An Introduction to LuaTeX (Part 1): What is it—and what makes it so different?](https://www.overleaf.com/learn/latex/Articles/An_Introduction_to_LuaTeX_(Part_1):_What_is_it%E2%80%94and_what_makes_it_so_different%3F)
\\documentclass{report}
\\title{Sections and Chapters}
\\author{Overleaf}
\\date{\\today}
\\begin{document}
\\maketitle
\\tableofcontents
\\chapter{An Introduction to Lua\\TeX}
\\section{What is it—and what makes it so different?}
Lua\\TeX{} is a \\textit{toolkit}—it contains sophisticated software tools and components with which you can construct (typeset) a wide range of documents. The sub-title of this article also poses two questions about Lua\\TeX: What is it—and what makes it so different? The answer to “What is it?” may seem obvious: “It’s a \\TeX{} typesetting engine!” Indeed it is, but a broader view, and one to which this author subscribes, is that Lua\\TeX{} is an extremely versatile \\TeX\-based document construction and engineering system.
\\subsection{Explaining Lua\\TeX: Where to start?}
The goal of this first article on Lua\\TeX{} is to offer a context for understanding what this TeX engine provides and why/how its design enables users to build/design/create a wide range of solutions to complex typesetting and design problems—perhaps also offering some degree of “future proofing”
\\chapter{Lua\\TeX: Background and history}
\\section{Introduction}
Lua\\TeX{} is, in \\TeX{} terms, “the new kid on the block” despite having been in active development for over 10 years.
\\subsection{Lua\\TeX: Opening up \\TeX’s “black box”}
Knuth’s original \\TeX{} program is the common ancestor of all modern \\TeX{} engines in use today and Lua\\TeX{} is, in effect, the latest evolutionary step: derived from the pdf\\TeX{} program but with the addition of some powerful software components which bring a great deal of extra functionality.
\\end{document}
[Open this example in Overleaf (using `lualatex`)](https://www.overleaf.com/docs?engine=lualatex&snip_name=Example+of+a+LaTeX+report&snip=%5Cdocumentclass%7Breport%7D%0A%5Ctitle%7BSections+and+Chapters%7D%0A%5Cauthor%7BOverleaf%7D%0A%5Cdate%7B%5Ctoday%7D%0A%5Cbegin%7Bdocument%7D%0A%5Cmaketitle%0A%5Ctableofcontents%0A%5Cchapter%7BAn+Introduction+to+Lua%5CTeX%7D%0A%0A%5Csection%7BWhat+is+it%E2%80%94and+what+makes+it+so+different%3F%7D%0ALua%5CTeX%7B%7D+is+a+%5Ctextit%7Btoolkit%7D%E2%80%94it+contains+sophisticated+software+tools+and+components+with+which+you+can+construct+%28typeset%29+a+wide+range+of+documents.+The+sub-title+of+this+article+also+poses+two+questions+about+Lua%5CTeX%3A+What+is+it%E2%80%94and+what+makes+it+so+different%3F+The+answer+to+%E2%80%9CWhat+is+it%3F%E2%80%9D+may+seem+obvious%3A+%E2%80%9CIt%E2%80%99s+a+%5CTeX%7B%7D+typesetting+engine%21%E2%80%9D+Indeed+it+is%2C+but+a+broader+view%2C+and+one+to+which+this+author+subscribes%2C+is+that+Lua%5CTeX%7B%7D+is+an+extremely+versatile+%5CTeX-based+document+construction+and+engineering+system.%0A%0A%5Csubsection%7BExplaining+Lua%5CTeX%3A+Where+to+start%3F%7D%0AThe+goal+of+this+first+article+on+Lua%5CTeX%7B%7D+is+to+offer+a+context+for+understanding+what+this+TeX+engine+provides+and+why%2Fhow+its+design+enables+users+to+build%2Fdesign%2Fcreate+a+wide+range+of+solutions+to+complex+typesetting+and+design+problems%E2%80%94perhaps+also+offering+some+degree+of+%E2%80%9Cfuture+proofing%E2%80%9D+%0A%0A%5Cchapter%7BLua%5CTeX%3A+Background+and+history%7D%0A%5Csection%7BIntroduction%7D%0ALua%5CTeX%7B%7D+is%2C+in+%5CTeX%7B%7D+terms%2C+%E2%80%9Cthe+new+kid+on+the+block%E2%80%9D+despite+having+been+in+active+development+for+over+10+years.%0A%0A%5Csubsection%7BLua%5CTeX%3A+Opening+up+%5CTeX%E2%80%99s+%E2%80%9Cblack+box%E2%80%9D%7D%0AKnuth%E2%80%99s+original+%5CTeX%7B%7D+program+is+the+common+ancestor+of+all+modern+%5CTeX%7B%7D+engines+in+use+today+and+Lua%5CTeX%7B%7D+is%2C+in+effect%2C+the+latest+evolutionary+step%3A+derived+from+the+pdf%5CTeX%7B%7D+program+but+with+the+addition+of+some+powerful+software+components+which+bring+a+great+deal+of+extra+functionality.%0A%5Cend%7Bdocument%7D)
This example produces the following output—here we show pages 2–4, where the page images have been overlapped to ease presentation:
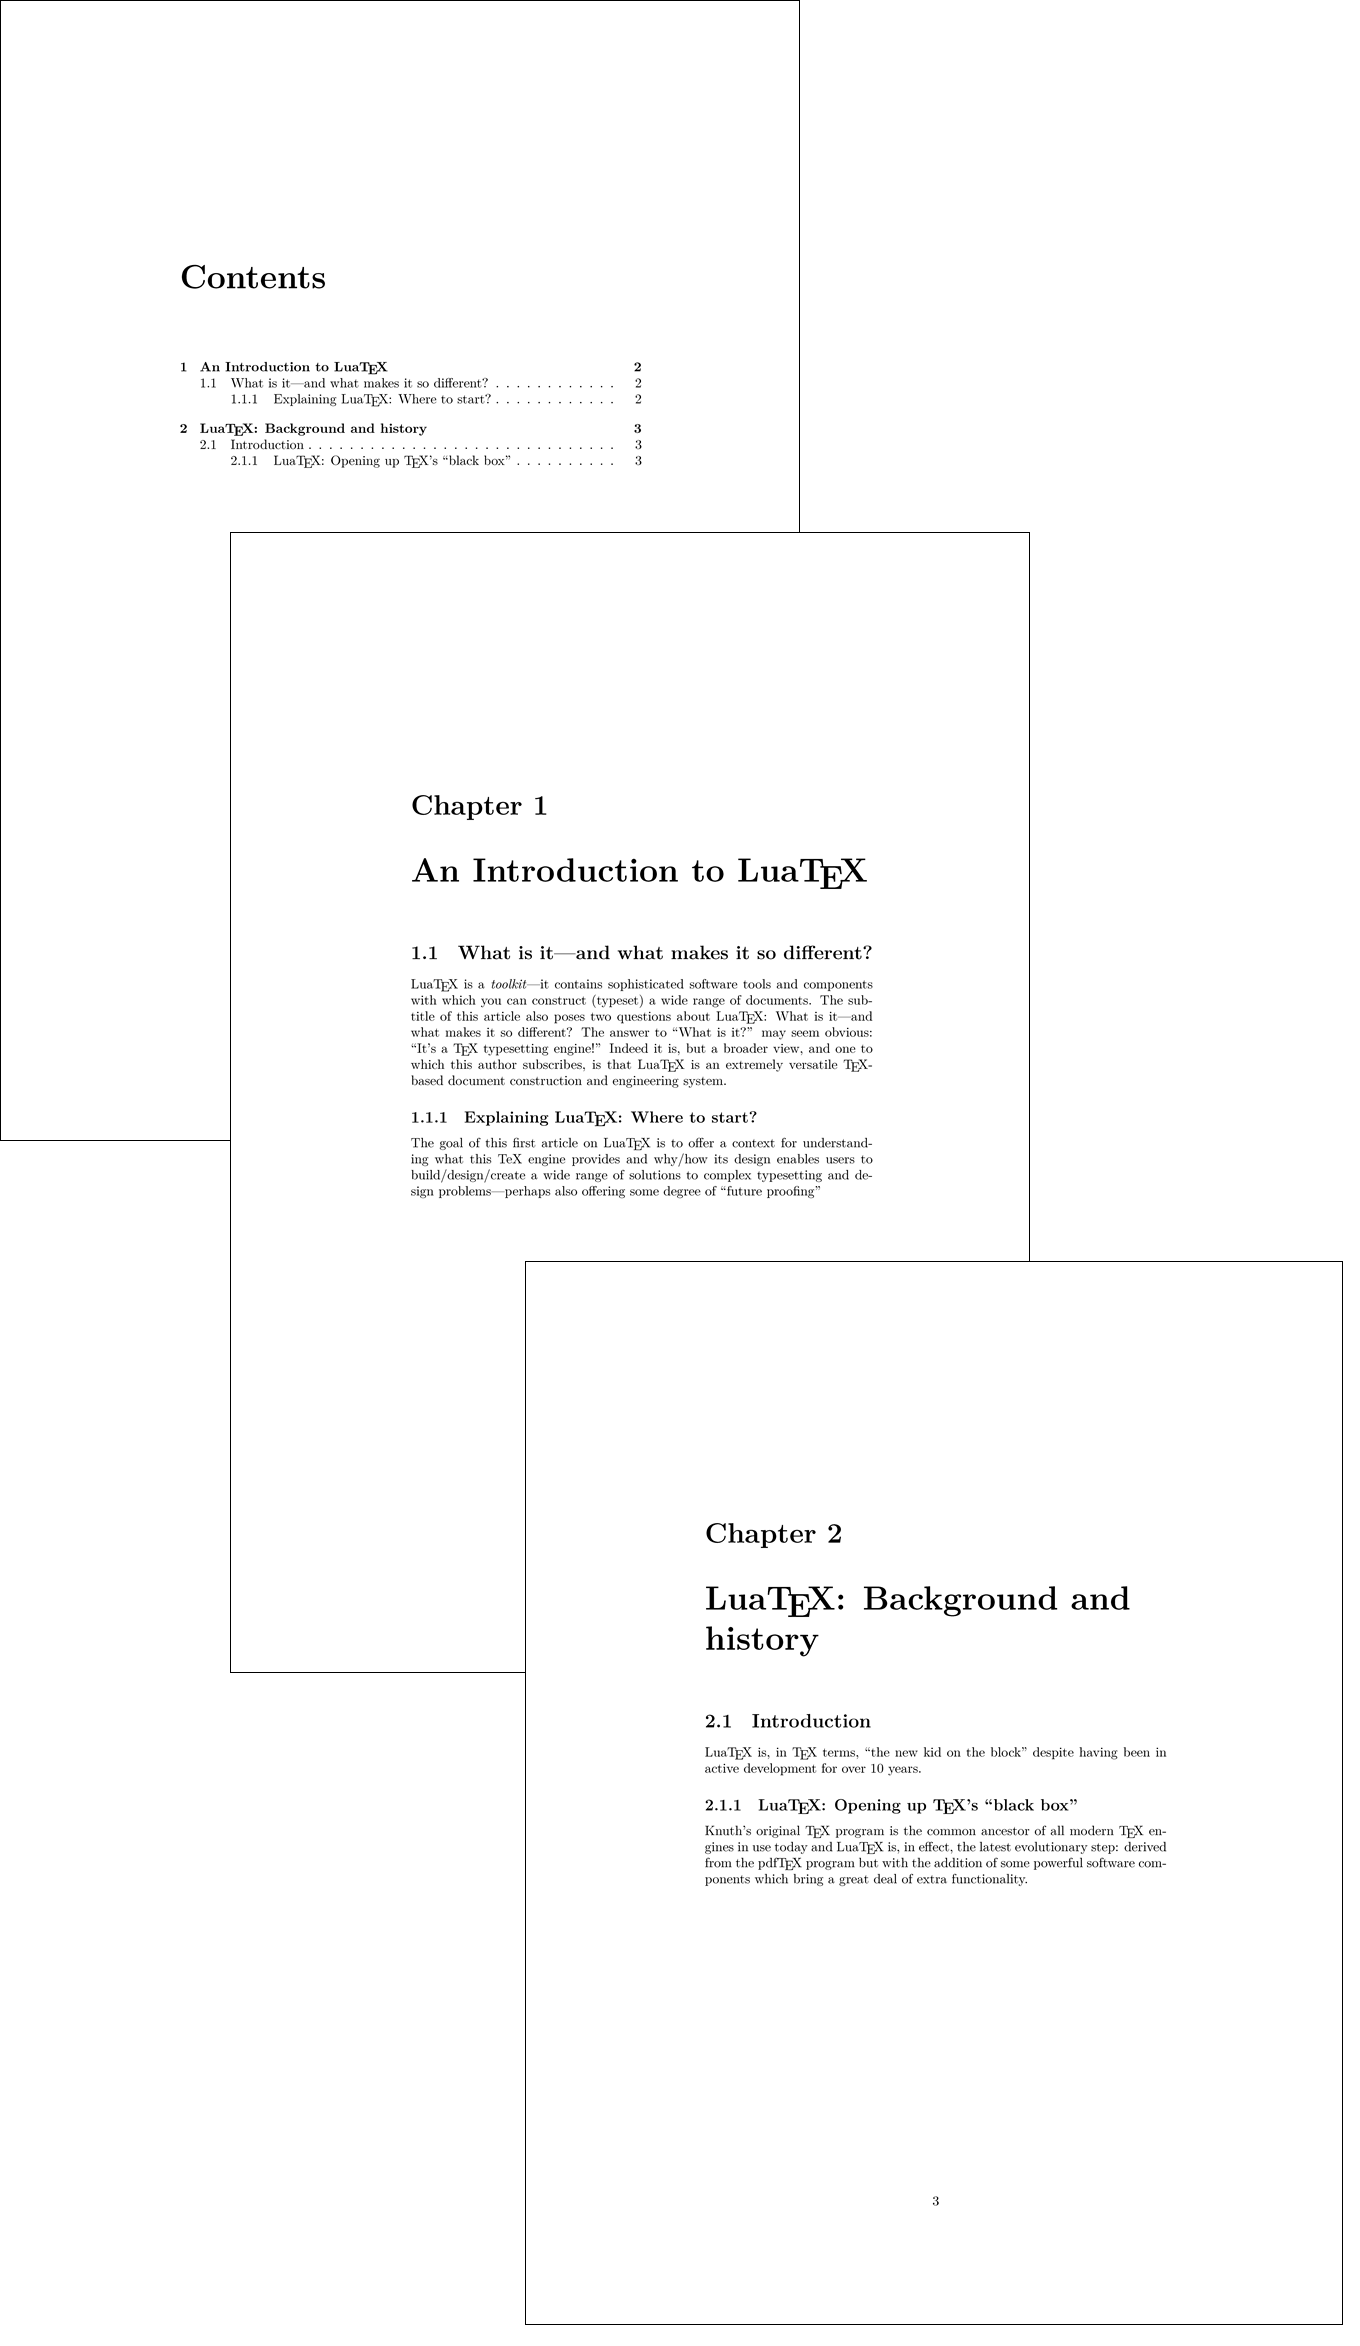
### The `book` class
The following example reproduces text from the `report` example but with `\documentclass{book}`, containing parts, chapters, sections, subsections and sub-subsections. If you open the example in Overleaf you should see that sub-subsections produced by `\subsubsection` are _not_ numbered. That is by design of the `book` class: if you want to change this behavior, add the following command to your document preamble:
\\setcounter{secnumdepth}{3}
\\documentclass{book}
\\title{Sections and Chapters}
\\author{Overleaf}
\\date{\\today}
\\begin{document}
\\maketitle
\\tableofcontents
\\part{History of Lua\\TeX}
\\chapter{An Introduction to Lua\\TeX}
\\section{What is it—and what makes it so different?}
Lua\\TeX{} is a \\textit{toolkit}—it contains sophisticated software tools and components with which you can construct (typeset) a wide range of documents. The sub-title of this article also poses two questions about Lua\\TeX: What is it—and what makes it so different? The answer to “What is it?” may seem obvious: “It’s a \\TeX{} typesetting engine!” Indeed it is, but a broader view, and one to which this author subscribes, is that Lua\\TeX{} is an extremely versatile \\TeX\-based document construction and engineering system.
\\subsection{Explaining Lua\\TeX: Where to start?}
The goal of this first article on Lua\\TeX{} is to offer a context for understanding what this TeX engine provides and why/how its design enables users to build/design/create a wide range of solutions to complex typesetting and design problems—perhaps also offering some degree of “future proofing”
\\chapter{Lua\\TeX: Background and history}
\\section{Introduction}
Lua\\TeX{} is, in \\TeX{} terms, “the new kid on the block” despite having been in active development for over 10 years.
\\subsection{Lua\\TeX: Opening up \\TeX’s “black box”}
Knuth’s original \\TeX{} program is the common ancestor of all modern \\TeX{} engines in use today and Lua\\TeX{} is, in effect, the latest evolutionary step: derived from the pdf\\TeX{} program but with the addition of some powerful software components which bring a great deal of extra functionality.
\\subsubsection{How Lua\\TeX{} processes \\texttt{\\string\\directlua}: A first look}
The ⟨code⟩ provided to \\verb|\\directlua{}| is first converted to tokens using the processes and calculations discussed above; that sequence of tokens is stored in a token list.
\\end{document}
[To see the output, **open this example in Overleaf** (it uses `**lualatex**`)](https://www.overleaf.com/docs?engine=lualatex&snip_name=Example+of+a+LaTeX+book&snip=%5Cdocumentclass%7Bbook%7D%0A%5Ctitle%7BSections+and+Chapters%7D%0A%5Cauthor%7BOverleaf%7D%0A%5Cdate%7B%5Ctoday%7D%0A%5Cbegin%7Bdocument%7D%0A%5Cmaketitle%0A%5Ctableofcontents%0A%5Cpart%7BHistory+of+Lua%5CTeX%7D%0A%0A%5Cchapter%7BAn+Introduction+to+Lua%5CTeX%7D%0A%0A%5Csection%7BWhat+is+it%E2%80%94and+what+makes+it+so+different%3F%7D%0ALua%5CTeX%7B%7D+is+a+%5Ctextit%7Btoolkit%7D%E2%80%94it+contains+sophisticated+software+tools+and+components+with+which+you+can+construct+%28typeset%29+a+wide+range+of+documents.+The+sub-title+of+this+article+also+poses+two+questions+about+Lua%5CTeX%3A+What+is+it%E2%80%94and+what+makes+it+so+different%3F+The+answer+to+%E2%80%9CWhat+is+it%3F%E2%80%9D+may+seem+obvious%3A+%E2%80%9CIt%E2%80%99s+a+%5CTeX%7B%7D+typesetting+engine%21%E2%80%9D+Indeed+it+is%2C+but+a+broader+view%2C+and+one+to+which+this+author+subscribes%2C+is+that+Lua%5CTeX%7B%7D+is+an+extremely+versatile+%5CTeX-based+document+construction+and+engineering+system.%0A%0A%5Csubsection%7BExplaining+Lua%5CTeX%3A+Where+to+start%3F%7D%0AThe+goal+of+this+first+article+on+Lua%5CTeX%7B%7D+is+to+offer+a+context+for+understanding+what+this+TeX+engine+provides+and+why%2Fhow+its+design+enables+users+to+build%2Fdesign%2Fcreate+a+wide+range+of+solutions+to+complex+typesetting+and+design+problems%E2%80%94perhaps+also+offering+some+degree+of+%E2%80%9Cfuture+proofing%E2%80%9D+%0A%0A%5Cchapter%7BLua%5CTeX%3A+Background+and+history%7D%0A%5Csection%7BIntroduction%7D%0ALua%5CTeX%7B%7D+is%2C+in+%5CTeX%7B%7D+terms%2C+%E2%80%9Cthe+new+kid+on+the+block%E2%80%9D+despite+having+been+in+active+development+for+over+10+years.%0A%0A%5Csubsection%7BLua%5CTeX%3A+Opening+up+%5CTeX%E2%80%99s+%E2%80%9Cblack+box%E2%80%9D%7D%0AKnuth%E2%80%99s+original+%5CTeX%7B%7D+program+is+the+common+ancestor+of+all+modern+%5CTeX%7B%7D+engines+in+use+today+and+Lua%5CTeX%7B%7D+is%2C+in+effect%2C+the+latest+evolutionary+step%3A+derived+from+the+pdf%5CTeX%7B%7D+program+but+with+the+addition+of+some+powerful+software+components+which+bring+a+great+deal+of+extra+functionality.%0A%0A%5Csubsubsection%7BHow+Lua%5CTeX%7B%7D+processes+%5Ctexttt%7B%5Cstring%5Cdirectlua%7D%3A+A+first+look%7D%0AThe+%E2%9F%A8code%E2%9F%A9+provided+to+%5Cverb%7C%5Cdirectlua%7B%3Ccode%3E%7D%7C+is+first+converted+to+tokens+using+the+processes+and+calculations+discussed+above%3B+that+sequence+of+tokens+is+stored+in+a+token+list.%0A%5Cend%7Bdocument%7D)
Customize chapters and sections
-------------------------------
You can use the [`titlesec`](https://ctan.org/pkg/titlesec?lang=en)
package to customize chapters, sections and subsections style in an easy way.
\\documentclass\[a4paper,12pt\]{book}
\\usepackage\[T1\]{fontenc}
\\usepackage{titlesec}
\\titleformat
{\\chapter} % command
\[display\] % shape
{\\bfseries\\Large\\itshape} % format
{Story No. \\ \\thechapter} % label
{0.5ex} % sep
{
\\rule{\\textwidth}{1pt}
\\vspace{1ex}
\\centering
} % before-code
\[\
\\vspace{\-0.5ex}%\
\\rule{\\textwidth}{0.3pt}\
\] % after-code
\\titleformat{\\section}\[wrap\]
{\\normalfont\\bfseries}
{\\thesection.}{0.5em}{}
\\titlespacing{\\section}{12pc}{1.5ex plus .1ex minus .2ex}{1pc}
\\begin{document}
\\chapter{Let's begin}
\\section{First Attempt}
Lorem ipsum dolor sit amet, consectetur adipiscing elit, sed do
eiusmod tempor incididunt ut labore et dolore magna aliqua. Ut
enim ad minim veniam, quis nostrud exercitation ullamco laboris...
\\section{Second attempt}
Lorem ipsum dolor sit amet, consectetur adipiscing elit, sed do
eiusmod tempor incididunt ut labore et dolore magna aliqua. Ut
enim ad minim veniam, quis nostrud exercitation ullamco laboris...
\\end{document}
[Open this `titlesec` example in Overleaf.](https://www.overleaf.com/docs?engine=pdflatex&snip_name=titlesec+example&snip=%5Cdocumentclass%5Ba4paper%2C12pt%5D%7Bbook%7D%0A%5Cusepackage%5BT1%5D%7Bfontenc%7D%0A%5Cusepackage%7Btitlesec%7D%0A%0A%5Ctitleformat%0A%7B%5Cchapter%7D+%25+command%0A%5Bdisplay%5D+%25+shape%0A%7B%5Cbfseries%5CLarge%5Citshape%7D+%25+format%0A%7BStory+No.+%5C+%5Cthechapter%7D+%25+label%0A%7B0.5ex%7D+%25+sep%0A%7B%0A++++%5Crule%7B%5Ctextwidth%7D%7B1pt%7D%0A++++%5Cvspace%7B1ex%7D%0A++++%5Ccentering%0A%7D+%25+before-code%0A%5B%0A%5Cvspace%7B-0.5ex%7D%25%0A%5Crule%7B%5Ctextwidth%7D%7B0.3pt%7D%0A%5D+%25+after-code%0A%0A%0A%5Ctitleformat%7B%5Csection%7D%5Bwrap%5D%0A%7B%5Cnormalfont%5Cbfseries%7D%0A%7B%5Cthesection.%7D%7B0.5em%7D%7B%7D%0A%0A%5Ctitlespacing%7B%5Csection%7D%7B12pc%7D%7B1.5ex+plus+.1ex+minus+.2ex%7D%7B1pc%7D%0A%0A%5Cbegin%7Bdocument%7D%0A%5Cchapter%7BLet%27s+begin%7D%0A%5Csection%7BFirst+Attempt%7D%0A%0ALorem+ipsum+dolor+sit+amet%2C+consectetur+adipiscing+elit%2C+sed+do+%0Aeiusmod+tempor+incididunt+ut+labore+et+dolore+magna+aliqua.+Ut+%0Aenim+ad+minim+veniam%2C+quis+nostrud+exercitation+ullamco+laboris...%0A%0A%5Csection%7BSecond+attempt%7D%0A%0ALorem+ipsum+dolor+sit+amet%2C+consectetur+adipiscing+elit%2C+sed+do+%0Aeiusmod+tempor+incididunt+ut+labore+et+dolore+magna+aliqua.+Ut+%0Aenim+ad+minim+veniam%2C+quis+nostrud+exercitation+ullamco+laboris...%0A%0A%5Cend%7Bdocument%7D)
This example produces the following output:
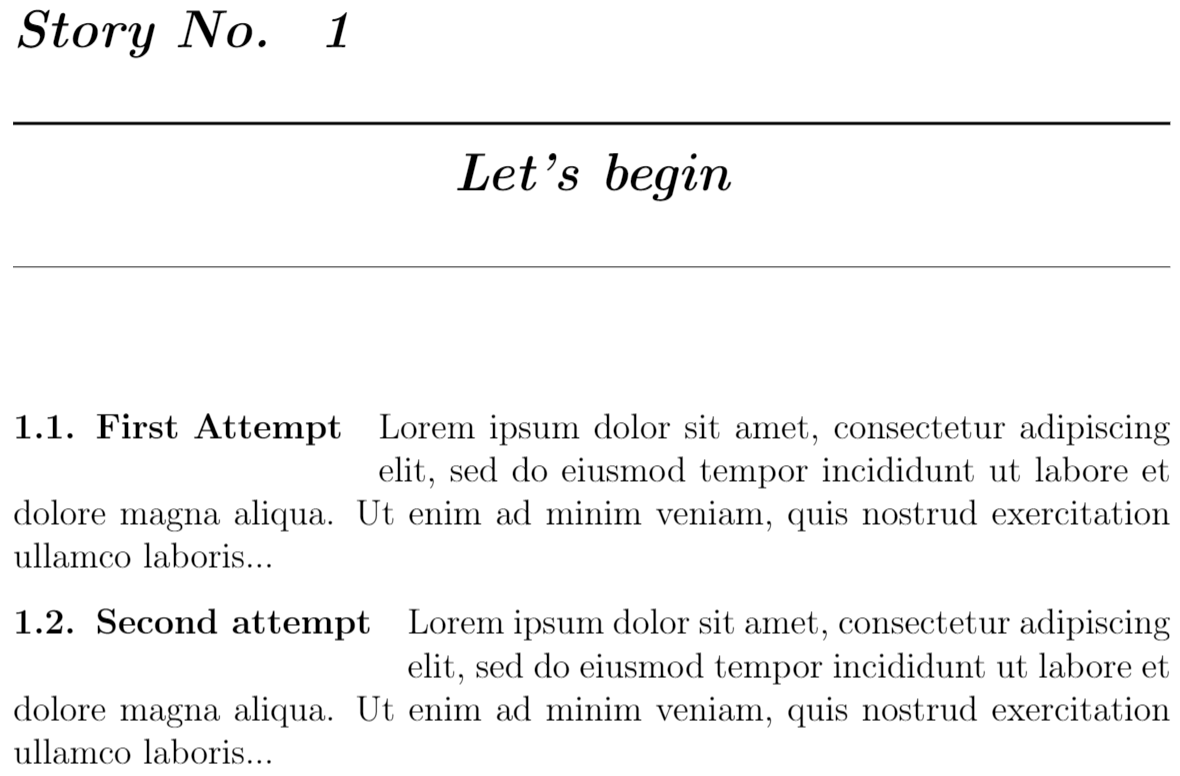
### `titlesec` commands
There are two general commands:
\\titleformat{}\[\]{}{