# Table of Contents
- [Getting started - Recraft](#getting-started-recraft)
- [Swagger - Recraft](#swagger-recraft)
- [Local MCP Server - Recraft](#local-mcp-server-recraft)
- [Tools - Recraft](#tools-recraft)
- [Pricing - Recraft](#pricing-recraft)
- [Appendix - Recraft](#appendix-recraft)
- [Getting started - Recraft](#getting-started-recraft)
- [Remote MCP server - Recraft](#remote-mcp-server-recraft)
- [Choosing a model - Recraft](#choosing-a-model-recraft)
- [Recraft V2 - Recraft](#recraft-v2-recraft)
- [Styles - Recraft](#styles-recraft)
- [Recraft V4 - Recraft](#recraft-v4-recraft)
- [Introduction - Recraft](#introduction-recraft)
- [External Models in Recraft - Recraft](#external-models-in-recraft-recraft)
- [Contacting support - Recraft](#contacting-support-recraft)
- [Recraft on Discord - Recraft](#recraft-on-discord-recraft)
- [Recraft V3 - Recraft](#recraft-v3-recraft)
- [Requesting a feature - Recraft](#requesting-a-feature-recraft)
- [Reporting bugs - Recraft](#reporting-bugs-recraft)
- [Security and compliance - Recraft](#security-and-compliance-recraft)
- [Legal and policy documents - Recraft](#legal-and-policy-documents-recraft)
- [Ownership - Recraft](#ownership-recraft)
- [Recraft V4.1 - Recraft](#recraft-v4-1-recraft)
- [Data protection and privacy - Recraft](#data-protection-and-privacy-recraft)
- [Compliance and certifications - Recraft](#compliance-and-certifications-recraft)
- [Data use and model training - Recraft](#data-use-and-model-training-recraft)
- [Security - Recraft](#security-recraft)
- [Prompting and image generation - Recraft](#prompting-and-image-generation-recraft)
- [Character consistency - Recraft](#character-consistency-recraft)
- [Closing notes - Recraft](#closing-notes-recraft)
- [Commercial rights and ownership - Recraft](#commercial-rights-and-ownership-recraft)
- [Billing and invoices - Recraft](#billing-and-invoices-recraft)
- [Deleting an account - Recraft](#deleting-an-account-recraft)
- [Free plan - Recraft](#free-plan-recraft)
- [Medium - Recraft](#medium-recraft)
- [Paid plans - Recraft](#paid-plans-recraft)
- [Vibe - Recraft](#vibe-recraft)
- [Attributes - Recraft](#attributes-recraft)
- [Universal prompt template - Recraft](#universal-prompt-template-recraft)
- [Upgrading and downgrading a plan - Recraft](#upgrading-and-downgrading-a-plan-recraft)
- [Prompting for image generation - Recraft](#prompting-for-image-generation-recraft)
- [Mobile Apps - Recraft](#mobile-apps-recraft)
- [Style - Recraft](#style-recraft)
- [Subject - Recraft](#subject-recraft)
- [FAQ - Recraft](#faq-recraft)
- [Context - Recraft](#context-recraft)
- [Composition - Recraft](#composition-recraft)
- [Vector art - Recraft](#vector-art-recraft)
- [Graphic design - Recraft](#graphic-design-recraft)
- [Photorealism - Recraft](#photorealism-recraft)
- [Credits - Recraft](#credits-recraft)
- [Level of detail - Recraft](#level-of-detail-recraft)
- [Illustration - Recraft](#illustration-recraft)
- [Logos and icons - Recraft](#logos-and-icons-recraft)
- [Recraft Plugins - Recraft](#recraft-plugins-recraft)
- [Overview - Recraft](#overview-recraft)
- [How to create a color palette - Recraft](#how-to-create-a-color-palette-recraft)
- [Vectorizing - Recraft](#vectorizing-recraft)
- [How to share an image - Recraft](#how-to-share-an-image-recraft)
- [Interface language - Recraft](#interface-language-recraft)
- [Examples - Recraft](#examples-recraft)
- [Upscaling - Recraft](#upscaling-recraft)
- [Using color palettes in generation - Recraft](#using-color-palettes-in-generation-recraft)
- [Recoloring existing images - Recraft](#recoloring-existing-images-recraft)
- [Introduction to frames - Recraft](#introduction-to-frames-recraft)
- [How to share a project - Recraft](#how-to-share-a-project-recraft)
- [Outpainting - Recraft](#outpainting-recraft)
- [How to export an image - Recraft](#how-to-export-an-image-recraft)
- [Inpainting - Recraft](#inpainting-recraft)
- [History - Recraft](#history-recraft)
- [Quick start - Recraft](#quick-start-recraft)
- [How to import an image - Recraft](#how-to-import-an-image-recraft)
- [Teams overview - Recraft](#teams-overview-recraft)
- [About importing - Recraft](#about-importing-recraft)
- [Size limits and supported formats of imported images - Recraft](#size-limits-and-supported-formats-of-imported-images-recraft)
- [Teams workspace admin page - Recraft](#teams-workspace-admin-page-recraft)
- [How to crop an image - Recraft](#how-to-crop-an-image-recraft)
- [Applying your design to the mockup - Recraft](#applying-your-design-to-the-mockup-recraft)
- [Favorites - Recraft](#favorites-recraft)
- [Community - Recraft](#community-recraft)
- [How to create a mockup - Recraft](#how-to-create-a-mockup-recraft)
- [Remix - Recraft](#remix-recraft)
- [Background tools - Recraft](#background-tools-recraft)
- [Raster effects - Recraft](#raster-effects-recraft)
- [Manual editing tools - Recraft](#manual-editing-tools-recraft)
- [How To Generate A Video - Recraft](#how-to-generate-a-video-recraft)
- [Editing images with natural language - Recraft](#editing-images-with-natural-language-recraft)
- [Curated styles - Recraft](#curated-styles-recraft)
- [Templates - Recraft](#templates-recraft)
- [Seamless patterns - Recraft](#seamless-patterns-recraft)
- [Sharing a style - Recraft](#sharing-a-style-recraft)
- [Canvas tools - Recraft](#canvas-tools-recraft)
- [Endpoints - Recraft](#endpoints-recraft)
- [Interface overview - Recraft](#interface-overview-recraft)
- [Overview - Recraft](#overview-recraft)
- [Prompting with Recraft V4 - Recraft](#prompting-with-recraft-v4-recraft)
- [Selection tools - Recraft](#selection-tools-recraft)
- [How to delete a custom style - Recraft](#how-to-delete-a-custom-style-recraft)
- [Projects - Recraft](#projects-recraft)
- [Keyboard shortcuts - Recraft](#keyboard-shortcuts-recraft)
- [How to edit a custom style - Recraft](#how-to-edit-a-custom-style-recraft)
- [Canvas - Recraft](#canvas-recraft)
- [How to create a custom style - Recraft](#how-to-create-a-custom-style-recraft)
- [Artistic levels - Recraft](#artistic-levels-recraft)
- [Aspect ratios - Recraft](#aspect-ratios-recraft)
- [How to generate a logo - Recraft](#how-to-generate-a-logo-recraft)
- [How to generate an image - Recraft](#how-to-generate-an-image-recraft)
- [Agentic mode - Recraft](#agentic-mode-recraft)
- [Generation modes - Recraft](#generation-modes-recraft)
- [Generating multiple images - Recraft](#generating-multiple-images-recraft)
- [Selecting a style - Recraft](#selecting-a-style-recraft)
- [Prompt panel - Recraft](#prompt-panel-recraft)
- [Exploration Mode - Recraft](#exploration-mode-recraft)
- [External models - Recraft](#external-models-recraft)
- [Using custom fonts - Recraft](#using-custom-fonts-recraft)
- [Negative prompts - Recraft](#negative-prompts-recraft)
- [Adding text to an image - Recraft](#adding-text-to-an-image-recraft)
- [Extract prompt - Recraft](#extract-prompt-recraft)
- [Video Prompts - Recraft](#video-prompts-recraft)
- [Context panel - Recraft](#context-panel-recraft)
- [Unknown](#unknown)
- [Introduction - Recraft](#introduction-recraft)
---
# Getting started - Recraft
> Documentation Index
> -------------------
>
> Fetch the complete documentation index at: [/docs/llms.txt](https://www.recraft.ai/docs/llms.txt)
>
> Use this file to discover all available pages before exploring further.
[Skip to main content](https://www.recraft.ai/docs/mcp-reference/getting-started#content-area)
Recraft supports the [Model Context Protocol](https://modelcontextprotocol.io/)
(MCP), enabling AI agents such as Claude, Cursor, and other MCP-compatible clients to interact with Recraft’s image generation and editing tools through a standardized interface. By connecting Recraft’s MCP server to your client, you can generate and edit high-quality raster and vector images directly from your agent environment without switching tools. Recraft offers two ways to connect:
* **Remote MCP server** — a hosted server at `https://mcp.recraft.ai/mcp` that requires no local installation. Authenticate via OAuth with your Recraft account and connect directly from any MCP-compatible client. Usage is billed against your Recraft **subscription credits** (the same balance used in the Recraft Studio app). See [Remote MCP server](https://www.recraft.ai/docs/mcp-reference/remote-server)
for setup instructions.
* **Local MCP server** — a self-hosted server you run on your machine. Useful if you want to store generated images locally or need full control over the setup. Usage is billed against your **API units** balance (the same balance used by the [Recraft API](https://www.recraft.ai/docs/api-reference/getting-started)
) and requires a Recraft API key. See [Setup](https://www.recraft.ai/docs/mcp-reference/local-server)
for installation options.
The remote and local MCP servers draw from **different balances**. The remote server consumes **subscription credits** from your Recraft plan, while the local server consumes **API units** purchased separately. Choose the option that matches the balance you want to use.
[](https://www.recraft.ai/docs/mcp-reference/getting-started#supported-operations)
Supported operations
-----------------------------------------------------------------------------------------------------------
Both Recraft’s MCP servers expose the following operations:
* Raster and vector image generation
* Raster and vector image transforms
* Creating and using custom styles
* Vectorization of raster images
* Background removal and replacement
* Upscaling of raster images
For the source code of the Local MCP Server, visit [Recraft MCP GitHub](https://github.com/recraft-ai/mcp-recraft-server)
.
[](https://www.recraft.ai/docs/mcp-reference/getting-started#choosing-remote-vs-local)
Choosing remote vs. local
--------------------------------------------------------------------------------------------------------------------
Use this comparison to decide which option fits your workflow:
| | Remote MCP server | Local MCP server |
| --- | --- | --- |
| Installation | None — hosted at `https://mcp.recraft.ai/mcp` | Requires Node.js, or install via DXT / Smithery |
| Authentication | OAuth 2.0 with your Recraft account | Recraft API key |
| Billing | **Subscription credits** (same balance as the Recraft Studio web app) | **API units** (same balance as the [Recraft API](https://www.recraft.ai/docs/api-reference/getting-started)
) |
| Result storage | Hosted by Recraft; clients receive URLs | Local directory (default) or hosted; configurable |
| Best for | Fast setup, Claude App / web clients | Local file output, custom environments, users on a pay-as-you-go API plan |
See [Remote MCP server](https://www.recraft.ai/docs/mcp-reference/remote-server)
or [Local MCP server](https://www.recraft.ai/docs/mcp-reference/local-server)
for setup details.
[](https://www.recraft.ai/docs/mcp-reference/getting-started#supported-clients)
Supported clients
-----------------------------------------------------------------------------------------------------
Any MCP-compatible client that supports the Streamable HTTP transport and OAuth can use the remote server; any client that supports stdio-based servers can use the local server.
[](https://www.recraft.ai/docs/mcp-reference/getting-started#troubleshooting)
Troubleshooting
-------------------------------------------------------------------------------------------------
###
[](https://www.recraft.ai/docs/mcp-reference/getting-started#remote-mcp-server)
Remote MCP server
* **OAuth window doesn’t open or loops back.** Clear the cached OAuth state in your client and reconnect. For `mcp-remote`, delete `~/.mcp-auth/` (or the equivalent directory for your OS) and restart the client.
* **Tools don’t appear in the client.** Confirm the connector is enabled in your client’s tools menu. In Claude Code, run `/mcp` to verify the server is connected and authenticated.
* **“Insufficient credits” errors.** Top up your subscription credits on the [Recraft web platform](https://www.recraft.ai/)
. Remote MCP calls deduct from this balance, not from your API units.
###
[](https://www.recraft.ai/docs/mcp-reference/getting-started#local-mcp-server)
Local MCP server
* **`401 Unauthorized` from the API.** Check that `RECRAFT_API_KEY` is set in the client config and that your API units balance is greater than zero on the [API page](https://www.recraft.ai/profile/api)
.
* **Server doesn’t start.** Verify Node.js is installed and that the config file path is correct for your client. Restart the client after editing the config so it re-reads the MCP server list.
* **“API units depleted” errors.** Buy additional API units from your [profile page](https://www.recraft.ai/profile/api)
. API units are separate from subscription credits.
###
[](https://www.recraft.ai/docs/mcp-reference/getting-started#either-server)
Either server
* **Generation succeeds but no image preview is shown.** Some clients impose a size limit on inline images. Retry with a smaller `size`, or open the returned URL directly.
* **Tools call appears to hang.** Image operations can take up to a few minutes for large outputs or upscales. Wait for the call to time out before retrying.
[Remote MCP server](https://www.recraft.ai/docs/mcp-reference/remote-server)
⌘I
Assistant
Responses are generated using AI and may contain mistakes.
---
# Swagger - Recraft
> Documentation Index
> -------------------
>
> Fetch the complete documentation index at: [/docs/llms.txt](https://www.recraft.ai/docs/llms.txt)
>
> Use this file to discover all available pages before exploring further.
[Skip to main content](https://www.recraft.ai/docs/api-reference/swagger#content-area)
OpenAPI is a standard format for describing RESTful APIs that allows those APIs to be integrated with tools for a wide variety of applications, including testing, client library generation, IDE integration, and more. To get started, check out the [Specification](https://external.api.recraft.ai/doc/#/)
.
[Appendix](https://www.recraft.ai/docs/api-reference/appendix)
⌘I
Assistant
Responses are generated using AI and may contain mistakes.
---
# Local MCP Server - Recraft
> Documentation Index
> -------------------
>
> Fetch the complete documentation index at: [/docs/llms.txt](https://www.recraft.ai/docs/llms.txt)
>
> Use this file to discover all available pages before exploring further.
[Skip to main content](https://www.recraft.ai/docs/mcp-reference/local-server#content-area)
[](https://www.recraft.ai/docs/mcp-reference/local-server#billing)
Billing
------------------------------------------------------------------------------
The local MCP server consumes **API units** — the pay-as-you-go balance used by the [Recraft API](https://www.recraft.ai/docs/api-reference/getting-started)
. Each operation deducts API units according to the rates in [API pricing](https://www.recraft.ai/docs/api-reference/pricing)
. API units are separate from the **subscription credits** used by the Recraft Studio app and the [Remote MCP server](https://www.recraft.ai/docs/mcp-reference/remote-server)
; you must purchase API units before you can generate an API key. If you’d rather pay from your **subscription credits** balance, use the [Remote MCP server](https://www.recraft.ai/docs/mcp-reference/remote-server)
instead.
[](https://www.recraft.ai/docs/mcp-reference/local-server#prerequisites)
Prerequisites
------------------------------------------------------------------------------------------
1. **Recraft API key**
* Access it in the [API section](https://www.recraft.ai/profile/api)
of your account **Profile**.
* Note: You will need to buy API units before you can generate an API key.
2. **MCP client installed**
* For example, [Claude Desktop](https://claude.ai/)
.
[](https://www.recraft.ai/docs/mcp-reference/local-server#option-1-claude-desktop-extensions)
Option 1: Claude Desktop Extensions
-------------------------------------------------------------------------------------------------------------------------------------
You can set up the Recraft MCP server in Claude using [Claude Desktop Extensions](https://www.anthropic.com/engineering/desktop-extensions)
.
1. Download **mcp-recraft-server.dxt** from the [latest release](https://github.com/recraft-ai/mcp-recraft-server/releases/latest/download/mcp-recraft-server.dxt)
.
2. Double-click the file to open it with Claude Desktop Extensions.
3. In Claude Desktop, click **Install**.
4. Fill out the setup form:
* Paste your Recraft API key obtained from your [Profile API page](https://www.recraft.ai/profile/api)
.
* (Optional) Specify a local path for generated image storage, or indicate that all results should be stored remotely.
5. Enable the server.
If you encounter installation issues, make sure you have the latest version of Claude Desktop installed.
[](https://www.recraft.ai/docs/mcp-reference/local-server#option-2-smithery)
Option 2: Smithery
---------------------------------------------------------------------------------------------------
1. Find this MCP server on [Smithery](https://smithery.ai/server/@recraft-ai/mcp-recraft-server)
.
2. Install from Smithery.
* Note: all generation results will be stored remotely.
* If you want to store results locally, use Claude Desktop Extensions or manual setup instead.
[](https://www.recraft.ai/docs/mcp-reference/local-server#option-3-manual-setup)
Option 3: Manual setup
-----------------------------------------------------------------------------------------------------------
###
[](https://www.recraft.ai/docs/mcp-reference/local-server#requirements)
Requirements
* Ensure **Node.js** is installed on your machine.
* If not, install from [nodejs.org](https://nodejs.org/)
.
* You will need to run `npx` or `node` commands in your terminal.
###
[](https://www.recraft.ai/docs/mcp-reference/local-server#from-npm)
From NPM
1. Open your **Claude Desktop configuration file**: `claude_desktop_config.json`.
2. Modify the file to add the following configuration snippet (replace with your API key and desired settings):
{
"mcpServers": {
"recraft": {
"command": "npx",
"args": [\
"-y",\
"@recraft-ai/mcp-recraft-server@latest"\
],
"env": {
"RECRAFT_API_KEY": "",
"IMAGE_STORAGE_DIRECTORY": "",
"RECRAFT_REMOTE_RESULTS_STORAGE": ""
}
}
}
}
###
[](https://www.recraft.ai/docs/mcp-reference/local-server#from-source)
From source
1. Clone the repository:
git clone https://github.com/recraft-ai/mcp-recraft-server.git
2. Navigate into the cloned directory and build the project:
npm install
npm run build
3. Modify your `claude_desktop_config.json` file with the following configuration:
{
"mcpServers": {
"recraft": {
"command": "node",
"args": [\
"/dist/index.js"\
],
"env": {
"RECRAFT_API_KEY": "",
"IMAGE_STORAGE_DIRECTORY": "",
"RECRAFT_REMOTE_RESULTS_STORAGE": ""
}
}
}
}
###
[](https://www.recraft.ai/docs/mcp-reference/local-server#environment-variables)
Environment variables
You can configure the following parameters in the `env` section:
* **`RECRAFT_API_KEY`** _(required)_ Your [Recraft API key](https://www.recraft.ai/profile/api)
.
* **`IMAGE_STORAGE_DIRECTORY`** _(optional)_ Local directory to store generated images. Defaults to:
$HOME_DIR/.mcp-recraft-server
This value is ignored if `RECRAFT_REMOTE_RESULTS_STORAGE="1"`.
* **`RECRAFT_REMOTE_RESULTS_STORAGE`** _(optional)_ Set to `"1"` to store all generated images remotely. In this case, only URLs are returned and `IMAGE_STORAGE_DIRECTORY` is ignored.
[Remote MCP server](https://www.recraft.ai/docs/mcp-reference/remote-server)
[Tools](https://www.recraft.ai/docs/mcp-reference/tools)
⌘I
Assistant
Responses are generated using AI and may contain mistakes.
---
# Tools - Recraft
> Documentation Index
> -------------------
>
> Fetch the complete documentation index at: [/docs/llms.txt](https://www.recraft.ai/docs/llms.txt)
>
> Use this file to discover all available pages before exploring further.
[Skip to main content](https://www.recraft.ai/docs/mcp-reference/tools#content-area)
Recraft’s MCP server allows use of the following tools.
[](https://www.recraft.ai/docs/mcp-reference/tools#billing)
Billing
-----------------------------------------------------------------------
The two MCP servers bill differently against the same operation:
* **Local MCP server** — charges the same prices as the [Recraft API](https://www.recraft.ai/docs/api-reference/pricing)
and deducts from your **API units** balance. The USD prices in the table below correspond to this rate.
* **Remote MCP server** — charges the same prices as the Recraft web platform and deducts from your **subscription credits** balance. See [Credits](https://www.recraft.ai/docs/plans-and-billing/credits)
for credit costs per operation.
[](https://www.recraft.ai/docs/mcp-reference/tools#tools)
Tools
-------------------------------------------------------------------
| Tool name | Description | Parameters |
| --- | --- | --- |
| `generate_image` | Generates raster/vector images from a prompt | \- `prompt`
\- `style`
\- `size`
\- `model`
\- `number of images` |
| `create_style` | Creates a style from a list of images | \- `list of images`
\- `basic style` |
| `vectorize_image` | Vectorizes a raster image into a vector format | \- `image` |
| `image_to_image` | Generates raster/vector images from an image + prompt | \- `image`
\- `prompt`
\- `similarity strength`
\- `style`
\- `size`
\- `model`
\- `number of images` |
| `remove_background` | Removes the background of an image | \- `image` |
| `replace_background` | Generates a new background in an image from a prompt | \- `image`
\- `prompt for background`
\- `style`
\- `size`
\- `model`
\- `number of images` |
| `crisp_upscale` | Upscales image resolution without altering content | \- `image` |
| `creative_upscale` | Upscales image resolution while regenerating details | \- `image` |
| `get_user` | Retrieves information about the user and balance | – |
For a detailed explanation of each tool, its parameters, and pricing, visit the [Recraft API docs](https://www.recraft.ai/docs/api-reference/getting-started)
.
[](https://www.recraft.ai/docs/mcp-reference/tools#models-and-style-compatibility)
Models and style compatibility
---------------------------------------------------------------------------------------------------------------------
Tools that accept a `model` parameter (`generate_image`, `image_to_image`, `replace_background`) work with any model from the Recraft V2, V3, V4, and V4.1 generations. A few compatibility rules apply:
* **Styles are not supported on V4 and V4.1 models** (including their Pro, Utility, and Vector variants). The `style` and `style_id` parameters only apply to V2 and V3 models. See [Styles](https://www.recraft.ai/docs/api-reference/styles)
for the full compatibility matrix.
* **Vector models** (names ending in `_vector`) produce SVG output; raster models produce PNG/WEBP/JPG output. Pair your chosen model with a compatible style category — raster styles with raster models, vector styles with vector models.
* **`custom_style_id`** created via `create_style` is bound to the model and base style supplied at creation time; reuse it with the same model.
[Local MCP Server](https://www.recraft.ai/docs/mcp-reference/local-server)
⌘I
Assistant
Responses are generated using AI and may contain mistakes.
---
# Pricing - Recraft
> Documentation Index
> -------------------
>
> Fetch the complete documentation index at: [/docs/llms.txt](https://www.recraft.ai/docs/llms.txt)
>
> Use this file to discover all available pages before exploring further.
[Skip to main content](https://www.recraft.ai/docs/api-reference/pricing#content-area)
[](https://www.recraft.ai/docs/api-reference/pricing#api-unit-package-pricing)
API unit package pricing
-----------------------------------------------------------------------------------------------------------
The following are the API Unit packages available from Recraft for the use of the Recraft API Service. API Unit packages must be purchased in advance and all API Unit packages are non-cancellable and non-refundable. Any number of unit packages can be bought, and purchased unit packages do not expire.
| Price | API units |
| --- | --- |
| USD $1.00 | 1,000 |
[](https://www.recraft.ai/docs/api-reference/pricing#api-unit-charges-for-api-services)
API unit charges for API services
-----------------------------------------------------------------------------------------------------------------------------
The following are the service charges (in API Units) for use of the API Services. API Units will be automatically deducted from Member’s pre-purchased API Unit package.
| Service description | Cost (USD) | Cost (API units) | Billing Basis |
| --- | --- | --- | --- |
| Raster image generation:
– Recraft V4.1 Pro
– Recraft V4.1 Utility Pro | $0.21 | 210 | Per image |
| Raster image generation:
– Recraft V4.1
– Recraft V4.1 Utility | $0.035 | 35 | Per image |
| Raster image generation – Recraft V4 Pro | $0.25 | 250 | Per image |
| Raster image generation – Recraft V4 | $0.04 | 40 | Per image |
| Raster image generation – Recraft V3 | $0.04 | 40 | Per image |
| Raster image generation – Recraft V2 | $0.022 | 22 | Per image |
| Vector image generation:
– Recraft V4.1 Pro Vector
– Recraft V4.1 Utility Pro Vector
– Recraft V4 Pro Vector | $0.30 | 300 | Per image |
| Vector image generation:
– Recraft V4.1 Vector
– Recraft V4.1 Utility Vector
– Recraft V4 Vector | $0.08 | 80 | Per image |
| Vector image generation – Recraft V3 Vector | $0.08 | 80 | Per image |
| Vector image generation – Recraft V2 Vector | $0.044 | 44 | Per image |
| Raster image to image – Recraft V3 | $0.04 | 40 | Per image |
| Vector image to image – Recraft V3 Vector | $0.08 | 80 | Per image |
| Raster image inpainting – Recraft V3 | $0.04 | 40 | Per image |
| Vector image inpainting – Recraft V3 Vector | $0.08 | 80 | Per image |
| Raster image outpainting – Recraft V3 | $0.04 | 40 | Per image |
| Vector image outpainting – Recraft V3 Vector | $0.08 | 80 | Per image |
| Replace raster background – Recraft V3 | $0.04 | 40 | Per image |
| Replace vector background – Recraft V3 Vector | $0.08 | 80 | Per image |
| Generate raster background – Recraft V3 | $0.04 | 40 | Per image |
| Generate vector background – Recraft V3 Vector | $0.08 | 80 | Per image |
| Image style creation | $0.04 | 40 | Per request |
| Image vectorization | $0.01 | 10 | Per request |
| Image background removal | $0.01 | 10 | Per request |
| Crisp upscale | $0.004 | 4 | Per request |
| Creative upscale | $0.25 | 250 | Per request |
| Erase region | $0.002 | 2 | Per request |
| Variate image | $0.04 | 40 | Per request |
| Prompt enhancement | $0.01 | 10 | Per request |
[Styles](https://www.recraft.ai/docs/api-reference/styles)
[Appendix](https://www.recraft.ai/docs/api-reference/appendix)
⌘I
Assistant
Responses are generated using AI and may contain mistakes.
---
# Appendix - Recraft
> Documentation Index
> -------------------
>
> Fetch the complete documentation index at: [/docs/llms.txt](https://www.recraft.ai/docs/llms.txt)
>
> Use this file to discover all available pages before exploring further.
[Skip to main content](https://www.recraft.ai/docs/api-reference/appendix#content-area)
###
[](https://www.recraft.ai/docs/api-reference/appendix#maximum-prompt-length)
Maximum prompt length
The maximum prompt length depends on the model.
| Models | Limit |
| --- | --- |
| Recraft V4.1
Recraft V4.1 Vector
Recraft V4.1 Pro
Recraft V4.1 Pro Vector
Recraft V4.1 Utility
Recraft V4.1 Utility Vector
Recraft V4.1 Utility Pro
Recraft V4.1 Utility Pro Vector
Recraft V4
Recraft V4 Vector
Recraft V4 Pro
Recraft V4 Pro Vector | 10000 |
| Recraft V3
Recraft V3 Vector
Recraft V2
Recraft V2 Vector | 1000 |
###
[](https://www.recraft.ai/docs/api-reference/appendix#list-of-supported-image-sizes)
List of supported image sizes
The image size can be specified using one of two formats:
* Explicit dimensions (`WxH`): defines the exact width (`W`) and height (`H`) of the output image in pixels. Example: `1820x1024`.
* Aspect ratio (`w:h`): defines the proportional relationship between width and height without specifying absolute dimensions. Example: `16:9`.
See [Wikipedia](https://en.wikipedia.org/wiki/Aspect_ratio_(image))
for more details. The set of valid aspects and size values depends on the selected model. Refer to the table below for supported configurations.
| Models | Aspect | Size |
| --- | --- | --- |
| Recraft V4.1
Recraft V4.1 Utility
Recraft V4 | `1:1` | `1024x1024` |
| `2:1` | `1536x768` |
| `1:2` | `768x1536` |
| `3:2` | `1280x832` |
| `2:3` | `832x1280` |
| `4:3` | `1216x896` |
| `3:4` | `896x1216` |
| `5:4` | `1152x896` |
| `4:5` | `896x1152` |
| `6:10` | `832x1344` |
| `14:10` | `1280x896` |
| `10:14` | `896x1280` |
| `16:9` | `1344x768` |
| `9:16` | `768x1344` |
| Recraft V4.1 Pro
Recraft V4.1 Utility Pro
Recraft V4 Pro | `1:1` | `2048x2048` |
| `2:1` | `3072x1536` |
| `1:2` | `1536x3072` |
| `3:2` | `2560x1664` |
| `2:3` | `1664x2560` |
| `4:3` | `2432x1792` |
| `3:4` | `1792x2432` |
| `5:4` | `2304x1792` |
| `4:5` | `1792x2304` |
| `6:10` | `1664x2688` |
| `14:10` | `2560x1792` |
| `10:14` | `1792x2560` |
| `16:9` | `2688x1536` |
| `9:16` | `1536x2688` |
| Recraft V2
Recraft V3 | `1:1` | `1024x1024` |
| `2:1` | `2048x1024` |
| `1:2` | `1024x2048` |
| `3:2` | `1536x1024` |
| `2:3` | `1024x1536` |
| `4:3` | `1365x1024` |
| `3:4` | `1024x1365` |
| `5:4` | `1280x1024` |
| `4:5` | `1024x1280` |
| `6:10` | `1024x1707` |
| `14:10` | `1434x1024` |
| `10:14` | `1024x1434` |
| `16:9` | `1820x1024` |
| `9:16` | `1024x1820` |
| Recraft V4.1 Vector
Recraft V4.1 Pro Vector
Recraft V4.1 Utility Vector
Recraft V4.1 Utility Pro Vector
Recraft V4 Vector
Recraft V4 Pro Vector
Recraft V3 Vector
Recraft V2 Vector | `1:1` | |
| `2:1` | |
| `1:2` | |
| `3:2` | |
| `2:3` | |
| `4:3` | |
| `3:4` | |
| `5:4` | |
| `4:5` | |
| `6:10` | |
| `14:10` | |
| `10:14` | |
| `16:9` | |
| `9:16` | |
###
[](https://www.recraft.ai/docs/api-reference/appendix#policies)
Policies
* All generated images are currently stored for approx. 24 hours, this policy may change in the future, and you should not rely on it remaining constant.
* Images are publicly accessible via direct links without authentication. However, since the URLs include unique image identifiers and are cryptographically signed, restoring lost links is nearly impossible.
* Currently, image generation rates are defined on a per-user basis and set at **100 images per minute**. In addition, requests are limited to **5 per second**. These rate limits may be adjusted in the future.
Need help or have suggestions for improving our docs? [Contact support](mailto:%5Bhelp@recraft.ai%5D(mailto:help@recraft.ai))
[Pricing](https://www.recraft.ai/docs/api-reference/pricing)
[Swagger](https://www.recraft.ai/docs/api-reference/swagger)
⌘I
Assistant
Responses are generated using AI and may contain mistakes.
---
# Getting started - Recraft
> Documentation Index
> -------------------
>
> Fetch the complete documentation index at: [/docs/llms.txt](https://www.recraft.ai/docs/llms.txt)
>
> Use this file to discover all available pages before exploring further.
[Skip to main content](https://www.recraft.ai/docs/api-reference/getting-started#content-area)
Welcome to Recraft image generation and editing API. Learn the basics of the Recraft API, including raster and vector image generation, style creation, image generation in your brand style and colors, image vectorization, and background removal. **Authenticate and interact with our API in a matter of minutes.**
###
[](https://www.recraft.ai/docs/api-reference/getting-started#models)
Models
Recraft has developed four generations of proprietary models:
| Generation | Models |
| --- | --- |
| V4.1 | Recraft V4.1
Recraft V4.1 Vector
Recraft V4.1 Pro
Recraft V4.1 Pro Vector
Recraft V4.1 Utility
Recraft V4.1 Utility Pro |
| V4 | Recraft V4
Recraft V4 Vector
Recraft V4 Pro
Recraft V4 Pro Vector |
| V3 | Recraft V3 (aka Red Panda)
Recraft V3 Vector |
| V2 | Recraft V2 (aka Recraft 20B)
Recraft V2 Vector |
Recraft V4.1 models, released in mid-May 2026, are the next step beyond V4, with sharper, more polished, and more consistent results across the board. Photorealism takes a serious step forward — cleaner outputs, better object understanding, and noticeably sharper mockups. Prompt following has improved too: V4.1 reads intent more naturally, so shorter prompts produce stronger results. New illustration styles are now possible, and icons and vectors come out cleaner by default. V4.1 ships in two lines — V4.1, tuned for peak artistic and design quality, and V4.1 Utility, optimized for broader, general-purpose appeal. Each line is available in standard (1MP) versions for everyday work and fast iteration, and Pro (4MP) versions for print-ready assets and large-scale use. Recraft V4 models, released in February 2026, represent a ground-up rebuild and our most advanced generation to date. Focused on what matters for real work — design taste, prompt accuracy, and output quality at any size — V4 models deliver true design vision in composition, lighting, textures, and overall feel, along with the world’s only production-grade vector generation. Available in two versions: V4 (1MP) for everyday work and fast iteration, and V4 Pro (4MP) for print-ready assets and large-scale use. Both share the same creative capabilities, design taste, and art-directed professional results. Recraft V3 models, released in October 2024, were new state-of-the-art models trained from scratch that introduced major advances in photorealism and text rendering. V3 ranked first on the Hugging Face Text-to-Image leaderboard for five consecutive months. Recraft V2 models, released in February 2024, were the first AI models built specifically for designers. V2 enabled the creation of both raster and vector images with anatomical accuracy, consistent brand styling, and precise iteration control. All 16 models from V2, V3, V4, V4.1 generations are available in the Recraft API and within the Recraft web and mobile applications.
[](https://www.recraft.ai/docs/api-reference/getting-started#supported-features)
Supported features
-------------------------------------------------------------------------------------------------------
The Recraft API exposes the following capabilities. See [Endpoints](https://www.recraft.ai/docs/api-reference/endpoints)
for full request and response schemas.
* [Generate image](https://www.recraft.ai/docs/api-reference/endpoints#generate-image)
— create raster or vector images from a text prompt.
* [Create style](https://www.recraft.ai/docs/api-reference/endpoints#create-style)
— upload reference images to define a reusable custom style.
* [Image to image](https://www.recraft.ai/docs/api-reference/endpoints#image-to-image)
— generate variations of an existing image guided by a prompt.
* [Image inpainting](https://www.recraft.ai/docs/api-reference/endpoints#image-inpainting)
— regenerate masked regions of an image while keeping the rest intact.
* [Image outpainting](https://www.recraft.ai/docs/api-reference/endpoints#image-outpainting)
— extend an image beyond its original borders.
* [Replace background](https://www.recraft.ai/docs/api-reference/endpoints#replace-background)
— swap the background of an image with a new one described by a prompt.
* [Generate background](https://www.recraft.ai/docs/api-reference/endpoints#generate-background)
— generate a fresh background around a subject.
* [Vectorize image](https://www.recraft.ai/docs/api-reference/endpoints#vectorize-image)
— convert a raster image into a scalable vector graphic.
* [Remove background](https://www.recraft.ai/docs/api-reference/endpoints#remove-background)
— produce a transparent-background cutout of the subject.
* [Crisp upscale](https://www.recraft.ai/docs/api-reference/endpoints#crisp-upscale)
— increase resolution without altering image content.
* [Creative upscale](https://www.recraft.ai/docs/api-reference/endpoints#creative-upscale)
— increase resolution while regenerating finer details.
* [Erase region](https://www.recraft.ai/docs/api-reference/endpoints#erase-region)
— remove selected objects or regions from an image.
* [Remix image](https://www.recraft.ai/docs/api-reference/endpoints#remix-image)
— recompose an image with adjustable variation strength.
* [Explore](https://www.recraft.ai/docs/api-reference/endpoints#explore)
— generate a grid of prompt variations to explore visual directions.
* [Explore similar](https://www.recraft.ai/docs/api-reference/endpoints#explore-similar)
— generate further variations close to a chosen reference image.
* [Enhance prompt](https://www.recraft.ai/docs/api-reference/endpoints#enhance-prompt)
— rewrite a short prompt into a richer, more detailed one.
* [Get user information](https://www.recraft.ai/docs/api-reference/endpoints#get-user-information)
— fetch account details and remaining balance.
[](https://www.recraft.ai/docs/api-reference/getting-started#authentication)
Authentication
-----------------------------------------------------------------------------------------------
We use [Bearer](https://swagger.io/docs/specification/authentication/bearer-authentication/)
API tokens for authentication. To access your API key, log in to Recraft, [enter your profile](https://app.recraft.ai/profile/api)
and hit ‘Generate’ (available only if your API units balance is above zero). All requests should include your API key in an Authorization HTTP header as follows:
`Authorization: Bearer RECRAFT_API_TOKEN` A user may create multiple API tokens; however, all tokens share the same API units balance.
[](https://www.recraft.ai/docs/api-reference/getting-started#swagger)
Swagger
---------------------------------------------------------------------------------
Interactive API documentation is available via [Swagger](https://external.api.recraft.ai/doc/#/)
. You can explore all available endpoints, test API calls, and view request/response schemas directly in your browser.
###
[](https://www.recraft.ai/docs/api-reference/getting-started#rest-/-python-library)
REST / Python Library
The Recraft API adheres to REST principles, allowing you to interact using any utilities (e.g., curl), programming languages, or libraries of your choice. One of the easiest of available alternatives is [OpenAI Python library](https://github.com/openai/openai-python)
which is also compatible with Recraft API, but it’s important to remember that not all parameters/options are supported or implemented. Additionally, some parameters may have different meanings, or they may be quietly ignored if they are not applicable to the Recraft API. Future examples will be shown using that library, for example, once installed, you can use the following code to be authenticated:
from openai import OpenAI
client = OpenAI(
base_url='https://external.api.recraft.ai/v1',
api_key=,
)
[Endpoints](https://www.recraft.ai/docs/api-reference/endpoints)
⌘I
Assistant
Responses are generated using AI and may contain mistakes.
---
# Remote MCP server - Recraft
> Documentation Index
> -------------------
>
> Fetch the complete documentation index at: [/docs/llms.txt](https://www.recraft.ai/docs/llms.txt)
>
> Use this file to discover all available pages before exploring further.
[Skip to main content](https://www.recraft.ai/docs/mcp-reference/remote-server#content-area)
Recraft provides a hosted remote MCP server at `https://mcp.recraft.ai/mcp`. It supports the Streamable HTTP transport and uses OAuth 2.0 for authentication. The remote server exposes all functionality available through the [Recraft API](https://www.recraft.ai/docs/api-reference/endpoints)
, including image generation, editing, vectorization, upscaling, background removal and replacement, and custom style creation.
[](https://www.recraft.ai/docs/mcp-reference/remote-server#billing)
Billing
-------------------------------------------------------------------------------
The remote MCP server consumes **subscription credits** from your Recraft plan — the same balance used by the Recraft Studio app. Each operation deducts credits according to the rates in [Plans and billing → Credits](https://www.recraft.ai/docs/plans-and-billing/credits)
. Free users receive a daily credit allowance; paid plans include a monthly allowance, with optional top-ups. If you’d rather pay from your **API units** balance (the pay-as-you-go balance used by the Recraft API), use the [Local MCP server](https://www.recraft.ai/docs/mcp-reference/local-server)
instead.
[](https://www.recraft.ai/docs/mcp-reference/remote-server#authentication)
Authentication
---------------------------------------------------------------------------------------------
The remote MCP server uses OAuth 2.0. When you connect for the first time, your MCP client will initiate an OAuth flow and redirect you to Recraft to authorize access. Once authorized, the client stores the token and handles authentication automatically on subsequent requests.
[](https://www.recraft.ai/docs/mcp-reference/remote-server#setup-by-client)
Setup by client
-----------------------------------------------------------------------------------------------
###
[](https://www.recraft.ai/docs/mcp-reference/remote-server#claude-app)
Claude App
The Recraft MCP server is available as a custom connector in the [Claude App](https://claude.ai/)
(web and desktop). The easiest way to install the connector is to follow this one-click link: [Add Recraft to Claude](https://claude.ai/customize/connectors?modal=add-custom-connector&connectorName=Recraft&connectorUrl=https%3A%2F%2Fmcp.recraft.ai%2Fmcp)
. The link opens the “Add custom connector” modal with the Recraft fields prefilled — review them and click **Add**. Alternatively, add the connector manually:
1. Open [Settings → Connectors](https://claude.ai/settings/connectors)
in the Claude App.
2. Click **Add custom connector**.
3. Fill in the fields:
* **Name:** `Recraft`
* **Remote MCP server URL:** `https://mcp.recraft.ai/mcp`
4. Click **Add** to save the connector.
The first time you use the connector, Claude will redirect you to Recraft to authorize access via OAuth. Once authorized, the connector stays available across your Claude conversations — enable it from the **Search and tools** menu in the composer when you want Claude to use Recraft.
###
[](https://www.recraft.ai/docs/mcp-reference/remote-server#claude-code)
Claude Code
Run the following command in your terminal:
claude mcp add --transport http recraft https://mcp.recraft.ai/mcp
Then run `/mcp` in a session to authenticate via OAuth.
**Allow image downloads on Claude Code on the web.** [Claude Code on the web](https://code.claude.com/docs/en/claude-code-on-the-web)
runs in a managed container with restricted network access, so it may fail to download generated images from Recraft’s image host. To fix this, allowlist the Recraft image host in the environment’s **Network access** settings:
1. Open the environment for editing and find the **Network access** selector in the dialog.
2. Set the access level to **Custom**.
3. In the **Allowed domains** field, add the Recraft image host (one domain per line):
img.recraft.ai
4. Check **Also include default list of common package managers** to keep the default trusted domains alongside your custom entry.
Once `img.recraft.ai` is allowed, Claude Code can download generated images without errors.
###
[](https://www.recraft.ai/docs/mcp-reference/remote-server#claude-desktop)
Claude Desktop
Open your `claude_desktop_config.json` file and add the following configuration:
{
"mcpServers": {
"recraft": {
"command": "npx",
"args": [\
"-y",\
"mcp-remote",\
"https://mcp.recraft.ai/mcp"\
]
}
}
}
On first use, `mcp-remote` will open a browser window to complete the OAuth flow.
###
[](https://www.recraft.ai/docs/mcp-reference/remote-server#cursor)
Cursor
Open your `~/.cursor/mcp.json` file and add the following configuration:
{
"mcpServers": {
"recraft": {
"url": "https://mcp.recraft.ai/mcp"
}
}
}
###
[](https://www.recraft.ai/docs/mcp-reference/remote-server#visual-studio-code)
Visual Studio Code
Open your `.vscode/mcp.json` file (or your user settings) and add:
{
"servers": {
"recraft": {
"type": "http",
"url": "https://mcp.recraft.ai/mcp"
}
}
}
###
[](https://www.recraft.ai/docs/mcp-reference/remote-server#other-mcp-clients)
Other MCP clients
Any MCP-compatible client that supports Streamable HTTP transport and OAuth can connect using:
* **URL:** `https://mcp.recraft.ai/mcp`
* **Transport:** Streamable HTTP
If your client does not support remote OAuth flows directly and requires a stdio-based command, use [`mcp-remote`](https://www.npmjs.com/package/mcp-remote)
:
npx -y mcp-remote https://mcp.recraft.ai/mcp
[](https://www.recraft.ai/docs/mcp-reference/remote-server#supported-operations)
Supported operations
---------------------------------------------------------------------------------------------------------
The remote server supports the full set of image operations available through the Recraft API, including:
* Generate raster and vector images from text prompts
* Create image variations and image-to-image transformations
* Edit selected parts of an image
* Remove selected objects or regions
* Remove, replace, or generate backgrounds
* Convert raster images into vector graphics
* Upscale images for either sharper or more detailed results
* Create custom styles from reference images
* View account details such as your remaining credits
[Getting started](https://www.recraft.ai/docs/mcp-reference/getting-started)
[Local MCP Server](https://www.recraft.ai/docs/mcp-reference/local-server)
⌘I
Assistant
Responses are generated using AI and may contain mistakes.
---
# Choosing a model - Recraft
> Documentation Index
> -------------------
>
> Fetch the complete documentation index at: [/docs/llms.txt](https://www.recraft.ai/docs/llms.txt)
>
> Use this file to discover all available pages before exploring further.
[Skip to main content](https://www.recraft.ai/docs/recraft-models/choosing-a-model#content-area)
**V4** is the best default choice for most tasks. It delivers the highest design taste, prompt accuracy, and output quality across raster and vector. Use it for everyday generation and fast iteration. **V4 Pro** shares the same creative capabilities as V4 but outputs at higher resolution. Choose it when you need print-ready assets, large-format visuals, or pixel-dense detail. **V3** is a strong option when you need style consistency, precise text positioning, or artistic level control. **V2** remains valuable for specialized creative effects and unique style options that are exclusive to the model.
[Recraft V2](https://www.recraft.ai/docs/recraft-models/recraft-V2)
[External Models in Recraft](https://www.recraft.ai/docs/recraft-models/external-models)
⌘I
Assistant
Responses are generated using AI and may contain mistakes.
---
# Recraft V2 - Recraft
> Documentation Index
> -------------------
>
> Fetch the complete documentation index at: [/docs/llms.txt](https://www.recraft.ai/docs/llms.txt)
>
> Use this file to discover all available pages before exploring further.
[Skip to main content](https://www.recraft.ai/docs/recraft-models/recraft-V2#content-area)
Recraft V2 is an image generation model released in March 2024 and the first model trained from scratch by Recraft. With 20 billion parameters, it was a breakthrough in human anatomical accuracy and the first to support brand consistency and brand color inputs. It also introduced vector image generation (SVG output), as well as minimalistic icon and illustration styles. V2 is available both in the web tool and via the API. In API use, it has a lower inference cost than V3. While V2 does not match V3 in prompt adherence or text accuracy, it remains preferred by many users for a set of specific styles and vector-based workflows. As of 2025, V2 is the only model that supports generating vector icons with brand consistency, allowing multiple icons to be produced with consistent line width, corner shapes, and other stylistic rules.
###
[](https://www.recraft.ai/docs/recraft-models/recraft-V2#v2-curated-styles)
**V2 curated styles**
The curated library in V2 includes **Plastic 3D**, **Linocut**, **Grain**, and **Vector Art**, among others, and remain favorites of Recraft designers.
* **Plastic 3D** produces consistently stylized 3D figures and icons in a chosen color palette, and is often used for app UI and presentation graphics.
* **Linocut** is a vector style that can be monochrome or palette-based, and is frequently used for packaging.
* **Grain** is valued for its textured look, common in blog and book illustrations.
* **Vector Art** is popular for its distinctive outputs and is often used for logos, despite V2’s lack of accurate text generation.
###
[](https://www.recraft.ai/docs/recraft-models/recraft-V2#v2-icon-and-pictogram-styles)
**V2 icon and pictogram styles**
V2 includes several icon styles with different behavior. The **Recraft V2 Icon** style produces a different style for each generation when creating icons one-by-one. To achieve consistency, a new Vector Icon style must be created, or the Image Set tool can be used with **Recraft V2 Icon** selected. The **Recraft V2 Pictogram** style works similarly: each generation returns a new style unless the Image Set feature is used. This style also supports adjustable parameters such as cap type (see in-tool for available options). Other V2 icon styles produce consistent results by default. The most popular is **Vector Icon Outline**, which generates outline-style vector icons with a consistent look.
###
[](https://www.recraft.ai/docs/recraft-models/recraft-V2#limitations-of-v2)
**Limitations of V2**
Some style names exist in both V2 and V3, but the visual results can differ significantly between them. V2 does not support accurate in-image text generation and may produce typographic errors. It uses the **Level of detail** parameter, which is not supported in V3, and does not support the **Artistic level** parameter available in V3.
[Recraft V3](https://www.recraft.ai/docs/recraft-models/recraft-V3)
[Choosing a model](https://www.recraft.ai/docs/recraft-models/choosing-a-model)
⌘I
Assistant
Responses are generated using AI and may contain mistakes.
---
# Styles - Recraft
> Documentation Index
> -------------------
>
> Fetch the complete documentation index at: [/docs/llms.txt](https://www.recraft.ai/docs/llms.txt)
>
> Use this file to discover all available pages before exploring further.
[Skip to main content](https://www.recraft.ai/docs/api-reference/styles#content-area)
**Note:** Styles are **not yet supported for V4 models**. Styles define the visual appearance and aesthetic of generated images, including textures, visual effects, colors, composition, and overall artistic feel. Recraft offers both predefined curated styles and the ability to create custom styles. Recraft styles are organized into groups: realistic, digital illustrations, vector illustrations, icons, etc. Please refer to the examples below for visual references. To generate an image, you may provide a specific style name, such as `Recraft V3 Raw`, `Photorealism`, or `Vector art`. If a style name is supported by multiple models, the API defaults to Recraft V3 (if supported, to Recraft V2 otherwise). To use a specific version, explicitly pair the style with the model parameter (e.g., `Photorealism` with `recraftv3` or `Vector art` with `recraftv2_vector`). Refer to the [List of Styles](https://www.recraft.ai/docs/api-reference/styles#list-of-styles)
for compatibility across V2 / V3 models. Examples:
Photorealism
Images of style `Photorealism` are expected to look like just ordinary photographs made with a digital camera or a smartphone or a film camera.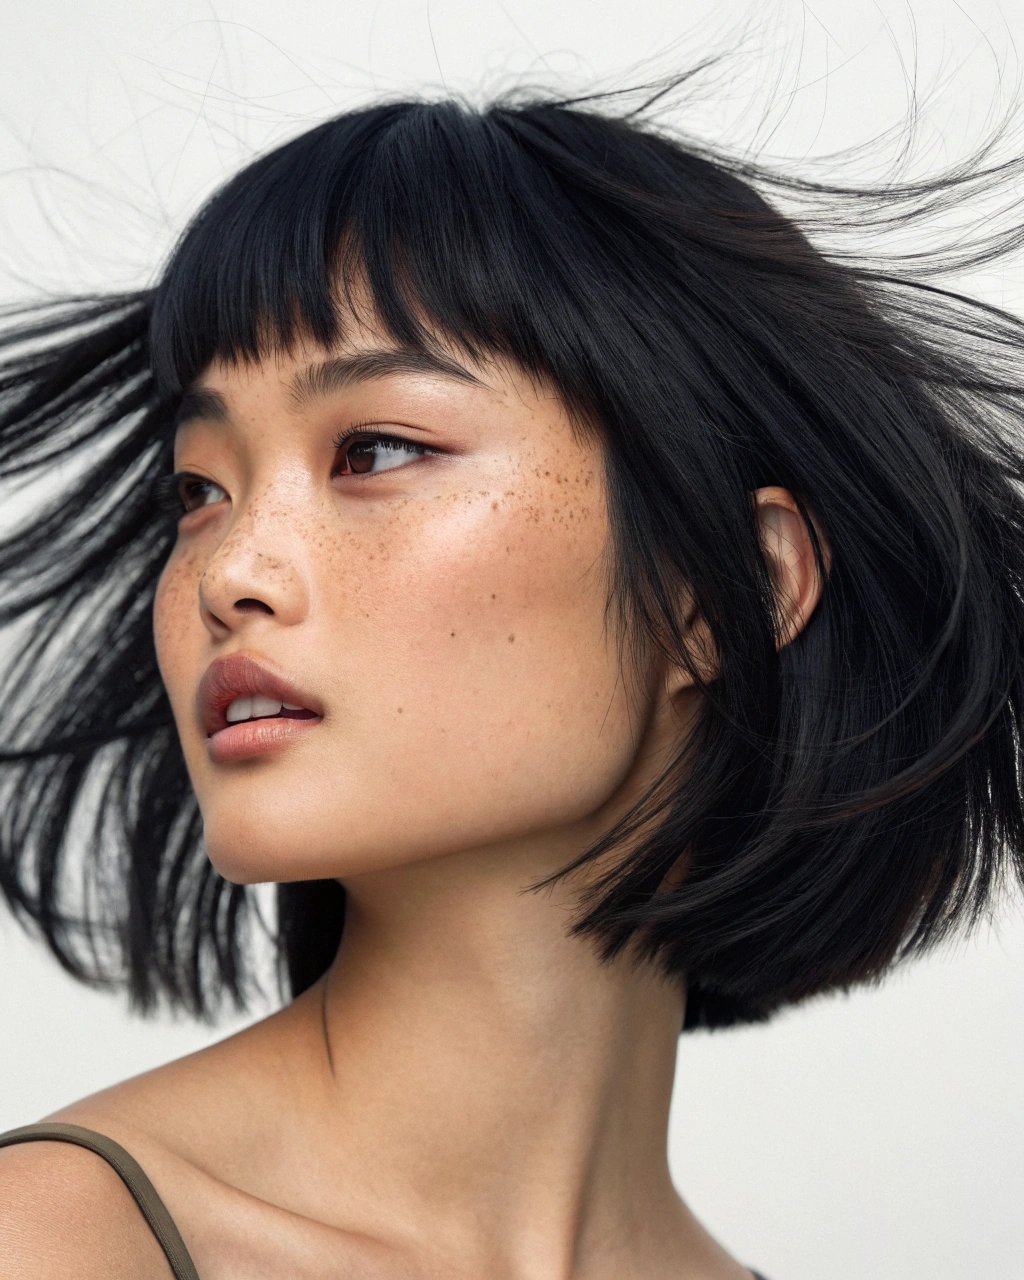
Illustration
Images of style `Illustration` are pictures drawn by hand or using computers - virtually everything except photos and vector illustrations. The most crucial difference from `Photorealism` is that illustrations possess simplified textures (like in 3D-rendered or manually drawn images) - or they are stylized in a certain creative way. The difference from `Vector art` is that `Illustration` allow for more complex color transitions, shades, fine textures..png)
Vector art
Images of style `Vector art` are expected to look like those drawn using vector graphics (see [Wikipedia](https://en.wikipedia.org/wiki/Vector_graphics)
). Usually, they use only a few different colors at once, shapes are filled with flat colors or simple color gradients. Shapes of objects can be arbitrarily complex.photorealism-exp1-1.png)
Icon
Images of style `Icon` are small digital images or symbols used in the graphical user interface. They are designed to be simple and recognizable at small sizes, often visually summarizing the action or object they stand for, or they can act as the visual identity for an app or a website and are crucial in branding.
`Photorealism` and `Illustration` images are generated in raster formats such as PNG, WEBP, or JPG. These formats use pixels to represent details, making them ideal for photos and complex artwork. On the other hand, `Vector art` and `Icon` are generated in the SVG format. Unlike raster images, SVGs are made of mathematical paths and shapes, allowing them to scale to any size without losing quality.
###
[](https://www.recraft.ai/docs/api-reference/styles#using-of-styles)
Using of styles
The `style` parameter accepts the name of any curated style provided by Recraft. Examples include but not limited to:
* Recraft V4.1, Recraft V4.1 Vector, Recraft V4.1 Pro, Recraft V4.1 Vector Pro: **styles are not supported**
* Recraft V4.1 Utility, Recraft V4.1 Utility Vector, Recraft V4.1 Utility Pro, Recraft V4.1 Utility Vector Pro: **styles are not supported**
* Recraft V4, Recraft V4 Vector, Recraft V4 Pro, Recraft V4 Vector Pro: **styles are not supported**
* Recraft V3: [`Recraft V3 Raw`](https://www.recraft.ai/styles/b9af225b-6b98-43d0-a4b3-16343641e852)
, [`Photorealism`](https://www.recraft.ai/styles/6b98805f-9342-4d1e-9b53-bcb6b6d20ea1)
, [`Illustration`](https://www.recraft.ai/styles/3eb71874-5e13-4386-a74b-e42119186b0a)
, [`Enterprise`](https://www.recraft.ai/styles/e4eb5a3f-1b8b-4f5c-bada-bf6c2451cb17)
, [`Hand-drawn`](https://www.recraft.ai/styles/17027120-cf06-465f-a4d0-2e44ad8dee0d)
, [`Punk Graphic`](https://www.recraft.ai/styles/84789d26-1153-4faf-a1d1-c3e94d7a0035)
, etc
* Recraft V3 Vector: [`Vector art`](https://www.recraft.ai/styles/773902ac-683a-4042-86a3-fe714eee345a)
, [`Line art`](https://www.recraft.ai/styles/19942671-ffa4-4867-9bbe-f5e4503dcc93)
, [`Engraving`](https://www.recraft.ai/styles/ce1f9161-a8dc-488f-9ff1-3f41082887b5)
, etc
* Recraft V2: [`Photorealism`](https://www.recraft.ai/styles/5a99ae89-3f14-433b-abb2-a1d8074b1ab1)
, [`Illustration`](https://www.recraft.ai/styles/b8772060-8802-4f3c-b051-73349b1017a5)
, [`3D render`](https://www.recraft.ai/styles/4659b2d6-a580-4287-849e-96190d7dbf30)
, [`Kawaii`](https://www.recraft.ai/styles/f8f1bc1c-1ae7-43ea-a36f-c81049feee01)
, etc
* Recraft V2 Vector: [`Vector art`](https://www.recraft.ai/styles/807ce9bc-7e36-4efa-a6cb-11cda1cecd19)
, [`Icon`](https://www.recraft.ai/styles/645cb7ca-4be3-4d90-9f16-e9c26f6812f1)
, [`Doodle`](https://www.recraft.ai/styles/a2ba0c04-e40d-4210-8ed2-46d3537c546c)
, etc
For the complete list of available styles organized by model and category, see the [List of Styles](https://www.recraft.ai/docs/api-reference/styles#list-of-styles)
. Some styles with identical names exist across multiple models (e.g., `Photorealism` is available in Recraft V2, and Recraft V3 models). Use the `model` parameter to explicitly specify which model version to use. The `style_id` parameter accepts:
* style IDs created via the API;
* style IDs from the Recraft web platform, accessible if :
* you own the style;
* the style is publicly available;
* the style was explicitly shared to your account.
To obtain a style ID from the web platform, open any style in the Styles panel and click the three-dot menu to copy the style ID. The `style` and `style_id` parameters cannot be used together. Specify one or the other, not both. If neither parameter is provided, the default style for the selected model will be used:
* Recraft V3: [`Recraft V3 Raw`](https://www.recraft.ai/styles/b9af225b-6b98-43d0-a4b3-16343641e852)
;
* Recraft V3 Vector: [`Vector art`](https://www.recraft.ai/styles/773902ac-683a-4042-86a3-fe714eee345a)
;
* Recraft V2: [`Photorealism`](https://www.recraft.ai/styles/5a99ae89-3f14-433b-abb2-a1d8074b1ab1)
;
* Recraft V2 Vector: [`Vector art`](https://www.recraft.ai/styles/807ce9bc-7e36-4efa-a6cb-11cda1cecd19)
.
Model compatibility:
* custom styles created on the web platform are compatible with the model specified during creation;
* custom styles created via the API are compatible with Recraft V3 and Recraft V3 Vector models only.
###
[](https://www.recraft.ai/docs/api-reference/styles#list-of-styles)
List of styles
To generate an image, you may provide a specific style name, such as `Recraft V3 Raw`, `Photorealism`, or `Vector art`. If a style name is supported by multiple models, the API defaults to Recraft V3 (if supported, to Recraft V2 otherwise). To use a specific version, explicitly pair the style with the model parameter (e.g., `Photorealism` with `recraftv3` or `Vector art` with `recraftv2_vector`).
####
[](https://www.recraft.ai/docs/api-reference/styles#recraft-v3)
Recraft V3
* Photorealistic styles: [`Photorealism`](https://www.recraft.ai/styles/6b98805f-9342-4d1e-9b53-bcb6b6d20ea1)
, [`Enterprise`](https://www.recraft.ai/styles/e4eb5a3f-1b8b-4f5c-bada-bf6c2451cb17)
, [`Natural light`](https://www.recraft.ai/styles/90cf050a-5985-4ca8-b255-d370831701ca)
, [`Studio photo`](https://www.recraft.ai/styles/b8f16786-5794-47fd-b2b3-5f607d919d1c)
, [`HDR`](https://www.recraft.ai/styles/d0c61ed6-5f6c-4332-af27-e6a5fc2bde64)
, [`Hard flash`](https://www.recraft.ai/styles/41501ef8-26a6-4d1c-946c-d8b659ff11c3)
, [`Motion blur`](https://www.recraft.ai/styles/ca56e01b-a128-477f-b2f3-13a7191c8e91)
, [`Black & white`](https://www.recraft.ai/styles/7babd38f-dc87-4ccf-99de-d8834f8900f5)
, [`Evening light`](https://www.recraft.ai/styles/d92bef4c-605e-451d-a93f-a8d78f14effa)
, [`Faded Nostalgia`](https://www.recraft.ai/styles/889bee89-edce-4104-b572-df38c58e8659)
, [`Forest life`](https://www.recraft.ai/styles/51536681-7ee0-4604-bbb3-3a9e45e2b59f)
, [`Mystic Naturalism`](https://www.recraft.ai/styles/3ab91eeb-203f-4e00-865b-1e64c7854f08)
, [`Natural Tones`](https://www.recraft.ai/styles/45f34903-6da9-4468-966d-11314d845b41)
, [`Organic Calm`](https://www.recraft.ai/styles/06401905-a828-4652-a962-7026693c8cf7)
, [`Real-Life Glow`](https://www.recraft.ai/styles/336eabc6-da87-4a1e-a567-c3dd17bf5e79)
, [`Retro Realism`](https://www.recraft.ai/styles/2a4176f2-be17-49c5-b8b7-7a3bdd11a277)
, [`Retro Snapshot`](https://www.recraft.ai/styles/226190a0-5c43-4e0c-98a0-1a4ba63800cd)
, [`Urban Drama`](https://www.recraft.ai/styles/c61a727c-a9a8-40a5-a289-fdaf3a59eae1)
, [`Village Realism`](https://www.recraft.ai/styles/ba5e9c0c-4a20-492d-924d-a758b52b102d)
, [`Warm Folk`](https://www.recraft.ai/styles/db207d41-37bf-46ae-9e12-3201167c4cbe)
, [`Product photo`](https://www.recraft.ai/styles/57ed072c-3e0e-4df5-baba-83a6e87048b8)
;
* Illustration styles: [`Illustration`](https://www.recraft.ai/styles/3eb71874-5e13-4386-a74b-e42119186b0a)
, [`Hand-drawn`](https://www.recraft.ai/styles/17027120-cf06-465f-a4d0-2e44ad8dee0d)
, [`Grain`](https://www.recraft.ai/styles/245b724f-8a24-4bde-aba4-21d41295074d)
, [`Bold Sketch`](https://www.recraft.ai/styles/6319466c-2bda-4b13-88ba-3e4e82aba55e)
, [`Pencil sketch`](https://www.recraft.ai/styles/8a5273c5-12cf-48de-8217-0f879b881398)
, [`Retro Pop`](https://www.recraft.ai/styles/a56d7265-ed27-4e0d-827b-2692d0b46fba)
, [`Clay`](https://www.recraft.ai/styles/f5145ada-d0d5-46d9-adda-d38fdf0b80d9)
, [`Risograph`](https://www.recraft.ai/styles/7be82d9c-ad40-483e-b235-389043675ad2)
, [`Color engraving`](https://www.recraft.ai/styles/75ee357c-ff80-4fbe-99ae-44d3310155fe)
, [`Pixel art`](https://www.recraft.ai/styles/aa32a571-eeeb-48bc-bc51-5792e9f49eb4)
, [`Antiquarian`](https://www.recraft.ai/styles/2b6d8781-7ab6-43dc-b870-891cc072246d)
, [`Bold fantasy`](https://www.recraft.ai/styles/1703ae77-b491-47e2-a25d-9dd6c28c2ffa)
, [`Child book`](https://www.recraft.ai/styles/ecd1de2b-02b7-43ce-9780-2ea91deb38f4)
, [`Cover`](https://www.recraft.ai/styles/6e403112-b52d-408b-8f78-539657229ade)
, [`Crosshatch`](https://www.recraft.ai/styles/7cccbbd2-c282-4ef6-a37f-889d1c503b74)
, [`Digital engraving`](https://www.recraft.ai/styles/f0999093-d0dc-4718-adba-a038a60ff6b2)
, [`Expressionism`](https://www.recraft.ai/styles/e2d8e964-ea62-43f4-a269-a47dd8728fe5)
, [`Freehand details`](https://www.recraft.ai/styles/eac001dc-5c63-4e6b-8d1f-390cbe5d2040)
, [`Grain 2.0`](https://www.recraft.ai/styles/824645a6-dc5b-4ad2-95c2-90bb6db5fbe1)
, [`Graphic intensity`](https://www.recraft.ai/styles/88b9e740-728c-4d00-9725-6d820859f6b7)
, [`Hard Comics`](https://www.recraft.ai/styles/98cef725-f770-498b-a90e-2eb4ab03cddb)
, [`Long shadow`](https://www.recraft.ai/styles/9a3edce0-424f-49c5-b372-61b0f589426c)
, [`Modern Folk`](https://www.recraft.ai/styles/6aa86245-e03f-432d-8b57-5fe5bfdb60cf)
, [`Multicolor`](https://www.recraft.ai/styles/da5cc27d-0389-4b5c-8a0d-fe5b76937214)
, [`Neon Calm`](https://www.recraft.ai/styles/1feb869d-edcc-4b6b-b6d0-413e9560f2dd)
, [`Noir`](https://www.recraft.ai/styles/956a5ac8-401f-4e5f-a034-ec458c371598)
, [`Nostalgic pastel`](https://www.recraft.ai/styles/4ce80d17-2e82-4f07-8ee7-c20931174da9)
, [`Outline details`](https://www.recraft.ai/styles/87cf0b6b-a495-4436-8598-897a71bf5db6)
, [`Pastel gradient`](https://www.recraft.ai/styles/9819278f-d0fe-4331-b7d4-37b0cf69150a)
, [`Pastel sketch`](https://www.recraft.ai/styles/149f13db-53ac-4c3e-8eb7-d5d44af04405)
, [`Pop art`](https://www.recraft.ai/styles/c5c3026e-66e5-412e-b87a-101512d745ac)
, [`Pop renaissance`](https://www.recraft.ai/styles/99c21c89-7de0-46dc-b447-e519be2c47f0)
, [`Street art`](https://www.recraft.ai/styles/c42616cd-f2c2-459c-a745-6f0ac86589d7)
, [`Tablet sketch`](https://www.recraft.ai/styles/c0c1b91e-8b46-4243-8f0b-fdea56c43701)
, [`Urban Glow`](https://www.recraft.ai/styles/acf7c4d0-ac61-4fb4-a3fa-d3a1fde6c014)
, [`Urban sketching`](https://www.recraft.ai/styles/ce069e6f-09bc-482b-9a05-fabf6658f27f)
, [`Young adult book`](https://www.recraft.ai/styles/e3838b40-dbac-450c-a06c-2c52b3b790c7)
, [`Young adult book 2`](https://www.recraft.ai/styles/b2449e5b-6954-453e-a168-c6e743dafd9a)
, [`Seamless Digital`](https://www.recraft.ai/styles/a054fca2-259e-449e-9b25-a7b2ec7a9aa3)
;
* Emblem styles: [`Prestige Emblem`](https://www.recraft.ai/styles/1c2f96d5-c2cf-4311-909f-44190a8ea153)
, [`Pop Graphic`](https://www.recraft.ai/styles/a4681bb8-4e6b-47c6-ae61-d4dcdf9b9dbc)
, [`Stamp`](https://www.recraft.ai/styles/dac4f551-db80-4cdd-8778-8d6ad4fa992b)
, [`Punk Graphic`](https://www.recraft.ai/styles/84789d26-1153-4faf-a1d1-c3e94d7a0035)
, [`Vintage Emblem`](https://www.recraft.ai/styles/7faff2e0-bdce-4a2b-aea5-471f7fb88f5e)
;
####
[](https://www.recraft.ai/docs/api-reference/styles#recraft-v3-vector)
Recraft V3 Vector
* Vector styles: [`Vector art`](https://www.recraft.ai/styles/773902ac-683a-4042-86a3-fe714eee345a)
, [`Line art`](https://www.recraft.ai/styles/19942671-ffa4-4867-9bbe-f5e4503dcc93)
, [`Linocut`](https://www.recraft.ai/styles/455a5cff-6d70-4d9a-945f-9256f279f50e)
, [`Color blobs`](https://www.recraft.ai/styles/7119b64b-b99d-4929-a418-3ead12ca1847)
, [`Engraving`](https://www.recraft.ai/styles/ce1f9161-a8dc-488f-9ff1-3f41082887b5)
, [`Bold stroke`](https://www.recraft.ai/styles/e33777c2-e1d3-4b16-bcdb-c7335e67a138)
, [`Chemistry`](https://www.recraft.ai/styles/e5aeb587-cac5-45ab-887f-bbc933a3d756)
, [`Colored stencil`](https://www.recraft.ai/styles/f5907d95-d032-4f70-a035-308bf8326ff3)
, [`Cosmics`](https://www.recraft.ai/styles/f14175ea-077f-4d8d-b1cb-e568ed906324)
, [`Cutout`](https://www.recraft.ai/styles/9ab9c49c-a934-4c83-af04-de6665a8d992)
, [`Depressive`](https://www.recraft.ai/styles/94b499fd-6408-48d1-8160-87661e93767c)
, [`Editorial`](https://www.recraft.ai/styles/59133ee8-2fc5-4225-bcd9-6934d21bcac8)
, [`Emotional flat`](https://www.recraft.ai/styles/782e2222-dbd8-46e0-bcec-1179d6c0e511)
, [`Marker outline`](https://www.recraft.ai/styles/1e018a0b-3299-445d-8812-06fd2f24eafa)
, [`Mosaic`](https://www.recraft.ai/styles/6c19cde9-52a6-40b3-9cc9-d81fe1fdd387)
, [`Naivector`](https://www.recraft.ai/styles/70192033-8db6-49af-b08b-f0e0043dddb8)
, [`Roundish flat`](https://www.recraft.ai/styles/857c6d5e-4039-45c1-8e31-12cfa25fa638)
, [`Segmented Colors`](https://www.recraft.ai/styles/8eafc64b-6483-46ca-858c-ef509ded10b5)
, [`Sharp contrast`](https://www.recraft.ai/styles/3ddad82f-d3c0-432e-ab7e-d9ed441a73c0)
, [`Thin`](https://www.recraft.ai/styles/f8300e4a-1b2f-4ad6-abbe-7e7180b87f30)
, [`Vector Photo`](https://www.recraft.ai/styles/b331f7bc-4ef6-4d17-a042-bae020cab91f)
, [`Vivid shapes`](https://www.recraft.ai/styles/85243d3e-dfd8-4f8b-83d7-456e72491814)
, [`Seamless Vector`](https://www.recraft.ai/styles/2e8f425e-b1a4-4c38-8f07-977bd8c2caf5)
;
####
[](https://www.recraft.ai/docs/api-reference/styles#recraft-v2)
Recraft V2
* Photorealistic styles: [`Photorealism`](https://www.recraft.ai/styles/5a99ae89-3f14-433b-abb2-a1d8074b1ab1)
, [`Enterprise`](https://www.recraft.ai/styles/35ceb30e-50f5-46d4-9372-e95d8458a380)
, [`Natural light`](https://www.recraft.ai/styles/030886da-f6b9-4730-a1c1-4ce54a610a81)
, [`Studio photo`](https://www.recraft.ai/styles/0295270b-e050-45ad-8711-e29d1ac87d10)
, [`HDR`](https://www.recraft.ai/styles/07d689f1-ee16-49c4-a103-befb59bd7032)
, [`Hard flash`](https://www.recraft.ai/styles/4cb07726-d352-48cf-8f9b-b06eed4e0563)
, [`Motion blur`](https://www.recraft.ai/styles/cee8bee7-2085-4aca-91d5-2e3939f11dc8)
, [`Black & white`](https://www.recraft.ai/styles/6fefbfcf-9c93-4bce-8b31-bcbd86327d66)
, [`Product photo`](https://www.recraft.ai/styles/570c6fb3-1b01-4da0-afc9-0cd9997ffcc2)
;
* Illustration styles: [`Illustration`](https://www.recraft.ai/styles/b8772060-8802-4f3c-b051-73349b1017a5)
, [`3D render`](https://www.recraft.ai/styles/4659b2d6-a580-4287-849e-96190d7dbf30)
, [`Glow`](https://www.recraft.ai/styles/077aeb2b-fca1-49e6-805b-6174bf55ee1a)
, [`Watercolor`](https://www.recraft.ai/styles/568daa6a-9631-44e7-a615-ce547146ae52)
, [`Hand-drawn`](https://www.recraft.ai/styles/a389a8b9-1209-463f-b816-0c08eb4f93c4)
, [`Kawaii`](https://www.recraft.ai/styles/f8f1bc1c-1ae7-43ea-a36f-c81049feee01)
, [`Grain`](https://www.recraft.ai/styles/9fe2962e-ac66-4d41-8ff4-38dbdfc79835)
, [`Bold Sketch`](https://www.recraft.ai/styles/41ef6ca6-8797-4cf1-87c6-522f425f2059)
, [`Pencil sketch`](https://www.recraft.ai/styles/f6e787d5-80cc-415e-b68d-860a0d25dafb)
, [`Retro Pop`](https://www.recraft.ai/styles/a28c4388-81fd-497c-a7ea-a44013636071)
, [`Clay`](https://www.recraft.ai/styles/c7aaa207-769f-4449-bdc4-c9d8cbcdbb09)
, [`Risograph`](https://www.recraft.ai/styles/902997d1-72a5-4951-81b8-042732f32d26)
, [`Psychedelic`](https://www.recraft.ai/styles/1f9a9d70-2d71-4b85-9106-646bbddf1fd0)
, [`Seamless Digital`](https://www.recraft.ai/styles/655b577f-a89f-4015-8a95-12b8daa2414b)
, [`Color engraving`](https://www.recraft.ai/styles/a36fc277-4f70-445b-bc1a-c50412c8c439)
, [`Pixel art`](https://www.recraft.ai/styles/7c8c1d97-17c8-44b4-a252-2808d44795a6)
, [`80's`](https://www.recraft.ai/styles/5e86f847-766c-4479-a6a0-645a54d77e06)
, [`Voxel art`](https://www.recraft.ai/styles/85770603-257a-4588-a9e7-73064991c1b7)
;
####
[](https://www.recraft.ai/docs/api-reference/styles#recraft-v2-vector)
Recraft V2 Vector
* Vector styles: [`Vector art`](https://www.recraft.ai/styles/807ce9bc-7e36-4efa-a6cb-11cda1cecd19)
, [`Line art`](https://www.recraft.ai/styles/da8ce568-08d9-4bfb-9ef0-2984ec6391e3)
, [`Linocut`](https://www.recraft.ai/styles/3fc31d5e-a4ea-436c-be1a-787ec1cc76d8)
, [`Cartoon`](https://www.recraft.ai/styles/6cdae472-693d-478a-91fc-83eaf7c91a0c)
, [`Flat 2.0`](https://www.recraft.ai/styles/bcfabc0a-dec4-479b-962f-b306609e90ee)
, [`Color blobs`](https://www.recraft.ai/styles/2dc79001-283c-4c1e-ac01-49a95e21175c)
, [`Vector Kawaii`](https://www.recraft.ai/styles/6caa7c53-ad06-4d3b-827d-5bb81e782659)
, [`Doodle Line art`](https://www.recraft.ai/styles/1eb016d9-46d0-4b4e-bf1d-76296f43b471)
, [`Seamless Vector`](https://www.recraft.ai/styles/22e6d2f6-7951-49c4-aaaa-b7db63cb880a)
, [`Engraving`](https://www.recraft.ai/styles/100ae2cf-358a-46d2-ab13-dda7079c0460)
;
* Icon styles: [`Icon`](https://www.recraft.ai/styles/645cb7ca-4be3-4d90-9f16-e9c26f6812f1)
, [`Outline`](https://www.recraft.ai/styles/5cf68b22-c903-48c5-882b-16872ef2d124)
, [`Pictogram`](https://www.recraft.ai/styles/be9ebb8f-312a-4d8e-b7ba-8276b05a2108)
, [`Colored outline`](https://www.recraft.ai/styles/7513cd33-5b71-4e04-8fed-becdd2672b4a)
, [`Doodle`](https://www.recraft.ai/styles/a2ba0c04-e40d-4210-8ed2-46d3537c546c)
, [`Colored shape`](https://www.recraft.ai/styles/1c5ca809-1bce-4b1c-8b14-79a5bc6df150)
, [`Gradient outline`](https://www.recraft.ai/styles/a7272add-907f-49f0-860d-d8b6d2dd0995)
, [`Offset doodle`](https://www.recraft.ai/styles/bdb513fc-cf7f-4e0f-be45-ef18bd693d03)
, [`Gradient shape`](https://www.recraft.ai/styles/65dcb522-d206-4561-bf93-9ae650f73136)
, [`Broken line`](https://www.recraft.ai/styles/d700cad3-94da-4204-b753-dbb75487edfc)
, [`Offset fill`](https://www.recraft.ai/styles/5a905231-9aee-4d4b-a0bb-eda7e79a0e95)
;
[Examples](https://www.recraft.ai/docs/api-reference/examples)
[Pricing](https://www.recraft.ai/docs/api-reference/pricing)
⌘I
Assistant
Responses are generated using AI and may contain mistakes.
---
# Recraft V4 - Recraft
> Documentation Index
> -------------------
>
> Fetch the complete documentation index at: [/docs/llms.txt](https://www.recraft.ai/docs/llms.txt)
>
> Use this file to discover all available pages before exploring further.
[Skip to main content](https://www.recraft.ai/docs/recraft-models/recraft-V4#content-area)
Recraft V4 is the latest generation of Recraft’s proprietary model family, released in **February 2026**. With a focus on visual and design taste, V4 produces images with balanced composition, cohesive color, and refined detail that feel intentional rather than stock-like, across both raster and vector outputs. Recraft V4 text-to-image models are available in four versions:
* **Recraft V4**: Standard raster model (1024x1024), ~10 seconds per image
* **Recraft V4 Vector**: Standard vector model, ~15 seconds per image
* **Recraft V4 Pro**: Higher-resolution raster model (2048x2048), ~30 seconds per image
* **Recraft V4 Pro Vector**: Higher-resolution vector model, ~45 seconds per image
**Pro** delivers higher resolution and finer detail, perfecting anatomy issues and improving realism across complex scenes. It produces more reliable results for detailed compositions, print-ready visuals, and other high-fidelity applications. All versions of Recraft V4 are available on all plan types, including the Free plan.
[](https://www.recraft.ai/docs/recraft-models/recraft-V4#exploration-mode)
Exploration Mode
-----------------------------------------------------------------------------------------------
Exploration Mode is available in Recraft V4 and allows you to generate multiple visual directions from a single prompt. Instead of producing one result, it returns a set of variations, helping you compare options and select the most suitable outcome more efficiently. This mode is particularly useful during the early stages of the creative process, when you are exploring styles, compositions, or concepts and want a broader overview before refining a specific direction. **How to Use Exploration Mode in Recraft**
1. **Open Recraft Studio** and start a new generation task.
2. In the generation panel, **select “Exploration Mode”** instead of the default mode.
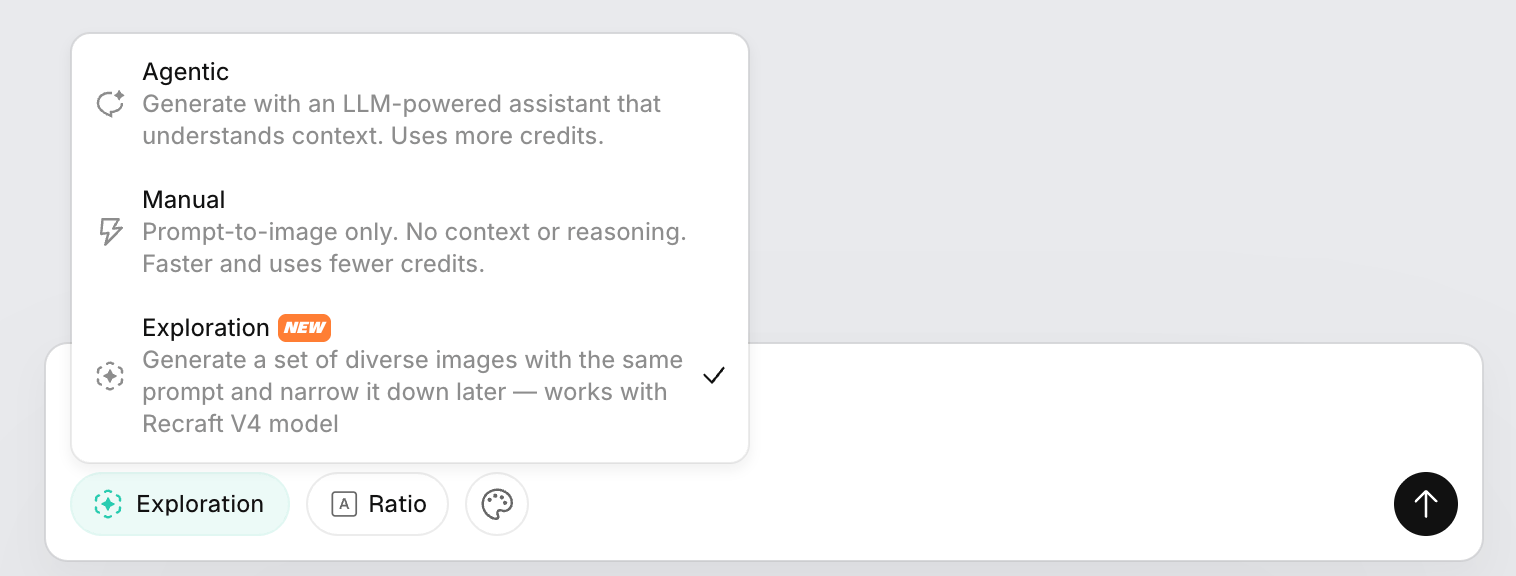
3. **Enter your prompt** as you normally would (describing the idea you want to explore).
4. Adjust any additional settings you need ( aspect ratio, etc.).
5. **Run the generation**, and Recraft will produce **multiple visual directions** from that one prompt.
6. Review the set of outputs and choose the direction you want to refine further.
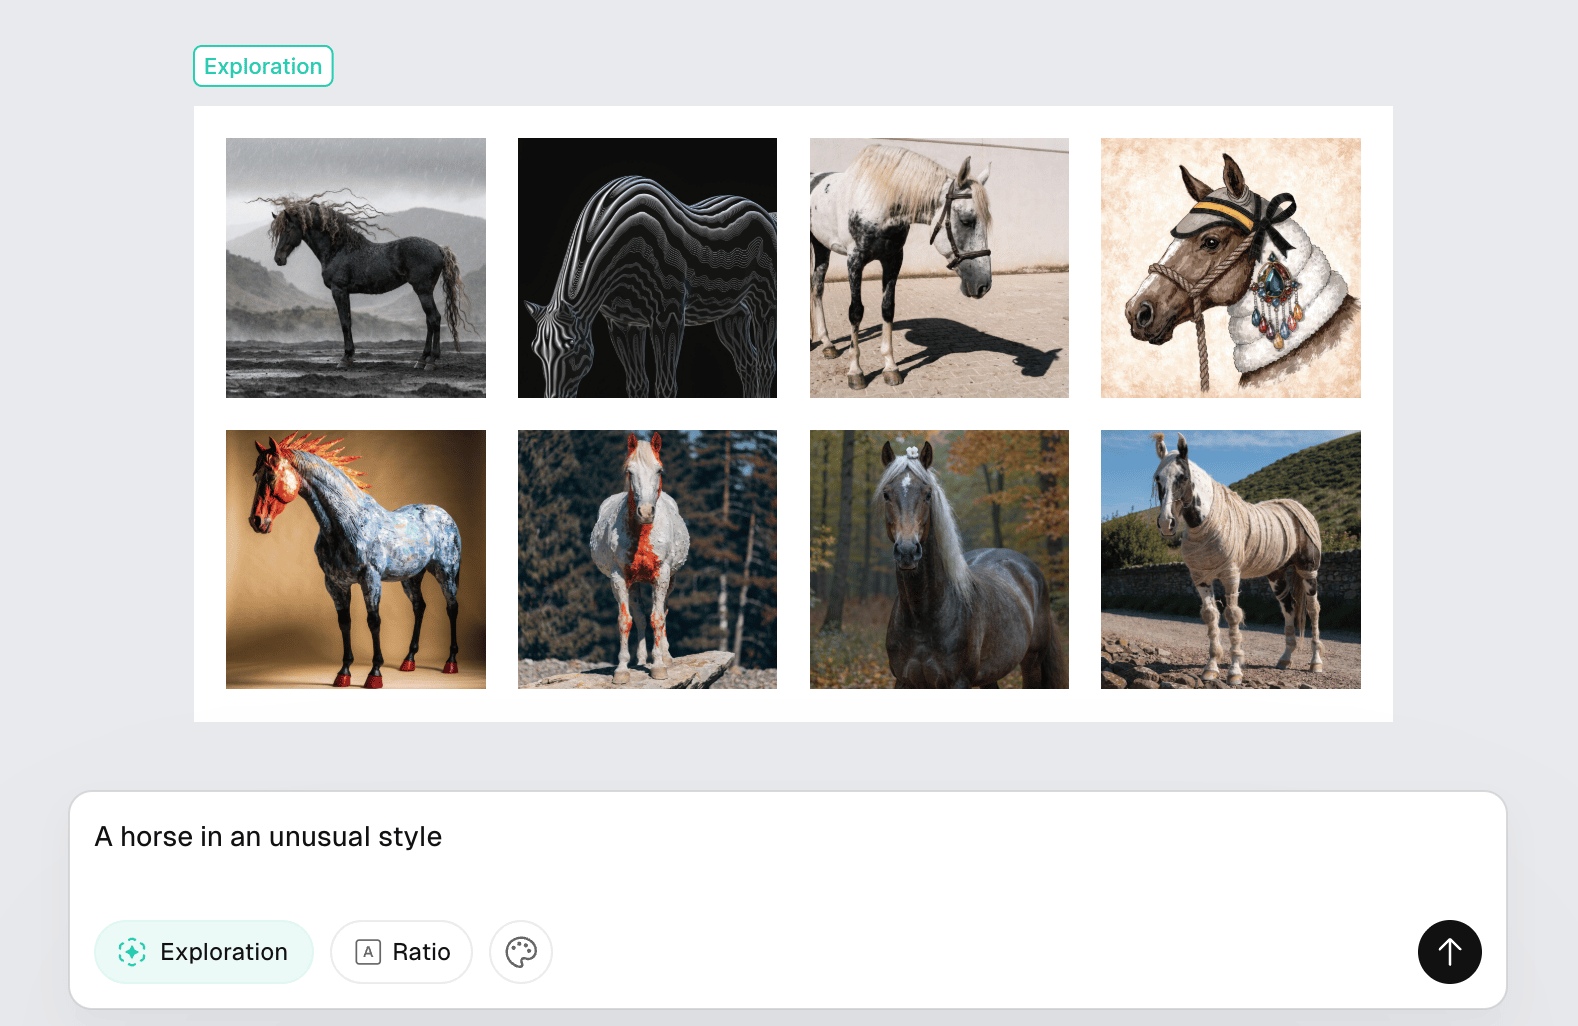 **Exploration Mode** is designed to help you quickly see a range of creative options without needing separate prompts for each variation. You can then pick one to continue working on or refine with additional prompts.
[](https://www.recraft.ai/docs/recraft-models/recraft-V4#key-features)
Key features
---------------------------------------------------------------------------------------
**Design-forward visual judgment**: Produces images with balanced composition, cohesive color relationships, and controlled detail, resulting in a more stylish, modern look that can be applied directly in professional creative workflows. Outputs tend to feel deliberate rather than generic or stock-like, making V4 well suited for workflows where aesthetic quality matters alongside prompt accuracy. **Exceptional prompt understanding**: Interprets detailed creative direction, accurately following visual relationships such as reflections, materials, and background interactions. **Readable, structured text generation**: Produces clear, legible text for infographics, menus, signage, and packaging designs. Handles short and mid-length phrases with high fidelity to layout and typography. **Rich output variety**: Generate everything from stylized illustrations to photoreal images and production-ready vectors. V4 maintains visual coherence and high detail across diverse creative directions. **Sharper detail and higher realism**: Improved textures, color balance, and lighting deliver clean geometry and consistent visual depth, avoiding the flat or synthetic look common in stock-style imagery. **High-quality vector generation**: The only model capable of generating editable, production-quality **SVG** graphics. Vector outputs preserve scalable geometry and discrete color regions suitable for professional design workflows. **Higher native resolution (Pro version)**: Ideal for professional production workflows that require large formats or pixel-dense detail. The Pro model outputs at 2048x2048 px for design-grade clarity across print, product, and marketing use cases. **Supported formats** Export results in **SVG**, **PNG**, **JPG**, **PDF**, **TIFF**, and **Lottie**. **Default availability** All V4 models are available in the web app and via the API.
[](https://www.recraft.ai/docs/recraft-models/recraft-V4#limitations)
Limitations
-------------------------------------------------------------------------------------
The following features are not yet supported in Recraft V4:
* Style creation
* Prompt-based editing
* Image sets
* Artistic level control
[](https://www.recraft.ai/docs/recraft-models/recraft-V4#availability)
Availability
---------------------------------------------------------------------------------------
Recraft V4 is accessible to all users via the **model selector** in the Recraft app and API, and replaces V3 for most generation tasks.
[](https://www.recraft.ai/docs/recraft-models/recraft-V4#pricing)
Pricing
-----------------------------------------------------------------------------
Each image in exploration mode costs 2 credits. Since you always receive 8 images per generation, the total cost per generation is 16 credits.
[Recraft V4.1](https://www.recraft.ai/docs/recraft-models/recraft-v4-1)
[Recraft V3](https://www.recraft.ai/docs/recraft-models/recraft-V3)
⌘I
Assistant
Responses are generated using AI and may contain mistakes.
---
# Introduction - Recraft
> Documentation Index
> -------------------
>
> Fetch the complete documentation index at: [/docs/llms.txt](https://www.recraft.ai/docs/llms.txt)
>
> Use this file to discover all available pages before exploring further.
[Skip to main content](https://www.recraft.ai/docs#content-area)
[](https://www.recraft.ai/docs#getting-started)
Getting started
-------------------------------------------------------------------
Generate your first image with Recraft.
Create an image
---------------
Follow these simple steps to create an image.
[](https://www.recraft.ai/docs#explore-recraft%E2%80%99s-tools-and-features)
Explore Recraft’s tools and features
---------------------------------------------------------------------------------------------------------------------
Design something amazing.
Editing
-------
Get better results with Recraft’s powerful editing features.
Styles
------
Apply a curated style or learn how to create your own to stay on-brand.
Mockups
-------
Create realisitc product mockups in minutes.
Colors and palettes
-------------------
Set up your own color swatches and palettes.
[](https://www.recraft.ai/docs#learn-about-plans-ownership-and-getting-help)
Learn about plans, ownership, and getting help
-------------------------------------------------------------------------------------------------------------------------------
Everything you need for a meaningful experience.
Paid plans
----------
Learn what’s included with our paid plans.
Ownership and copyright
-----------------------
Understand your commercial rights and copyright for generated content.
Get help
--------
Contact support, report a bug, and request a feature.
FAQ
---
View most frequently asked questions.
[](https://www.recraft.ai/docs#lookign-for-inspiration)
Lookign for inspiration?
------------------------------------------------------------------------------------
See exceptional AI-generated visuals
------------------------------------
Browse our community gallery to see what’s possible with Recraft.
[Recraft V4.1](https://www.recraft.ai/docs/recraft-models/recraft-v4-1)
⌘I
Assistant
Responses are generated using AI and may contain mistakes.
---
# External Models in Recraft - Recraft
> Documentation Index
> -------------------
>
> Fetch the complete documentation index at: [/docs/llms.txt](https://www.recraft.ai/docs/llms.txt)
>
> Use this file to discover all available pages before exploring further.
[Skip to main content](https://www.recraft.ai/docs/recraft-models/external-models#content-area)
Recraft Studio gives you access to a curated selection of third-party image and video generation models alongside Recraft’s own proprietary models.
[](https://www.recraft.ai/docs/recraft-models/external-models#what-are-external-models)
What are external models?
---------------------------------------------------------------------------------------------------------------------
External models are image and video generation models built by other providers that are available to use directly inside Recraft Studio. You can find them in the model selector alongside Recraft’s native V2, V3, V4 and V4.1 models.
###
[](https://www.recraft.ai/docs/recraft-models/external-models#where-can-i-use-external-models)
Where can I use external models?
External models are available in **Recraft Studio only**. Each generation consumes credits based on the model and quality setting. **External models are not available via the Recraft API.** The API supports only Recraft’s proprietary model family (V2, V3, V4 and V4.1 generations).
###
[](https://www.recraft.ai/docs/recraft-models/external-models#supported-external-models-for-image-generation)
Supported external models for Image generation
| Provider | Models |
| --- | --- |
| **OpenAI** | GPT Image 1 Low, Medium, High · GPT Image 1.5 Low, Medium, High · GPT Image 2 Low, Medium, High |
| **Google** | Nano Banana · Nano Banana 2 · Nano Banana Pro · Nano Banana 2 4K · Nano Banana Pro 4K · Imagen 4 · Imagen 4 Ultra |
| **Black Forest Labs** | Flux 1 Schnell · Flux 1.0 Dev · Flux 1.1 Pro · Flux 1 Kontext Pro · Flux 1 Kontext Max · Flux 2 Dev · Flux 2 Pro · Flux 2 Max · Flux 2 Flex |
| **Alibaba** | Qwen-Image · Qwen-Image 2 · Qwen-Image 2 Pro · Z-Image Turbo |
| **ByteDance** | Seedream V4 · Seedream V4.5 · Seedream 5.0 Lite |
| **Ideogram** | Ideogram V3 Turbo · Ideogram V3 Default · Ideogram V3 Quality, Ideogram V4 Turbo, Ideogram V4 Balanced, Ideogram V4 Quality |
| **ImagineArt** | ImagineArt 2.0 |
| **HiDream** | HiDream I1 Dev |
| **Grok Imagine** | Grok Imagine Image |
| **NVIDIA** | Cosmos 3 Super |
| **Krea** | Krea 2 Large, Krea 2 Medium, Krea 2 Turbo |
> _The list of available external models may change over time as new models are added or removed._
[](https://www.recraft.ai/docs/recraft-models/external-models#credits-and-reference-images)
Credits and Reference Images
----------------------------------------------------------------------------------------------------------------------------
Credit consumption varies depending on the selected model. The exact number of credits is displayed in the product when you choose a model.
| Provider | Credits | Reference Images |
| --- | --- | --- |
| **OpenAI** | 2–30 credits | Supports up to **10 reference images**. |
| **Google** | 5–40 credits | **Nano Banana** models support up to **10 reference images**. |
| **Black Forest Labs** | 1–18 credits | **FLUX.1 Kontext Max** and **FLUX.1 Kontext Pro** support **1 reference image**. **FLUX.2 Dev** supports **3 reference images**. **FLUX.2 Pro**, **FLUX.2 Flex**, and **FLUX.2 Max** support up to **8 reference images**. |
| **Alibaba** | 1–12 credits | **Qwen-Image**, **Qwen-Image 2**, and **Qwen-Image 2 Pro** support up to **10 reference images**. |
| **ByteDance** | 7–8 credits | Supports up to **10 reference images**. |
| **Ideogram** | 4–17 credits | Credit cost varies by model. |
| **ImagineArt** | 8 credits | Credit cost is fixed at **8 credits**. |
| **HiDream** | 6 credits | Credit cost is fixed at **6 credits**. |
| **Grok Imagine** | 4 credits | Supports up to **3 reference images**. |
| **NVIDIA** | 7 credits | Credit cost is fixed at **7 credits**. |
| **Krea** | 2–8 credits | Credit cost varies by model. |
> **Note:** The exact credit cost for each model is shown in the Recraft interface when you select it and may vary depending on the chosen model.
###
[](https://www.recraft.ai/docs/recraft-models/external-models#supported-external-models-for-video-generation)
Supported external models for Video generation
| **Provider** | **Models** |
| --- | --- |
| **OpenAI** | **Sora, Sora 2 Pro** |
| **Google** | **Veo 2, Veo 3 Fast, Veo 3, Veo 3.1 Lite, Veo 3.1 Fast ,Veo 3.1** |
| **Kling** | **Kling 2.1 Master, Kling 2.5 Turbo, Kling 2.6 Pro, Kling 3 Omni Standard, Kling 3 Omni Pro, Kling 3 Standard, Kling 3 Pro** |
| **Pixverse** | **Pixverse V6, Pixverse V5.5, Pixverse V5.6** |
| **Seedance** | **Seedance 1.5 Pro, Seedance 2.0 Fast, Seedance 2.0** |
| **Alibaba** | **Wan 2.2 A14B, Wan 2.5 Preview, Wan 2.6, Wan 2.7, Happy Horse 1.0, Happy Horse 1.1** |
| **Hailuo** | **Hailuo-02 Standard, Hailuo-02 Pro, Hailuo-2.3 Standard, Hailuo-2.3 Pro** |
| **Ray** | **Ray 2 Flash, Ray 2** |
[](https://www.recraft.ai/docs/recraft-models/external-models#video-generation-credits)
Video Generation Credits
--------------------------------------------------------------------------------------------------------------------
Video generation is priced **per second**. The total cost of a generation depends on both the **selected model** and additional video settings. In general, the longer the video, the higher the total credit cost.
| Provider | Credits per Second |
| --- | --- |
| **OpenAI** | 17–83 credits, depending on the selected model and additional settings |
| **Google** | 13–142 credits, depending on the selected model and additional settings |
| **Kling** | 12–56 credits, depending on the selected model and additional settings |
| **PixVerse** | 7–80 credits, depending on the selected model and additional settings |
| **Seedance** | 9–53 credits, depending on the selected model and additional settings |
| **Alibaba** | 7–35 credits, depending on the selected model and additional settings |
| **Hailuo** | 9–16 credits, depending on the selected model and additional settings |
| **Ray** | 15–36 credits, depending on the selected model and additional settings |
> **Note:** The exact credit cost is displayed in the Recraft interface when you select a model and configure your video generation settings.
###
[](https://www.recraft.ai/docs/recraft-models/external-models#faq)
FAQ
**Can I use GPT Image, Flux, or other external models through the Recraft API?** No. The Recraft API supports only Recraft’s own models (V2, V3, V4 and V4.1 ). External models are available in Recraft Studio only.
[Choosing a model](https://www.recraft.ai/docs/recraft-models/choosing-a-model)
⌘I
Assistant
Responses are generated using AI and may contain mistakes.
---
# Contacting support - Recraft
> Documentation Index
> -------------------
>
> Fetch the complete documentation index at: [/docs/llms.txt](https://www.recraft.ai/docs/llms.txt)
>
> Use this file to discover all available pages before exploring further.
[Skip to main content](https://www.recraft.ai/docs/support-and-faq/contact-support#content-area)
If you need help using Recraft, troubleshooting a problem, or reporting unexpected behavior, our support team is here to assist. You can contact Recraft support through any of the following channels:
* Email: [help@recraft.ai](mailto:help@recraft.ai)
* In-app support widget (found in your Recraft profile)
* Discord: post in the **#support** channel on the [Recraft Discord server](https://discord.gg/recraft)
**Response time:**
For users on a paid subscription, support requests are reviewed within 24 hours.
[Reporting bugs](https://www.recraft.ai/docs/support-and-faq/reporting-bugs)
⌘I
Assistant
Responses are generated using AI and may contain mistakes.
---
# Recraft on Discord - Recraft
> Documentation Index
> -------------------
>
> Fetch the complete documentation index at: [/docs/llms.txt](https://www.recraft.ai/docs/llms.txt)
>
> Use this file to discover all available pages before exploring further.
[Skip to main content](https://www.recraft.ai/docs/support-and-faq/recraft-on-discord#content-area)
The Recraft community lives on Discord. Join our server to ask questions, share tips, get help, or support others in the community. [Join the Recraft Discord server](https://discord.gg/recraft)
.
[Requesting a feature](https://www.recraft.ai/docs/support-and-faq/requesting-a-feature)
[Security and compliance](https://www.recraft.ai/docs/support-and-faq/security-and-compliance)
⌘I
Assistant
Responses are generated using AI and may contain mistakes.
---
# Recraft V3 - Recraft
> Documentation Index
> -------------------
>
> Fetch the complete documentation index at: [/docs/llms.txt](https://www.recraft.ai/docs/llms.txt)
>
> Use this file to discover all available pages before exploring further.
[Skip to main content](https://www.recraft.ai/docs/recraft-models/recraft-V3#content-area)
Recraft V3 is an image generation model released in October 2024. It ranked first for five consecutive months on the Artificial Analysis public benchmark on Hugging Face, maintaining a clear lead over models from Midjourney, OpenAI, and others. V3 introduced major advances in photorealism and text rendering. It was the first Recraft model to generate mid-size text accurately and, as of 2025, is the only model capable of placing text at specific positions in an image. It supports a rich library of curated styles, an infinite library of AI-generated styles, and—like V2—can maintain style consistency from a small set of example images without retraining. V3 also includes the **Artistic level** parameter for adjusting the artistic fidelity of an image. Lower values produce more standard images, such as direct portraits, while higher values create less conventional compositions with more peculiar angles or perspectives. Because of its flexibility and quality, V3 is recommended for most use cases.
[Recraft V4](https://www.recraft.ai/docs/recraft-models/recraft-V4)
[Recraft V2](https://www.recraft.ai/docs/recraft-models/recraft-V2)
⌘I
Assistant
Responses are generated using AI and may contain mistakes.
---
# Requesting a feature - Recraft
> Documentation Index
> -------------------
>
> Fetch the complete documentation index at: [/docs/llms.txt](https://www.recraft.ai/docs/llms.txt)
>
> Use this file to discover all available pages before exploring further.
[Skip to main content](https://www.recraft.ai/docs/support-and-faq/requesting-a-feature#content-area)
We welcome feature suggestions from the community. You can submit requests via:
1. The **#suggestions** channel on [Recraft Discord](https://discord.com/channels/1039589216033706005/1311006789428314164)
2. The [Canny feature request board](https://recraft.canny.io/)
3. Email: [help@recraft.ai](mailto:help@recraft.ai)
To help us evaluate your request:
* Clearly describe the feature or improvement you’d like to see
* Explain your use case and why it matters to your workflow
* Attach mockups or example images if available—they help us understand your idea better
[Reporting bugs](https://www.recraft.ai/docs/support-and-faq/reporting-bugs)
[Recraft on Discord](https://www.recraft.ai/docs/support-and-faq/recraft-on-discord)
⌘I
Assistant
Responses are generated using AI and may contain mistakes.
---
# Reporting bugs - Recraft
> Documentation Index
> -------------------
>
> Fetch the complete documentation index at: [/docs/llms.txt](https://www.recraft.ai/docs/llms.txt)
>
> Use this file to discover all available pages before exploring further.
[Skip to main content](https://www.recraft.ai/docs/support-and-faq/reporting-bugs#content-area)
You can report bugs in three ways:
1. Post in the **#bug-report** channel on the [Recraft Discord](https://discord.com/channels/1039589216033706005/1311006789428314164)
2. Submit a report via the [Canny feedback board](https://recraft.canny.io/)
3. Email us at [help@recraft.ai](mailto:help@recraft.ai)
When reporting a bug, please include:
* The email address linked to your Recraft account
* A screenshot or screen recording showing the issue
* A detailed description of the problem and the steps to reproduce it
* Platform details (e.g., browser, operating system, or device used)
[Contacting support](https://www.recraft.ai/docs/support-and-faq/contact-support)
[Requesting a feature](https://www.recraft.ai/docs/support-and-faq/requesting-a-feature)
⌘I
Assistant
Responses are generated using AI and may contain mistakes.
---
# Security and compliance - Recraft
> Documentation Index
> -------------------
>
> Fetch the complete documentation index at: [/docs/llms.txt](https://www.recraft.ai/docs/llms.txt)
>
> Use this file to discover all available pages before exploring further.
[Skip to main content](https://www.recraft.ai/docs/support-and-faq/security-and-compliance#content-area)
Recraft maintains clear policies on ownership, commercial rights, and licensing to help users understand how generated content can be used. These policies work alongside our broader security, privacy, and compliance practices, which outline how data is handled and protected. Read the full overview here: [Recraft Security, Privacy & Compliance Overview](https://www.recraft.ai/blog/recraft-security-privacy-compliance-overview)
[Recraft on Discord](https://www.recraft.ai/docs/support-and-faq/recraft-on-discord)
[FAQ](https://www.recraft.ai/docs/support-and-faq/FAQ)
⌘I
Assistant
Responses are generated using AI and may contain mistakes.
---
# Legal and policy documents - Recraft
> Documentation Index
> -------------------
>
> Fetch the complete documentation index at: [/docs/llms.txt](https://www.recraft.ai/docs/llms.txt)
>
> Use this file to discover all available pages before exploring further.
[Skip to main content](https://www.recraft.ai/docs/trust-and-security/legal-and-policy-documents#content-area)
###
[](https://www.recraft.ai/docs/trust-and-security/legal-and-policy-documents#terms-of-service-and-privacy-policy)
Terms of service and privacy policy
Your use of Recraft is governed by our [Terms of Service](https://www.recraft.ai/terms)
and [Privacy Policy](https://www.recraft.ai/privacy)
. The Terms establish the conditions for using the platform, while the Privacy Policy describes how we handle personal data and user rights.
###
[](https://www.recraft.ai/docs/trust-and-security/legal-and-policy-documents#data-processing-agreement-dpa)
Data processing agreement (DPA)
For enterprise clients, a Data Processing Agreement is available to ensure GDPR compliance.
###
[](https://www.recraft.ai/docs/trust-and-security/legal-and-policy-documents#transparency-notice)
Transparency notice
A Transparency Notice is also planned, which will provide additional clarity on subprocessors and data-handling practices once published.
###
[](https://www.recraft.ai/docs/trust-and-security/legal-and-policy-documents#faq)
FAQ
**Where can I find the Terms of Service?** They are available at [recraft.ai/terms](https://www.recraft.ai/terms)
.
[Compliance and certifications](https://www.recraft.ai/docs/trust-and-security/compliance-and-certifications)
[Security](https://www.recraft.ai/docs/trust-and-security/security)
⌘I
Assistant
Responses are generated using AI and may contain mistakes.
---
# Ownership - Recraft
> Documentation Index
> -------------------
>
> Fetch the complete documentation index at: [/docs/llms.txt](https://www.recraft.ai/docs/llms.txt)
>
> Use this file to discover all available pages before exploring further.
[Skip to main content](https://www.recraft.ai/docs/trust-and-security/ownership#content-area)
###
[](https://www.recraft.ai/docs/trust-and-security/ownership#free-plan)
Free plan
Images generated on the Free plan are public and owned by Recraft. Users are granted only a limited, non-exclusive license for personal purposes, and commercial use is prohibited.
###
[](https://www.recraft.ai/docs/trust-and-security/ownership#paid-plans)
Paid plans
With a paid subscription, users retain full ownership and commercial rights over the assets they generate. These assets remain private, will not appear in the public gallery, and can be used for any business or creative purpose. Ownership rights remain even after a subscription ends.
###
[](https://www.recraft.ai/docs/trust-and-security/ownership#recraft-intellectual-property)
Recraft intellectual property
Recraft retains ownership of the platform itself, including the software and underlying AI models. Assets generated with Recraft are not allowed to be used to train external AI systems, nor can the service be sublicensed or resold.
###
[](https://www.recraft.ai/docs/trust-and-security/ownership#faq)
FAQ
Q: **Can I sell images created with a Free plan?**
A: No. Free plan images are owned by Recraft and cannot be used commercially. Q: **Do I keep rights to images made with a paid plan after canceling my subscription?**
A: Yes. All assets generated during a paid subscription remain yours permanently. Q: **If I change to a paid plan from the Free plan, do I own my images and can I make them private?**
A: No. Any images generated while subscribed to the Free plan remain public and property of Recraft.
[Data use and model training](https://www.recraft.ai/docs/trust-and-security/data-use-and-model-training)
⌘I
Assistant
Responses are generated using AI and may contain mistakes.
---
# Recraft V4.1 - Recraft
> Documentation Index
> -------------------
>
> Fetch the complete documentation index at: [/docs/llms.txt](https://www.recraft.ai/docs/llms.txt)
>
> Use this file to discover all available pages before exploring further.
[Skip to main content](https://www.recraft.ai/docs/recraft-models/recraft-v4-1#content-area)
[](https://www.recraft.ai/docs/recraft-models/recraft-v4-1#more-beautiful-by-nature)
More Beautiful by Nature
=================================================================================================================
Beautiful images don’t happen by accident. Neither does V4.1. V4.1, released on May 14, 2026, is the upgrade you didn’t know you were waiting for. Images feel more alive, more purposeful, and more natural. The photorealism is quieter and more realistic. New illustration styles are now possible that simply weren’t before. And this model can read a short prompt and get the aesthetic right, all without the instructions of War and Peace to get there.
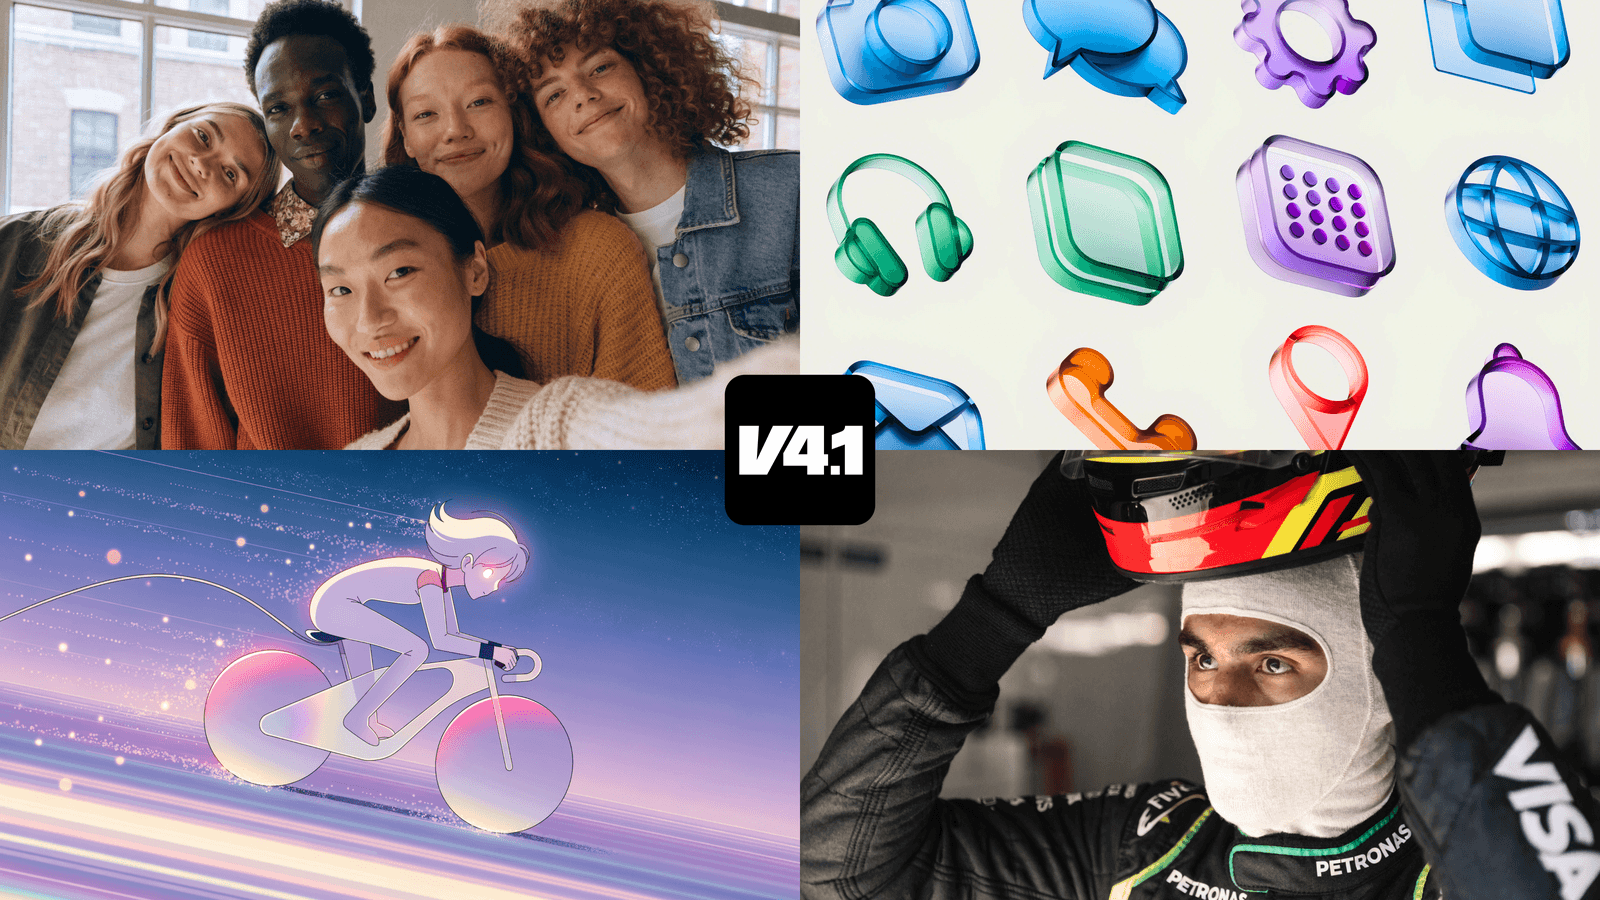
(Oh, and we built a Utility variant for when simplicity matters more than creative surprise. More on that below.) Turns out, there’s always room for one more pixel of progress. Here’s what that looks like.
[](https://www.recraft.ai/docs/recraft-models/recraft-v4-1#photorealism-that-actually-looks-real)
**Photorealism That Actually Looks Real**
-----------------------------------------------------------------------------------------------------------------------------------------------
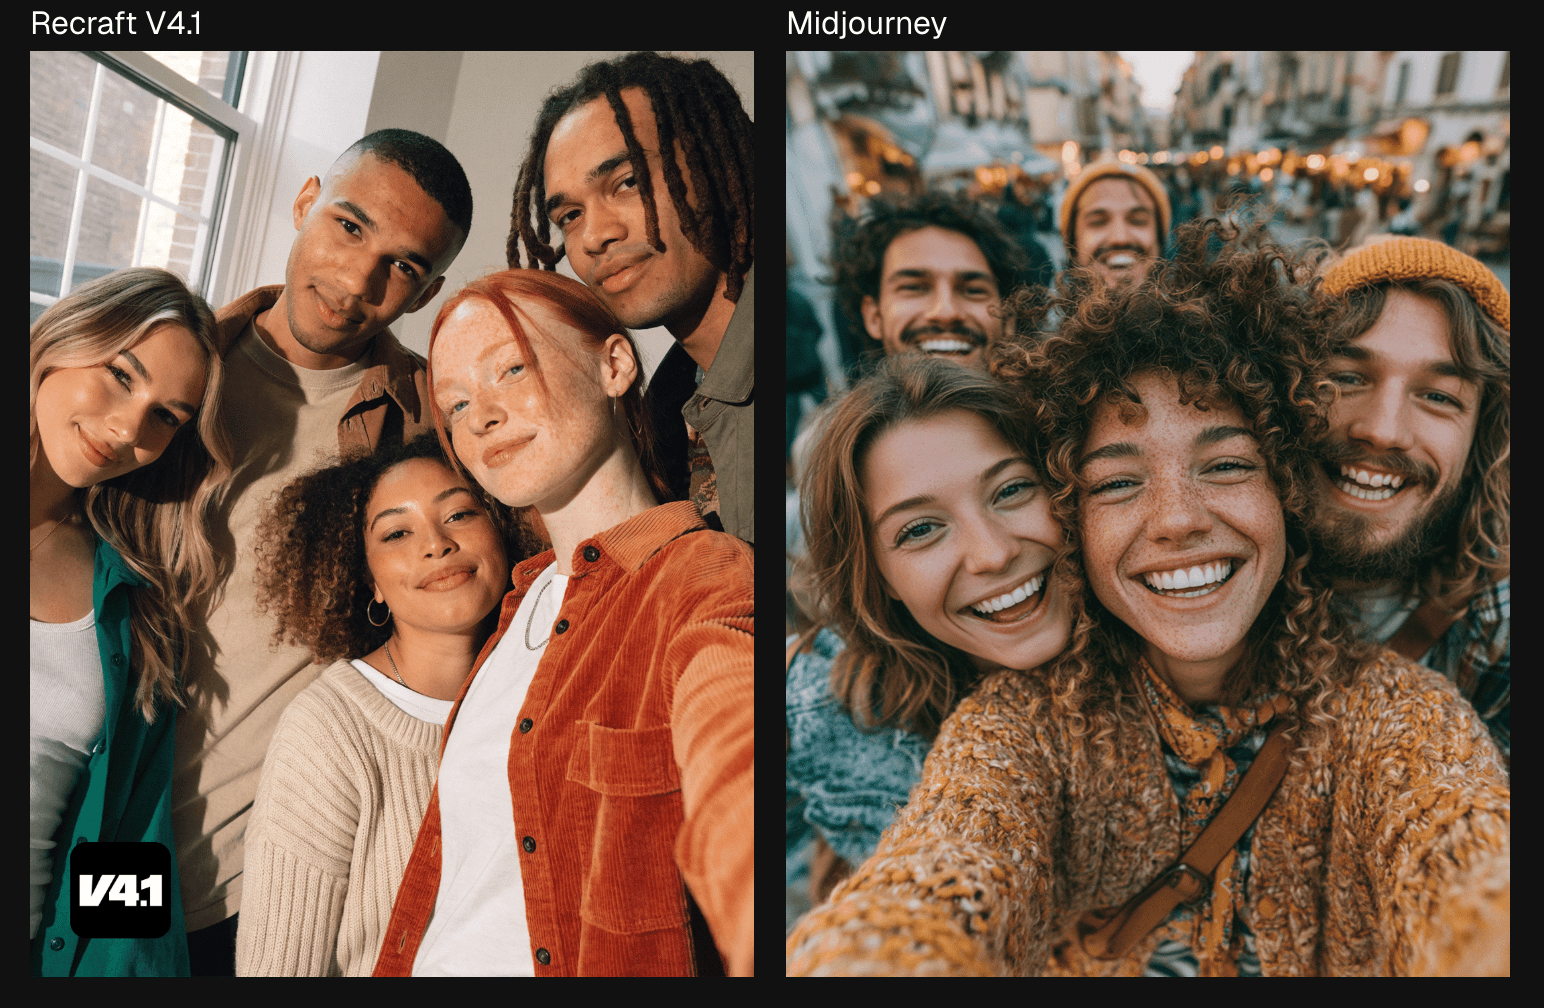
> PROMPT
> _Group selfie of friends standing close together, softly smiling with natural relaxed expressions, casual lifestyle photo, warm authentic atmosphere, modern youthful aesthetic, realistic lighting, candid social moment._
V4.1 understands people. In the group selfie above, it looks warm, diverse, and genuinely candid. There’s less noise in the background. You can count on more natural photos, not just of the people themselves, but of the background as well. No more random urban backgrounds unless you specifically ask for it. Midjourney produces a beautiful photo here, but it delivers a lot more than “warm authentic atmosphere.” The fuzzy, busy outdoor background has a life of its own.
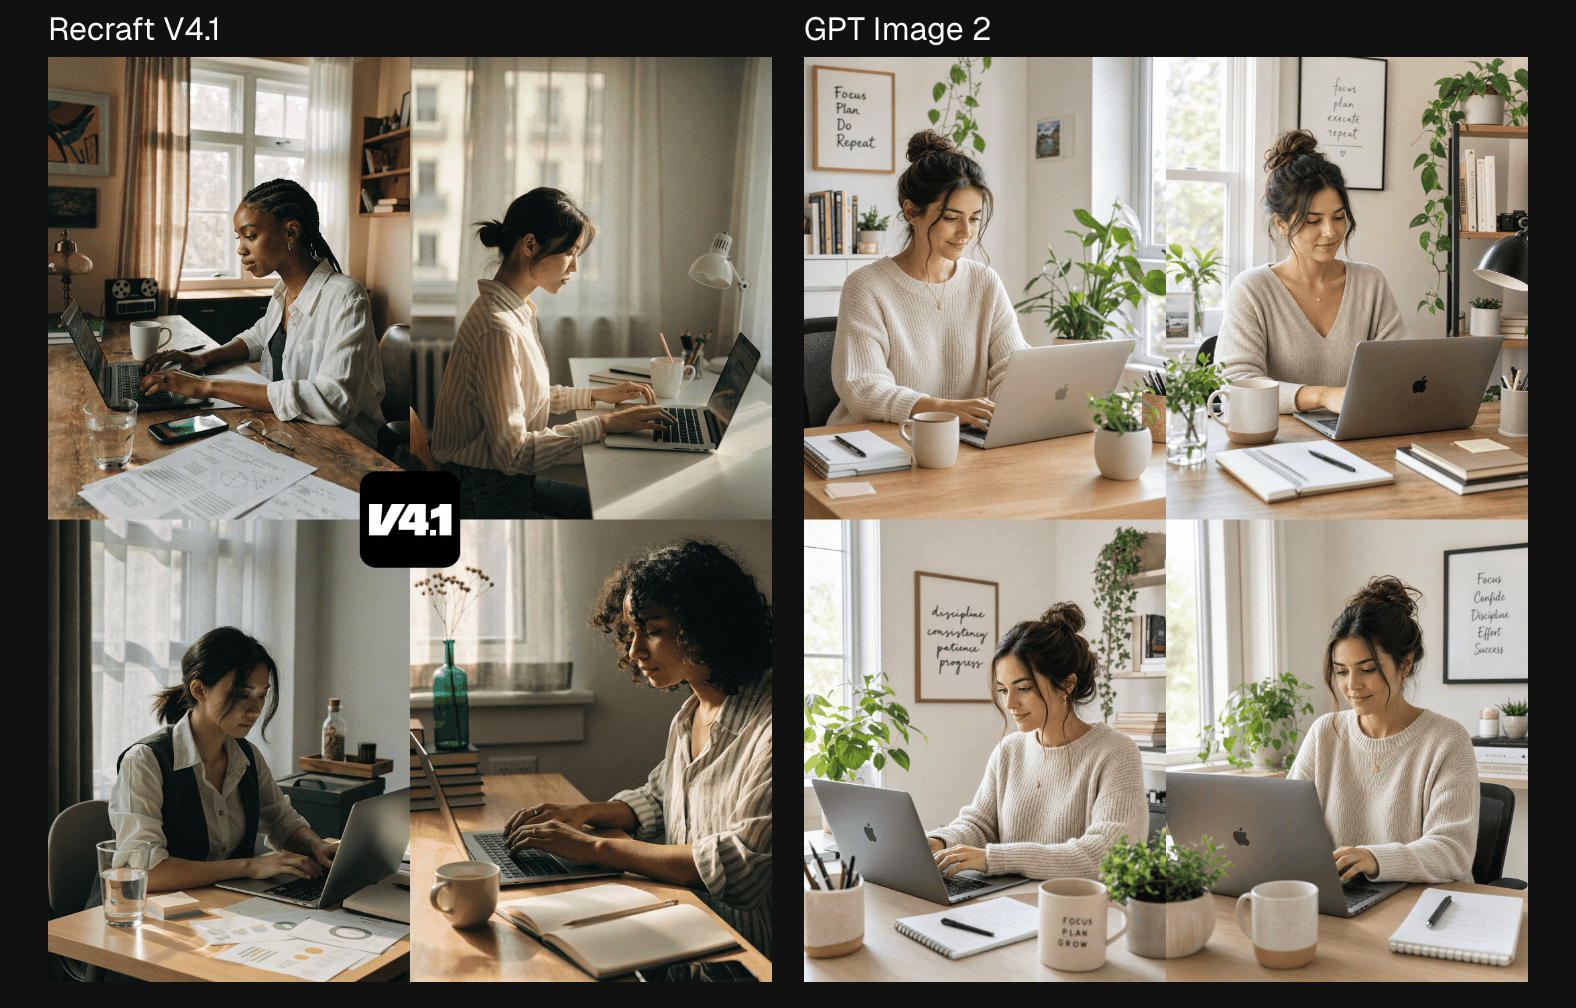
> PROMPT
> _Working on a laptop, desk setup, soft daylight_
The difference holds up even in quieter settings. In the comparison above, the GPT Image 2 model generated a busier background that feels more like a stock photo than a real home. They might as well have put “Live, Laugh, Love” on one of those posters. The subject also has that slender, slightly Disney-coded face that the model defaults to. A nice picture? Sure. Realistic? Not quite. V4.1’s image feels lived in. The desk is warm, a little messier, and real. V4.1 photorealism is built for images that need to feel human. It’s beautiful in the way that real life is beautiful.
[](https://www.recraft.ai/docs/recraft-models/recraft-v4-1#shorter-prompts-better-results)
**Shorter Prompts, Better Results**
----------------------------------------------------------------------------------------------------------------------------------
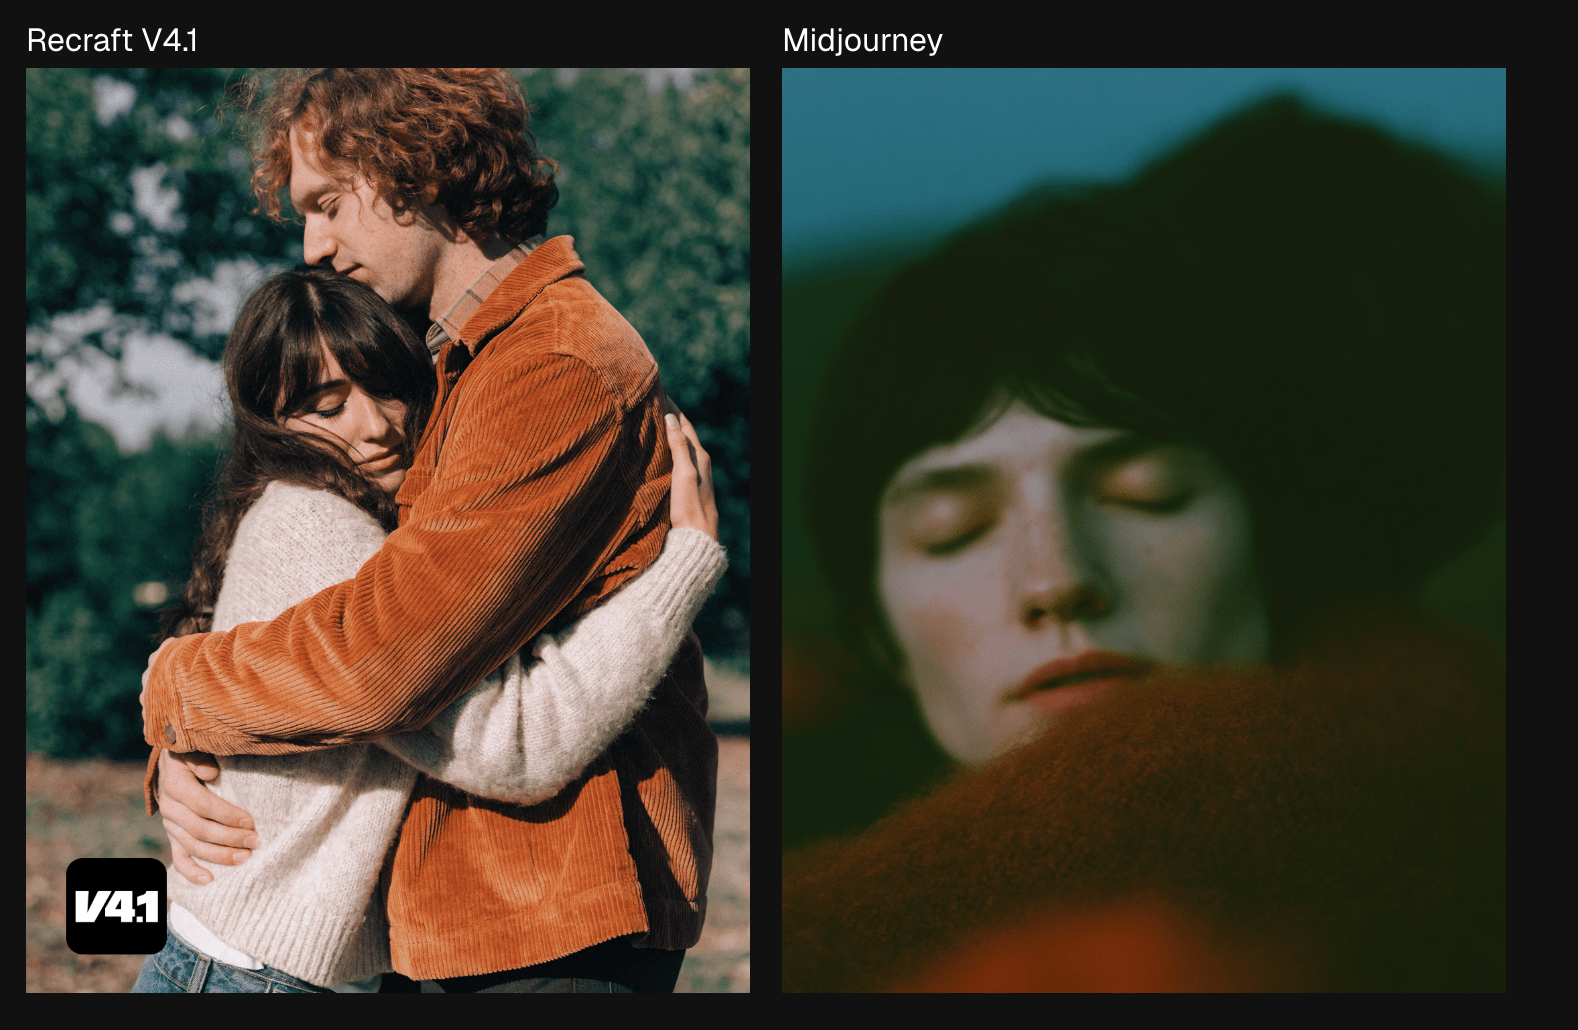
> PROMPT
> _Couple tight hug_
In this prompt, each model had only three words to get things right. V4.1 understood the assignment. The result is warm, intimate, and emotionally specific. It created a portrait photo of two people hugging with golden hour light that looks like a real couple photoshoot. Midjourney got the memo, but it went in a very different direction. It looks more like a first-person artistic view of a hug, not so much a photo of a couple in a tight hug.
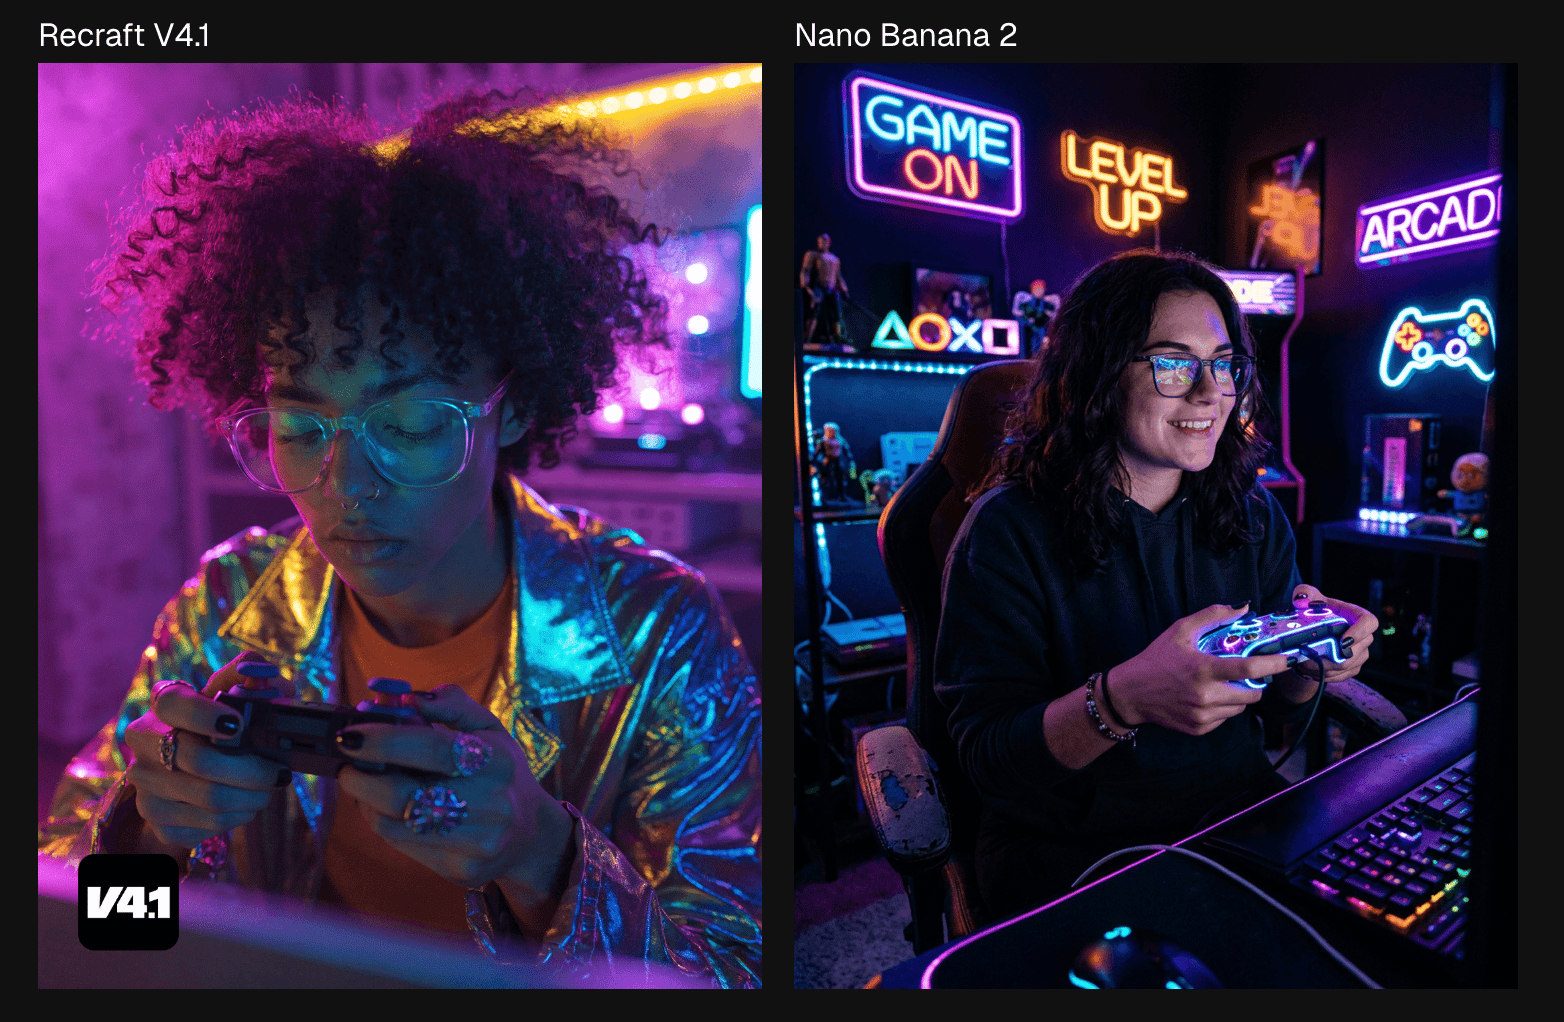
> PROMPT
> _Playing with a game controller, neon light_
V4.1 reads short prompts the way you’d imagine a creative director would. It fills the gap with taste instead of filling the frame with duplicates of things that no one asked for. With this prompt, Nano Banana 2 really goes all out with the “neon light” instructions, adding multiple neon signs to fill the background.
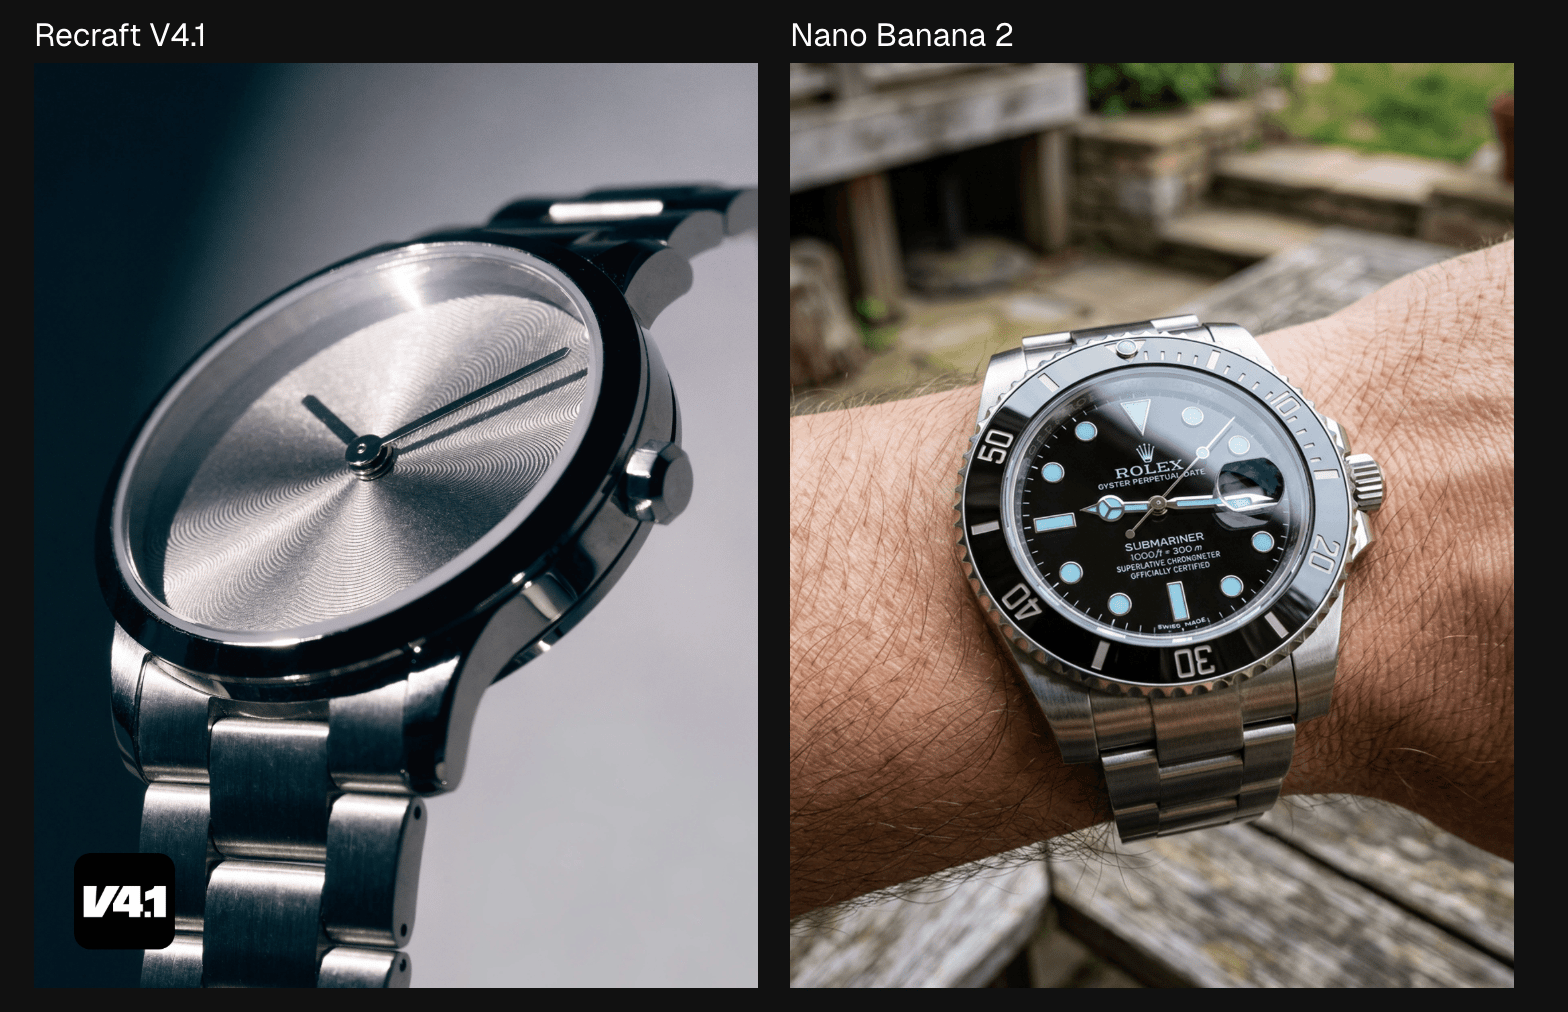
> PROMPT
> _Wristwatch, metal and glass, close-up photo_
In five words, Recraft read the room. The result is a sleek editorial shot with its dramatic angle and brushed metal catching light the way it does when a photographer with real taste is behind the camera. The competitor also produced a close-up photo of a wristwatch. On someone’s wrist. On a park bench. Technically correct, aesthetically somewhere else entirely. Give V4.1 just a few words, and it’ll give you something worth keeping.
[](https://www.recraft.ai/docs/recraft-models/recraft-v4-1#otherworldly-3d-design-and-smoother-gradients)
**Otherworldly 3D Design and Smoother Gradients**
---------------------------------------------------------------------------------------------------------------------------------------------------------------
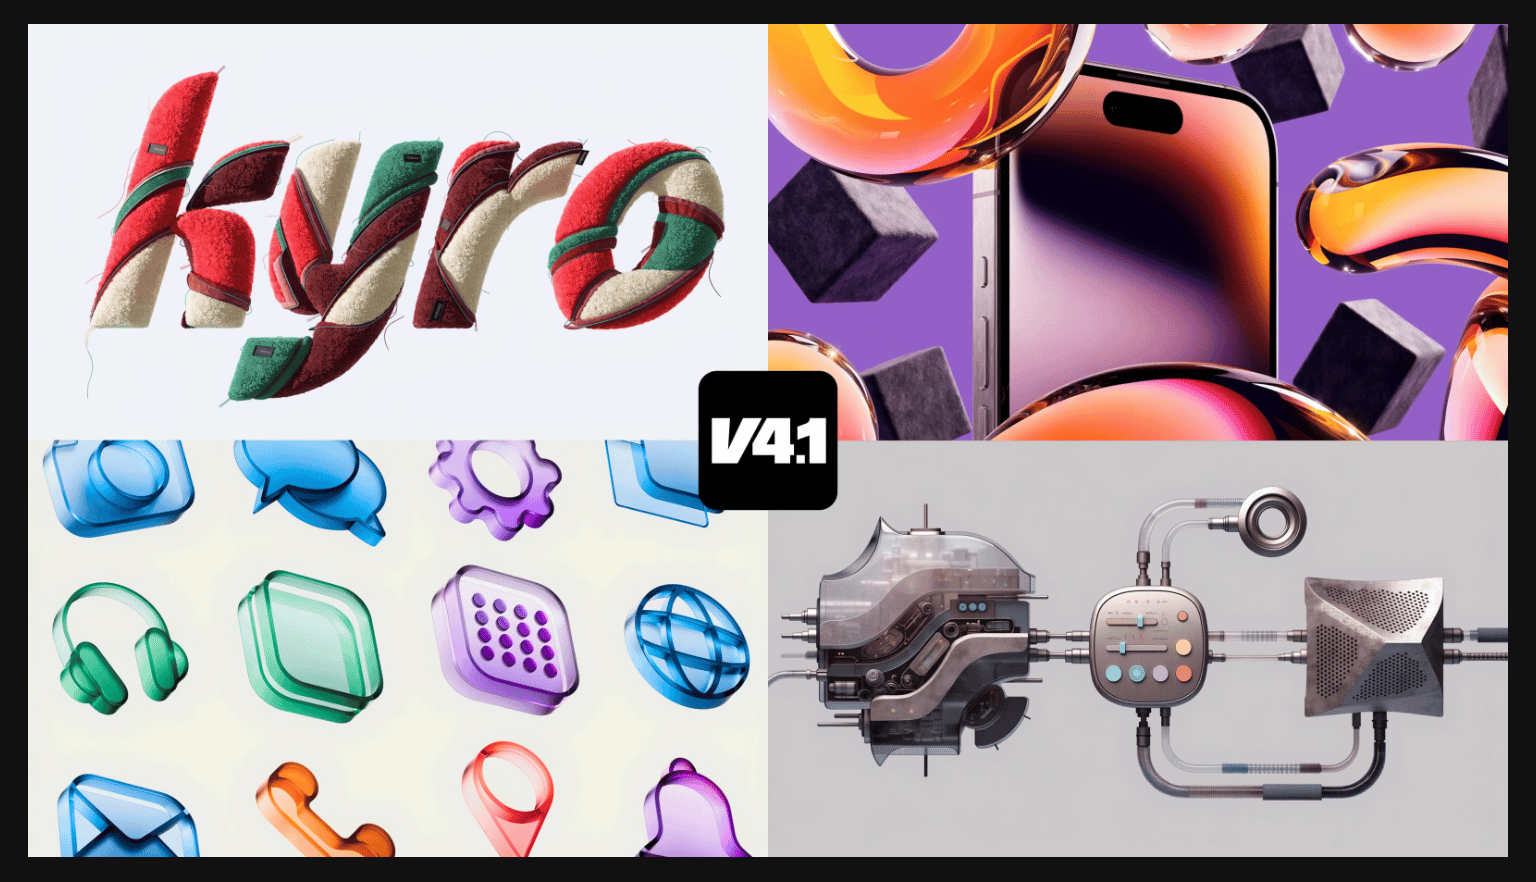
V4.1 opens doors that weren’t there before. It renders 3D in a way that feels like it belongs in a gallery. Chrome catches light naturally. Compositions have real depth and weight.
The gradient work is in its own league too. Soft transitions, dreamy color blends, and surfaces that feel smooth rather than processed. It creates illustration styles that live in that space between digital art and something you could almost touch. Consider your creative studio officially expanded.
[](https://www.recraft.ai/docs/recraft-models/recraft-v4-1#vector-and-illustration-done-right)
**Vector and Illustration, Done Right**
------------------------------------------------------------------------------------------------------------------------------------------
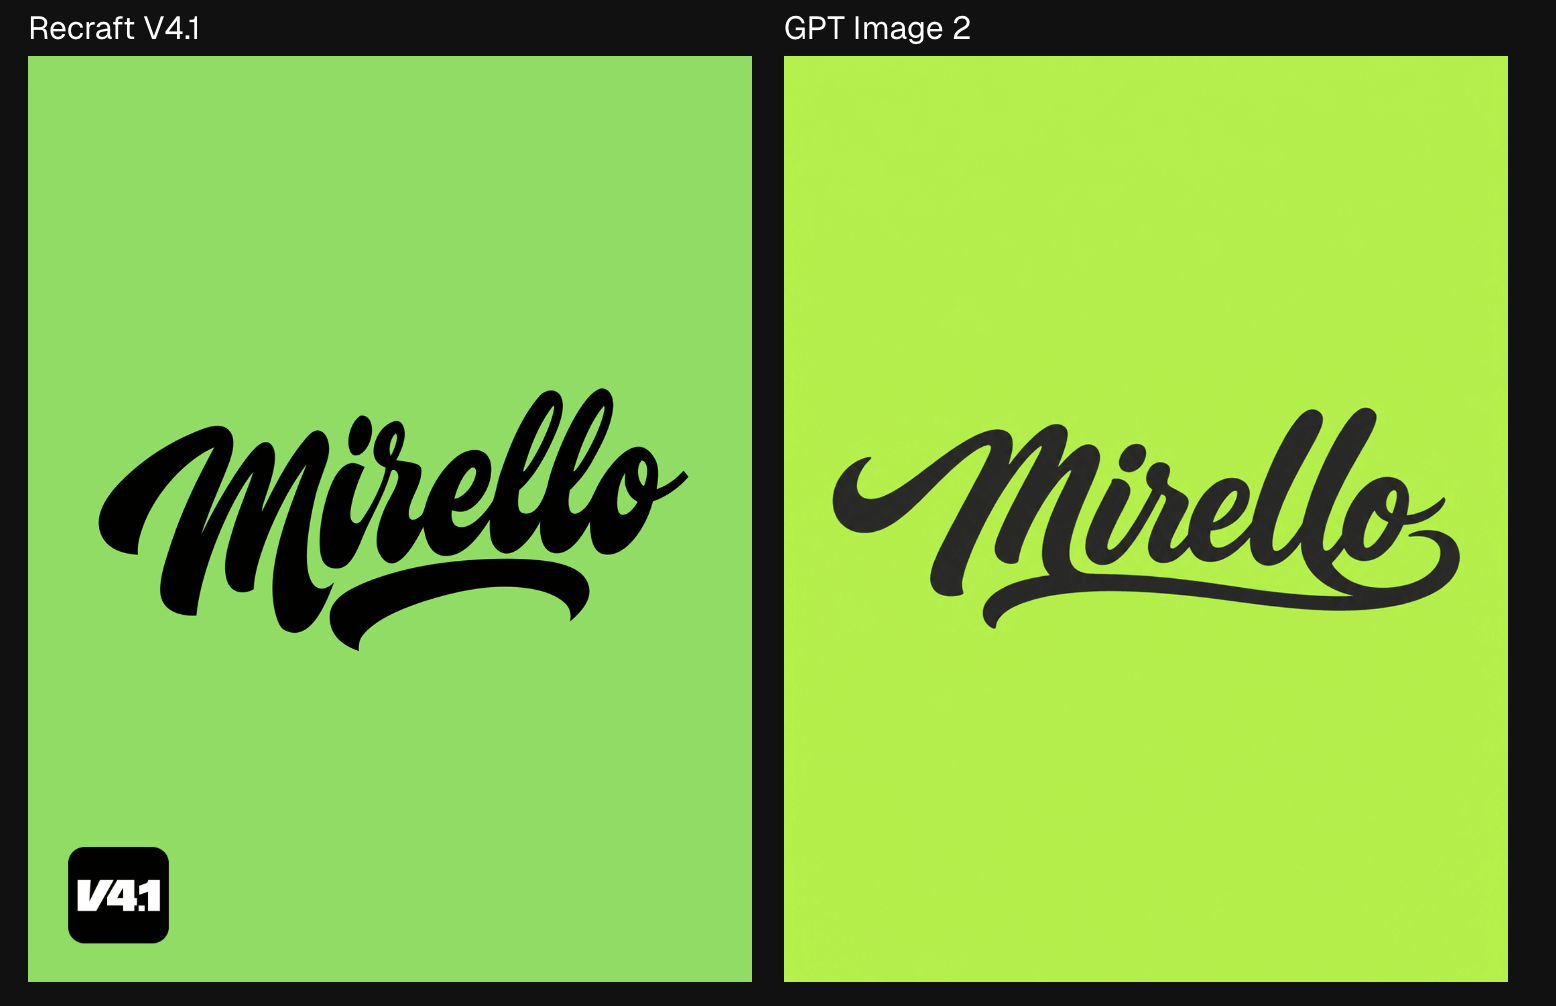
> Prompt _Handwritten-script vector logo, single centered lockup, wordmark only. The word “Mirello” rendered in expressive brush-script lettering — fluid strokes, natural ink variation in stroke weight from thick downstrokes to hairline upstrokes, slight baseline bounce for a hand-lettered feel, generous swash on the opening “m” and a looping tail on the final “o” that underlines the full word. Closed letterforms with clean interior counters, no rough edges or texture. Strict two-color palette: charcoal black on green. Flat fills only — no gradients, no shadows, no drop effects, no outlines around the letterform. Compact horizontal lockup with even optical spacing. Scalable silhouette with strong legibility at small sizes. No decorative elements, no frames, no secondary text._
Text and illustration is where taste really shows. V4.1 has plenty of it. The V4.1 image is bolder, more expressive, and features a strong underline sweep that draws attention to the logo. The GPT Image 2 model is softer and more timid. The M loses its swagger and drama. GPT plays it safe. The letters are correct but lack conviction. It’s the difference between a logo that commands attention and one that politely requests it.
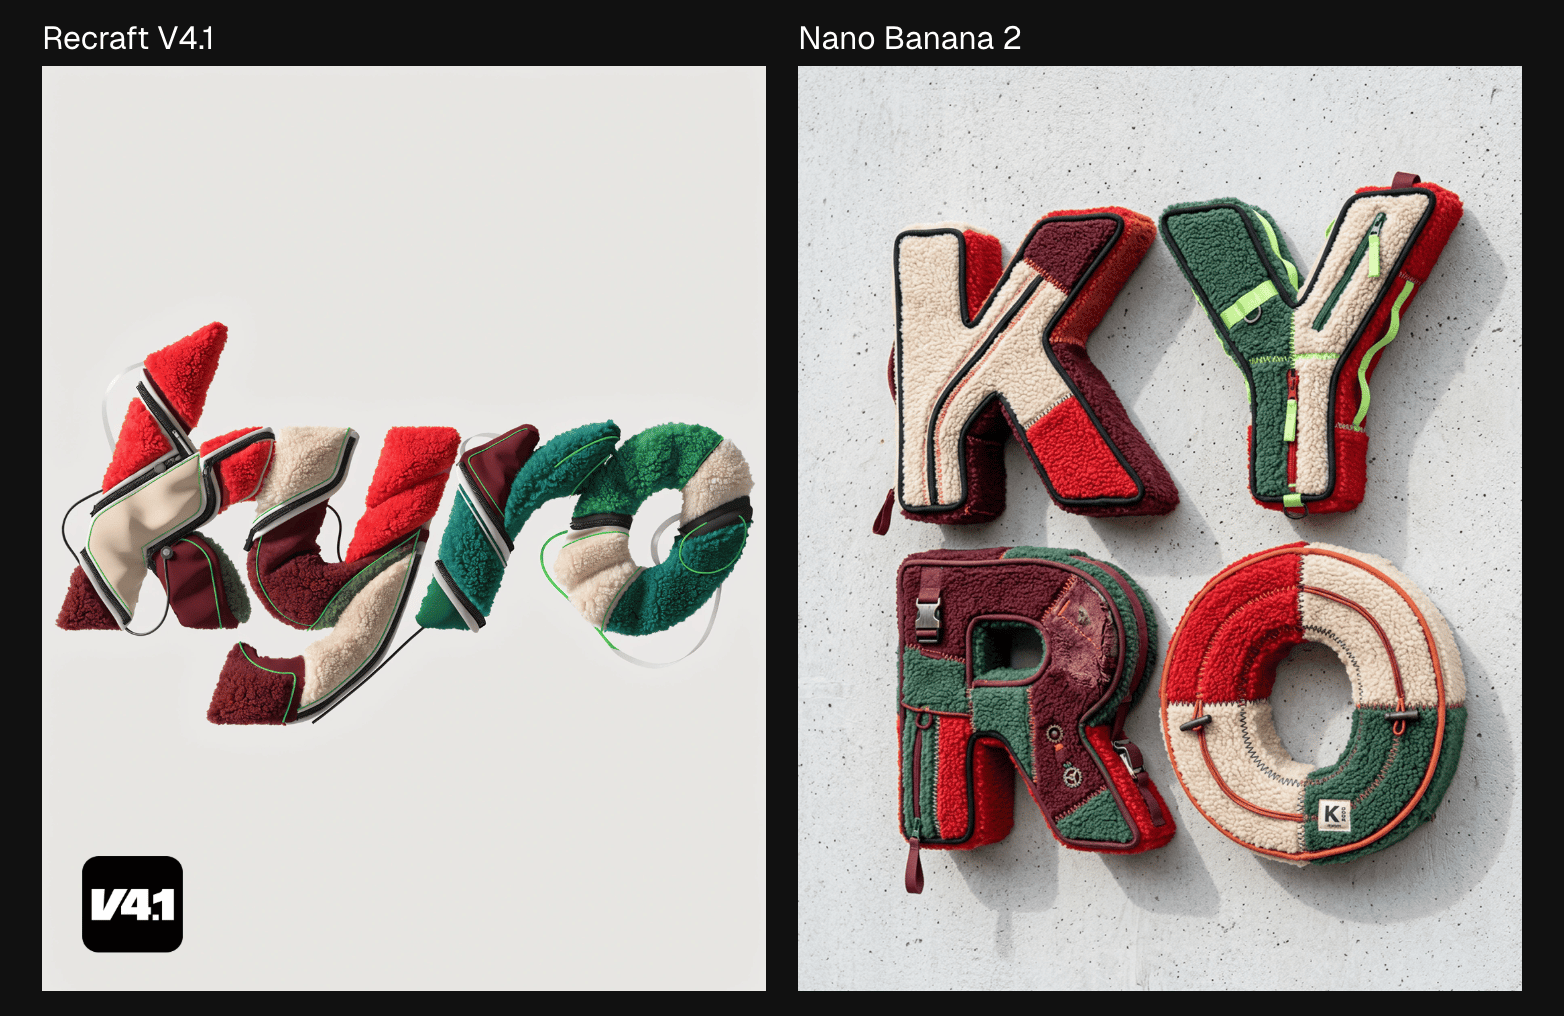
> PROMPT
> _Experimental typography spelling “kyro” made from fragmented sherpa fleece jacket panels, red, cream, green, and burgundy palette, sculptural textile letters with visible seams and piping, futuristic sportswear aesthetic, light-grey background, ultra detailed_
Even when the prompt isn’t as simple or straightforward, V4.1 makes sure that image is clean. With this kyro typography, the V4.1 model makes it sit flat on a light gray background, every letter structured and intentional. Nano Banana 2’s version is textured and photographic, which looks impressive until you try to use it. It is plastered on a concrete wall at an angle and is difficult to understand. It doesn’t look like something you’d bring to a exploration or brainstorming session. The V4.1 version, however, definitely belongs on a Pinterest board for someone’s future fleece jacket business.
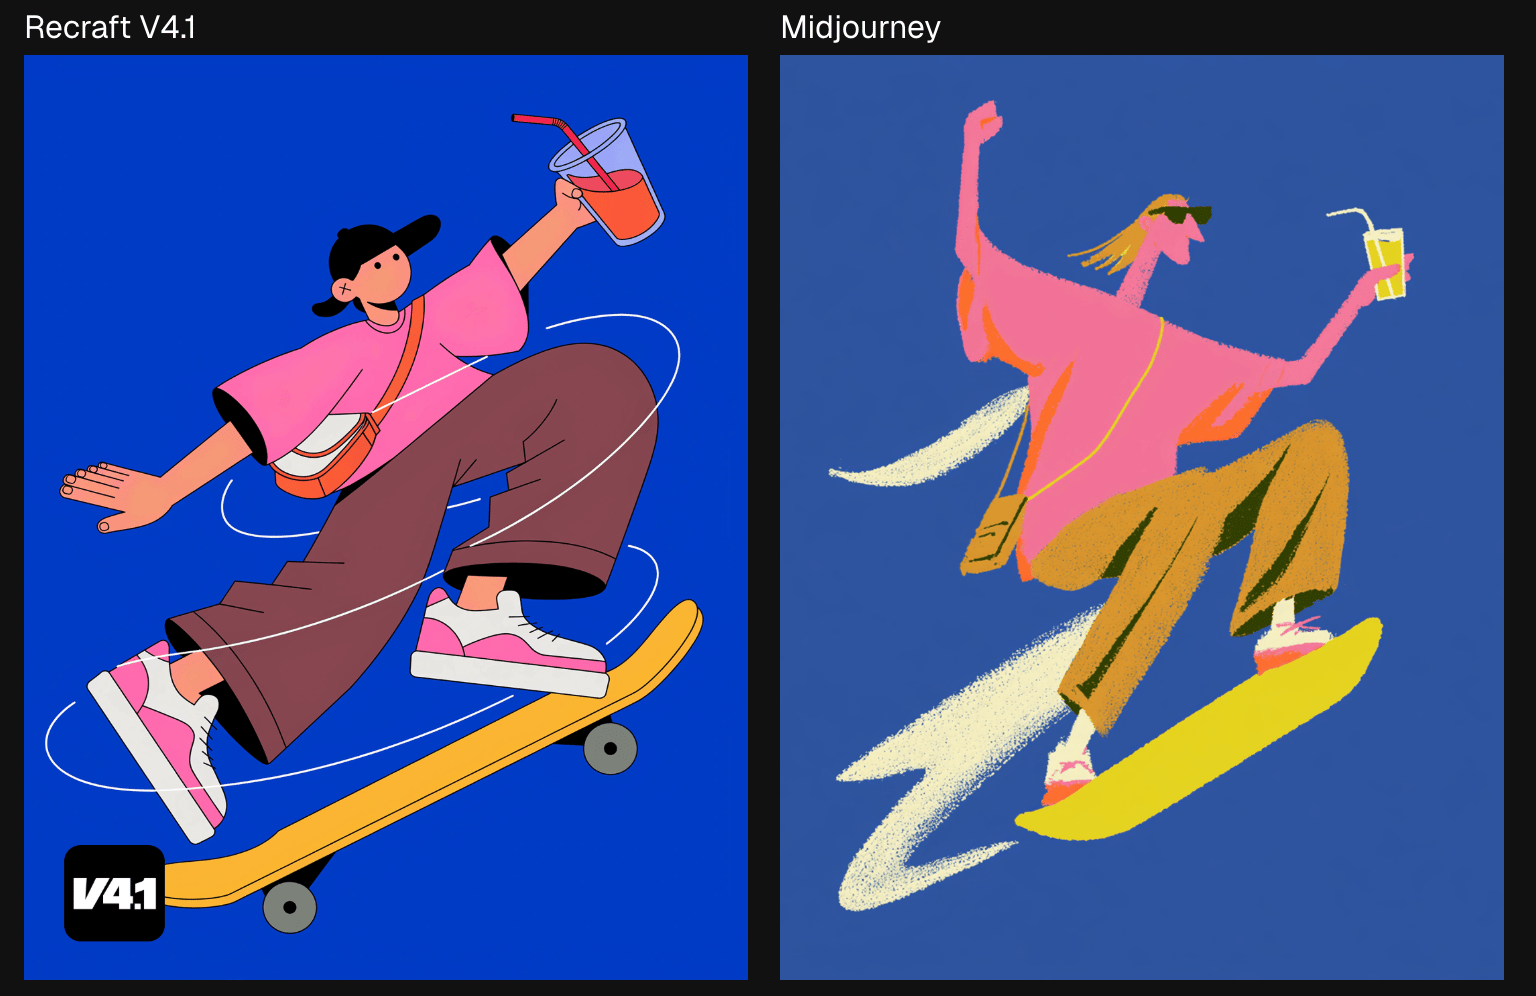
> Prompt
> _A playful flat vector illustration of a skater captured mid-trick in a dynamic airborne pose against a solid saturated blue background. The character has exaggerated proportions and a bold stylized design, wearing a pink oversized T-shirt, loose brown pants, white-and-pink sneakers, and a small crossbody bag, while riding a bright yellow skateboard with simplified graphic details. One arm is raised holding a drink, the other balances the motion, and curved white swooshes wrap around the figure to emphasize movement, speed, and impact. The illustration uses clean shapes, minimal facial detail, smooth flat color fills, and a vibrant high-contrast palette that feels youthful, energetic, and contemporary. The overall image should feel fun, graphic, and full of personality, blending street culture, motion, and modern character illustration in a bold poster-like composition. Style notes: flat vector illustration, skateboarding character, exaggerated pose, bold color blocking, playful street aesthetic, clean shapes, dynamic motion graphics, contemporary poster feel._
The skater image is where V4.1’s illustration quality really shows its hand. V4.1 gives you bold color fills, precise shapes, and a composition that feels alive. Midjourney’s version brings energy, but it loses the elegance with rougher lines and less consistent fills. One of these looks like a finished piece. The other looks like a first draft.
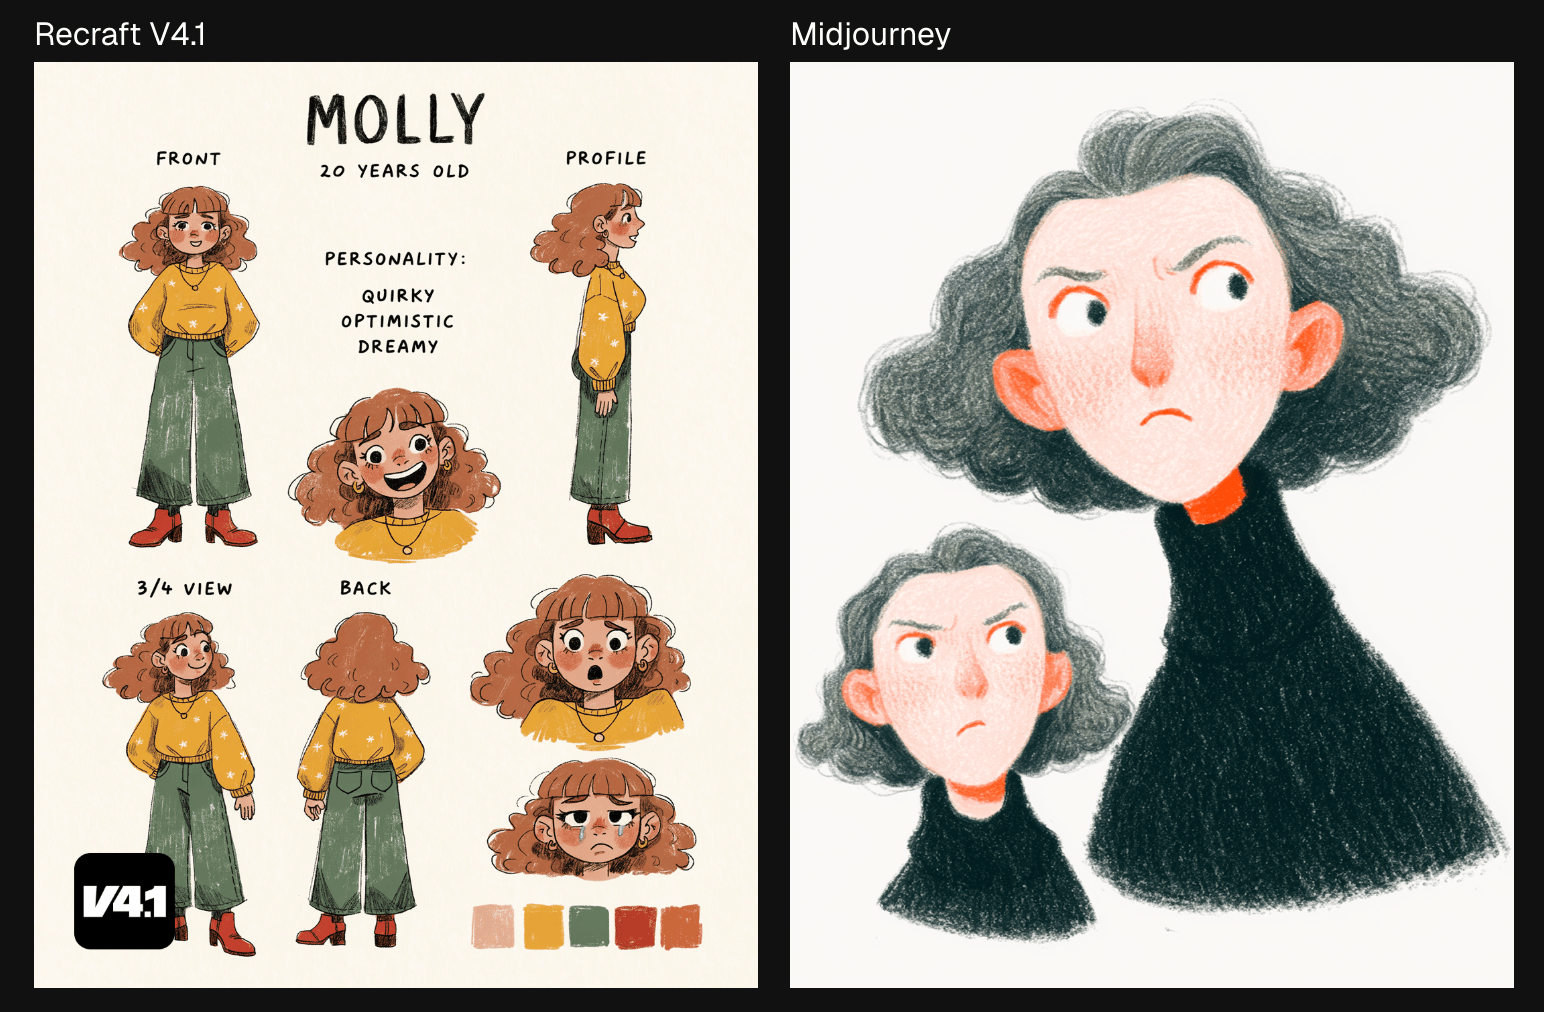
> PROMPT
> _a hand-drawn character reference sheet with consistent identity_
The character sheet is the most telling comparison of all. V4.1 creates a proper reference sheet with a front, profile, back, and 3/4 view, as well as adding character notes and color swatches. It looks like something an art student or anime fan would doodle. Midjourney draws a character. But Recraft brings one to life.
[](https://www.recraft.ai/docs/recraft-models/recraft-v4-1#the-full-v4-1-family)
**The Full V4.1 Family**
-------------------------------------------------------------------------------------------------------------
###
[](https://www.recraft.ai/docs/recraft-models/recraft-v4-1#recraft-v4-1-where-it-all-starts)
**Recraft V4.1: Where It All Starts**
V4.1 is the main model, and the most expressive one. It brings its own point of view to every prompt. It experiments with light, mood, and composition the way a good creative director would. It’s built for exploration and concepting, for artistic self-expression, and for anyone who wants the model to bring something unexpected to the table. Give it a direction and it’ll take you somewhere beautiful.
###
[](https://www.recraft.ai/docs/recraft-models/recraft-v4-1#v4-1-vector-sleek-illustrations-and-text)
**V4.1 Vector: Sleek Illustrations and Text**
V4.1 Vector is built for work where beauty lives in the line. Logos, typography, and illustrations are all crafted with the kind of precision and intention that makes the image feel created rather than generated. It understands lettering, it understands form, and it knows when something looks right.
###
[](https://www.recraft.ai/docs/recraft-models/recraft-v4-1#v4-1-utility-built-for-simplicity)
**V4.1 Utility: Built for Simplicity**
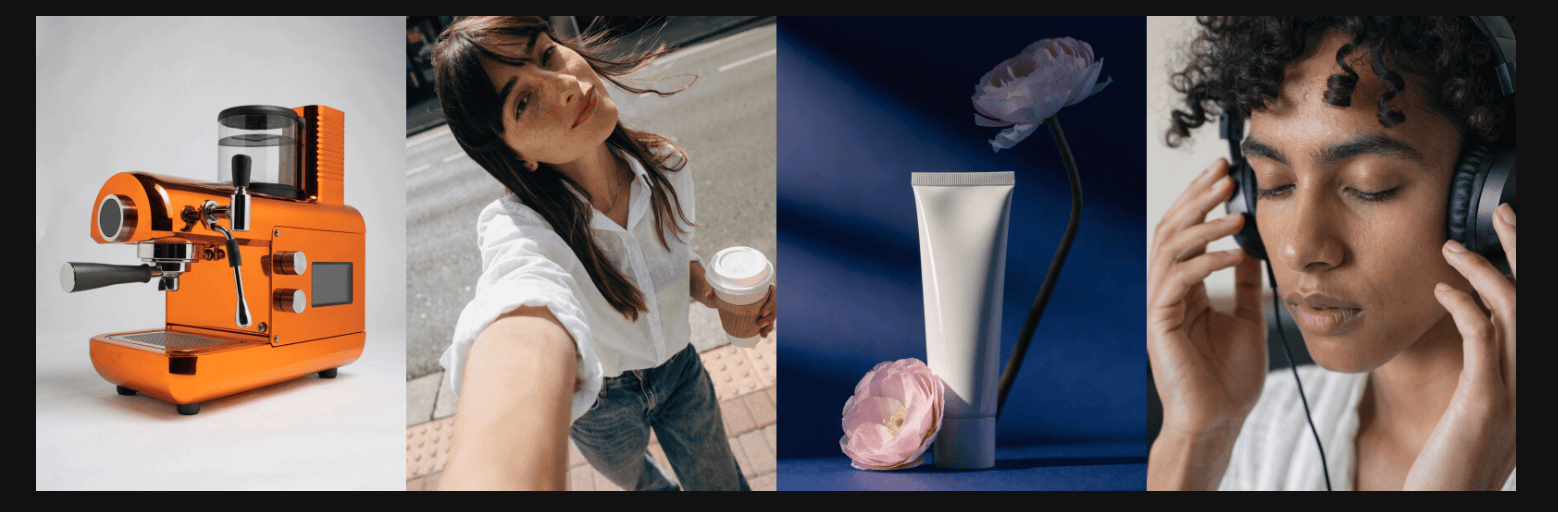
Some projects don’t need drama. They need clean, simple, and predictable. That’s when you need Utility. Where the main V4.1 model experiments with angle, light, and composition, Utility focuses on flat lighting, front-facing composition, and simple scenes. It’s the right tool when you’re working on mockups, product shots, or anything where a calm, straightforward output serves the work better than an expressive one.
[](https://www.recraft.ai/docs/recraft-models/recraft-v4-1#model-inference-time)
Model Inference Time
---------------------------------------------------------------------------------------------------------
| Model | Time | |
| --- | --- | --- |
| Recraft V4.1 | 6.5s | |
| Recraft V4.1 PRO | 12s | |
| Recraft V4.1 Vector | 12s | |
| Recraft V4.1 Vector PRO | 15s | |
| Recraft V4.1 Utility | 8.5s | |
| Recraft V4.1 Utility PRO | 14s | |
| Recraft V4.1 Utility Vector | 14s | |
| Recraft V4.1 Utility Vector PRO | 17s | |
| Recraft V4 | 11s | |
| Recraft V4 PRO | 16s | |
| Recraft V4 Vector | 16s | |
| Recraft V4 Vector PRO | 19s | |
| Recraft V3 | 7s | |
| Recraft 20B | 10s | |
**Note:** Latencies vary between requests and depend on the user prompt and other parameters (e.g. aspect ratio).
For some requests, latency can be lower than the values provided, and for others, it can be significantly higher. The values shown above represent median latencies.
[](https://www.recraft.ai/docs/recraft-models/recraft-v4-1#start-creating-with-v4-1-in-recraft-studio)
**Start Creating with V4.1 in Recraft Studio**
---------------------------------------------------------------------------------------------------------------------------------------------------------
You’ve seen what it can do. Now it’s your turn to see what one more pixel of progress looks like. Start creating via our [API](https://www.recraft.ai/docs/api-reference/getting-started)
or in [Recraft Studio](https://www.recraft.ai/auth/login)
.
[Introduction](https://www.recraft.ai/docs)
[Recraft V4](https://www.recraft.ai/docs/recraft-models/recraft-V4)
⌘I
Assistant
Responses are generated using AI and may contain mistakes.
---
# Data protection and privacy - Recraft
> Documentation Index
> -------------------
>
> Fetch the complete documentation index at: [/docs/llms.txt](https://www.recraft.ai/docs/llms.txt)
>
> Use this file to discover all available pages before exploring further.
[Skip to main content](https://www.recraft.ai/docs/trust-and-security/data-protection-and-privacy#content-area)
###
[](https://www.recraft.ai/docs/trust-and-security/data-protection-and-privacy#personal-data)
Personal data
The only personal data required to create a Recraft account is a user’s name, email address, and billing details. Payment information is never stored by Recraft and is securely managed by Stripe and Google Pay. Generated images are not considered personal data unless they contain identifiable information.
###
[](https://www.recraft.ai/docs/trust-and-security/data-protection-and-privacy#storage-and-retention)
Storage and retention
Data is encrypted both in transit and at rest. By default, all security documentation and audit trails are kept for a minimum of seven years, unless otherwise specified. For API usage, generation results are deleted within 24 hours to minimize exposure.
###
[](https://www.recraft.ai/docs/trust-and-security/data-protection-and-privacy#encryption-and-confidentiality)
Encryption and confidentiality
Recraft applies industry-standard encryption to protect data at rest and in transit. Continuous monitoring systems are in place to detect and respond to unauthorized access.
###
[](https://www.recraft.ai/docs/trust-and-security/data-protection-and-privacy#deletion)
Deletion
If a user deletes their account, all personal data is permanently erased. Uploaded images are also removed, though images generated on Free plans may remain visible in the community gallery.
###
[](https://www.recraft.ai/docs/trust-and-security/data-protection-and-privacy#data-use-principles)
Data use principles
Recraft does not monetize user data and does not permit ads, trackers, or reselling of personal information. Assets generated with Recraft are not allowed to be used to train external AI models.
###
[](https://www.recraft.ai/docs/trust-and-security/data-protection-and-privacy#faq)
FAQ
Q: **Are uploaded images private?**
A: On paid plans, all generated and uploaded assets remain private. Q: **What happens to images on the Free plan?**
A: They remain public and owned by Recraft, and may appear in the community gallery. Q: **What happens if I delete my account?**
A: Before deleting your account, you’ll need to cancel any active subscription. Once deleted, all of your personal data is permanently erased from Recraft’s systems. If you were subscribed to a paid plan, assets generated during your paid subscription remain private and yours to keep. If you were on the Free plan, any assets generated on the Free place remain public and owned by Recraft.
[Security](https://www.recraft.ai/docs/trust-and-security/security)
[Data use and model training](https://www.recraft.ai/docs/trust-and-security/data-use-and-model-training)
⌘I
Assistant
Responses are generated using AI and may contain mistakes.
---
# Compliance and certifications - Recraft
> Documentation Index
> -------------------
>
> Fetch the complete documentation index at: [/docs/llms.txt](https://www.recraft.ai/docs/llms.txt)
>
> Use this file to discover all available pages before exploring further.
[Skip to main content](https://www.recraft.ai/docs/trust-and-security/compliance-and-certifications#content-area)
###
[](https://www.recraft.ai/docs/trust-and-security/compliance-and-certifications#soc-2-certification)
SOC 2 certification
Recraft has completed a [SOC 2 Type 2 certification](https://www.recraft.ai/blog/recraft-is-soc-2-type-2-certified)
, demonstrating that our systems are independently audited for security, availability, and confidentiality controls. This annual audit confirms that our infrastructure and processes meet recognized industry benchmarks.
###
[](https://www.recraft.ai/docs/trust-and-security/compliance-and-certifications#aiuc-1-certification)
AIUC-1 certification
Recraft is [AIUC-1 certified](https://www.recraft.ai/blog/recraft-earns-aiuc-1-certification-for-enterprise-ai-trust)
by the Artificial Intelligence Underwriting Company. AIUC-1 focuses on how AI systems behave in real-world use, including third-party technical testing and ongoing evaluation.
###
[](https://www.recraft.ai/docs/trust-and-security/compliance-and-certifications#pci-dss-compliance)
PCI DSS compliance
We never store or process payment details directly. Transactions are handled exclusively by Stripe and Google Pay, both of which hold PCI DSS Level 1 certification.
###
[](https://www.recraft.ai/docs/trust-and-security/compliance-and-certifications#gdpr-alignment)
GDPR alignment
Recraft aligns with GDPR requirements. As outlined in our [Privacy Policy](https://www.recraft.ai/privacy)
, personal data is handled in accordance with GDPR standards. Users may request that this data be permanently deleted from our systems at any time.
###
[](https://www.recraft.ai/docs/trust-and-security/compliance-and-certifications#subprocessors)
Subprocessors
Recraft uses carefully selected third-party providers, known as **subprocessors**, to deliver certain parts of our service. These providers may process limited customer data on our behalf to support functions such as cloud hosting, payment processing, or analytics. All subprocessors are reviewed for their security and privacy practices before being engaged, and we maintain contracts to ensure they meet our standards for data protection. We regularly reassess these vendors to confirm ongoing compliance with industry requirements. You can view the current list of subprocessors at: [recraft.ai/subprocessors](https://www.recraft.ai/subprocessors)
###
[](https://www.recraft.ai/docs/trust-and-security/compliance-and-certifications#compliance-contacts)
Compliance contacts
For questions about certifications or GDPR rights, users can contact our compliance team directly at [compliance@recraft.ai](mailto:compliance@recraft.ai)
.
###
[](https://www.recraft.ai/docs/trust-and-security/compliance-and-certifications#faq)
FAQ
Q: **How do I request deletion of my personal data?**
A: Contact [help@recraft.ai](mailto:help@recraft.ai)
with your account email and the data will be permanently removed. Q: **Does Recraft use my data to train AI models?**
A: No. Generated or uploaded assets are not used to train external models.
[Legal and policy documents](https://www.recraft.ai/docs/trust-and-security/legal-and-policy-documents)
⌘I
Assistant
Responses are generated using AI and may contain mistakes.
---
# Data use and model training - Recraft
> Documentation Index
> -------------------
>
> Fetch the complete documentation index at: [/docs/llms.txt](https://www.recraft.ai/docs/llms.txt)
>
> Use this file to discover all available pages before exploring further.
[Skip to main content](https://www.recraft.ai/docs/trust-and-security/data-use-and-model-training#content-area)
To give you the most reliable, relevant, and high-quality results, Recraft continuously improves its AI models. One way we do this is by using content from our users, including images you create or upload and text you enter in prompts or chat mode. API inputs and outputs are never used for model training. Data sent through the Recraft API is processed only to generate requested results and is not stored or used to improve models. Both free and paid accounts are included by default, and Teams are not included by default. If you prefer not to have your content used for model training, you can opt out at any time in your account settings. Opting out does not affect your ability to use Recraft or any of its features. For full details, see our [Terms of Service](https://www.recraft.ai/terms)
.
[](https://www.recraft.ai/docs/trust-and-security/data-use-and-model-training#how-to-opt-out)
How to opt out
----------------------------------------------------------------------------------------------------------------
1. Log in to Recraft on desktop.
2. Go to your [Profile settings](https://www.recraft.ai/profile/settings)
.
3. Near **Help improve Recraft**, turn the toggle off.
4. Changes save automatically.
Once opted out, none of your future images or text inputs will be used to train our models.
[](https://www.recraft.ai/docs/trust-and-security/data-use-and-model-training#faq)
FAQ
------------------------------------------------------------------------------------------
**Is Training Opt-Out available for all users?**
Training opt-out is not available on the Free plan. On the Pro plan, you can choose to opt out in your Profile settings by turning off the “Help improve Recraft” switch. For Team plans, the training opt-out is applied by default. **Will opting out change how my images generate?**
No. Opting out only changes how Recraft uses your data for model improvements. Overall, the generation quality and features remain the same. **What data is used for training?**
Images, prompts, and chat content may be included. Personal information such as your email, billing details, or account data is never used. **If I delete my account, is my data kept?**
No. When you delete your account, all personal data is permanently removed from Recraft’s systems. **Can I change my preference later?**
Yes. You can return to **Profile → Preferences** at any time to re-enable or disable training use.
[Data protection and privacy](https://www.recraft.ai/docs/trust-and-security/data-protection-and-privacy)
[Ownership](https://www.recraft.ai/docs/trust-and-security/ownership)
⌘I
Assistant
Responses are generated using AI and may contain mistakes.
---
# Security - Recraft
> Documentation Index
> -------------------
>
> Fetch the complete documentation index at: [/docs/llms.txt](https://www.recraft.ai/docs/llms.txt)
>
> Use this file to discover all available pages before exploring further.
[Skip to main content](https://www.recraft.ai/docs/trust-and-security/security#content-area)
###
[](https://www.recraft.ai/docs/trust-and-security/security#physical-security)
Physical security
Recraft does not operate its own data centers but relies on trusted cloud providers. These providers enforce biometric access, 24/7 monitoring, and escorted visitor access. No Recraft employee or vendor has direct physical access to the servers. A full list of our cloud providers is available on our [subprocessors list](https://www.recraft.ai/subprocessors)
.
###
[](https://www.recraft.ai/docs/trust-and-security/security#system-security)
System security
Our systems are protected by role-based access controls (RBAC), ensuring that employees can only access the data necessary for their work. We conduct regular vulnerability scans, penetration testing, and continuous monitoring to identify and mitigate risks.
###
[](https://www.recraft.ai/docs/trust-and-security/security#disaster-recovery)
Disaster recovery
Recraft maintains a Disaster Recovery Plan. In the event of a disruption, systems can be restored within 24 hours using automated failover procedures and alternate cloud regions. A post-incident review is conducted within five business days to identify root causes and strengthen defenses.
###
[](https://www.recraft.ai/docs/trust-and-security/security#backups)
Backups
Daily backups are stored in Azure Postgres databases with regional replication and end-to-end encryption. Source code is kept in GitHub and mirrored to Azure to ensure recovery in the event of failure.
###
[](https://www.recraft.ai/docs/trust-and-security/security#authentication-and-access)
Authentication and access
Recraft uses a passwordless login system for maximum security and convenience. Authentication relies on email one-time passcodes or federated logins with Google, Discord, or Apple, removing risks associated with password theft or brute-force attacks.
###
[](https://www.recraft.ai/docs/trust-and-security/security#faq)
FAQ
Q: **How secure is my data?**
A: All data is encrypted in transit and at rest, monitored for unauthorized access, and supported by SOC 2–audited processes. Q: **What happens if there is a service disruption?**
A: Disaster recovery procedures are designed to restore operations within 24 hours. Q: **How secure is login to Recraft?**
A: Recraft’s passwordless authentication removes the risks associated with traditional passwords.
[Legal and policy documents](https://www.recraft.ai/docs/trust-and-security/legal-and-policy-documents)
[Data protection and privacy](https://www.recraft.ai/docs/trust-and-security/data-protection-and-privacy)
⌘I
Assistant
Responses are generated using AI and may contain mistakes.
---
# Prompting and image generation - Recraft
> Documentation Index
> -------------------
>
> Fetch the complete documentation index at: [/docs/llms.txt](https://www.recraft.ai/docs/llms.txt)
>
> Use this file to discover all available pages before exploring further.
[Skip to main content](https://www.recraft.ai/docs/best-practices/prompting-and-image-generation#content-area)
* If the model isn’t interpreting your prompt as expected, try switching to a more general style, like **Recraft V3**, **Photorealism**, or **Illustration,** instead of a custom or niche style.
* For logo designs with text that feel too rigid, enable **Negative prompt → Avoid text in prompt → Yes**. This can produce more expressive and creative text layouts, though it may introduce typos.
* If prompt comprehension is poor, try lowering the **Artistic level**. This reduces creative variance and often improves adherence to prompt details.
* If you’re having trouble generating content that avoids the edges of the image, place the image in a **Frame** and use **Outpainting** to expand around it.
* For small anatomical details (like faces or hands) that look distorted, run **Creative Upscale**. This often improves accuracy and visual quality.
###
[](https://www.recraft.ai/docs/best-practices/prompting-and-image-generation#how-to-create-mockups-with-designs)
How to create mockups with designs
If you’re working with a **complex surface** and need to experiment with how the design fits, such as adjusting size, placement, or angle, use **Convert to mockup**. If the mockup involves a **flat surface** where the design can be placed in a single, fixed way and doesn’t require experimenting with placement, use **prompt-based editing**.
For example: a street banner or a phone screen.
[Recraft Plugins](https://www.recraft.ai/docs/recraft-plugins)
[Character consistency](https://www.recraft.ai/docs/best-practices/character-consistency)
⌘I
Assistant
Responses are generated using AI and may contain mistakes.
---
# Character consistency - Recraft
> Documentation Index
> -------------------
>
> Fetch the complete documentation index at: [/docs/llms.txt](https://www.recraft.ai/docs/llms.txt)
>
> Use this file to discover all available pages before exploring further.
[Skip to main content](https://www.recraft.ai/docs/best-practices/character-consistency#content-area)
Character consistency refers to maintaining a recognizable subject across multiple image generations. This can include not only people or mascots, but also products or objects—such as a specific chair, a branded package, or a hat. While Recraft doesn’t offer a dedicated character-tracking feature, you can achieve strong visual continuity using a combination of prompt engineering, style control, reference images, frames, and external model tools.
[](https://www.recraft.ai/docs/best-practices/character-consistency#what-counts-as-a-%E2%80%9Ccharacter%E2%80%9D)
What counts as a “character”
--------------------------------------------------------------------------------------------------------------------------------------------------
* People (e.g., a red-haired woman in a space suit)
* Mascots (e.g., a cartoon beaver used across marketing visuals)
* Objects or products (e.g., the same pair of sunglasses shown in multiple lifestyle settings)
###
[](https://www.recraft.ai/docs/best-practices/character-consistency#techniques-for-maintaining-consistency)
Techniques for maintaining consistency
* **Use a detailed prompt:** Start with a prompt that clearly defines your subject’s distinguishing traits. For example:
_“Young woman with curly red hair, freckles, and an astronaut suit.”_
This establishes a verbal template for regenerating or varying the character later.
**Maintain a consistent style**: Apply the same style (or saved custom style) across all related images. Recraft interprets characters through the lens of visual style—keeping it consistent reduces unwanted shifts in appearance.
* **Use frames to evolve or isolate specific traits**: Insert the character into a Frame to edit selected parts—such as changing clothes, expressions, or poses—without altering the full image. This is especially useful for storytelling or iterative design.
* **Use reference images to preserve likeness**: Add a previously generated or uploaded image of your subject to the canvas and set it as a visual reference. Recraft will use this context to influence how new images are generated, helping preserve identity and structure.
* **Use external models for remixing or variation**: You can attach one or more images (of a person, object, or mascot) to a prompt using the external model option. For example:
* Combine two characters or items into a single scene.
* Generate style or activity variations, such as:
_“Make my selfie in the style of The Simpsons.”_
_“Make me laughing.”_
_“Make me riding a bike.”_
These techniques can be layered together to iteratively build a series of images that feature a character or product with recognizable, coherent features, even as you explore different styles, scenes, or compositions.
[Prompting and image generation](https://www.recraft.ai/docs/best-practices/prompting-and-image-generation)
[Free plan](https://www.recraft.ai/docs/plans-and-billing/free-plan)
⌘I
Assistant
Responses are generated using AI and may contain mistakes.
---
# Closing notes - Recraft
> Documentation Index
> -------------------
>
> Fetch the complete documentation index at: [/docs/llms.txt](https://www.recraft.ai/docs/llms.txt)
>
> Use this file to discover all available pages before exploring further.
[Skip to main content](https://www.recraft.ai/docs/prompt-engineering-guide/closing-notes#content-area)
Prompting is a creative practice. The more you experiment, observe, and refine, the more natural it becomes to guide an image model with confidence. Each attempt teaches you something about how language shapes the result, revealing what matters most in your description and where a small adjustment can shift the entire mood or structure of an image. Start with what you see in your mind, describe it simply, and build from there. Some prompts will work immediately. Others will take a few iterations. Both are part of the process. Over time, you’ll start to recognize patterns, develop preferences, and form a personal vocabulary that makes prompting feel intuitive rather than experimental.
[Universal prompt template](https://www.recraft.ai/docs/prompt-engineering-guide/prompt-templates/universal)
⌘I
Assistant
Responses are generated using AI and may contain mistakes.
---
# Commercial rights and ownership - Recraft
> Documentation Index
> -------------------
>
> Fetch the complete documentation index at: [/docs/llms.txt](https://www.recraft.ai/docs/llms.txt)
>
> Use this file to discover all available pages before exploring further.
[Skip to main content](https://www.recraft.ai/docs/plans-and-billing/commercial-rights-and-ownership#content-area)
Recraft’s usage rights depend on your subscription plan. Images generated under the **Free plan** are publicly visible in the community gallery and remain the property of Recraft. These images are not licensed for commercial use. For example, they typically cannot be listed on stock platforms, which require proof of ownership. Images generated under a **paid plan** grant you full ownership and commercial rights. You may use these assets for any purpose, including marketing, branding, product packaging, or other professional applications. Paid plan images remain private and under your ownership even after your subscription ends; they are not made public. Note: Regardless of plan, assets generated with Recraft may not be used to train any artificial intelligence models, systems, networks, or similar technologies. Learn more about image rights and ownership on [the Recraft blog](https://www.recraft.ai/blog/ownership-and-commercial-use-faq)
.
[Credits](https://www.recraft.ai/docs/plans-and-billing/credits)
[Teams overview](https://www.recraft.ai/docs/teams/teams-overview)
⌘I
Assistant
Responses are generated using AI and may contain mistakes.
---
# Billing and invoices - Recraft
> Documentation Index
> -------------------
>
> Fetch the complete documentation index at: [/docs/llms.txt](https://www.recraft.ai/docs/llms.txt)
>
> Use this file to discover all available pages before exploring further.
[Skip to main content](https://www.recraft.ai/docs/plans-and-billing/billing#content-area)
Subscriptions can be billed on a **monthly** or **annual** basis. Annual plans include a discount compared to monthly billing. **Accepted payment methods** include credit cards, debit cards, and bank transfers.
[](https://www.recraft.ai/docs/plans-and-billing/billing#canceling-your-subscription)
Canceling your subscription
---------------------------------------------------------------------------------------------------------------------
You can cancel your subscription at any time through the **Manage subscription** option in your profile. Your plan will remain active until the end of the current billing cycle. If you have used fewer than 30 credits over the lifetime of your account and your most recent payment was made within the past 30 days, you may request a refund. To do so, cancel your subscription and contact Recraft support at [help@recraft.ai](mailto:help@recraft.ai)
. Refunds are issued to the original payment method.
[](https://www.recraft.ai/docs/plans-and-billing/billing#switching-your-billing-cycle-from-yearly-to-monthly)
Switching your billing cycle from yearly to monthly
---------------------------------------------------------------------------------------------------------------------------------------------------------------------
To change from yearly to monthly billing, you will need to first cancel your yearly subscription, then start a new subscription on a monthly billing cycle:
1. At the bottom left of the page, click on your name, then select **Manage subscription**.
2. Click **Cancel subscription** at the bottom, then complete the cancellation flow.
3. Go to the [Pricing page](https://www.recraft.ai/pricing)
and click the toggle to select monthly billing.
4. Complete the purchase flow.
Your yearly subscription will remain active until the end of your current billing period. After that, your plan will renew on a monthly basis.
[](https://www.recraft.ai/docs/plans-and-billing/billing#how-to-download-an-invoice-or-receipt)
How to download an invoice or receipt
-----------------------------------------------------------------------------------------------------------------------------------------
1. For personal accounts: Click on your profile avatar in the upper right, then select **Manage subscription**.
For teams accounts: Open the **Workspace** tab, then select **Manage subscription**.
2. Click **Manage billing details**.
3. In the Invoice history section at the bottom, click on your desired invoice.
4. Choose from **Download invoice** or **Download receipt**.
[Deleting an account](https://www.recraft.ai/docs/plans-and-billing/deleting-an-account)
[Credits](https://www.recraft.ai/docs/plans-and-billing/credits)
⌘I
Assistant
Responses are generated using AI and may contain mistakes.
---
# Deleting an account - Recraft
> Documentation Index
> -------------------
>
> Fetch the complete documentation index at: [/docs/llms.txt](https://www.recraft.ai/docs/llms.txt)
>
> Use this file to discover all available pages before exploring further.
[Skip to main content](https://www.recraft.ai/docs/plans-and-billing/deleting-an-account#content-area)
Deleting your account permanently removes your access to Recraft. According to our pricing policy, refunds are not available for deleted accounts.
###
[](https://www.recraft.ai/docs/plans-and-billing/deleting-an-account#desktop-app)
Desktop app
1. Log in to your account.
2. Click the **Profile** icon in the top-right corner to open the menu.
3. Select **Profile**, then choose **Delete account**.
###
[](https://www.recraft.ai/docs/plans-and-billing/deleting-an-account#mobile-app)
Mobile app
1. Tap your **Profile** icon in the top-right corner.
2. Select **Delete account** from the menu.
[Upgrading and downgrading a plan](https://www.recraft.ai/docs/plans-and-billing/upgrading-and-downgrading-a-plan)
[Billing and invoices](https://www.recraft.ai/docs/plans-and-billing/billing)
⌘I
Assistant
Responses are generated using AI and may contain mistakes.
---
# Free plan - Recraft
> Documentation Index
> -------------------
>
> Fetch the complete documentation index at: [/docs/llms.txt](https://www.recraft.ai/docs/llms.txt)
>
> Use this file to discover all available pages before exploring further.
[Skip to main content](https://www.recraft.ai/docs/plans-and-billing/free-plan#content-area)
The Free plan is ideal for trying out Recraft’s core functionality without a subscription. It offers a daily credit allocation of 30 credits, allowing you to explore Recraft’s image and vector generation tools along with basic editing features. You can upload up to three images per day, and each prompt produces up to two images at a time. Credits reset every 24 hours. Credit top-ups are only available on paid plans. Generated images in the Free plan are public and may appear in the community gallery.
[Character consistency](https://www.recraft.ai/docs/best-practices/character-consistency)
[Paid plans](https://www.recraft.ai/docs/plans-and-billing/paid-plans)
⌘I
Assistant
Responses are generated using AI and may contain mistakes.
---
# Medium - Recraft
> Documentation Index
> -------------------
>
> Fetch the complete documentation index at: [/docs/llms.txt](https://www.recraft.ai/docs/llms.txt)
>
> Use this file to discover all available pages before exploring further.
[Skip to main content](https://www.recraft.ai/docs/prompt-engineering-guide/artistic-principles/medium#content-area)
The medium establishes the visual language of the image. It defines the format or technique the model should follow and shapes how edges, textures, lighting, and materials are rendered. Specify the medium clearly, whether it’s a photograph, watercolor painting, 3D render, pencil sketch, or flat vector illustration. This helps the model understand the visual framework it should use when generating the image.
[](https://www.recraft.ai/docs/prompt-engineering-guide/artistic-principles/medium#examples)
Examples
---------------------------------------------------------------------------------------------------------
.png?w=2500&fit=max&auto=format&n=CuSDebIUTgGiP2an&q=85&s=ccf33930b1e4397b4f1eead086161500)
.png?w=2500&fit=max&auto=format&n=VFFpbH6guiAy7fJb&q=85&s=e288d48748fa02562dfcba2d72d7e5b5)
.png?w=2500&fit=max&auto=format&n=zuOWkyT5KKdWnJbl&q=85&s=e4da4bfd9027fa180a94d98dd27c6ebb)
Photograph prompt
“_Single whole red apple centered in frame, medium size filling one-third of image, natural window light, realistic details with water droplets, professional food photography, clean white background_”
Watercolor prompt
“_Single whole red apple centered in frame, medium size filling one-third of image, watercolor painting, soft flowing edges, translucent washes, vibrant red and green palette, visible paper texture, white background_”
Vector prompt
“_Single whole red apple centered in frame, medium size filling one-third of image, flat vector illustration, simple geometric shape, clean minimal design, solid red color with highlight, modern graphic style, white background_”
[Context](https://www.recraft.ai/docs/prompt-engineering-guide/core-principles/context)
[Style](https://www.recraft.ai/docs/prompt-engineering-guide/artistic-principles/style)
⌘I
Assistant
Responses are generated using AI and may contain mistakes.
---
# Paid plans - Recraft
> Documentation Index
> -------------------
>
> Fetch the complete documentation index at: [/docs/llms.txt](https://www.recraft.ai/docs/llms.txt)
>
> Use this file to discover all available pages before exploring further.
[Skip to main content](https://www.recraft.ai/docs/plans-and-billing/paid-plans#content-area)
[_**Refer to the Recraft pricing table for the latest credit allowances and subscription rates.**_](https://www.recraft.ai/pricing)
Recraft offers paid subscriptions for individual creators and teams with both monthly and annual billing options (annual billing provides up to 20% discount). For individual users, the **Basic plan** starts at:
* **$12 per month (billed monthly)** for 1,000 credits
* **$10 per month (billed annually, $120 per year)** for 1,000 credits
The **Pro plan** starts at:
* **2000 credits** — $20 per month (monthly) or $16 per month (billed annually)
* **4,000 credits** — $40 per month (monthly) or $32 per month (billed annually)
* **8,000 credits** — $80 per month (monthly) or $64 per month (billed annually)
* **16000 credits** — $160 per month (monthly) or $128 per month (billed annually)
Credits renew monthly. Additionally, you can purchase top-up credits, which never expire and remain available until used, even if the subscription ends. For collaborative use, the **Teams plan** is available at:
* **2000 credits** — $22 per month (monthly) or $18 per month (billed annually)
* **4,000 credits** — $44 per month (monthly) or $35 per month (billed annually)
* **8,000 credits** — $70 per month (monthly) or $88 per month (billed annually)
* **16000 credits** — $176 per month (monthly) or $141 per month (billed annually)
The Teams plan includes:
* Shared custom styles
* Centralized account management
* Premium 24/7 support
* Single Sign-On (SSO)
All paid plans include private image generation and commercial usage rights while subscribed.
[](https://www.recraft.ai/docs/plans-and-billing/paid-plans#premium-plans)
Premium plans
--------------------------------------------------------------------------------------------
The Premium plans are intended for individuals who want to generate private images and retain [full ownership](https://www.recraft.ai/docs/plans-and-billing/commercial-rights-and-ownership)
. They include a monthly credit allowance and unlock access to all core editing and generation tools, as well as the ability to top up with additional credits as needed. Check out the full details on our [Pricing Page](https://recraft.ai/pricing)
to see everything included!
[](https://www.recraft.ai/docs/plans-and-billing/paid-plans#credit-top-ups)
Credit top-ups
----------------------------------------------------------------------------------------------
You can also top up credit packs at any time, in increments of 200, 400, 800 and 1600. They never expire and are used after your monthly credits. Learn more about [credits](https://www.recraft.ai/docs/plans-and-billing/credits)
.
[](https://www.recraft.ai/docs/plans-and-billing/paid-plans#teams)
Teams
----------------------------------------------------------------------------
Recraft offers paid plans for teams and enterprise organizations. To learn more, visit the [Teams page](https://www.recraft.ai/docs/teams/teams-overview)
.
[Free plan](https://www.recraft.ai/docs/plans-and-billing/free-plan)
[Upgrading and downgrading a plan](https://www.recraft.ai/docs/plans-and-billing/upgrading-and-downgrading-a-plan)
⌘I
Assistant
Responses are generated using AI and may contain mistakes.
---
# Vibe - Recraft
> Documentation Index
> -------------------
>
> Fetch the complete documentation index at: [/docs/llms.txt](https://www.recraft.ai/docs/llms.txt)
>
> Use this file to discover all available pages before exploring further.
[Skip to main content](https://www.recraft.ai/docs/prompt-engineering-guide/artistic-principles/vibe#content-area)
Vibe sets the emotional quality of the image. It shapes mood and atmosphere so the output reflects your intended tone. Choose descriptors that clearly express the feeling you want to convey. Terms like serene, dramatic, playful, or tense help the model establish a consistent emotional direction.
[](https://www.recraft.ai/docs/prompt-engineering-guide/artistic-principles/vibe#examples)
Examples
-------------------------------------------------------------------------------------------------------
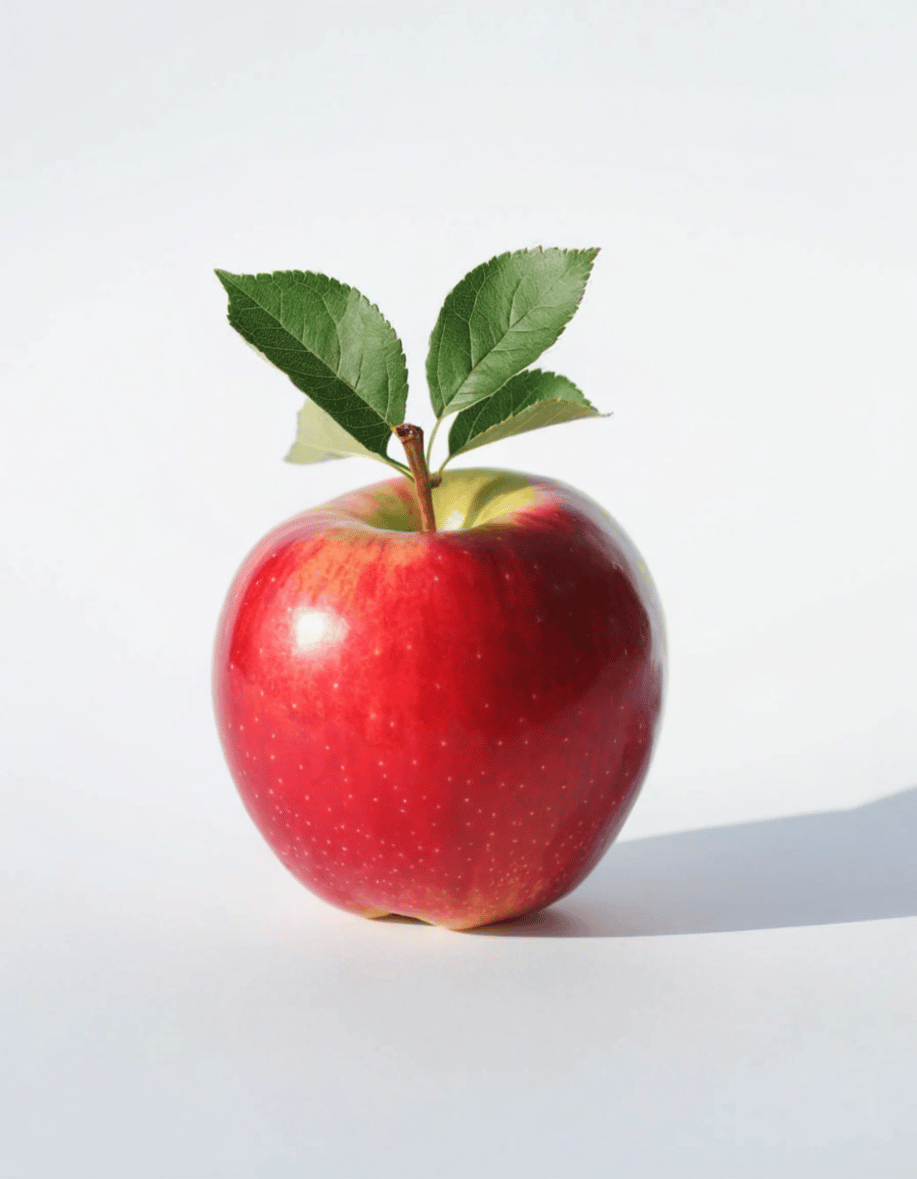
.png?w=2500&fit=max&auto=format&n=80Bg1-19IvHx1dXw&q=85&s=a0ee56651cecc6d973eb4d28c2344dc5)
.png?w=2500&fit=max&auto=format&n=F4b-9YMMvznf9BbE&q=85&s=7e2ee124d0b1398ae5ada8c90b4763a3)
Fresh prompt
“_Single whole red apple centered in frame, medium size filling one-third of image, fresh morning harvest mood, crisp and inviting, bright natural light, healthy vibrant feeling, clean white background_”
Nostalgic prompt
“_Single whole red apple centered in frame, medium size filling one-third of image, nostalgic autumn memory, warm golden tone, rustic countryside feeling, peaceful contemplative mood, soft neutral background_”
Dramatic prompt
“_Single whole red apple centered in frame, medium size filling one-third of image, dramatic moody atmosphere, dark black background with spotlight, intense shadows, theatrical chiaroscuro lighting, fine art still life_”
[Style](https://www.recraft.ai/docs/prompt-engineering-guide/artistic-principles/style)
[Attributes](https://www.recraft.ai/docs/prompt-engineering-guide/artistic-principles/attributes)
⌘I
Assistant
Responses are generated using AI and may contain mistakes.
---
# Attributes - Recraft
> Documentation Index
> -------------------
>
> Fetch the complete documentation index at: [/docs/llms.txt](https://www.recraft.ai/docs/llms.txt)
>
> Use this file to discover all available pages before exploring further.
[Skip to main content](https://www.recraft.ai/docs/prompt-engineering-guide/artistic-principles/attributes#content-area)
Attributes shape the fine details of the image. They determine lighting behavior, color relationships, texture, materials, and typographic structure, adding polish without altering the core composition. Once the subject, composition, medium, and style are defined, attributes refine the surface qualities and atmosphere of the image. These cues help the model interpret nuance and realism while keeping the overall structure intact. **Lighting** Influences mood and focus, for example soft morning light, dramatic side lighting, diffuse overcast light, or harsh fluorescent light. **Color and palette** Shapes mood and visual identity, for example muted earth tones, high-contrast palette, pastel gradient, or bright complementary colors. **Texture and materials** Describe how surfaces interact with light such as matte metal, polished glass, rough linen, or grainy paper. **Typography and layout** (for graphic or vector work) Specify typographic hierarchy and structure such as bold sans-serif headline, subtle serif caption, minimal grid layout, or clean centered title.
[](https://www.recraft.ai/docs/prompt-engineering-guide/artistic-principles/attributes#examples)
Examples
-------------------------------------------------------------------------------------------------------------
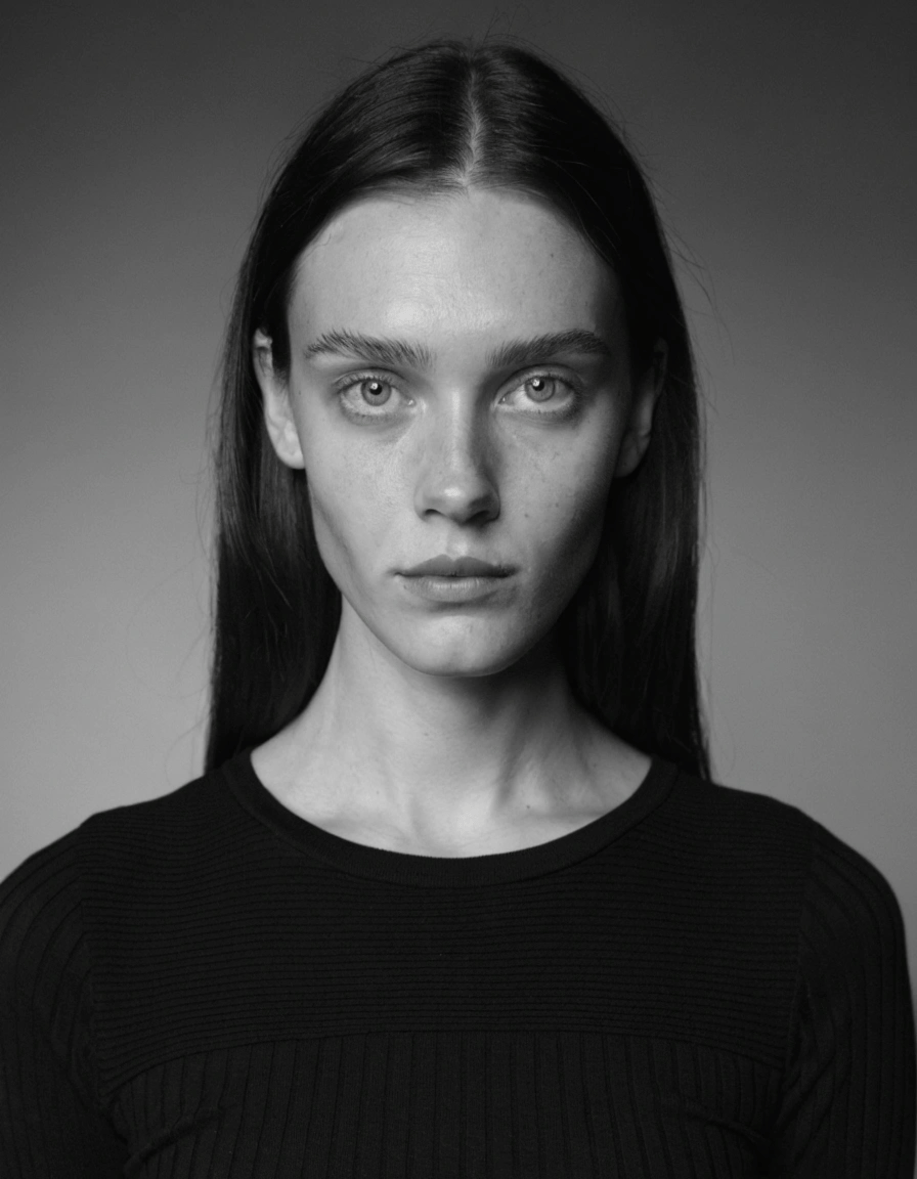
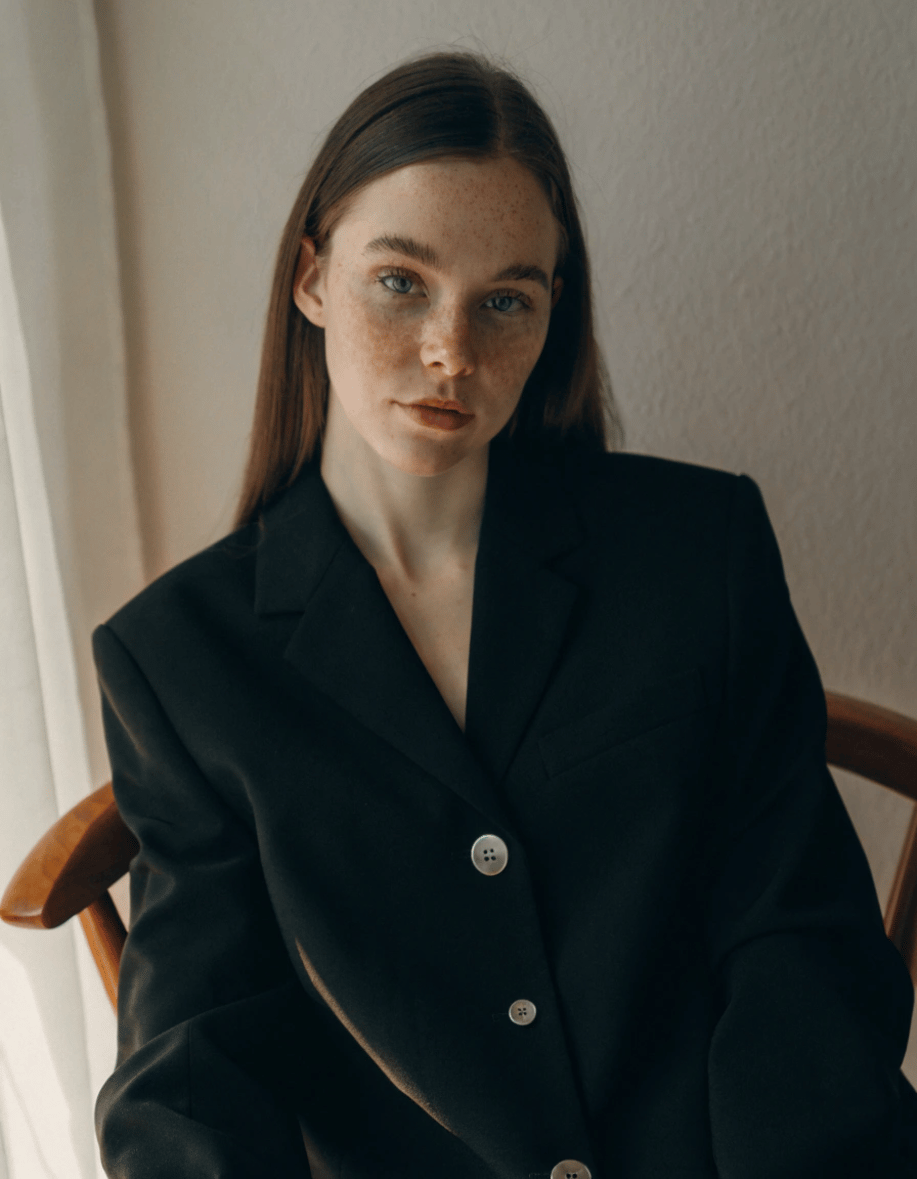
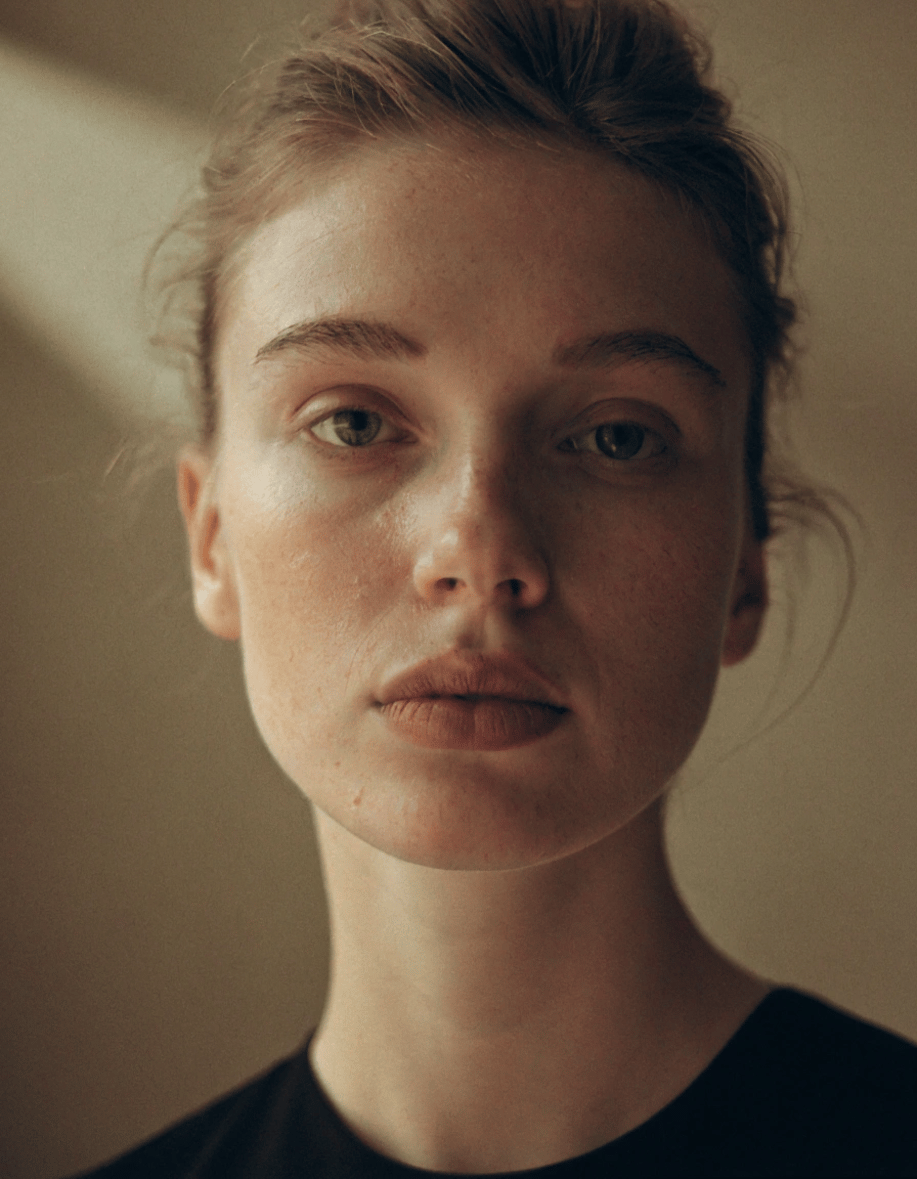
Minimal prompt
“_Portrait of a woman in a studio_”
With lighting prompt
“_Portrait of a woman in studio with soft window light from left, gentle shadows, warm golden hour glow, natural diffused illumination_”
Full attributes prompt
“_Close-up portrait of woman in studio, face and shoulders filling frame, soft window light from left creating gentle shadows across features, muted earth tone palette, matte skin texture with natural detail, shallow depth of field f/2.8 with background softly blurred, slight film grain adding warmth, golden atmospheric glow, gentle rim lighting highlighting hair edges, natural elegant expression, contemporary editorial style, intimate framing, 85mm lens perspective_”
[Vibe](https://www.recraft.ai/docs/prompt-engineering-guide/artistic-principles/vibe)
[Level of detail](https://www.recraft.ai/docs/prompt-engineering-guide/depth-and-control/level-of-detail)
⌘I
Assistant
Responses are generated using AI and may contain mistakes.
---
# Universal prompt template - Recraft
> Documentation Index
> -------------------
>
> Fetch the complete documentation index at: [/docs/llms.txt](https://www.recraft.ai/docs/llms.txt)
>
> Use this file to discover all available pages before exploring further.
[Skip to main content](https://www.recraft.ai/docs/prompt-engineering-guide/prompt-templates/universal#content-area)
This template brings together all prompt elements in a single structured format. It shows how subject, composition, context, medium, style, vibe, and attributes work together to guide the model toward a high-quality, coherent result.
[](https://www.recraft.ai/docs/prompt-engineering-guide/prompt-templates/universal#template)
Template
---------------------------------------------------------------------------------------------------------
`[SUBJECT + ACTION], [COMPOSITION], [CONTEXT], [MEDIUM], [STYLE], [VIBE], [ATTRIBUTES: lighting, color, texture, technical details]` 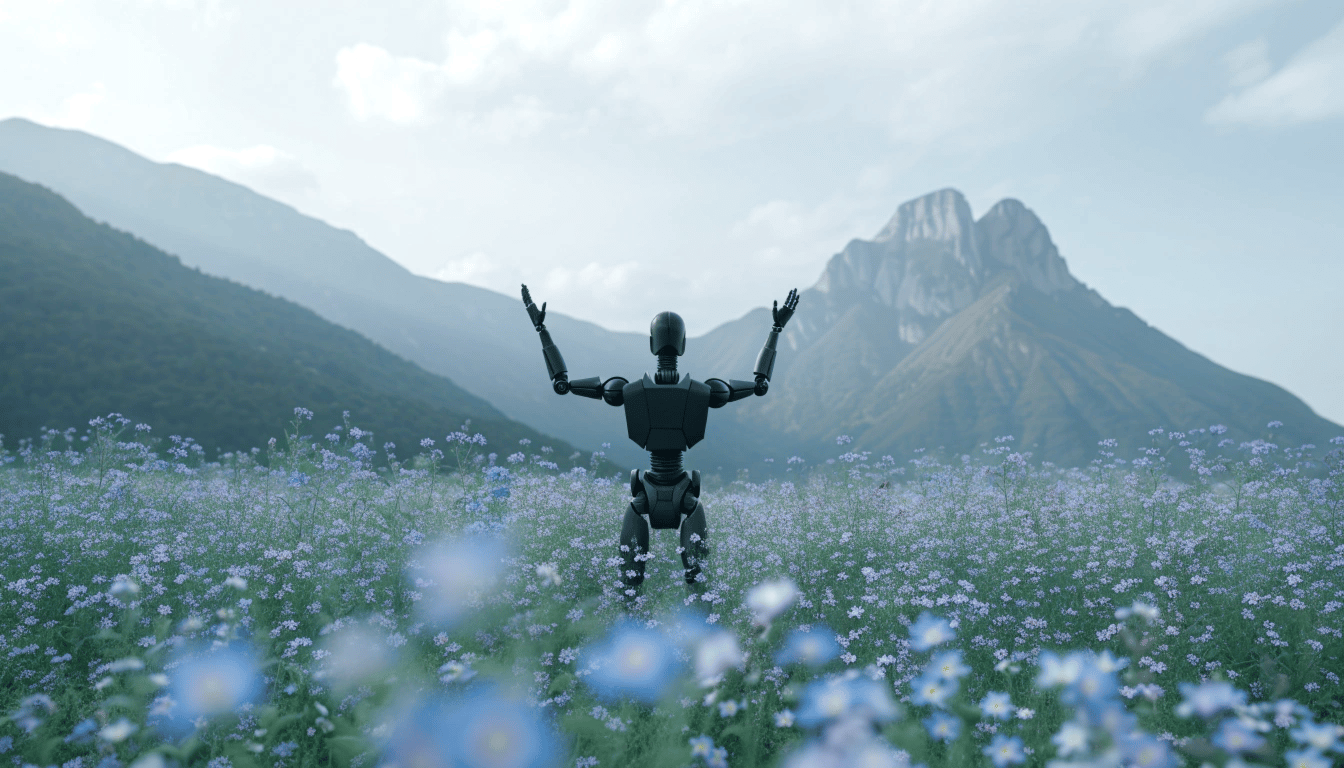 “A humanoid robot with black body standing in a vast wildflower meadow with arms raised upward, captured from behind, dramatic mountain ranges stretching across the horizon in soft focus, endless field of blue and white flowers surrounding the robot, professional cinematic photograph, contemporary sci-fi style, contemplative and mystical mood, soft diffused daylight with gentle atmospheric haze, cool color palette with pastel blues, whites, and muted greens, sharp focus on the robotic silhouette, slight depth of field blur on distant mountains, shot with 35mm lens at f/2.8”
[](https://www.recraft.ai/docs/prompt-engineering-guide/prompt-templates/universal#breakdown)
Breakdown
-----------------------------------------------------------------------------------------------------------
1. **Subject:** “A humanoid robot with black body standing in a vast wildflower meadow with arms raised upward”
2. **Composition:** “Captured from behind, dramatic mountain ranges stretching across the horizon in soft focus”
3. **Context:** “Endless field of blue and white flowers surrounding the robot”
4. **Medium:** “Professional cinematic photograph”
5. **Style:** “Contemporary sci-fi style”
6. **Vibe:** “Contemplative and mystical mood”
7. **Attributes:** “Soft diffused daylight with gentle atmospheric haze, cool color palette with pastel blues, whites, and muted greens, sharp focus on the robotic silhouette, slight depth of field blur on distant mountains, shot with 35mm lens at f/2.8”
[Logos and icons](https://www.recraft.ai/docs/prompt-engineering-guide/visual-formats/logos-and-icons)
[Closing notes](https://www.recraft.ai/docs/prompt-engineering-guide/closing-notes)
⌘I
Assistant
Responses are generated using AI and may contain mistakes.
---
# Upgrading and downgrading a plan - Recraft
> Documentation Index
> -------------------
>
> Fetch the complete documentation index at: [/docs/llms.txt](https://www.recraft.ai/docs/llms.txt)
>
> Use this file to discover all available pages before exploring further.
[Skip to main content](https://www.recraft.ai/docs/plans-and-billing/upgrading-and-downgrading-a-plan#content-area)
[](https://www.recraft.ai/docs/plans-and-billing/upgrading-and-downgrading-a-plan#upgrading)
Upgrading
----------------------------------------------------------------------------------------------------------
Once confirmed, your plan will be upgraded immediately. Your billing will be prorated based on the remaining time on your current plan.
**To upgrade to a paid Pro plan from a Free plan**:
1. Click **Upgrade** in the upper right screen.
2. Click **Get started** in the **Pro** plan.
3. Select the amount of credits you’d like to purchase, then click **Continue to payment**.
4. In the Stripe checkout window, confirm your new plan and complete the purchase.
**To increase the credits on your current Pro plan**:
1. Open the **Profile menu** in the upper-right corner of the app.
2. Click **Pricing and plans**.
3. On the pricing page, locate the Pro plan in the center, then click **Current plan**.
4. Select the amount of credits you’d like to purchase then click **Continue to payment**.
5. In the Stripe checkout window, confirm your new plan and complete the purchase.
[](https://www.recraft.ai/docs/plans-and-billing/upgrading-and-downgrading-a-plan#downgrading)
Downgrading
--------------------------------------------------------------------------------------------------------------
**To downgrade to the Free plan from a Pro plan**:
1. Open **Profile** in the upper-right corner of the app.
2. Click **Manage subscription**. In the Subscription box, click **Change plan**.
3. Click **Downgrade** under **Free**.
4. Click **Cancel subscription**.
5. Confirm changes.
**To downgrade the credit limit from a Pro plan**:
1. Open **Profile** in the upper-right corner of the app.
2. Click **Manage subscription**. In the Subscription box, click **Change plan.**
3. Click **Current plan** under **Pro**.
4. Select the amount of credits you’d like to purchase, then click **Continue to payment**.
5. Confirm changes.
After downgrading, you may receive a prorated amount of unused credits on your Stripe account that can be applied to future purchases.
[Paid plans](https://www.recraft.ai/docs/plans-and-billing/paid-plans)
[Deleting an account](https://www.recraft.ai/docs/plans-and-billing/deleting-an-account)
⌘I
Assistant
Responses are generated using AI and may contain mistakes.
---
# Prompting for image generation - Recraft
> Documentation Index
> -------------------
>
> Fetch the complete documentation index at: [/docs/llms.txt](https://www.recraft.ai/docs/llms.txt)
>
> Use this file to discover all available pages before exploring further.
[Skip to main content](https://www.recraft.ai/docs/prompt-engineering-guide/introduction#content-area)
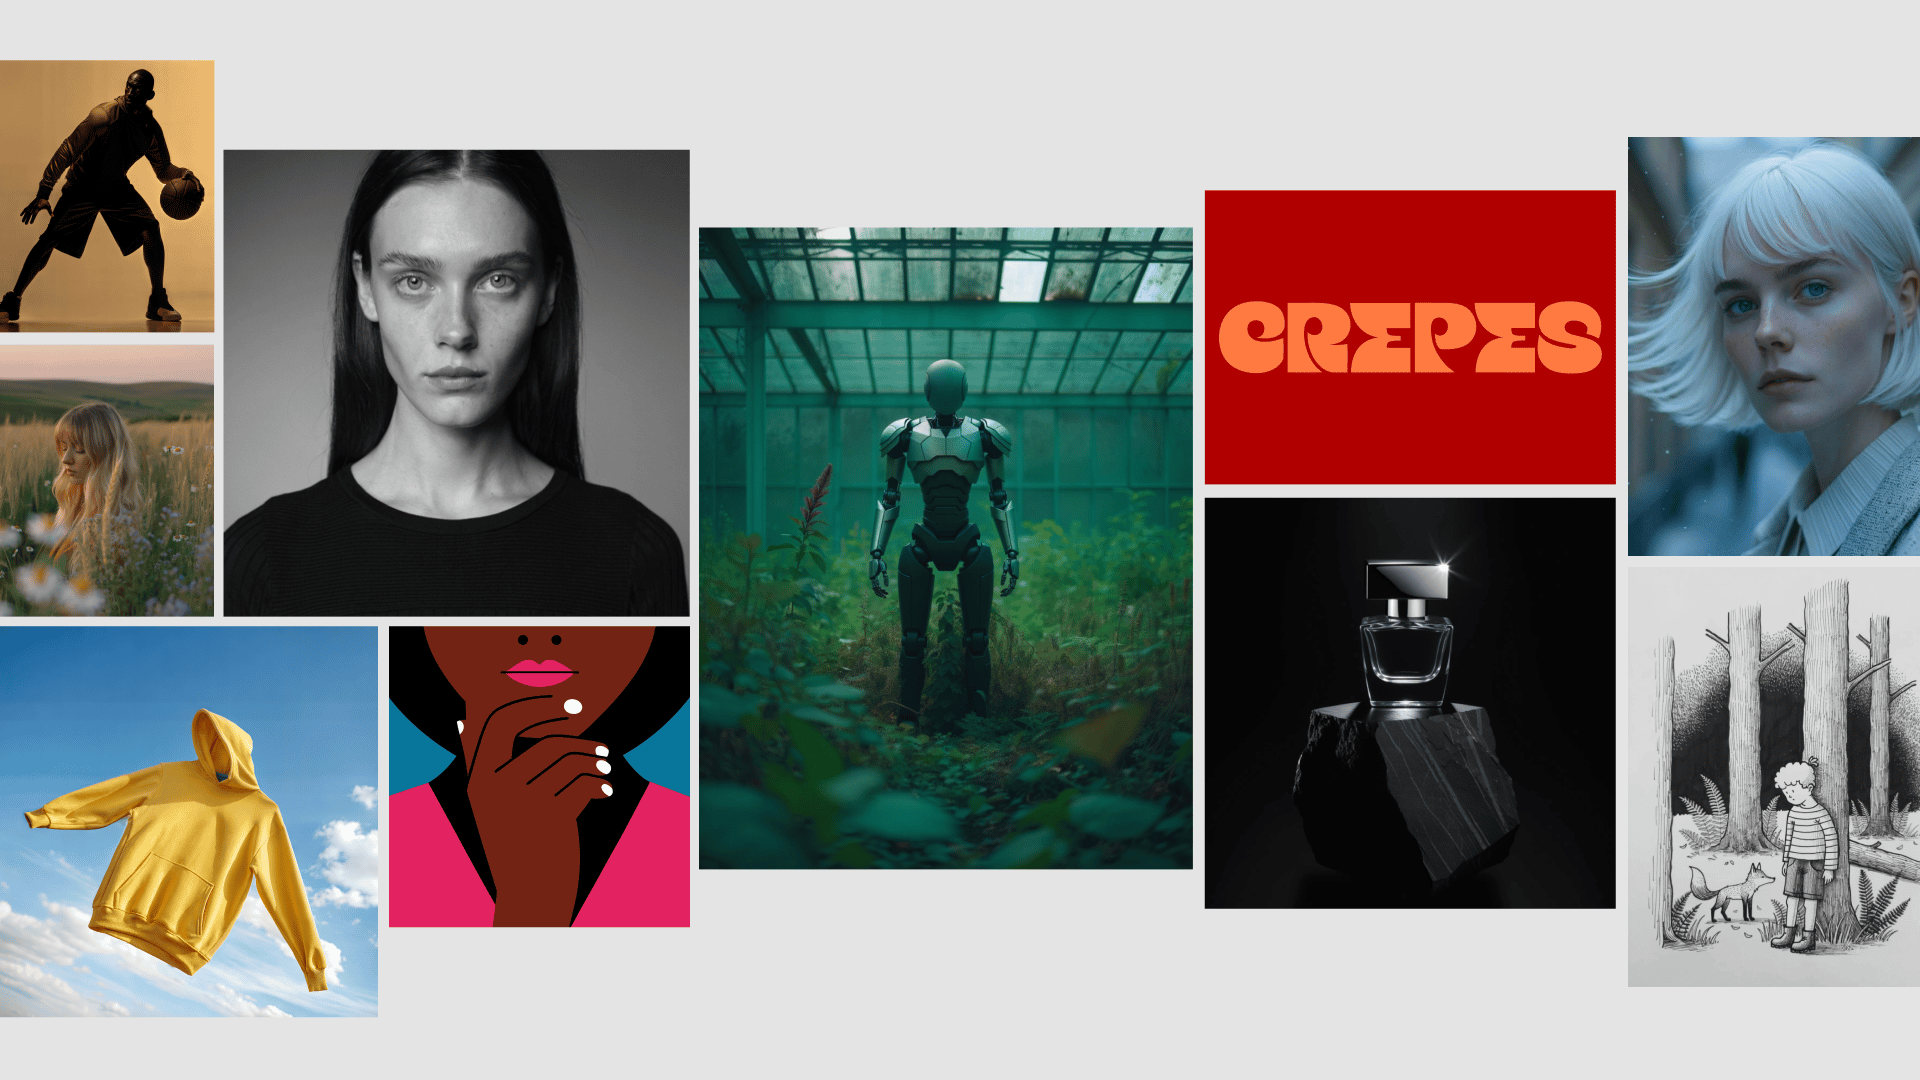 AI image generation allows you to create visuals using natural language instead of manual tools. With just a brief description, the model interprets your prompt and generates an image based on that input. For many users, the challenge is not producing an image, it is producing the right one. Even when your idea feels clear, the output can still look unexpected or misaligned with your intention. Effective prompting is not about memorizing magic keywords. It is about understanding how models interpret language and how simple adjustments to clarity and structure can guide the results. This guide introduces Recraft’s recommended prompting approach, built around a set of core components that help you communicate your creative idea more precisely. The **core principles** cover what every strong prompt needs at a minimum. The **artistic principles** are optional layers that enhance creativity, visual richness, and stylistic identity. Once these elements are clear, you can choose the image style you want to work in and decide whether your prompt should be brief or highly detailed.
[Prompting with Recraft V4](https://www.recraft.ai/docs/prompt-engineering-guide/prompting-with-recraft-v4)
⌘I
Assistant
Responses are generated using AI and may contain mistakes.
---
# Mobile Apps - Recraft
> Documentation Index
> -------------------
>
> Fetch the complete documentation index at: [/docs/llms.txt](https://www.recraft.ai/docs/llms.txt)
>
> Use this file to discover all available pages before exploring further.
[Skip to main content](https://www.recraft.ai/docs/mobile-apps#content-area)
Recraft is available on iOS and Android. Your account, projects, styles, and credits sync automatically across the mobile app and the web.
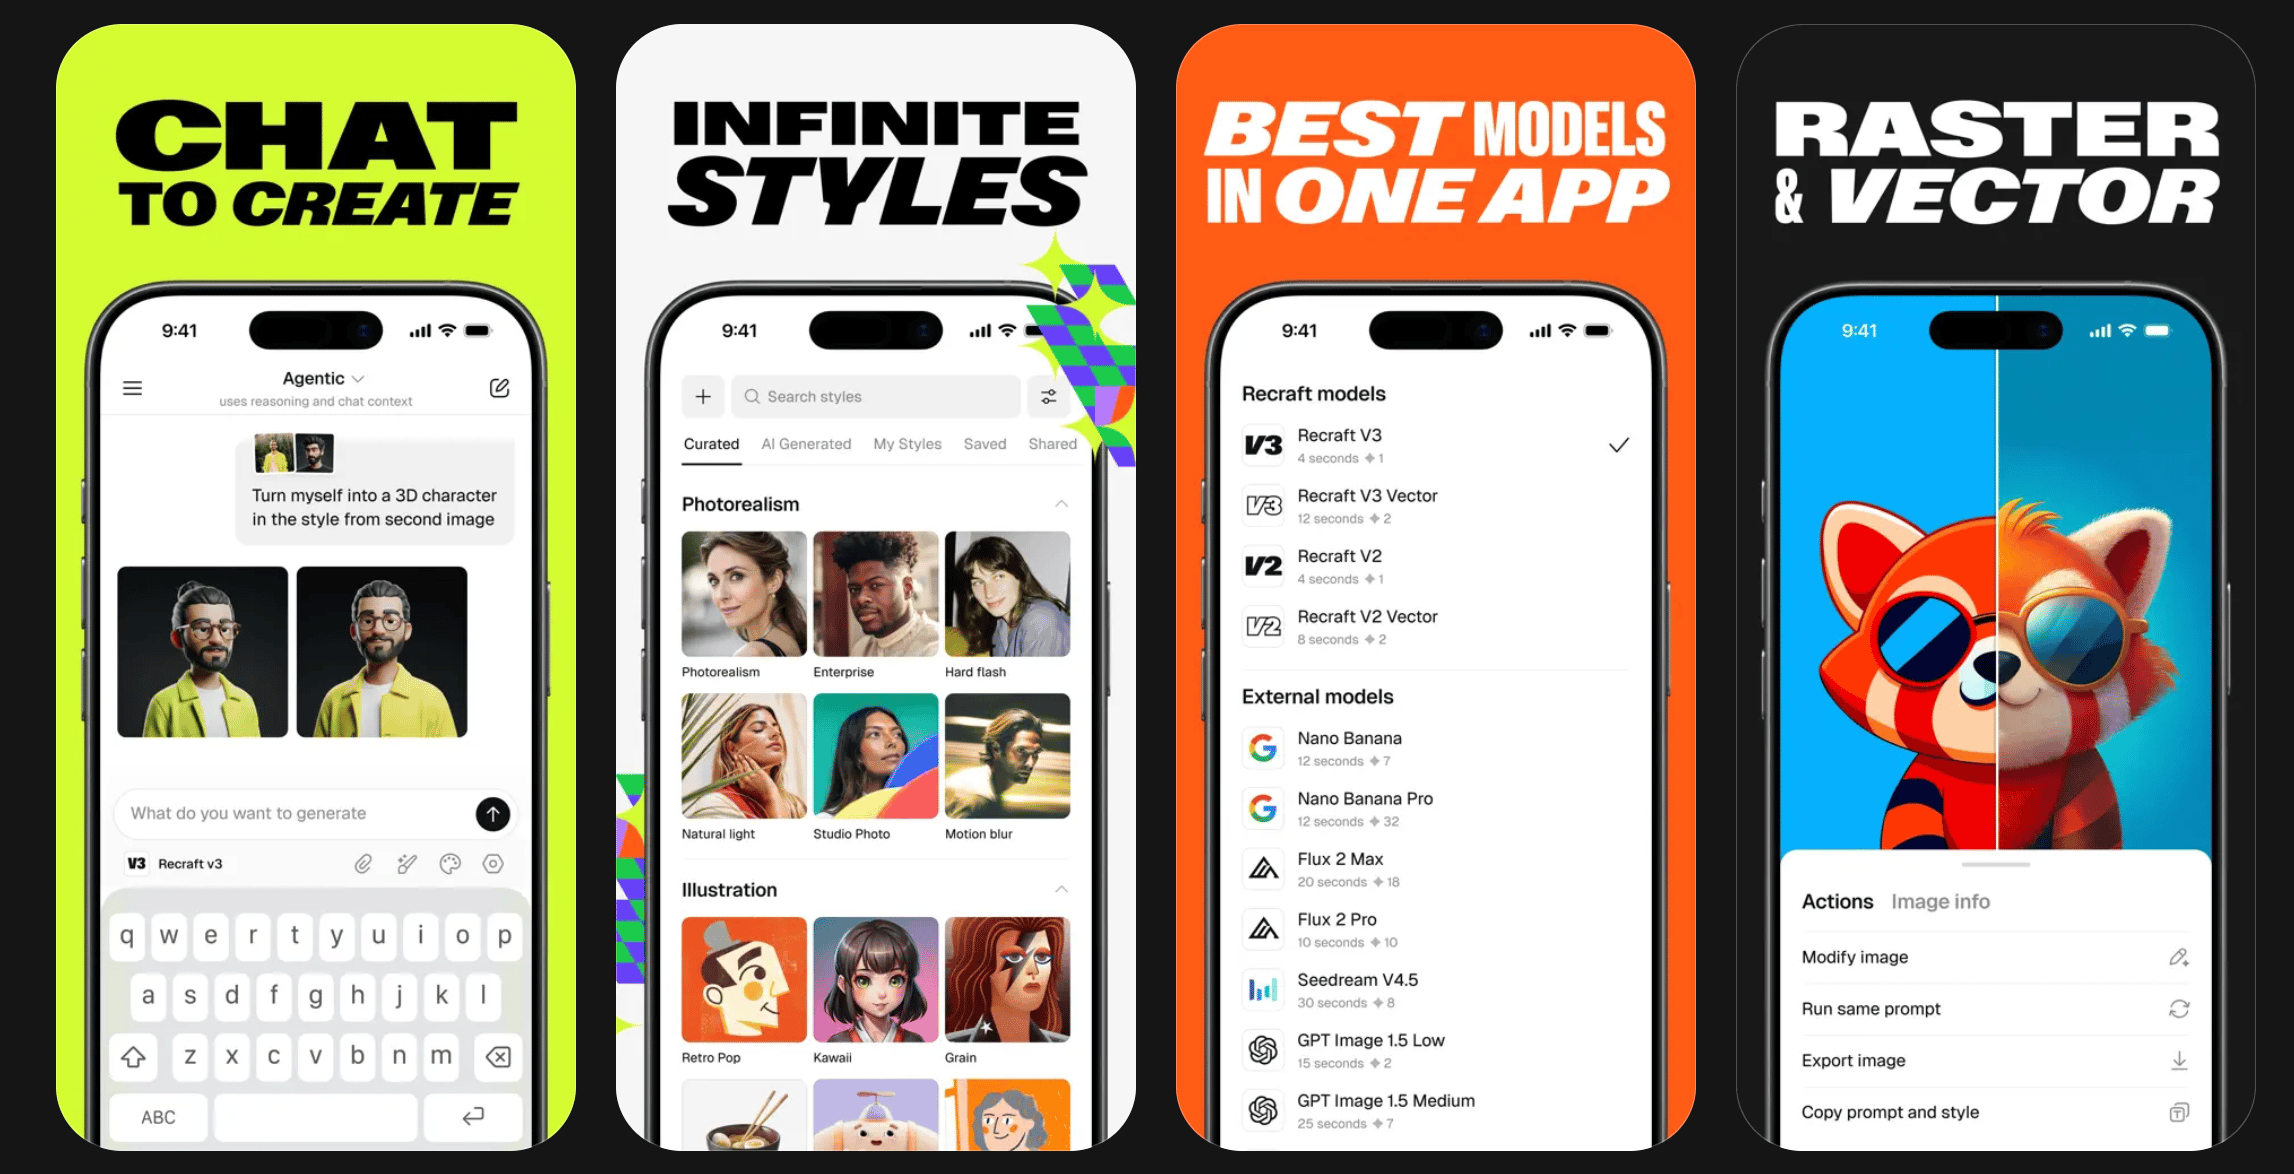
**Download the app**
* [Download on the App Store](https://apps.apple.com/us/app/recraft/id6502416347)
* [Get it on Google Play](https://play.google.com/store/apps/details?id=ai.recraft&hl=en)
**Requirements** iOS and iPadOS 17.6 or later. Android 8.0 or later. **Sign in** Open the app and sign in using the same method you use on the web — email, Google, or Apple. No password is required. If you sign in with email, you’ll receive a one-time code to complete sign-in. Your credits and projects will be available immediately. **Recraft Studio on Mobile** Recraft Studio on mobile includes tools such as Edit Image, Upscale, Remove Background, and Vectorize. You can take a photo or upload an image directly from your phone to start working with these features. **Chat quick actions** The chat interface includes quick actions that allow you to retry the same generation or copy a message with a single tap. Available on both mobile and desktop versions. **Generate an image** Type a prompt in the prompt field and tap the generate button. Your image appears on screen in a few seconds. Tap any result to view, save, or continue editing. **Generation modes** Two modes are available: _Agentic mode_ — An LLM-powered assistant understands context across multiple turns and optimizes settings automatically. Best for exploring ideas and iterating through conversation. _Manual mode_ — Full control over every parameter, including model, style, aspect ratio, and artistic level. Best for precise, repeatable results. You can switch between modes at any time from the prompt panel. **Models and styles** The mobile app gives you access to all models available in Recraft Studio, including Recraft V4.1, Nano Banana, GPT Image, Seedream, and Flux. To select a model or style, tap the Style button above the prompt panel. **Reference images** You can attach images from your camera roll to guide generation. Tap the image icon in the prompt panel and select a photo. Use references to transform an existing image, build on a sketch, or match a visual style. **Video generation** Generate videos from a text prompt or from an image. Supported models include Kling, Veo, and Grok. Tap the video icon in the prompt panel to switch to video mode. You can control duration and keyframes for more precise results. Video generation is available to paid subscribers. **Continue on desktop** All images you generate on mobile are saved to your account and accessible from the History panel. Open any image on the desktop to continue working with the full toolkit, including the canvas editor, frames, mockups, and advanced editing tools. **Plans and credits** Your plan and credits are shared between the mobile app and the web. Free users receive 30 credits per day, which reset every 24 hours. Paid plan credits reset monthly. You can purchase a paid plan or top up credits directly from the app. Top-up credits never expire. For more about plans, see [Paid plans](https://www.recraft.ai/docs/plans-and-billing/paid-plans)
.
[How to share a project](https://www.recraft.ai/docs/recraft-studio/exporting-and-sharing/how-to-share-a-project)
[Recraft Plugins](https://www.recraft.ai/docs/recraft-plugins)
⌘I
Assistant
Responses are generated using AI and may contain mistakes.
---
# Style - Recraft
> Documentation Index
> -------------------
>
> Fetch the complete documentation index at: [/docs/llms.txt](https://www.recraft.ai/docs/llms.txt)
>
> Use this file to discover all available pages before exploring further.
[Skip to main content](https://www.recraft.ai/docs/prompt-engineering-guide/artistic-principles/style#content-area)
Style directs the model toward a specific artistic or visual tradition. It keeps the image coherent by aligning it with a clear aesthetic direction. Style can reference artistic movements such as Impressionism or Bauhaus, genres like editorial fashion photography or minimal poster design, or techniques like collage, ink sketch, or isometric render. Clear stylistic cues help the model stay focused on a consistent look rather than blending unrelated influences.
[](https://www.recraft.ai/docs/prompt-engineering-guide/artistic-principles/style#examples)
Examples
--------------------------------------------------------------------------------------------------------
.png?w=2500&fit=max&auto=format&n=NNBq55arl6B6ktU-&q=85&s=23a294a180e5a2830c9a3e37f60e18f5)
.png?w=2500&fit=max&auto=format&n=UnWPJNjcaoZ6yI7_&q=85&s=611c3f6a202ea9fdec83af6e001f7cd4)
.png?w=2500&fit=max&auto=format&n=hQ2Io2cc27H1xRzc&q=85&s=9e8ed84c469e8cff81f169959e1371b4)
Retro prompt
“_Single whole red apple centered in frame, medium size filling one-third of image, authentic 1950s vintage advertisement style with aged paper texture, bold oversaturated red and green colors typical of mid-century print, prominent halftone dot screen pattern visible throughout, slight faded edges and subtle grain, retro commercial appeal with nostalgic quality, printed ephemera aesthetic, slight color separation misalignment for authentic vintage printing effect, classic Americana advertising look, warm sepia undertones, old magazine ad feeling_”
Minimalist prompt
“_Single whole red apple centered in frame, medium size filling one-third of image, Japanese minimalist aesthetic, zen simplicity, muted natural red tone, wabi-sabi philosophy, clean white empty space_”
Surreal prompt
“_Single whole red apple centered in frame, medium size filling one-third of image, organic surrealist transformation with skin seamlessly morphing into liquid mercury on one side, roots and branches emerging from bottom creating impossible life cycle, butterflies made of apple flesh flying away leaving hollow spaces, soft pastel dreamlike background with melting clock elements à la Dalí, fruit existing in multiple states of matter simultaneously, poetic visual metaphor style, contemporary surrealist fine art photography, impossible beauty_”
[Medium](https://www.recraft.ai/docs/prompt-engineering-guide/artistic-principles/medium)
[Vibe](https://www.recraft.ai/docs/prompt-engineering-guide/artistic-principles/vibe)
⌘I
Assistant
Responses are generated using AI and may contain mistakes.
---
# Subject - Recraft
> Documentation Index
> -------------------
>
> Fetch the complete documentation index at: [/docs/llms.txt](https://www.recraft.ai/docs/llms.txt)
>
> Use this file to discover all available pages before exploring further.
[Skip to main content](https://www.recraft.ai/docs/prompt-engineering-guide/core-principles/subject#content-area)
Start your prompt with the subject. This helps the model identify what the viewer should notice first and anchors the image around a clear focal point. Describe the primary character, object, or setting in simple, descriptive terms. Stating the subject clearly guides the model’s interpretation and keeps the output aligned with your intention.
[](https://www.recraft.ai/docs/prompt-engineering-guide/core-principles/subject#examples)
Examples
------------------------------------------------------------------------------------------------------
Minimal prompt
“_A chair_”
Descriptive prompt
“_Wooden chair_”
Detailed prompt
“_Mid-century modern walnut chair positioned beside tall window with afternoon sunlight casting diagonal shadows across seat, minimalist Scandinavian interior with white walls and light oak flooring, architectural photography style, clean composition with negative space_”
[Prompting with Recraft V4](https://www.recraft.ai/docs/prompt-engineering-guide/prompting-with-recraft-v4)
[Composition](https://www.recraft.ai/docs/prompt-engineering-guide/core-principles/composition)
⌘I
Assistant
Responses are generated using AI and may contain mistakes.
---
# FAQ - Recraft
> Documentation Index
> -------------------
>
> Fetch the complete documentation index at: [/docs/llms.txt](https://www.recraft.ai/docs/llms.txt)
>
> Use this file to discover all available pages before exploring further.
[Skip to main content](https://www.recraft.ai/docs/support-and-faq/FAQ#content-area)
###
[](https://www.recraft.ai/docs/support-and-faq/FAQ#what-is-recraft-and-what-can-i-create-with-it)
What is Recraft, and what can I create with it?
Recraft is an AI-powered platform for image generation and editing. It allows you to create a wide range of design assets, including raster and vector images, mockups (such as T-shirts and packaging), custom color palettes, and brand-style visuals. It also includes tools like background removal and image vectorization. These capabilities make it suitable for generating illustrations, icons, graphics, and other visual content for websites, apps, marketing materials, and branding. Recraft is built for both individual creators and teams who need fast, scalable, and commercially usable visuals.
###
[](https://www.recraft.ai/docs/support-and-faq/FAQ#what-is-recraft-studio)
What is Recraft Studio?
Recraft Studio is an all-in-one creative workspace within Recraft where you can generate, edit, organize, and manage your visual assets. It combines the AI-powered image generation tools with editing features and project organization, making it easier to work on designs from start to finish in one place, whether you’re working solo or with a team.
###
[](https://www.recraft.ai/docs/support-and-faq/FAQ#do-i-need-design-experience-to-use-recraft)
Do I need design experience to use Recraft?
No. Recraft is designed to be easy to use, even if you don’t have any design experience. You can create high-quality visuals using simple text prompts and built-in styles, while more advanced users can fine-tune results for greater control and consistency.
[](https://www.recraft.ai/docs/support-and-faq/FAQ#language-and-character-support)
Language and character support
---------------------------------------------------------------------------------------------------------------------
###
[](https://www.recraft.ai/docs/support-and-faq/FAQ#which-languages-and-characters-are-supported-in-the-prompt-field)
Which languages and characters are supported in the prompt field?
Recraft supports any Unicode text input, so you can use a wide range of characters and languages in your prompts. The model performs best with prompts written in English, but also demonstrates strong comprehension of:
* Major European languages: French, Spanish, Portuguese, German, Italian, Russian
* East Asian languages: Chinese, Japanese, Korean
* Selected Southeast Asian and Middle Eastern languages: Vietnamese, Thai, Arabic
Other languages are supported as well, though results may be less accurate for less commonly used or low-resource languages.
[](https://www.recraft.ai/docs/support-and-faq/FAQ#plans-and-credits)
Plans and credits
-------------------------------------------------------------------------------------------
###
[](https://www.recraft.ai/docs/support-and-faq/FAQ#what-subscription-plans-does-recraft-offer)
What subscription plans does Recraft offer?
Recraft offers a Free plan for exploring the product and paid plans for professional use. Paid subscriptions are available with monthly or yearly billing, include more credits, access to advanced features and models, private generations, and commercial usage rights. Recraft also offers a Teams plan for collaborative workspaces.
###
[](https://www.recraft.ai/docs/support-and-faq/FAQ#what%E2%80%99s-the-difference-between-the-free-and-pro-plans)
What’s the difference between the Free and Pro plans?
The Free plan lets you explore Recraft with limited credits and basic features. The Pro plan provides more monthly credits, access to advanced models and tools, higher generation limits, and full commercial usage rights. It’s designed for professionals and teams who need greater flexibility, higher output, and priority performance.
###
[](https://www.recraft.ai/docs/support-and-faq/FAQ#how-do-credits-work-in-recraft)
How do credits work in Recraft?
Recraft uses a credit-based system for generating and editing images. Each image generation or edit consumes credits depending on the model and action used. Paid plans include a fixed number of credits that reset every billing cycle, and any unused monthly credits do not roll over. Free plan users receive a limited number of credits that reset daily. Paid users can also purchase top-up credit packs at any time. These credits do not expire and are used after subscription credits. [Credits overview](https://www.recraft.ai/docs/plans-and-billing/credits)
###
[](https://www.recraft.ai/docs/support-and-faq/FAQ#what-payment-methods-do-you-accept)
What payment methods do you accept?
Recraft accepts credit cards, debit cards, and bank transfers. Payments are securely processed through trusted providers such as Stripe.
Learn more about billing and accepted payment methods [here](https://www.recraft.ai/docs/plans-and-billing/billing)
.
###
[](https://www.recraft.ai/docs/support-and-faq/FAQ#can-i-change-or-cancel-my-plan-at-any-time)
Can I change or cancel my plan at any time?
Yes, you can change or cancel your Recraft subscription at any time from your Account Settings. Your plan changes will take effect according to your current billing cycle. For more details on how to manage your subscription, refer to the Recraft billing [guide.](https://www.recraft.ai/docs/plans-and-billing/billing)
###
[](https://www.recraft.ai/docs/support-and-faq/FAQ#what-is-your-refund-policy)
What is your refund policy?
If you’ve used fewer than 30 credits over the lifetime of your account and your most recent payment was made within the last 30 days, you may be eligible for a refund. To request it, you must first cancel your subscription and then contact support at [help@recraft.ai](mailto:help@recraft.ai)
. Refunds, if approved, are issued to your original payment method. Refund eligibility and processing are subject to Recraft’s billing policies.
###
[](https://www.recraft.ai/docs/support-and-faq/FAQ#is-there-a-referral-program)
Is there a referral program?
The referral program is currently fully disabled. Please stay tuned for future updates.
[](https://www.recraft.ai/docs/support-and-faq/FAQ#prompting)
Prompting
---------------------------------------------------------------------------
###
[](https://www.recraft.ai/docs/support-and-faq/FAQ#why-was-my-prompt-blocked)
Why was my prompt blocked?
Prompts may be denied if they include content that violates Recraft’s Terms of Use. The system automatically filters out unsafe or sensitive input to maintain platform safety. For more information, refer to the [Terms of Use](https://www.recraft.ai/terms)
.
###
[](https://www.recraft.ai/docs/support-and-faq/FAQ#why-aren%E2%80%99t-negative-prompts-working)
Why aren’t negative prompts working?
Avoid using phrases like “no” or “don’t” in your main prompt. Instead, use the Negative prompt field to list unwanted elements—for example: `flowers, animals, people`
[](https://www.recraft.ai/docs/support-and-faq/FAQ#image-quality)
Image quality
-----------------------------------------------------------------------------------
###
[](https://www.recraft.ai/docs/support-and-faq/FAQ#why-does-the-image-look-blurry-or-low-quality)
Why does the image look blurry or low quality?
If your image appears blurry—especially for faces or fine details—try using Creative upscale after generation. This enhances sharpness and overall image quality.
###
[](https://www.recraft.ai/docs/support-and-faq/FAQ#why-do-high-resolution-images-look-lower-quality-after-using-inpainting-or-background-removal)
Why do high-resolution images look lower quality after using inpainting or background removal?
When inpainting or background removal is applied to large, high-resolution images, Recraft first downscales the image and then performs the edit. As a result, large images lose some quality after inpainting or background removal.
###
[](https://www.recraft.ai/docs/support-and-faq/FAQ#what-is-the-best-resolution-the-model-can-do)
**What is the best resolution the model can do?**
The maximum supported resolution depends on the file format:
• **JPG, PNG, WebP**
Maximum width or height: **5,800 pixels**
Maximum resolution: **16 megapixels**
Maximum file size: **48 MB**
• **SVG**
Maximum file size: **48 MB**
These limits apply to image generation and export in Recraft.
###
[](https://www.recraft.ai/docs/support-and-faq/FAQ#why-doesn%E2%80%99t-the-generated-image-match-my-prompt)
Why doesn’t the generated image match my prompt?
AI models interpret language differently than humans and rely on pattern recognition, not comprehension. To improve results:
* Use clear and descriptive prompts (e.g., “red leather armchair in a modern living room” instead of “armchair”)
* Try shorter prompts if the output seems random
* Experiment with different styles—some respond better to specific types of prompts
###
[](https://www.recraft.ai/docs/support-and-faq/FAQ#why-are-characters-facing-left-or-right-instead-of-directly-toward-or-away-from-the-camera)
Why are characters facing left or right instead of directly toward or away from the camera?
By default, higher Artistic level settings tend to introduce more dynamic poses and angled compositions. To get characters to face directly toward or away from the camera, lower the **Artistic level**. Try setting it to a minimal value, such as **Clean**. Lower settings favor centered, front-facing compositions and reduce directional bias in character orientation.
[](https://www.recraft.ai/docs/support-and-faq/FAQ#editing)
Editing
-----------------------------------------------------------------------
###
[](https://www.recraft.ai/docs/support-and-faq/FAQ#why-is-the-merge-objects-tool-unavailable)
Why is the Merge objects tool unavailable?
The Merge objects tool may be disabled if:
* You haven’t selected multiple images
* The resulting merged image would exceed 4096 pixels in size
###
[](https://www.recraft.ai/docs/support-and-faq/FAQ#what%E2%80%99s-the-best-order-to-remove-a-background-and-vectorize-an-image)
What’s the best order to remove a background and vectorize an image?
Remove the background first, then vectorize the image. Starting with background removal isolates the main subject and prevents unwanted background shapes from being converted into vector paths. This results in a cleaner, more accurate vector output with fewer artifacts.
[](https://www.recraft.ai/docs/support-and-faq/FAQ#styles)
Styles
---------------------------------------------------------------------
###
[](https://www.recraft.ai/docs/support-and-faq/FAQ#can-i-use-a-custom-style-created-in-the-tool-with-the-api)
Can I use a custom style created in the tool with the API?
Yes. You can use any style you’ve created in Recraft with the API by referencing its **Style ID** as a parameter in your API request. There are two ways to find the Style ID: **Option 1: From the styles page**
1. Go to [recraft.ai/styles](https://www.recraft.ai/styles)
2. Open the **My styles** tab
3. Click on the style you want to use
4. In the top panel, click the **…** icon
5. Select **Copy style ID** — this will copy the value to your clipboard
6. Paste the ID into your API code as the `style_id` parameter
**Option 2: From within the canvas**
1. Open any project
2. Click the **style selector** above the prompt field
3. Select the style you want to use
4. In the right panel, under **Properties**, locate the **Style ID** field
5. Copy the value and use it in your API request
[](https://www.recraft.ai/docs/support-and-faq/FAQ#teams-&-collaboration)
Teams & collaboration
---------------------------------------------------------------------------------------------------
###
[](https://www.recraft.ai/docs/support-and-faq/FAQ#can-i-use-recraft-with-my-team-or-workspace)
Can I use Recraft with my team or workspace?
Yes! Recraft supports team collaboration through workspaces, allowing multiple users to work together under a shared account. With the Teams plan, you can manage members, share assets and styles, and allocate credits across your group. This makes it easy to collaborate on projects while keeping billing and permissions centralized.
###
[](https://www.recraft.ai/docs/support-and-faq/FAQ#how-can-i-share-styles-from-my-personal-account-with-my-team-workspace)
How can I share styles from my personal account with my team workspace?
You can share styles by sharing the project they’re part of. Use the **Share** button to open the project from another account and duplicate it into your workspace. If you’re a workspace member, you can also duplicate projects between your personal and team accounts directly from the **Projects** page using the “…” menu.
[](https://www.recraft.ai/docs/support-and-faq/FAQ#api-&-advanced-usage)
API & advanced usage
-------------------------------------------------------------------------------------------------
###
[](https://www.recraft.ai/docs/support-and-faq/FAQ#do-you-offer-an-api)
Do you offer an API?
Yes, Recraft provides an API that allows developers to integrate our image generation and editing capabilities into their own applications, workflows, or systems. The API lets you automate creation, manage assets programmatically, and build custom solutions on top of Recraft’s models. For details on how to get started, pricing, and documentation, refer to the [API](https://www.recraft.ai/docs/api-reference/getting-started)
docs.
[Security and compliance](https://www.recraft.ai/docs/support-and-faq/security-and-compliance)
⌘I
Assistant
Responses are generated using AI and may contain mistakes.
---
# Context - Recraft
> Documentation Index
> -------------------
>
> Fetch the complete documentation index at: [/docs/llms.txt](https://www.recraft.ai/docs/llms.txt)
>
> Use this file to discover all available pages before exploring further.
[Skip to main content](https://www.recraft.ai/docs/prompt-engineering-guide/core-principles/context#content-area)
Context adds story, environment, and atmosphere. It helps the model understand the setting and the conditions that surround the subject. Provide supporting details such as environment, style, mood, or lighting to help anchor the scene. You do not need long descriptions, only enough to guide the model. Too little context leads to unpredictable results, while too much can restrict the outcome. Aim for a balanced level of detail that supports your intention without over-constraining the image.
[](https://www.recraft.ai/docs/prompt-engineering-guide/core-principles/context#examples)
Examples
------------------------------------------------------------------------------------------------------
.png?w=2500&fit=max&auto=format&n=K32uXqkH6v7Ym2Rv&q=85&s=d864c8473c6ef2796dcef8089c47cb59)
.png?w=2500&fit=max&auto=format&n=8ETX-dSYo4G_48Y_&q=85&s=e1bf3fd899392cb63d8f72295bd144b5)
Neutral prompt
“_Full body shot of humanoid robot standing centered in frame, complete figure visible from head to feet, neutral white studio background, soft even lighting, clean product photography, frontal view, sleek modern design_”
Atmospheric prompt
“_Full body shot of humanoid robot standing centered on foggy city street at night, complete figure visible, neon signs reflecting on metallic surface, rain-wet pavement around feet, cyberpunk atmosphere, cinematic photography, moody blue and pink tones, futuristic urban setting_”
Contrasting prompt
“_Full body shot of humanoid robot standing centered in overgrown abandoned greenhouse, complete figure visible from head to feet, dramatic contrast between advanced technology and wild nature reclaiming space, vines growing around base, soft natural light through broken glass roof, post-apocalyptic meets botanical, cinematic editorial photography_”
[Composition](https://www.recraft.ai/docs/prompt-engineering-guide/core-principles/composition)
[Medium](https://www.recraft.ai/docs/prompt-engineering-guide/artistic-principles/medium)
⌘I
Assistant
Responses are generated using AI and may contain mistakes.
---
# Composition - Recraft
> Documentation Index
> -------------------
>
> Fetch the complete documentation index at: [/docs/llms.txt](https://www.recraft.ai/docs/llms.txt)
>
> Use this file to discover all available pages before exploring further.
[Skip to main content](https://www.recraft.ai/docs/prompt-engineering-guide/core-principles/composition#content-area)
Composition defines how the subject is positioned and viewed within the frame. Clear spatial instructions help the model understand perspective, balance, and overall framing. Specify how the subject should appear by describing camera angle, crop, pose, and perspective. A structured description helps the model interpret spatial relationships and produce a coherent image.
[](https://www.recraft.ai/docs/prompt-engineering-guide/core-principles/composition#examples)
Examples
----------------------------------------------------------------------------------------------------------
Centered prompt
“_Hands holding ceramic mug centered in frame, direct frontal view, cozy sweater sleeves visible, neutral background, soft even lighting, lifestyle close-up_”
Rule of thirds prompt
“_Hand resting beside coffee cup on left third of frame, full cup of coffee with steam on right side, wooden table surface, morning natural light, editorial beverage photography, minimalist composition_”
Tight crop prompt
“_Extreme close-up of hands kneading dough, tight crop on fingers and flour, texture details visible, warm directional light, macro detail shot_”
[Subject](https://www.recraft.ai/docs/prompt-engineering-guide/core-principles/subject)
[Context](https://www.recraft.ai/docs/prompt-engineering-guide/core-principles/context)
⌘I
Assistant
Responses are generated using AI and may contain mistakes.
---
# Vector art - Recraft
> Documentation Index
> -------------------
>
> Fetch the complete documentation index at: [/docs/llms.txt](https://www.recraft.ai/docs/llms.txt)
>
> Use this file to discover all available pages before exploring further.
[Skip to main content](https://www.recraft.ai/docs/prompt-engineering-guide/visual-formats/vector-art#content-area)
Vector art depends on precise shapes and clean geometry. Because it does not rely on texture or lighting for realism, prompts should highlight structure and simplified visual form. A focus on form, alignment, and clear edges guides the model toward the structured look typical of vector graphics.
[](https://www.recraft.ai/docs/prompt-engineering-guide/visual-formats/vector-art#examples)
Examples
--------------------------------------------------------------------------------------------------------
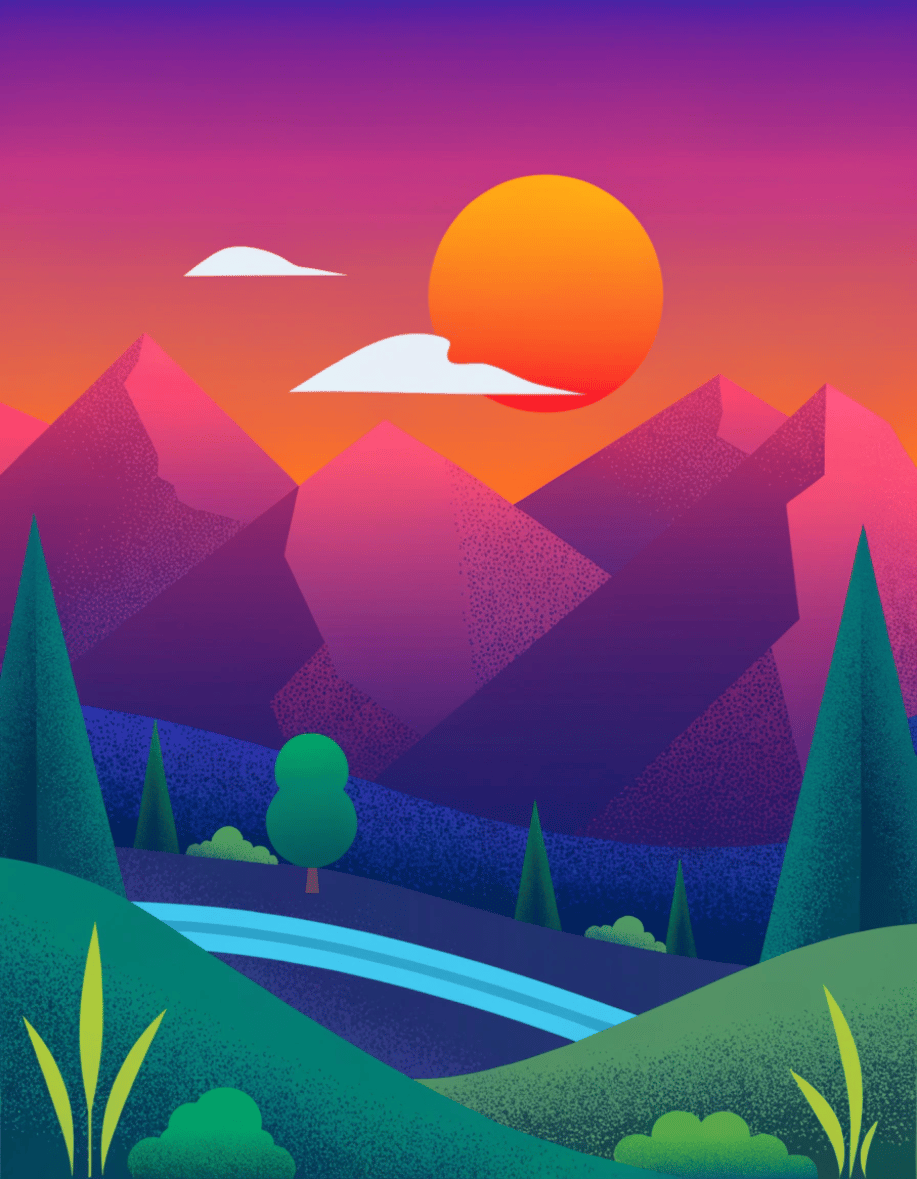
Minimal prompt
“_Flat vector illustration of mountain landscape, simple geometric shapes, two-color palette (blue, green), clean lines, minimal design_”
Descriptive prompt
“_Flat vector illustration of mountain landscape with layers, geometric peaks, stylized trees, gradient sky, bold outlines, modern graphic design style, balanced color palette_”
Detailed prompt
“_Detailed flat vector illustration of mountain landscape, layered geometric mountains, stylized forest elements, gradient sunset sky, clean vector paths, contemporary poster design, rich color palette with complementary tones_”
[Illustration](https://www.recraft.ai/docs/prompt-engineering-guide/visual-formats/illustration)
[Graphic design](https://www.recraft.ai/docs/prompt-engineering-guide/visual-formats/graphic-design)
⌘I
Assistant
Responses are generated using AI and may contain mistakes.
---
# Graphic design - Recraft
> Documentation Index
> -------------------
>
> Fetch the complete documentation index at: [/docs/llms.txt](https://www.recraft.ai/docs/llms.txt)
>
> Use this file to discover all available pages before exploring further.
[Skip to main content](https://www.recraft.ai/docs/prompt-engineering-guide/visual-formats/graphic-design#content-area)
Graphic design brings together images, text, and layout to communicate information clearly. Effective prompts emphasize structure, hierarchy, and consistent use of typography and color so the model can produce organized and readable compositions.
[](https://www.recraft.ai/docs/prompt-engineering-guide/visual-formats/graphic-design#examples)
Examples
------------------------------------------------------------------------------------------------------------
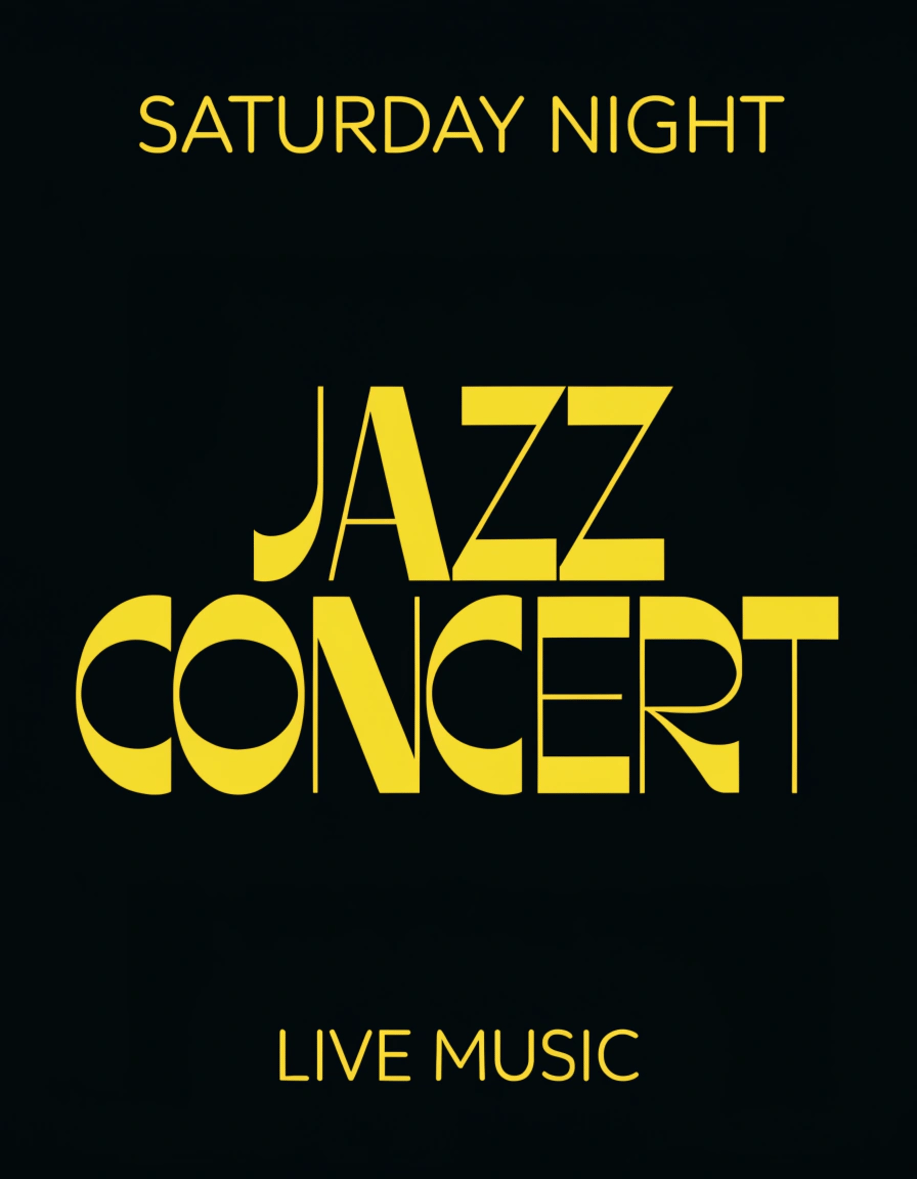
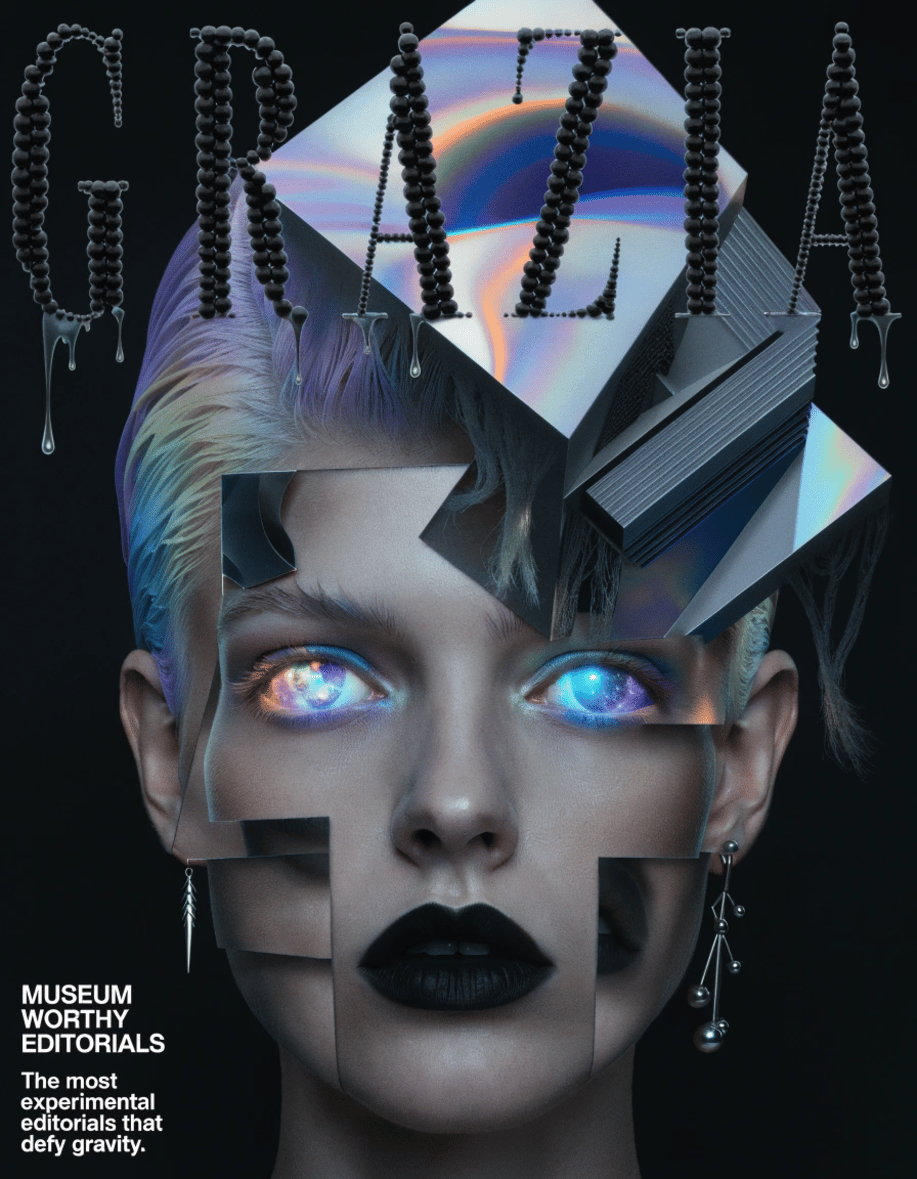
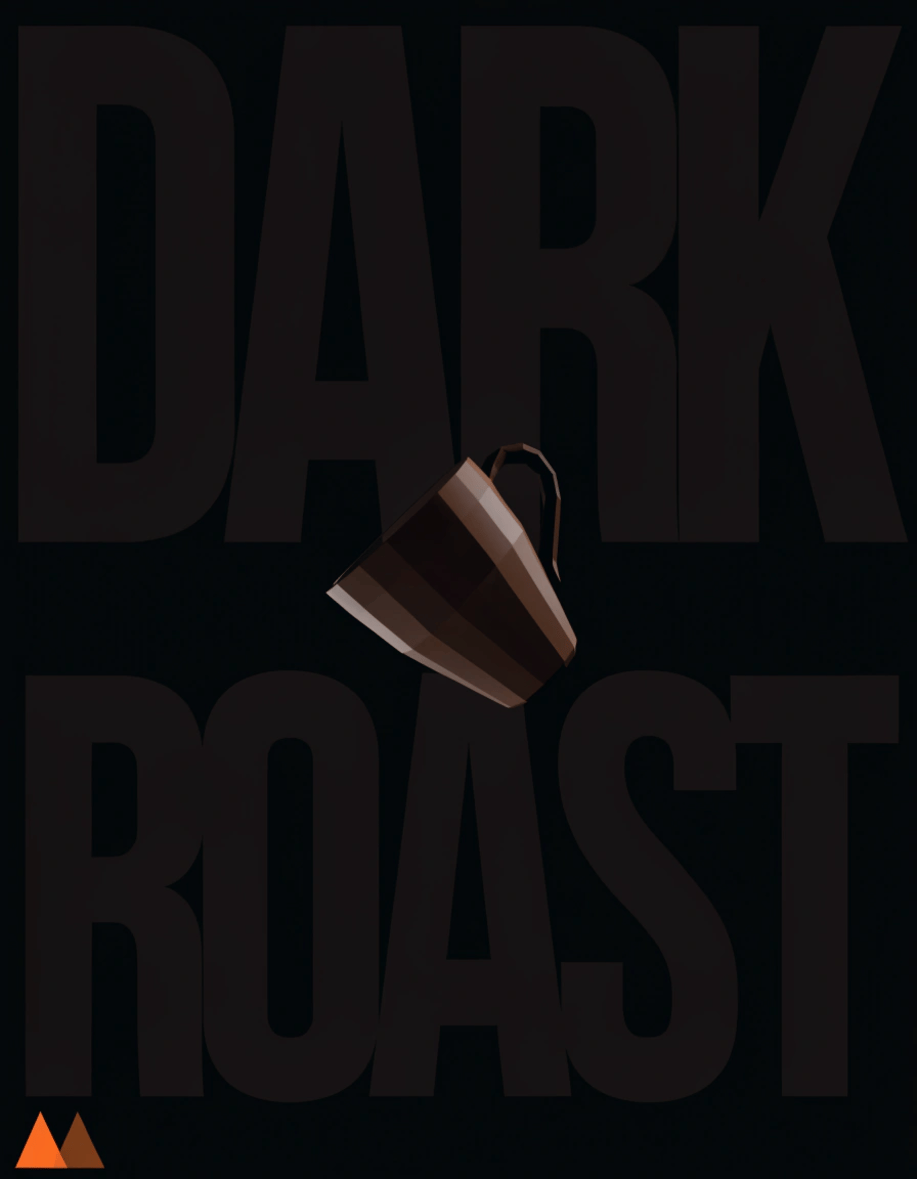
Poster prompt
“_Minimal poster design for jazz concert, bold yellow headline typography on black background, sans-serif lettering, high contrast_”
Magazine cover prompt
“_Avant-garde surrealist magazine cover, model’s portrait fragmented into floating mirror shards reflecting different dimensions, magazine title constructed from 3D letters dripping down image, impossible architecture emerging from model’s hair, eyes replaced by cosmic nebulas, gravity-defying objects suspended in space, psychedelic color shifts, dreamlike Escher-inspired composition, cutting-edge experimental editorial design, museum-worthy surreal photography_”
Social media prompt
“_Bold 3D coffee advertisement, geometric low-poly coffee cup made of sharp triangular facets suspended in darkness, enormous brutalist sans-serif letters “DARK ROAST” dominating frame - typography so massive it bleeds off all edges, severe angular composition, monochrome black and espresso brown with electric orange geometric accent, Cinema 4D architectural rendering, minimalist maximalism, 65% oversized cropped typography 35% abstract 3D cup sculpture, contemporary luxury brand aesthetic, striking visual hierarchy_”
[Vector art](https://www.recraft.ai/docs/prompt-engineering-guide/visual-formats/vector-art)
[Logos and icons](https://www.recraft.ai/docs/prompt-engineering-guide/visual-formats/logos-and-icons)
⌘I
Assistant
Responses are generated using AI and may contain mistakes.
---
# Photorealism - Recraft
> Documentation Index
> -------------------
>
> Fetch the complete documentation index at: [/docs/llms.txt](https://www.recraft.ai/docs/llms.txt)
>
> Use this file to discover all available pages before exploring further.
[Skip to main content](https://www.recraft.ai/docs/prompt-engineering-guide/visual-formats/photorealism#content-area)
Photorealism relies on accurate lighting, believable textures, and clear perspective. Emphasizing these elements helps the model produce images that resemble real photography. The goal is to make the image feel captured rather than created.
[](https://www.recraft.ai/docs/prompt-engineering-guide/visual-formats/photorealism#examples)
Examples
----------------------------------------------------------------------------------------------------------
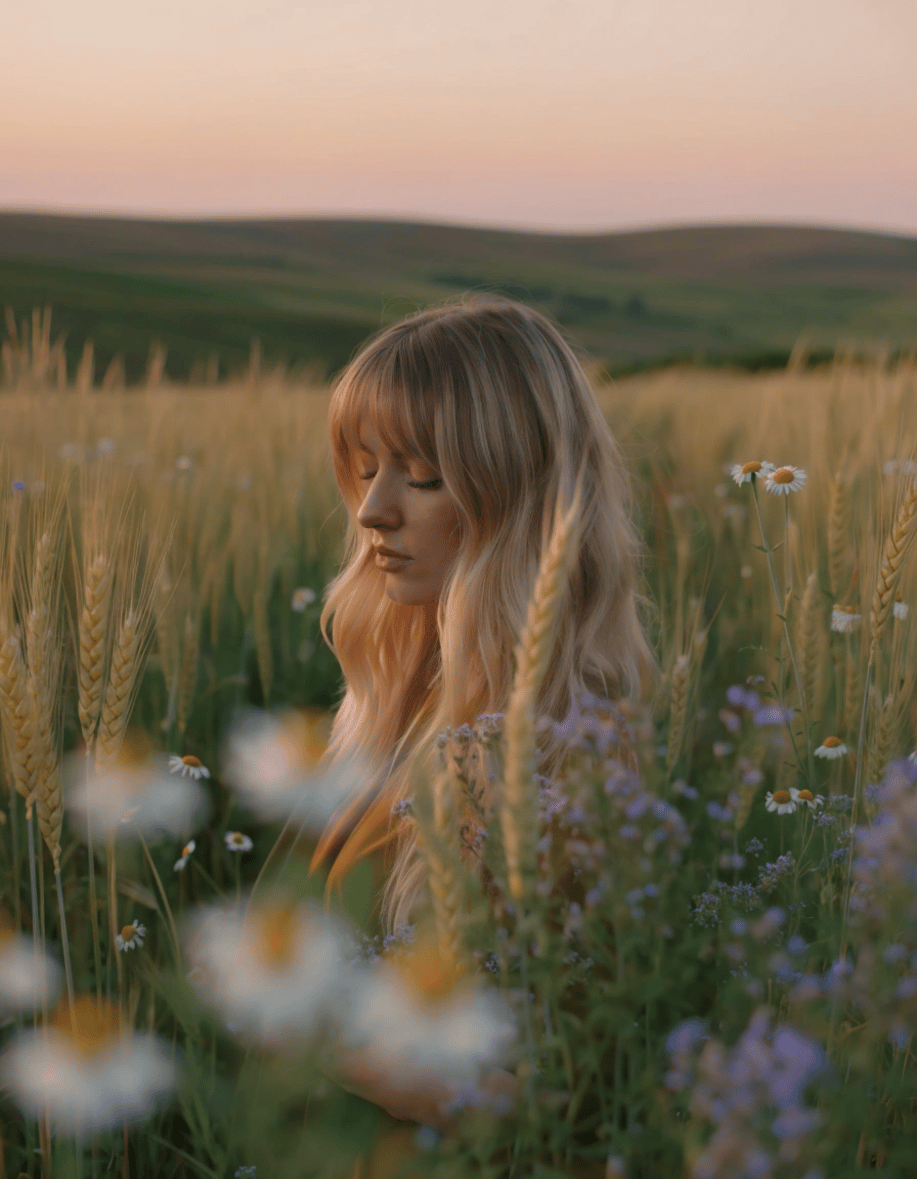
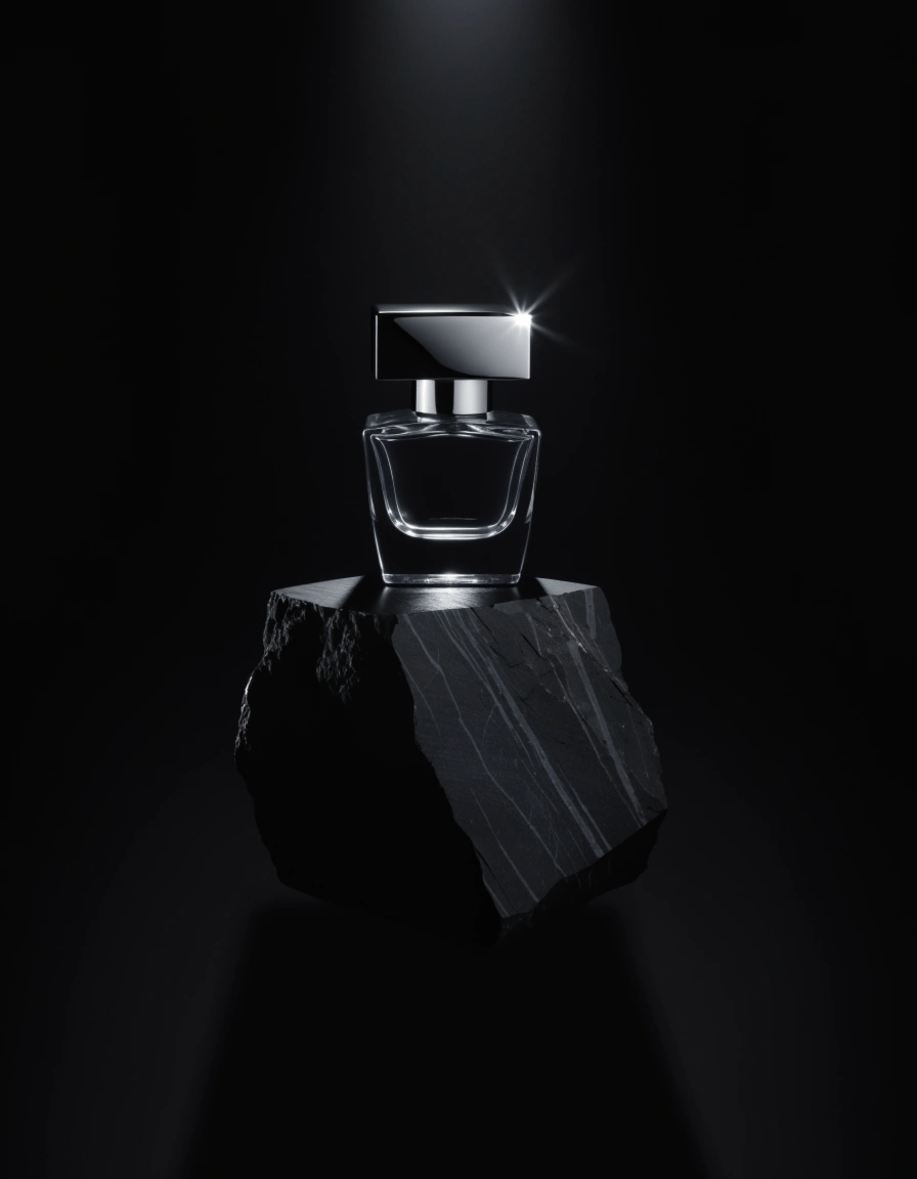
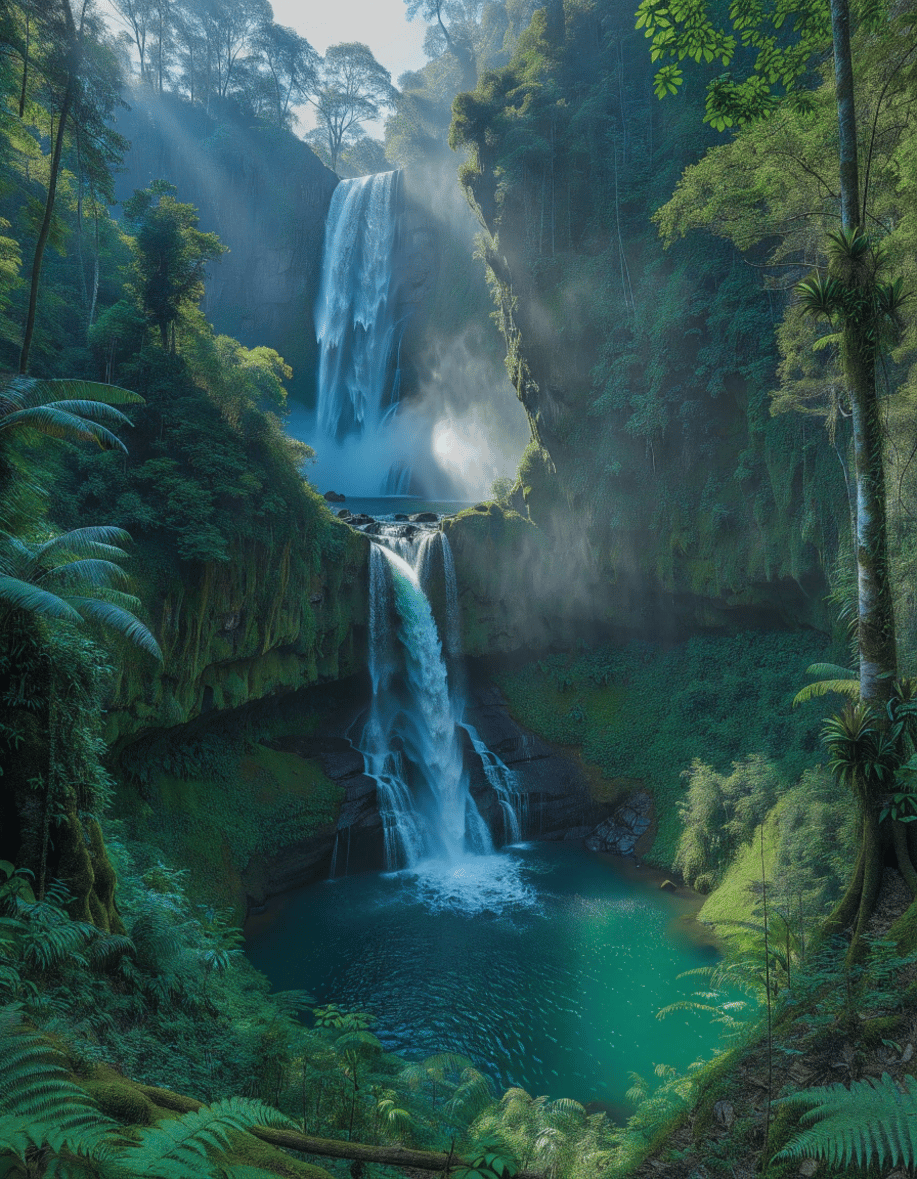
Portrait prompt
“_Photorealistic medium portrait of woman in tall grass field at sunset, framing from shoulders up with face and flowing hair in focus, hands completely out of frame below, golden wheat and wildflowers surrounding her at shoulder level, warm golden hour backlighting creating rim light on hair, soft bokeh background with rolling fields, f/2.8 shallow depth, natural glowing skin, peaceful dreamy expression, simple natural style, warm amber and green tones, serene pastoral mood, lifestyle editorial photography, 50mm portrait lens, cinematic natural light_”
Product prompt
“_High-end perfume product photography, elegant crystal bottle positioned on single geometric black obsidian block floating in void, dramatic spotlight from directly above creating sharp defined shadow beneath, rest in complete darkness, one precise beam of golden light hitting cap creating starburst reflection, ultra-minimalist composition with maximum negative space, luxury meets brutalist aesthetic, sharp focus throughout with f/11, museum-quality lighting setup, sophisticated contemporary commercial style, powerful visual restraint, Vogue-level editorial perfume shot_”
Tight crop prompt
“_Photorealistic wide shot of massive waterfall cascading into emerald pool deep in tropical rainforest, lush green vegetation covering every surface, morning mist rising from water creating ethereal atmosphere, sun rays penetrating through dense jungle canopy above, vibrant ferns and moss-covered rocks in foreground, crystal clear turquoise water, dramatic scale showing towering cliff walls, natural landscape photography, cinematic depth and layers, rich saturated greens and blues, shot on 16mm ultra_”
[Level of detail](https://www.recraft.ai/docs/prompt-engineering-guide/depth-and-control/level-of-detail)
[Illustration](https://www.recraft.ai/docs/prompt-engineering-guide/visual-formats/illustration)
⌘I
Assistant
Responses are generated using AI and may contain mistakes.
---
# Credits - Recraft
> Documentation Index
> -------------------
>
> Fetch the complete documentation index at: [/docs/llms.txt](https://www.recraft.ai/docs/llms.txt)
>
> Use this file to discover all available pages before exploring further.
[Skip to main content](https://www.recraft.ai/docs/plans-and-billing/credits#content-area)
Recraft uses credits to power all image generation and editing operations. Free users receive 30 credits per day. Paid plans include a monthly credit allowance, which resets at the start of each billing cycle. Credits are consumed based on the type of action performed. The table below summarizes the typical credit costs. The price depends on the selected model, and all prices are shown per image. Some operations have a base cost and are multiplied by the model price. \* **Multiplies by the selected model price.** For external models, please see [here](https://www.recraft.ai/docs/recraft-studio/image-generation/external-models#external-models)
.
| Action | Credits | |
| --- | --- | --- |
| Extract prompt | 1 | |
| Creative upscale | 20 | |
| Crisp upscale | 1 | |
| Erase area | 1 | |
| Generate a mockup | 2 | |
| Modify area / Outpaint | 1\* | equals the model price (see Recraft Studio) |
| Mockupize | 2 | |
| Generate mockup | 2 | |
| Generate image from prompt | 1\* | equals the model price (see Recraft Studio) |
| Generate image set | 1\* | equals the model price (see Recraft Studio) |
| Remove background | 1 | |
| Vectorization | 1 | |
| Remix | 1\* | equals the model price (see Recraft Studio) |
| Replace background | 1\* | equals the model price (see Recraft Studio) |
| Image Editing | 1\* | equals the model price (see Recraft Studio) |
| Generate image variations | 1\* | equals the model price (see Recraft Studio) |
| Exploration | 2 | |
| Generate a video from a prompt | 1\* | equals the model price (see Recraft Studio) |
| Generate a video from frames and a prompt | 1\* | equals the model price (see Recraft Studio) |
| Upscale with external models | 1\* | equals the model price (see Recraft Studio) |
| Prompt enhancer | 0 | |
[](https://www.recraft.ai/docs/plans-and-billing/credits#credit-types-and-expiration)
Credit types and expiration
---------------------------------------------------------------------------------------------------------------------
* Subscription credits reset monthly (or daily for Free users) and do not roll over.
* Top-up credits never expire and remain available until used, even if the subscription ends.
* When subscription credits are depleted, top-up credits are used automatically.
* Credits can be earned through the referral program or purchased as needed (top-ups are available to paid users only).
[](https://www.recraft.ai/docs/plans-and-billing/credits#credit-top-ups)
Credit top-ups
-------------------------------------------------------------------------------------------
Top-up credits can be purchased at any time, even before subscription credits are fully used. This ensures uninterrupted access to generation tools. It increments by 200, 800, 1000, and 1600 credits. They never expire and are used after your monthly credits. and are only available to users on paid plans. **How to top up credits**:
1. Open Recraft and sign in.
2. Click on the credit counter icon in the upper right corner, then click **Buy more**.
3. A dialog box will appears to confirm your purchase, click **Add credits** to confirm.
4. Once payment is processed, the updated credit balance will appear (reload the page if necessary).
Some models are provided by external providers and may have different credit costs. See the [External Models](https://www.recraft.ai/docs/recraft-studio/image-generation/external-models)
page for more details. If assistance is needed, contact support at [help@recraft.ai](mailto:help@recraft.ai)
. Notes:
* Top-up packs are available in fixed increments of 200, 800, 1000, and 1600.
* There is no limit to the number of top-ups that can be purchased.
* Top-up credits are preserved across billing periods and subscriptions.
[Billing and invoices](https://www.recraft.ai/docs/plans-and-billing/billing)
[Commercial rights and ownership](https://www.recraft.ai/docs/plans-and-billing/commercial-rights-and-ownership)
⌘I
Assistant
Responses are generated using AI and may contain mistakes.
---
# Level of detail - Recraft
> Documentation Index
> -------------------
>
> Fetch the complete documentation index at: [/docs/llms.txt](https://www.recraft.ai/docs/llms.txt)
>
> Use this file to discover all available pages before exploring further.
[Skip to main content](https://www.recraft.ai/docs/prompt-engineering-guide/depth-and-control/level-of-detail#content-area)
Detail level controls how much creative freedom the model has. By adjusting the amount of instruction you provide, you decide whether the model should explore broadly or render with precision. The level of detail in a prompt determines how much guidance the model receives and how closely it will follow your intention. Choosing the right amount of detail helps you balance predictability with creative exploration. Use level of detail intentionally. Expand it when you need specific results, and reduce it when you want variation and creative freedom.
[](https://www.recraft.ai/docs/prompt-engineering-guide/depth-and-control/level-of-detail#examples)
Examples
----------------------------------------------------------------------------------------------------------------
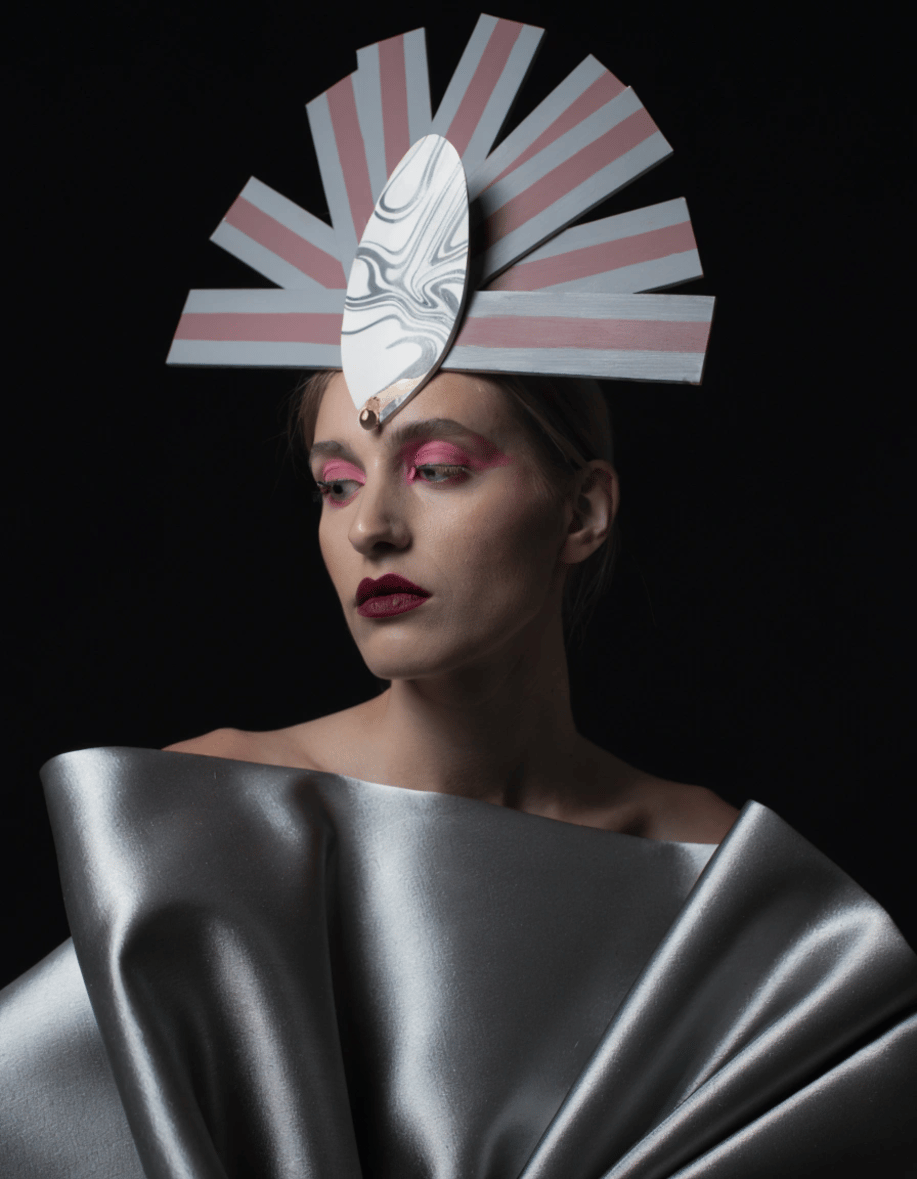
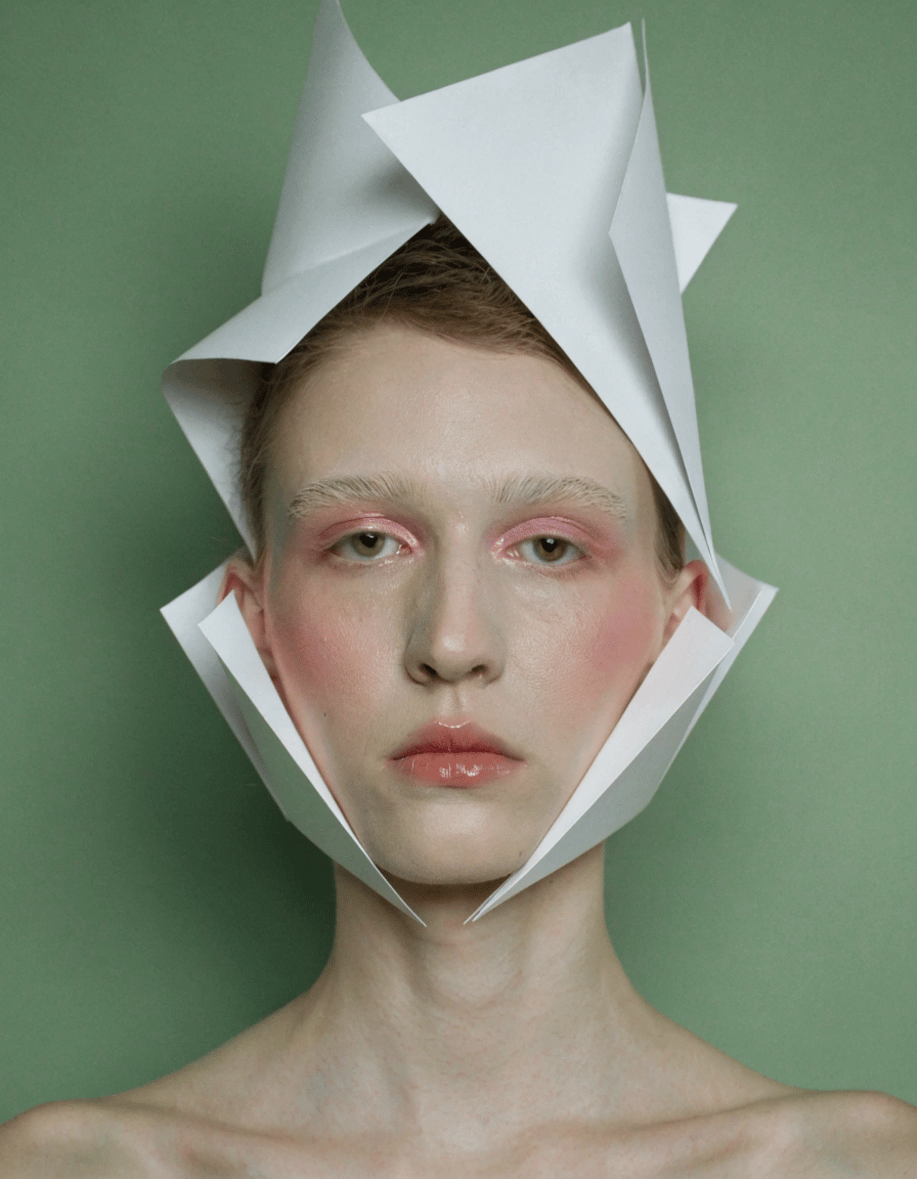
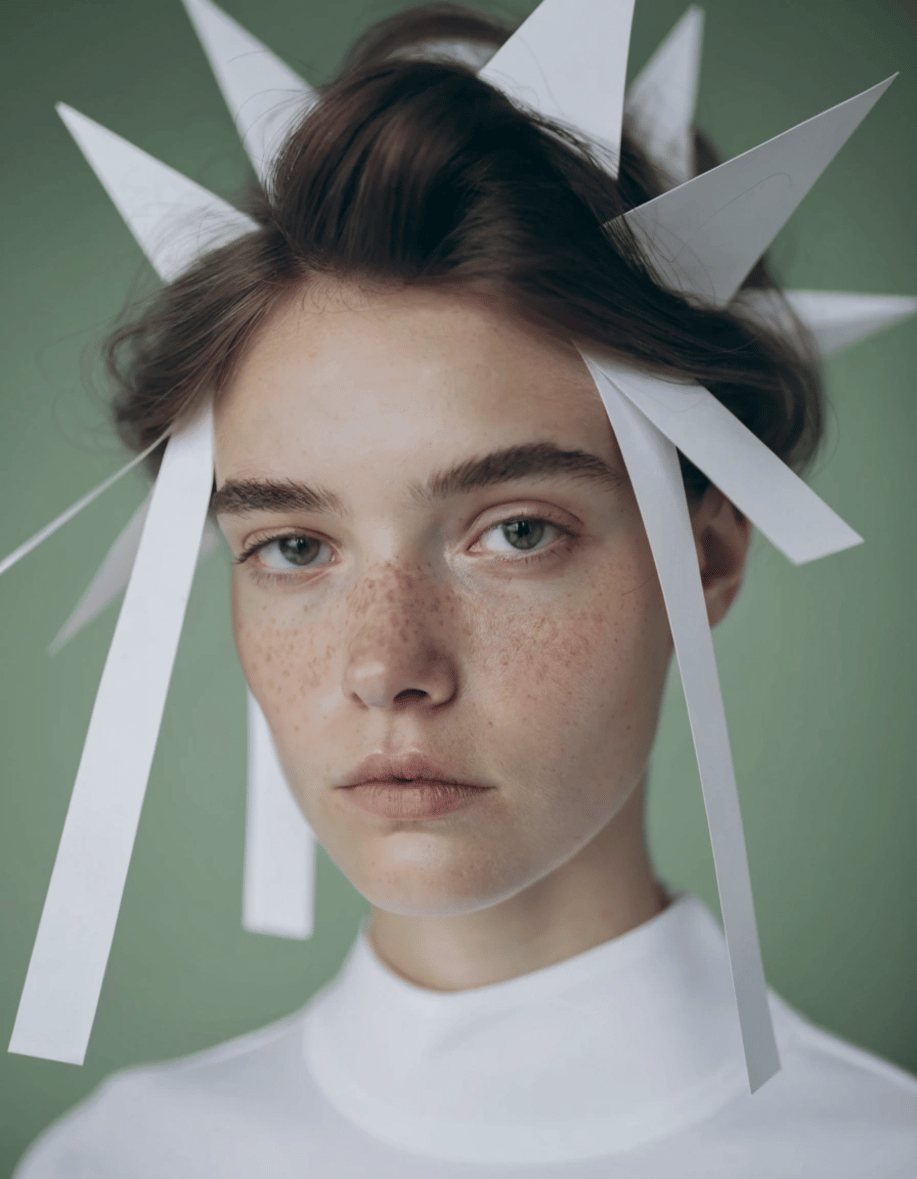
Short prompt
“_Avant-garde fashion portrait, sculptural headpiece_”
Medium prompt
“_Close-up avant-garde fashion portrait with dramatic white sculptural paper headpiece, model’s face and shoulders visible, muted sage green background, soft studio lighting, editorial style_”
Long prompt
“_Close-up editorial fashion portrait of model with natural beauty and no makeup wearing dramatic avant-garde white paper sculptural headpiece with geometric folded elements radiating outward, complete head and headpiece fully visible within frame from top to shoulders, face centered with breathing room around edges, natural skin with visible freckles and texture, serene calm expression with eyes looking directly at camera, wearing simple white high-neck garment, muted sage green studio background creating color harmony, soft diffused lighting from front with subtle shadows defining natural facial features, contemporary high-fashion meets authentic beauty aesthetic, architectural fashion photography, shot on 85mm lens at f/2.8 with gentle background blur, entire sculptural element captured without cropping, muted pastel palette emphasizing natural skin tones whites and soft greens, clean balanced composition, professional editorial photography celebrating raw natural beauty_”
[Attributes](https://www.recraft.ai/docs/prompt-engineering-guide/artistic-principles/attributes)
[Photorealism](https://www.recraft.ai/docs/prompt-engineering-guide/visual-formats/photorealism)
⌘I
Assistant
Responses are generated using AI and may contain mistakes.
---
# Illustration - Recraft
> Documentation Index
> -------------------
>
> Fetch the complete documentation index at: [/docs/llms.txt](https://www.recraft.ai/docs/llms.txt)
>
> Use this file to discover all available pages before exploring further.
[Skip to main content](https://www.recraft.ai/docs/prompt-engineering-guide/visual-formats/illustration#content-area)
Illustration allows for expressive, stylized, or imaginative interpretation. The medium and emotional tone play a central role in shaping the final look. This style supports a wide range of techniques, from watercolor to ink to digital painting. Specify the medium and emotional tone to guide the model toward the character and atmosphere you want.
[](https://www.recraft.ai/docs/prompt-engineering-guide/visual-formats/illustration#examples)
Examples
----------------------------------------------------------------------------------------------------------
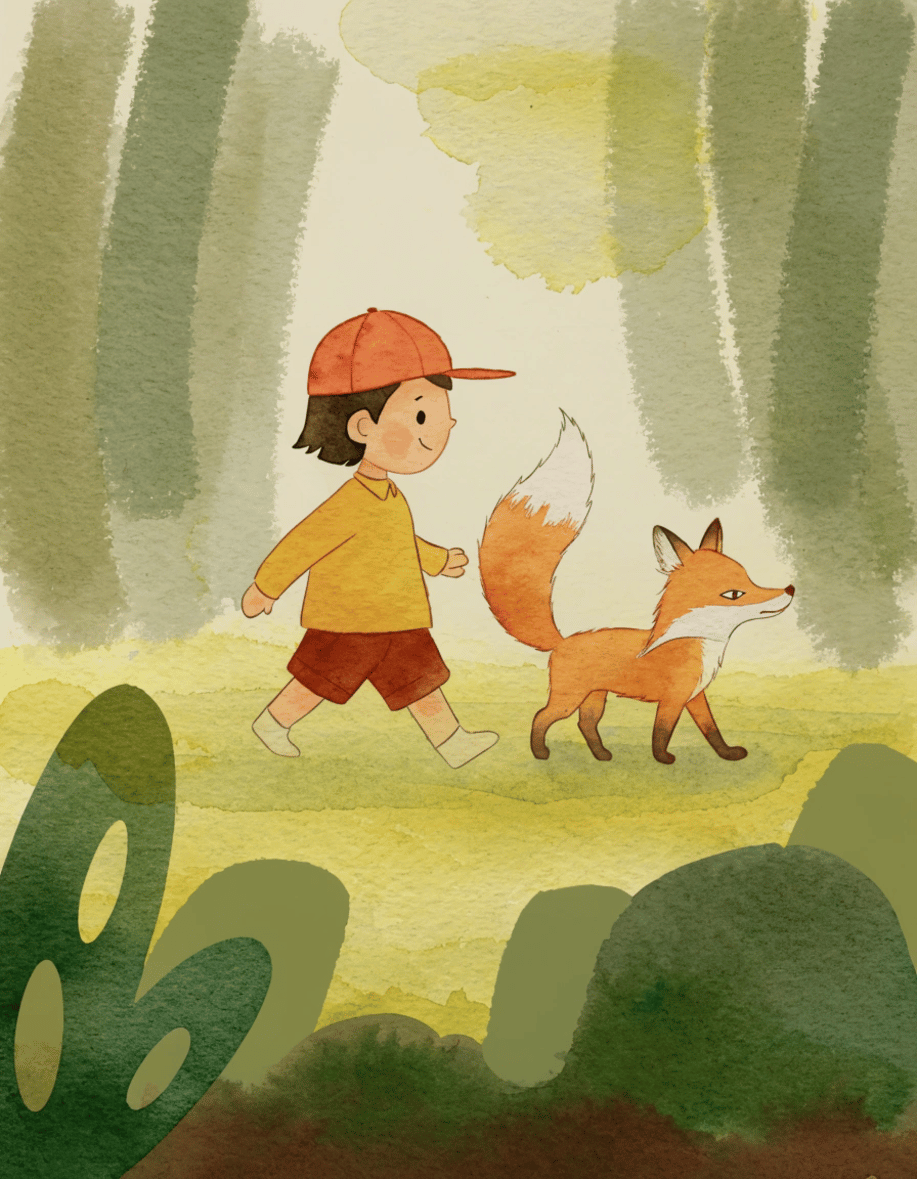
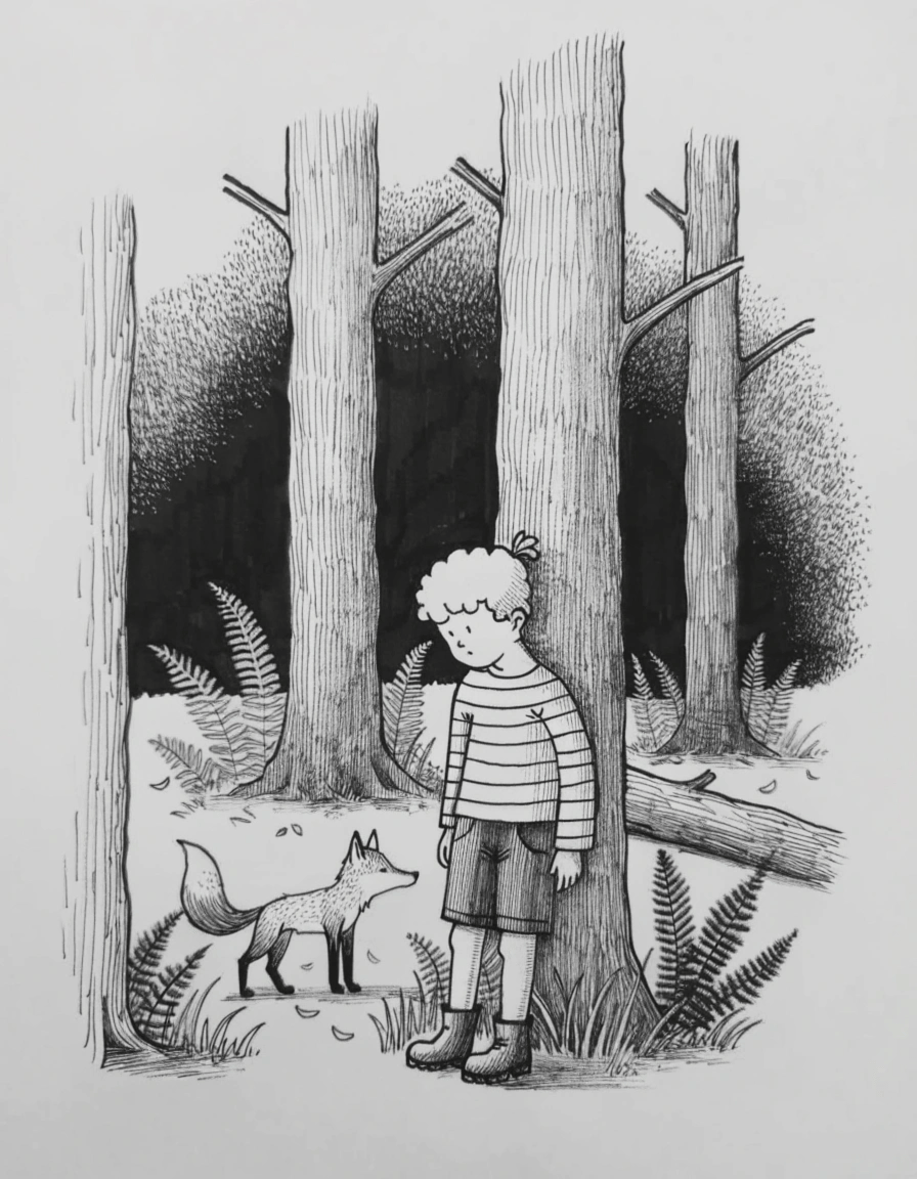
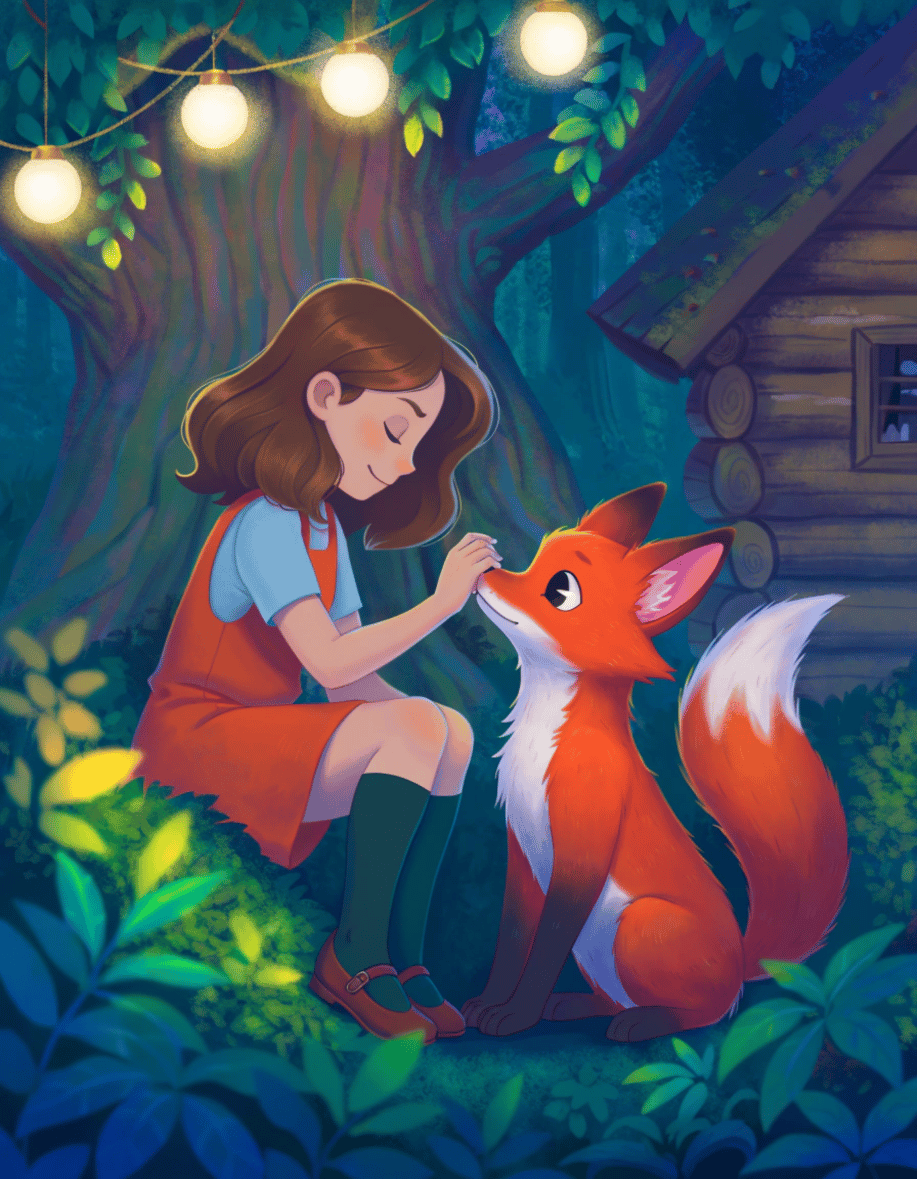
Watercolor prompt
“_Watercolor illustration of close up child and fox walking in the forest, soft diffused edges, flowing pigment washes, warm orange and green palette, visible paper texture, dreamy atmosphere, painterly style_”
Ink prompt
“_Black ink illustration of child and fox in forest, bold line work, crosshatching shadows, high contrast, pen and ink technique, detailed linework, white paper_”
Digital painting prompt
“_Digital painting of child and fox in forest, smooth brushstrokes, layered blending, soft lighting effects, contemporary illustration style, vibrant colors, polished finish_”
[Photorealism](https://www.recraft.ai/docs/prompt-engineering-guide/visual-formats/photorealism)
[Vector art](https://www.recraft.ai/docs/prompt-engineering-guide/visual-formats/vector-art)
⌘I
Assistant
Responses are generated using AI and may contain mistakes.
---
# Logos and icons - Recraft
> Documentation Index
> -------------------
>
> Fetch the complete documentation index at: [/docs/llms.txt](https://www.recraft.ai/docs/llms.txt)
>
> Use this file to discover all available pages before exploring further.
[Skip to main content](https://www.recraft.ai/docs/prompt-engineering-guide/visual-formats/logos-and-icons#content-area)
Logos and icons distill identity into simple, recognizable shapes that work at any scale. They depend on minimal detail, clear geometry, and a restrained palette. Direct prompts toward form and clarity to guide the model toward effective symbolic designs.
[](https://www.recraft.ai/docs/prompt-engineering-guide/visual-formats/logos-and-icons#examples)
Examples
-------------------------------------------------------------------------------------------------------------
Modern minimal prompt
“_Minimalist pasta brand logo centered in composition, circular icon with brand name integrated as negative space cutout within the circle, letters carved from pasta nest spiral, text visible through transparent areas of symbol, typography and icon fused as one shape, soft golden beige outline on white, modern serif letterforms becoming part of circular geometry, unified design where you cannot separate text from image, balanced central placement with white space buffer, zen minimalist aesthetic where form and meaning unite_”
Vintage badge prompt
“_Vintage badge logo for artisan pasta brand, circular emblem with wheat sheaf and pasta shapes in center, ornate decorative border, ribbon banner with “Est. 1892”, classic Italian typography, warm gold and cream palette, traditional family recipe seal design_”
Line icon prompt
“_Line art icon logo for pasta brand, simple outline of spaghetti wrapped around fork, consistent stroke width, monoline style, clean and minimal, works at small sizes, modern culinary app aesthetic_”
[Graphic design](https://www.recraft.ai/docs/prompt-engineering-guide/visual-formats/graphic-design)
[Universal prompt template](https://www.recraft.ai/docs/prompt-engineering-guide/prompt-templates/universal)
⌘I
Assistant
Responses are generated using AI and may contain mistakes.
---
# Recraft Plugins - Recraft
> Documentation Index
> -------------------
>
> Fetch the complete documentation index at: [/docs/llms.txt](https://www.recraft.ai/docs/llms.txt)
>
> Use this file to discover all available pages before exploring further.
[Skip to main content](https://www.recraft.ai/docs/recraft-plugins#content-area)
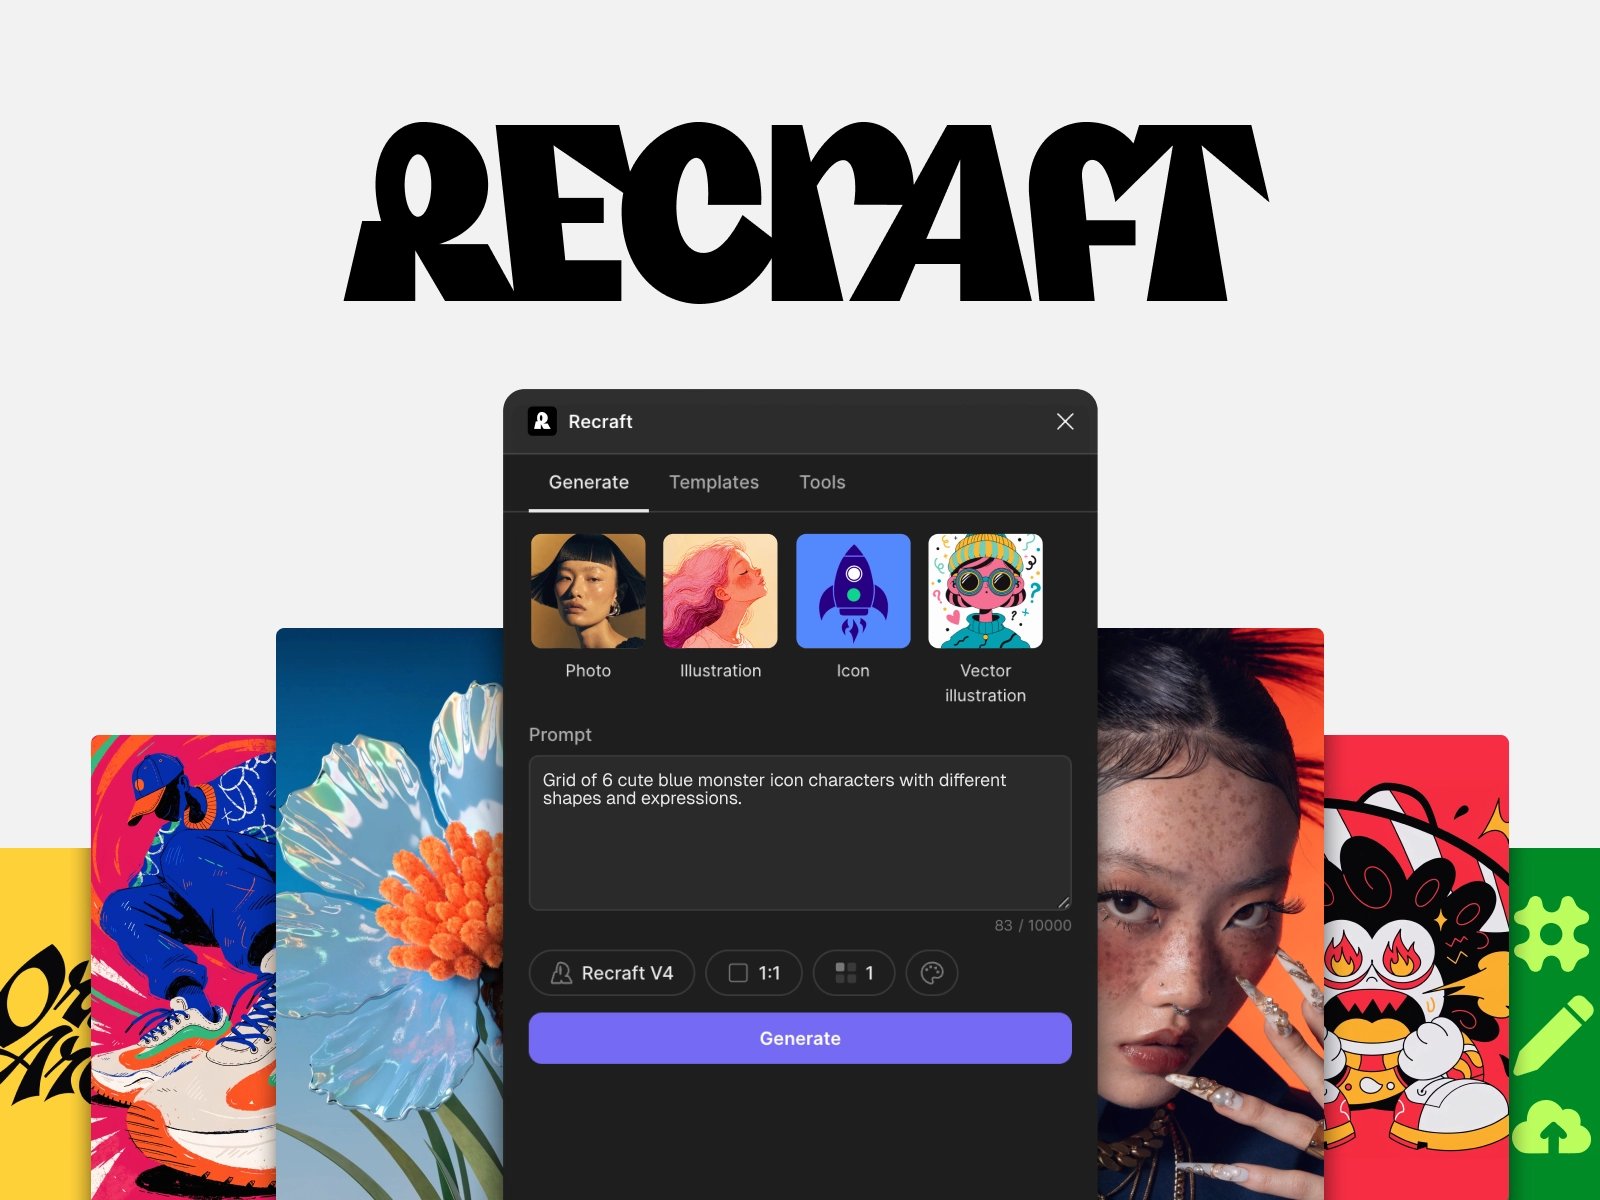
Recraft integrates directly into the tools you already use. Through native plugins and browser extensions, you can generate images, vectors, icons, and more without leaving your design or production environment. All plugins connect to your Recraft account and draw from your existing credits and plan.
[](https://www.recraft.ai/docs/recraft-plugins#recraft-for-figma)
**Recraft for Figma**
-------------------------------------------------------------------------------------------
The [Recraft Figma](https://www.figma.com/community/plugin/1613917155067897575/ai-image-generator-recraft)
plugin brings AI image and vector generation directly into your Figma workspace. Generate raster images or fully editable SVG vectors without switching tools, and apply editing operations on any image inside your file. _**Features**_ • **AI image generation** - Generate raster images from a text prompt using Recraft V3, V4, or V4 Vector Pro models. • **Vector generation** - Produce editable SVG vectors, including icons and logos, ready to use as Figma layers. • **Vectorization** - Convert any raster image to a clean, scalable vector. • **Background removal** - Remove image backgrounds in one click. • **Upscaling** - Increase resolution for print or high-density screens. • **Templates** — Browse Recraft’s template library to guide style and composition. _**How to install**_ • Go to the Recraft plugin page on [Figma Community](https://www.figma.com/community/plugin/1613917155067897575/ai-image-generator-recraft)
. • Click **Open in Figma** — the plugin is added to your account automatically. • In any Figma file, open **Plugins** → **Recraft**. • Sign in with your Recraft account. _**How to use**_ • Open the plugin from the Plugins menu in any Figma file. • Enter a prompt describing the image or vector you need. • Select a model (V3, V4, or V4 Vector Pro) and any style preferences. • Click **Generate**. • Drag the result onto your canvas, or use the editing tools to refine it. _**Typical workflow**_ A product designer generating UI illustration assets can stay in Figma throughout: write a prompt, generate an SVG icon, drag it to the canvas, and adjust it like any other vector layer. Background removal and upscaling are available on selected images without leaving the file.
[](https://www.recraft.ai/docs/recraft-plugins#recraft-for-framer)
**Recraft for Framer**
---------------------------------------------------------------------------------------------
The Recraft plugin for Framer lets you generate images and vectors for web projects directly from the Framer canvas. It is designed for website and landing-page workflows where visual assets need to be web-ready and optimised for performance. _**Features**_ • **AI image generation** — Generate raster images using Recraft V3, V4, or V4 Vector Pro. • **Vector generation** — Create editable SVG illustrations, icons, and logos. • **Vectorization** — Convert uploaded raster images to vector format. • **Background removal** — Clean up images for transparent-background use in web layouts. • **Upscaling** — Increase resolution for hero images and full-width sections. • **Templates** — Browse templates to keep style consistent across generated assets.
_**How to install**_ No installation required. Access the plugin directly from the Framer canvas: • Open a Framer project and click browse all **Plugins** icon in the toolbar. • Search for **Recraft** and click **Open Plugin**. • Alternatively, visit the Recraft page on the [Framer Marketplace](https://www.framer.com/marketplace/plugins/recraft/)
. • Sign in with your Recraft account. _**Practical examples**_ • **Hero section illustration** - Generate a custom illustration from a prompt and drop it into the hero section of a landing page. • **Icon set** - Use V4 Vector Pro to generate a consistent set of SVG icons for a navigation or feature grid. • **Background image** - Generate a full-width raster image, upscale it for high-resolution displays, and set it as a section background.
[](https://www.recraft.ai/docs/recraft-plugins#recraft-chrome-extension)
**Recraft Chrome Extension**
---------------------------------------------------------------------------------------------------------
The [Recraft Chrome Extension](https://www.recraft.ai/recraft-integrations/chrome-extension)
AI image generation and editing to any webpage. It opens as a side panel and works alongside Google Docs, Google Slides, Gmail, and other web-based tools, letting you generate and insert assets without leaving the browser tab. _**Features**_ • **Image generation on any webpage** - Generate raster images and vectors from a text prompt in the side panel. • **Image editing** - Pick any image on the current page to edit, or upload your own. Apply background removal, vectorization, and upscaling. • **Direct insertion** - Insert generated images directly into Google Docs, Google Slides, and Gmail. • **Templates** - Browse and apply Recraft templates from within the extension. _**How to install**_ • Visit the Recraft extension page on the Chrome Web Store. • Click **Add to Chrome**. • Pin the Recraft icon to your browser toolbar for quick access. • Click the icon on any webpage and sign in with your Recraft account. _**Typical use cases**_ • **Google Docs** - Generate an illustration mid-document and insert it at the cursor position. • **Google Slides** - Create a custom image for a slide without opening a separate design tool. • **Gmail** - Add a generated image to an email directly from the side panel. • **General browsing** - Click any image on a webpage to remove its background or upscale it.
[](https://www.recraft.ai/docs/recraft-plugins#recraft-for-google-docs)
**Recraft for Google Docs**
-------------------------------------------------------------------------------------------------------
The [Recraft Google Docs](https://www.recraft.ai/recraft-integrations/google-docs)
lets you generate raster images and insert them directly into a document. You can also edit images already in the document using background removal and upscaling. _Vector image generation requires opening Recraft directly at [recraft.ai](http://recraft.ai/)
._ _**How to install**_ • In Google Docs, go to **Extensions** → **Add-ons** → **Get add-ons**. • Search for **Recraft** and click **Install**. • Grant the required permissions and sign in with your Recraft account. • Access the add-on via **Extensions** → **Recraft**.
[](https://www.recraft.ai/docs/recraft-plugins#recraft-for-google-slides)
**Recraft for Google Slides**
-----------------------------------------------------------------------------------------------------------
The [Recraft Google Slides](https://www.recraft.ai/recraft-integrations/google-slides)
add-on works the same way as the Docs add-on, but outputs images directly onto your slide. Background removal and upscaling are supported for images already on the slide. _Vector image generation requires opening Recraft directly at [recraft.ai](http://recraft.ai/)
._ _**How to install**_ • In Google Slides, go to **Extensions** → **Add-ons** → **Get add-ons**. • Search for **Recraft** and click **Install**. • Grant the required permissions and sign in with your Recraft account. • Access the add-on via **Extensions** → **Recraft**. _**Common Features Across Plugins**_ All Recraft integrations share the same underlying models, editing tools, and account system. The table below shows feature availability per platform. Please note that for vectorization and vector images, you need to go to Recraft if you are using Google add-ons.
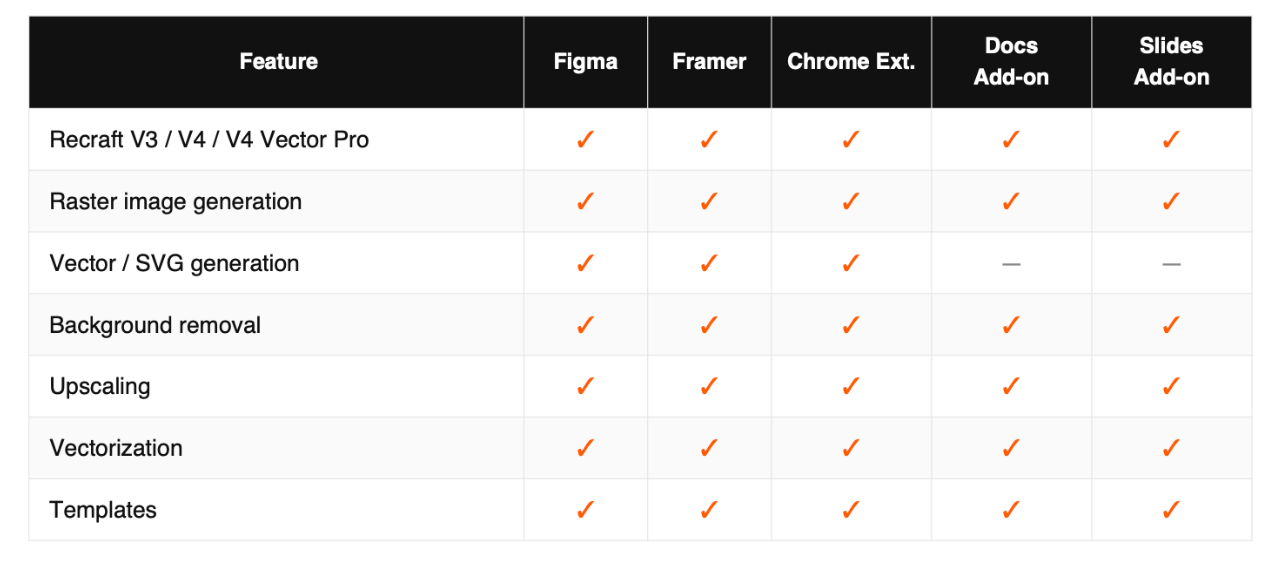
**Models** • **Recraft V3** — Fast, reliable generation for standard workflows. • **Recraft V4** — Latest raster model with improved prompt understanding and built-in design taste. • **Recraft V4 Vector Pro** — Produces editable SVG vectors, icons, and logos. _**Credits and plans**_ All plugins share the same credit pool as your Recraft account. Free accounts receive 30 credits per day (up to 30 images). Additional credits and advanced features are available on paid plans. _**Best Practices**_ **Use templates as style references** Templates help maintain visual consistency across a project. Apply a template before generating to anchor the style, then adjust with your own prompt. **Choose the right output format** Use vector output (V4 Vector Pro) for icons, logos, and UI elements that need to scale or be edited at the layer level. Use raster output (V4) for photographic-style images, textures, and backgrounds. **Upscale as a final step** The upscaling tool is most effective after composition is finalised, not mid-workflow. Run it once on the completed image before exporting. **Write specific, concrete prompts** Prompts that describe subject, style, and context together produce more consistent results than short or abstract prompts. Example: ‘flat vector icon of a leaf, minimal, two colours, dark green on white’. **Keep styles consistent across a project** Use the same model, template, and style settings across all generations in a project. Switching models mid-project typically produces visible inconsistencies. **Limitations and Notes** • **Vector generation in Google tools** - Not available in Google Docs or Slides add-ons. Use [recraft.ai](http://recraft.ai/)
, the Figma plugin, or the Framer plugin for vector output. • **Credit usage** - Each generation, upscale, or background removal consumes credits. Credit cost depends on the operation and model used. • **Browser support** - The Chrome Extension requires Google Chrome or a Chromium-based browser. Not available for Firefox or Safari. • **Export format** - Figma and Framer plugins output within the platform’s native layer system. Export formats depend on each platform’s own export settings. • **Feature parity** - New capabilities are released to [recraft.ai](http://recraft.ai/)
first and rolled out to plugins over time. • **Authentication** - Each plugin requires a sign-in with your Recraft account. All plugins share the same account credits and settings once connected.
[Mobile Apps](https://www.recraft.ai/docs/mobile-apps)
[Prompting and image generation](https://www.recraft.ai/docs/best-practices/prompting-and-image-generation)
⌘I
Assistant
Responses are generated using AI and may contain mistakes.
---
# Overview - Recraft
> Documentation Index
> -------------------
>
> Fetch the complete documentation index at: [/docs/llms.txt](https://www.recraft.ai/docs/llms.txt)
>
> Use this file to discover all available pages before exploring further.
[Skip to main content](https://www.recraft.ai/docs/recraft-studio/overview#content-area)
Quick start guide
-----------------
Get up and running with Recraft Studio in just a few minutes.
Get oriented in the new interface
---------------------------------
Watch a quick walkthrough of Session mode, panels, and key workflows.
[](https://www.recraft.ai/docs/recraft-studio/overview#explore-recraft-studio%E2%80%99s-tools-and-features)
Explore Recraft Studio’s tools and features
-----------------------------------------------------------------------------------------------------------------------------------------------------------
Create something amazing.
Editing
-------
Get better results with Recraft Studio’s powerful editing features.
Styles
------
Apply a curated style or learn how to create your own to stay on-brand.
Mockups
-------
Create realistic product mockups in minutes.
Color palettes
--------------
Set up your own color swatches and palettes.
[](https://www.recraft.ai/docs/recraft-studio/overview#learn-about-plans-ownership-and-getting-help)
Learn about plans, ownership, and getting help
-------------------------------------------------------------------------------------------------------------------------------------------------------
Everything you need for a meaningful experience.
Paid plans
----------
Learn what’s included with our paid plans.
Commercial rights and ownership
-------------------------------
Understand commercial rights and ownership for generated content.
Get help
--------
Contact support, report a bug, and request a feature.
FAQ
---
View most frequently asked questions.
[](https://www.recraft.ai/docs/recraft-studio/overview#looking-for-inspiration)
Looking for inspiration?
------------------------------------------------------------------------------------------------------------
See exceptional AI-generated visuals
------------------------------------
Browse our community gallery to see what’s possible with Recraft.
[Quick start](https://www.recraft.ai/docs/recraft-studio/quick-start)
⌘I
Assistant
Responses are generated using AI and may contain mistakes.
---
# How to create a color palette - Recraft
> Documentation Index
> -------------------
>
> Fetch the complete documentation index at: [/docs/llms.txt](https://www.recraft.ai/docs/llms.txt)
>
> Use this file to discover all available pages before exploring further.
[Skip to main content](https://www.recraft.ai/docs/recraft-studio/color-palettes/how-to-create-a-color-palette#content-area)
You can create a custom palette in one of three ways:
1. **Add hex codes manually**
Enter specific color codes from your brand guide or visual spec to control the palette with precision.
2. **Use the eyedropper tool**
Sample colors from any image on the canvas using the color picker. This is helpful when referencing past generations or imported brand materials.
3. **Extract colors from an image**
Upload an image from your computer and Recraft will automatically extract the dominant colors. This is ideal for building palettes based on moodboards, campaign assets, or photography.
Palettes are saved to your library and can be edited, renamed, or deleted at any time. A small color indicator on the palette icon shows whether a palette is currently active.
[Using color palettes in generation](https://www.recraft.ai/docs/recraft-studio/color-palettes/using-color-palettes-in-generation)
[Recoloring existing images](https://www.recraft.ai/docs/recraft-studio/color-palettes/recoloring-existing-images)
⌘I
Assistant
Responses are generated using AI and may contain mistakes.
---
# Vectorizing - Recraft
> Documentation Index
> -------------------
>
> Fetch the complete documentation index at: [/docs/llms.txt](https://www.recraft.ai/docs/llms.txt)
>
> Use this file to discover all available pages before exploring further.
[Skip to main content](https://www.recraft.ai/docs/recraft-studio/format-conversions-and-scaling/vectorizing#content-area)
You can convert raster images into editable vector graphics directly within Recraft Stuio. Once vectorized, the image becomes scalable without quality loss and fully editable in terms of color. **How to vectorize an image**:
1. Place a raster image (e.g., PNG or JPG) onto the canvas.
2. Select the image, then click the **Vectorize** icon in the context panel.
3. Use the **Color Reduction** slider to limit the number of colors in the output—this helps simplify complex images or prepare for print.
4. Edit colors using two available modes:
* **Swatches mode** (default): Click on individual color swatches to replace specific colors.
* **Spectrum mode**: Adjust entire ranges of related colors at once—for example, shift all blue tones to green. Ideal for images with many subtle variations.
5. When you’re satisfied, export the vector as an SVG file for use in web, print, or design workflows.
**Note**: Not all images can be cleanly vectorized. Photorealistic images, 3D renders, or highly textured illustrations may produce artifacts when converted to SVG, since the format supports only simplified shapes, lines, and fills.
[Size limits and supported formats of imported images](https://www.recraft.ai/docs/recraft-studio/importing/size-limits-and-supported-formats)
[Upscaling](https://www.recraft.ai/docs/recraft-studio/format-conversions-and-scaling/upscaling)
⌘I
Assistant
Responses are generated using AI and may contain mistakes.
---
# How to share an image - Recraft
> Documentation Index
> -------------------
>
> Fetch the complete documentation index at: [/docs/llms.txt](https://www.recraft.ai/docs/llms.txt)
>
> Use this file to discover all available pages before exploring further.
[Skip to main content](https://www.recraft.ai/docs/recraft-studio/exporting-and-sharing/how-to-share-an-image#content-area)
You can share an image in multiple ways:
* right-clicking on the in the canvas and selecting **Copy image link**
* opening the image in the Community, Favorites, or History panels and clicking on the **link icon** to copy the URL.
You can then share the URL. A Recraft account is required to view shared images. If the image is public, the link will be viewable by others. On paid plans, you can also set privacy settings before sharing. For **private images** (images generated with a subscription), this link will not open for other users. To share a private image together with its generation settings, you need to create a **project** and add the image there. This allows you to share both the image and its full generation context in one place.
[How to export an image](https://www.recraft.ai/docs/recraft-studio/exporting-and-sharing/how-to-export-an-image)
[How to share a project](https://www.recraft.ai/docs/recraft-studio/exporting-and-sharing/how-to-share-a-project)
⌘I
Assistant
Responses are generated using AI and may contain mistakes.
---
# Interface language - Recraft
> Documentation Index
> -------------------
>
> Fetch the complete documentation index at: [/docs/llms.txt](https://www.recraft.ai/docs/llms.txt)
>
> Use this file to discover all available pages before exploring further.
[Skip to main content](https://www.recraft.ai/docs/recraft-studio/interface-language#content-area)
Recraft is designed for creators around the world. To make the experience more comfortable and accessible, the interface is now available in **six languages**. You can easily change the interface language directly from your **Profile settings**.
###
[](https://www.recraft.ai/docs/recraft-studio/interface-language#how-to-change-the-language)
How to change the language
1. Open your **Profile** in Recraft.
2. Locate the **Language** dropdown menu.
3. Select your preferred language from the list.
Once selected, the interface will automatically update.
###
[](https://www.recraft.ai/docs/recraft-studio/interface-language#available-languages)
Available languages
Currently, Recraft supports the following languages:
* **English**

* **Deutsch (German)**
* **Español (Spanish)**

* **Français (French)**

* **Українська (Ukrainian)**

* **Русский (Russian)**

You can switch languages anytime from the **Profile → Language** dropdown menu, and the change will apply instantly across the interface.
[Interface overview](https://www.recraft.ai/docs/recraft-studio/interface-overview)
[Projects](https://www.recraft.ai/docs/recraft-studio/work-area/projects)
⌘I
Assistant
Responses are generated using AI and may contain mistakes.
---
# Examples - Recraft
> Documentation Index
> -------------------
>
> Fetch the complete documentation index at: [/docs/llms.txt](https://www.recraft.ai/docs/llms.txt)
>
> Use this file to discover all available pages before exploring further.
[Skip to main content](https://www.recraft.ai/docs/api-reference/examples#content-area)
Generate AI images using cURL or Python and create your own styles programmatically.
###
[](https://www.recraft.ai/docs/api-reference/examples#generate-a-raster-image-using-recraft-v4-1-model)
Generate a raster image using Recraft V4.1 model
generate\_recraftv4\_1.sh
generate\_recraftv4\_1.py
curl https://external.api.recraft.ai/v1/images/generations \
-H "Content-Type: application/json" \
-H "Authorization: Bearer $RECRAFT_API_TOKEN" \
-d '{
"prompt": "two race cars on a track",
"model": "recraftv4_1"
}'
###
[](https://www.recraft.ai/docs/api-reference/examples#generate-a-vector-image-using-recraft-v4-1-vector-model)
Generate a vector image using Recraft V4.1 Vector model
generate\_recraftv4\_1\_vector.sh
generate\_recraftv4\_1\_vector.py
curl https://external.api.recraft.ai/v1/images/generations \
-H "Content-Type: application/json" \
-H "Authorization: Bearer $RECRAFT_API_TOKEN" \
-d '{
"prompt": "cat on a mat",
"model": "recraftv4_1_vector"
}'
###
[](https://www.recraft.ai/docs/api-reference/examples#generate-an-image-using-recraft-v4-1-pro-with-specific-size)
Generate an image using Recraft V4.1 Pro with specific size
generate\_recraftv4\_1\_pro\_with\_size.sh
generate\_recraftv4\_1\_pro\_with\_size.py
curl https://external.api.recraft.ai/v1/images/generations \
-H "Content-Type: application/json" \
-H "Authorization: Bearer $RECRAFT_API_TOKEN" \
-d '{
"prompt": "red point siamese cat",
"model": "recraftv4_1_pro",
"size": "2560x1664"
}'
###
[](https://www.recraft.ai/docs/api-reference/examples#generate-a-digital-illustration-by-recraft-v3-with-specific-style)
Generate a digital illustration by Recraft V3 with specific style
generate\_digital\_illustration.sh
generate\_digital\_illustration.py
curl https://external.api.recraft.ai/v1/images/generations \
-H "Content-Type: application/json" \
-H "Authorization: Bearer $RECRAFT_API_TOKEN" \
-d '{
"prompt": "a monster with lots of hands",
"style": "Hand-drawn"
}'
###
[](https://www.recraft.ai/docs/api-reference/examples#image-to-image-by-recraft-v3-with-digital-illustration-style)
Image to image by Recraft V3 with digital illustration style
image\_to\_image.sh
image\_to\_image.py
curl -X POST https://external.api.recraft.ai/v1/images/imageToImage \
-H "Content-Type: multipart/form-data" \
-H "Authorization: Bearer $RECRAFT_API_TOKEN" \
-F "image=@image.png" \
-F "prompt=winter" \
-F "strength=0.2" \
-F "style=Illustration"
###
[](https://www.recraft.ai/docs/api-reference/examples#inpaint-an-image-by-recraft-v3-with-style-enterprise)
Inpaint an image by Recraft V3 with style Enterprise
inpaint.sh
inpaint.py
curl -X POST https://external.api.recraft.ai/v1/images/inpaint \
-H "Content-Type: multipart/form-data" \
-H "Authorization: Bearer $RECRAFT_API_TOKEN" \
-F "prompt=moon" \
-F "style=Enterprise" \
-F "image=@image.png" -F "mask=@mask.png"
###
[](https://www.recraft.ai/docs/api-reference/examples#outpaint-an-image-by-recraft-v3-to-a-169-aspect-ratio)
Outpaint an image by Recraft V3 to a 16:9 aspect ratio
outpaint.sh
outpaint.py
curl -X POST https://external.api.recraft.ai/v1/images/outpaint \
-H "Content-Type: multipart/form-data" \
-H "Authorization: Bearer $RECRAFT_API_TOKEN" \
-F "prompt=a mountain landscape" \
-F "size=16:9" \
-F "zoom_out_percentage=25.0" \
-F "image=@image.png"
###
[](https://www.recraft.ai/docs/api-reference/examples#outpaint-an-image-by-recraft-v3-with-per-side-pixel-margins)
Outpaint an image by Recraft V3 with per-side pixel margins
outpaint\_expand.sh
outpaint\_expand.py
curl -X POST https://external.api.recraft.ai/v1/images/outpaint \
-H "Content-Type: multipart/form-data" \
-H "Authorization: Bearer $RECRAFT_API_TOKEN" \
-F "prompt=a mountain landscape" \
-F "expand_left=256" \
-F "expand_right=256" \
-F "expand_top=128" \
-F "expand_bottom=128" \
-F "image=@image.png"
###
[](https://www.recraft.ai/docs/api-reference/examples#create-own-recraft-v3-style-by-uploading-reference-images-and-use-them-for-generation)
Create own Recraft V3 style by uploading reference images and use them for generation
create\_style\_and\_generate.sh
create\_style\_and\_generate.py
curl -X POST https://external.api.recraft.ai/v1/styles \
-H "Content-Type: multipart/form-data" \
-H "Authorization: Bearer $RECRAFT_API_TOKEN" \
-F "style=digital_illustration" \
-F "file=@image.png"
# response: {"id":"095b9f9d-f06f-4b4e-9bb2-d4f823203427"}
curl https://external.api.recraft.ai/v1/images/generations \
-H "Content-Type: application/json" \
-H "Authorization: Bearer $RECRAFT_API_TOKEN" \
-d '{
"prompt": "wood potato masher",
"style_id": "095b9f9d-f06f-4b4e-9bb2-d4f823203427"
}'
###
[](https://www.recraft.ai/docs/api-reference/examples#vectorize-an-image-in-png-format)
Vectorize an image in PNG format
vectorize.sh
vectorize.py
curl -X POST https://external.api.recraft.ai/v1/images/vectorize \
-H "Content-Type: multipart/form-data" \
-H "Authorization: Bearer $RECRAFT_API_TOKEN" \
-F "file=@image.png"
###
[](https://www.recraft.ai/docs/api-reference/examples#remove-background-from-a-png-image-get-the-result-in-b64-json)
Remove background from a PNG image, get the result in B64 JSON
remove\_background\_b64.sh
remove\_background\_b64.py
curl -X POST https://external.api.recraft.ai/v1/images/removeBackground \
-H "Content-Type: multipart/form-data" \
-H "Authorization: Bearer $RECRAFT_API_TOKEN" \
-F "response_format=b64_json" \
-F "file=@image.png"
###
[](https://www.recraft.ai/docs/api-reference/examples#run-crisp-upscale-tool-for-a-png-image-get-the-result-in-b64-json)
Run crisp upscale tool for a PNG image, get the result in B64 JSON
crisp\_upscale\_b64.sh
crisp\_upscale\_b64.py
curl -X POST https://external.api.recraft.ai/v1/images/crispUpscale \
-H "Content-Type: multipart/form-data" \
-H "Authorization: Bearer $RECRAFT_API_TOKEN" \
-F "response_format=b64_json" \
-F "file=@image.png"
###
[](https://www.recraft.ai/docs/api-reference/examples#run-creative-upscale-tool-for-a-png-image)
Run creative upscale tool for a PNG image
creative\_upscale.sh
creative\_upscale.py
curl -X POST https://external.api.recraft.ai/v1/images/creativeUpscale \
-H "Content-Type: multipart/form-data" \
-H "Authorization: Bearer $RECRAFT_API_TOKEN" \
-F "file=@image.png"
###
[](https://www.recraft.ai/docs/api-reference/examples#variate-png-image-get-the-result-in-webp-format)
Variate PNG image, get the result in WEBP format
variate\_image.sh
variate\_image.py
curl -X POST https://external.api.recraft.ai/v1/images/variateImage \
-H "Content-Type: multipart/form-data" \
-H "Authorization: Bearer $RECRAFT_API_TOKEN" \
-F "response_format=url" \
-F "size=1024x1024" \
-F "n=1" \
-F "seed=13191922" \
-F "image_format=webp" \
-F "file=@image.png"
###
[](https://www.recraft.ai/docs/api-reference/examples#explore-images)
Explore images
explore.sh
explore.py
curl https://external.api.recraft.ai/v1/images/explore \
-H "Content-Type: application/json" \
-H "Authorization: Bearer $RECRAFT_API_TOKEN" \
-d '{
"prompt": "race car on a track",
"model": "recraftv4"
}'
###
[](https://www.recraft.ai/docs/api-reference/examples#enhance-a-prompt)
Enhance a prompt
enhance\_prompt.sh
enhance\_prompt.py
curl https://external.api.recraft.ai/v1/prompts/enhance \
-H "Content-Type: application/json" \
-H "Authorization: Bearer $RECRAFT_API_TOKEN" \
-d '{
"prompt": "race car on a track"
}'
###
[](https://www.recraft.ai/docs/api-reference/examples#explore-similar-images)
Explore similar images
explore\_similar.sh
explore\_similar.py
curl https://external.api.recraft.ai/v1/images/explore/similar \
-H "Content-Type: application/json" \
-H "Authorization: Bearer $RECRAFT_API_TOKEN" \
-d '{
"source_image_id": "c18a1988-45e7-4c00-82c4-4ad7d3dbce3a",
"similarity": 3
}'
[Endpoints](https://www.recraft.ai/docs/api-reference/endpoints)
[Styles](https://www.recraft.ai/docs/api-reference/styles)
⌘I
Assistant
Responses are generated using AI and may contain mistakes.
---
# Upscaling - Recraft
> Documentation Index
> -------------------
>
> Fetch the complete documentation index at: [/docs/llms.txt](https://www.recraft.ai/docs/llms.txt)
>
> Use this file to discover all available pages before exploring further.
[Skip to main content](https://www.recraft.ai/docs/recraft-studio/format-conversions-and-scaling/upscaling#content-area)
Recraft Studio offers two upscaling options, Crisp and Creative, depending on your needs for resolution and detail.
* **Crisp upscale** increases resolution and sharpness without altering the structure or content of the image. Ideal for icons, vector-style illustrations, and assets where visual consistency is critical.
* **Creative upscale** enhances resolution while subtly regenerating image content. It can improve anatomy, textures, and fine details, making it well suited for photos, portraits, or group scenes. Note: all creative upscale results are slightly different, and some iterations might render better than others.
Note: Creative Upscale is a more resource-intensive process than Crisp Upscale. If you only need to increase resolution, use Crisp Upscale for faster results. If you want to enhance small details, improve anatomy (such as faces or hands), or add definition to background elements, Creative Upscale is the more suitable option. **How to upscale an image**:
1. Select an image on the canvas.
2. In the context panel, click either **Crisp Upscale** or **Creative Upscale**, depending on the image type and desired result.
3. Wait for the upscaled version to appear on the canvas.
4. When you’re satisfied, export the upscaled image in your preferred format (e.g., PNG, JPG, PDF).
Note: Upscaling doesn’t support transparent images. The result of the upscaled image with a transparent background will have a white background instead of a transparent background.
[Vectorizing](https://www.recraft.ai/docs/recraft-studio/format-conversions-and-scaling/vectorizing)
[Overview](https://www.recraft.ai/docs/recraft-studio/styles/overview)
⌘I
Assistant
Responses are generated using AI and may contain mistakes.
---
# Using color palettes in generation - Recraft
> Documentation Index
> -------------------
>
> Fetch the complete documentation index at: [/docs/llms.txt](https://www.recraft.ai/docs/llms.txt)
>
> Use this file to discover all available pages before exploring further.
[Skip to main content](https://www.recraft.ai/docs/recraft-studio/color-palettes/using-color-palettes-in-generation#content-area)
When generating images, you can apply a color palette to guide the output:
* On the Free plan, Recraft offers a rotating selection of preset palettes. These palettes are hand-picked and shuffled for variety and quick inspiration.
* On a paid plan, you can create and save custom palettes, which can be applied to any image generation.
Palettes can be used with any image type: photorealistic, illustrated, vector, or icon. You can also apply a background color separately to control the image’s overall tone. To apply a palette, click the **Color Palette icon** in the prompt panel. You can also explore randomized inspiration palettes from the “More” menu, useful for experimenting with color direction. Tip: The more complex your prompt or style, the harder it may be for the model to strictly adhere to limited palettes. Simpler prompts and styles tend to yield more accurate color matching.
[Applying your design to the mockup](https://www.recraft.ai/docs/recraft-studio/mockups/applying-your-design-to-a-mockup)
[How to create a color palette](https://www.recraft.ai/docs/recraft-studio/color-palettes/how-to-create-a-color-palette)
⌘I
Assistant
Responses are generated using AI and may contain mistakes.
---
# Recoloring existing images - Recraft
> Documentation Index
> -------------------
>
> Fetch the complete documentation index at: [/docs/llms.txt](https://www.recraft.ai/docs/llms.txt)
>
> Use this file to discover all available pages before exploring further.
[Skip to main content](https://www.recraft.ai/docs/recraft-studio/color-palettes/recoloring-existing-images#content-area)
[](https://www.recraft.ai/docs/recraft-studio/color-palettes/recoloring-existing-images#raster-images)
Raster images
------------------------------------------------------------------------------------------------------------------------
For raster images, you can’t change specific colors directly. However, you can adjust overall tone and feel by selecting **Adjust colors** in the context panel located on the right of the canvas. This gives you access to sliders for:
* Color spectrum
* Saturation
* Brightness
* Contrast
* Opacity
Recoloring is especially helpful for light retouching or shifting the mood of a generated photo or painting.
[](https://www.recraft.ai/docs/recraft-studio/color-palettes/recoloring-existing-images#vector-images)
Vector images
------------------------------------------------------------------------------------------------------------------------
Vector images offer more detailed color control. After generation, an **Adjust colors** options appears in the prompt panel. You can:
* Reduce color count to simplify the image and improve print-readiness.
* Recolor using a saved palette by clicking on one from your library.
There are two modes for adjusting colors, accessible via labeled tabs within the Adjust color panel:
* **Swatches** (default): Adjust individual colors by clicking and replacing them.
* **Spectrum**: Adjust groups of similar colors all at once. Ideal for complex illustrations with subtle tonal variations.
Tip: Spectrum mode is more efficient for batch changes or when fine-tuning a unified look across multiple similar hues.
[How to create a color palette](https://www.recraft.ai/docs/recraft-studio/color-palettes/how-to-create-a-color-palette)
[History](https://www.recraft.ai/docs/recraft-studio/history)
⌘I
Assistant
Responses are generated using AI and may contain mistakes.
---
# Introduction to frames - Recraft
> Documentation Index
> -------------------
>
> Fetch the complete documentation index at: [/docs/llms.txt](https://www.recraft.ai/docs/llms.txt)
>
> Use this file to discover all available pages before exploring further.
[Skip to main content](https://www.recraft.ai/docs/recraft-studio/frames/introduction-to-frames#content-area)
Frames are flexible containers for organising and grouping content on your canvas. Use frames to structure your work, keep related elements together, and share or export specific parts of your canvas with ease. They’re especially useful for organising layouts, grouping visuals, and sharing or exporting specific sections of your canvas. **How to use a frame**:
1. Open the toolbar and select **Frame** to add a frame to your canvas.
2. Drag an existing image, text, or shape into the frame, or create new content inside it.
3. Change the frame’s background to suit your composition.
4. Move the frame to reposition all its contents together as one group.
5. Rename the frame, export it as a single image, or copy a direct link to share it with others.
Frames support images, text, and shapes. Videos, image sets, exploration sets, mockups, and other frames cannot currently be placed inside a frame.
> **Note:** Generating a frame, blending all contents, and all associated generation settings are not available in the current UI.
[Seamless patterns](https://www.recraft.ai/docs/recraft-studio/styles/seamless-patterns)
[Inpainting](https://www.recraft.ai/docs/recraft-studio/frames/inpainting)
⌘I
Assistant
Responses are generated using AI and may contain mistakes.
---
# How to share a project - Recraft
> Documentation Index
> -------------------
>
> Fetch the complete documentation index at: [/docs/llms.txt](https://www.recraft.ai/docs/llms.txt)
>
> Use this file to discover all available pages before exploring further.
[Skip to main content](https://www.recraft.ai/docs/recraft-studio/exporting-and-sharing/how-to-share-a-project#content-area)
[](https://www.recraft.ai/docs/recraft-studio/exporting-and-sharing/how-to-share-a-project#overview)
Overview
-----------------------------------------------------------------------------------------------------------------
Sharing a project in Recraft allows you to give other users access to your work. This is useful for team collaboration, reviewing work-in-progress, or handing off assets to a client or colleague.
[](https://www.recraft.ai/docs/recraft-studio/exporting-and-sharing/how-to-share-a-project#how-to-share-a-project)
How to Share a Project
---------------------------------------------------------------------------------------------------------------------------------------------
1. From the **Projects** view, hover over the project you want to share
2. Click the **⋯ (three-dot menu)** in the top-right corner of the project card
3. Select **Share project** from the dropdown menu
4. In the sharing dialog, enter the email address of the person you want to invite
5. Set their permission level using the dropdown next to the email field (default is **Viewer**)
6. Click **Invite** to send the invitation
To share via link, click **Copy link** at the bottom of the dialog and send it directly. You can control what link recipients can do using the **Anyone with the link** permission dropdown.
[](https://www.recraft.ai/docs/recraft-studio/exporting-and-sharing/how-to-share-a-project#viewing-prompts-and-exporting-assets)
Viewing prompts and exporting assets
-------------------------------------------------------------------------------------------------------------------------------------------------------------------------
In a project, you can view the prompts and generation settings in the right-side panel. This allows you to review how assets were created and replicate or adjust results if needed. You can also export images directly from the project for external use.
###
[](https://www.recraft.ai/docs/recraft-studio/exporting-and-sharing/how-to-share-a-project#permissions-&-access)
Permissions & Access
| Role | What they can do |
| --- | --- |
| **Viewer** | Browse and view all assets in the project |
| **Commenter** | View assets and leave comments |
Link sharing can be set to:
| Setting | What it means |
| --- | --- |
| **No access** | The link does not grant access - only invited users can open the project |
| **Viewer** | Anyone with the link can view the project |
| **Commenter** | Anyone with the link can view and comment |
**Limitations:**
* There is no Editor role for shared users — only the project owner can generate or edit assets
* Shared users can only access the specific project they were invited to, not the full workspace
* Sharing permissions can be updated or revoked at any time by the project owner
###
[](https://www.recraft.ai/docs/recraft-studio/exporting-and-sharing/how-to-share-a-project#best-practices)
Best Practices
**Use sharing when:**
* Collecting feedback or review from a client or stakeholder
* Giving a teammate visibility into an active project
* Sharing a read-only link for quick review without requiring sign-up
**Tips for smooth collaboration:**
* Use **No access** for the link setting by default, and invite specific people by email for more controlled access
* Switch to **Commenter** link access when you need quick feedback from multiple reviewers without managing individual invites
* Name your projects clearly before sharing - the project name appears in the sharing dialog and in the recipient’s view
[How to share an image](https://www.recraft.ai/docs/recraft-studio/exporting-and-sharing/how-to-share-an-image)
[Mobile Apps](https://www.recraft.ai/docs/mobile-apps)
⌘I
Assistant
Responses are generated using AI and may contain mistakes.
---
# Outpainting - Recraft
> Documentation Index
> -------------------
>
> Fetch the complete documentation index at: [/docs/llms.txt](https://www.recraft.ai/docs/llms.txt)
>
> Use this file to discover all available pages before exploring further.
[Skip to main content](https://www.recraft.ai/docs/recraft-studio/frames/outpainting#content-area)
Outpainting expands your image by generating new visual content beyond its original borders. It’s especially useful for changing aspect ratios, extending compositions, or adapting existing images to new formats.
###
[](https://www.recraft.ai/docs/recraft-studio/frames/outpainting#how-to-use-outpainting-two-methods-)
How to use outpainting (two methods):
**Method 1**:
1. Double click on an image on the canvas.
2. A resizable frame will appear around the image. Click and drag the gray bars on any or all sides of the frame to your desired new size.
3. Click the **Expand** button.
4. Optionally, add a prompt in the box below to edit or enhance your image.
**Method 2**:
1. Add a **Frame** to your canvas.
2. Drag an existing image into the frame.
3. Leave the prompt unchanged, or add a short prompt if you want to influence the expansion.
4. Click the **generate button** in the prompt panel to generate new content around the original image.
5. Optionally, add additional elements (like text or overlays) inside the frame to include them in the final composition.
[Inpainting](https://www.recraft.ai/docs/recraft-studio/frames/inpainting)
[How to create a mockup](https://www.recraft.ai/docs/recraft-studio/mockups/how-to-create-a-mockup)
⌘I
Assistant
Responses are generated using AI and may contain mistakes.
---
# How to export an image - Recraft
> Documentation Index
> -------------------
>
> Fetch the complete documentation index at: [/docs/llms.txt](https://www.recraft.ai/docs/llms.txt)
>
> Use this file to discover all available pages before exploring further.
[Skip to main content](https://www.recraft.ai/docs/recraft-studio/exporting-and-sharing/how-to-export-an-image#content-area)
1. Select the image or images on the canvas.
2. Click the **Export** button in context panel.
3. Specify your image dimensions, format (PNG, JPG, TIFF, PDF SVG, or Lottie) and resolution.
4. Click the **Export** button.
You can also right-click the image and choose **Export as…** from the context menu. Vector images can be exported as SVG and PDF for scalable use.
[Templates](https://www.recraft.ai/docs/recraft-studio/templates)
[How to share an image](https://www.recraft.ai/docs/recraft-studio/exporting-and-sharing/how-to-share-an-image)
⌘I
Assistant
Responses are generated using AI and may contain mistakes.
---
# Inpainting - Recraft
> Documentation Index
> -------------------
>
> Fetch the complete documentation index at: [/docs/llms.txt](https://www.recraft.ai/docs/llms.txt)
>
> Use this file to discover all available pages before exploring further.
[Skip to main content](https://www.recraft.ai/docs/recraft-studio/frames/inpainting#content-area)
Inpainting lets you regenerate specific parts of an image while keeping the rest intact. This is useful for correcting details, replacing elements, or making creative changes without starting from scratch.
Inpainting is currently available in the old interface, which is accessible by clicking the **Old interface** toggle in the top navigation.
**How to use inpainting**:
1. Select an image on the canvas.
2. Click the **Edit area** button in the top toolbar.
3. Choose a selection tool: **Lasso**, **Brush**, **Area**, or **Wand**.
4. Highlight the part of the image you want to change.
5. Enter a new prompt describing the desired update.
6. Click the **generation button** to apply the edit. The selected area will be replaced based on your prompt while the rest of the image stays the same.
**Note**: When using inpainting on large images, Recraft automatically downscales the image before applying edits, which can result in a noticeable loss of quality in the final output.
[](https://www.recraft.ai/docs/recraft-studio/frames/inpainting#tips-for-better-results)
Tips for better results
--------------------------------------------------------------------------------------------------------------------
* If the selected area is too small, the change may be subtle or unnoticeable. Select a larger area for more effective inpainting.
* Inpainting works best on images resolutions of 1024 pixels or smaller. For larger images, Recraft automatically downscales before editing. The result will be returned at the supported resolution of 1024 pixels.
* After multiple rounds of inpainting, image quality may begin to degrade. If that happens, try reverting to an earlier version and batch several edits together in a single step.
* To learn more about the selection tools available, visit [Selection tools](https://www.recraft.ai/docs/recraft-studio/work-area/selection-tools)
.
[Introduction to frames](https://www.recraft.ai/docs/recraft-studio/frames/introduction-to-frames)
[Outpainting](https://www.recraft.ai/docs/recraft-studio/frames/outpainting)
⌘I
Assistant
Responses are generated using AI and may contain mistakes.
---
# History - Recraft
> Documentation Index
> -------------------
>
> Fetch the complete documentation index at: [/docs/llms.txt](https://www.recraft.ai/docs/llms.txt)
>
> Use this file to discover all available pages before exploring further.
[Skip to main content](https://www.recraft.ai/docs/recraft-studio/history#content-area)
All images you generate, including images from deleted projects, appear in both the **History page** and the **History panel**. You can access History in two ways:
* From the **Recraft home menu** in the top navigation, select **History** to open the full [History page](https://www.recraft.ai/history)
.
* From within a project, click **History** in the top navigation to open the History panel.
###
[](https://www.recraft.ai/docs/recraft-studio/history#history-page)
History page
The **History page** is the primary place to manage your generated images. It provides full functionality, including:
* filtering by type
* searching across your entire history
* viewing detailed image metadata
* copying prompts and image links
* downloading images
* deleting images (under premium plans)
* selecting multiple images for bulk actions
Use the History page when you need to review, organize, or clean up your image history.
###
[](https://www.recraft.ai/docs/recraft-studio/history#history-panel)
History panel
The **History panel** opens inside a project and is designed for quick access and reuse. It supports:
* filtering by type
* searching your image history
* viewing detailed image metadata
* copying prompts and image links
* downloading images
* dragging images onto the canvas
* inserting a copy of an image into the current project
* deleting images (under premium plans)
The History panel displays generations in a grid of square tiles. You can filter the content by **Image** or **Video** to quickly find specific generations. The same filtering options are available in the **History panel on Canvas**. Generations are grouped by date, making it easier to browse creations from specific days.
[](https://www.recraft.ai/docs/recraft-studio/history#browsing-and-searching-history-page)
Browsing and searching (History page)
------------------------------------------------------------------------------------------------------------------------------------
###
[](https://www.recraft.ai/docs/recraft-studio/history#filters)
Filters
You can filter items on the History page using the **Type** filter to display either **Images** or **Videos**. You can also view your history grouped by date for easier navigation.
###
[](https://www.recraft.ai/docs/recraft-studio/history#search)
Search
Use the search bar to find images using simple keywords, such as _red panda_ or _rainbow cake_.
Search matches against the prompt used to generate the image.
[](https://www.recraft.ai/docs/recraft-studio/history#working-with-images-history-page)
Working with images (History page)
------------------------------------------------------------------------------------------------------------------------------
###
[](https://www.recraft.ai/docs/recraft-studio/history#hover-actions)
Hover actions
When you hover over an image thumbnail, you can:
* Copy the prompt
* Download the image
* Delete the image (under premium plans)
* Select the image for bulk actions (a checkbox appears in the corner)
###
[](https://www.recraft.ai/docs/recraft-studio/history#image-detail-panel)
Image detail panel
Click any image to open its image detail panel. This panel shows:
* the prompt used to generate the image
* whether the image is raster or vector
* the aspect ratio
* the model or style used
From the image detail panel, you can also:
* add the image to Favorites
* copy the image URL
* download the image
* permanently delete the image (under premium plans)
[](https://www.recraft.ai/docs/recraft-studio/history#bulk-actions-on-images-history-page)
Bulk actions on images (History page)
------------------------------------------------------------------------------------------------------------------------------------
Bulk selection allows you to perform actions on multiple images at once.
###
[](https://www.recraft.ai/docs/recraft-studio/history#selecting-multiple-images)
Selecting multiple images
1. Open the [History](https://www.recraft.ai/history)
page.
2. Hover over a thumbnail to reveal the checkbox in the corner.
3. Click the checkbox to select the image.
4. Continue selecting additional images as needed.
* A bulk action bar appears at the bottom showing how many images are selected.
5. Click a checkbox again to deselect an image.
6. Click the **X** in the bulk action bar to clear all selections.
###
[](https://www.recraft.ai/docs/recraft-studio/history#bulk-delete-download-or-favorite)
Bulk delete, download, or favorite
Once one or more images are selected, the bulk action bar lets you:
* **Download** all selected images
* **Favorite** all selected images
* **Delete** all selected images (confirmation required)
**Note**: Bulk delete cannot be undone. You can still regenerate images later using their original prompts.
[](https://www.recraft.ai/docs/recraft-studio/history#using-images-in-your-canvas)
Using images in your canvas
------------------------------------------------------------------------------------------------------------------
From the **History panel** inside a project:
* Drag an image onto the canvas to place it directly
* Or click a thumbnail to insert a copy into your current project
Images added from History behave like any other canvas image and can be edited, transformed, or combined with other elements.
[Recoloring existing images](https://www.recraft.ai/docs/recraft-studio/color-palettes/recoloring-existing-images)
[Favorites](https://www.recraft.ai/docs/recraft-studio/libraries/favorites)
⌘I
Assistant
Responses are generated using AI and may contain mistakes.
---
# Quick start - Recraft
> Documentation Index
> -------------------
>
> Fetch the complete documentation index at: [/docs/llms.txt](https://www.recraft.ai/docs/llms.txt)
>
> Use this file to discover all available pages before exploring further.
[Skip to main content](https://www.recraft.ai/docs/recraft-studio/quick-start#content-area)
This quick start guide walks you through the core steps to begin creating images in Recraft Studio. You’ll create an account, generate your first image, make a simple edit, and export the result.
1
[](https://www.recraft.ai/docs/recraft-studio/quick-start#)
Create a Recraft account
------------------------
Go to recraft.ai and click [Start now free](https://www.recraft.ai/auth/login?callbackUrl=%2F)
. Choose one of the available sign-in methods:
* Email
* Google
* Discord
* Apple
No password is required. If you sign up with email, you’ll receive a one-time code to complete sign-in.New accounts include free credits so you can start generating images right away.If you already have an account, you can skip this step.
2
[](https://www.recraft.ai/docs/recraft-studio/quick-start#)
Create a new project
--------------------
Open [Recraft Studio](https://www.recraft.ai/)
from your browser. If prompted, sign in to continue.You’ll land on the Projects view, where all your work is organized.From here, click **Create new project** to open an empty canvas.
3
[](https://www.recraft.ai/docs/recraft-studio/quick-start#)
Generate your first image
-------------------------
At the bottom of the canvas, use the prompt panel to describe what you want to generate, then click the arrow button to generate.After a few seconds, your image will appear on the canvas in a bounding box.(Optional) Adjust settings such as model, style, aspect ratio, or image count.
4
[](https://www.recraft.ai/docs/recraft-studio/quick-start#)
Make your first edit
--------------------
Select the image on the canvas to reveal editing options.You can make simple changes using tools like natural language editing, background removal, or area selection.Edits create a new version of the image while keeping the original intact.
5
[](https://www.recraft.ai/docs/recraft-studio/quick-start#)
Export your image
-----------------
When you’re happy with the result, export the image from the canvas.Select the image and click **Export** in the upper right or right-click the image and select **Export as…**Choose a format such as PNG, JPG, PDF, and TIFF for raster images; or SVG, PDF, and Lottie for vector images.
[](https://www.recraft.ai/docs/recraft-studio/quick-start#what%E2%80%99s-next)
What’s next
----------------------------------------------------------------------------------------------
From here, you can explore [styles](https://www.recraft.ai/docs/recraft-studio/styles/overview)
, create vectors, generate [mockups](https://www.recraft.ai/docs/recraft-studio/mockups/how-to-create-a-mockup)
, or work with more advanced editing tools.
[Overview](https://www.recraft.ai/docs/recraft-studio/overview)
[Interface overview](https://www.recraft.ai/docs/recraft-studio/interface-overview)
⌘I
Assistant
Responses are generated using AI and may contain mistakes.
---
# How to import an image - Recraft
> Documentation Index
> -------------------
>
> Fetch the complete documentation index at: [/docs/llms.txt](https://www.recraft.ai/docs/llms.txt)
>
> Use this file to discover all available pages before exploring further.
[Skip to main content](https://www.recraft.ai/docs/recraft-studio/importing/how-to-import-an-image#content-area)
There are a few ways to import an image:
* Drag and drop an image directly from your system file browser onto the canvas
* Click the **Upload image** button in the **toolbar**
* Click **History** in the top navigation to open the history panel. Click on any image to place it onto the canvas.
Once placed, an imported image will behave like any other canvas element. You can resize, rotate, and reposition it as needed. **Note**: Imported images are not used for training AI models.
[About importing](https://www.recraft.ai/docs/recraft-studio/importing/about-importing)
[Size limits and supported formats of imported images](https://www.recraft.ai/docs/recraft-studio/importing/size-limits-and-supported-formats)
⌘I
Assistant
Responses are generated using AI and may contain mistakes.
---
# Teams overview - Recraft
> Documentation Index
> -------------------
>
> Fetch the complete documentation index at: [/docs/llms.txt](https://www.recraft.ai/docs/llms.txt)
>
> Use this file to discover all available pages before exploring further.
[Skip to main content](https://www.recraft.ai/docs/teams/teams-overview#content-area)
The Teams plan is designed for organizations that need a shared creative environment with centralized credit usage and administrative control. This plan activates a **Workspace**, which serves as a collaborative space for team members to generate, edit, and manage assets together. A workspace:
* Requires a minimum of 3 seats
* Allows any member to be assigned the **Admin** role to invite or remove members, manage seat count, and handle billing
* Provides a set number of monthly credits (2,000, 4,000, 8,000, or 16,000, depending on the selected credit plan) for each workspace member.
* Includes access to first-priority customer support
**Note**: Monthly credits are not sharable between members. Each workspace member occupies a seat and receives full access to all paid subscription features and benefits:
* Generated images are private
* Commercial license: full ownership and usage rights for all generations made under the paid plan
* Unlimited image uploads (vs. 3/day on Free)
* Priority image generation
* Maximum concurrent jobs: 10
* Maximum images per prompt: 4
* Access to external models
* Artistic level control
* Ability to extract detailed and optimized image prompts
* Custom color palette input
* Magic wand tool for enhanced selection and edits
* Access to the Creative Upscale tool
If the workspace subscription ends or becomes inactive, all members revert to individual Free or Basic plan access, depending on their previous plan. Unused prepaid fees are not refunded. **Note**: Imported images, whether added to the canvas or uploaded to create a custom style, are not used for training AI models.
[Commercial rights and ownership](https://www.recraft.ai/docs/plans-and-billing/commercial-rights-and-ownership)
[Teams workspace admin page](https://www.recraft.ai/docs/teams/teams-workspace-admin)
⌘I
Assistant
Responses are generated using AI and may contain mistakes.
---
# About importing - Recraft
> Documentation Index
> -------------------
>
> Fetch the complete documentation index at: [/docs/llms.txt](https://www.recraft.ai/docs/llms.txt)
>
> Use this file to discover all available pages before exploring further.
[Skip to main content](https://www.recraft.ai/docs/recraft-studio/importing/about-importing#content-area)
Recraft Studio lets you bring your own images into the canvas. Imported images can be used across the platform’s tools, from mockups and vectorization to prompt-based editing and fine-tuning. Once imported, your image can be used to:
* Generate a variation of the original visual
* Use as a reference for prompt-based generation
* Remove the background
* Vectorize raster images (e.g., PNG to SVG)
* Remix or edit specific areas with prompts
* Apply your image to a product mockup
* Extend the image using outpainting (frame tool)
* Create a custom style for consistent generation
* Upscale to increase resolution and detail
**Notes on imported and edited images**
* Only **original generated images** are saved to project history. Images that have been edited e.g., background removed or fine-tuned) will not appear in the project timeline.
* Imported images, whether added to the canvas or uploaded to create a custom style, are not used for training AI models.
* To reuse edited images, first **export them**, then **re-import** as needed.
* When importing an image, Recraft Studio may default to an external model to enable natural language editing.
[Background tools](https://www.recraft.ai/docs/recraft-studio/image-editing/background-tools)
[How to import an image](https://www.recraft.ai/docs/recraft-studio/importing/how-to-import-an-image)
⌘I
Assistant
Responses are generated using AI and may contain mistakes.
---
# Size limits and supported formats of imported images - Recraft
> Documentation Index
> -------------------
>
> Fetch the complete documentation index at: [/docs/llms.txt](https://www.recraft.ai/docs/llms.txt)
>
> Use this file to discover all available pages before exploring further.
[Skip to main content](https://www.recraft.ai/docs/recraft-studio/importing/size-limits-and-supported-formats#content-area)
JPG, PNG, WebP:
* Width and height dimensions should not exceed 5800 pixels each
* Max resolution: 16 megapixels
* Max file size: 48MB
SVG:
* Max file size: 48MB
[How to import an image](https://www.recraft.ai/docs/recraft-studio/importing/how-to-import-an-image)
[Vectorizing](https://www.recraft.ai/docs/recraft-studio/format-conversions-and-scaling/vectorizing)
⌘I
Assistant
Responses are generated using AI and may contain mistakes.
---
# Teams workspace admin page - Recraft
> Documentation Index
> -------------------
>
> Fetch the complete documentation index at: [/docs/llms.txt](https://www.recraft.ai/docs/llms.txt)
>
> Use this file to discover all available pages before exploring further.
[Skip to main content](https://www.recraft.ai/docs/teams/teams-workspace-admin#content-area)
The **Teams workspace admin page** is where Team plan administrators manage their organization’s workspace. From here, admins can update company information, control seat usage, invite or remove members, and handle subscription settings. This dashboard is available only to users with **Admin** permissions in a Team workspace.
[](https://www.recraft.ai/docs/teams/teams-workspace-admin#what-you-can-do-in-the-teams-workspace-admin-page)
What you can do in the Teams workspace admin page
-------------------------------------------------------------------------------------------------------------------------------------------------------------------
###
[](https://www.recraft.ai/docs/teams/teams-workspace-admin#manage-seats)
Manage seats
Admins can adjust how many people are part of the workspace.
* **Buy more seats**: Increase the number of available seats as your team grows.
* **View total seats**: See your current seat count and how many are filled.
* **Invite members**: Add new users by email.
* **Remove members**: Free up a seat by removing someone from the workspace.
###
[](https://www.recraft.ai/docs/teams/teams-workspace-admin#assign-roles-and-permissions)
Assign roles and permissions
Each person in the workspace can be assigned a role. Roles determine what they can access or manage inside Recraft.
* **Admin**: Full workspace control, including inviting and removing members, updating company information, managing seats, and accessing subscription settings.
* **Member**: Can use Recraft with all paid features but cannot make workspace-level changes.
You can change a user’s role at any time using the dropdown next to their name.
###
[](https://www.recraft.ai/docs/teams/teams-workspace-admin#update-workspace-details)
Update workspace details
Workspace identity and billing information can be managed directly in the dashboard.
* **Company name**
* **Billing name**
* **Billing email**
* **Workspace avatar/logo**
Changes apply immediately across the workspace and will appear on invoices and subscription records.
###
[](https://www.recraft.ai/docs/teams/teams-workspace-admin#manage-your-subscription)
Manage your subscription
The dashboard provides direct access to plan and billing controls.
* **Manage subscription**: Opens the subscription panel within Stripe, where you can view your current plan, update payment methods, switch plans, or cancel your subscription.
* **Next invoice date**: Shows when your workspace subscription will renew.
Subscription management is handled through the desktop version of Recraft.
###
[](https://www.recraft.ai/docs/teams/teams-workspace-admin#view-people-and-credit-balance)
View people and credit balance
Under **People**, each workspace member shows:
* **Email**
* **Credits left** (each seat receives the monthly 9,000-credit allowance from the Team plan)
* **Role**
The credit pool is shared across the workspace, but each member sees their own remaining balance.
###
[](https://www.recraft.ai/docs/teams/teams-workspace-admin#danger-zone)
Danger zone
Workspace admins can delete the entire workspace. **Delete workspace**: Permanently removes the workspace and all associated data. This action cannot be undone. _(Deleting the workspace does not affect your personal Recraft account.)_
[](https://www.recraft.ai/docs/teams/teams-workspace-admin#when-to-use-the-teams-workspace-admin-page)
When to use the Teams workspace admin page
-----------------------------------------------------------------------------------------------------------------------------------------------------
Use this dashboard whenever you need to:
* Add new members to your team
* Remove someone who no longer needs access
* Increase or reduce your total seat count
* Update billing details before your next invoice
* Change who has admin permissions
* Adjust your subscription or review renewal dates
* Rebrand your workspace with the correct name or logo
[Teams overview](https://www.recraft.ai/docs/teams/teams-overview)
⌘I
Assistant
Responses are generated using AI and may contain mistakes.
---
# How to crop an image - Recraft
> Documentation Index
> -------------------
>
> Fetch the complete documentation index at: [/docs/llms.txt](https://www.recraft.ai/docs/llms.txt)
>
> Use this file to discover all available pages before exploring further.
[Skip to main content](https://www.recraft.ai/docs/recraft-studio/image-editing/how-to-crop-an-image#content-area)
To crop an image, hold ⌘ Cmd (Mac) or Ctrl (other systems) and drag its border to your desired dimensions.
[Remix](https://www.recraft.ai/docs/recraft-studio/image-editing/remix)
[Background tools](https://www.recraft.ai/docs/recraft-studio/image-editing/background-tools)
⌘I
Assistant
Responses are generated using AI and may contain mistakes.
---
# Applying your design to the mockup - Recraft
> Documentation Index
> -------------------
>
> Fetch the complete documentation index at: [/docs/llms.txt](https://www.recraft.ai/docs/llms.txt)
>
> Use this file to discover all available pages before exploring further.
[Skip to main content](https://www.recraft.ai/docs/recraft-studio/mockups/applying-your-design-to-a-mockup#content-area)
Once the mockup frame is ready, you can add and position your artwork:
1. Upload or generate your design (image, logo, text, etc.) onto the canvas.
2. Place it over the mockup frame.
3. Adjust **position**, **size**, and **rotation**.
4. Use available styling options:
* **Appearance settings**: Control blending, texture, shading, and how the design interacts with the surface.
* **Tiling**: Repeat the design pattern across the mockup.
* **Masking**: Limit where the design appears on the mockup surface.
5. When you’re satisfied, select the mockup image and export it as a PNG, JPG, PDF, or TIFF (CMYK) format.
[](https://www.recraft.ai/docs/recraft-studio/mockups/applying-your-design-to-a-mockup#appearance-settings)
Appearance settings
-----------------------------------------------------------------------------------------------------------------------------------
The Appearance panel controls how the applied design visually interacts with the mockup surface. These settings affect only the design layer, not the mockup base.
###
[](https://www.recraft.ai/docs/recraft-studio/mockups/applying-your-design-to-a-mockup#blend-mode)
Blend mode
Blend mode determines how the colors and brightness of the design combine with the underlying mockup.
| Blend mode | Description |
| --- | --- |
| **Normal** | Displays the design as-is, without blending with the mockup colors. |
| **Darken** | Keeps the darker pixels from either the design or the mockup, allowing lighter areas to drop out. |
| **Multiply** | Darkens the result by combining design and mockup colors, making the design appear printed into shadows. |
| **Color Burn** | Deepens shadows and increases contrast by darkening the mockup based on the design. |
| **Lighten** | Keeps the lighter pixels from either the design or the mockup, removing darker design areas. |
| **Screen** | Brightens the result by lightening darker areas while preserving highlights. |
| **Color Dodge** | Intensifies highlights by brightening the mockup using the design’s lighter colors. |
| **Overlay** | Increases contrast by darkening shadows and lightening highlights while preserving midtones. |
| **Soft Light** | Applies a subtle contrast adjustment, gently lightening or darkening based on the design. |
| **Hard Light** | Applies strong contrast, similar to Overlay but with a more pronounced effect. |
| **Difference** | Produces an inverted, high-contrast result by subtracting color values between layers. |
| **Exclusion** | Similar to Difference but with lower contrast and softer color inversion. |
| **Hue** | Applies the design’s hue while preserving the mockup’s brightness and saturation. |
| **Saturation** | Applies the design’s saturation while preserving the mockup’s hue and brightness. |
| **Color** | Applies the design’s hue and saturation while preserving the mockup’s brightness. |
| **Luminosity** | Applies the design’s brightness while preserving the mockup’s color information. |
###
[](https://www.recraft.ai/docs/recraft-studio/mockups/applying-your-design-to-a-mockup#ai-blend-mode)
AI Blend mode
AI Blend mode applies adaptive, AI-generated shading to the design based on the lighting, folds, and contours of the mockup surface. When enabled, the design appears more naturally integrated into the product. AI Blend mode works alongside standard blend modes and can be toggled on or off independently.
###
[](https://www.recraft.ai/docs/recraft-studio/mockups/applying-your-design-to-a-mockup#show-texture)
Show texture
Show texture controls whether the surface texture of the mockup is applied to the design.
* **Yes**: The design inherits surface details such as fabric grain or material texture.
* **No**: The design appears smooth and uniform on the surface.
This setting affects texture only and does not change lighting or shading.
###
[](https://www.recraft.ai/docs/recraft-studio/mockups/applying-your-design-to-a-mockup#tiling)
Tiling
Tiling controls how the design repeats across the mockup surface.
* **None**: The design appears once.
* **Repeat**: The design is tiled evenly across the surface.
* **Mirror**: The design is tiled with alternating mirrored tiles to reduce visible seams.
Tiling works best with seamless patterns.
###
[](https://www.recraft.ai/docs/recraft-studio/mockups/applying-your-design-to-a-mockup#masking-the-design)
Masking the design
Masking lets you hide or reveal parts of a design so it fits the surface of a mockup, such as fabric folds, edges, or object contours. To edit a mask:
1. Select the design placed on top of the mockup.
2. Open **Edit mask** in the right sidebar.
3. Choose a **Selection** mode:
* **Brush**: Paint freeform areas into the mask.
* **Lasso**: Draw a closed shape to define a masked region.
* **Area**: Select a rectangular region to add to the mask.
* **Wand**: Automatically selects contiguous areas based on visual boundaries.
4. Set **Show mask → Yes** to visualize the active mask while editing.
####
[](https://www.recraft.ai/docs/recraft-studio/mockups/applying-your-design-to-a-mockup#precision-controls)
Precision controls
* When using the **Brush** tool, hold **Shift** while dragging to constrain the stroke to a straight line.
* You can also hold **Shift** and click to continue the previous brush stroke in a straight line. This is useful for outlining rigid or angled edges, such as a rotated rectangle.
####
[](https://www.recraft.ai/docs/recraft-studio/mockups/applying-your-design-to-a-mockup#erasing-parts-of-a-mask)
Erasing parts of a mask
* Hold **Option** (Alt) while using **Brush**, **Lasso**, or **Area** to erase parts of the existing mask.
* This allows you to quickly correct mistakes, such as removing unwanted cutouts where parts of the design disappear.
####
[](https://www.recraft.ai/docs/recraft-studio/mockups/applying-your-design-to-a-mockup#brush-size)
Brush size
* When **Brush** is selected, adjust **Brush size** using the slider in the **Edit mask** panel for finer or broader control.
When finished, close **Edit mask** or toggle **Show mask → No** to return to the normal canvas view.
[How to create a mockup](https://www.recraft.ai/docs/recraft-studio/mockups/how-to-create-a-mockup)
[Using color palettes in generation](https://www.recraft.ai/docs/recraft-studio/color-palettes/using-color-palettes-in-generation)
⌘I
Assistant
Responses are generated using AI and may contain mistakes.
---
# Favorites - Recraft
> Documentation Index
> -------------------
>
> Fetch the complete documentation index at: [/docs/llms.txt](https://www.recraft.ai/docs/llms.txt)
>
> Use this file to discover all available pages before exploring further.
[Skip to main content](https://www.recraft.ai/docs/recraft-studio/libraries/favorites#content-area)
Favorites is a personal library for saving and revisiting images you want quick access to later. It allows you to collect useful, inspiring, or frequently reused images in one place, independent of any single project. Favorites is part of **Libraries**. It exists outside the canvas and persists across projects and sessions.
[](https://www.recraft.ai/docs/recraft-studio/libraries/favorites#what-favorites-is-for)
What Favorites is for
------------------------------------------------------------------------------------------------------------------
Favorites is designed to help you:
* save images you want to reuse or reference later
* keep important or high-quality generations easy to find
* collect inspiration without duplicating or exporting files
* access saved images across different projects
Favoriting an image does not change the image itself or affect the project it belongs to.
[](https://www.recraft.ai/docs/recraft-studio/libraries/favorites#adding-images-to-favorites)
Adding images to Favorites
----------------------------------------------------------------------------------------------------------------------------
There are three ways to add an image to Favorites:
* From the canvas, right-click an image and select **Add to Favorites**
* From **History**, hover over an image and click the **heart icon**
* From **Community**, hover over an image and click the **heart icon**
When an image is favorited, the **red heart icon** appears filled. Favorited images are saved to your Favorites library for easy access and reuse.
[](https://www.recraft.ai/docs/recraft-studio/libraries/favorites#accessing-favorites)
Accessing Favorites
--------------------------------------------------------------------------------------------------------------
Favorites can be accessed in two ways:
* Click the **Recraft (R) icon** in the top navigation and select **Favorites**
* Open the [Favorites page](https://www.recraft.ai/liked)
directly
Favorites opens as a standalone library view outside the canvas.
[](https://www.recraft.ai/docs/recraft-studio/libraries/favorites#actions-available-on-favorites)
Actions available on Favorites
------------------------------------------------------------------------------------------------------------------------------------
Favorites supports two interaction levels: **hover actions** for quick access, and **image detail actions** when you open an image.
###
[](https://www.recraft.ai/docs/recraft-studio/libraries/favorites#on-hover)
On hover
When you hover over an image in Favorites, you can:
* **Copy prompt**: Copy the prompt used to generate the image
* **Download**: Download the image to your device
* **Remove from Favorites**: Click the **heart icon** to remove the image from Favorites
###
[](https://www.recraft.ai/docs/recraft-studio/libraries/favorites#on-click-image-detail-view)
On click (image detail view)
When you click an image, an image detail panel opens. From there, you can:
* **View metadata**: See details such as model, style, image type (raster or vector), and aspect ratio
* **View prompt**: Inspect the full prompt used to generate the image
* **Copy link**: Copy a direct link to the image
* **Download**: Download the image
* **Remove from Favorites**: Remove the image from Favorites
These actions do not modify the original image or the project it came from.
[](https://www.recraft.ai/docs/recraft-studio/libraries/favorites#removing-images-from-favorites)
Removing images from Favorites
------------------------------------------------------------------------------------------------------------------------------------
Removing an image from Favorites does not delete the image or affect its original location. To remove an image from Favorites:
* Open **Favorites**
* Hover over the image and click the **heart icon** to remove it from Favorites
[History](https://www.recraft.ai/docs/recraft-studio/history)
[Community](https://www.recraft.ai/docs/recraft-studio/libraries/community)
⌘I
Assistant
Responses are generated using AI and may contain mistakes.
---
# Community - Recraft
> Documentation Index
> -------------------
>
> Fetch the complete documentation index at: [/docs/llms.txt](https://www.recraft.ai/docs/llms.txt)
>
> Use this file to discover all available pages before exploring further.
[Skip to main content](https://www.recraft.ai/docs/recraft-studio/libraries/community#content-area)
Community is a public inspiration library that showcases images created with Recraft. It is designed for exploration, discovery, and learning. Community is part of **Libraries** and exists outside the canvas. Browsing Community does not affect your current project or selection.
[](https://www.recraft.ai/docs/recraft-studio/libraries/community#what-community-is-for)
What Community is for
------------------------------------------------------------------------------------------------------------------
Community is intended to help you:
* explore what others are creating with Recraft
* discover visual styles, compositions, and prompt ideas
* find inspiration for new projects or directions
* learn how different models and styles behave in practice
Community is not a workspace and does not store your personal assets.
[](https://www.recraft.ai/docs/recraft-studio/libraries/community#accessing-community)
Accessing Community
--------------------------------------------------------------------------------------------------------------
You can open Community at any time:
* Click the **Recraft (R) icon** in the top navigation and select **Community**, or go directly to [Community](https://www.recraft.ai/community)
Opening Community does not interrupt your current work. You can return to the canvas at any time.
[](https://www.recraft.ai/docs/recraft-studio/libraries/community#browsing-community)
Browsing Community
------------------------------------------------------------------------------------------------------------
Community displays a curated feed of public images generated with Recraft. When browsing Community, you can:
* scroll through images to explore different visual approaches
* hover over an image to reveal quick actions
* click an image to open a context panel with more details
* inspect prompts and generation settings when available
When hovering over an image, you can click the **heart icon** to save it to [Favorites](https://www.recraft.ai/docs/recraft-studio/libraries/favorites)
. A filled heart (shown as a red heart) indicates the image has been favorited. Clicking an image opens a context panel where you can view additional information such as the prompt, model, format, and aspect ratio, and access available actions like copying a link or downloading the image. Community includes filtering options to help narrow what you see. You can filter images by type, including:
* All images
* Photorealism
* Illustration
* Vector art
* Icon
Community content is read-only. Images cannot be edited directly in place.
[](https://www.recraft.ai/docs/recraft-studio/libraries/community#using-community-images)
Using Community images
--------------------------------------------------------------------------------------------------------------------
Community images are provided for reference and inspiration. You can:
* view prompts and settings to understand how an image was created
* download an image and import it into your canvas to use as a reference image
* use Community images as visual inspiration for your own prompts
Community images are not added to your projects automatically. To work with an image in your own project, recreate it using its prompt, or download and import it as a reference image before generating new content.
[Favorites](https://www.recraft.ai/docs/recraft-studio/libraries/favorites)
[Templates](https://www.recraft.ai/docs/recraft-studio/templates)
⌘I
Assistant
Responses are generated using AI and may contain mistakes.
---
# How to create a mockup - Recraft
> Documentation Index
> -------------------
>
> Fetch the complete documentation index at: [/docs/llms.txt](https://www.recraft.ai/docs/llms.txt)
>
> Use this file to discover all available pages before exploring further.
[Skip to main content](https://www.recraft.ai/docs/recraft-studio/mockups/how-to-create-a-mockup#content-area)
Mockups allow you to place your artwork, logo, or design onto product photography, such as T-shirts, tote bags, cups, or packaging, directly within the Recraft canvas. You can either generate a mockup from scratch or convert an existing image into a mockup frame.
[](https://www.recraft.ai/docs/recraft-studio/mockups/how-to-create-a-mockup#mockup-collections)
Mockup collections
-----------------------------------------------------------------------------------------------------------------------
Click the **Mockup** icon in the toolbar to open the mockup panel. From there you can:
* Browse four collections of pre-made mockups: **Apparel**, **Packaging**, **Devices**, and **Outdoor ads**
* Upload a mockup from your computer
* Generate a mockup from scratch
The same four collections are also accessible via the **Get started** window. Select any ready-made mockup from a collection to add it directly to the canvas.
####
[](https://www.recraft.ai/docs/recraft-studio/mockups/how-to-create-a-mockup#there-are-three-ways-to-create-a-mockup)
There are three ways to create a mockup:
####
[](https://www.recraft.ai/docs/recraft-studio/mockups/how-to-create-a-mockup#1-use-a-pre-made-mockup-from-a-collection)
1\. Use a pre-made mockup from a collection
1. Click the **Mockup** icon in the toolbar to open the panel.
2. Browse the collections and select a mockup to add to the canvas.
3. Apply your design following the steps in [Applying your design to the mockup](https://www.recraft.ai/docs/recraft-studio/mockups/applying-your-design-to-a-mockup)
.
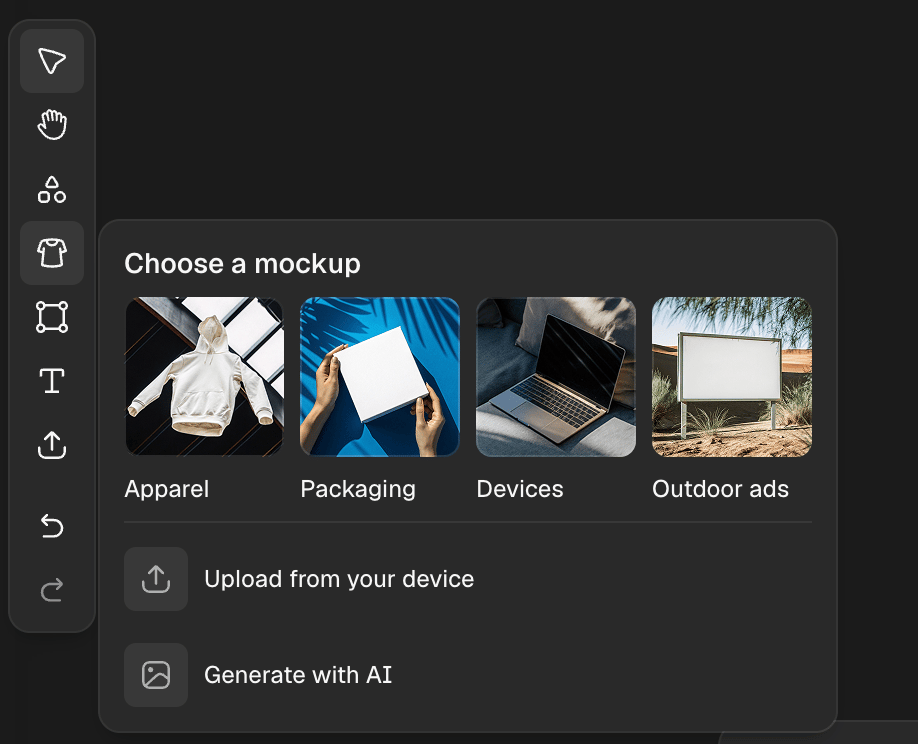
####
[](https://www.recraft.ai/docs/recraft-studio/mockups/how-to-create-a-mockup#2-generate-a-mockup-from-scratch)
2\. Generate a mockup from scratch
Use this option if you want to start from a prompt:
1. Open the prompt panel and select **Mockup** as the generation type (where you switch between Image / Video / etc.).
2. Write a prompt describing the product you want to visualize (e.g., “white T-shirt facing forward”).
3. Press **Enter** or click the **up arrow** to generate a mockup-ready image.
Once generated, the image is automatically converted into a mockup frame.
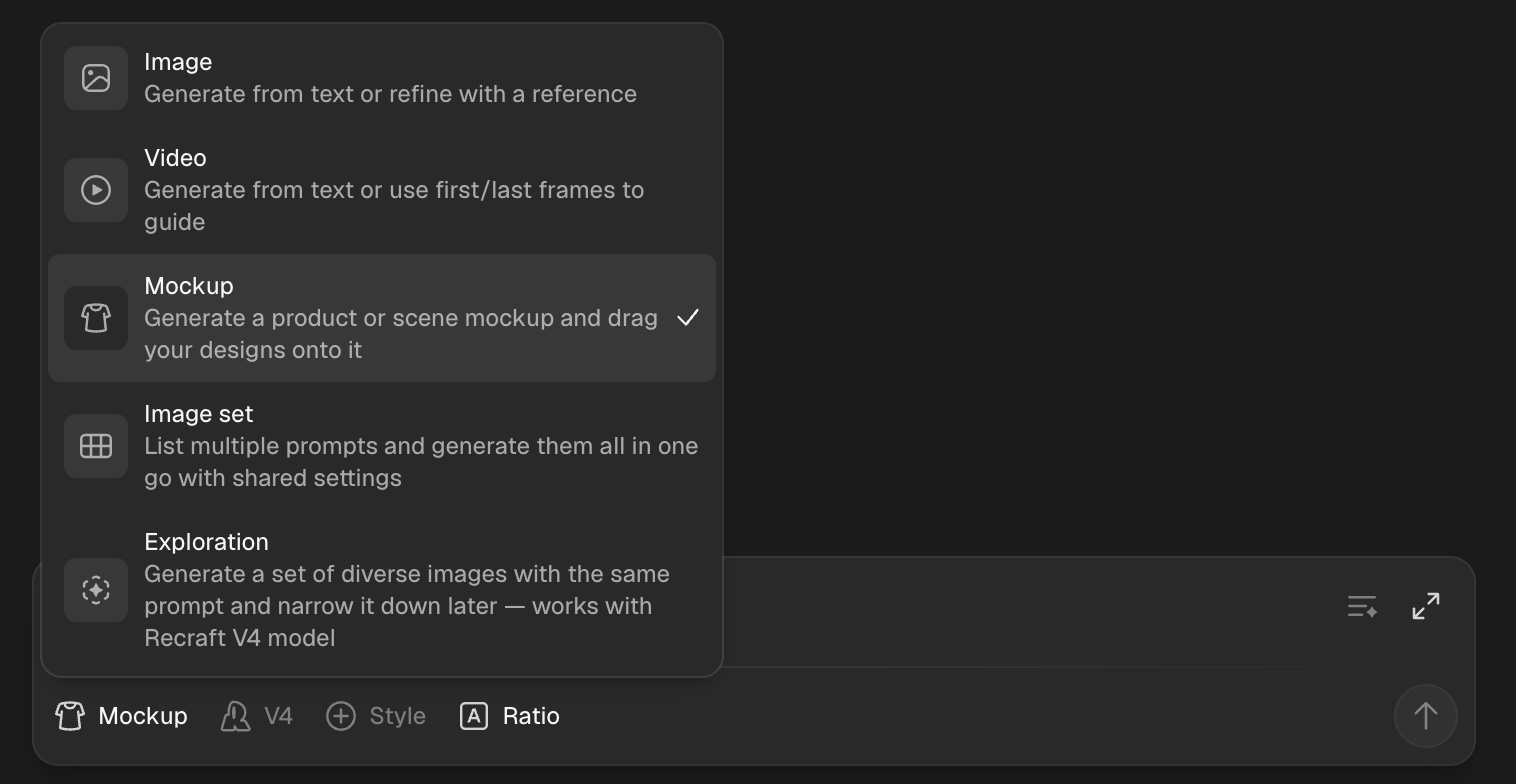
####
[](https://www.recraft.ai/docs/recraft-studio/mockups/how-to-create-a-mockup#3-convert-an-existing-image-to-a-mockup)
3\. Convert an existing image to a mockup
You can also convert any photorealistic image (e.g., a stock photo of a product) into a mockup:
1. Place the image onto the canvas.
2. Select the image and in the right panel, click **Convert to mockup**.
3. The image will be converted into a mockup frame.
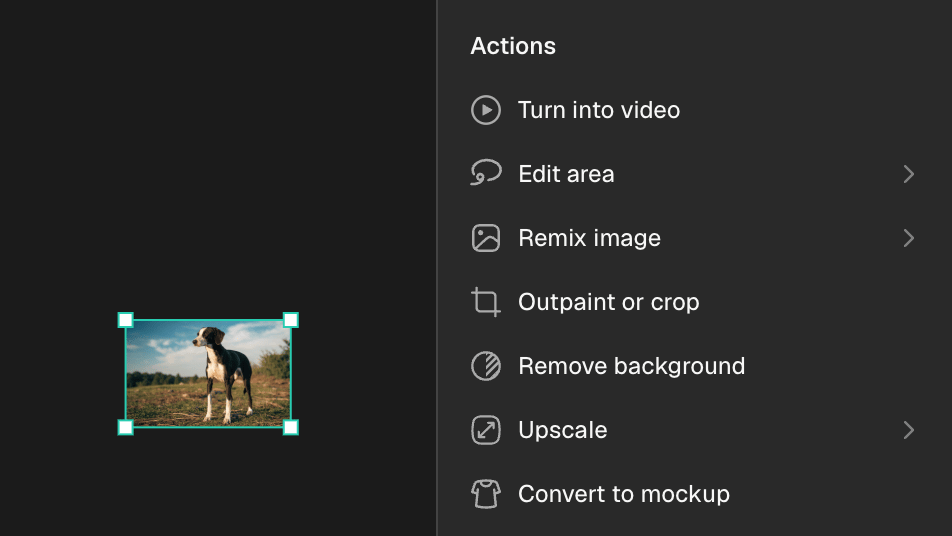
This method works best with any suitable object in an image, such as T-shirts, cups, packaging, notebooks, etc. You can also generate a product photo in a photorealistic style and convert it the same way.
[](https://www.recraft.ai/docs/recraft-studio/mockups/how-to-create-a-mockup#enhance-realism)
Enhance realism
-----------------------------------------------------------------------------------------------------------------
For mockups with flat surfaces — such as packaging or devices — you may want to refine how the design sits on the object, so it follows the correct perspective or fits precisely onto a screen. Use the **Enhance realism** function to blend your design more naturally into the mockup. It uses the Nano Banana 2 model and costs **11 credits**. This step is optional — depending on the mockup, you may or may not need it.
####
[](https://www.recraft.ai/docs/recraft-studio/mockups/how-to-create-a-mockup#)
[Outpainting](https://www.recraft.ai/docs/recraft-studio/frames/outpainting)
[Applying your design to the mockup](https://www.recraft.ai/docs/recraft-studio/mockups/applying-your-design-to-a-mockup)
⌘I
Assistant
Responses are generated using AI and may contain mistakes.
---
# Remix - Recraft
> Documentation Index
> -------------------
>
> Fetch the complete documentation index at: [/docs/llms.txt](https://www.recraft.ai/docs/llms.txt)
>
> Use this file to discover all available pages before exploring further.
[Skip to main content](https://www.recraft.ai/docs/recraft-studio/image-editing/remix#content-area)
Remix generates new versions of an image while keeping the overall concept intact. Each remix introduces slight differences in elements like character appearance, object position, or scene composition. Remix the image by adjusting the description and similarity strength. Start with an image, rewrite the prompt (e.g., ‘cat’ to ‘dog’), and set how closely the new image should match the original. The Remix function does not use a prompt. Instead, it uses the visual content of the original image to generate alternatives in different aspect ratios. **How to use Remix**:
1. Select an existing image on the canvas.
2. Click on the **Remix image** in the context panel.
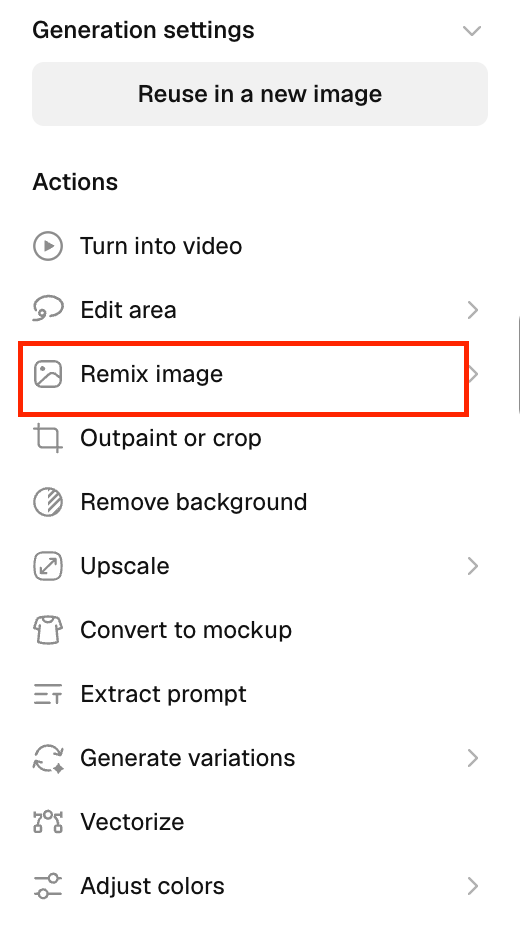
3. **Adjust similarity to the original**
Use the slider at the top to control how closely the new image should match the original. **Select the model**
Under the _Model_ section, choose the generation model.
* Here, **V4** is selected. **Choose a style**
In the _Style_ section, you can apply a predefined style to the image.
* Currently, **No styles** is selected.
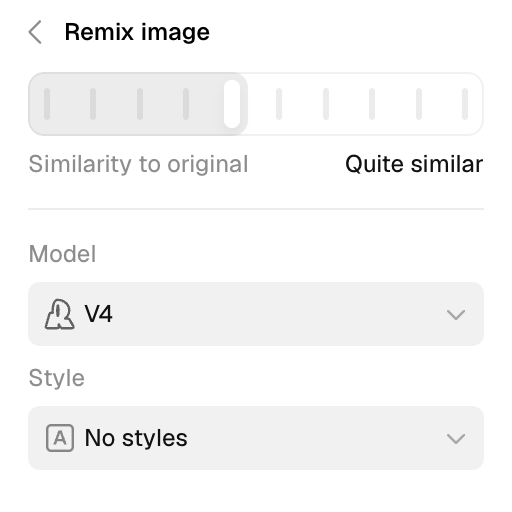
4. Click **Generate** to produce a set of new outputs based on the selected image.
[Raster effects](https://www.recraft.ai/docs/recraft-studio/image-editing/raster-effects)
[How to crop an image](https://www.recraft.ai/docs/recraft-studio/image-editing/how-to-crop-an-image)
⌘I
Assistant
Responses are generated using AI and may contain mistakes.
---
# Background tools - Recraft
> Documentation Index
> -------------------
>
> Fetch the complete documentation index at: [/docs/llms.txt](https://www.recraft.ai/docs/llms.txt)
>
> Use this file to discover all available pages before exploring further.
[Skip to main content](https://www.recraft.ai/docs/recraft-studio/image-editing/background-tools#content-area)
[](https://www.recraft.ai/docs/recraft-studio/image-editing/background-tools#remove-background)
Remove background
---------------------------------------------------------------------------------------------------------------------
Recraft Studio’s Remove background tool is especially tuned for AI-generated images, making it more effective than the background removal features found in most other AI image generators. You can remove the background from any image with one click, creating a transparent version for compositing or mockups. To remove a background, select the image and click **Remove background** in the context panel. The background will be deleted, leaving only the subject. This is especially useful for preparing product overlays or isolating graphics. Remove background functionality works with images with resolution of 1024 by the smaller side. For images with large resolution there might be some artifacts on the border of the image. **Note**: When using Remove background on large images, Recraft automatically downscales the image before applying edits, which can result in a noticeable loss of quality in the final output.
[](https://www.recraft.ai/docs/recraft-studio/image-editing/background-tools#change-background)
Change background
---------------------------------------------------------------------------------------------------------------------
**How to change the background of an image**:
1. Select a generated or uploaded image.
2. Select the image, then click **Change background** in the context panel.
3. Wait for the background area to be masked.
4. Enter a new prompt for the background in the prompt panel, then click the **generate button**.
5. Your image with new backgrond will appear on the canvas as a new image.
[How to crop an image](https://www.recraft.ai/docs/recraft-studio/image-editing/how-to-crop-an-image)
[About importing](https://www.recraft.ai/docs/recraft-studio/importing/about-importing)
⌘I
Assistant
Responses are generated using AI and may contain mistakes.
---
# Raster effects - Recraft
> Documentation Index
> -------------------
>
> Fetch the complete documentation index at: [/docs/llms.txt](https://www.recraft.ai/docs/llms.txt)
>
> Use this file to discover all available pages before exploring further.
[Skip to main content](https://www.recraft.ai/docs/recraft-studio/image-editing/raster-effects#content-area)
Recraft Studio effects let you add visual treatments to any **raster image** on the canvas, such as illustrations, photos, or painted textures. These effects do not apply to vector images. You can combine multiple effects, reorder them, or remove them at any time. Effects are non-destructive; you can remove them without modifying the original image.
[](https://www.recraft.ai/docs/recraft-studio/image-editing/raster-effects#accessing-raster-effects)
Accessing raster effects
---------------------------------------------------------------------------------------------------------------------------------
Raster effects are accessed through the **Adjust colors** control in the context panel. To open raster effects:
1. Select a **raster image** on the canvas.
2. In the right sidebar (context panel), click **Adjust colors**.
3. Click **+** in the **Effects** section to add an effect, such as **Blur**, **Drop Shadow**, or **Stroke**.
The Effects section is available only when a raster image is selected.
[](https://www.recraft.ai/docs/recraft-studio/image-editing/raster-effects#drop-shadow)
Drop shadow
-------------------------------------------------------------------------------------------------------
Drop shadow adds depth by placing a soft shadow behind your image. To add a drop shadow:
1. Select a raster image on the canvas.
2. In the right sidebar, open the **Effects** section and choose **Drop Shadow**.
3. Adjust the available controls:
* **Position (X, Y):** Offsets the shadow horizontally and vertically
* **Blur:** Controls how soft or sharp the shadow edge appears
* **Color:** Sets the shadow color (use darker tones for natural shadows)
Tip: Drop shadow also works with images with transparent backgrounds.
[](https://www.recraft.ai/docs/recraft-studio/image-editing/raster-effects#stroke)
Stroke
---------------------------------------------------------------------------------------------
Stroke adds an outline around the frame of your raster image. To add a stroke:
1. Select a raster image.
2. In **Effects**, choose **Stroke**.
3. Customize your outline using:
* **Weight:** Controls the thickness of the outline
* **Color:** Sets the outline color
* **Position:**
* **Inside** – stroke sits just inside the image boundary
* **Outside** – stroke sits outside the image boundary
* **Center** – stroke is placed half inside, half outside the boundary
[](https://www.recraft.ai/docs/recraft-studio/image-editing/raster-effects#blur)
Blur
-----------------------------------------------------------------------------------------
Blur softens the entire image for atmospheric or stylistic effects. To apply a blur:
1. Select a raster image.
2. In **Effects**, choose **Blur**.
3. Adjust the **Strength** slider to increase or decrease the blur intensity.
Blur is frequently used to create depth, soften textures, or reduce detail behind foreground elements.
[](https://www.recraft.ai/docs/recraft-studio/image-editing/raster-effects#removing-an-effect)
Removing an effect
---------------------------------------------------------------------------------------------------------------------
Each effect added appears as an entry under **Effects** in the right sidebar. Click **–** next to any effect to remove it. Removing an effect immediately resets all of its settings to default.
[Manual editing tools](https://www.recraft.ai/docs/recraft-studio/image-editing/manual-editing-tools)
[Remix](https://www.recraft.ai/docs/recraft-studio/image-editing/remix)
⌘I
Assistant
Responses are generated using AI and may contain mistakes.
---
# Manual editing tools - Recraft
> Documentation Index
> -------------------
>
> Fetch the complete documentation index at: [/docs/llms.txt](https://www.recraft.ai/docs/llms.txt)
>
> Use this file to discover all available pages before exploring further.
[Skip to main content](https://www.recraft.ai/docs/recraft-studio/image-editing/manual-editing-tools#content-area)
**Manual selection tools** Recraft Studio provides several selection and modification tools for precise manual edits, such as the **Lasso**, **Brush**, **Area selector**, **Magic wand**, **Eraser**, and **Cut** tools. These allow fine control over what parts of an image are affected when applying edits, regenerations, or style changes. For detailed descriptions and usage of each tool, go to [Selection tools](https://www.recraft.ai/docs/recraft-studio/work-area/selection-tools)
.
[](https://www.recraft.ai/docs/recraft-studio/image-editing/manual-editing-tools#edit-area)
Edit area
---------------------------------------------------------------------------------------------------------
You can manually select and edit an image or design using the Edit area feature. To activate it, select an image on the canvas, then click **Edit area** in the context panel that appears at the right of the canvas. This will open a panel where you can choose the Lasso, Brush, Area, and Wand tools. To exit these selection tools, click **Edit area** again.
[](https://www.recraft.ai/docs/recraft-studio/image-editing/manual-editing-tools#duplicate-an-image)
Duplicate an image
---------------------------------------------------------------------------------------------------------------------------
There are multiple ways to duplicate an image:
* Use the copy-paste function: Cmd/Ctrl+C and Cmd/Ctrl+V
* Hold Option on Mac and Alt on other OS, then click and drag the new image
* Right-click the image and select **Duplicate**
[Editing images with natural language](https://www.recraft.ai/docs/recraft-studio/image-editing/editing-images-with-natural-language)
[Raster effects](https://www.recraft.ai/docs/recraft-studio/image-editing/raster-effects)
⌘I
Assistant
Responses are generated using AI and may contain mistakes.
---
# How To Generate A Video - Recraft
> Documentation Index
> -------------------
>
> Fetch the complete documentation index at: [/docs/llms.txt](https://www.recraft.ai/docs/llms.txt)
>
> Use this file to discover all available pages before exploring further.
[Skip to main content](https://www.recraft.ai/docs/recraft-studio/video-generation/how-to-generate-a-video#content-area)
[](https://www.recraft.ai/docs/recraft-studio/video-generation/how-to-generate-a-video#overview)
Overview
-------------------------------------------------------------------------------------------------------------
Recraft supports video generation powered by a curated selection of leading AI video models. Users can generate videos from text prompts or use existing images as starting frames — all within the same canvas workflow used for image generation. Video generation is available on **Pro plans** (new Pro plan, and legacy Pro 4K / Pro 8K plans) and **Team plans (all)**. As of now, the video is accessible on Desktop and Android, with iOS availability rolling out soon.
[](https://www.recraft.ai/docs/recraft-studio/video-generation/how-to-generate-a-video#how-to-access-video-generation)
How to Access Video Generation
=========================================================================================================================================================
1. Open the chat prompt panel.
2. Click the “Image” control and switch to “Video.”
3. Now you can select a particular video model in the models selector
4. Type your prompt and generate a video
[](https://www.recraft.ai/docs/recraft-studio/video-generation/how-to-generate-a-video#generation-modes)
Generation Modes
=============================================================================================================================
[](https://www.recraft.ai/docs/recraft-studio/video-generation/how-to-generate-a-video#text-to-video)
Text-to-Video
-----------------------------------------------------------------------------------------------------------------------
Describe a scene, action, or concept in the prompt, and the selected video model will generate a video clip from scratch. This works similarly to text-to-image generation — the more specific and descriptive the prompt, the better the result.
[](https://www.recraft.ai/docs/recraft-studio/video-generation/how-to-generate-a-video#image-to-video)
Image-to-Video
-------------------------------------------------------------------------------------------------------------------------
To create a video using images, you can simply select an image(s) on the canvas or upload one using the attachment option in the prompt panel (paperclip icon). Some models support the **first frame** and the **last frame** of the video. This is useful for animating a specific composition, maintaining visual consistency with existing assets, or extending a still image into motion.
[](https://www.recraft.ai/docs/recraft-studio/video-generation/how-to-generate-a-video#available-models)
Available Models
=============================================================================================================================
Recraft offers a range of video models, each with different strengths in quality, speed, and style.
| Model | Variants |
| --- | --- |
| Google Veo 3.1 | Standard, Fast |
| Google Veo 3 | Standard, Fast |
| Google Veo 2 | Standard |
| OpenAI Sora 2 | Standard, Pro |
| Luma Ray 2 | Standard, Flash |
| Kling 3 | Pro, Standard, Omni Pro, Omni Standard |
| Kling 2.6 | Pro |
| Kling 2.5 | Turbo |
| Kling 2.1 | Master |
| MiniMax Hailuo 2.3 | Pro, Standard |
| MiniMax Hailuo 02 | Pro, Standard |
| Wan 2.6 | Standard |
| Wan 2.5 | Preview |
| Wan 2.2 | A14B |
| ByteDance Seedance 1.5 | Standard |
| PixVerse 5.5 | Standard |
| Grok Imagine Video | Standard |
> **Note:** Model availability may change as new models are added and existing ones are updated. The credit cost varies by model and generation settings (resolution, duration, audio). See the in-app credit display for current pricing.
[](https://www.recraft.ai/docs/recraft-studio/video-generation/how-to-generate-a-video#working-with-generated-videos)
Working with Generated Videos
=======================================================================================================================================================
Generated videos appear as **video layers** on the canvas, just like images.
* **Play** the video directly on the canvas.
* **Download** by right-clicking the video layer and selecting **Download** from the context menu.
* **Reposition and resize** the video layer on the canvas alongside other assets
When generating or editing a video in Recraft Studio, you can interact with the project directly on the canvas. **Tip:** When interacting with a public project, your cursor, along with your username, will be visible to others.
[](https://www.recraft.ai/docs/recraft-studio/video-generation/how-to-generate-a-video#plan-requirements)
Plan Requirements
===============================================================================================================================
Video generation is available on the following plans:
* **Any Pro plan** (new)
* **Legacy Pro 4K** and **Pro 8K** plans
* **Any Team plan** (legacy and new)
Video generation is not available on Basic or Free plans as well as on legacy Pro 1k plan.
[Extract prompt](https://www.recraft.ai/docs/recraft-studio/image-generation/working-with-text-and-prompts/extract-prompt)
[Video Prompts](https://www.recraft.ai/docs/recraft-studio/video-generation/video-prompts)
⌘I
Assistant
Responses are generated using AI and may contain mistakes.
---
# Editing images with natural language - Recraft
> Documentation Index
> -------------------
>
> Fetch the complete documentation index at: [/docs/llms.txt](https://www.recraft.ai/docs/llms.txt)
>
> Use this file to discover all available pages before exploring further.
[Skip to main content](https://www.recraft.ai/docs/recraft-studio/image-editing/editing-images-with-natural-language#content-area)
Recraft Studio supports targeted image editing using integrated external models **Google Nano Banana**, **OpenAI GPT‑4o**, **Seedream**, **Flux Kontext**, and **Qwen-Image** that respond to natural language prompts and optional reference images. These models are built directly into the Recraft interface, so you can make precise edits without switching platforms or starting from scratch. Natural language editing allows you to modify specific aspects of an image (like clothing, background, or facial expression) while preserving the overall structure and style. Only the elements described in your prompt are changed; everything else remains intact.
[](https://www.recraft.ai/docs/recraft-studio/image-editing/editing-images-with-natural-language#use-cases)
Use cases
-------------------------------------------------------------------------------------------------------------------------
* Make small adjustments, such as changing clothing, background elements, or facial features
* Refine visual details without regenerating the entire image
* Maintain stylistic or character consistency across multiple images
* Add, remove, or modify specific objects within a scene
* Adjust visual elements like lighting, color palette, or seasonal context
* Update product features or character traits while keeping composition intact
* Apply a consistent style or mood using reference images
[](https://www.recraft.ai/docs/recraft-studio/image-editing/editing-images-with-natural-language#how-to-edit-an-image-with-natural-language-prompts)
How to edit an image with natural language prompts
-----------------------------------------------------------------------------------------------------------------------------------------------------------------------------------------------------------
1. Open a project and upload or generate the image you want to modify.
2. Select the image on the canvas.
3. In the prompt panel, select a model:
* **Nano Banana** (normal, Pro, Pro 4K)
* **Seedream V4**
* **GPT‑4o** (Low, Medium, or High quality)
* **Flux Kontext** (Pro or Max quality)
* **Qwen-Image**
4. Enter a prompt describing the change (e.g., _“make the jacket red”_ or _“change background to nighttime”_).
5. (Optional) Click the **paper clip icon** within the prompt panel to attach reference images:
* Up to **9 images** for GPT‑4o, Nano Banana, and Seedream
* **1 image** for Flux Kontext and Qwen-Image Reference images allow the model to incorporate visual elements like style, character, pose, or layout into the output. In your prompt, describe what you want to borrow from each image and how you’d like them composed.
6. Click the **generate button** to apply the edit.
7. You can repeat the process as needed. Each new edit builds on the previous result without requiring a full regeneration.
[](https://www.recraft.ai/docs/recraft-studio/image-editing/editing-images-with-natural-language#supported-models)
Supported models
---------------------------------------------------------------------------------------------------------------------------------------
Currently, the reference image feature is supported only by select external models. You can manually choose the model, or GPT‑4o Medium will be used by default when a reference image is attached. Recraft standard image generation is included in the table below for reference.
| Model | Credits |
| --- | --- |
| Recraft raster image generation | 1 credits |
| Recraft vector image generation | 2 credits |
| Flux Kontext Pro | 2 credits |
| Flux Kontext Max | 4 credits |
| GPT-4o Low | 1 credit |
| GPT-4o Medium | 6 credits |
| GPT-4o High | 24 credits |
| Nano Banana | 2 credits |
| Nano Banana Pro | 15 credits |
| Nano Banana Pro 4K | 30 credits |
| Seedream V4 | 2 credits |
| Qwen-Image | 2 credits |
[](https://www.recraft.ai/docs/recraft-studio/image-editing/editing-images-with-natural-language#notes-on-external-models)
Notes on external models
-------------------------------------------------------------------------------------------------------------------------------------------------------
Each external model has its own supported aspect ratios. For example, GPT‑4o supports only 1:1, 3:2, and 2:3 formats. If your original image uses an unsupported aspect ratio (e.g., 16:9), the output will default to the closest supported format. The credit cost for using external models depends on each model’s API pricing.
[Video Prompts](https://www.recraft.ai/docs/recraft-studio/video-generation/video-prompts)
[Manual editing tools](https://www.recraft.ai/docs/recraft-studio/image-editing/manual-editing-tools)
⌘I
Assistant
Responses are generated using AI and may contain mistakes.
---
# Curated styles - Recraft
> Documentation Index
> -------------------
>
> Fetch the complete documentation index at: [/docs/llms.txt](https://www.recraft.ai/docs/llms.txt)
>
> Use this file to discover all available pages before exploring further.
[Skip to main content](https://www.recraft.ai/docs/recraft-studio/styles/curated-styles#content-area)
To apply a curated style, click the **Styles button** in the prompt panel before generating your image and make sure the **Curated tab** is selected. You can browse styles created and selected by the Recraft team, apply styles you’ve saved, or select styles that have been shared with you. If you frequently use a particular style, click the **bookmark icon** in the upper right corner of the style panel. This adds the style to your library, making it easier to access in future projects.
[Overview](https://www.recraft.ai/docs/recraft-studio/styles/overview)
[How to create a custom style](https://www.recraft.ai/docs/recraft-studio/styles/custom-styles/how-to-create-a-custom-style)
⌘I
Assistant
Responses are generated using AI and may contain mistakes.
---
# Templates - Recraft
> Documentation Index
> -------------------
>
> Fetch the complete documentation index at: [/docs/llms.txt](https://www.recraft.ai/docs/llms.txt)
>
> Use this file to discover all available pages before exploring further.
[Skip to main content](https://www.recraft.ai/docs/recraft-studio/templates#content-area)
Templates help you generate structured visuals faster by starting from curated examples or applying predefined transformations to an existing image. The **Templates** panel contains two modes:
* **Collections**: pre-generated prompt + style combinations
* **Editing templates**: structured transformations applied to your uploaded image
Both are accessed from the same place.
[](https://www.recraft.ai/docs/recraft-studio/templates#how-to-access-templates)
How to access Templates
------------------------------------------------------------------------------------------------------------
Templates are available from the top navigation bar inside Recraft Studio.
1. Open any project.
2. In the top toolbar, click **Templates** (next to History and Help).
3. The Templates panel will open.
4. Choose between:
* **Collections**
* **Editing templates**
You can switch between the two tabs at any time.
[](https://www.recraft.ai/docs/recraft-studio/templates#collections)
Collections
====================================================================================
Collections are pre-generated visual examples organized by outcome type. They help you start from a proven visual direction instead of writing a prompt from scratch. Examples include:
* Lifestyle photo
* Vector illustration
* Product mockup
* Modern minimal logo
* Hand-drawn illustration
* Vector set
* Concept art
* Web design
(Available categories may change over time.) Each Collection represents:
* A curated prompt
* A selected style
* A structured visual outcome
They show you what is possible before you generate anything.
[](https://www.recraft.ai/docs/recraft-studio/templates#how-to-use-collections)
How to use Collections
----------------------------------------------------------------------------------------------------------
1. Open **Templates → Collections**.
2. Click a category (for example, _Product mockup_).
3. Select one of the example images.
You will see two options:
###
[](https://www.recraft.ai/docs/recraft-studio/templates#use-prompt)
Use prompt
Generates a new image using the same underlying prompt + style logic. The result will be similar in structure and aesthetic, but not identical.
###
[](https://www.recraft.ai/docs/recraft-studio/templates#use-as-reference)
Use as reference
Attaches the selected example to your prompt as a visual reference. You can then:
* Write your own prompt
* Combine it with the reference
* Generate a new image influenced by that layout or style
[](https://www.recraft.ai/docs/recraft-studio/templates#when-to-use-collections)
When to use Collections
------------------------------------------------------------------------------------------------------------
Use Collections when:
* You want a fast starting point
* You know the type of visual you need, but not the exact prompt
* You want structured results (mockups, posters, logos, etc.)
* You want inspiration with production-ready direction
[](https://www.recraft.ai/docs/recraft-studio/templates#editing-templates)
Editing templates
================================================================================================
Editing templates transform an existing image using predefined visual logic. Unlike Collections, which generate new images, Editing templates modify your uploaded image. They apply structured transformations behind the scenes, so you don’t need to engineer the prompt manually.
[](https://www.recraft.ai/docs/recraft-studio/templates#how-to-use-editing-templates)
How to use Editing templates
----------------------------------------------------------------------------------------------------------------------
1. Open **Templates → Editing templates**.
2. Select a template (for example, _Product photoshoot_).
3. Click **Upload your image**.
4. Choose a visual direction (if the template offers multiple looks).
5. Click **Run the template**.
The system:
* Preserves your subject
* Applies the selected transformation
* Generates a new edited version
[](https://www.recraft.ai/docs/recraft-studio/templates#types-of-editing-templates)
Types of Editing templates
------------------------------------------------------------------------------------------------------------------
Available templates may change, but generally include transformations such as:
* **Product photoshoot**: convert a product image into a studio-quality visual
* **Sketch to photo**: turn a drawing into a realistic render
* **Angles**: generate alternative perspectives of the same object
* **Apply texture**: change surface material or visual finish
* **Portrait transformations**: apply editorial lighting or stylized looks
* **Graphic treatments**: create themed or layout-based variations
Each template is optimized for a specific type of transformation.
[](https://www.recraft.ai/docs/recraft-studio/templates#when-to-use-editing-templates)
When to use Editing templates
------------------------------------------------------------------------------------------------------------------------
Use Editing templates when:
* You already have a base image
* You want structured visual transformation
* You need consistent variations
* You want faster results without iterative prompting
Editing templates provide predictable, production-ready transformations while keeping your original subject intact.
[Community](https://www.recraft.ai/docs/recraft-studio/libraries/community)
[How to export an image](https://www.recraft.ai/docs/recraft-studio/exporting-and-sharing/how-to-export-an-image)
⌘I
Assistant
Responses are generated using AI and may contain mistakes.
---
# Seamless patterns - Recraft
> Documentation Index
> -------------------
>
> Fetch the complete documentation index at: [/docs/llms.txt](https://www.recraft.ai/docs/llms.txt)
>
> Use this file to discover all available pages before exploring further.
[Skip to main content](https://www.recraft.ai/docs/recraft-studio/styles/seamless-patterns#content-area)
Recraft Studio supports seamless pattern generation for both raster and vector formats. These patterns are tileable by nature, meaning they can be repeated across large areas without noticeable edges. Seamless patterns are commonly used for website backgrounds, social media graphics, presentation visuals, textile and surface design, product packaging, and branding materials.
[](https://www.recraft.ai/docs/recraft-studio/styles/seamless-patterns#how-to-create-a-seamless-pattern)
How to create a seamless pattern
---------------------------------------------------------------------------------------------------------------------------------------------
1. Click the **Style button** in the prompt panel to open the **Styles** panel.
a. For a raster-based pattern, scroll down to **Illustration** and select **Seamless Digital**.
b. For a scalable vector pattern, scroll down to **Vector art** and select **Seamless Vector**.
2. In the prompt field, describe the pattern you want to generate. You can also adjust visual complexity using the **Specify Artistry level** slider.
a. After generation, you can use editing tools to adjust colors, shapes, layout, or iterate on variations.
3. Export your pattern to PNG, JPEG, TIFF (CMYK), SVG, PDF, or Lottie.
[Sharing a style](https://www.recraft.ai/docs/recraft-studio/styles/sharing-a-style)
[Introduction to frames](https://www.recraft.ai/docs/recraft-studio/frames/introduction-to-frames)
⌘I
Assistant
Responses are generated using AI and may contain mistakes.
---
# Sharing a style - Recraft
> Documentation Index
> -------------------
>
> Fetch the complete documentation index at: [/docs/llms.txt](https://www.recraft.ai/docs/llms.txt)
>
> Use this file to discover all available pages before exploring further.
[Skip to main content](https://www.recraft.ai/docs/recraft-studio/styles/sharing-a-style#content-area)
There are two ways to browse styles for sharing in Recraft Studio:
* From within the **canvas**, using the Styles panel
* On the standalone styles page: [recraft.ai/styles](https://www.recraft.ai/styles)
You can share styles from either location, but the sharing options differ slightly depending on whether the style is public or one you’ve created yourself.
[](https://www.recraft.ai/docs/recraft-studio/styles/sharing-a-style#how-to-share-a-style)
How to share a style
-------------------------------------------------------------------------------------------------------------------
1. Open the **Styles panel** (from the prompt panel or styles page).
2. Click on the style you want to share.
3. If it’s a public style (e.g. from the Feed), click the **three-dot menu** near the top of the page and choose:
* **Copy link to style** – generates a public URL you can share with anyone
* **Copy style ID** – for use with the Recraft API or developer workflows
4. If it’s a **style you’ve created**, click **Share style**. This opens a dialog similar to project sharing, where you can invite collaborators by email and manage their access.
Anyone with an active Recraft account can view and apply a shared style in their own projects. You can find:
* Styles **shared with you** in the **Shared** tab of the Styles panel
* Styles **you’ve shared** by revisiting the original style and checking the sharing settings
[How to delete a custom style](https://www.recraft.ai/docs/recraft-studio/styles/custom-styles/how-to-delete-a-custom-style)
[Seamless patterns](https://www.recraft.ai/docs/recraft-studio/styles/seamless-patterns)
⌘I
Assistant
Responses are generated using AI and may contain mistakes.
---
# Canvas tools - Recraft
> Documentation Index
> -------------------
>
> Fetch the complete documentation index at: [/docs/llms.txt](https://www.recraft.ai/docs/llms.txt)
>
> Use this file to discover all available pages before exploring further.
[Skip to main content](https://www.recraft.ai/docs/recraft-studio/work-area/canvas-tools#content-area)
These tools are accessible from the **side toolbar**:
[](https://www.recraft.ai/docs/recraft-studio/work-area/canvas-tools#shape-rectangle-/-ellipse-/-line-/-arrow)
Shape (Rectangle / Ellipse / Line / Arrow)
-------------------------------------------------------------------------------------------------------------------------------------------------------------
Use for annotations, diagrams, or layout prototyping.
[](https://www.recraft.ai/docs/recraft-studio/work-area/canvas-tools#text)
Text
-----------------------------------------------------------------------------------
Add and format editable text layers using Google Fonts.
[](https://www.recraft.ai/docs/recraft-studio/work-area/canvas-tools#brush)
Brush
-------------------------------------------------------------------------------------
Freehand tool with adjustable size. Useful for rough markup, masking, or collaborative notes. Adjust size with bracket keys **\[** and **\]**.
[](https://www.recraft.ai/docs/recraft-studio/work-area/canvas-tools#comment)
Comment
-----------------------------------------------------------------------------------------
Use to leave comments for collaborators.
[Selection tools](https://www.recraft.ai/docs/recraft-studio/work-area/selection-tools)
[Keyboard shortcuts](https://www.recraft.ai/docs/recraft-studio/work-area/keyboard-shortcuts)
⌘I
Assistant
Responses are generated using AI and may contain mistakes.
---
# Endpoints - Recraft
> Documentation Index
> -------------------
>
> Fetch the complete documentation index at: [/docs/llms.txt](https://www.recraft.ai/docs/llms.txt)
>
> Use this file to discover all available pages before exploring further.
[Skip to main content](https://www.recraft.ai/docs/api-reference/endpoints#content-area)
Dig into the details of the Recraft API endpoints.
[](https://www.recraft.ai/docs/api-reference/endpoints#authentication)
Authentication
-----------------------------------------------------------------------------------------
We use [Bearer](https://swagger.io/docs/specification/authentication/bearer-authentication/)
API tokens for authentication. To access your API key, log in to Recraft and [enter your profile](https://app.recraft.ai/profile/api)
. All requests should include your API key in an Authorization HTTP header as follows:
`Authorization: Bearer RECRAFT_API_TOKEN`
###
[](https://www.recraft.ai/docs/api-reference/endpoints#openai-python-library)
OpenAI Python library
Future examples will be shown using OpenAI Python library, for example, once installed, you can use the following code to be authenticated:
from openai import OpenAI
client = OpenAI(
base_url='https://external.api.recraft.ai/v1',
api_key=,
)
Since the Recraft API follows REST principles, you can interact with it using any standard HTTP client such as `curl`, as well as your preferred programming language or library.
[](https://www.recraft.ai/docs/api-reference/endpoints#generate-image)
Generate image
-----------------------------------------------------------------------------------------
Creates an image given a prompt.
POST https://external.api.recraft.ai/v1/images/generations
In addition to the general endpoint above, two specialized variants accept the same request body but constrain the allowed `model` and `style` values to a single output type:
POST https://external.api.recraft.ai/v1/images/generations/raster
POST https://external.api.recraft.ai/v1/images/generations/vector
* **`/generations/raster`** — only raster models (any model from the list above whose name does **not** end in `_vector`) and raster styles are accepted. Requests using a vector model or vector style are rejected.
* **`/generations/vector`** — only vector models (any model from the list above whose name ends in `_vector`) and vector styles are accepted. Requests using a raster model or raster style are rejected.
Use these variants when you want the server to enforce the output type — for example, in an agent or workflow that must produce only raster (or only vector) images. The base `/generations` endpoint remains available and accepts any supported model or style.
###
[](https://www.recraft.ai/docs/api-reference/endpoints#example)
Example
response = client.images.generate(
prompt='race car on a track',
)
print(response.data[0].url)
###
[](https://www.recraft.ai/docs/api-reference/endpoints#parameters)
Parameters
| Parameter | Type | Description | Compatibility |
| --- | --- | --- | --- |
| prompt (required) | string | A text description of the desired image(s). | Maximum prompt length depends on model, refer to [Appendix](https://www.recraft.ai/docs/api-reference/appendix#maximum-prompt-length) |
| n | integer or null, default is 1 | The number of images to generate, must be between 1 and 6. | All models |
| model | string or null, default is `recraftv4_1` | The model to use for image generation. | Must be one of:
`recraftv4_1`
`recraftv4_1_vector`
`recraftv4_1_pro`
`recraftv4_1_pro_vector`
`recraftv4_1_utility`
`recraftv4_1_utility_vector`
`recraftv4_1_utility_pro`
`recraftv4_1_utility_pro_vector`
`recraftv4`
`recraftv4_vector`
`recraftv4_pro`
`recraftv4_pro_vector`
`recraftv3`
`recraftv3_vector`
`recraftv2`
`recraftv2_vector` |
| style | string or null | The style of the generated images, refer to [Styles](https://www.recraft.ai/docs/api-reference/styles)
. | V2 / V3 styles |
| style\_id | UUID or null | Use a style as visual reference, refer to [Styles](https://www.recraft.ai/docs/api-reference/styles)
. | V2 / V3 styles |
| size | string or null | The size of the generated images in `WxH` or `w:h` format. If not specified, the size is auto-selected based on the prompt. | Depends on model, supported values are published in [Appendix](https://www.recraft.ai/docs/api-reference/appendix#list-of-supported-image-sizes) |
| negative\_prompt | string or null | A text description of undesired elements on an image. | V2 / V3 models |
| random\_seed | integer or null | Seed for reproducible generation. | All models |
| response\_format | string or null, default is `url` | The format in which the generated images are returned. Must be one of `url` or `b64_json`. | All models |
| text\_layout | Array of objects or null | Refer to [Text Layout](https://www.recraft.ai/docs/api-reference/endpoints#text-layout)
. | V3 models only |
| controls | object or null | A set of custom parameters to tweak generation process, refer to [Controls](https://www.recraft.ai/docs/api-reference/endpoints#controls)
. | All models, partially supported for V4 |
**Hint:** if OpenAI Python Library is used, non-standard parameters can be passed using the `extra_body` argument. For example:
response = client.images.generate(
prompt='race car on a track',
extra_body={
'style_id': style_id,
'controls': {
...
}
}
)
print(response.data[0].url)
[](https://www.recraft.ai/docs/api-reference/endpoints#create-style)
Create style
-------------------------------------------------------------------------------------
Upload a set of images to create a style reference.
POST https://external.api.recraft.ai/v1/styles
###
[](https://www.recraft.ai/docs/api-reference/endpoints#example-2)
Example
response = client.post(
path='/styles',
cast_to=object,
options={'headers': {'Content-Type': 'multipart/form-data'}},
body={'style': 'digital_illustration'},
files={'file1': open('image.png', 'rb')},
)
print(response['id'])
###
[](https://www.recraft.ai/docs/api-reference/endpoints#output)
Output
{
"id": "229b2a75-05e4-4580-85f9-b47ee521a00d",
"style": "digital_illustration",
"creation_time": "2024-01-01T00:00:00Z",
"is_private": true,
"credits": 40
}
###
[](https://www.recraft.ai/docs/api-reference/endpoints#request-body)
Request body
Upload a set of images to create a style reference.
| Parameter | Type | Description |
| --- | --- | --- |
| style (required) | string | The base style of the generated images, should be one of: `any`, `realistic_image`, `digital_illustration`, `vector_illustration`, `icon`, `logo_raster` |
| files | files | Images in PNG, JPG, or WEBP format for use as style references, sent as multipart file parts (any field name). The max number of images is 5. Total size of all images is limited to 5 MB (each file must also be under the 10 MB upload limit). Required unless `source_styles` is provided. |
| model | string or null | The transform model the style is created for, e.g. `recraftv3`, `recraftv3_vector`. |
| image\_weights | array of numbers or null | Per-image weights; the number of weights must match the number of uploaded images. |
| source\_styles | array of UUIDs or null | Existing style IDs to mix into the new style. May be used instead of, or together with, uploaded images. |
| source\_style\_weights | array of numbers or null | Per-source-style weights; the number of weights must match the number of `source_styles`. |
| prompt | string or null | Optional text prompt associated with the style. |
| mix\_policy | string or null | How sources are mixed when combining images/source styles. Must be one of `PaletteMatch`, `MaxWeight`. |
[](https://www.recraft.ai/docs/api-reference/endpoints#image-to-image)
Image to image
-----------------------------------------------------------------------------------------
Image-to-image operation tool allows you to create images similar to a given image, preserving certain aspects like composition, color, or subject identity while altering others based on the prompt. This can be used to create variations of the image or images that have similar composition to existing image. Use prompt to describe the new image and strength to define similarity level. _**Note**_: This operation is available with Recraft V3 and Recraft V4 models (raster and vector).
POST https://external.api.recraft.ai/v1/images/imageToImage
###
[](https://www.recraft.ai/docs/api-reference/endpoints#example-3)
Example
response = client.post(
path='/images/imageToImage',
cast_to=object,
options={'headers': {'Content-Type': 'multipart/form-data'}},
files={
'image': open('image.png', 'rb'),
},
body={
'prompt': 'winter',
'strength': 0.2,
},
)
print(response['data'][0]['url'])
###
[](https://www.recraft.ai/docs/api-reference/endpoints#parameters-2)
Parameters
| Parameter | Type | Description | Compatibility |
| --- | --- | --- | --- |
| image (required) | file | An image to modify, must be less than 10 MB in size, have resolution less than 16 MP, and max dimension less than 4096 pixels. PNG, JPG, WEBP, or SVG. The output format is determined by the selected model. | |
| prompt (required) | string | A text description of areas to change. | refer to [Appendix](https://www.recraft.ai/docs/api-reference/appendix#maximum-prompt-length) |
| strength (required) | float | Defines the difference with the original image, should lie in `[0, 1]`, where `0` means almost identical, and `1` means minimal similarity. | |
| n | integer or null, default is 1 | The number of images to generate, must be between 1 and 6. | |
| model | string or null, default is `recraftv4_1` | The model to use for image generation. | Must be one of the Recraft V3 / V4 models: `recraftv3`, `recraftv3_vector`, `recraftv4`, `recraftv4_vector`, `recraftv4_pro`, `recraftv4_pro_vector`, `recraftv4_1`, `recraftv4_1_vector`, `recraftv4_1_pro`, `recraftv4_1_pro_vector`, `recraftv4_1_utility`, `recraftv4_1_utility_vector`, `recraftv4_1_utility_pro`, `recraftv4_1_utility_pro_vector` |
| style | string or null | The style of the generated images, refer to [Styles](https://www.recraft.ai/docs/api-reference/styles)
. | V3 / V4 styles |
| style\_id | UUID or null | Use a style as visual reference, refer to [Styles](https://www.recraft.ai/docs/api-reference/styles)
. | V3 / V4 styles |
| random\_seed | integer or null | Seed for reproducible generation. | |
| response\_format | string or null, default is `url` | The format in which the generated images are returned. Must be one of `url` or `b64_json`. | |
| negative\_prompt | string or null | A text description of undesired elements on an image. | |
| text\_layout | Array of objects or null | Refer to [Text Layout](https://www.recraft.ai/docs/api-reference/endpoints#text-layout)
. | |
| controls | object or null | A set of custom parameters to tweak generation process, refer to [Controls](https://www.recraft.ai/docs/api-reference/endpoints#controls)
. | |
[](https://www.recraft.ai/docs/api-reference/endpoints#image-inpainting)
Image inpainting
---------------------------------------------------------------------------------------------
Inpainting lets you regenerate specific parts of an image while keeping the rest intact. This is useful for correcting details, replacing elements, or making creative changes without starting from scratch. It uses a mask to identify the areas to be filled in, where white pixels represent the regions to inpaint, and black pixels indicate the areas to keep intact, i.e. the white pixels are filled based on the input provided in the prompt. _**Note**_: This operation is available with Recraft V3, Recraft V3 Vector models only.
POST https://external.api.recraft.ai/v1/images/inpaint
###
[](https://www.recraft.ai/docs/api-reference/endpoints#example-4)
Example
response = client.post(
path='/images/inpaint',
cast_to=object,
options={'headers': {'Content-Type': 'multipart/form-data'}},
files={
'image': open('image.png', 'rb'),
'mask': open('mask.png', 'rb'),
},
body={
'prompt': 'winter',
},
)
print(response['data'][0]['url'])
###
[](https://www.recraft.ai/docs/api-reference/endpoints#parameters-3)
Parameters
Body of a request should contain an image file (PNG, JPG, WEBP, or SVG) and a mask (PNG, JPG, or WEBP), passed as content type `'multipart/form-data'`. The image must be no more than 10 MB in size, have resolution no more than 16 MP, max dimension no more than 4096 pixels and min dimension no less than 256 pixels. The output format (raster or vector) is determined by the selected model.
| Parameter | Type | Description | Compatibility |
| --- | --- | --- | --- |
| image (required) | file | An image to modify, must be less than 10 MB in size, have resolution less than 16 MP, and max dimension less than 4096 pixels. | |
| mask (required) | file | An image encoded in **grayscale color mode**, used to define the specific regions of an image that need modification. The white pixels represent the parts of the image that will be inpainted, while black pixels indicate the parts of the image that will remain unchanged. Should have exactly the same size as the image. Each pixel of the image should be either pure black (value `0`) or pure white (value `255`). | |
| prompt (required) | string | A text description of areas to change. | refer to [Appendix](https://www.recraft.ai/docs/api-reference/appendix#maximum-prompt-length) |
| n | integer or null, default is 1 | The number of images to generate, must be between 1 and 6. | |
| model | string or null, default is `recraftv3` | The model to use for image generation. | Must be one of: `recraftv3`, `recraftv3_vector` |
| style | string or null | The style of the generated images, refer to [Styles](https://www.recraft.ai/docs/api-reference/styles)
. | V3 styles only |
| style\_id | UUID or null | Use a style as visual reference, refer to [Styles](https://www.recraft.ai/docs/api-reference/styles)
. | V3 styles only |
| response\_format | string or null, default is `url` | The format in which the generated images are returned. Must be one of `url` or `b64_json`. | |
| negative\_prompt | string or null | A text description of undesired elements on an image. | |
| text\_layout | Array of objects or null | Refer to [Text Layout](https://www.recraft.ai/docs/api-reference/endpoints#text-layout)
. | |
| controls | object or null | A set of custom parameters to tweak generation process, refer to [Controls](https://www.recraft.ai/docs/api-reference/endpoints#controls)
. | |
[](https://www.recraft.ai/docs/api-reference/endpoints#image-outpainting)
Image outpainting
-----------------------------------------------------------------------------------------------
Outpainting extends an image beyond its original boundaries by generating new content around it. This is useful for changing the aspect ratio, adding scenery, or zooming out to reveal more of the scene while keeping the original image intact. The area to be generated can be specified either by per-side pixel margins via `expand_left`, `expand_right`, `expand_top`, `expand_bottom` (which extend the image by the given amount on each side), or by a target `size` (which places the source image inside the resulting image of the given dimensions); these two options cannot be used together. After that, it is also possible to specify `zoom_out_percentage`, which scales the source image down relative to the resulting image by the given percentage and can be combined with either option or used on its own. At least one of `size`, `expand_*`, or `zoom_out_percentage` must be specified. _**Note**_: This operation is available with Recraft V3, Recraft V3 Vector models only.
POST https://external.api.recraft.ai/v1/images/outpaint
###
[](https://www.recraft.ai/docs/api-reference/endpoints#example-5)
Example
response = client.post(
path='/images/outpaint',
cast_to=object,
options={'headers': {'Content-Type': 'multipart/form-data'}},
files={
'image': open('image.png', 'rb'),
},
body={
'prompt': 'a mountain landscape',
'size': '16:9',
'zoom_out_percentage': 25.0,
},
)
print(response['data'][0]['url'])
###
[](https://www.recraft.ai/docs/api-reference/endpoints#parameters-4)
Parameters
Body of a request should contain an image file in PNG, JPG, WEBP, or SVG format and parameters passed as content type `'multipart/form-data'`. The image must be no more than 10 MB in size, have resolution no more than 16 MP, max dimension no more than 4096 pixels and min dimension no less than 256 pixels. The resulting image dimensions (after applying `expand_*`) must not exceed 4096 pixels on either side. The output format (raster or vector) is determined by the selected model.
| Parameter | Type | Description | Compatibility |
| --- | --- | --- | --- |
| image (required) | file | An image to extend, must be less than 10 MB in size, have resolution less than 16 MP, and max dimension less than 4096 pixels. | |
| prompt (required) | string | A text description of the content to generate in the extended area. | refer to [Appendix](https://www.recraft.ai/docs/api-reference/appendix#maximum-prompt-length) |
| expand\_left | integer or null | Number of pixels to add to the left side of the image, must be in range `[0, 4096]`. Cannot be combined with `size`. | |
| expand\_right | integer or null | Number of pixels to add to the right side of the image, must be in range `[0, 4096]`. Cannot be combined with `size`. | |
| expand\_top | integer or null | Number of pixels to add to the top side of the image, must be in range `[0, 4096]`. Cannot be combined with `size`. | |
| expand\_bottom | integer or null | Number of pixels to add to the bottom side of the image, must be in range `[0, 4096]`. Cannot be combined with `size`. | |
| size | string or null | The size of the resulting outpainted image in `WxH` or `w:h` format. The source image is placed inside the resulting image. Cannot be combined with `expand_*`. | Depends on model, supported values are published in [Appendix](https://www.recraft.ai/docs/api-reference/appendix#list-of-supported-image-sizes) |
| zoom\_out\_percentage | float or null, default is `0` | Percentage by which the source image is scaled down before outpainting, must be in range `[0, 100)`. Higher values produce more surrounding context. Can be used on its own or combined with `size` or `expand_*`. | |\
| n | integer or null, default is 1 | The number of images to generate, must be between 1 and 6. | |\
| model | string or null, default is `recraftv3` | The model to use for image generation. | Must be one of: `recraftv3`, `recraftv3_vector` |\
| style | string or null | The style of the content generated in the extended area, refer to [Styles](https://www.recraft.ai/docs/api-reference/styles)
. | V3 styles only |\
| style\_id | UUID or null | Use a style as visual reference for the content generated in the extended area, refer to [Styles](https://www.recraft.ai/docs/api-reference/styles)
. | V3 styles only |\
| response\_format | string or null, default is `url` | The format in which the generated images are returned. Must be one of `url` or `b64_json`. | |\
| negative\_prompt | string or null | A text description of undesired elements on an image. | |\
| text\_layout | Array of objects or null | Refer to [Text Layout](https://www.recraft.ai/docs/api-reference/endpoints#text-layout)
. | |\
| controls | object or null | A set of custom parameters to tweak generation process, refer to [Controls](https://www.recraft.ai/docs/api-reference/endpoints#controls)
. | |\
\
[](https://www.recraft.ai/docs/api-reference/endpoints#replace-background)\
\
Replace background\
-------------------------------------------------------------------------------------------------\
\
Replace Background operation detects background of an image and modifies it according to given prompt. _**Note**_: This operation is available with Recraft V3, Recraft V3 Vector models only.\
\
POST https://external.api.recraft.ai/v1/images/replaceBackground\
\
\
### \
\
[](https://www.recraft.ai/docs/api-reference/endpoints#example-6)\
\
Example\
\
response = client.post(\
path='/images/replaceBackground',\
cast_to=object,\
options={'headers': {'Content-Type': 'multipart/form-data'}},\
files={\
'image': open('image.png', 'rb'),\
},\
body={\
'prompt': 'winter',\
},\
)\
print(response['data'][0]['url'])\
\
\
### \
\
[](https://www.recraft.ai/docs/api-reference/endpoints#parameters-5)\
\
Parameters\
\
Body of a request should contain an image file in PNG, JPG, WEBP, or SVG format and parameters passed as content type `'multipart/form-data'`. The image must be no more than 10 MB in size, have resolution no more than 16 MP, max dimension no more than 4096 pixels and min dimension no less than 256 pixels. The output format (raster or vector) is determined by the selected model.\
\
| Parameter | Type | Description | Compatibility |\
| --- | --- | --- | --- |\
| image (required) | file | An image to modify, must be less than 10 MB in size, have resolution less than 16 MP, and max dimension less than 4096 pixels. | |\
| prompt (required) | string | A text description of areas to change. | refer to [Appendix](https://www.recraft.ai/docs/api-reference/appendix#maximum-prompt-length) |\
| n | integer or null, default is 1 | The number of images to generate, must be between 1 and 6. | |\
| model | string or null, default is `recraftv3` | The model to use for image generation. | Must be one of: `recraftv3`, `recraftv3_vector` |\
| style | string or null | The style of the generated images, refer to [Styles](https://www.recraft.ai/docs/api-reference/styles)
. | V3 styles only |\
| style\_id | UUID or null | Use a style as visual reference, refer to [Styles](https://www.recraft.ai/docs/api-reference/styles)
. | V3 styles only |\
| response\_format | string or null, default is `url` | The format in which the generated images are returned. Must be one of `url` or `b64_json`. | |\
| negative\_prompt | string or null | A text description of undesired elements on an image. | |\
| text\_layout | Array of objects or null | Refer to [Text Layout](https://www.recraft.ai/docs/api-reference/endpoints#text-layout)
. | |\
| controls | object or null | A set of custom parameters to tweak generation process, refer to [Controls](https://www.recraft.ai/docs/api-reference/endpoints#controls)
. | |\
\
[](https://www.recraft.ai/docs/api-reference/endpoints#generate-background)\
\
Generate background\
---------------------------------------------------------------------------------------------------\
\
Generate Background operation generates a background for a given image, based on a prompt and a mask that specifies the regions to fill. _**Note**_: This operation is available with Recraft V3, Recraft V3 Vector models only.\
\
POST https://external.api.recraft.ai/v1/images/generateBackground\
\
\
### \
\
[](https://www.recraft.ai/docs/api-reference/endpoints#example-7)\
\
Example\
\
response = client.post(\
path='/images/generateBackground',\
cast_to=object,\
options={'headers': {'Content-Type': 'multipart/form-data'}},\
files={\
'image': open('image.png', 'rb'),\
'mask': open('mask.png', 'rb'),\
},\
body={\
'prompt': 'winter',\
},\
)\
print(response['data'][0]['url'])\
\
\
### \
\
[](https://www.recraft.ai/docs/api-reference/endpoints#parameters-6)\
\
Parameters\
\
Body of a request should contain an image file (PNG, JPG, WEBP, or SVG) and a mask file (PNG, JPG, or WEBP), passed as content type `'multipart/form-data'`. The image must be no more than 10 MB in size, have resolution no more than 16 MP, max dimension no more than 4096 pixels and min dimension no less than 256 pixels. The output format (raster or vector) is determined by the selected model.\
\
| Parameter | Type | Description | Compatibility |\
| --- | --- | --- | --- |\
| image (required) | file | An image to modify, must be less than 10 MB in size, have resolution less than 16 MP, and max dimension less than 4096 pixels. | |\
| mask (required) | file | An image encoded in **grayscale color mode**, used to define the specific regions of an image that need modification. The white pixels represent the parts of the image that will be inpainted, while black pixels indicate the parts of the image that will remain unchanged. Should have exactly the same size as the image. Each pixel of the image should be either pure black (value `0`) or pure white (value `255`). | |\
| prompt (required) | string | A text description of areas to change. | refer to [Appendix](https://www.recraft.ai/docs/api-reference/appendix#maximum-prompt-length) |\
| n | integer or null, default is 1 | The number of images to generate, must be between 1 and 6. | |\
| model | string or null, default is `recraftv3` | The model to use for image generation. | Must be one of: `recraftv3`, `recraftv3_vector` |\
| style | string or null | The style of the generated images, refer to [Styles](https://www.recraft.ai/docs/api-reference/styles)
. | V3 styles only |\
| style\_id | UUID or null | Use a style as visual reference, refer to [Styles](https://www.recraft.ai/docs/api-reference/styles)
. | V3 styles only |\
| response\_format | string or null, default is `url` | The format in which the generated images are returned. Must be one of `url` or `b64_json`. | |\
| negative\_prompt | string or null | A text description of undesired elements on an image. | |\
| text\_layout | Array of objects or null | Refer to [Text Layout](https://www.recraft.ai/docs/api-reference/endpoints#text-layout)
. | |\
| controls | object or null | A set of custom parameters to tweak generation process, refer to [Controls](https://www.recraft.ai/docs/api-reference/endpoints#controls)
. | |\
\
[](https://www.recraft.ai/docs/api-reference/endpoints#vectorize-image)\
\
Vectorize image\
-------------------------------------------------------------------------------------------\
\
Converts a given raster image to SVG format.\
\
POST https://external.api.recraft.ai/v1/images/vectorize\
\
\
### \
\
[](https://www.recraft.ai/docs/api-reference/endpoints#example-8)\
\
Example\
\
response = client.post(\
path='/images/vectorize',\
cast_to=object,\
options={'headers': {'Content-Type': 'multipart/form-data'}},\
files={'file': open('image.png', 'rb')},\
)\
print(response['image']['url'])\
\
\
### \
\
[](https://www.recraft.ai/docs/api-reference/endpoints#parameters-7)\
\
**Parameters**\
\
Body of a request should be a file in PNG, JPG or WEBP format and parameters passed as content type `'multipart/form-data'`. The image must be no more than 10 MB in size, have resolution no more than 16 MP, max dimension no more than 4096 pixels and min dimension no less than 256 pixels.\
\
| Parameter | Type | Description |\
| --- | --- | --- |\
| response\_format | string or null, default is `url` | The format in which the generated images are returned. Must be one of `url` or `b64_json`. |\
\
[](https://www.recraft.ai/docs/api-reference/endpoints#remove-background)\
\
Remove background\
-----------------------------------------------------------------------------------------------\
\
Removes background of a given image. Accepts raster (PNG, JPG, WEBP) or SVG input. When the input is an SVG, the result is returned as an SVG (vector output); raster input returns a raster image.\
\
POST https://external.api.recraft.ai/v1/images/removeBackground\
\
\
### \
\
[](https://www.recraft.ai/docs/api-reference/endpoints#example-9)\
\
Example\
\
response = client.post(\
path='/images/removeBackground',\
cast_to=object,\
options={'headers': {'Content-Type': 'multipart/form-data'}},\
files={'file': open('image.png', 'rb')},\
)\
print(response['image']['url'])\
\
\
### \
\
[](https://www.recraft.ai/docs/api-reference/endpoints#parameters-8)\
\
**Parameters**\
\
Body of a request should be a file in PNG, JPG, WEBP, or SVG format and parameters passed as content type `'multipart/form-data'`. The image must be no more than 10 MB in size, have resolution no more than 16 MP, max dimension no more than 4096 pixels and min dimension no less than 256 pixels. SVG inputs smaller than the 256 px minimum are scaled up before processing; SVGs exceeding the max dimension/resolution, and unsafe SVGs, are rejected.\
\
| Parameter | Type | Description |\
| --- | --- | --- |\
| response\_format | string or null, default is `url` | The format in which the generated images are returned. Must be one of `url` or `b64_json`. |\
\
[](https://www.recraft.ai/docs/api-reference/endpoints#crisp-upscale)\
\
Crisp upscale\
---------------------------------------------------------------------------------------\
\
Enhances a given raster image using ‘crisp upscale’ tool, increasing image resolution, making the image sharper and cleaner.\
\
POST https://external.api.recraft.ai/v1/images/crispUpscale\
\
\
### \
\
[](https://www.recraft.ai/docs/api-reference/endpoints#example-10)\
\
Example\
\
response = client.post(\
path='/images/crispUpscale',\
cast_to=object,\
options={'headers': {'Content-Type': 'multipart/form-data'}},\
files={'file': open('image.png', 'rb')},\
)\
print(response['image']['url'])\
\
\
### \
\
[](https://www.recraft.ai/docs/api-reference/endpoints#request-body-2)\
\
Request body\
\
Body of a request should be a file in PNG, JPG or WEBP format and parameters passed as content type `multipart/form-data`. The image must be no more than 10 MB in size, have resolution no more than 16 MP, max dimension no more than 4096 pixels and min dimension no less than 32 pixels.\
\
| Parameter | Type | Description |\
| --- | --- | --- |\
| response\_format | string or null, default is `url` | The format in which the generated images are returned. Must be one of `url` or `b64_json`. |\
\
[](https://www.recraft.ai/docs/api-reference/endpoints#creative-upscale)\
\
Creative upscale\
---------------------------------------------------------------------------------------------\
\
Enhances a given raster image using ‘creative upscale’ tool, boosting resolution with a focus on refining small details and faces.\
\
POST https://external.api.recraft.ai/v1/images/creativeUpscale\
\
\
### \
\
[](https://www.recraft.ai/docs/api-reference/endpoints#example-11)\
\
Example\
\
response = client.post(\
path='/images/creativeUpscale',\
cast_to=object,\
options={'headers': {'Content-Type': 'multipart/form-data'}},\
files={'file': open('image.png', 'rb')},\
)\
print(response['image']['url'])\
\
\
### \
\
[](https://www.recraft.ai/docs/api-reference/endpoints#request-body-3)\
\
Request body\
\
Body of a request should be a file in PNG, JPG or WEBP format and parameters passed as content type `multipart/form-data`. The image must be no more than 10 MB in size, have resolution no more than 16 MP, max dimension no more than 4096 pixels and min dimension no less than 256 pixels.\
\
| Parameter | Type | Description |\
| --- | --- | --- |\
| response\_format | string or null, default is `url` | The format in which the generated images are returned. Must be one of `url` or `b64_json`. |\
\
[](https://www.recraft.ai/docs/api-reference/endpoints#erase-region)\
\
Erase region\
-------------------------------------------------------------------------------------\
\
Erases a region of a given raster image following a given mask, where white pixels represent the regions to erase, and black pixels indicate the areas to keep intact.\
\
POST https://external.api.recraft.ai/v1/images/eraseRegion\
\
\
### \
\
[](https://www.recraft.ai/docs/api-reference/endpoints#example-12)\
\
Example\
\
response = client.post(\
path='/images/eraseRegion',\
cast_to=object,\
options={'headers': {'Content-Type': 'multipart/form-data'}},\
files={'image': open('image.png', 'rb'), 'mask': open('mask.png', 'rb')},\
)\
print(response['image']['url'])\
\
\
### \
\
[](https://www.recraft.ai/docs/api-reference/endpoints#request-body-4)\
\
Request body\
\
Body of a request should contain a file (PNG, JPG, WEBP, or SVG) and a mask (PNG, JPG, or WEBP), passed as content type `multipart/form-data`. The images must be no more than 10 MB in size, have resolution no more than 16 MP, max dimension no more than 4096 pixels and min dimension no less than 256 pixels. The mask and image must have the same dimensions. When the input is an SVG, the result is returned as an SVG; a raster input returns a raster image.\
\
| Parameter | Type | Description |\
| --- | --- | --- |\
| image (required) | file | An image to modify, must be less than 10 MB in size, have resolution less than 16 MP, and max dimension less than 4096 pixels. |\
| mask (required) | file | An image encoded in **grayscale color mode**, used to define the specific regions of the image to be erased. The white pixels represent the parts of the image that will be erased, while black pixels indicate the parts of the image that will remain unchanged. Should have exactly the same size as the image. Each pixel of the image should be either pure black (value `0`) or pure white (value `255`). |\
| response\_format | string or null, default is `url` | The format in which the generated images are returned. Must be one of `url` or `b64_json`. |\
\
[](https://www.recraft.ai/docs/api-reference/endpoints#remix-image)\
\
Remix image\
-----------------------------------------------------------------------------------\
\
Remix generates new versions of an image while keeping the overall concept intact. Each remix introduces slight differences in elements like character appearance, object position, or scene composition. The Remix function does not use a prompt. Instead, it uses the visual content of the original image to generate alternatives in different aspect ratios.\
\
\
POST https://external.api.recraft.ai/v1/images/variateImage\
\
\
### \
\
[](https://www.recraft.ai/docs/api-reference/endpoints#example-13)\
\
Example\
\
response = client.post(\
path='/images/variateImage',\
cast_to=object,\
options={'headers': {'Content-Type': 'multipart/form-data'}},\
files={'image': open('image.png', 'rb')},\
body={'size': '1024x1024'}\
)\
print(response['data'][0]['url'])\
\
\
### \
\
[](https://www.recraft.ai/docs/api-reference/endpoints#parameters-9)\
\
Parameters\
\
The request body must be a file in PNG, JPG, WEBP, or SVG format, submitted with the content type ‘multipart/form-data’. The image must not exceed 10 MB in size, with a maximum resolution of 16 MP, a maximum dimension of 4096 px, and a minimum dimension of 256 px. The output format (raster or vector) is determined by the selected model.\
\
| Parameter | Type | Description |\
| --- | --- | --- |\
| image (required) | file | The input image in PNG, WEBP, JPEG, or SVG format. |\
| size (required) | string | The size of the generated images in `WxH` or `w:h` format, supported values are published in [Appendix](https://www.recraft.ai/docs/api-reference/appendix#list-of-supported-image-sizes)
. |\
| n | integer or null, default is 1 | Number of variations to generate \[1–6\]. |\
| model | string or null | The model to use for generation. The output format (raster or vector) is determined by the selected model. |\
| random\_seed | integer or null | Optional random seed for reproducibility. |\
| response\_format | string or null, default is `url` | The format in which the generated images are returned. Must be one of `url` or `b64_json`. |\
\
[](https://www.recraft.ai/docs/api-reference/endpoints#explore)\
\
Explore\
---------------------------------------------------------------------------\
\
Generates a set of images based on a prompt, designed for visual exploration and discovery of diverse results.\
\
POST https://external.api.recraft.ai/v1/images/explore\
\
\
### \
\
[](https://www.recraft.ai/docs/api-reference/endpoints#example-14)\
\
Example\
\
response = client.post(\
path='/images/explore',\
cast_to=object,\
body={\
'prompt': 'race car on a track',\
},\
)\
print(response['data'][0]['url'])\
\
\
### \
\
[](https://www.recraft.ai/docs/api-reference/endpoints#parameters-10)\
\
Parameters\
\
| Parameter | Type | Description |\
| --- | --- | --- |\
| prompt (required) | string | A text description of the desired image(s). Maximum prompt length depends on model, refer to [Appendix](https://www.recraft.ai/docs/api-reference/appendix#maximum-prompt-length)
. |\
| model | string or null, default is `recraftv4_1` | The model to use for image generation. Must be one of: `recraftv4_1`, `recraftv4_1_vector`, `recraftv4_1_pro`, `recraftv4_1_pro_vector`, `recraftv4`, `recraftv4_vector`, `recraftv4_pro`, `recraftv4_pro_vector`. |\
| style | string or null | The style of the generated images, refer to [Styles](https://www.recraft.ai/docs/api-reference/styles)
. |\
| style\_id | UUID or null | Use a style as visual reference, refer to [Styles](https://www.recraft.ai/docs/api-reference/styles)
. |\
| size | string or null, default is `1:1` | The size of the generated images in `WxH` or `w:h` format. Depends on model, supported values are published in [Appendix](https://www.recraft.ai/docs/api-reference/appendix#list-of-supported-image-sizes)
. |\
| response\_format | string or null, default is `url` | The format in which the generated images are returned. Must be one of `url` or `b64_json`. |\
| controls | object or null | A set of custom parameters to tweak generation process, refer to [Controls](https://www.recraft.ai/docs/api-reference/endpoints#controls)
. Supports `prompt_to_image` controls. |\
\
[](https://www.recraft.ai/docs/api-reference/endpoints#explore-similar)\
\
Explore similar\
-------------------------------------------------------------------------------------------\
\
Start from an image you already created and generate new images that are visually similar to the given source image. The source image **must** be one previously generated via the Explore endpoint. The `similarity` parameter controls how closely the results should resemble the source.\
\
POST https://external.api.recraft.ai/v1/images/explore/similar\
\
\
### \
\
[](https://www.recraft.ai/docs/api-reference/endpoints#example-15)\
\
Example\
\
response = client.post(\
path='/images/explore/similar',\
cast_to=object,\
body={\
'source_image_id': 'c18a1988-45e7-4c00-82c4-4ad7d3dbce3a',\
'similarity': 5,\
},\
)\
print(response['data'][0]['url'])\
\
\
### \
\
[](https://www.recraft.ai/docs/api-reference/endpoints#parameters-11)\
\
Parameters\
\
| Parameter | Type | Description |\
| --- | --- | --- |\
| source\_image\_id (required) | UUID | The ID of the source image to use as a visual reference for exploration. |\
| similarity (required) | integer | Defines how closely the generated images should resemble the source image. The value should be between `1` and `5`: `1` — a little bit similar, `2` — moderately similar, `3` — quite similar, `4` — very similar, `5` — extremely similar. |\
| response\_format | string or null, default is `url` | The format in which the generated images are returned. Must be one of `url` or `b64_json`. |\
\
[](https://www.recraft.ai/docs/api-reference/endpoints#enhance-prompt)\
\
Enhance prompt\
-----------------------------------------------------------------------------------------\
\
Expands a short prompt into a richer, more detailed description with added visual context, style cues, and composition details. Use the enhanced prompt in any image generation endpoint to produce more vivid and accurate results.\
\
POST https://external.api.recraft.ai/v1/prompts/enhance\
\
\
### \
\
[](https://www.recraft.ai/docs/api-reference/endpoints#example-16)\
\
Example\
\
response = client.post(\
path='/prompts/enhance',\
cast_to=object,\
body={'prompt': 'race car on a track'},\
)\
print(response['enhanced_prompt'])\
\
\
### \
\
[](https://www.recraft.ai/docs/api-reference/endpoints#parameters-12)\
\
Parameters\
\
| Parameter | Type | Description |\
| --- | --- | --- |\
| prompt (required) | string | The original prompt to enhance. Must not be empty and must not exceed `2000` characters. |\
\
[](https://www.recraft.ai/docs/api-reference/endpoints#get-user-information)\
\
Get user information\
-----------------------------------------------------------------------------------------------------\
\
Returns information of the current user including credits balance.\
\
GET https://external.api.recraft.ai/v1/users/me\
\
\
### \
\
[](https://www.recraft.ai/docs/api-reference/endpoints#example-17)\
\
Example\
\
response = client.get(path='/users/me', cast_to=object)\
print(response)\
\
\
### \
\
[](https://www.recraft.ai/docs/api-reference/endpoints#output-2)\
\
Output\
\
{\
"credits": 1000,\
"email": "test@example.com",\
"id": "c18a1988-45e7-4c00-82c4-4ad7d3dbce3a",\
"name": "Recraft Test"\
}\
\
\
[](https://www.recraft.ai/docs/api-reference/endpoints#auxiliary)\
\
Auxiliary\
-------------------------------------------------------------------------------\
\
### \
\
[](https://www.recraft.ai/docs/api-reference/endpoints#controls)\
\
Controls\
\
The generation process can be adjusted with a number of tweaks.\
\
| Parameter | Type | Description | Compatibility |\
| --- | --- | --- | --- |\
| colors | array of color definitions | An array of preferable colors. | All models |\
| background\_color | color definition | Use the given color as a desired background color. | All models |\
| artistic\_level | integer or null | Defines the artistic tone of your image. At a simple level, the person looks straight at the camera in a static and clean style. Dynamic and eccentric levels introduce movement and creativity. The value should be in the range `[0..5]`. | V3 models only |\
| no\_text | bool | Do not embed text layouts. | V3 models only |\
\
#### \
\
[](https://www.recraft.ai/docs/api-reference/endpoints#colors)\
\
Colors\
\
Color type is defined as an object with the following fields\
\
| Parameter | Description |\
| --- | --- |\
| rgb (required) | An array of 3 integer values in range of `0...255` defining RGB color model. |\
| weight | An optional number in range `0.0...1.0` indicating the relative preference of this color. The sum of weights across all `colors` must not exceed `1.0`. |\
\
**Example**\
\
response = client.images.generate(\
prompt='race car on a track',\
extra_body={\
'controls': {\
'colors': [\
{'rgb': [0, 255, 0]}\
]\
}\
}\
)\
print(response.data[0].url)\
\
\
### \
\
[](https://www.recraft.ai/docs/api-reference/endpoints#text-layout)\
\
Text Layout\
\
Text layout is used to define spatial and textual attributes for individual text elements. Each text element consists of an individual word and its bounding box (bbox). This feature is supported by Recraft V3 and Recraft V3 Vector models only.\
\
| Parameter | Description |\
| --- | --- |\
| text (required) | A single word containing only supported characters. |\
| bbox (required) | A bounding box representing a 4-angled polygon. Each point in the polygon is defined by relative coordinates. |\
\
**Bounding box**: The bounding box (bbox) is a list of 4 points representing a 4-angled figure (not necessarily a rectangle). Each point specifies its coordinates relative to the layout dimensions, where (0, 0) is the top-left corner, (1, 1) is the bottom-right corner. **Coordinates**: Coordinates are **relative** to the layout dimensions. Coordinates can extend beyond the \[0, 1\] range, such values indicate that the shape will be cropped. **Points**: The bounding box must always have **exactly 4 points**. Each point is an array of two floats \[x, y\] representing the relative position. **Supported characters** The `text` field must contain a single word composed only of the following characters:\
\
! " # $ % & ' ( ) * + , - . / \
0 1 2 3 4 5 6 7 8 9 \
: ; < > ? @ \
A B C D E F G H I J K L M N O P Q R S T U V W X Y Z \
_ { } \
Ø Đ Ħ Ł Ŋ Ŧ \
Α Β Ε Ζ Η Ι Κ Μ Ν Ο Ρ Τ Υ Χ \
І \
А В Е К М Н О Р С Т У Х \
ß ẞ\
\
\
\
Any character not listed above will result in validation errors. **Example**\
\
response = client.images.generate(\
prompt="cute red panda with a sign",\
style="Illustration",\
extra_body={\
"text_layout": [\
{\
"text": "Recraft",\
"bbox": [[0.3, 0.45], [0.6, 0.45], [0.6, 0.55], [0.3, 0.55]],\
},\
{\
"text": "AI",\
"bbox": [[0.62, 0.45], [0.70, 0.45], [0.70, 0.55], [0.62, 0.55]],\
},\
]\
},\
)\
print(response.data[0].url)\
\
\
[Getting started](https://www.recraft.ai/docs/api-reference/getting-started)\
[Examples](https://www.recraft.ai/docs/api-reference/examples)\
\
⌘I\
\
Assistant\
\
Responses are generated using AI and may contain mistakes.
---
# Interface overview - Recraft
> Documentation Index
> -------------------
>
> Fetch the complete documentation index at: [/docs/llms.txt](https://www.recraft.ai/docs/llms.txt)
>
> Use this file to discover all available pages before exploring further.
[Skip to main content](https://www.recraft.ai/docs/recraft-studio/interface-overview#content-area)
This product walkthrough highlights the three available session layouts, explains how Manual, Agentic, and Exploration modes differ, and shows where to configure models, styles, and generation settings. It also demonstrates how generated images connect to on-canvas tools such as background removal, edit area, vectorization, and mockups, and how to bring images to life using the built-in video generation tools.
[](https://www.recraft.ai/docs/recraft-studio/interface-overview#learn-more)
Learn more
-------------------------------------------------------------------------------------------
* [Quick start](https://www.recraft.ai/docs/recraft-studio/quick-start)
: generate your first images step by step
* [Agentic mode](https://www.recraft.ai/docs/recraft-studio/image-generation/agentic-mode)
: learn conversational, multi-step generation
* [Exploration mode](https://www.recraft.ai/docs/recraft-studio/image-generation/exploration-mode)
: rapid visual discovery with minimal prompting
* [Prompt panel](https://www.recraft.ai/docs/recraft-studio/image-generation/prompt-panel)
: configure prompts, models, and generation settings
* [Context panel](https://www.recraft.ai/docs/recraft-studio/image-generation/context-panel)
: manage generation tools in Session mode
* [Editing tools](https://www.recraft.ai/docs/recraft-studio/image-editing/editing-images-with-natural-language)
: edit images with natural language
* [Mockups](https://www.recraft.ai/docs/recraft-studio/mockups/how-to-create-a-mockup)
: place designs onto realistic product surfaces
* [Styles](https://www.recraft.ai/docs/recraft-studio/styles/overview)
: apply and create consistent visual styles
* [Video generation](https://www.recraft.ai/docs/recraft-studio/video-generation/how-to-generate-a-video)
: how to generate a video
[Quick start](https://www.recraft.ai/docs/recraft-studio/quick-start)
[Interface language](https://www.recraft.ai/docs/recraft-studio/interface-language)
⌘I
Assistant
Responses are generated using AI and may contain mistakes.
---
# Overview - Recraft
> Documentation Index
> -------------------
>
> Fetch the complete documentation index at: [/docs/llms.txt](https://www.recraft.ai/docs/llms.txt)
>
> Use this file to discover all available pages before exploring further.
[Skip to main content](https://www.recraft.ai/docs/recraft-studio/styles/overview#content-area)
Styles define the visual characteristics of your generated images. You can choose from a wide range of curated styles categorized by type, such as photorealism, illustration, vector icon, or logo, or create your own using reference images.
[](https://www.recraft.ai/docs/recraft-studio/styles/overview#the-styles-panel)
The Styles panel
----------------------------------------------------------------------------------------------------
The Styles panel includes several tabs and filters to help you browse and manage styles. There are two ways to open the Styles panel:
* Select **Style** in the prompt panel
* From within a canvas, click the **Recraft home menu icon** and select [**Styles**](https://www.recraft.ai/styles)
from the dropdown menu.
Styles offers several options:
* **Feed**: An “infinite style library” that shows AI-generated styles. You can search using descriptive terms like _“comics”_, _“3D”_, or _“line art”_, and Recraft will surface visually similar styles — even if the style names don’t exactly match.
* **My styles**: Styles you’ve personally created and saved. (Note: This is distinct from the “Saved” tab to avoid confusion.)
* **Saved**: Styles created by Recraft or other Recraft users that you’ve saved for reuse.
* **Shared**: Styles that have been shared with you by other users. For example, if a teammate or friend sends you a style link, it will appear here.
* **Display filter**: Use the dropdown to filter styles by image type (e.g., Illustration, Vector art, Photorealism).
* **Search**: In most tabs, you can search by **style name**. In the Feed, search terms like _“comic”_ or _“3D”_ will return styles with similar visual qualities, even if they have different names.
[](https://www.recraft.ai/docs/recraft-studio/styles/overview#style-detail-view)
Style detail view
------------------------------------------------------------------------------------------------------
Click on a style to view more information. From here, you can:
* View sample images generated in that style or similar styles
* Click on any image to view its metadata (prompt, style name, and model), add it to your favorites, copy a link, or download it
* Browse related styles for additional inspiration
[Upscaling](https://www.recraft.ai/docs/recraft-studio/format-conversions-and-scaling/upscaling)
[Curated styles](https://www.recraft.ai/docs/recraft-studio/styles/curated-styles)
⌘I
Assistant
Responses are generated using AI and may contain mistakes.
---
# Prompting with Recraft V4 - Recraft
> Documentation Index
> -------------------
>
> Fetch the complete documentation index at: [/docs/llms.txt](https://www.recraft.ai/docs/llms.txt)
>
> Use this file to discover all available pages before exploring further.
[Skip to main content](https://www.recraft.ai/docs/prompt-engineering-guide/prompting-with-recraft-v4#content-area)
The model is designed to operate across different levels of control while consistently delivering outputs aligned with design-level quality and visual intent. You can describe intent briefly or define constraints in detail — both approaches are valid and produce stable results.
* V4 accurately follows long, highly detailed prompts with multiple constraints.
* V4 produces coherent, usable results from very short prompts.
* V4 performs reliably in vector illustration and logo systems.
* V4 generates stylized illustrations with clear silhouette, depth, and visual hierarchy.
* V4 handles 3D visuals with consistent volume and material definition.
* V4 works with text predictably, including multi-language text.
* V4 delivers refined, designer-level photorealism when realism is required.
In some cases, a short prompt is sufficient to explore form, mood, or composition. In others, longer prompts allow you to define structure, style systems, typography behavior, or production constraints.This guide focuses on practical usage: how prompt length, structure, and level of detail affect output — and how to choose the appropriate approach for different design tasks.
[](https://www.recraft.ai/docs/prompt-engineering-guide/prompting-with-recraft-v4#short-prompts-%E2%86%92-interpretive-mode)
Short Prompts → Interpretive Mode
------------------------------------------------------------------------------------------------------------------------------------------------------------------
Recraft is capable of making informed aesthetic decisions when provided with minimal input. **Examples**
Short Prompt #1
“_Fashion couple portrait, close up._”
Short Prompt #2
“_Fashion portrait, close up._”
Short Prompt #3
“Fashion man portrait, close up.”
[](https://www.recraft.ai/docs/prompt-engineering-guide/prompting-with-recraft-v4#why-this-works)
Why this works:
---------------------------------------------------------------------------------------------------------------------
_Even minimal prompts produce:_
* Balanced framing
* Controlled lighting
* Clean composition
* Cohesive styling
Recraft fills in missing structure using internal design logic. _When to use short prompts:_
* Early-stage exploration
* Mood discovery
* Concept sketching
* Allowing the model to introduce variation
Short prompts activate interpretive behavior.
[](https://www.recraft.ai/docs/prompt-engineering-guide/prompting-with-recraft-v4#structured-prompts-%E2%86%92-architectural-control)
Structured Prompts → Architectural Control
------------------------------------------------------------------------------------------------------------------------------------------------------------------------------------
If you want precision, define the visual system. **Examples**
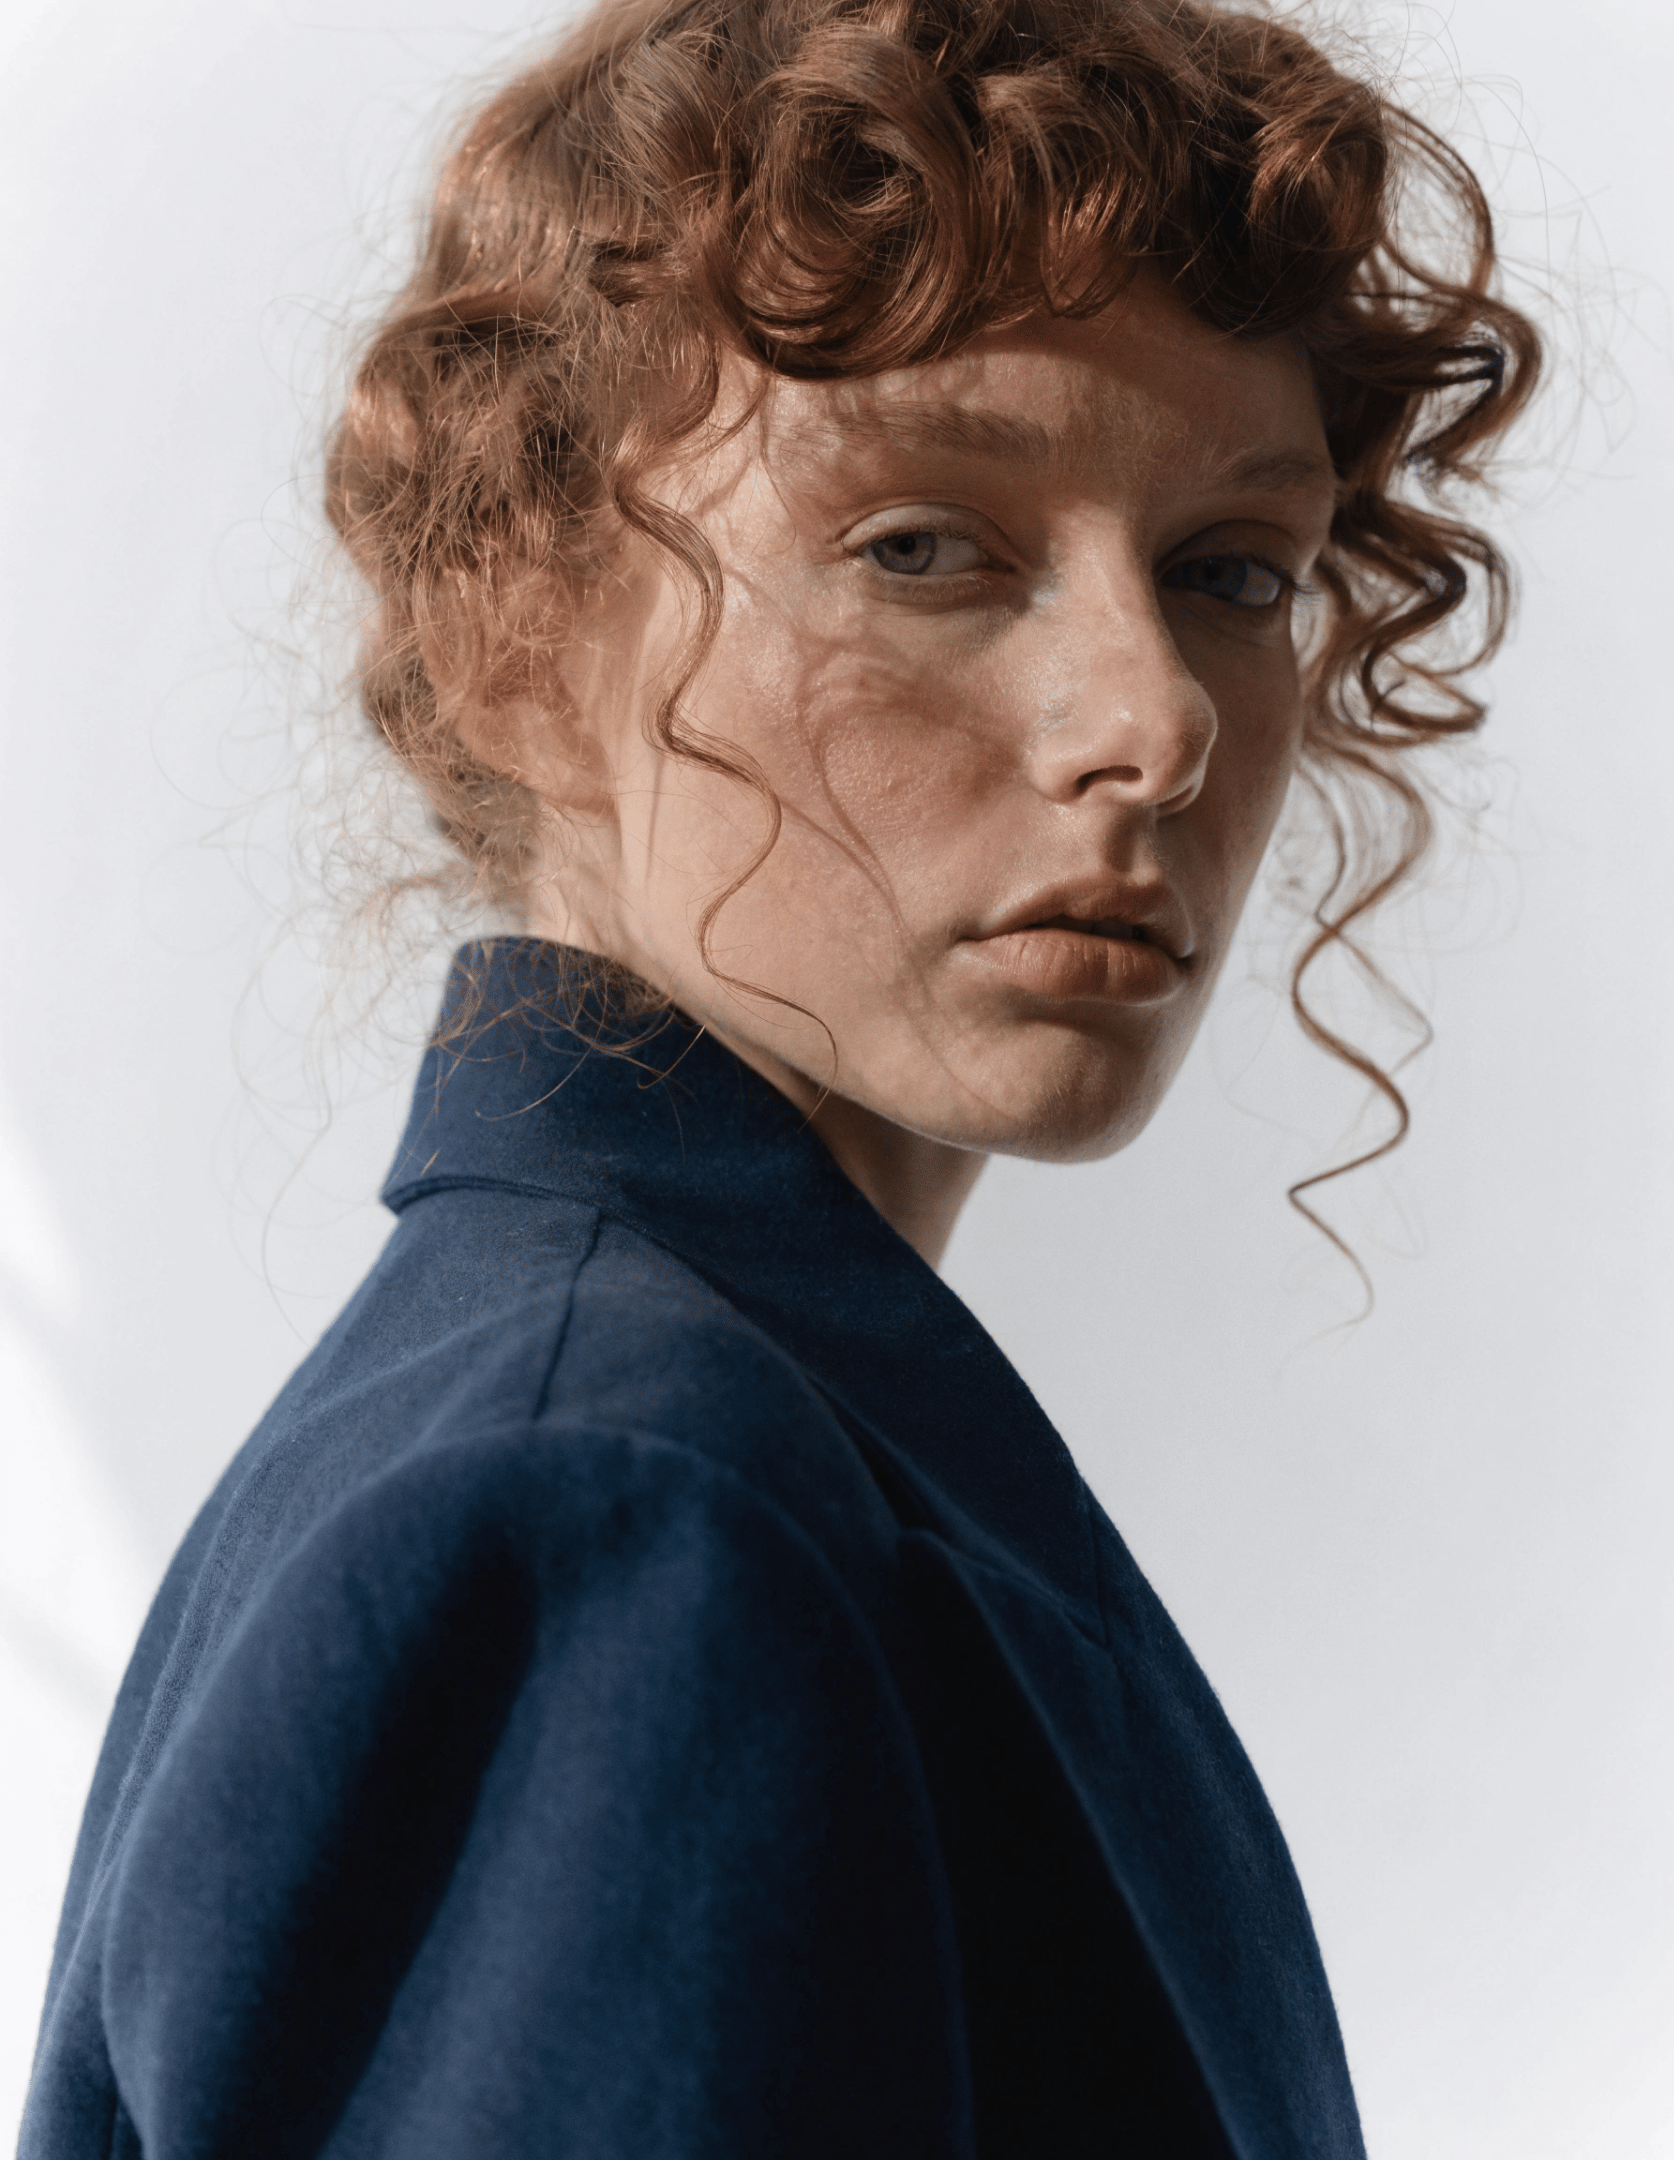
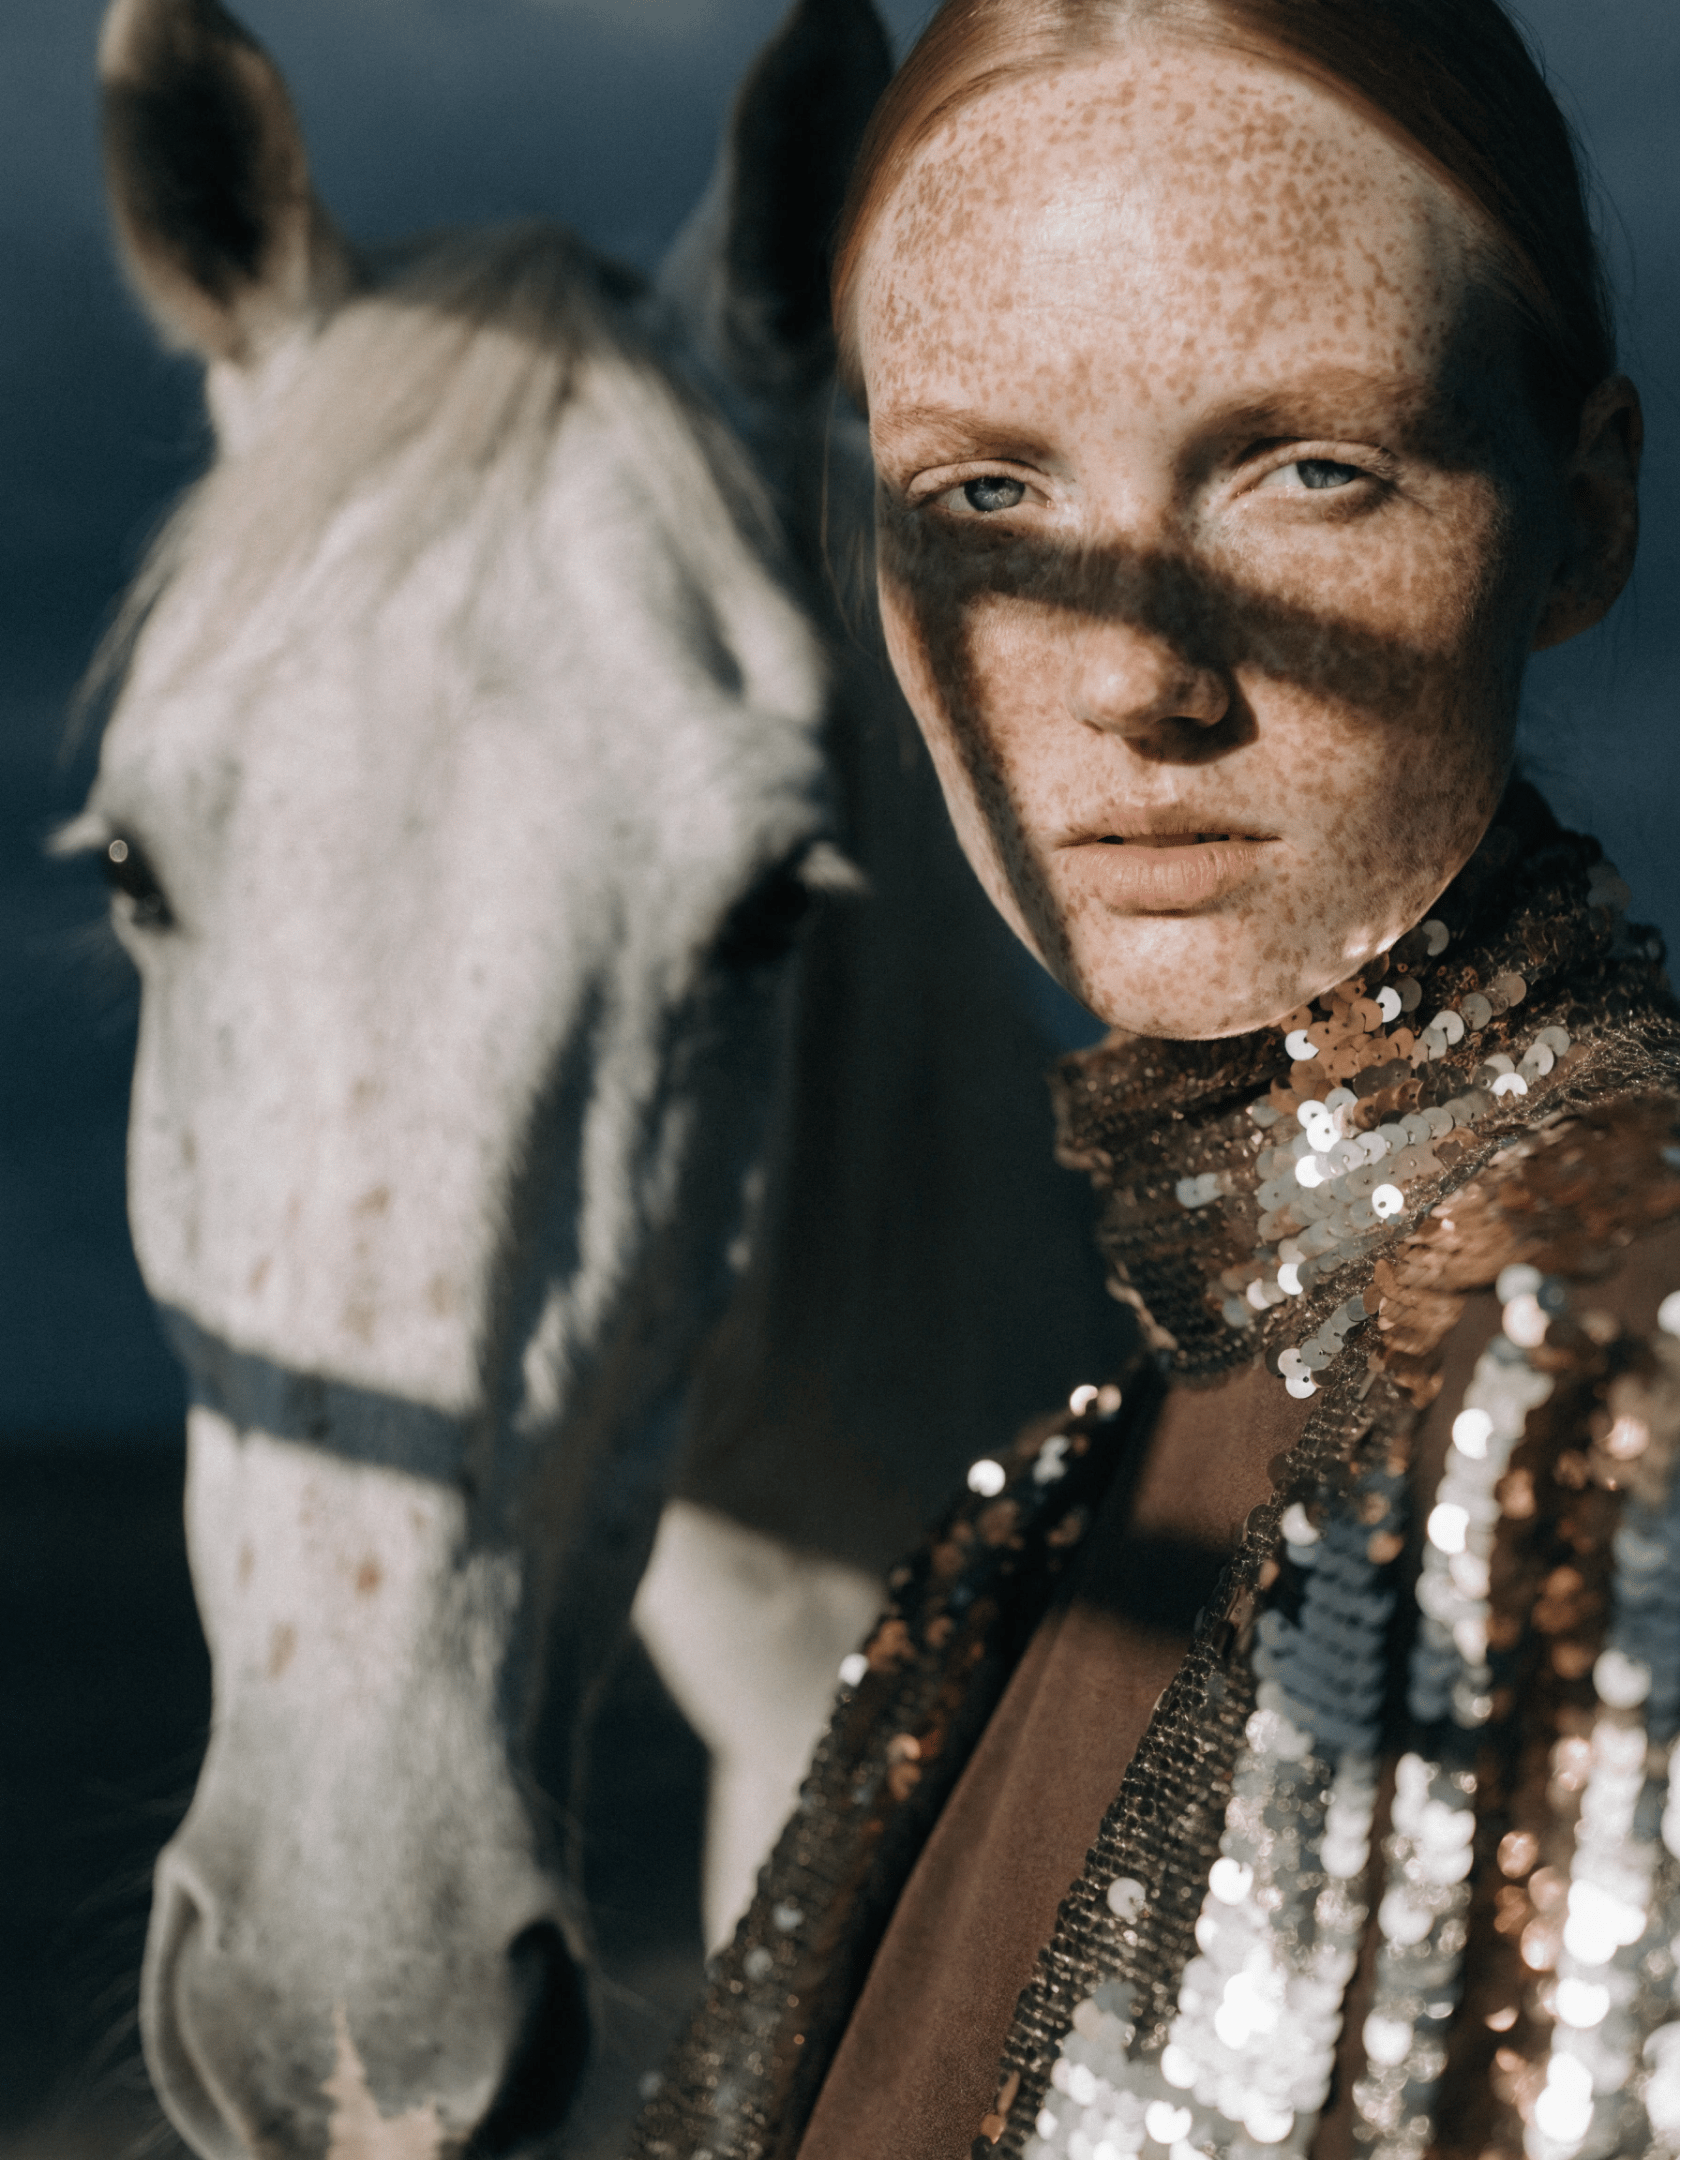
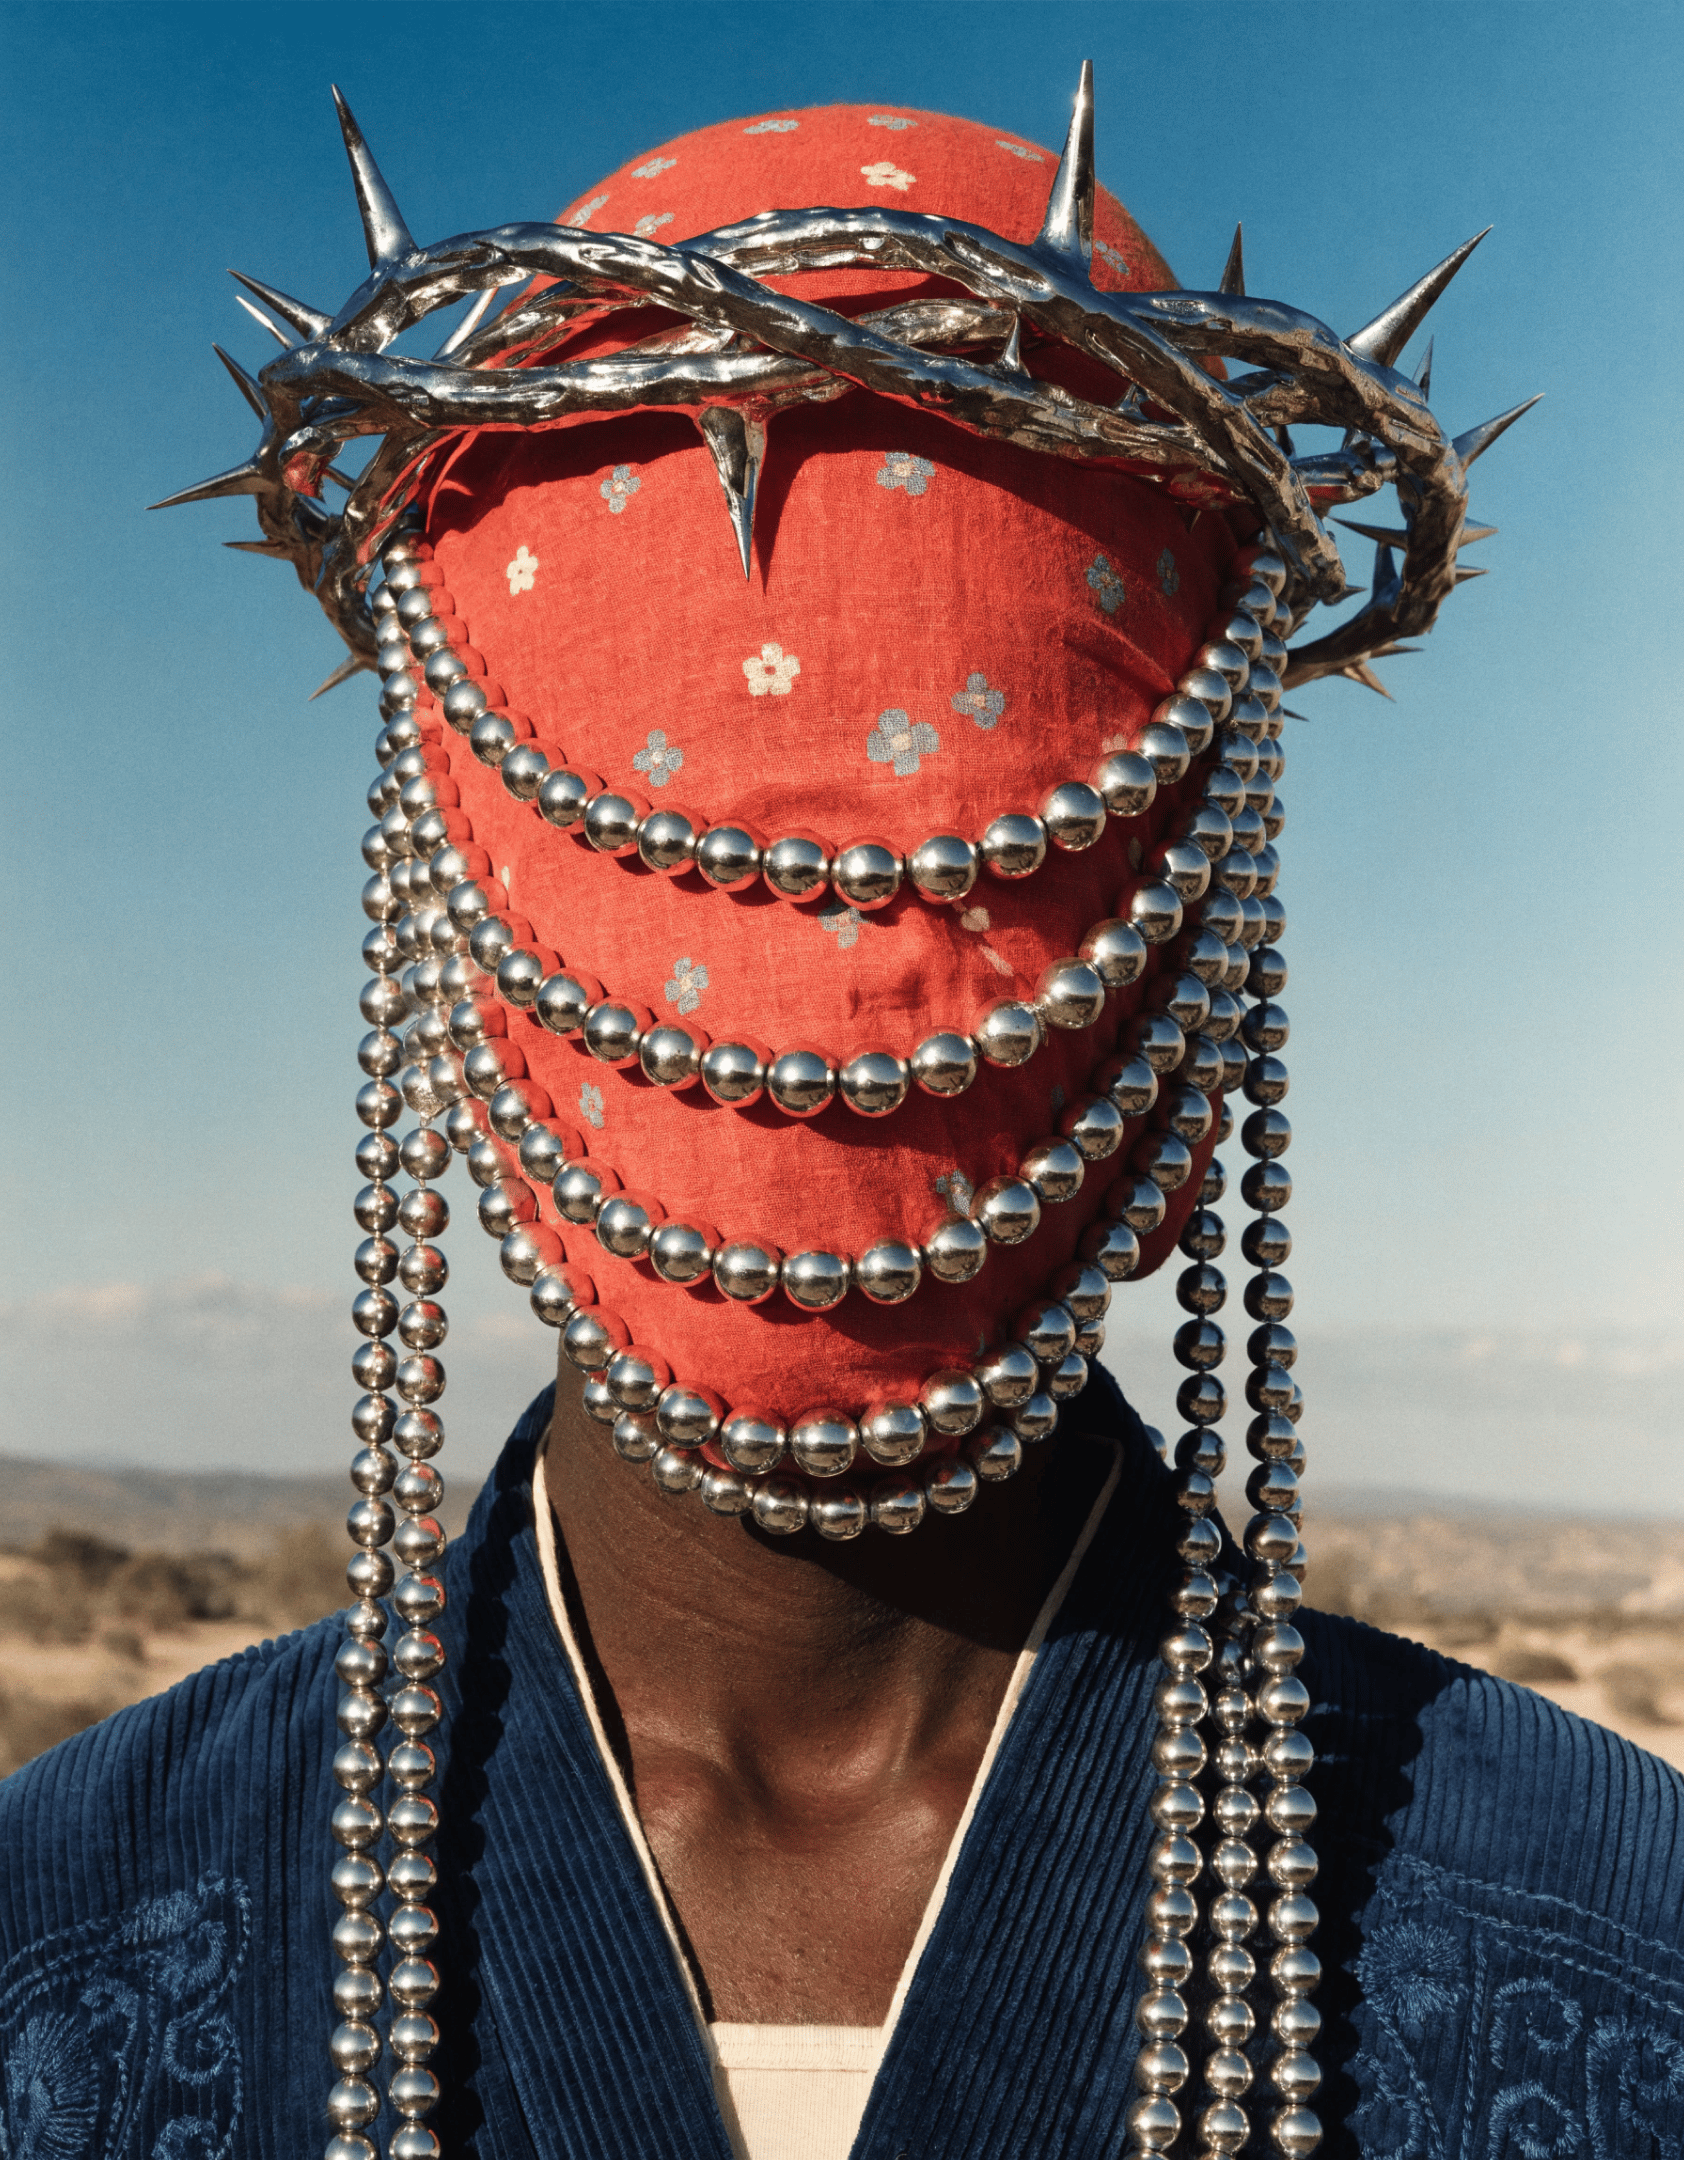
Structured Prompt #1
“_Centered close-up portrait of white woman, slightly closer than waist-up, natural three-quarter turn (semi-profile), wearing a structured tailored jacket with visible seam construction and precise cut lines. Matte fabric with realistic textile texture and subtle depth. Very natural-looking model with minimal to no makeup, authentic skin texture, soft imperfections visible.Clean seamless background without a horizon line. Natural daylight, soft and diffused, coming from the side (window light feel), gentle falloff across the face, delicate shadow under the chin and along the jawline. Calm, contemporary editorial mood. Balanced negative space, intimate framing, spatial clarity, quiet realism._”
Structured Prompts #2
“_Artistic close-up portrait of a young Caucasian woman and a pale horse against a dark desaturated blue-grey background with subtle vignetting. The woman stands on the right in sharp head-and-torso focus, slightly angled left, looking directly into the camera with a serious, neutral expression. Fair freckled skin, light reddish-brown hair pulled back, light eyes, no jewelry. She wears a high-neck metallic gold sequined garment over a dark brown layer, reflecting soft golden highlights.In the left foreground, slightly behind her, the pale horse’s head is softly out of focus but clear in form — white coat with faint speckles, light mane, visible eye, no tack. Strong natural light from the upper left creates sharp diagonal shadows and warm highlights against the cool background. Shallow depth of field, high contrast, eye-level composition, asymmetrical and intense mood._”
Structured Prompts #3
“Ultra-photorealistic high-angle bust portrait of an adult figure with dark skin visible at the neck and jawline, natural pores and realistic texture. Head slightly tilted downward, face fully concealed by a lightweight reddish-orange cotton head covering with visible weave, natural folds, and small light-blue and off-white floral print. A metallic silver crown of thorns wraps around the head, pressing into the fabric with realistic tension.Silver bead strands cross the forehead horizontally and hang vertically over the fabric and chest, each bead showing accurate reflections and subtle imperfections. The figure wears a deep navy corduroy kimono-style robe with ribbed texture and visible seams, with a cream underlayer at the neckline. Clear sky background fading from deep blue to pale haze over an arid landscape. Strong natural sunlight from the front-right, sharp shadows, realistic metal reflections, high dynamic range. High-end fashion editorial style, 8K clarity, solemn and contemplative mood.”
**Prompt structure (from global to local):**
1. Core concept — subject(s) and scene (who and what is in the image)
2. Background and environment (where the subjects exist)
3. Primary subject framing and pose (pose and expression)
4. Physical attributes and identity details (identity and appearance)
5. Secondary subjects and spatial relationships (if needed)
6. Lighting direction and behavior
7. Camera, depth, and contrast (how the scene is captured)
8. Mood and compositional resolution
**Key takeaway:**
Structured prompts don’t make results “better.”They make outcomes intentional, controllable, and repeatable.
**Practical tip:**
If the image must match a specific art direction → structure the prompt.If you’re exploring → keep it minimal.
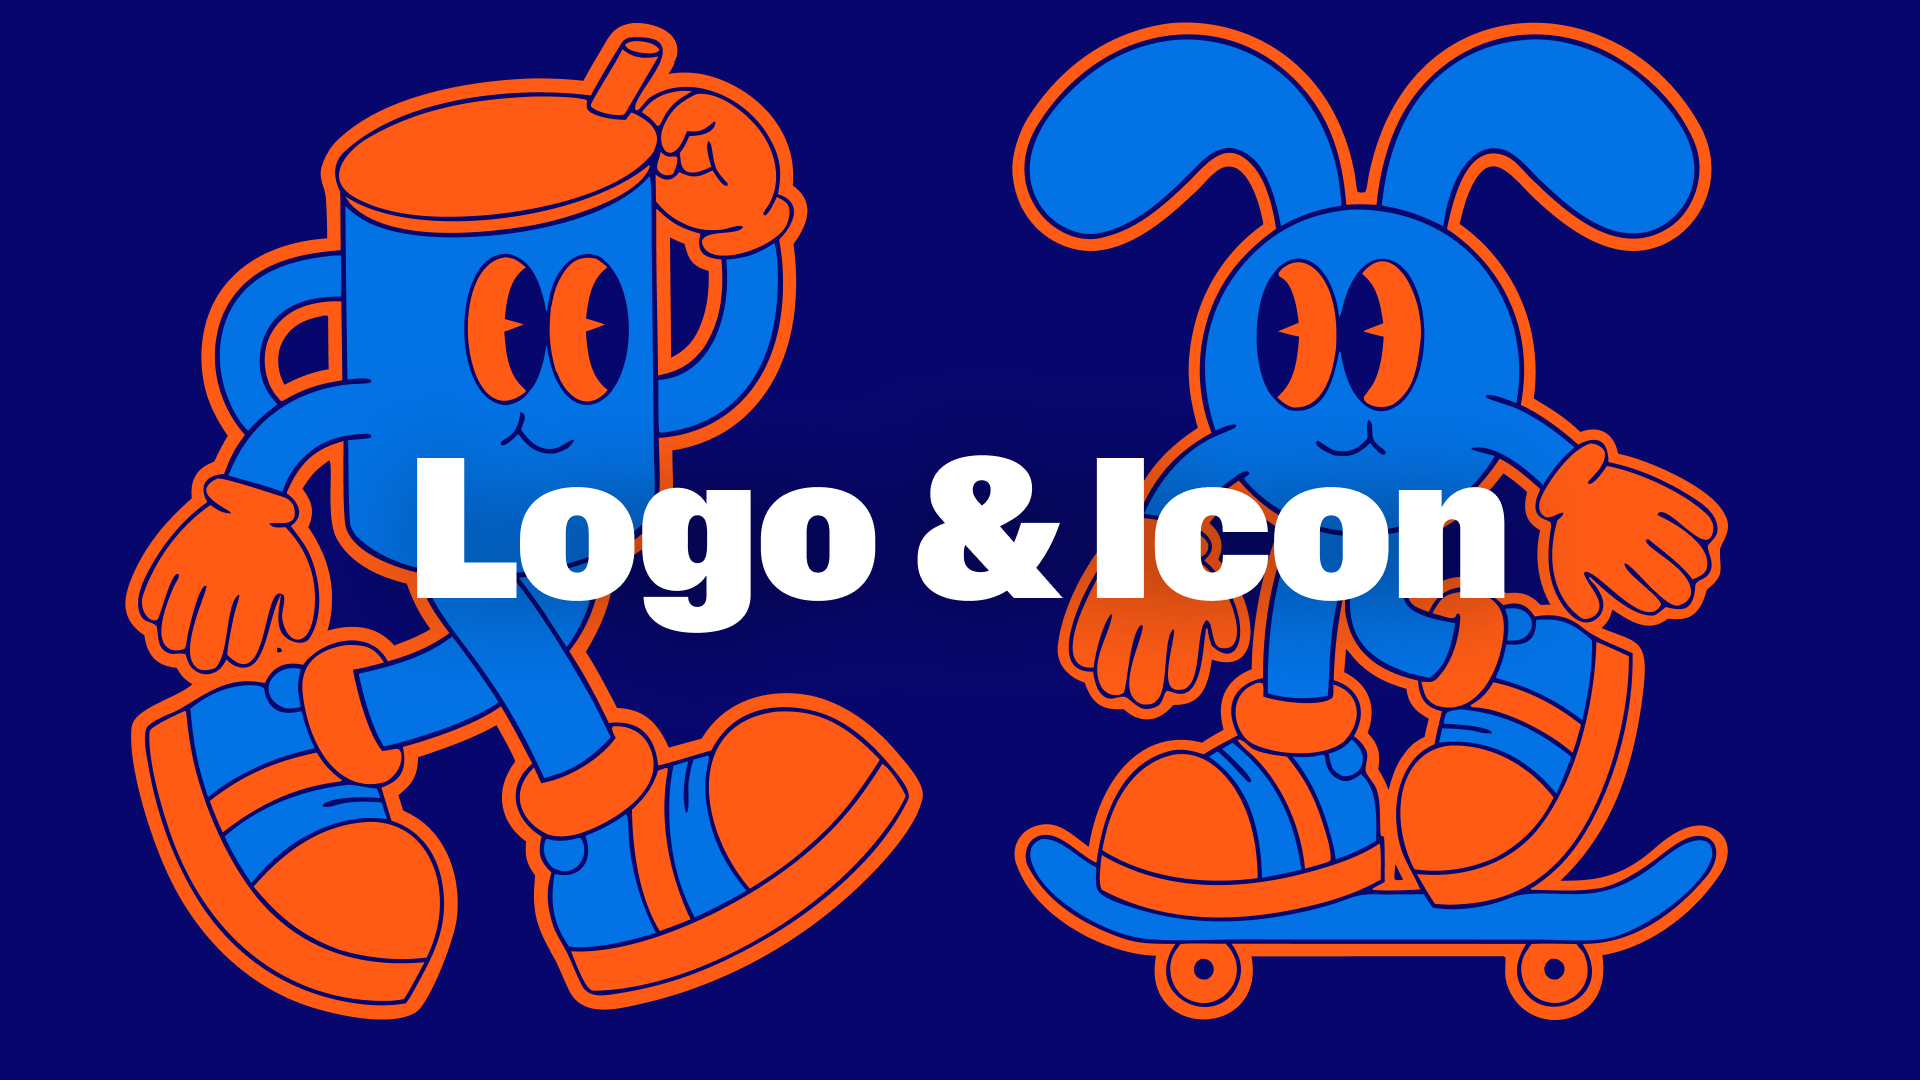
[](https://www.recraft.ai/docs/prompt-engineering-guide/prompting-with-recraft-v4#vector-&-logo-design-strength)
Vector & Logo Design Strength
--------------------------------------------------------------------------------------------------------------------------------------------------
Recraft V4 is unusually strong at flat graphic logic. **Examples**
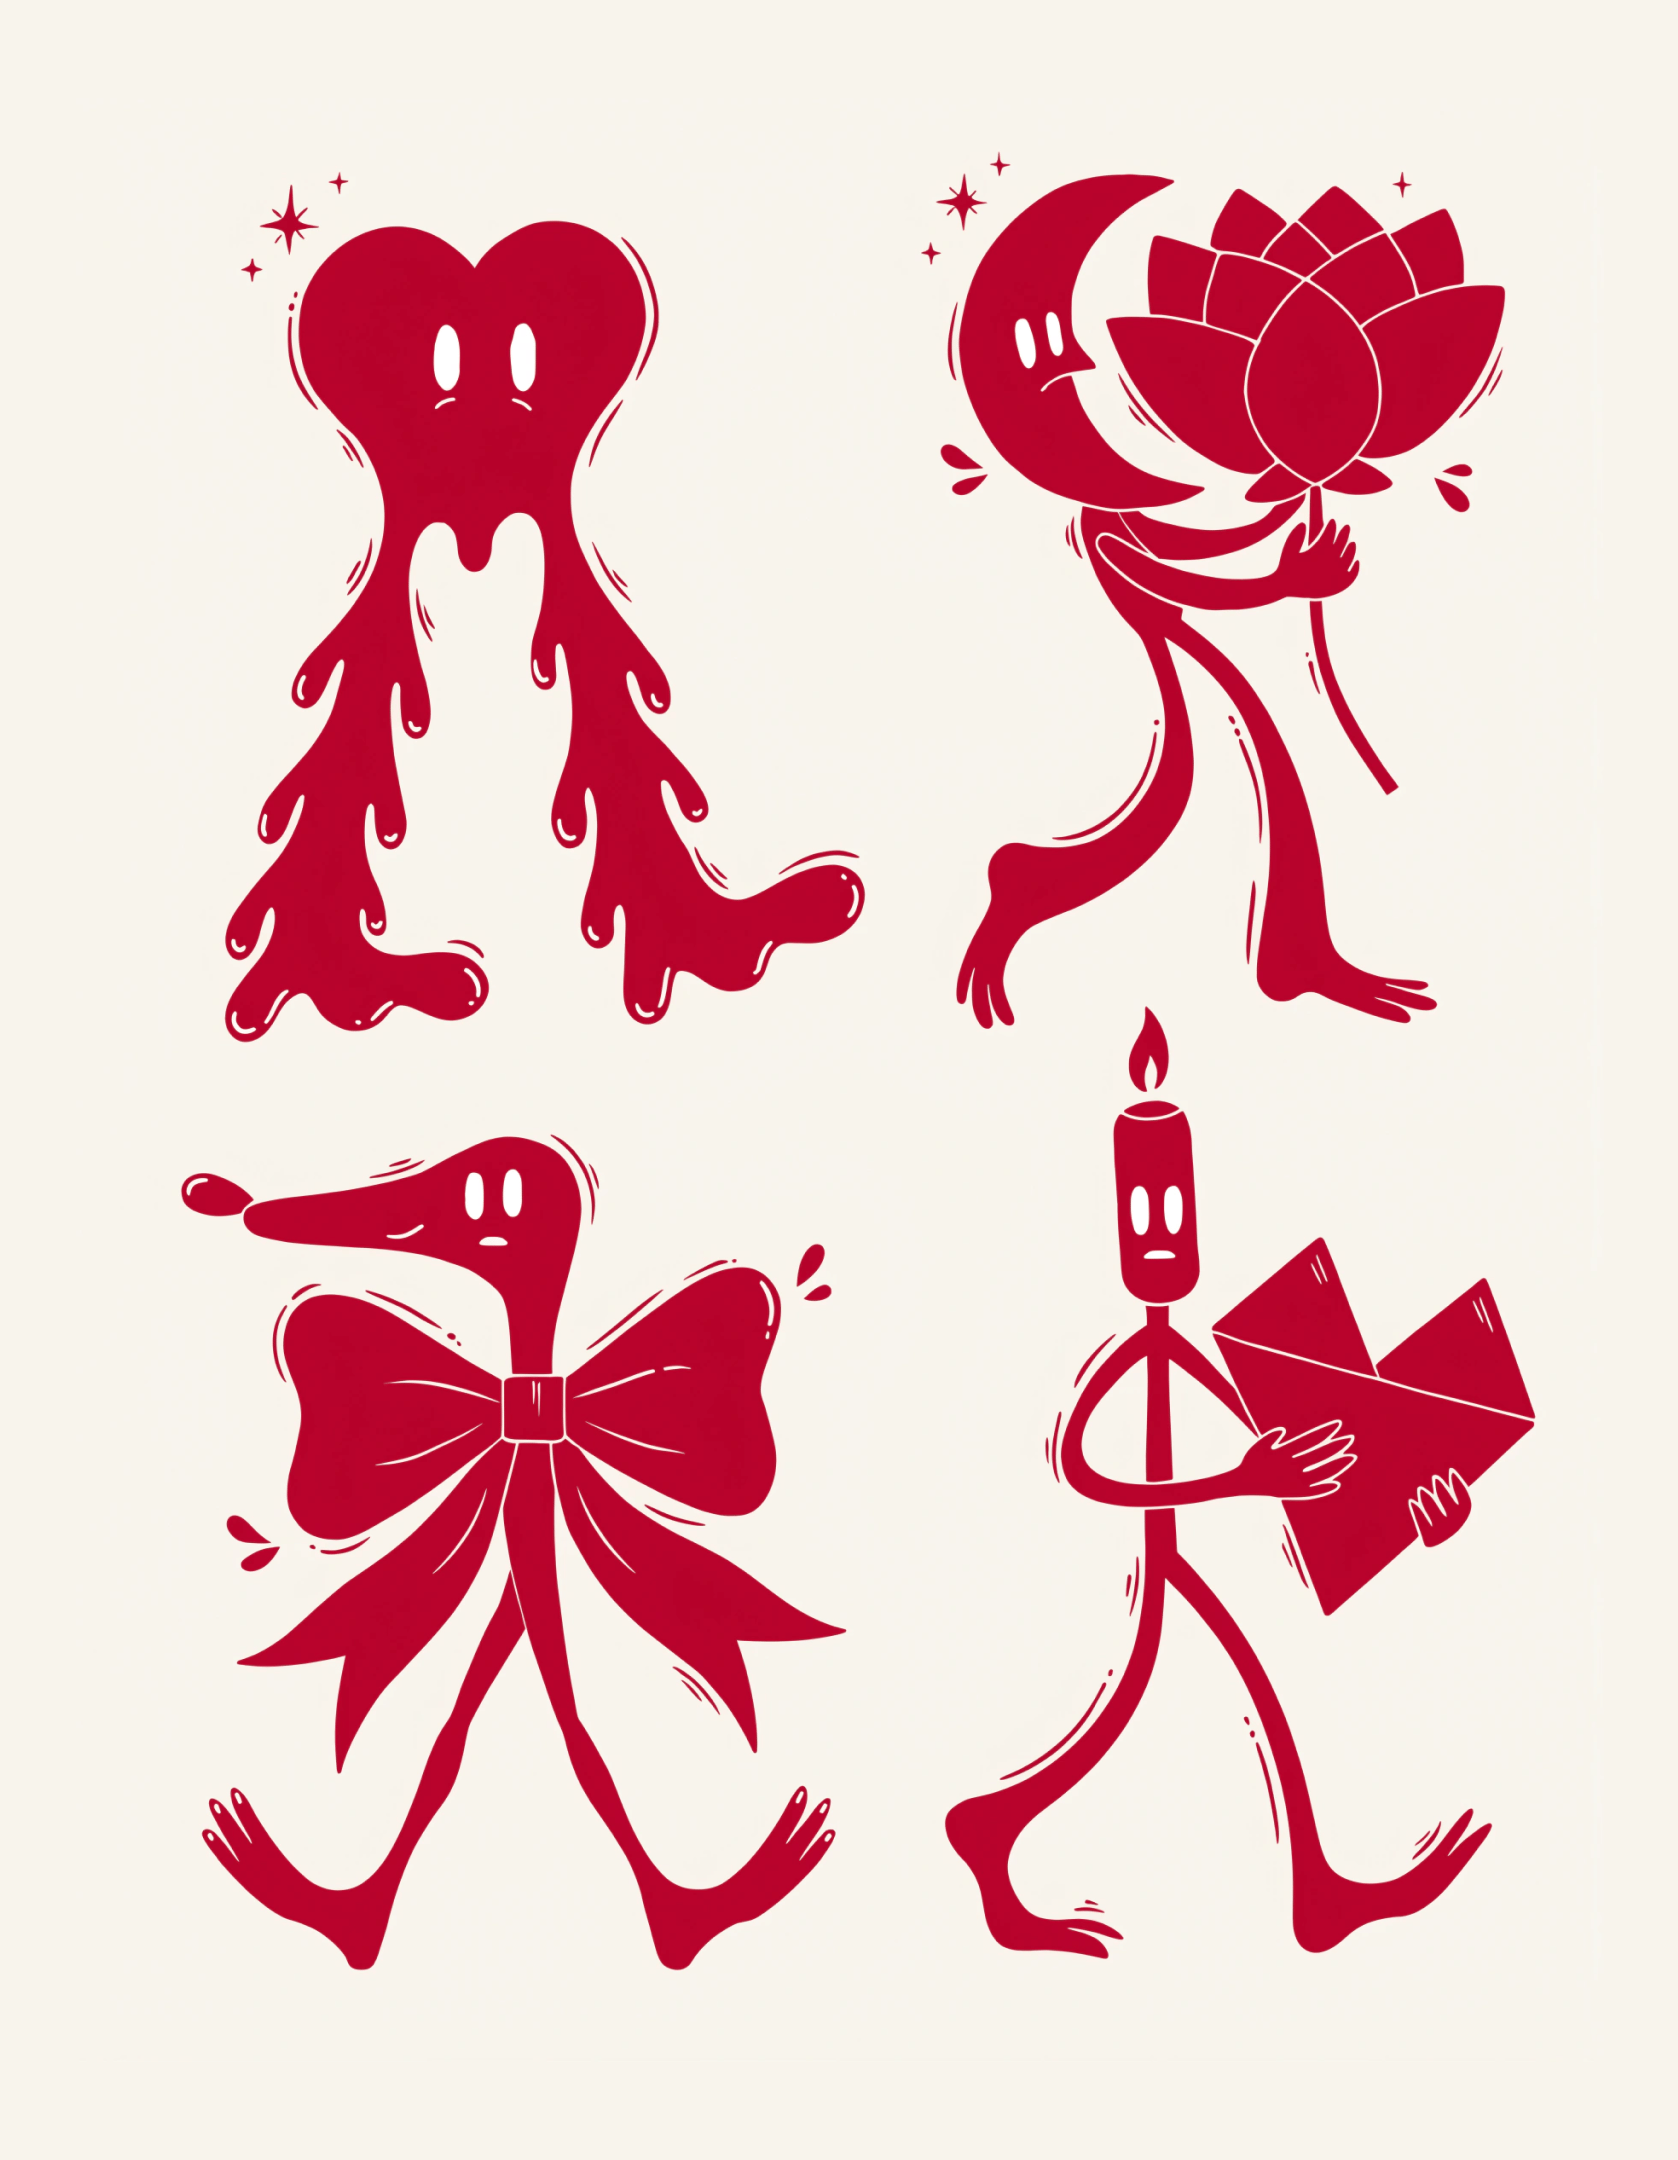

Vector & Logo Design Prompt #1
“_Minimal playful logo on a deep muted green background with warm off-white or cream elements. Flat colors only — no gradients, shadows, or texture. Designed for a slow, nature-focused creative space such as a studio, independent publishing project, or mindfulness platform. Calm, grounded, human, slightly whimsical — never commercial or trendy.Bold hand-drawn chunky wordmark with soft uneven strokes, rounded edges, imperfect spacing, and slightly irregular proportions. Letters feel brush-painted or cut from paper, earthy and intuitive rather than precise. Simple plant-inspired symbols (abstract leaves, berries, seeds) are integrated into or around the lettering — flat, bold, highly simplified shapes with no outlines or fine details.Centered, compact composition forming one unified silhouette with strong legibility. Warm, natural, quietly confident identity. Avoid corporate aesthetics, sharp geometry, thin lines, decorative fonts, or tech styling._”
Vector & Logo Design Prompt #2
“_Clean modern illustration icon set featuring exactly 4 ultra-bold surreal character pictograms in a playful contemporary mascot style. Exaggerated geometric bodies, elastic limbs, dynamic confident poses, slightly asymmetrical forms, smooth hand-drawn outlines with a subtle wobble. Minimal facial features — small oval eyes, calm neutral expressions. Personality expressed through posture. Strict two-tone palette only: deep saturated crimson for all characters and graphic elements on a soft warm cream background. Flat vector aesthetic. No gradients, no shading, no texture, no shadows. Include exactly four characters: – A tall melting heart with long flexible legs walking forward – A floating crescent-moon-headed figure hugging a large abstract flower – A stretched dachshund-like creature with an oversized bow around its body – A tall matchstick-headed character with a tiny flame-shaped head holding a large geometric love letter. Add minimal decorative elements in the same crimson line style: small starbursts, abstract leaves, curved motion lines, and floating petals. Clean, balanced, poster-style composition with strong negative space. No text. No clutter. Bold, graphic, collectible art-print aesthetic._”
Vector & Logo Design Prompt #3
“_Create a collection of 12 clean vector tourism character icons arranged in a grid with four per row (three rows total). Ultra-minimal bold silhouette style, pure black solid shapes on a white background. No gradients, no textures, no outlines — only simple geometric filled forms with strong silhouette clarity. All characters must have identical tiny dot eyes, same size and placement, with no additional facial details.The icons should feel playful, abstract, slightly absurd, and clearly tourism-inspired in a modern Scandinavian-brutalist pictogram style.Include exactly these 12 characters: a mountain with minimal sunrise rays, a rolling suitcase with small wheels, a tall lighthouse with beam lines, a rounded airplane, a palm tree with a face in the trunk, a camper van, a sun disk with short rays, a hot air balloon with a small basket, a backpack with visible straps, a triangular tent, a cruise ship with stacked decks, and a camera with a circular lens.Ensure even spacing, consistent visual weight, uniform eye placement, and a bold, clean, graphic poster-like composition._”
**Practical tip:**
For logo and vector design, prompts should define:
1. Graphic type (logo, icon set, symbol system)
2. Shape logic (geometry, symmetry, silhouette clarity)
3. Color system (strict palette definition)
4. Line discipline (consistent stroke, no texture)
5. Layout structure (centered, grid-based, scalable)
6. Constraints (no gradients, no shadows, etc.)
Avoid texture or material-focused language. Vector output responds to structural definition and geometric clarity.
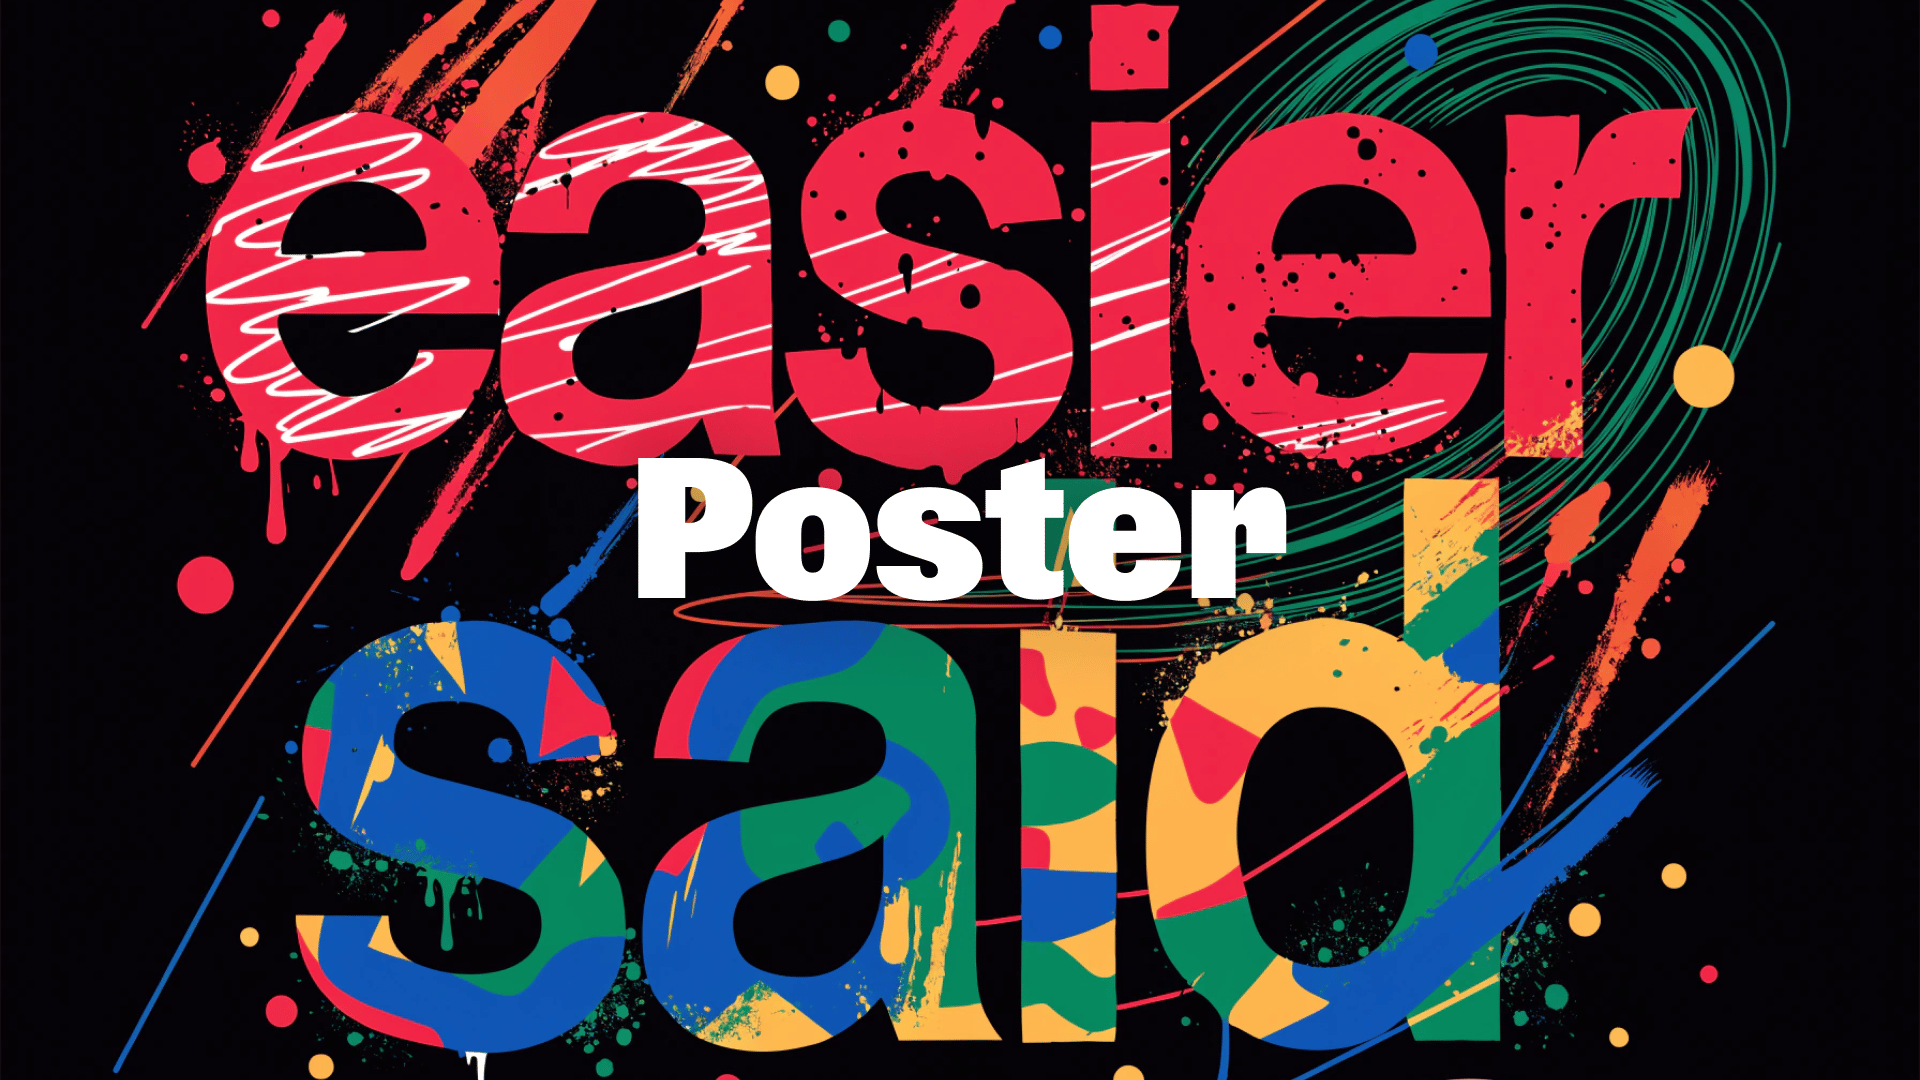
[](https://www.recraft.ai/docs/prompt-engineering-guide/prompting-with-recraft-v4#graphic-design-posters-vol-1)
Graphic Design: Posters vol. 1
--------------------------------------------------------------------------------------------------------------------------------------------------
This is where Recraft V4 becomes especially powerful for designers.
**It demonstrates a clear understanding of:** Typographic hierarchy
Visual weight
Poster-scale composition When layout logic is explicitly described, the model responds with accurate and predictable results. **Examples** Minimal Poster System
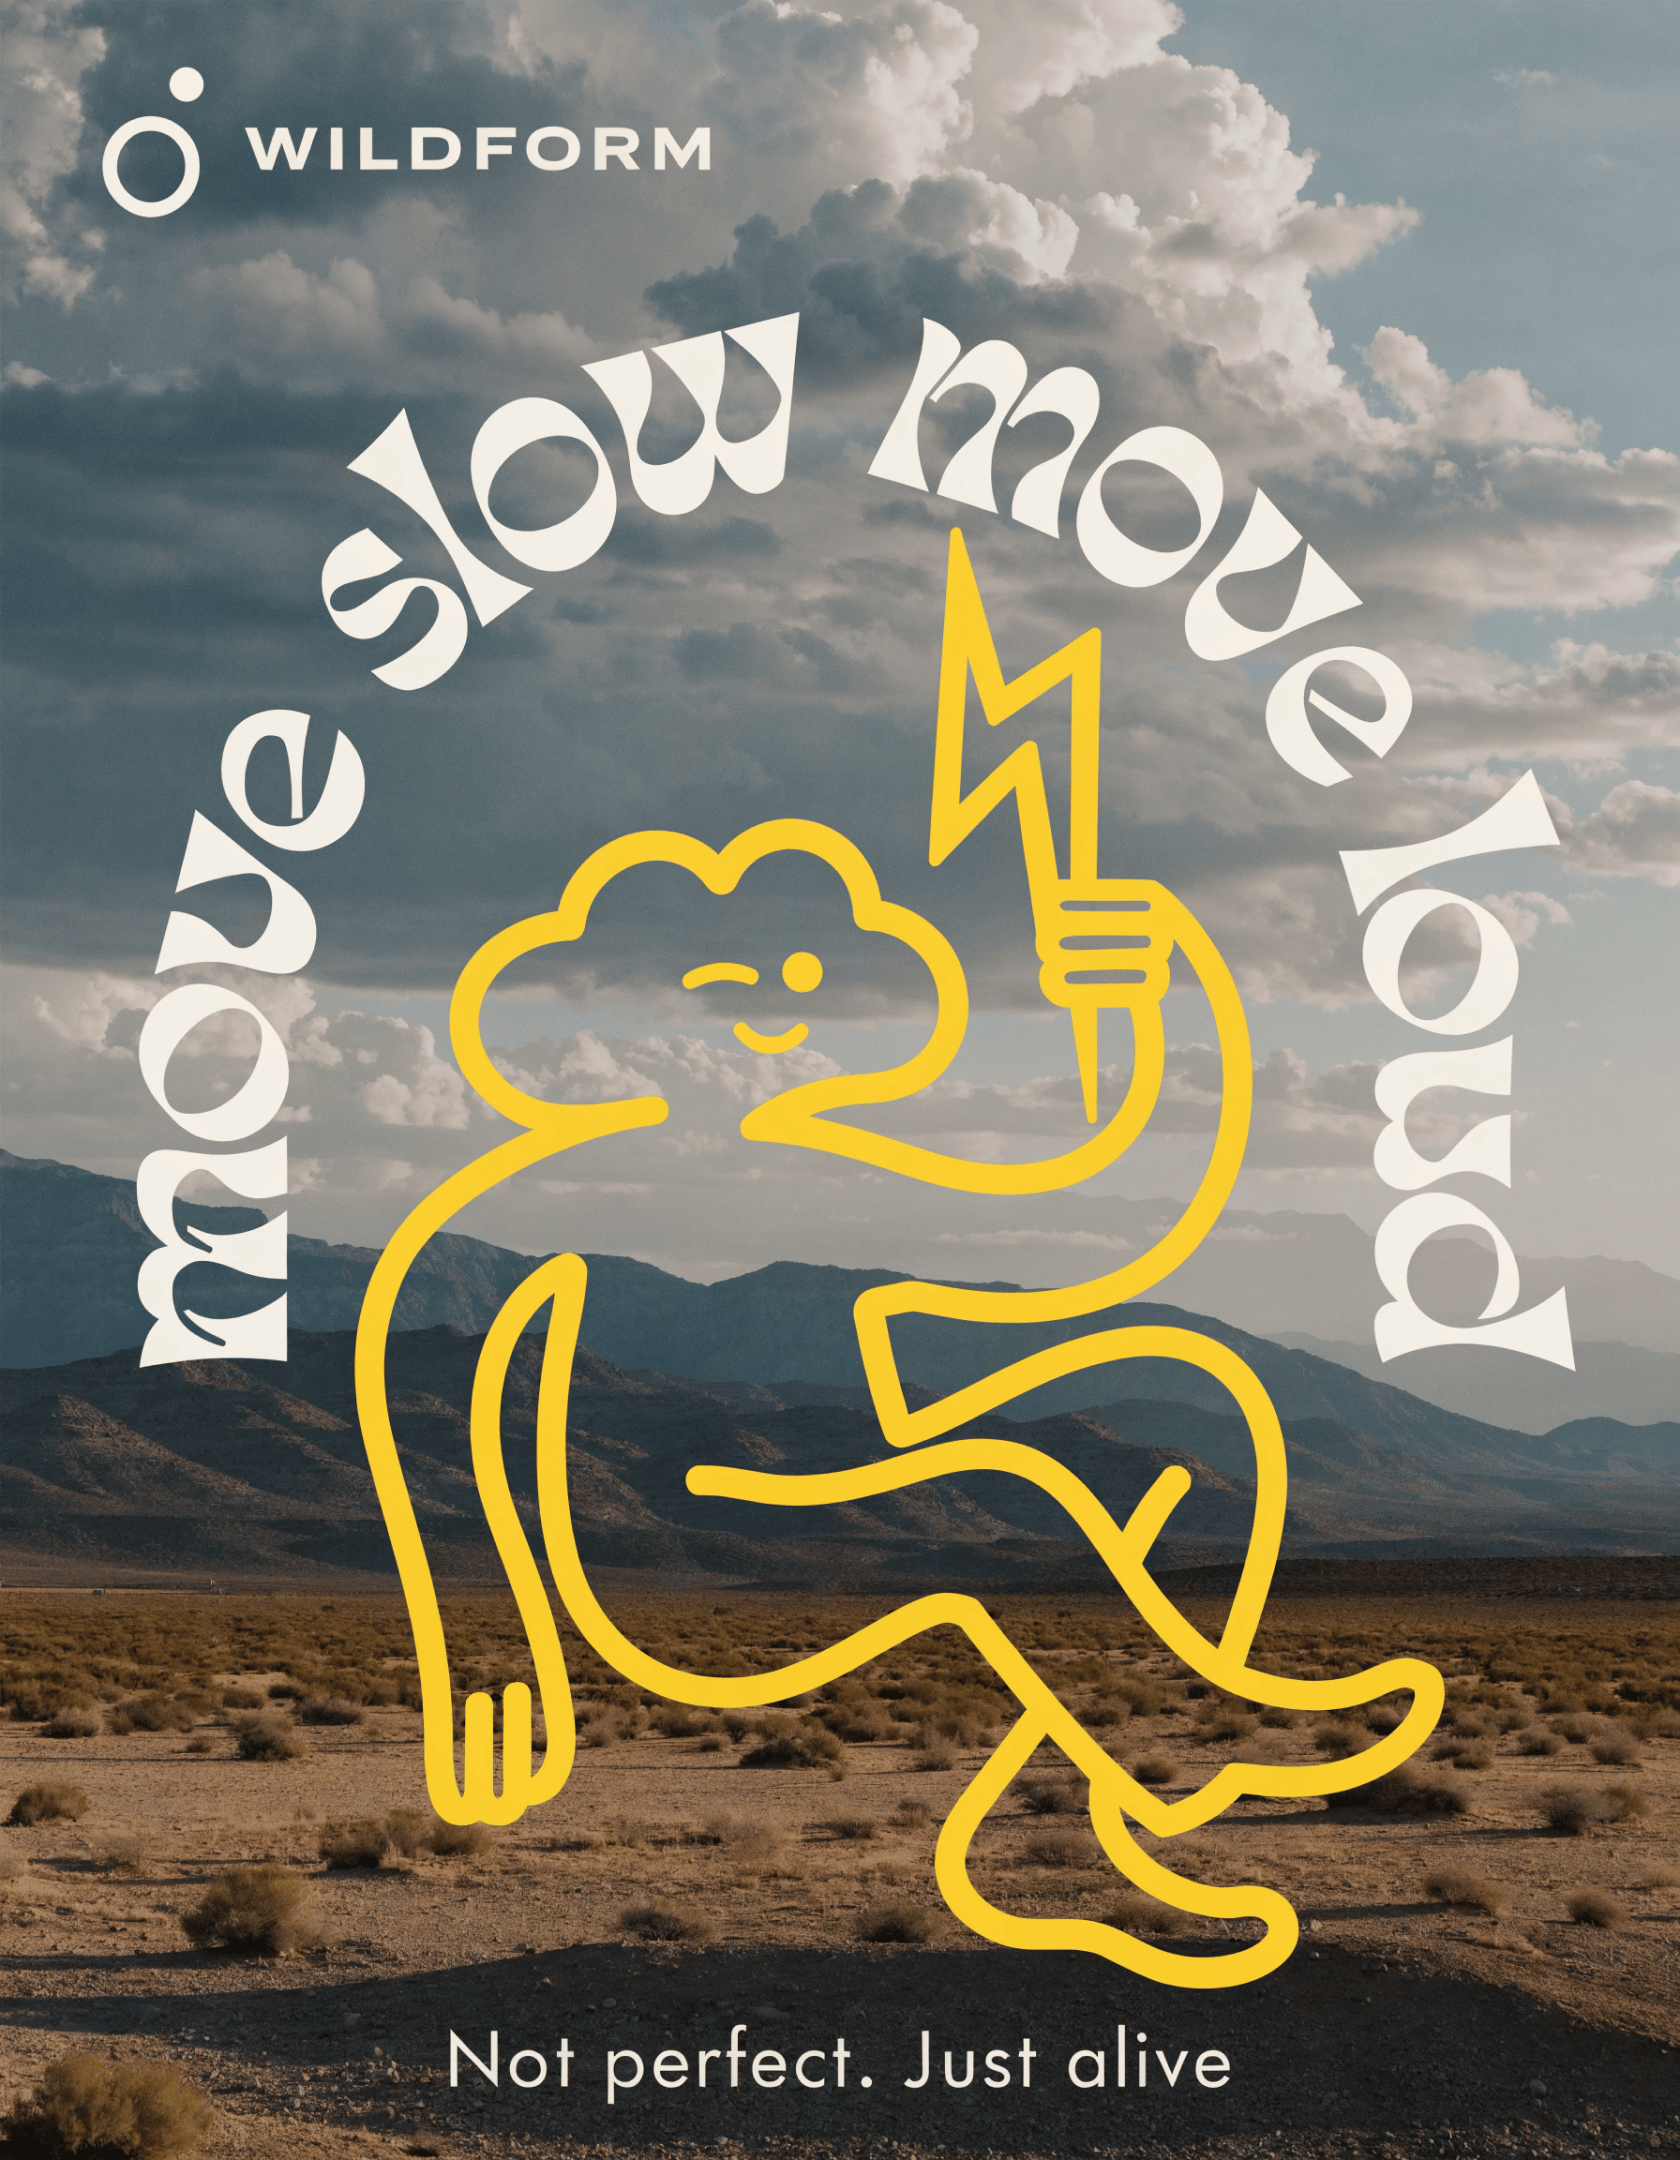
Posters vol. 1 #1
“_Large-format poster combining a cinematic desert landscape with bold graphic overlay. Background: open arid plain with warm sand tones, distant mountains, dramatic sky with soft evening light. Subtle print texture. Oversized electric-yellow abstract character drawn with thick expressive lines. A floating cloud-shaped figure with stretched limbs, one arm raised holding a symbolic lightning bolt. Simple facial features, closed eyes, calm expression. Flat solid fill, no gradients. Top left — minimal geometric logo mark + wordmark WILDFORM in clean modern sans-serif.Arched headline integrated with illustration: move slow move loud.Bottom line: Not perfect. Just alive. Strong contrast between realistic landscape and flat graphic layer. Contemporary, expressive, slightly rebellious poster aesthetic._”
Posters vol. 1 #2
“_Large-format contemporary graphic design poster combining raw editorial typography with expressive childlike crayon illustration. Warm off-white background with subtle paper grain and a strict grid layout defined by thin black frame lines and vertical divisions. At the top, an oversized tightly kerned bold black word in heavy grotesque sans-serif reads “BRAVE.” The center features a naive crayon drawing of a large sun and abstract landscape, made with thick wax strokes in saturated yellow, red, sky blue, and grass green, with uneven pressure and energetic scribbles. The drawing overlaps the grid and typography. Handwritten crayon text near it reads “dream big.”At the bottom, another oversized bold word reads “IMAGINE.” Between the illustration and lower headline, a narrow vertical column of small clean sans-serif text states: “Creative practice lives between structure and instinct. Design is not perfection — it is expression.” Footer in small uppercase sans-serif: “ARCHIVE / PRINT / POSTER / STUDIO / WORKS.”Brutalist black typography meets playful crayon art, flat colors, strong contrast, subtle paper texture — structured yet expressive and slightly rebellious._”
Posters vol. 1 #3
“_Large-format contemporary magazine cover combining bold naive painting with oversized modern typography. Background features a hand-painted still life of oversized seasonal vegetables — heirloom tomatoes, sliced purple cabbage, yellow squash, green zucchini, and red chili peppers — rendered in simplified flat shapes with thick matte acrylic texture and visible brushstrokes. The palette is saturated yet slightly muted, including dusty coral, mustard, sage green, deep plum, and soft cream tones. At the top, an oversized lowercase white wordmark in a heavy rounded sans-serif reads “harbor,” tightly spaced and spanning nearly the full width. Beneath it, a small clean sans-serif line reads: “design · culture · craft · studio · print · living.” A bold corner badge states “SPECIAL EDITION.” At the bottom, an organic cream-colored bubble contains the teaser text: “a handmade toolkit, slow projects, and a fold-out seasonal guide.”Clean editorial hierarchy, strong contrast between typography and painterly background, textured brush detail, modern independent print aesthetic — naive art combined with confident contemporary graphic design._”
**Prompt Structure:**
1. Format and scale (poster, cover, large-format)
2. Background / visual layer A
3. Graphic or image layer B
4. Typographic hierarchy (what is the largest?)
5. Text placement logic (top, center, edge, curved, cropped)
6. Contrast between layers
7. Overall compositional mechanics
Recraft builds the layout instead of randomly placing elements. **Practical tip**: for hybrid posters (photo + graphic): Define each visual language separately, then describe how they interact.
[](https://www.recraft.ai/docs/prompt-engineering-guide/prompting-with-recraft-v4#graphic-design-posters-vol-2)
Graphic Design: Posters vol. 2
--------------------------------------------------------------------------------------------------------------------------------------------------
**Examples** Experimental Graphic Poster
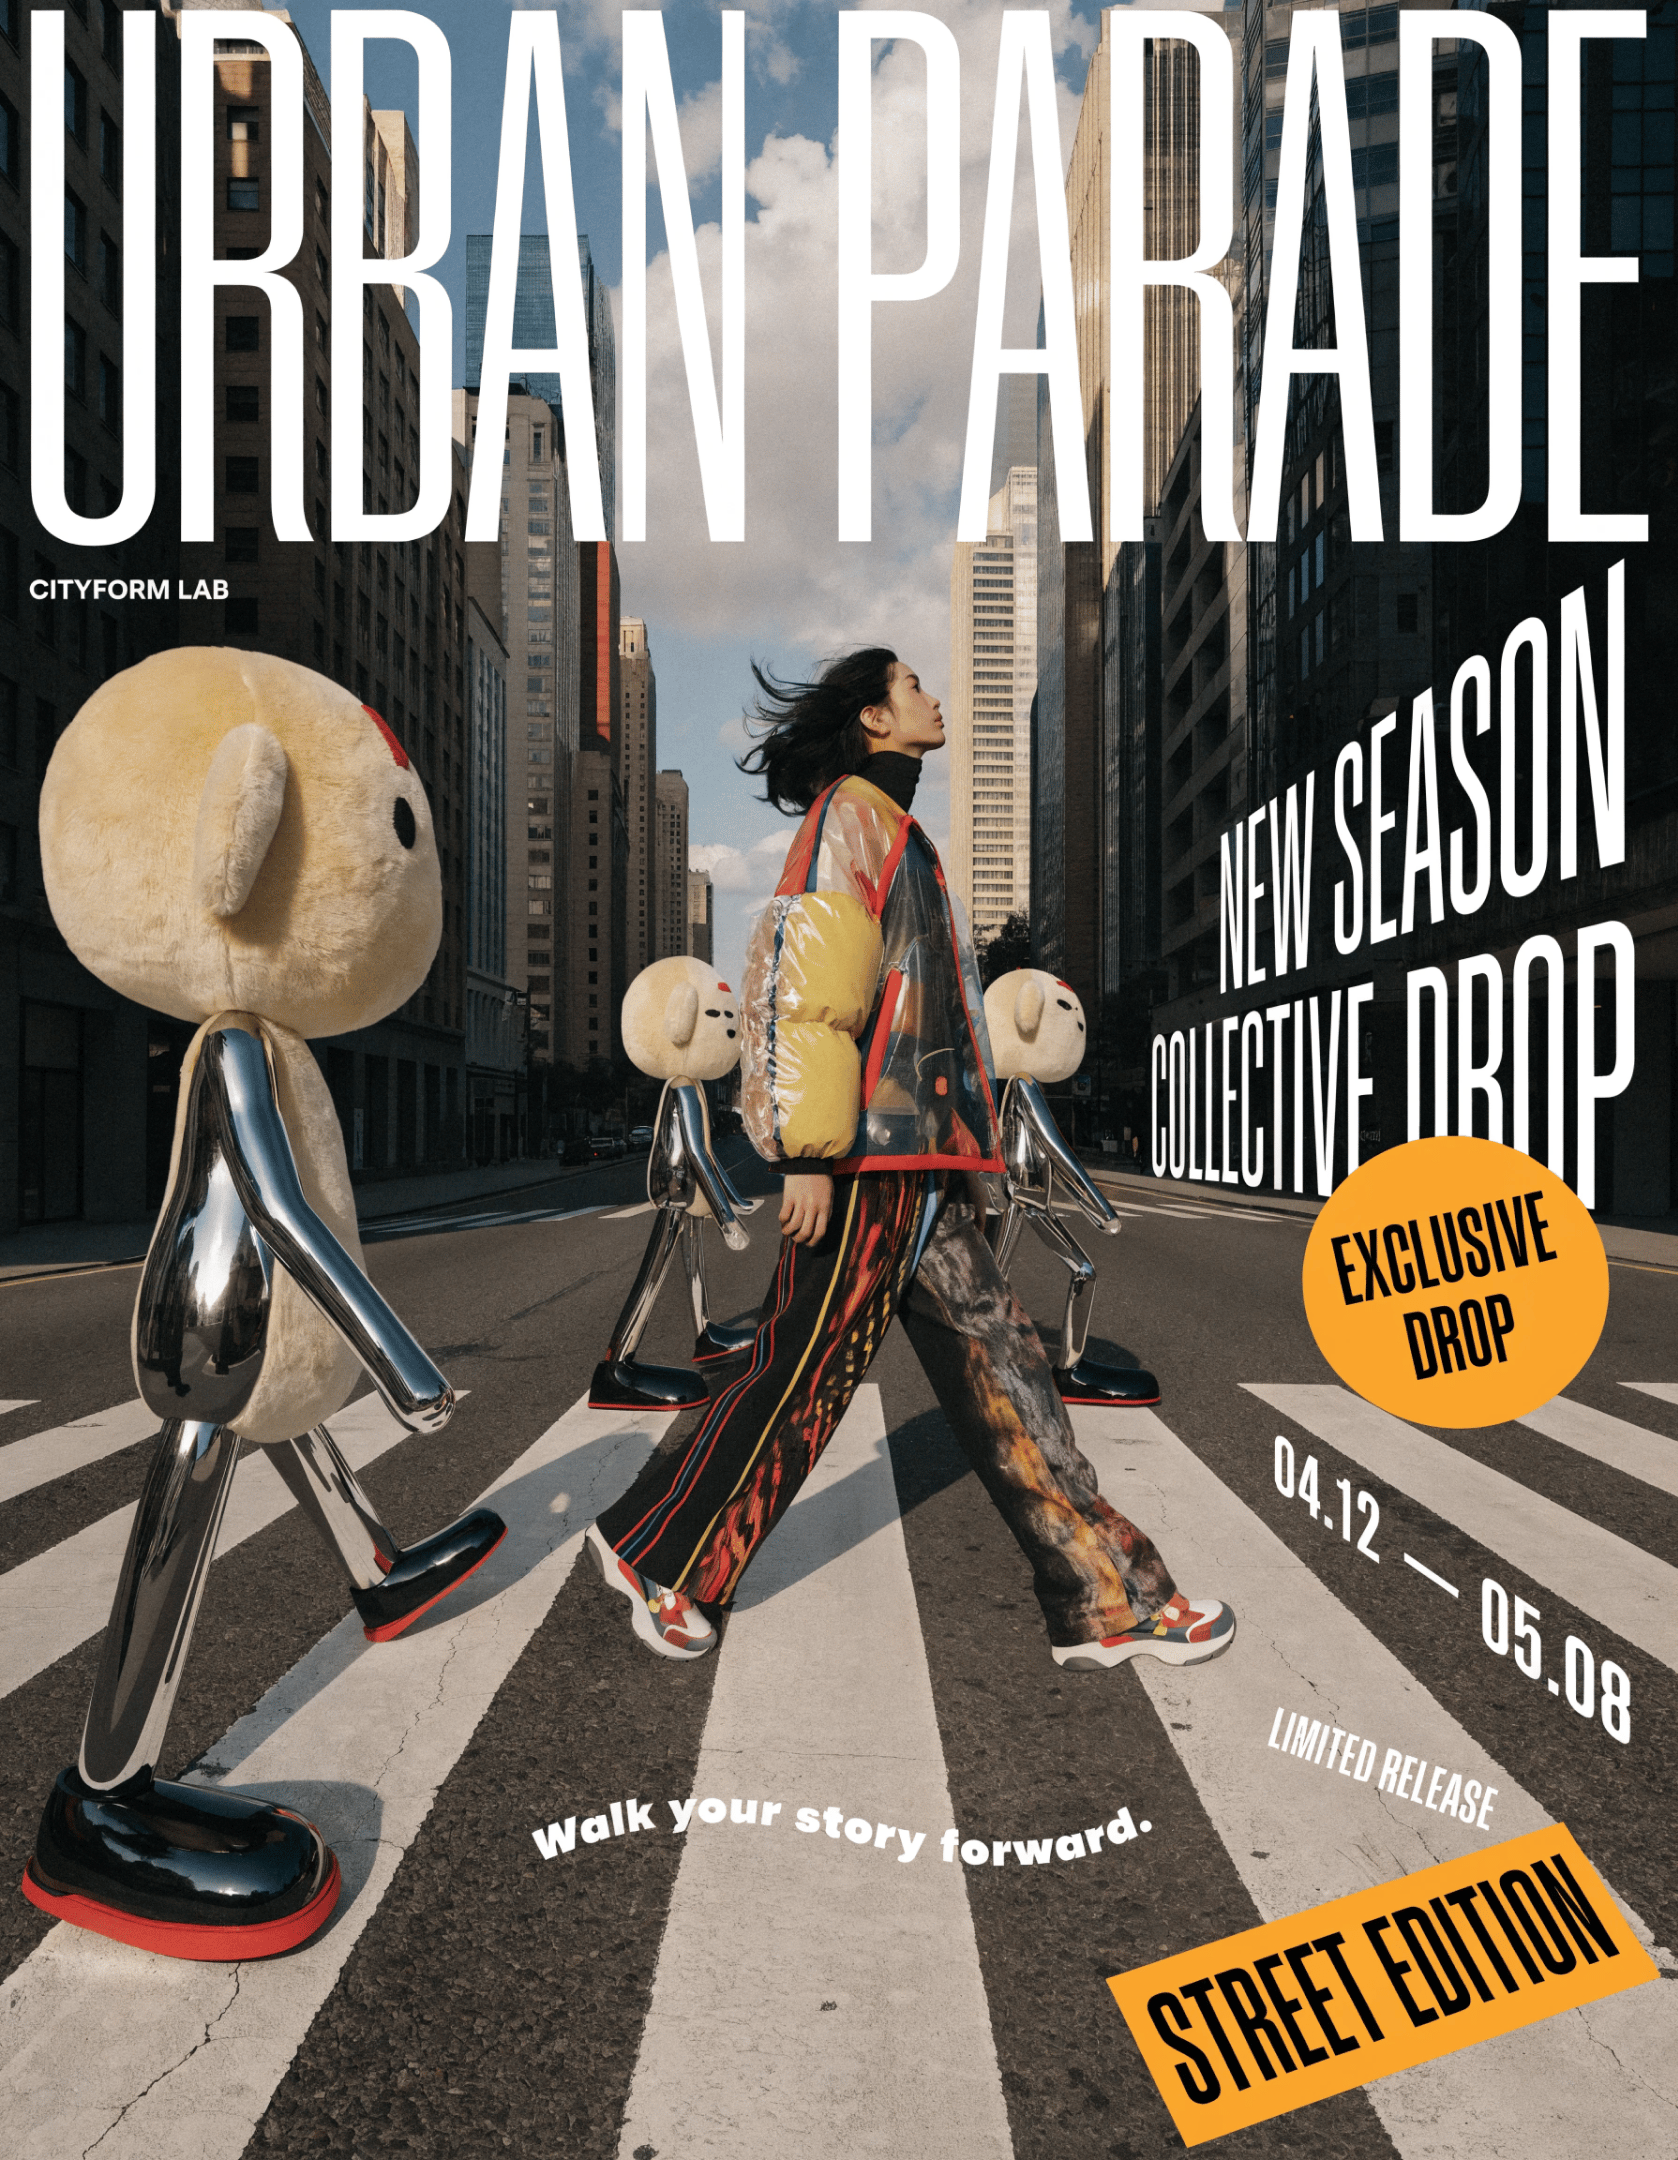
Posters vol. 2 #1
“_Playful glossy 3D poster featuring three iconic rubber ducks styled as high-fashion characters in a strong centered vertical stack. Each duck wears an exaggerated outfit: oversized futuristic sunglasses with a metallic puffer vest, a dramatic feathered collar with chunky jewelry, and a sporty streetwear hoodie with tiny sneakers. Smooth semi-gloss rubber texture, soft studio reflections, rounded toy-like proportions, subtle highlights, and confident minimal expressions. Background is flat saturated baby-blue. Layered 3D sticker elements float around the ducks — chunky stars, lightning bolts, smiley faces, safety pins, hearts, speech bubbles, and glossy tags in hot pink, yellow, cobalt, and white — creating diagonal movement and depth.Typography is bold and dynamic: inflated glossy hot-pink bubble letters reading “DUCK MODE” arch across the top, slightly overlapping the upper duck. A large diagonal shiny cobalt 3D headline “RECRAFT SPLASH” cuts across the lower half. A tilted oval sticker reads “LIMITED DROP.” Below the stack, small clean sans-serif text says “Designed for loud personalities.” In the corner, a glossy red capsule logo reads “QUACK CLUB — Tokyo / Milan.” High-fashion parody meets collectible toy culture, saturated, sculptural, poster-ready._”
Posters vol. 2 #2
“_Promotional poster for “System Lab” designer tableware collection from Formgrid Studio featuring sculptural ceramics and typography in a fresh grass-green tone — slightly acidic but not neon — set against a deep matte black background for sharp modern contrast. Centered symmetrical composition, photographed straight-on with a slightly high angle, soft diffused studio lighting from the top-front creating smooth highlights and gentle shadows.An extremely large bold condensed sans-serif headline “DESIGNER TABLEWARE” spans the full width at the top, edge-to-edge and slightly cropped, with smaller “VAJILLA DE DISEÑO” beneath. Oversized “SYSTEM LAB” overlays the center with smaller “LABORATORIO DE FORMAS” below. Vertical left text reads “EDITION 05 / EDICIÓN 05.” Bottom-right rounded rectangle contains “360° COMPOSITION / 360° COMPOSICIÓN,” with “FORMGRID STUDIO / ESTUDIO FORMGRID” nearby.The arrangement includes a sculptural low table with S-shaped legs and circular cutout shelf, an organic shallow platter with five petal-like lobes, a tall dual-handle glossy pitcher, and three matte bowls stacked in descending size. Minimalist industrial aesthetic, bold hierarchy, acid-leaning green on black, clean contemporary poster design._”
Posters vol. 2 #3
“_Contemporary fashion campaign poster blending realistic street photography with hyper-detailed 3D characters and bold experimental typography. A wide pedestrian crosswalk in a modern city under soft daylight — detailed asphalt, crisp zebra stripes, natural shadows, cinematic grading. A young avant-garde stylist walks confidently left to right, slightly off-center, captured in documentary realism with wind in the hair and a layered experimental outfit of saturated tones, technical fabrics, metallic accents, and structured tailoring.Plush-tech hybrid mascots move in the same direction along the stripes — one leading, one strong in the foreground, two behind at staggered depths — with ultra-real fur, glossy plastic and chrome details, and precise shadows aligned to the crosswalk. Seamless blend of real photography and CGI.Bold layered typography: “URBAN PARADE” oversized across the top, partially cropped; “NEW SEASON” and “COLLECTIVE DROP” as strong blocks on the right; date “04.12 — 05.08” in perspective along a stripe; curved tagline “Walk your story forward.” near the ground; compact “CITYFORM LAB” logo in the corner. Add large glossy sticker graphics — circular “EXCLUSIVE DROP,” rectangular “STREET EDITION,” diagonal “LIMITED RELEASE.” Strong asymmetry, unified motion, high-fashion meets collectible culture, dynamic editorial poster energy._”
**Prompt Structure:**
1. Core scene or subject
2. Additional 3D / graphic elements
3. Typographic dynamics (overlap, perspective, layering)
4. Color energy
5. Depth and spatial layering
6. Overall movement and tension
_**Logic:**_ Define layers first → then describe interaction.
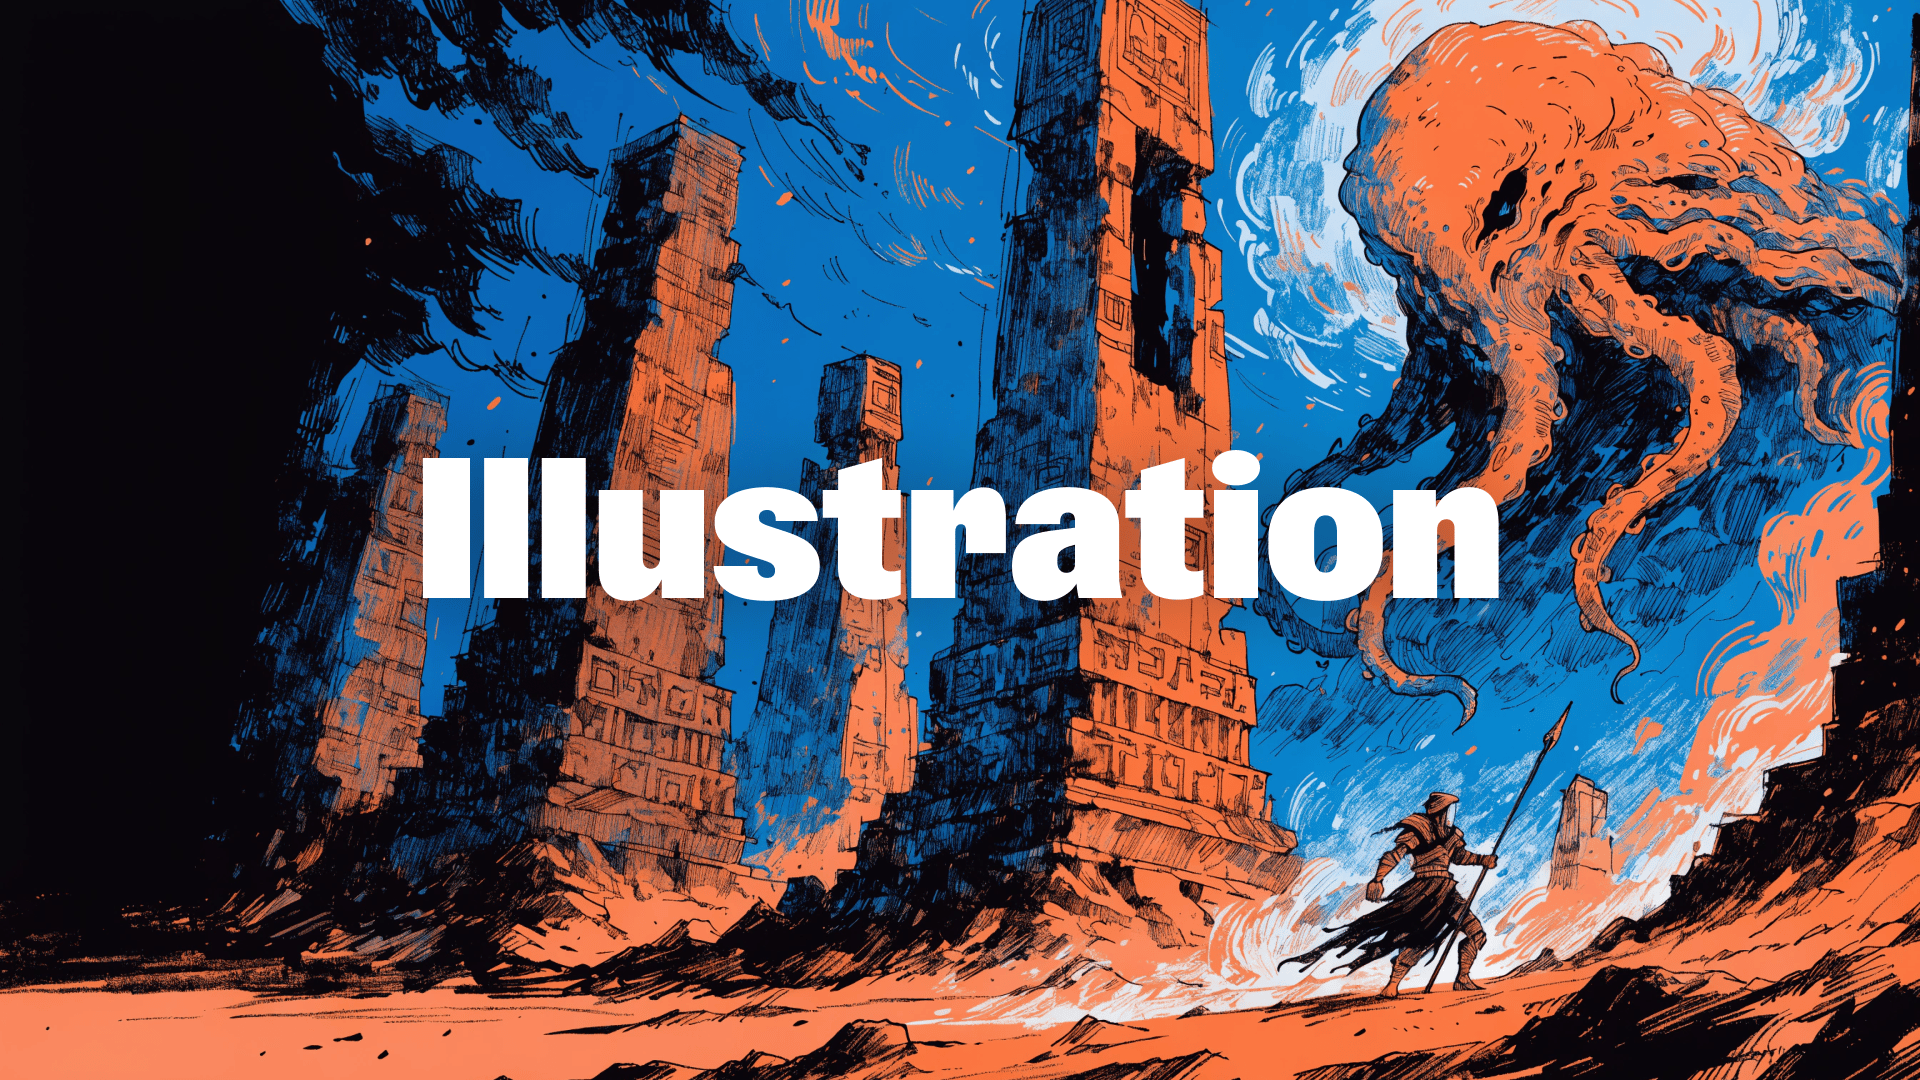
[](https://www.recraft.ai/docs/prompt-engineering-guide/prompting-with-recraft-v4#illustration-strength)
Illustration Strength
----------------------------------------------------------------------------------------------------------------------------------
Recraft V4 is highly capable in stylized and narrative illustration. **Examples**
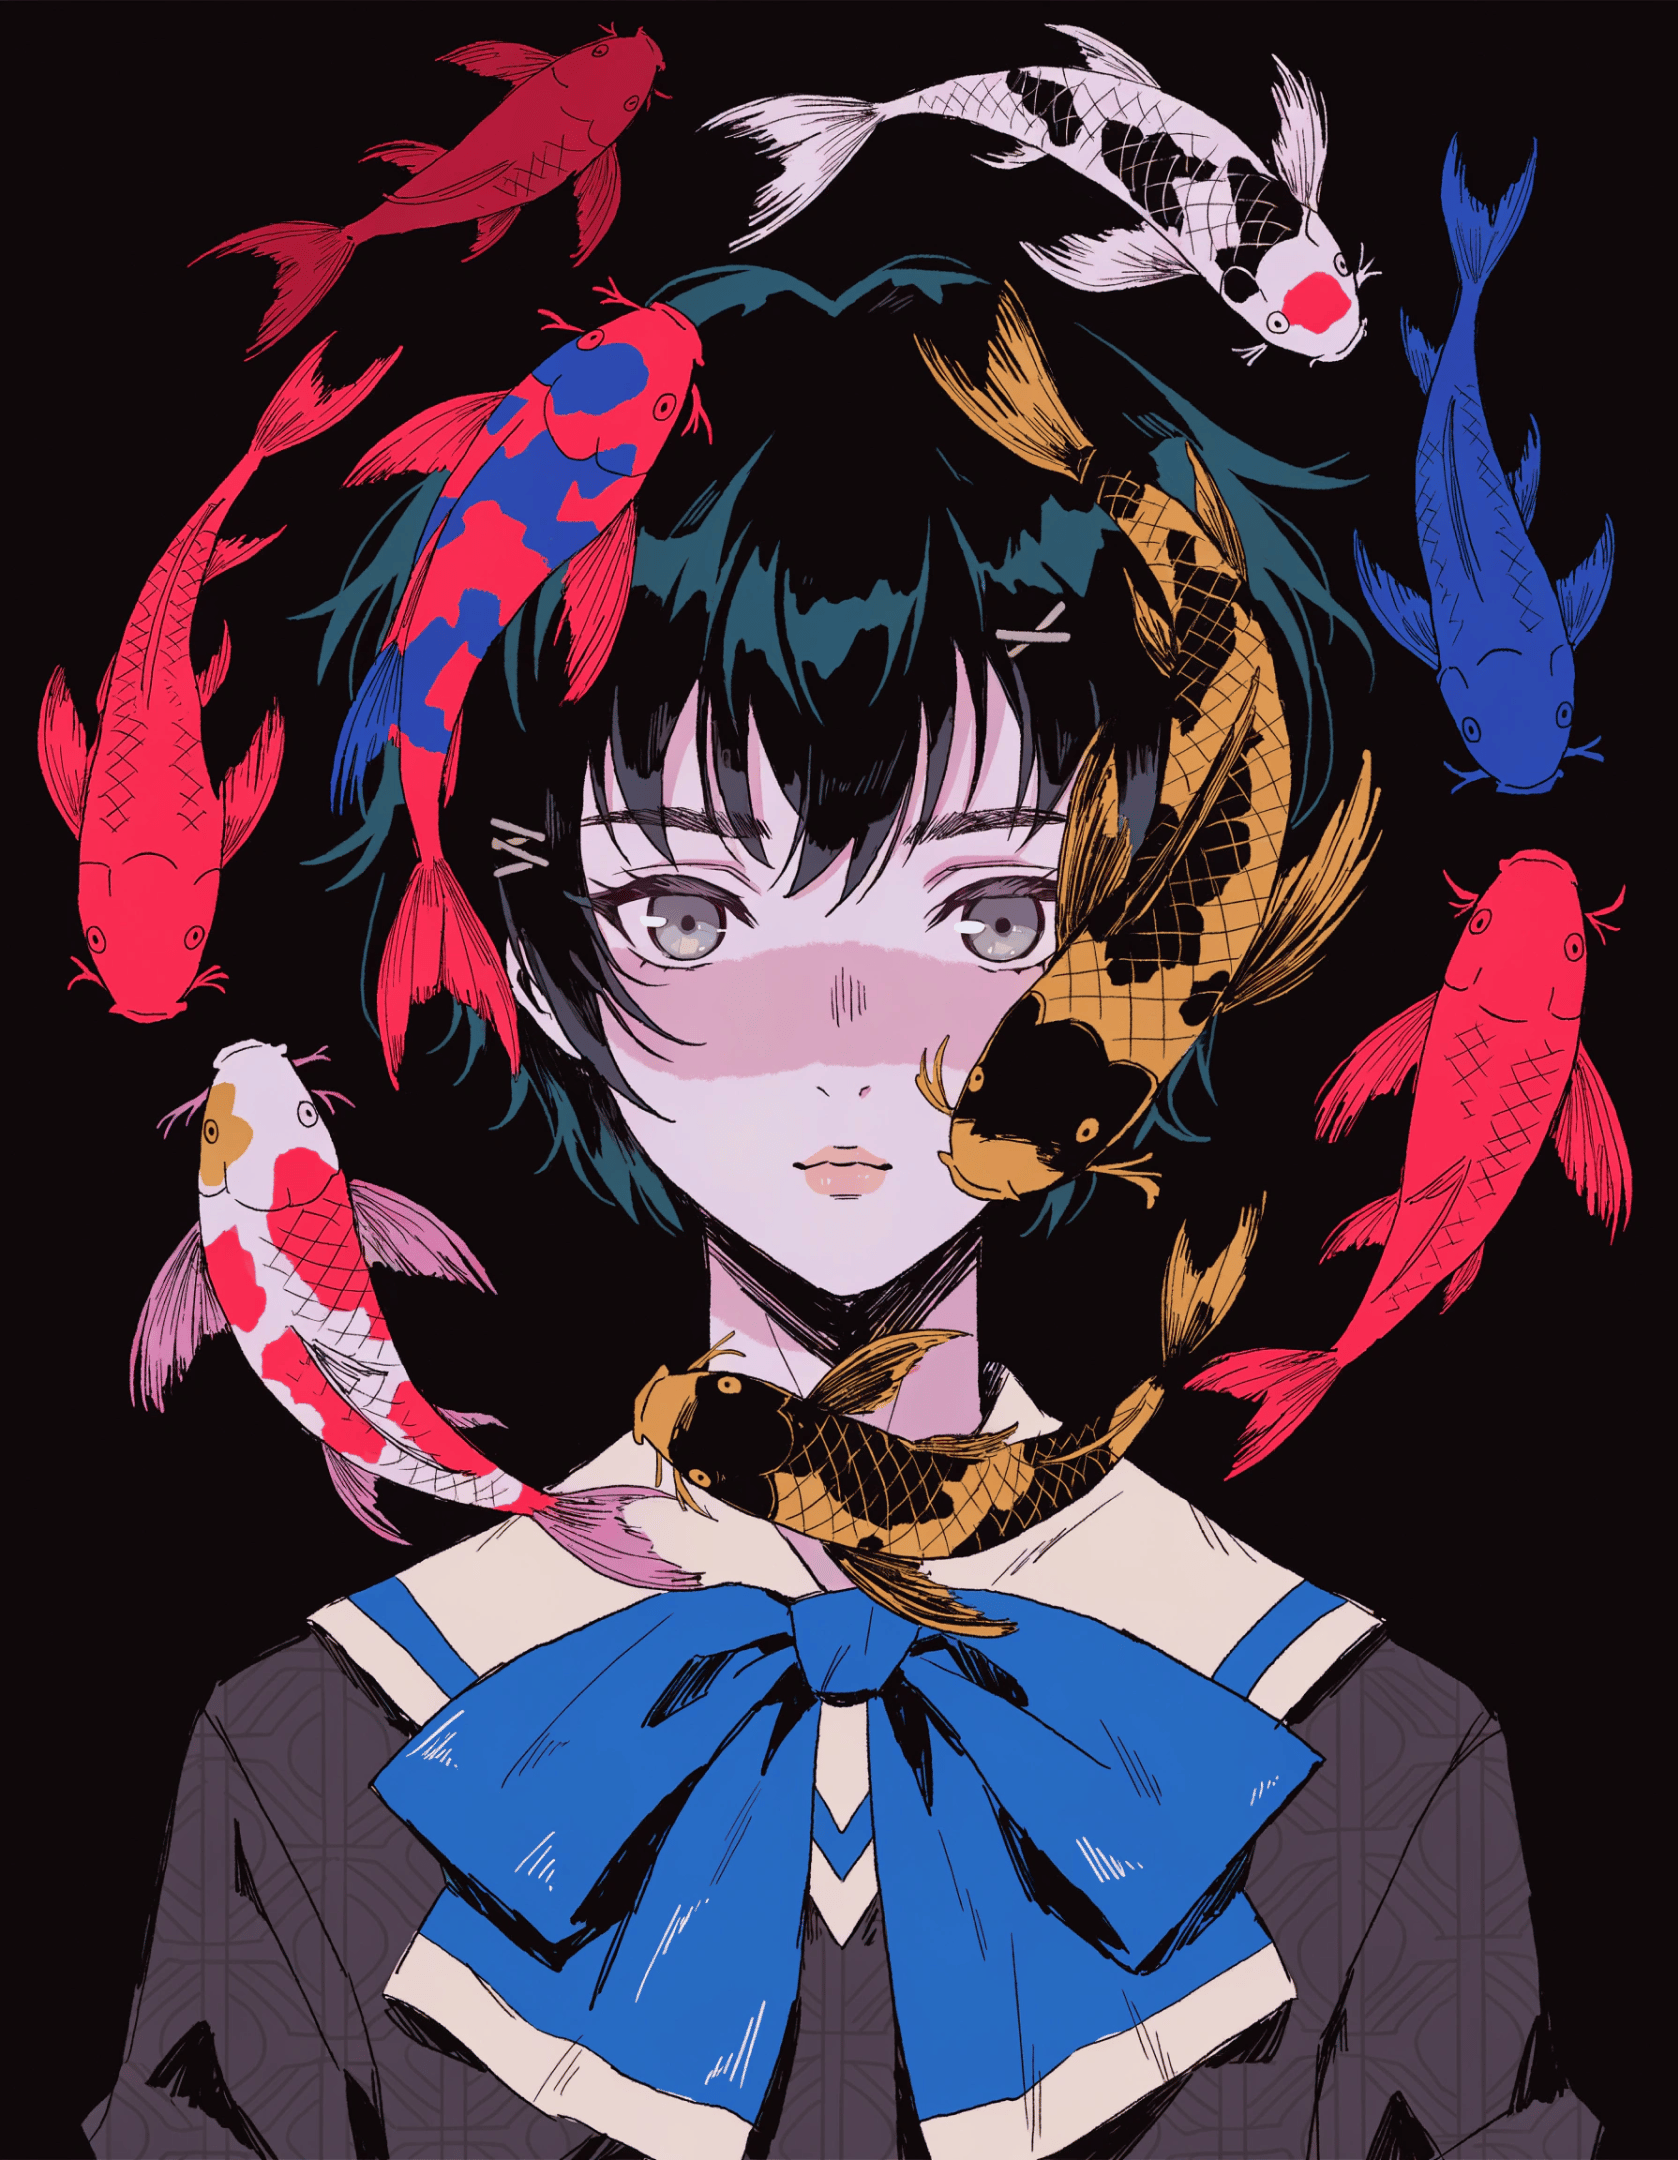
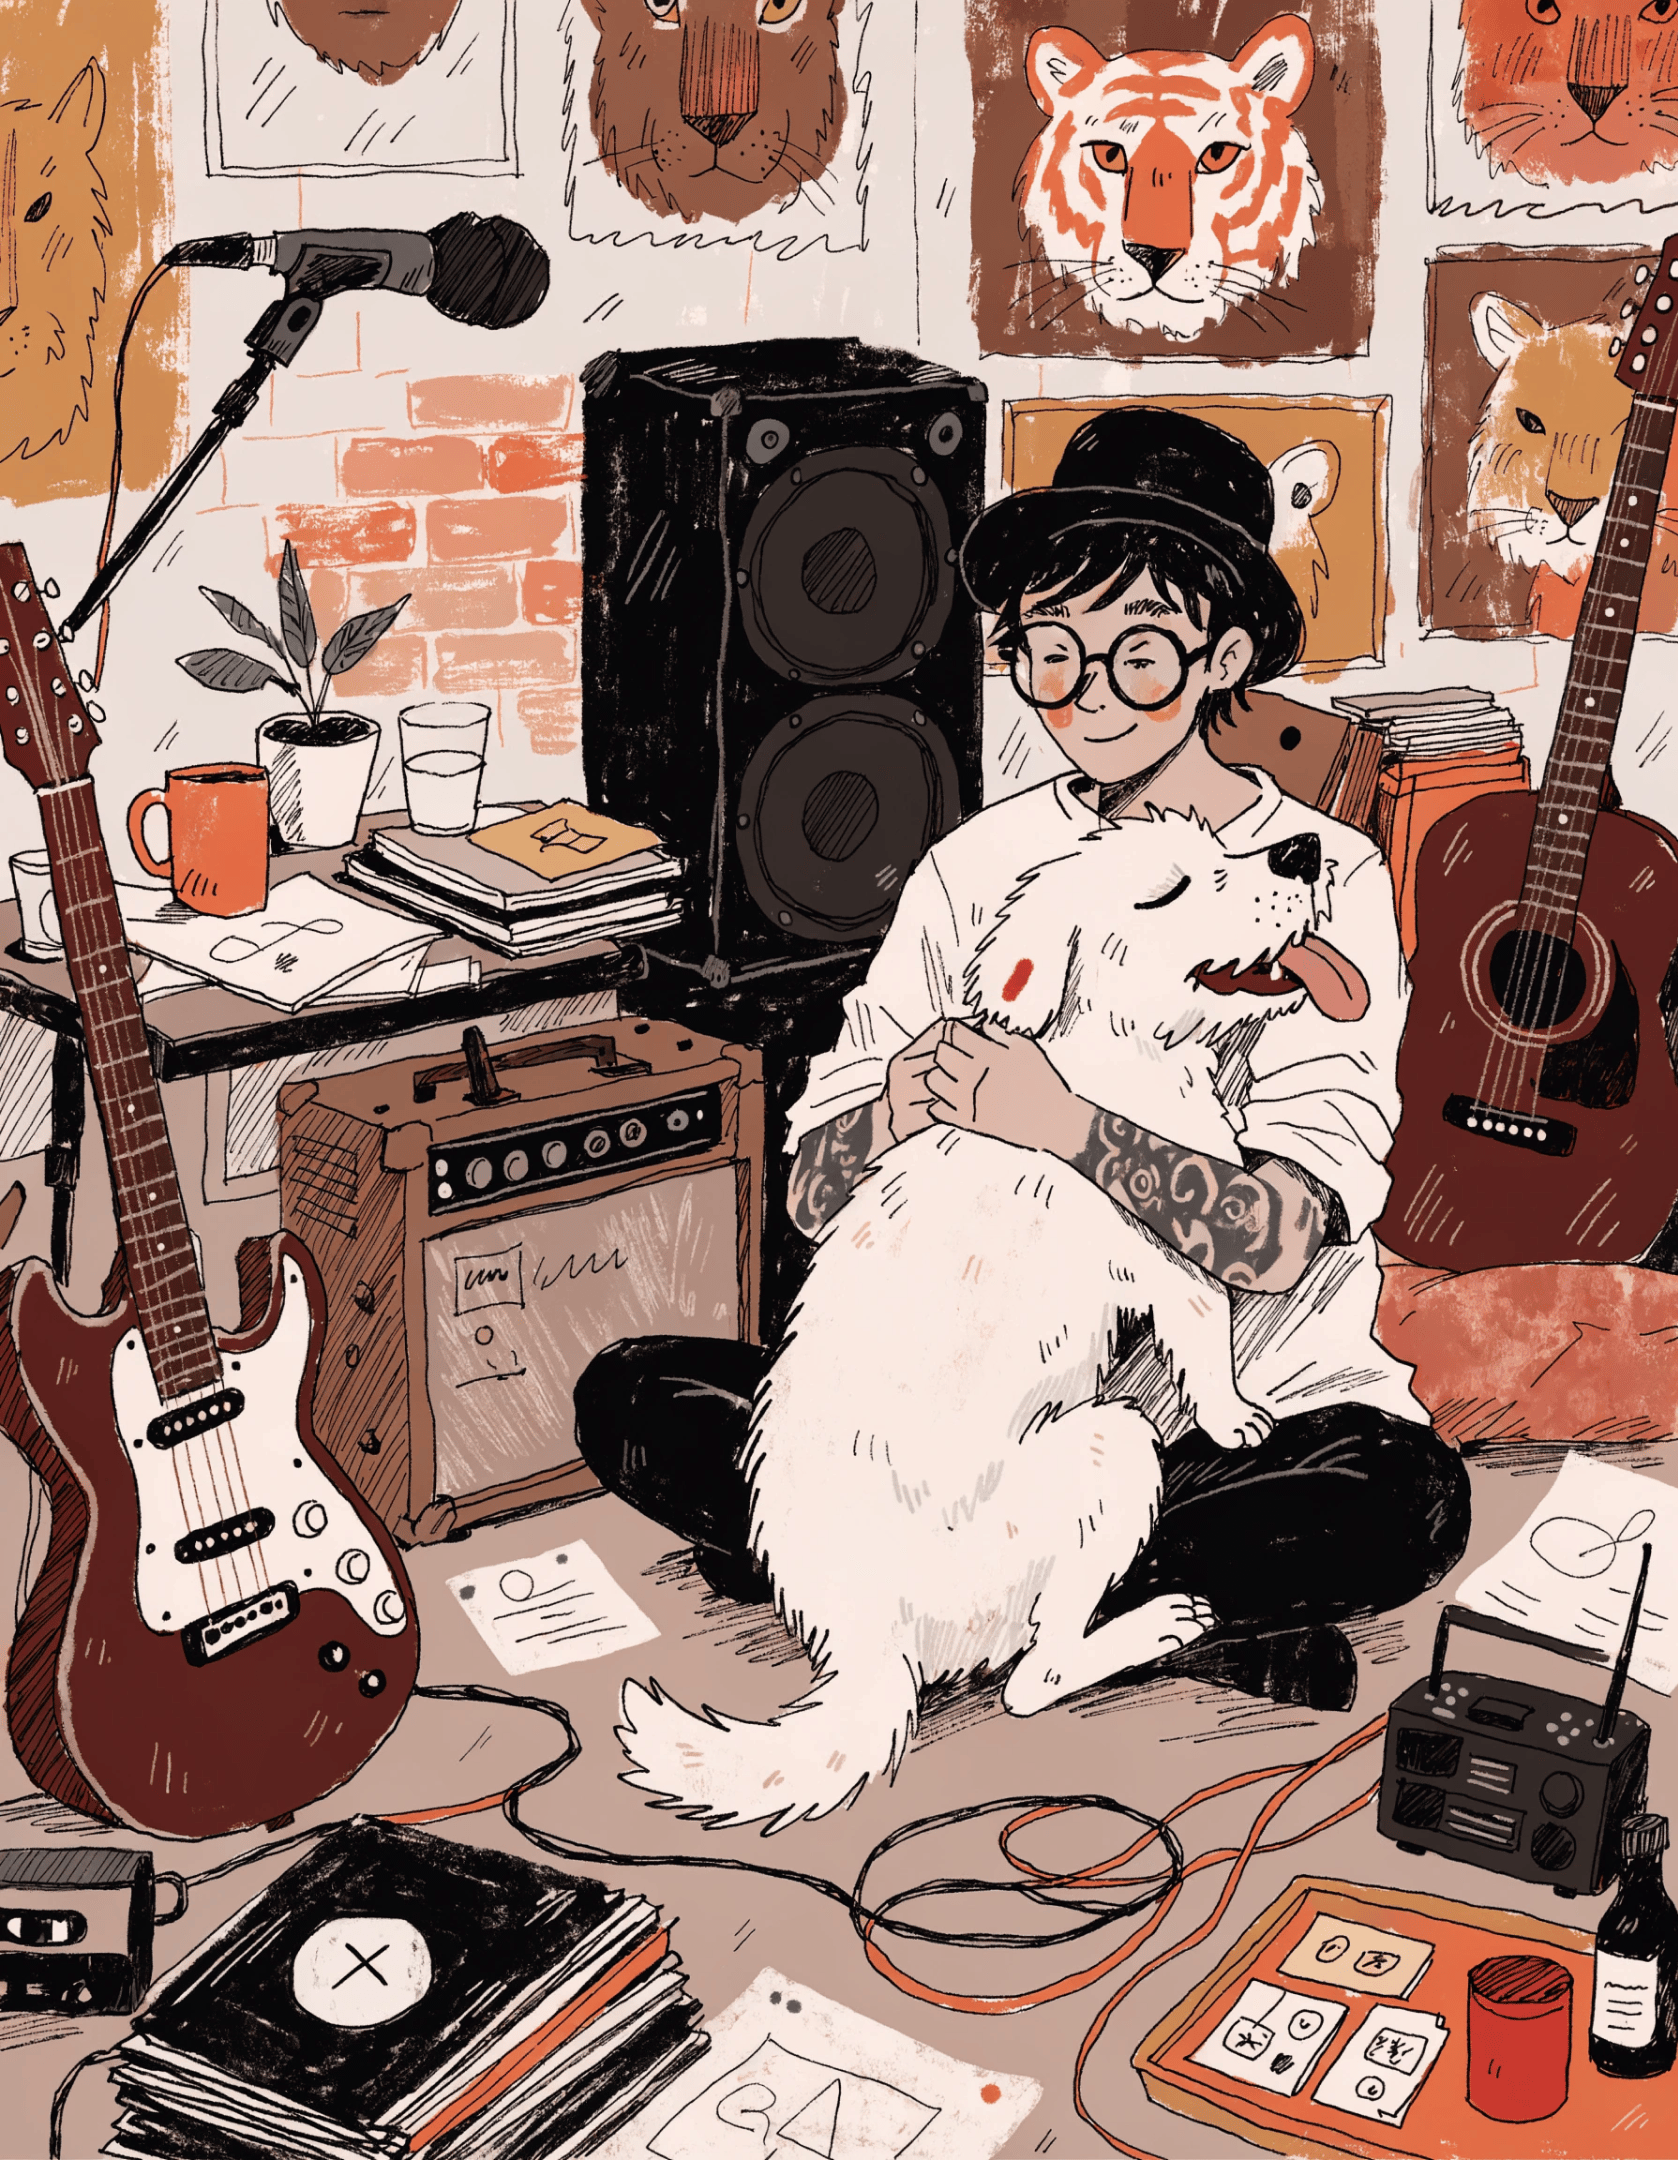
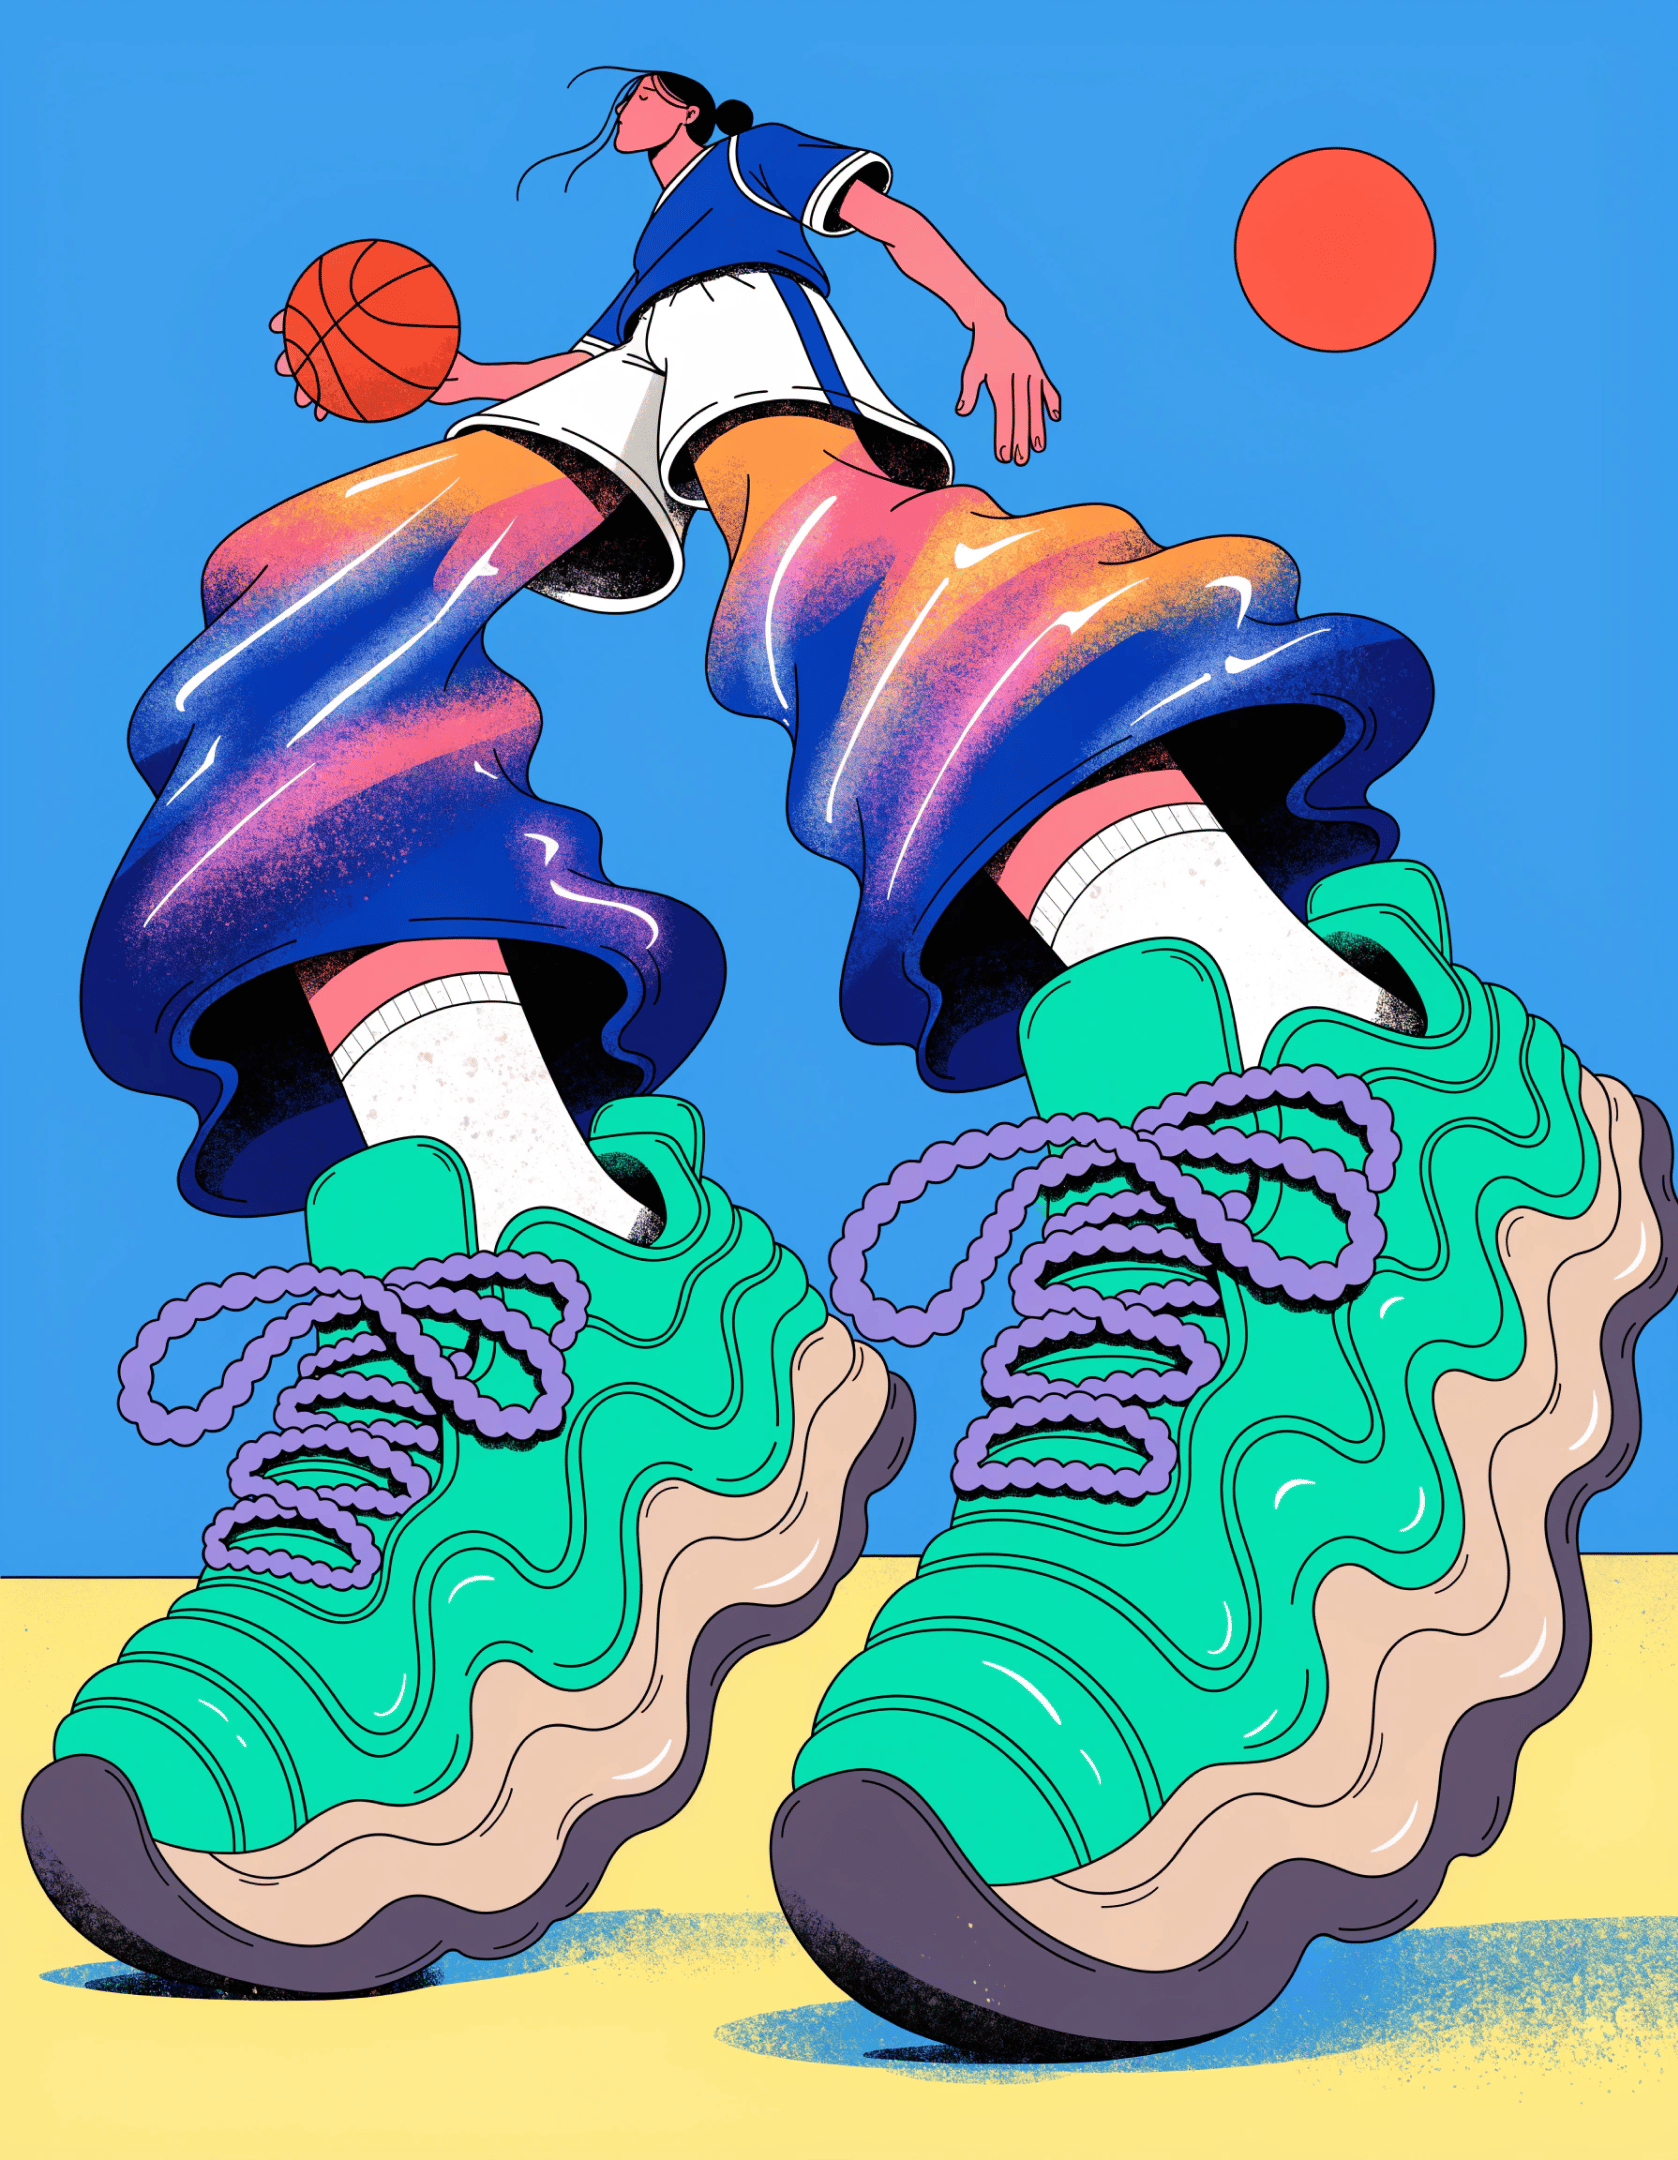
Illustration Prompt #1
“_Digital anime-style chest-up portrait on a solid black background, centered. An androgynous young teen with cool pale skin and soft lavender blush, short choppy black hair with subtle teal highlights and small metallic clips. Large grey-blue eyes with bright highlights, thin straight brows, small muted rose lips, calm introspective expression.Wearing a modern sailor-inspired top in deep charcoal with a subtle geometric pattern, off-white collar trimmed in cobalt, and an oversized cobalt bow. Ten stylized koi fish in saturated reds, blues, gold, pink, white, and black swirl around the head and shoulders, overlapping the hair and partially crossing the face; one bold black-and-gold koi curves across the lower face. High contrast, flat lighting with soft shading, clean edges, dreamlike and contemporary mood._”
Illustration Prompt #2
“_Сolorful illustration of a creative art studio filled with instruments and posters, but with a slightly more painterly, hand-drawn feel rather than clean vector graphics. A short-haired woman with visible arm tattoos and round glasses gently holds a large fluffy dog. She wears a loose white shirt and a dark hat. Around her are guitars, vinyl records, speakers, cables, sketchbooks, and framed portraits of abstract animal faces layered on the walls.Warm mustard, brown, terracotta, and burnt orange palette with soft tonal variation. Forms remain simplified and graphic, but edges are slightly irregular, as if drawn with ink and brush. Add a very subtle, delicate paper-like grain and gentle watercolor-style shading to avoid a flat vector look. Soft layered color transitions, light uneven brush marks, and faint depth in shadows. Cozy, artistic, intimate atmosphere — playful yet slightly textured, warm, and handcrafted rather than digitally perfect._”
Illustration Prompt #3
“_Bold stylized illustration of an androgynous basketball player mid-dribble in extreme exaggerated perspective, with disproportionately enormous legs dominating the composition and oversized sneakers pushed dramatically toward the viewer. The entire figure is fully visible and fills the frame, but the legs occupy most of the visual space, making the torso appear smaller above them. Strong foreshortening and dynamic twisting posture.Color palette taken from the reference: saturated lemon-yellow ground, intense sky-blue background, vivid orange-red sun accent, bright acid neon green sneakers as the dominant highlight color, lavender-purple laces, soft beige midsole details, charcoal-grey outsole, crisp white socks, and bold black outlines. High-contrast flat graphic blocks.Add smooth gradients across the massive legs and shoes for volume, subtle airbrushed shading beneath the sneakers, and a delicate speckled grain overlay to avoid a clean vector look. Slightly irregular hand-drawn outlines remain visible. Energetic, surreal, contemporary poster aesthetic with bold acid green focus and exaggerated proportions._”
**Prompt Structure:**
1. Drawing style (anime, painterly, graphic, exaggerated)
2. Main character and pose
3. Line behavior (clean, irregular, bold)
4. Color logic
5. Surface treatment (flat, grain, watercolor shading)
6. Depth structure (gradients, airbrush, shadow softness)
7. Emotional tone
_**Logic:**_ You define drawing logic, not camera logic.
[](https://www.recraft.ai/docs/prompt-engineering-guide/prompting-with-recraft-v4#3d-&-dimensional-visual-strength)
3D & Dimensional Visual Strength
--------------------------------------------------------------------------------------------------------------------------------------------------------
Recraft V4 handles dimensional form with strong material and lighting awareness. **Examples**
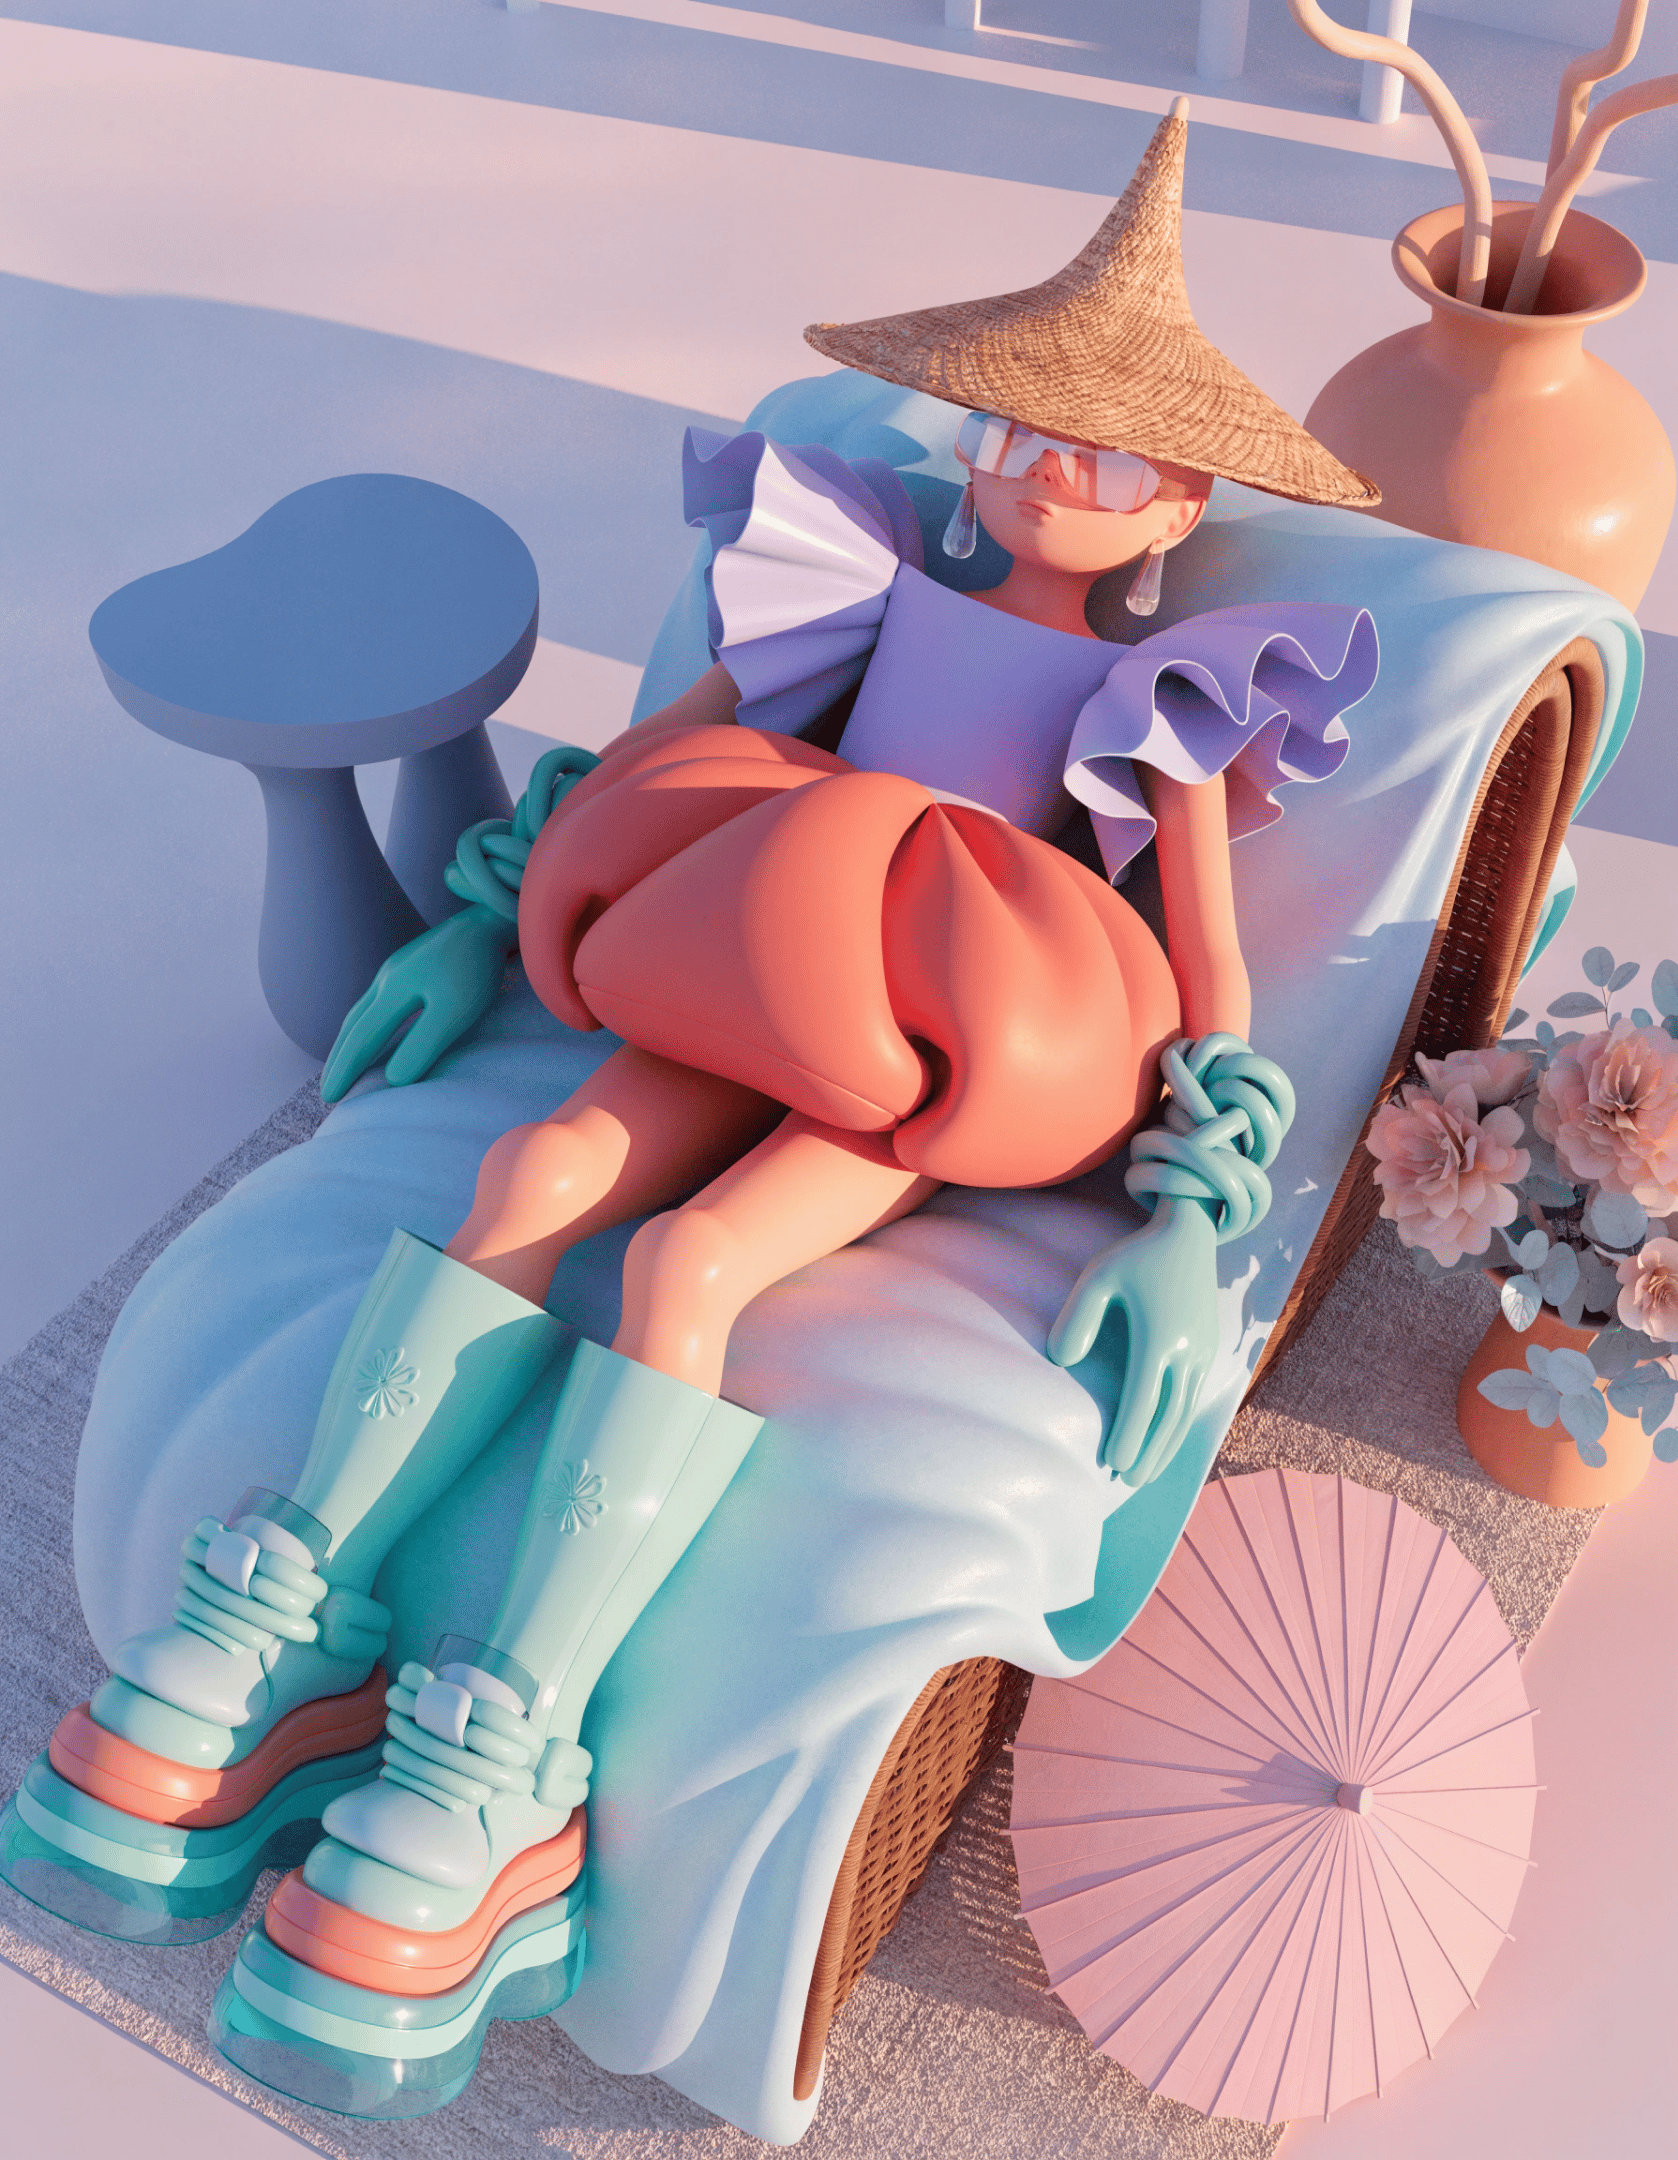
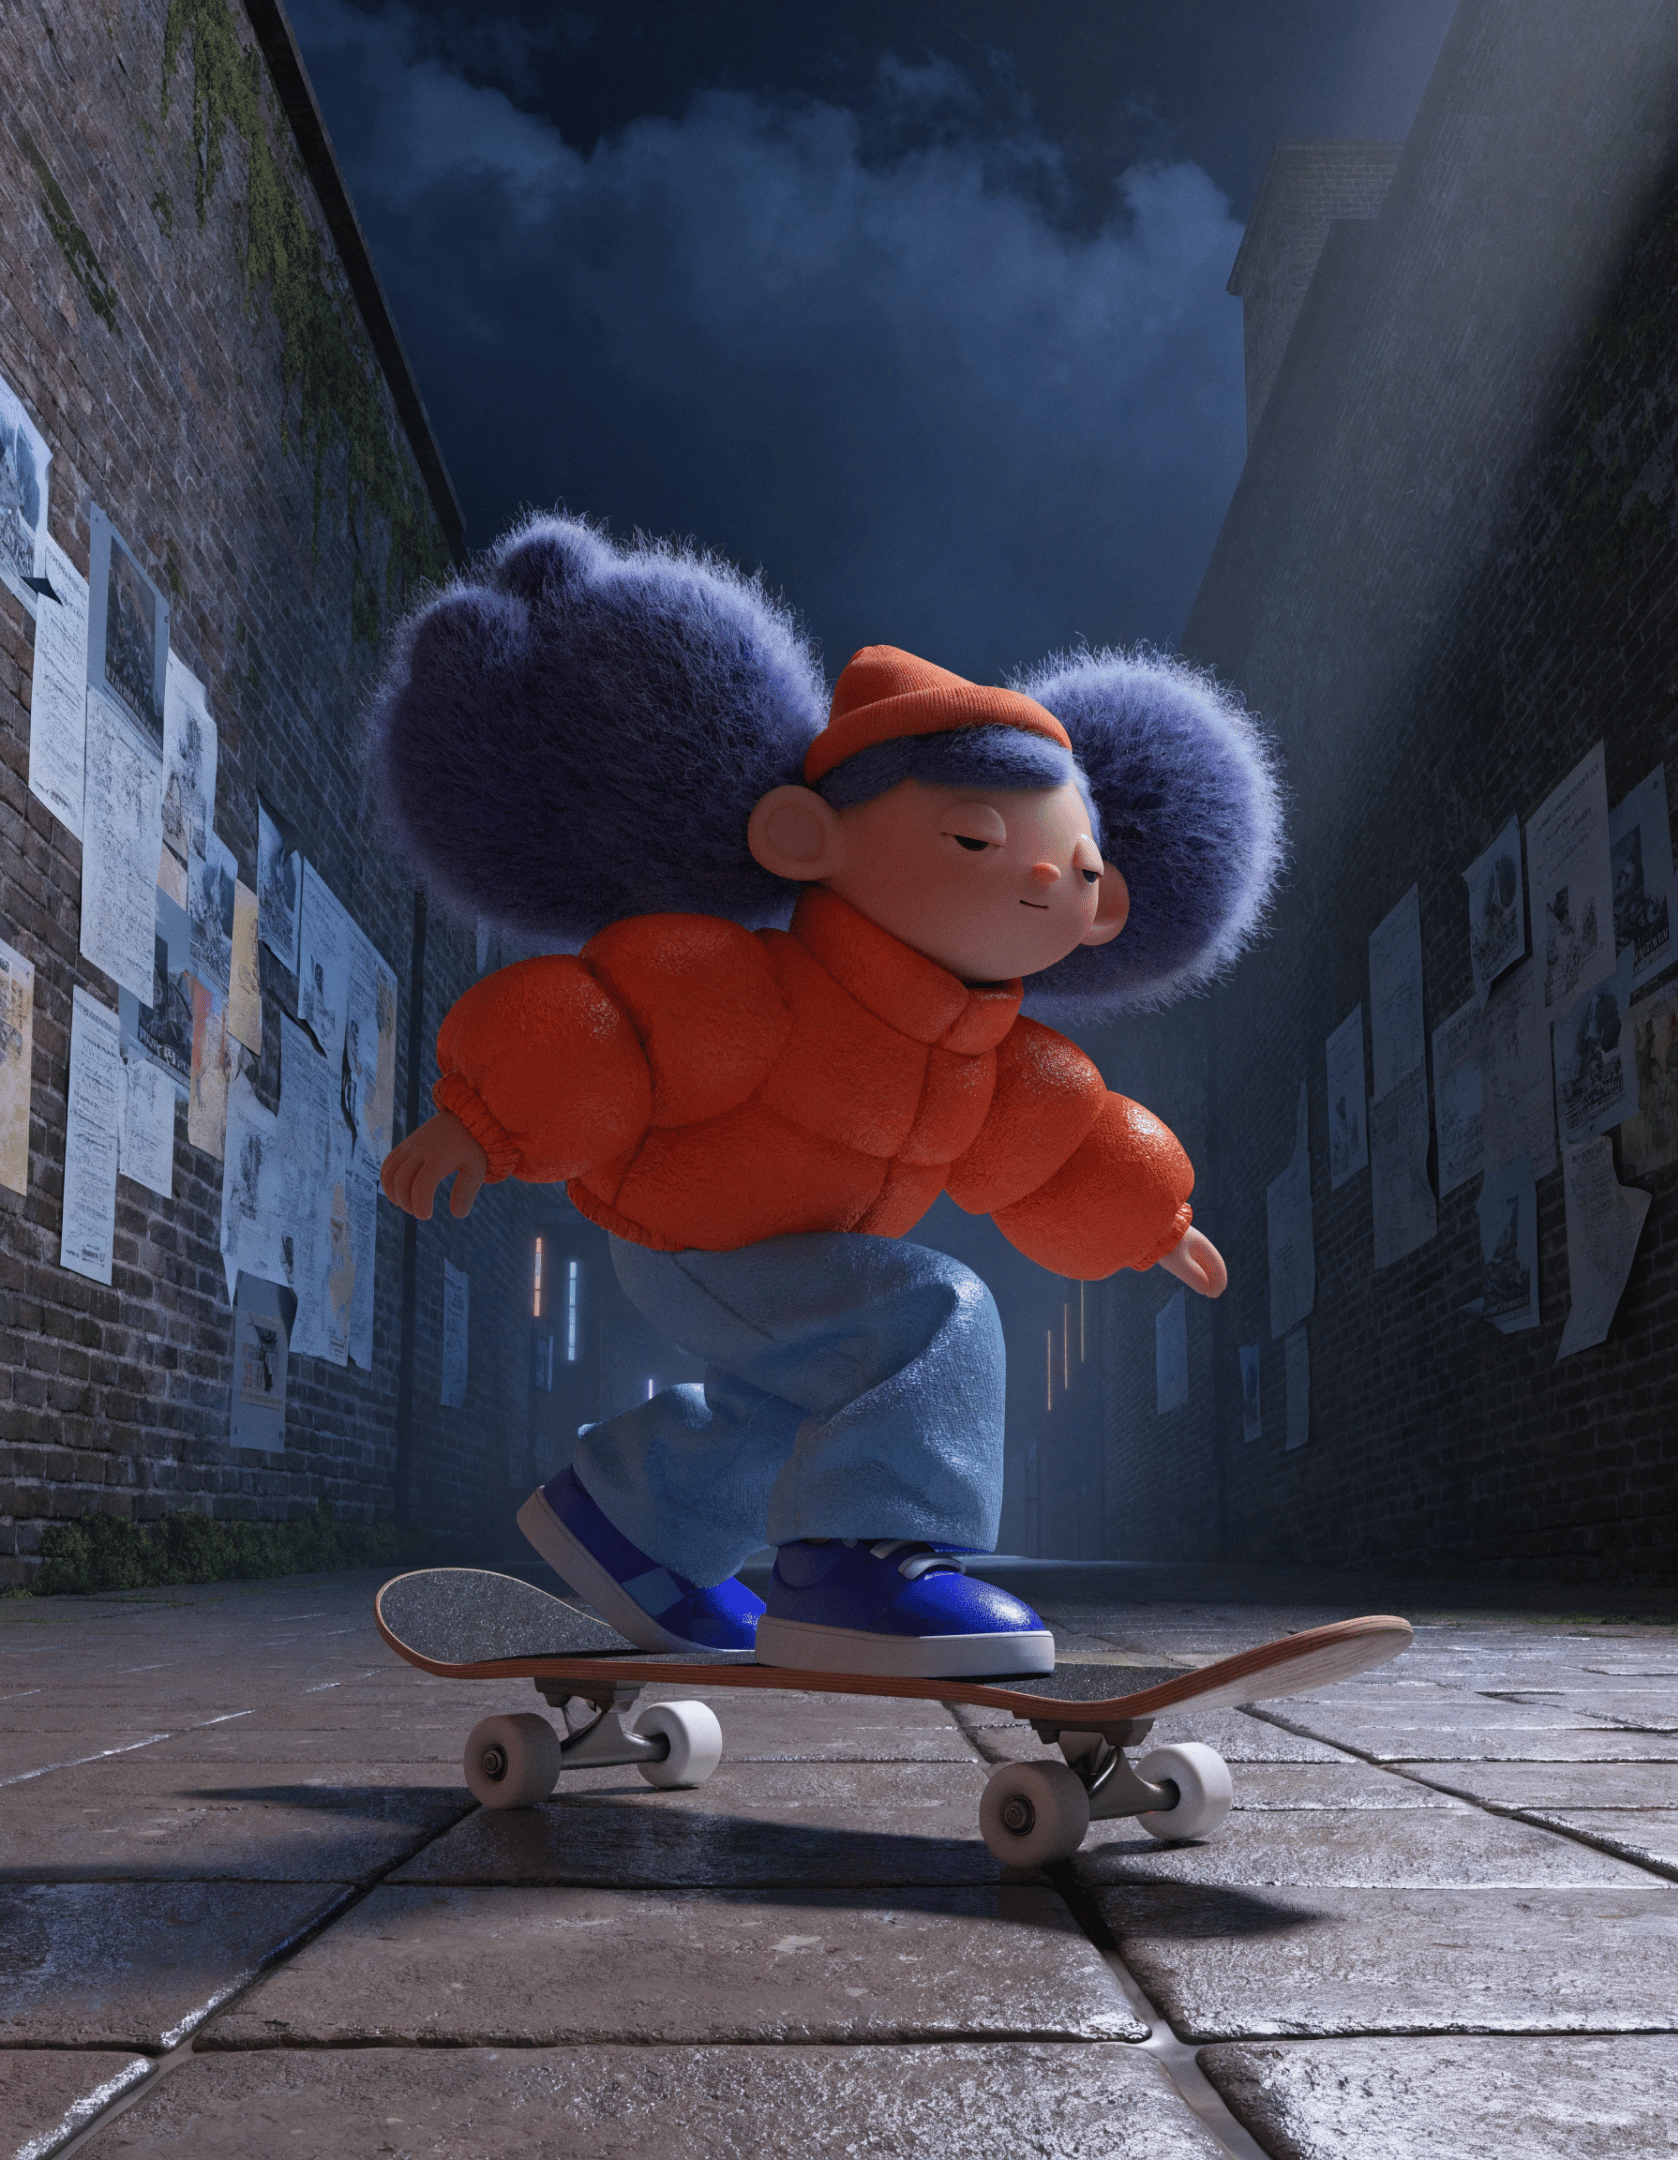
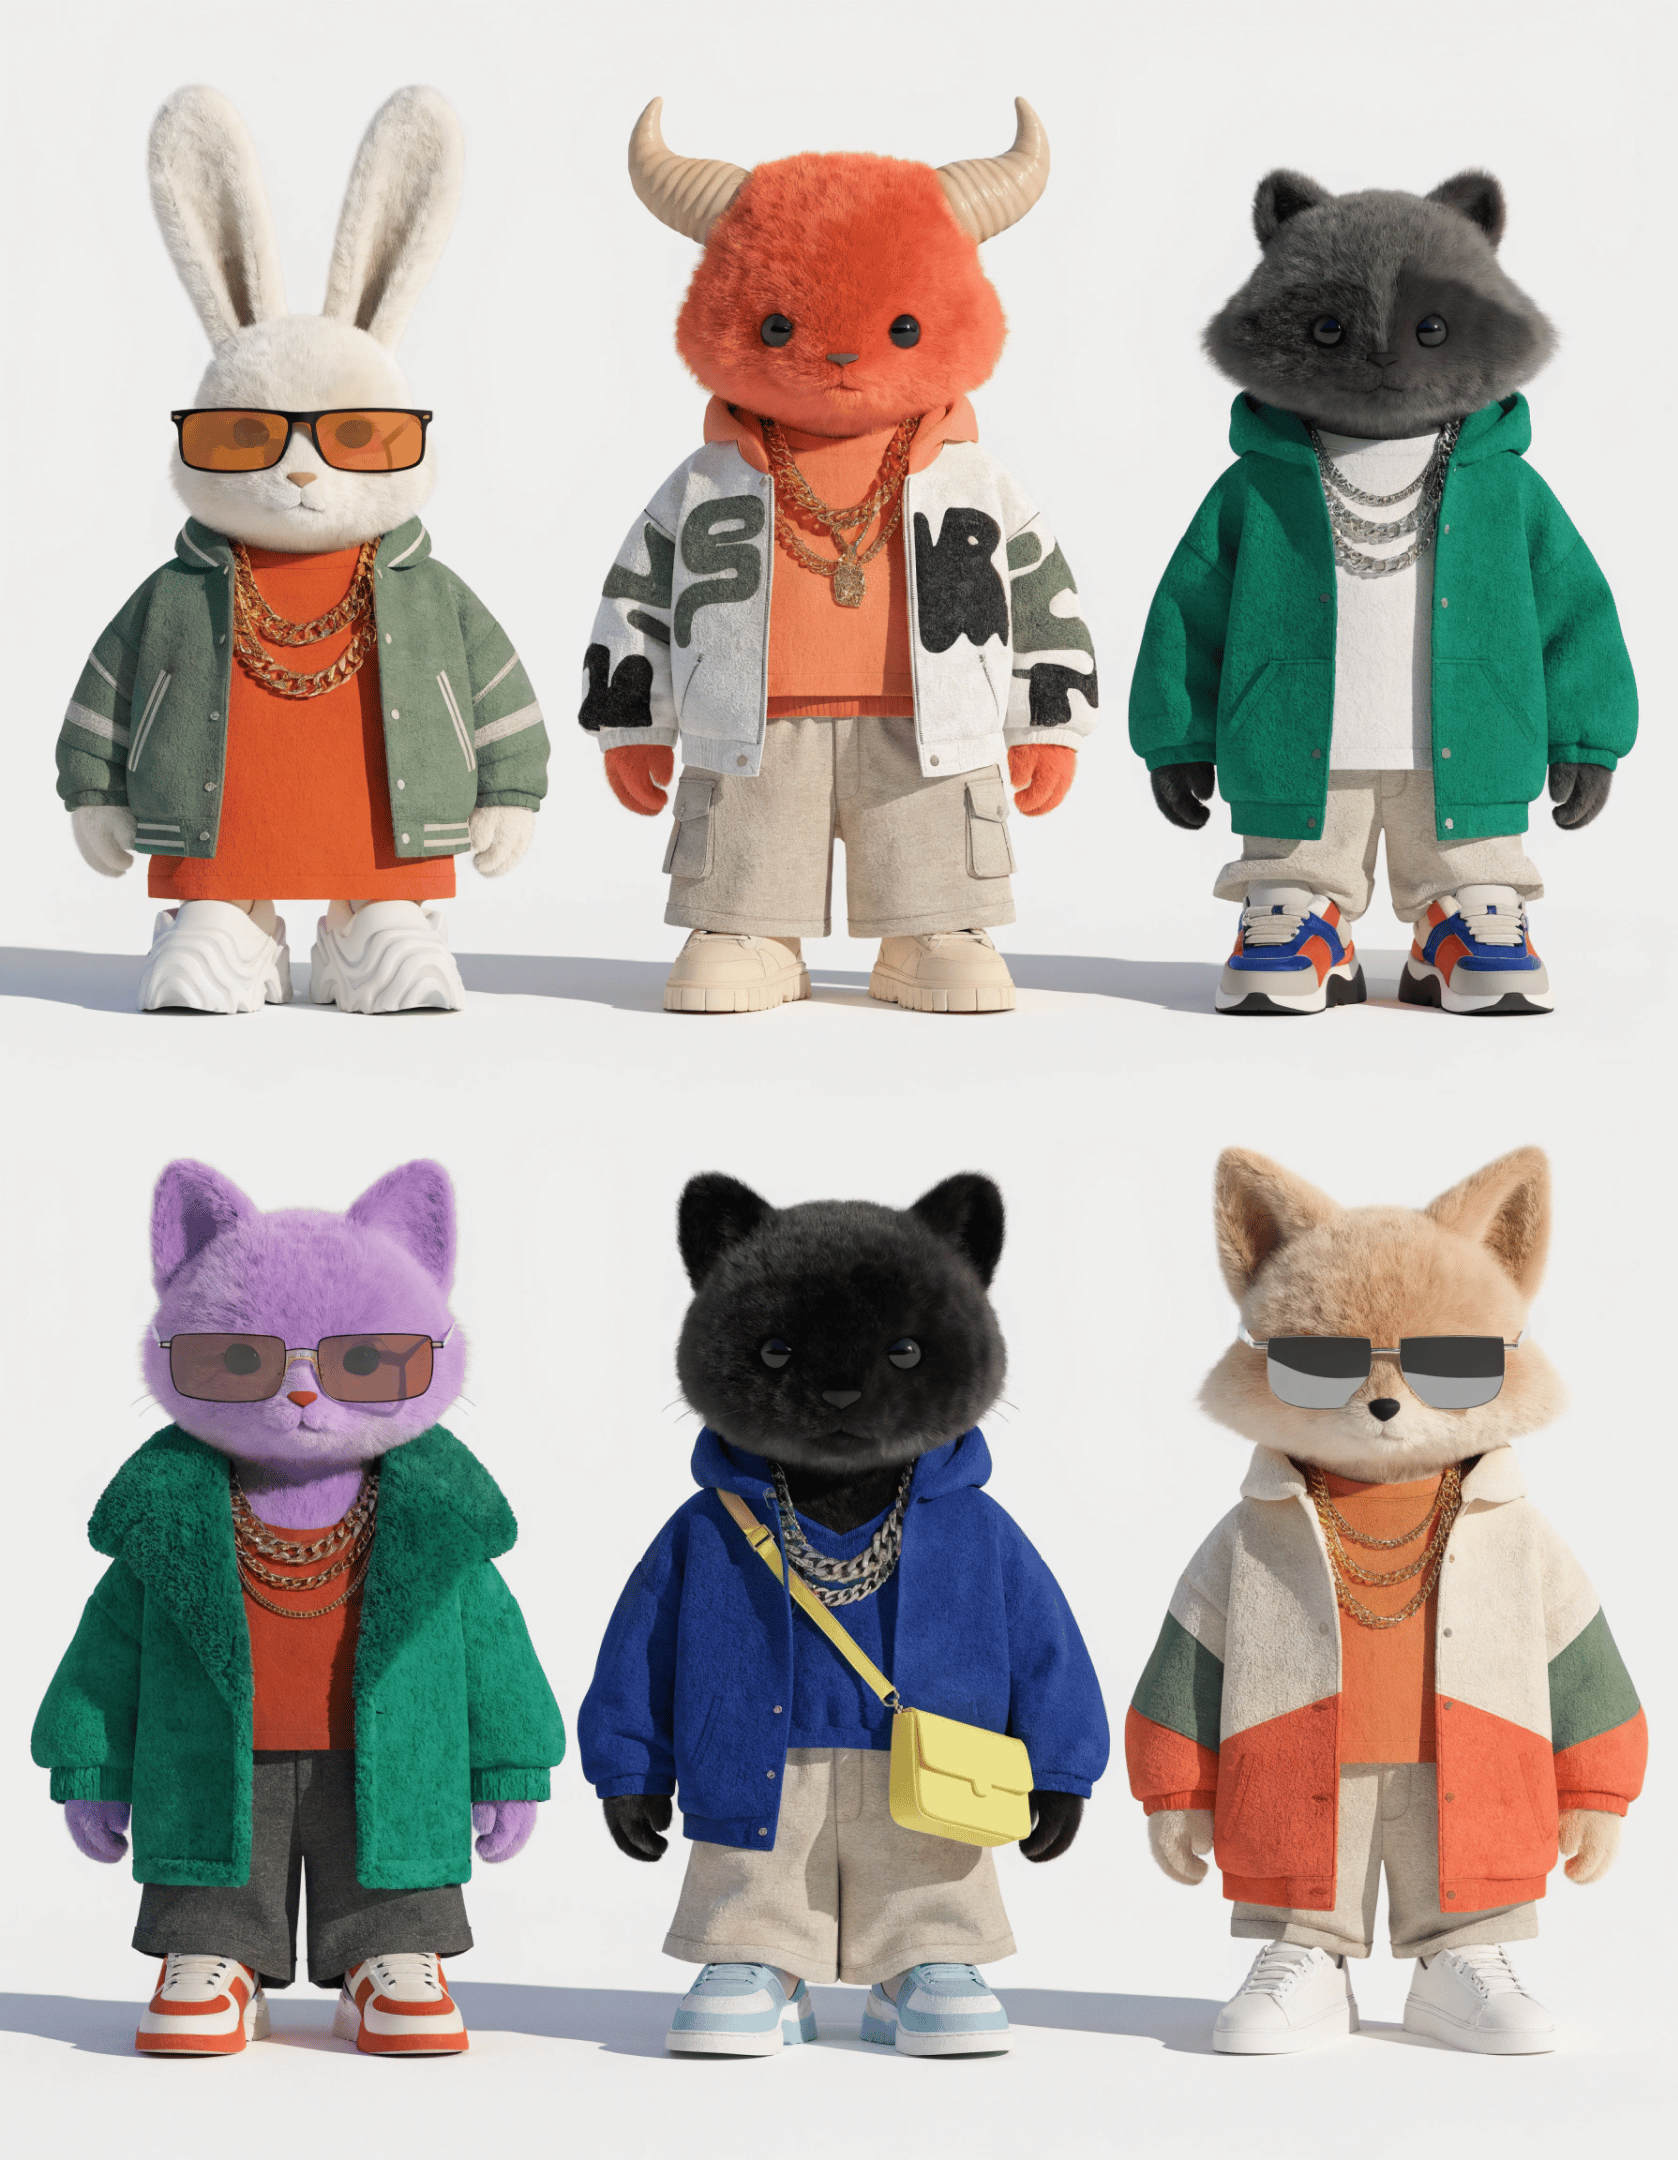
3D & Dimensional #1
“_Ultra-detailed stylized 3D render in a high-end designer toy aesthetic from a top-down bird’s-eye view. A small sculptural character with rounded geometric anatomy and ultra-smooth semi-matte resin surfaces reclines diagonally on a large flowing chaise lounge with an integrated wicker detail, creating a strong graphic composition.The look is extravagant: lavender and powder-blue layered shoulders, dusty-coral torso, mint-green glossy knee-high boots, chunky pastel sneakers in mint, aqua and coral, plus oversized bangles, elongated earrings, a woven beige conical hat, tinted glasses, and a flowing ribbon accent. Around the chaise are a slate-blue side table, a peach ceramic vase with pastel branches, blush flowers, a folded parasol casting a radial shadow, and a woven rug.Soft peach, lavender, dusty coral, mint, wicker brown and blush tones dominate. Bright directional daylight creates long defined shadows from above, preserving a clean, sculptural, pastel-balanced editorial 3D still life._”
3D & Dimensional #2
“_Cinematic stylized 3D night scene with strong depth and contrast, rendered in ultra-smooth plastic-like materials with refined matte surfaces and gentle subsurface scattering. A small stylized girl with an oversized head rides a skateboard through a dim urban alley. She has a playful, slightly mischievous expression, heavy-lidded minimal eyes, rounded proportions, two bouncing hair puffs, and a tiny snug beanie. She wears an oversized puffy jacket, loose wide-leg pants, and chunky sneakers in brighter electric blue and luminous cobalt tones, clearly separated from the darker surroundings.The background is deep and moody — navy-to-indigo gradient sky, shadowed brick walls, posters fading into darkness. The alley recedes with clear atmospheric perspective: sharper foreground, cooler midground, darker softly blurred background. Dry tiled pavement with subtle reflections, no rain or wet surfaces. Soft distant neon glow.Lighting is cinematic: strong cool key light from above-right, soft side fill, and a clean rim light outlining her silhouette. Visible cast shadows from the skateboard and legs enhance depth. Low eye-level camera angle, shallow depth of field, modern animated short-film aesthetic with clear spatial layering and dimensional contrast._”
3D & Dimensional #3
“Digital 3D fashion lookbook render featuring six anthropomorphic characters arranged in a clean 3 × 2 grid on a single solid light grey background and matching floor, figures slightly smaller in frame with generous negative space, soft frontal diffused lighting and gentle grounded shadows. All share identical minimalist faces with very small glossy bead-like black eyes, no pupils, no nose, and a thin minimal mouth line. Chibi proportions with oversized heads and compact bodies, matte plush materials with subtle metallic shine on layered chains. All styled as contemporary rappers with oversized silhouettes and bold streetwear attitude: a cream-white hare in an electric orange tee and sage varsity jacket with gold chains; a coral horned creature in a cropped white bomber over an apricot hoodie with beige cargos and a heavy chain; a charcoal raccoon in a moss oversized hoodie with layered chains and relaxed trousers; a lavender cat in an emerald oversized coat over a terracotta tee with wide charcoal pants; a black panther with subtle velvety fur wearing a cobalt hoodie and acid yellow crossbody bag with wide beige pants and platform sneakers; and a sand-colored fox in an ivory color-block jacket over a dusty-orange shirt with layered chains and white sneakers. Bright saturated palette, cohesive fashion-forward hip-hop collectible aesthetic.”
**Prompt Structure:**
1. Render type (designer toy, cinematic 3D, lookbook)
2. Form and proportion system
3. Material behavior (matte, gloss, plastic, fabric)
4. Spatial environment (floor, background, atmosphere)
5. Lighting direction and intensity
6. Camera angle and depth
7. Color system
_**Logic:**_ If you only describe the object, the result is interpretive.
If you define the physical system, the result becomes controlled
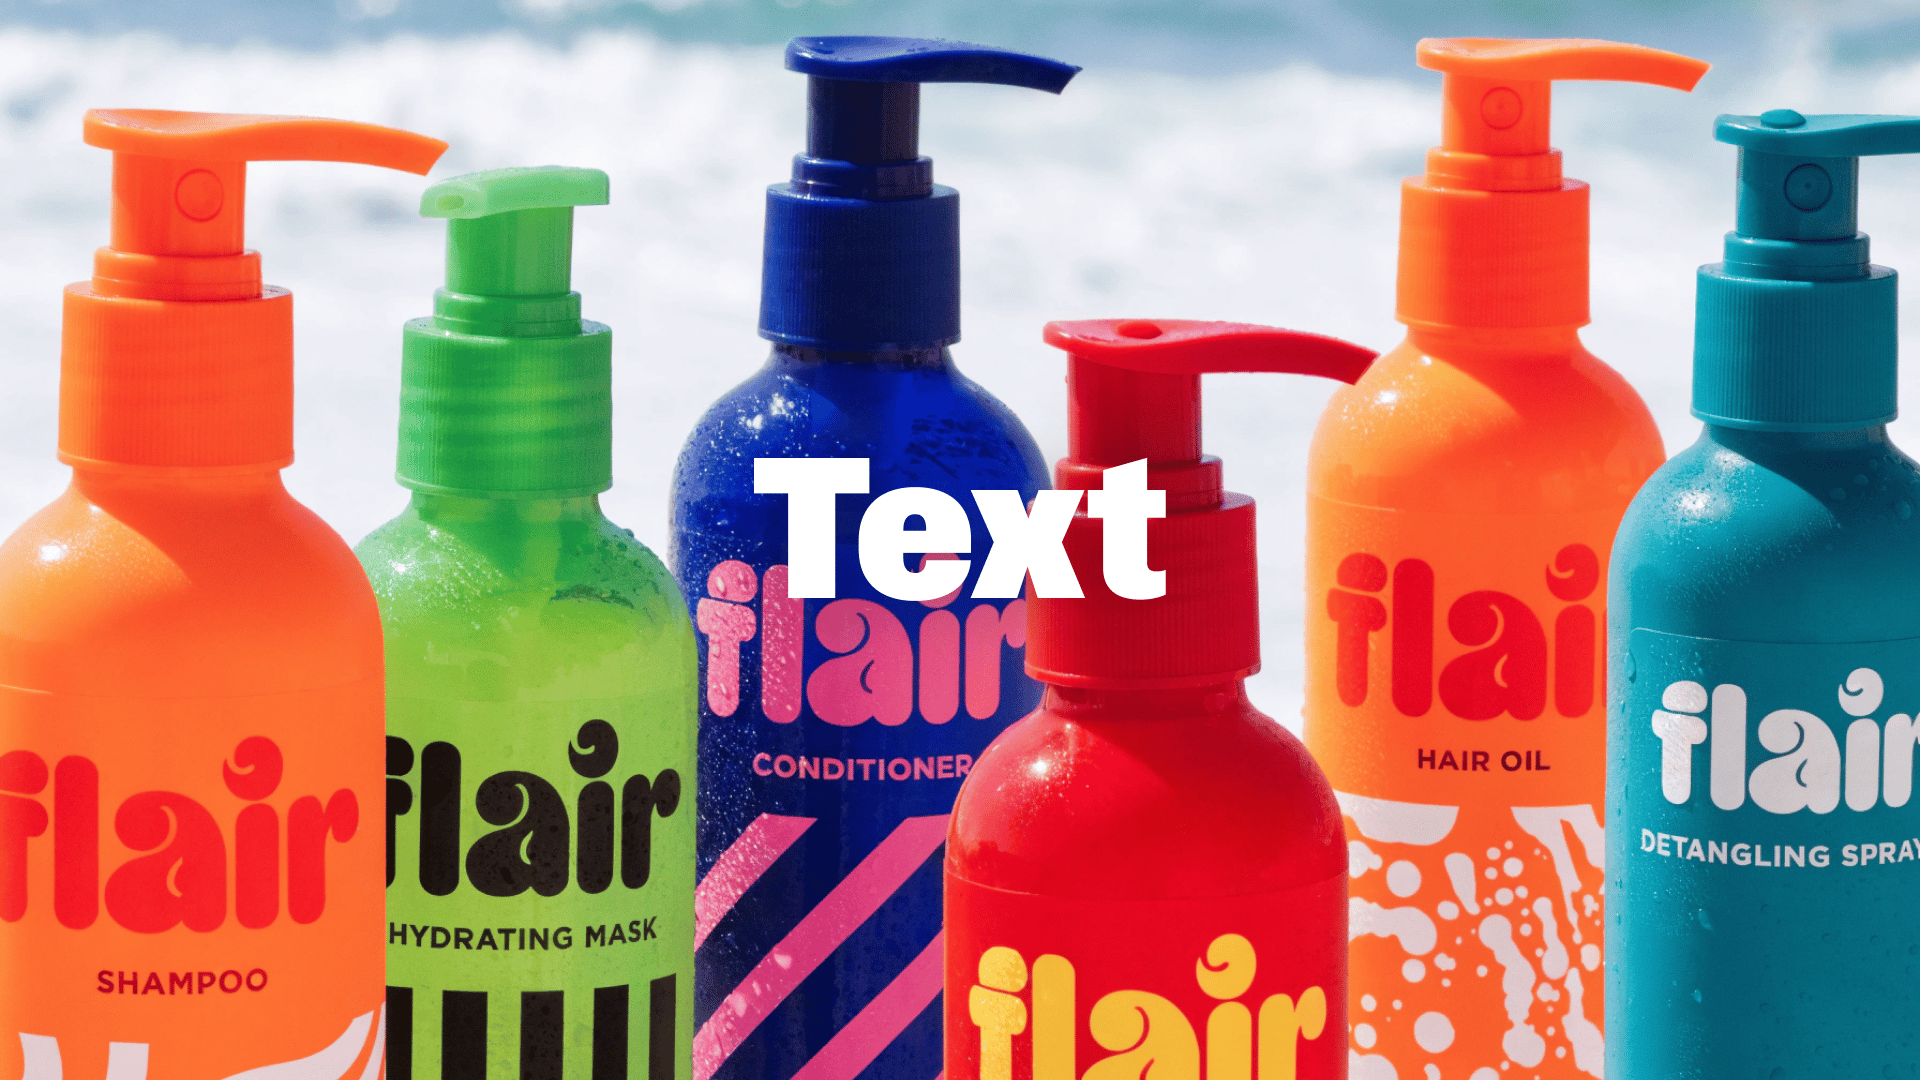
[](https://www.recraft.ai/docs/prompt-engineering-guide/prompting-with-recraft-v4#working-with-text)
Working with Text
---------------------------------------------------------------------------------------------------------------------------
Recraft V4 handles text better than most generative systems, especially when you describe hierarchy. **Examples**
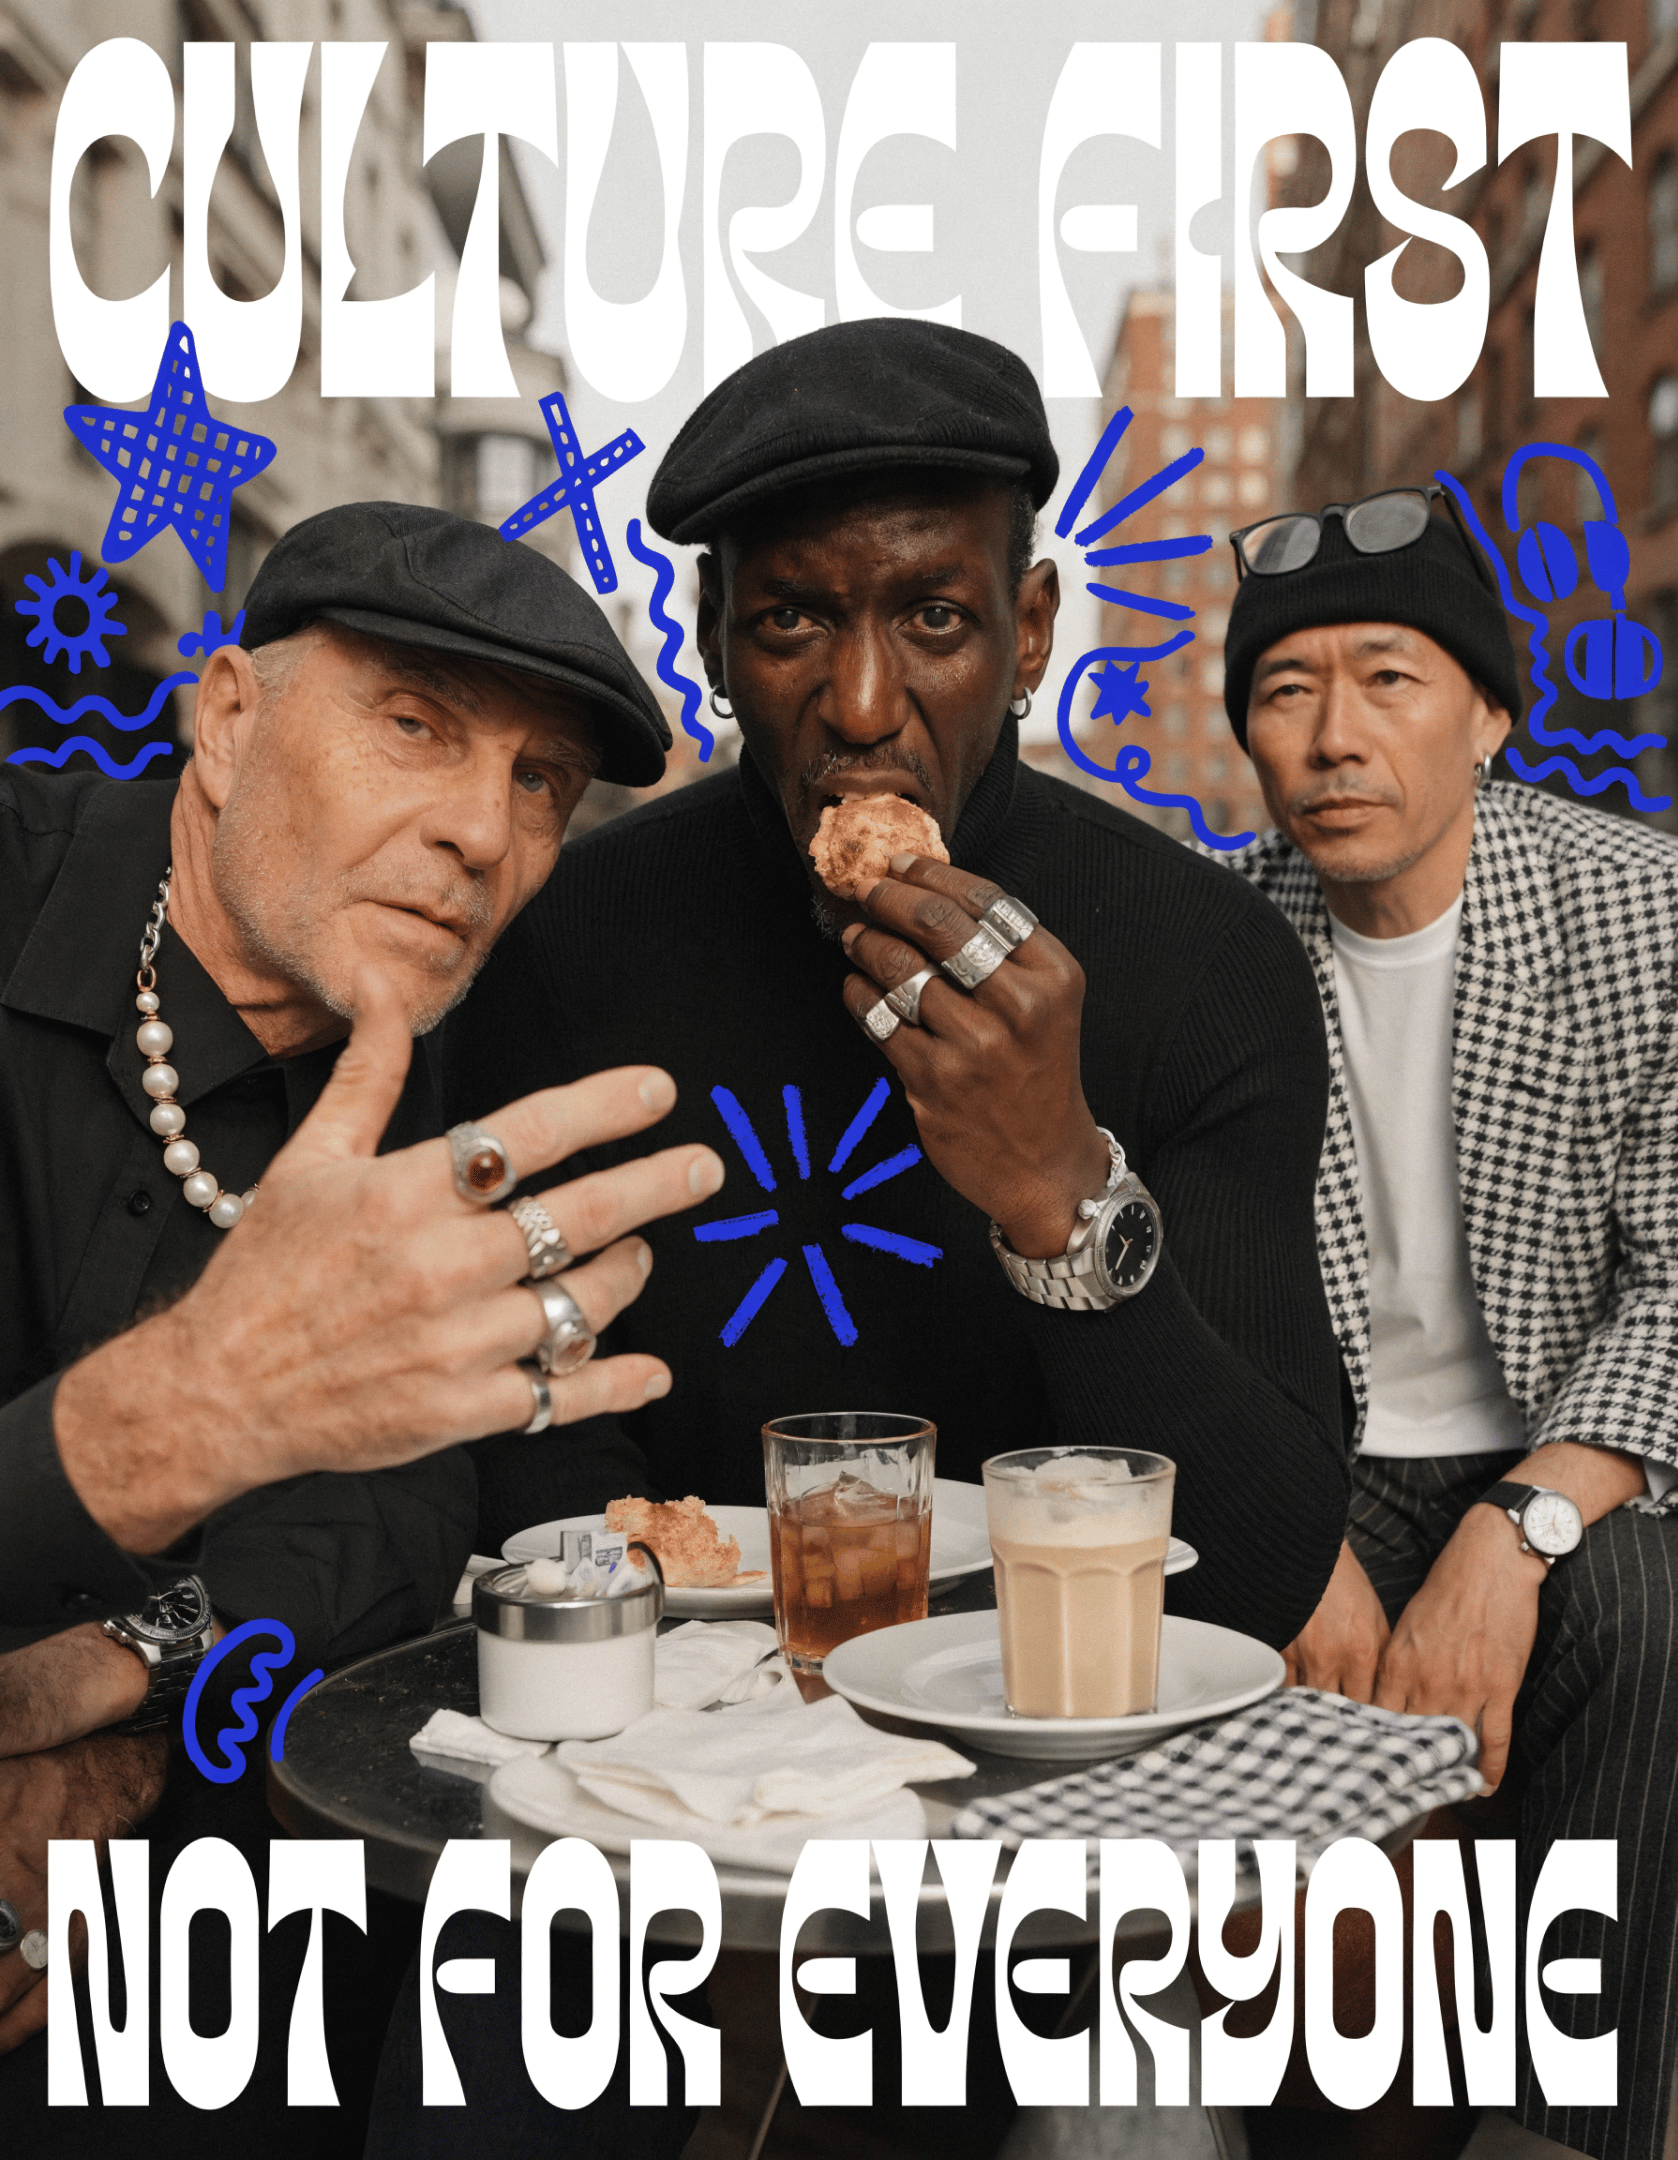
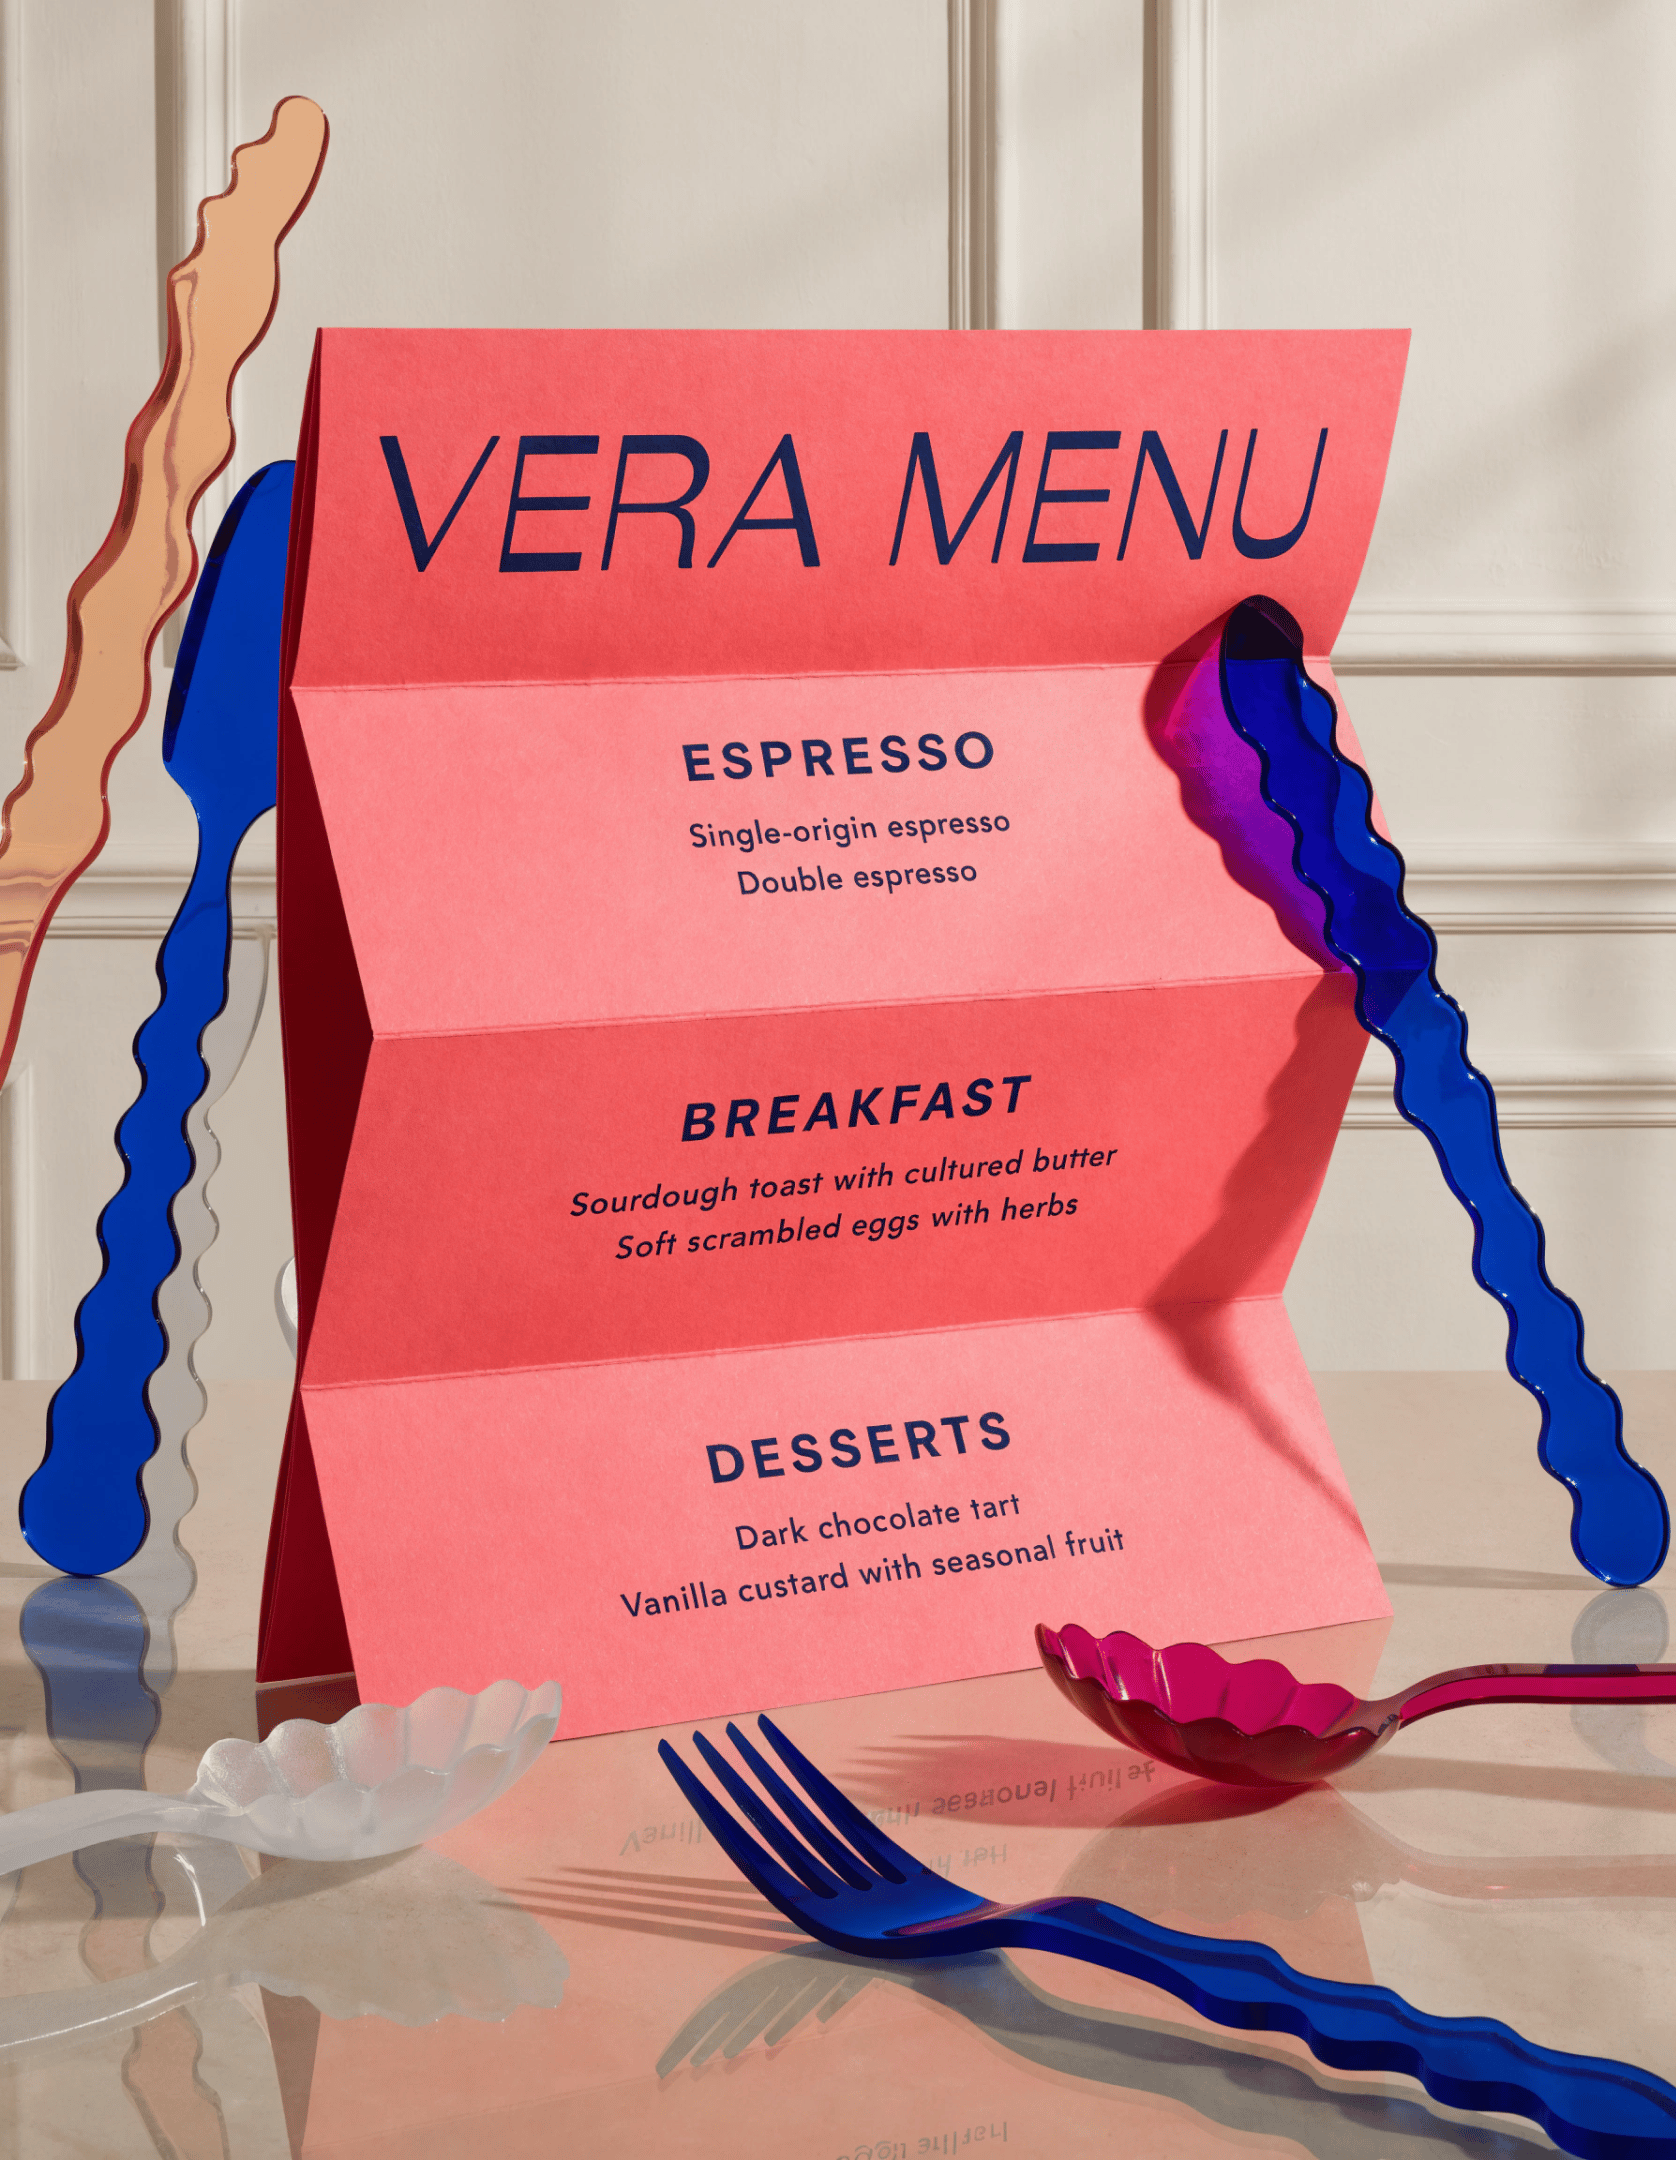
Text Prompt #1
“_Bold urban lifestyle editorial featuring three avant-garde middle-aged men of distinctly different ethnic and visual backgrounds, with radically unique faces — varied bone structures, skin tones, wrinkles, scars, facial hair, asymmetry — real, unpolished, lived-in presence with no harmony or idealization. They sit close together at a small city street café table: one mid-bite holding food casually, one making a clear assertive hand gesture toward the camera, the third slightly back, calm and observant. All maintain direct or near-direct eye contact, confident, grounded, unapologetic.Shot at eye level in natural daylight with a documentary street-photography feel, tight framing on faces, hands, and table, honest skin texture and imperfections visible, softly blurred background. Controlled color palette with deep black base, clean white contrast, and one single bold accent color (cobalt blue, emerald green, or burnt orange), flat high-contrast tones only.Oversized experimental editorial typography overlaps the image without covering faces, using one or two short manifesto-style statements such as “NO RULES,” “CULTURE FIRST,” or “NOT FOR EVERYONE.” Multiple bold sticker-style graphic elements in the accent color visually connect the trio. Mood: raw contemporary street culture meets high-fashion editorial — confident, intelligent, manifesto-like, not made to please, not for everyone._”
Text Prompt #2
“_Bold avant-garde café menu design in a luxury editorial style, photographed in an elevated, design-forward table setting. A large-format folded or partially unfolded menu card dominates the frame as the clear focal point, printed on thick premium matte paper with crisp edges and precise folds, placed on polished stone, lacquered wood, or tinted glass. The headline “VERA MENU” appears oversized and highly legible in an expressive high-fashion sans-serif with sculptural yet clean letterforms. The content is grammatically correct, clearly structured, and professionally written in proper English, with large evenly spaced typography and no filler text: sections such as ESPRESSO (Single-origin espresso, Double espresso), BREAKFAST (Sourdough toast with cultured butter, Soft scrambled eggs with herbs), and DESSERTS (Dark chocolate tart, Vanilla custard with seasonal fruit).Use a vivid high-impact palette — saturated coral, electric pink, deep cobalt blue, warm orange, and creamy off-white — with strong color blocking only, no gradients, and a disciplined typographic hierarchy. Surround the menu with minimal sculptural avant-garde cutlery featuring exaggerated forms and refined finishes. Soft directional editorial lighting creates subtle shadows while keeping the menu surface and typography crisp and fully readable. Overall impression: avant-garde luxury dining where graphic design meets contemporary art — bold, refined, collectible, no real brands, no clutter, focused on scale, clarity, and sculptural composition._”
Text Prompt #3
“_Contemporary premium food packaging photographed in soft natural daylight, stacked rectangular matte cardboard boxes with sharp edges held slightly off-balance in human hands for a natural feel. Each box is a single refined color — deep forest green, warm cream, muted sky blue, soft clay beige — creating strong contrast. Bold oversized sans-serif brand name in dark ink is confidently cropped by the edges, with one short supporting line only, e.g., “VERA — Artisanal foods crafted slowly.” All typography is large, clear, and fully legible, no micro text or decorative clutter. A minimal abstract organic symbol (seed, leaf, or stone shape) appears flat and slightly irregular on the lid.One box is partially open, revealing two or three small clear glass jars with matte metal lids and simple bold labels containing gourmet spreads like pâté or eggplant caviar, rich natural textures visible. Matte paper texture with subtle grain, crisp printing, clean background, shallow depth of field. Modern, warm, premium editorial aesthetic — tactile, calm, design-forward, and quietly luxurious with intentional clarity in every element._”
**Prompt Structure:**
1. Format type (menu, editorial, packaging, poster)
2. Primary headline (size + placement)
3. Secondary hierarchy
4. Color blocking logic
5. Print surface and material
6. Spatial placement
7. Readability constraints
8. Place all required text in quotation marks
_**Logic:**_ Define the typographic system — not just the phrase. Quoted text ensures precise text rendering within the layout.
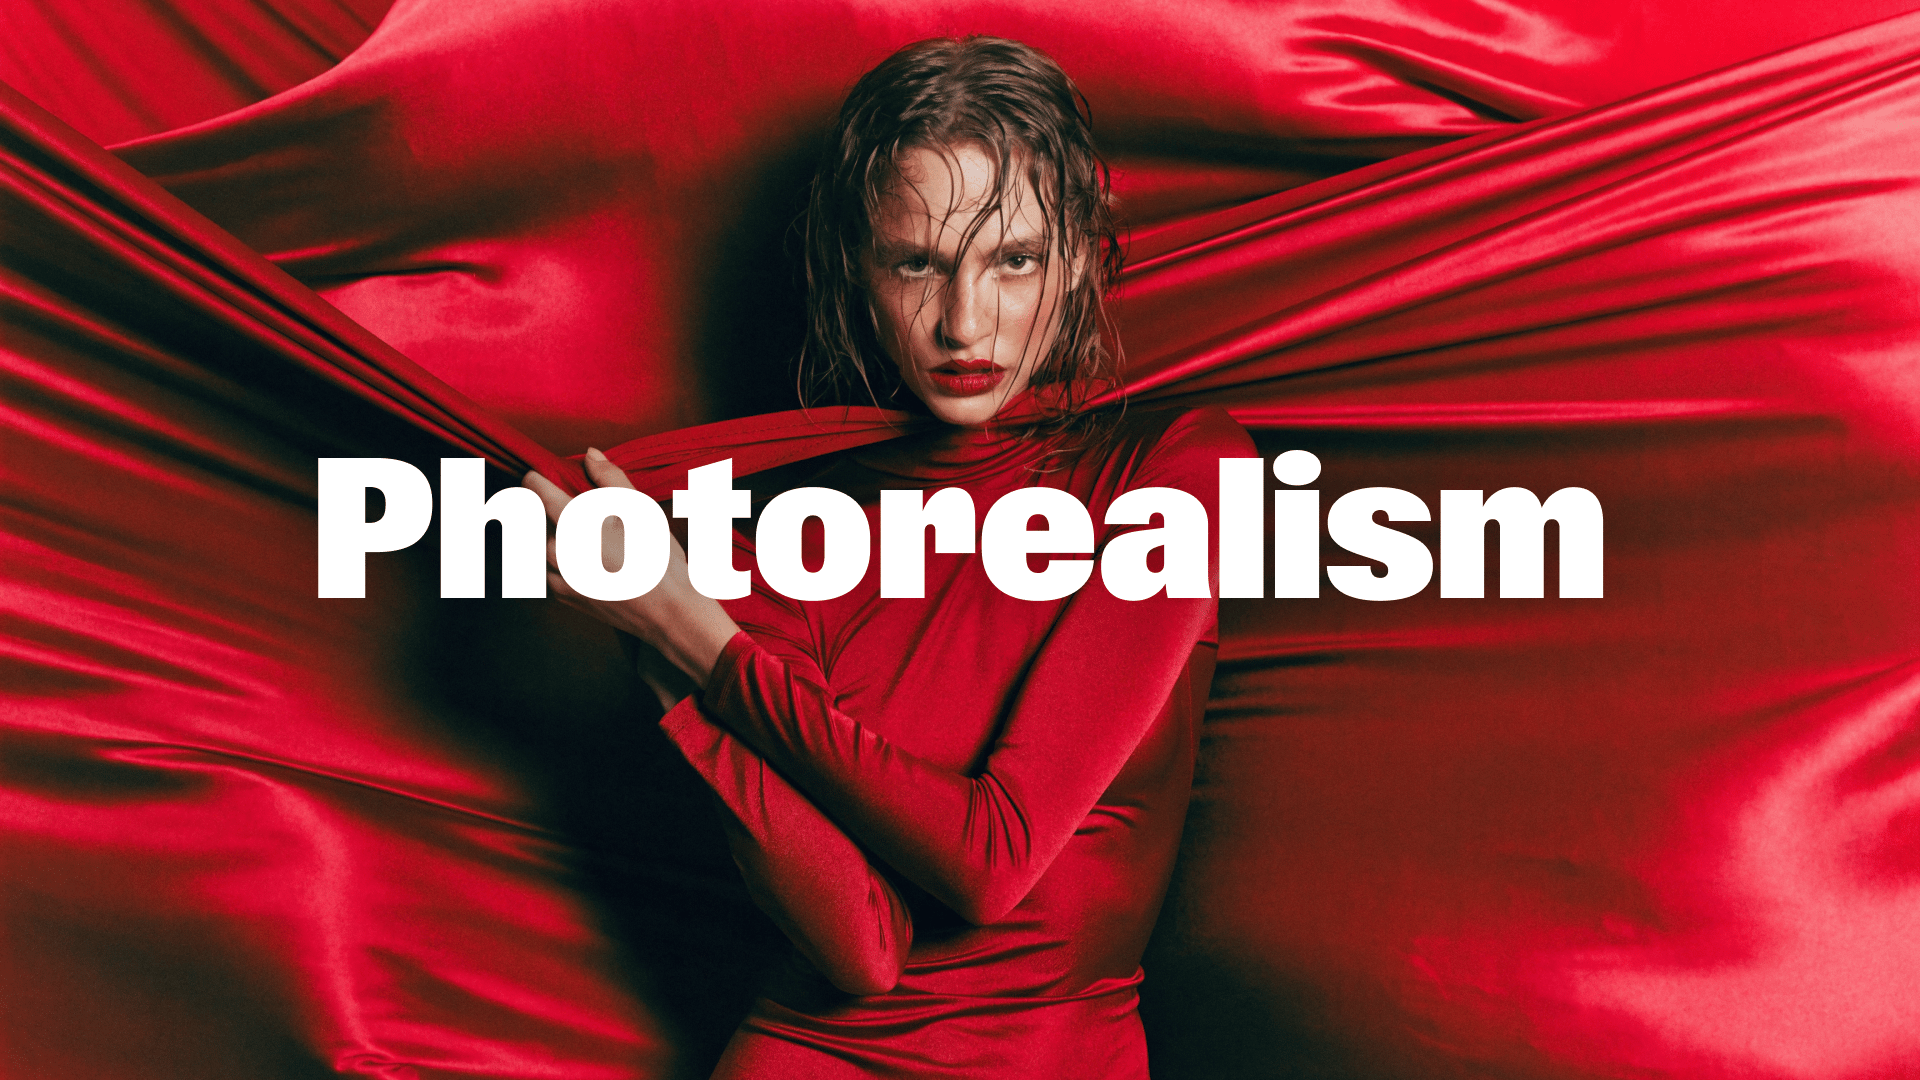
[](https://www.recraft.ai/docs/prompt-engineering-guide/prompting-with-recraft-v4#designer-photorealism)
Designer Photorealism
----------------------------------------------------------------------------------------------------------------------------------
Recraft’s realism feels curated rather than chaotic. **Examples**
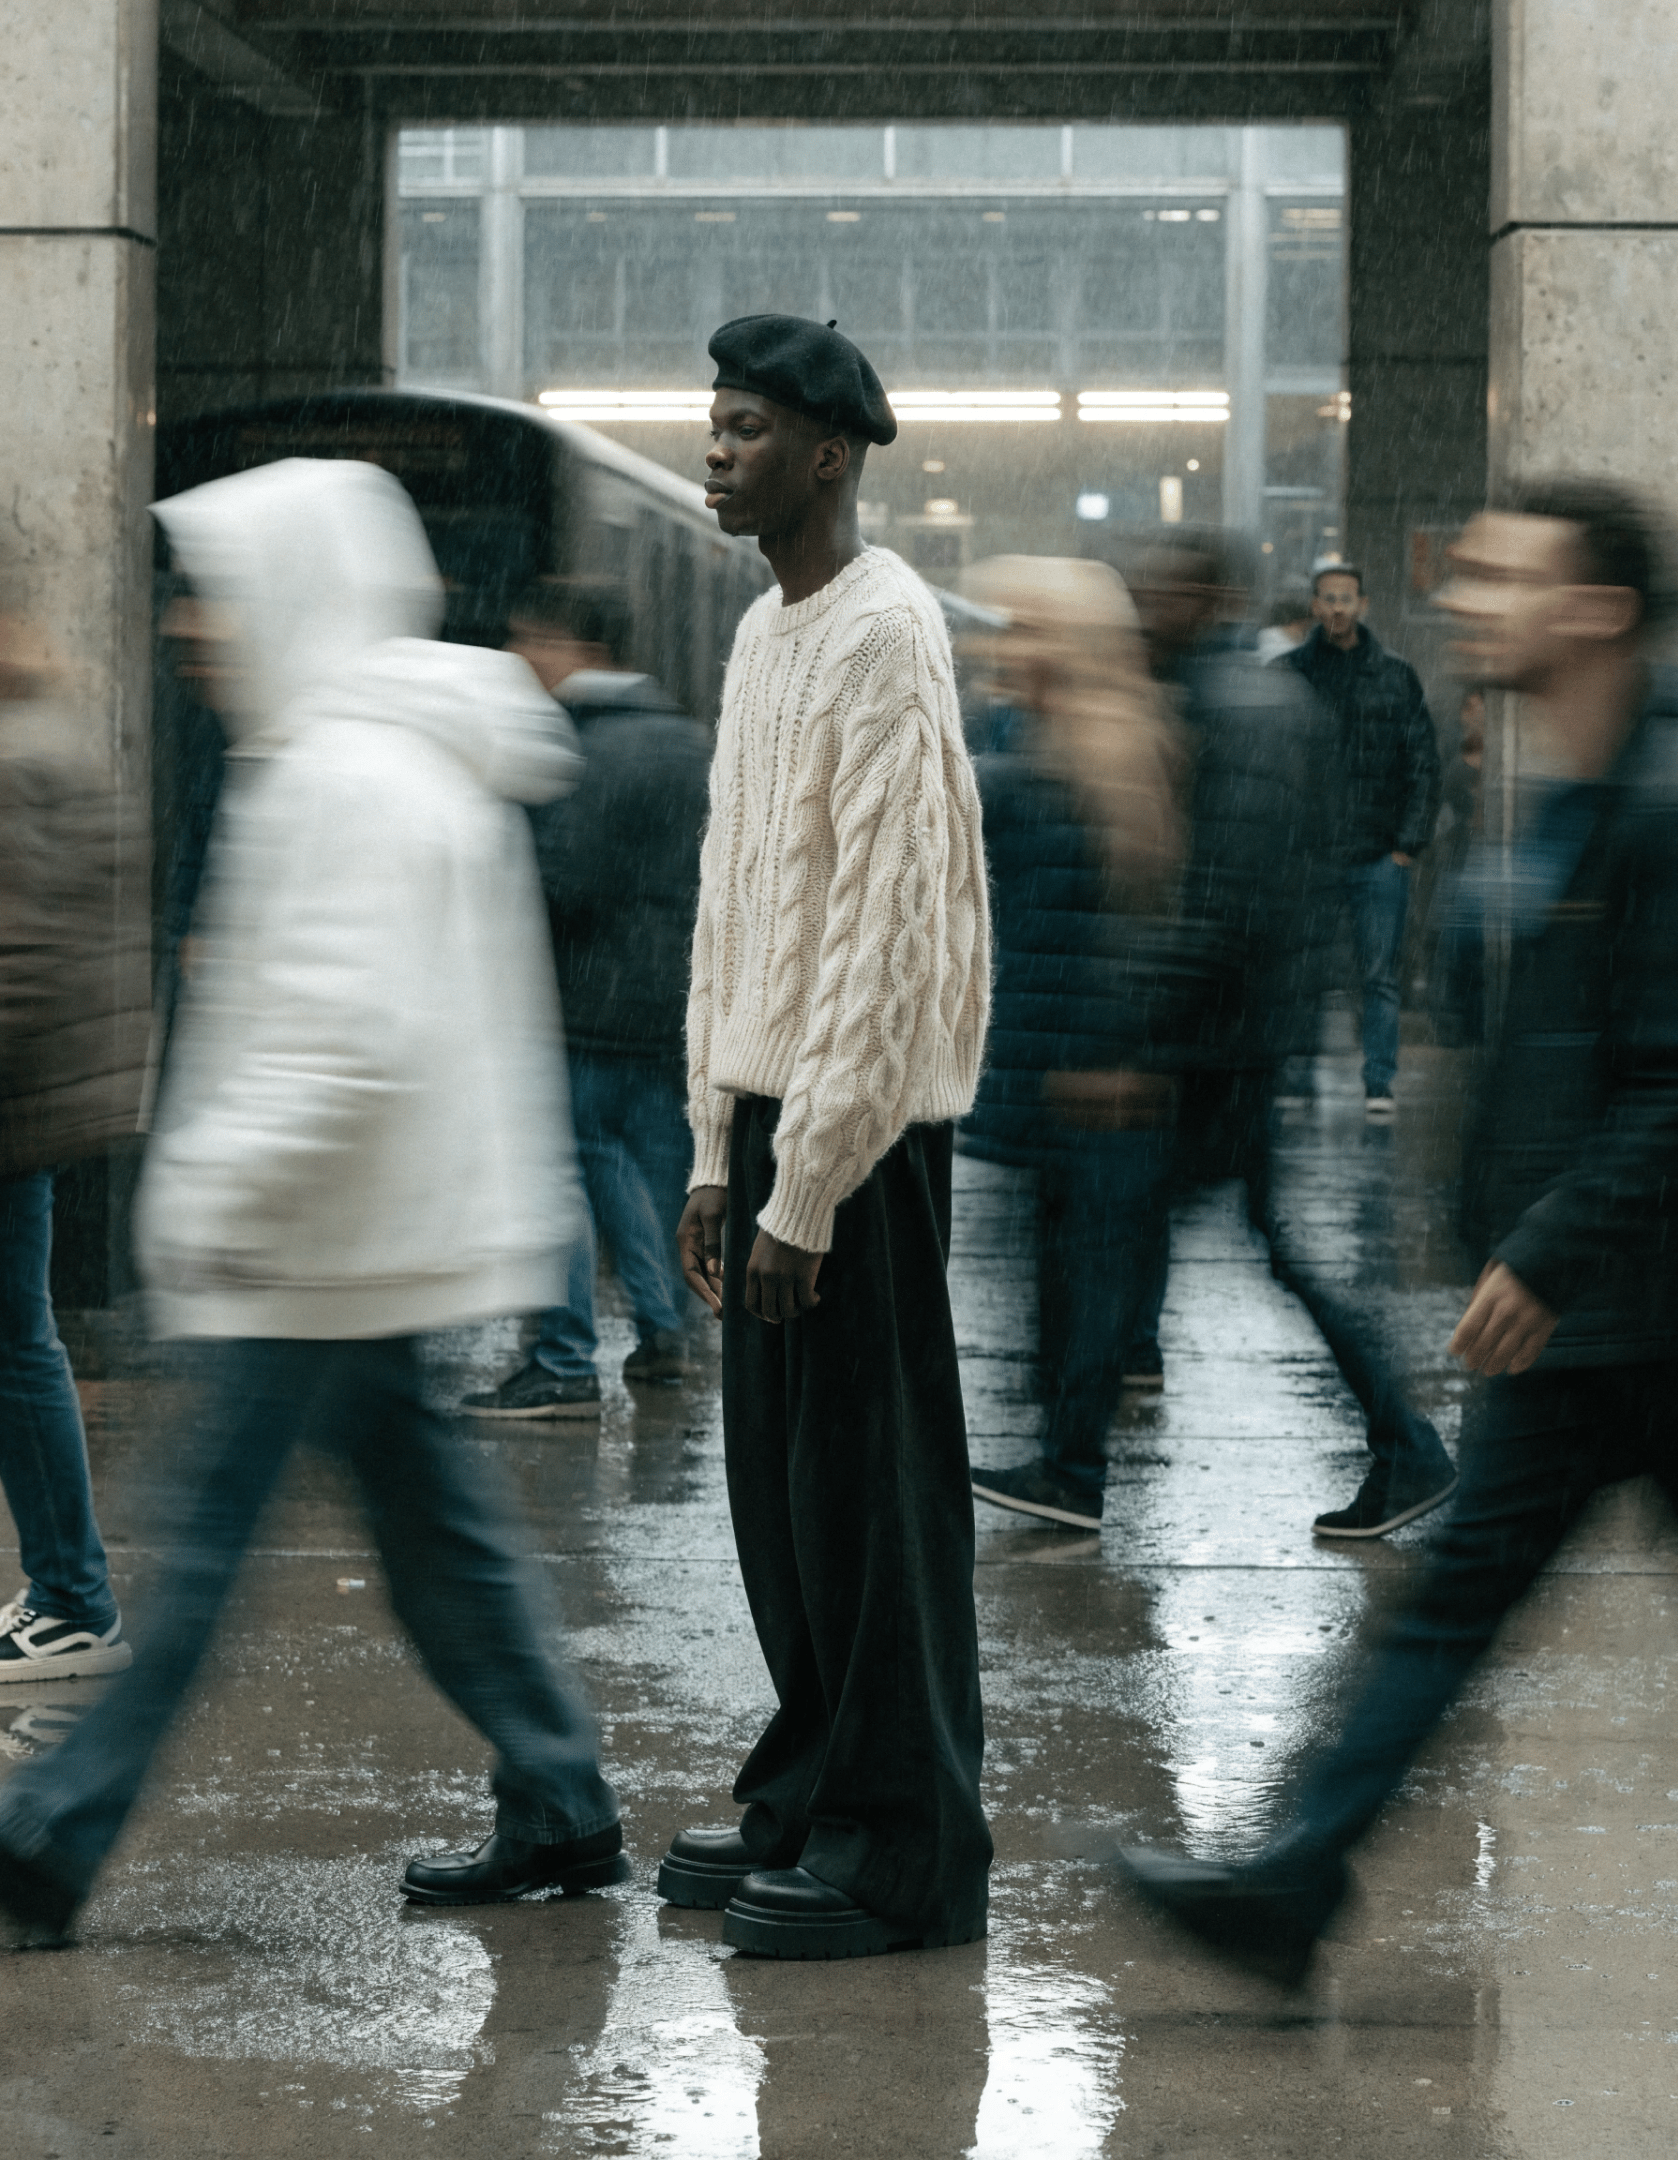
Photorealism Prompt #1
“_Ultra high-fashion avant-garde close-up editorial portrait set in a cold cinematic studio. Deep monochrome cobalt-blue foggy background with a smooth gradient haze and soft atmospheric depth, minimal environment with no visible edges. The single character appears sculptural and iconic, with realistic natural skin texture — subtle pores, matte finish, sharp cheekbones, icy blue eyes, and an emotionless expression. Hair is platinum-blonde in a sharp geometric bob. They wear a dramatic couture piece featuring an oversized architectural ruffled collar made of translucent electric-blue tulle and layered organza, forming wave-like sculptural shapes around the neck. Makeup is minimal with muted burgundy lips and a soft powder finish.Strong long-exposure motion blur creates flowing trails and ghosted silhouettes behind the body and collar, while the face remains perfectly sharp. Clean, refined aesthetic with smooth gradients, no grain or painterly texture, high-end studio lighting. Cinematic, museum-like atmosphere with surreal quiet tension — modern couture captured mid-motion._”
Photorealism Prompt #2
“_Cinematic fashion editorial photograph captured outdoors during golden hour, focused on wind, motion, and atmosphere. The camera sits very low to the ground, almost inside tall wild grass, shooting upward to create an immersive, dynamic perspective. Softly blurred wheat-like plants dominate the foreground, forming organic diagonal lines that naturally frame the imageA young woman stands above the camera in a relaxed three-quarter pose, body slightly turned away while her head turns back toward the lens with direct eye contact, caught mid-movement rather than staged. She wears an oversized red hooded garment made of lightweight flowing nylon, voluminous and dramatic with visible drawstrings. Strong natural wind inflates and wraps the fabric around her body while her hair blows across her face, partially obscuring it.Warm golden-hour light casts a soft glow, with the sky fading from warm yellow near the horizon to gentle blue above. The setting is an open untamed field with no urban elements. Shallow depth of field keeps her face sharp while foreground grass and distant background remain blurred. Poetic, powerful, and alive — raw fashion captured in real wind, no studio lighting or artificial posing._”
Photorealism Prompt #3
“_A cinematic editorial photograph of a black man standing still on a busy crossing platform while crowds rush past her in heavy motion blur; he remains sharp and calm as people dissolve into streaks of movement; slow shutter effect, long exposure photography; muted urban color palette, soft industrial lighting, concrete textures, metro train in background; feeling of isolation, introspection, emotional contrast between chaos and stillness; contemporary fashion editorial mood, minimal styling, natural expression; shallow depth of field, cinematic framing, realism, high detail._”
**Practical tip:**
Avoid stacking dramatic or evaluative adjectives.Precision and concrete description produce more reliable results than exaggeration.
Prompt structure is flexible. The sequence of elements can be adjusted to change emphasis and influence model behavior. Elements placed earlier in the prompt receive higher priority and may shape the result more strongly.
Common structural patterns include:
* Scene / subject → style → details(prioritizes composition and content before aesthetic treatment)
* Style → scene / subject → details(prioritizes visual language and overall aesthetic before composition)
Both approaches are valid. Choose the structure based on which aspect should dominate the output.
**How to Apply This in Real** **Branding:** Geometry → hierarchy → spacing → scalability → constraints **Fashion / Campaign:** Light → material → framing → simplified background **Vectors:** Silhouette → shape clarity → system consistency **Exploration:** 3–6 word prompts → generate variations **Posters:** Grid → margins → text size relationships **The Core Principle** **Recraft V4 adapts to your level of clarity** **|** Short prompts → model designs with you.
Long prompts → model executes your architecture.
**The model is strong in both modes |** Prompt engineering here is not about verbosity.
It’s about defining structure, surface, space, hierarchy, and control.
The more intentional your visual thinking, the more consistent and refined your results.
[Prompting for image generation](https://www.recraft.ai/docs/prompt-engineering-guide/introduction)
[Subject](https://www.recraft.ai/docs/prompt-engineering-guide/core-principles/subject)
⌘I
Assistant
Responses are generated using AI and may contain mistakes.
---
# Selection tools - Recraft
> Documentation Index
> -------------------
>
> Fetch the complete documentation index at: [/docs/llms.txt](https://www.recraft.ai/docs/llms.txt)
>
> Use this file to discover all available pages before exploring further.
[Skip to main content](https://www.recraft.ai/docs/recraft-studio/work-area/selection-tools#content-area)
There are several tools to do a selection of a region on an image for editing. To start editing a selected area of an image, first select the image on canvas, then click **Edit area** in the right **context panel**. Each tool offers a different way to define the target area, depending on the shape, detail, or boundaries of what you want to edit.
[](https://www.recraft.ai/docs/recraft-studio/work-area/selection-tools#lasso)
Lasso
----------------------------------------------------------------------------------------
Lasso allows you to draw a freehand selection around objects or areas in an image. Click the Lasso tool and draw an area of any shape within the image. The system will select everything inside of the drawn area.
[](https://www.recraft.ai/docs/recraft-studio/work-area/selection-tools#brush)
Brush
----------------------------------------------------------------------------------------
Brush allows you to draw with a circular brush to choose the area within the image. You can adjust the brush size using the slider in the selection menu. The area formed of all brush strokes made will be selected by the system.
[](https://www.recraft.ai/docs/recraft-studio/work-area/selection-tools#area)
Area
--------------------------------------------------------------------------------------
Area is a selection tool allowing you to select a rectangular area within the image. Click the Area tool, then click on the image, hold and drag to form the rectangle you need. The system will select everything inside the drawn rectangle.
[](https://www.recraft.ai/docs/recraft-studio/work-area/selection-tools#magic-wand)
Magic wand
--------------------------------------------------------------------------------------------------
The magic wand tool helps you quickly select specific areas or objects in an image based on their visual boundaries. It is only available on paid plans. Click the Wand tool and select any part of the image. The system will auto-detect the boundaries and highlight the selection. Use this selection for inpainting, masking, or replacing elements. The wand works best for clean, well-defined areas such as flat shapes or backgrounds.
[](https://www.recraft.ai/docs/recraft-studio/work-area/selection-tools#tools-available-after-selection)
Tools available after selection
============================================================================================================================================
After selecting a region of an image using one of the selection tools (**Lasso**, **Brush**, **Area**, or **Wand**), you can apply one of two manual editing options: **Erase** or **Cut**.
[](https://www.recraft.ai/docs/recraft-studio/work-area/selection-tools#erase-tool)
Erase tool
--------------------------------------------------------------------------------------------------
The Erase tool lets you remove unwanted elements from a selected area. **How to use the erase tool**:
* Make a selection using Lasso, Brush, Area, or Wand.
* Click the **Erase** button.
Recraft will remove the selected content and automatically fill the cleared area to maintain visual continuity.
[](https://www.recraft.ai/docs/recraft-studio/work-area/selection-tools#cut-tool)
Cut tool
----------------------------------------------------------------------------------------------
The Cut tool removes the selected area and fills it with transparency, without applying any AI regeneration. Use this when you want to eliminate something cleanly without replacement, such as cutting out a logo or isolating a subject. **How to use the cut tool**:
* Make a selection using Lasso, Brush, Area, or Wand
* Click the **Scissors** icon.
The selected area is deleted, leaving a transparent region that can be left as is or edited manually later.
[Canvas](https://www.recraft.ai/docs/recraft-studio/work-area/canvas)
[Canvas tools](https://www.recraft.ai/docs/recraft-studio/work-area/canvas-tools)
⌘I
Assistant
Responses are generated using AI and may contain mistakes.
---
# How to delete a custom style - Recraft
> Documentation Index
> -------------------
>
> Fetch the complete documentation index at: [/docs/llms.txt](https://www.recraft.ai/docs/llms.txt)
>
> Use this file to discover all available pages before exploring further.
[Skip to main content](https://www.recraft.ai/docs/recraft-studio/styles/custom-styles/how-to-delete-a-custom-style#content-area)
1. From the canvas, create a new image or click an existing one.
2. Click the **Style button** in the prompt panel, then click the **My styles** tab on the top menu tab.
3. Click on the style you want to remove.
4. In the right panel, click on the three dots at the top right, then click **Delete style**.
Note: Style deletion is only available on the desktop version of Recraft Studio.
[How to edit a custom style](https://www.recraft.ai/docs/recraft-studio/styles/custom-styles/how-to-edit-a-custom-style)
[Sharing a style](https://www.recraft.ai/docs/recraft-studio/styles/sharing-a-style)
⌘I
Assistant
Responses are generated using AI and may contain mistakes.
---
# Projects - Recraft
> Documentation Index
> -------------------
>
> Fetch the complete documentation index at: [/docs/llms.txt](https://www.recraft.ai/docs/llms.txt)
>
> Use this file to discover all available pages before exploring further.
[Skip to main content](https://www.recraft.ai/docs/recraft-studio/work-area/projects#content-area)
Projects are virtual spaces where you create, iterate, organize, and store Recraft images and designs. You can create multiple projects in Recraft, and each project contains an infinite canvas that allows you to generate content in all directions without boundaries. To create a new project, go to [Projects](https://www.recraft.ai/projects)
and select **Create new project**. To delete a project, there are two options:
* From the Projects page, hover over the project you want to delete, click on the three dots that appear, select **Delete**, then click **Delete** again to confirm.
* From an open project, click the dropdown selector at the top center, select **Delete**, then click **Delete** again to confirm.
Note: Deleted projects cannot be recovered, but you can still access the images from a deleted project in [History](https://www.recraft.ai/docs/recraft-studio/history)
.
[](https://www.recraft.ai/docs/recraft-studio/work-area/projects#project-cover-image)
Project cover image
-------------------------------------------------------------------------------------------------------------
A project’s cover image by default shows a thumbnail preview of that project’s canvas. This is a view of a part of canvas. To better visually organize your projects, you can right-click on any image within a project and select **Set as project cover image** to set it to the Project’s cover image. Note: For projects created before July 2025:
* The project cover image uses one of the images from within the project.
* If you open a project where no cover image was manually set, the cover image will automatically change to a project canvas thumbnail preview. Otherwise, it will stay as one of the images from the project.
[](https://www.recraft.ai/docs/recraft-studio/work-area/projects#renaming-a-project)
Renaming a project
-----------------------------------------------------------------------------------------------------------
There are two ways to rename a project:
* From an open project, click the dropdown selector at the top center (the default name is “Untitled”), select **Rename**, type the new name, then click **Save**.
* From the Projects page, hover over the project you want to rename, click on the three dots that appear, select **Rename**, type the new name, then click **Save**.
[Interface language](https://www.recraft.ai/docs/recraft-studio/interface-language)
[Canvas](https://www.recraft.ai/docs/recraft-studio/work-area/canvas)
⌘I
Assistant
Responses are generated using AI and may contain mistakes.
---
# Keyboard shortcuts - Recraft
> Documentation Index
> -------------------
>
> Fetch the complete documentation index at: [/docs/llms.txt](https://www.recraft.ai/docs/llms.txt)
>
> Use this file to discover all available pages before exploring further.
[Skip to main content](https://www.recraft.ai/docs/recraft-studio/work-area/keyboard-shortcuts#content-area)
[](https://www.recraft.ai/docs/recraft-studio/work-area/keyboard-shortcuts#image-creation-and-tools)
Image creation and tools
---------------------------------------------------------------------------------------------------------------------------------
* **Enter** – Recraft (generate image)
* **I** – Image (Raster)
* **⇧ I** – Image (Vector)
* **S** – Image set
* **T** – Text
* **F** – Frame
* **V** – Move
* **H** – Hand (move canvas)
* **B** – Brush
* **C** – Comment
* **⇧ C** – Toggle comments visibility
* **E** – Erase area
[](https://www.recraft.ai/docs/recraft-studio/work-area/keyboard-shortcuts#clipboard-and-object-control)
Clipboard and object control
-----------------------------------------------------------------------------------------------------------------------------------------
* **⌘ C** – Copy
* **⌘ ⇧ C** – Copy image to clipboard
* **⌘ V** – Paste
* **E** – Merge objects
[](https://www.recraft.ai/docs/recraft-studio/work-area/keyboard-shortcuts#undo/redo-and-zoom)
Undo/redo and zoom
---------------------------------------------------------------------------------------------------------------------
* **⌘ Z** – Undo
* **⌘ Y** – Redo
* **0** – Zoom 100%
* **\= / +** – Zoom in
* **\-** – Zoom out
[](https://www.recraft.ai/docs/recraft-studio/work-area/keyboard-shortcuts#layer-order-and-flipping)
Layer order and flipping
---------------------------------------------------------------------------------------------------------------------------------
* **⌘ \]** – Bring forward
* **⌘ \[** – Send backward\
* **⌘ ⌥ \[** – Send to back\
* **⌘ ⌥ \]** – Bring to front\
* **⇧ V** – Flip vertically\
* **⇧ H** – Flip horizontally\
\
[](https://www.recraft.ai/docs/recraft-studio/work-area/keyboard-shortcuts#brush-and-text-adjustments)\
\
Brush and text adjustments\
-------------------------------------------------------------------------------------------------------------------------------------\
\
* **\]** – Increase brush size
* **\[** – Decrease brush size\
* **⌘ .** – Increase text size\
* **⌘ ,** – Decrease text size\
\
[](https://www.recraft.ai/docs/recraft-studio/work-area/keyboard-shortcuts#selection-and-interface)\
\
Selection and interface\
-------------------------------------------------------------------------------------------------------------------------------\
\
* **⌘ D** – Duplicate selection\
* **\\** – Show/hide UI\
* **1** – Move viewport to fit project\
* **2** – Move viewport to fit selection\
\
[Canvas tools](https://www.recraft.ai/docs/recraft-studio/work-area/canvas-tools)\
[How to generate an image](https://www.recraft.ai/docs/recraft-studio/image-generation/how-to-generate-an-image)\
\
⌘I\
\
Assistant\
\
Responses are generated using AI and may contain mistakes.
---
# How to edit a custom style - Recraft
> Documentation Index
> -------------------
>
> Fetch the complete documentation index at: [/docs/llms.txt](https://www.recraft.ai/docs/llms.txt)
>
> Use this file to discover all available pages before exploring further.
[Skip to main content](https://www.recraft.ai/docs/recraft-studio/styles/custom-styles/how-to-edit-a-custom-style#content-area)
Styles created in Recraft Studio can be edited and iterated on at any time. Editing a style does not overwrite the original. Instead, it creates a new version based on the updates. **How to edit a style**:
1. Select an image on the canvas.
2. Click the **Style button** to open the Styles panel.
3. At the top of the panel, click on the **My styles** tab. Select the style you want to modify, then click **Edit style**.
4. In the editor, you can:
* Adjust the weight (influence) of each reference image
* Upload new reference images
* Modify the style-level prompt
5. Generate test images to preview the result.
6. Once satisfied, click **Save style**. You’ll be prompted to give the updated version a new name. This preserves the original style while saving the new version as a separate style.
[How to create a custom style](https://www.recraft.ai/docs/recraft-studio/styles/custom-styles/how-to-create-a-custom-style)
[How to delete a custom style](https://www.recraft.ai/docs/recraft-studio/styles/custom-styles/how-to-delete-a-custom-style)
⌘I
Assistant
Responses are generated using AI and may contain mistakes.
---
# Canvas - Recraft
> Documentation Index
> -------------------
>
> Fetch the complete documentation index at: [/docs/llms.txt](https://www.recraft.ai/docs/llms.txt)
>
> Use this file to discover all available pages before exploring further.
[Skip to main content](https://www.recraft.ai/docs/recraft-studio/work-area/canvas#content-area)
The canvas is the primary work surface in Recraft Studio. It’s where images, frames, mockups, text, and shapes are created, arranged, and edited within a project. **The Recraft canvas is infinite**, allowing you to zoom, scroll, and place images freely in all directions. It handles placing and arranging visual elements, selecting one or more objects, editing generated images and imported assets, and applying layout, alignment, and transformation actions.
[](https://www.recraft.ai/docs/recraft-studio/work-area/canvas#canvas-states)
Canvas states
-----------------------------------------------------------------------------------------------
When nothing is selected, the canvas shows the workspace and toolbar. When a single object is selected, the [Context panel](https://www.recraft.ai/docs/recraft-studio/image-generation/context-panel)
appears with object-specific information and actions. This includes properties such as dimensions and prompt, along with generation and editing options for that object. When multiple objects are selected, the context panel switches to batch actions. Object alignment options become available and apply to all selected objects at once.
[](https://www.recraft.ai/docs/recraft-studio/work-area/canvas#creating-content-on-the-canvas)
Creating content on the canvas
---------------------------------------------------------------------------------------------------------------------------------
You can create content on the canvas in several ways: generate or edit images using the [Prompt panel](https://www.recraft.ai/docs/recraft-studio/image-generation/prompt-panel)
, use **Create new** actions from the toolbar or right-click menu, import existing images, or add text, shapes, comments, and frames directly to the canvas. The prompt panel adapts based on whether you are generating new content or editing an existing selection.
[](https://www.recraft.ai/docs/recraft-studio/work-area/canvas#canvas-navigation-and-movement)
Canvas navigation and movement
---------------------------------------------------------------------------------------------------------------------------------
The canvas supports freeform navigation across large projects. You can scroll, pan, and zoom to move around the workspace and focus on specific areas. **Navigation tools and controls** The canvas toolbar includes dedicated tools for navigation and selection:
* **Pointer tool**: Used to select, move, and resize objects on the canvas.
* **Hand tool**: Used to move the canvas itself without changing selection. This tool is available in the toolbar and can also be temporarily activated by holding the space bar.
**Scrolling and panning**
* Use your trackpad or mouse wheel to scroll across the canvas.
* Trackpad scrolling moves the canvas in any direction.
* Use the hand tool to click and drag the canvas when working in larger layouts.
**Zoom controls**
* Use your trackpad or scroll wheel to zoom in and out.
* The zoom control in the top header displays the current zoom level.
* Opening the zoom menu provides preset options:
* Zoom in
* Zoom out
* Zoom to 50%
* Zoom to 100%
* Zoom to 200%
* Zoom to fit project (shows all content on the canvas)
* Zoom to fit selection (focuses the view on the currently selected objects, when available)
Undo and redo actions are available from the toolbar.
[](https://www.recraft.ai/docs/recraft-studio/work-area/canvas#context-menus-and-shortcuts)
Context menus and shortcuts
---------------------------------------------------------------------------------------------------------------------------
Right-clicking provides quick access to common actions. On an empty canvas, the menu focuses on creating new content. On selected objects, the menu includes actions such as copy, duplicate, delete, export, and arrange.
[](https://www.recraft.ai/docs/recraft-studio/work-area/canvas#canvas-right-click)
Canvas (right-click)
-----------------------------------------------------------------------------------------------------------
When you right-click on the canvas, you’ll see the **“Generate here”** option at the top of the menu.
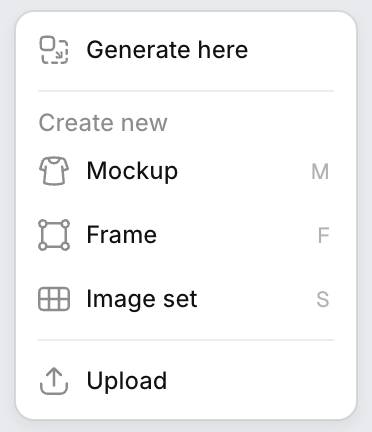
Use it to:
* Start generation directly at a specific location on the canvas
* Control placement without manually moving results afterward
* Quickly iterate in a chosen area (e.g., filling empty space or extending a layout)
This is especially useful when working with compositions, mockups, or multi-element designs where positioning matters. Keyboard shortcuts are available for faster navigation and editing. View [Keyboard shortcuts](https://www.recraft.ai/docs/recraft-studio/work-area/keyboard-shortcuts)
.
[Projects](https://www.recraft.ai/docs/recraft-studio/work-area/projects)
[Selection tools](https://www.recraft.ai/docs/recraft-studio/work-area/selection-tools)
⌘I
Assistant
Responses are generated using AI and may contain mistakes.
---
# How to create a custom style - Recraft
> Documentation Index
> -------------------
>
> Fetch the complete documentation index at: [/docs/llms.txt](https://www.recraft.ai/docs/llms.txt)
>
> Use this file to discover all available pages before exploring further.
[Skip to main content](https://www.recraft.ai/docs/recraft-studio/styles/custom-styles/how-to-create-a-custom-style#content-area)
1. Open the style creation tool:
* Click the **Style** button above the prompt panel to open the style selector and click **Create style** in the upper right.
2. **Add reference material**
Upload up to five reference images (256px minimum recommended resolution) using any of the following methods:
* Drag and drop images directly into the style creation area
* Click anywhere within the gray box at the top to upload from your computer
* Select from **Saved styles**
* Select from **Images from canvas**
3. **Remix styles (optional)**
You can also remix existing styles with images. To remix a style:
* First, add it to your **Style images.**
* Once saved, styles appear as remixable options
* You can remix several images, several styles, or combine both images and styles
4. **Adjust weights**
Use the **percentage sliders** between each reference image or style to control their influence. This allows you to prioritize certain references over others when generating your style.
5. **Add a style-level prompt** _(optional but recommended)_
This prompt defines the visual qualities of your style, such as:
* _“colored pencil strokes”_
* _“digital illustration with neon colors”_
* _“surfing magazine editorial-style photos”_
The style prompt becomes embedded in the style, enabling you to use shorter prompts (e.g., _“cute panda”_) while still generating results that follow your custom look.
**Tip:** For more accurate style prompts, try using an AI model to generate a description. For example, ask: _“Describe this illustration style in detail in one sentence. Focus on technique, composition, color, and visual feel—not the subject.”_
Paste the generated description into the style prompt field.
6. **Choose a style model (reference interpretation mode)**
This setting is located below the style prompt field. Recraft offers two interpretation models:
**Style essentials** _(default)_: Focuses on overall aesthetic elements such as color, texture, and detail. Works well for simpler compositions.
**Style and composition**: Captures both visual style and image structure, including layout, object placement, and perspective. Ideal for complex scenes or stylized compositions, but results may be more unpredictable with minimal designs. You can switch between these options while building your style to preview and refine the results. Testing both models can help you decide which better matches your intended outcome.
**Choose a style category** _(optional)_
You can switch between:
* **Photorealism**
* **Illustration**
* **Vector art**
* **Vector icon**
In most cases, the default category works well.
* If you’re aiming for **minimalistic icons**, use **Vector icon**.
* If you’re trying to get clean vector shapes but the system defaults to **Illustration** (raster), manually switch to **Vector art**.
* It’s also worth experimenting between **Photorealism** and **Illustration** for edge cases.
7. **Test the style**
* Use the **Test it** panel to the right of your uploaded references.
* Enter a prompt and click **Generate test image** to preview results.
* If you’re not satisfied, adjust the reference mix or revise your style prompt.
8. **Save your style**
When you’re happy with the output, click **Save style**. It will be added to your personal style library for use in any future project.
[](https://www.recraft.ai/docs/recraft-studio/styles/custom-styles/how-to-create-a-custom-style#tips-for-best-results-with-styles)
Tips for best results with styles
------------------------------------------------------------------------------------------------------------------------------------------------------------------------
* Use **high-resolution reference images** whenever possible. Low-quality references may lead to poor generation fidelity. Learn more about [image resolution limits](https://www.recraft.ai/docs/recraft-studio/importing/size-limits-and-supported-formats)
.
* Don’t be afraid to experiment. Adjust prompt wording, test both style models, and remix references to refine your results.
[Curated styles](https://www.recraft.ai/docs/recraft-studio/styles/curated-styles)
[How to edit a custom style](https://www.recraft.ai/docs/recraft-studio/styles/custom-styles/how-to-edit-a-custom-style)
⌘I
Assistant
Responses are generated using AI and may contain mistakes.
---
# Artistic levels - Recraft
> Documentation Index
> -------------------
>
> Fetch the complete documentation index at: [/docs/llms.txt](https://www.recraft.ai/docs/llms.txt)
>
> Use this file to discover all available pages before exploring further.
[Skip to main content](https://www.recraft.ai/docs/recraft-studio/image-generation/artistic-levels#content-area)
Artistic levels allow you control the complexity, composition, and visual tone of generated images. It is available in the Recraft V3 model. Settings range from **Simple** to **Eccentric**, offering six levels of control:
* Simple levels tend to be clean, minimal, and straightforward, similar to stock-style visuals.
* Eccentric levels become more dynamic and expressive, with varied layouts, richer compositions, and creative flourishes.
* The levels in between offer increasing degrees of visual complexity, allowing you to calibrate the output to suit your project’s tone and context.
**How to use the artistic level slider**
1. Start a new image by entering a prompt.
2. Locate **Artistic level** by clicking on the settings icon in the prompt panel.
3. Click the drop down menu and select your desired setting: Simple, Clear, Artistic, Expressive, Rich, Eccentric.
4. Click the **generate button** to generate your image using the selected visual tone.
Tip: Set the Artistic level to **minimum** if you want people to look directly at the camera.
[Aspect ratios](https://www.recraft.ai/docs/recraft-studio/image-generation/aspect-ratios)
[Generating multiple images](https://www.recraft.ai/docs/recraft-studio/image-generation/generating-multiple-images)
⌘I
Assistant
Responses are generated using AI and may contain mistakes.
---
# Aspect ratios - Recraft
> Documentation Index
> -------------------
>
> Fetch the complete documentation index at: [/docs/llms.txt](https://www.recraft.ai/docs/llms.txt)
>
> Use this file to discover all available pages before exploring further.
[Skip to main content](https://www.recraft.ai/docs/recraft-studio/image-generation/aspect-ratios#content-area)
Recraft Studio supports several preset aspect ratios that can be applied when generating new images. Use the **Aspect ratio selector** located in the prompt panel to choose the desired format. Aspect ratio affects how content is framed and composed, and is especially important when preparing assets for platforms with fixed dimensions, such as social media, thumbnails, or print layouts. **How to generate an image using a custom or unsupported aspect ratio**
1. Generate an image using the aspect ratio closest to your desired one.
2. Create an empty Frame and manually type in the **W** and **H** values to the exact dimensions you need.
3. Drag and drop the generated image into the Frame.
4. Click **Generate frame** to outpaint the empty space and fill the frame to your target size.
###
[](https://www.recraft.ai/docs/recraft-studio/image-generation/aspect-ratios#using-the-aspect-slider-to-crop-an-image)
Using the Aspect slider to crop an image
You can crop an existing image by selecting it and using the Aspect slider to crop it to your desired dimensions.
[Context panel](https://www.recraft.ai/docs/recraft-studio/image-generation/context-panel)
[Artistic levels](https://www.recraft.ai/docs/recraft-studio/image-generation/artistic-levels)
⌘I
Assistant
Responses are generated using AI and may contain mistakes.
---
# How to generate a logo - Recraft
> Documentation Index
> -------------------
>
> Fetch the complete documentation index at: [/docs/llms.txt](https://www.recraft.ai/docs/llms.txt)
>
> Use this file to discover all available pages before exploring further.
[Skip to main content](https://www.recraft.ai/docs/recraft-studio/image-generation/how-to-generate-a-logo#content-area)
1. **Create a new image**. Open your project and add a new image frame on the canvas.
2. **Select a vector style**. For the best results, choose one of Recraft’s vector models and styles designed for logo creation, such as Geometric Logo, Sharp Drawn Logo, or Playful Typographic. You can find more by typing “logo” in the style search bar.
3. **Write your prompt**. Describe the logo you want to create, for example: “logo ancient Greek sculpture, clever negative space”. To include text in the logo, place it in quotation marks. For instance, typing “Broccoli” will add that word as stylized text.
4. **Click the generate button**. Your logo will be generated in seconds.
[How to generate an image](https://www.recraft.ai/docs/recraft-studio/image-generation/how-to-generate-an-image)
[Selecting a style](https://www.recraft.ai/docs/recraft-studio/image-generation/selecting-a-style)
⌘I
Assistant
Responses are generated using AI and may contain mistakes.
---
# How to generate an image - Recraft
> Documentation Index
> -------------------
>
> Fetch the complete documentation index at: [/docs/llms.txt](https://www.recraft.ai/docs/llms.txt)
>
> Use this file to discover all available pages before exploring further.
[Skip to main content](https://www.recraft.ai/docs/recraft-studio/image-generation/how-to-generate-an-image#content-area)
1. Create a new project, or go to [http://recraft.new](http://recraft.new/)
.
2. Describe your image in the prompt panel at the bottom of the canvas, then click the **generate button**. After a few seconds, the new image will appear on the canvas in a bounding box.
###
[](https://www.recraft.ai/docs/recraft-studio/image-generation/how-to-generate-an-image#image-generation-options)
Image generation options
Use the buttons in the prompt panel to adjust how your image is generated:
* **Agentic** / **Manual**: Select between [Agentic and Manual modes](https://www.recraft.ai/docs/recraft-studio/image-generation/generation-modes)
.
* **Model**: Choose which image model to use. Different models are optimized for different output types, such as raster images or vector graphics.
* **Style**: Browse curated styles or explore an infinite feed of AI-generated styles. You can apply a predefined style or create your own using reference images.
* **Ratio**: Set the aspect ratio of your image to control its dimensions and framing, such as square, landscape, or portrait formats.
* **Count**: Choose how many images to generate from a single prompt, up to 4. Multiple images are generated as variations and appear together on the canvas.
* **Color**: Apply a predefined or custom color palette to guide image generation.
[Keyboard shortcuts](https://www.recraft.ai/docs/recraft-studio/work-area/keyboard-shortcuts)
[How to generate a logo](https://www.recraft.ai/docs/recraft-studio/image-generation/how-to-generate-a-logo)
⌘I
Assistant
Responses are generated using AI and may contain mistakes.
---
# Agentic mode - Recraft
> Documentation Index
> -------------------
>
> Fetch the complete documentation index at: [/docs/llms.txt](https://www.recraft.ai/docs/llms.txt)
>
> Use this file to discover all available pages before exploring further.
[Skip to main content](https://www.recraft.ai/docs/recraft-studio/image-generation/agentic-mode#content-area)
Recraft Studio’s Agentic mode enables users to talk and generate images in Recraft Studio like a design assistant. To activate Agentic mode, select **Agentic** in the generation controls in the prompt panel.
[](https://www.recraft.ai/docs/recraft-studio/image-generation/agentic-mode#what%E2%80%99s-possible-with-agentic-mode)
What’s possible with Agentic mode
------------------------------------------------------------------------------------------------------------------------------------------------------------
**Session-driven generation & iteration**: Start by describing an idea or intent, and iterate on the visuals using the entire session context. **Brainstorming prompts and design ideas.** Use the Agentic mode interface to help craft and refine prompts or explore different design directions without complex instructions. **Step-by-step workflows**: Multi-step tasks are guided automatically to help move from brainstorming to finished assets in fewer steps. **Smart tips in context**: Get suggestions for next actions, such as upscaling images to higher clarity and resolution, discovering different styles, or improving results within a workflow. **Canvas integration**: Result appears side-by-side on the canvas, preserving context to help compare or build on earlier outputs without resetting.
[](https://www.recraft.ai/docs/recraft-studio/image-generation/agentic-mode#how-credits-work-in-agentic-mode)
How credits work in Agentic mode
--------------------------------------------------------------------------------------------------------------------------------------------------
Agentic mode uses the same credit system as the rest of Recraft Studio. Each interaction with the language model consumes credits, in addition to any credits used for image generation or editing.
* Simple, one-off requests may use as little as 1 credit.
* Longer conversations with multiple iterations and accumulated context consume more credits.
* Agentic credits are separate from image generation and editing costs.
For better control over usage, start a new session when switching tasks instead of continuing a long conversation. Credit usage scales with compute:
* Quick requests stay lightweight.
* Complex, multi-step workflows use more credits.
This keeps everyday tasks efficient while accurately reflecting the cost of more advanced sessions.
[](https://www.recraft.ai/docs/recraft-studio/image-generation/agentic-mode#example-agentic-mode-workflows)
Example Agentic mode workflows
----------------------------------------------------------------------------------------------------------------------------------------------
* Start by asking for help with a prompt for a design task, e.g.: _“I need a hero illustration for a SaaS landing page about teamwork. Help me craft 3 prompt ideas”_
* Select one of the suggested prompts, edit it as needed, and try generating in different styles by typing _“generate it in flat style”_ or _“generate it in photorealistic style”._
* To change specific details on an image, type in session e.g., _“take 2nd image generated in flat style, but add a dog showing a pet-friendly office”_
* Experiment with styles by attaching a reference image, then ask in the session to apply the style to another image
* When generating or iterating on images, use a session to specify the aspect ratio, number of images, or to apply Recraft features such remove/replace background, vectorize, create variations, or upscale.
* Try using some more advanced design workflows or chain of generations and editing actions e.g.,:
* _“Generate a photoreal product shot of a ceramic mug on a plain light background. Then remove the background. Then produce a clean vector interpretation of the silhouette.”_
* Use key visuals as image reference(s), then ask to create a marketing assets (such as a landing hero, social cover, email hero), specifying desirable formats, colors or other important details.
[Generation modes](https://www.recraft.ai/docs/recraft-studio/image-generation/generation-modes)
[Exploration Mode](https://www.recraft.ai/docs/recraft-studio/image-generation/exploration-mode)
⌘I
Assistant
Responses are generated using AI and may contain mistakes.
---
# Generation modes - Recraft
> Documentation Index
> -------------------
>
> Fetch the complete documentation index at: [/docs/llms.txt](https://www.recraft.ai/docs/llms.txt)
>
> Use this file to discover all available pages before exploring further.
[Skip to main content](https://www.recraft.ai/docs/recraft-studio/image-generation/generation-modes#content-area)
Recraft Studio offers three ways to generate images: **Agentic**, **Manual,** and **Exploration mode**. Each mode is designed for a different workflow, and you can switch between them at any time.
Agentic and Manual modes are available in the new interface. If the **Old interface** toggle is enabled, these modes are not accessible.
[](https://www.recraft.ai/docs/recraft-studio/image-generation/generation-modes#agentic-mode)
Agentic mode
--------------------------------------------------------------------------------------------------------------
[Agentic mode](https://www.recraft.ai/docs/recraft-studio/image-generation/agentic-mode)
uses an LLM-powered assistant to help generate and refine images through a conversational workflow. In this mode:
* The system understands context and intent across multiple turns, and keeps track of your history.
* You can describe ideas naturally, refine them, and ask for suggestions.
* The assistant may suggest adjustments, apply styles, or select models automatically when helpful.
* You don’t need to restate details repeatedly as you iterate.
* Image generation and edits follow the flow of the conversation.
Agentic mode is best for exploration, iteration, and situations where you want guidance or are still shaping what you want to create. It may also be faster in _achieving your goal_, especially when you’re not sure how to prompt something.
[](https://www.recraft.ai/docs/recraft-studio/image-generation/generation-modes#manual-mode)
Manual mode
------------------------------------------------------------------------------------------------------------
Manual mode is a manual, prompt-based workflow with no conversational context. In this mode:
* Each request is treated independently.
* No history, context, or memory is applied between generations.
* You control all inputs explicitly through the prompt and settings.
* Generation is faster and more predictable.
Manual mode is ideal when you know exactly what you want, need precise control, or are making quick, one-off generations.
[](https://www.recraft.ai/docs/recraft-studio/image-generation/generation-modes#exploration-mode)
Exploration Mode
----------------------------------------------------------------------------------------------------------------------
[Exploration mode](https://www.recraft.ai/docs/recraft-studio/image-generation/exploration-mode)
helps you quickly generate and browse multiple visual directions from a single idea. In this mode:
* You start with a prompt and receive a variety of generated options at once.
* The system focuses on diversity, showing different styles, compositions, and interpretations.
* You can easily compare results and pick the direction you like most.
* Selected outputs can be refined further or used as a starting point for iteration.
* It’s designed to surface ideas you might not have considered.
Exploration mode is best when you want inspiration, are comparing creative directions, or need to quickly discover what works before refining further.
[](https://www.recraft.ai/docs/recraft-studio/image-generation/generation-modes#switching-between-modes)
Switching between modes
------------------------------------------------------------------------------------------------------------------------------------
You can switch modes directly in the prompt panel:
1. Locate the mode selector in the prompt panel.
2. Select **Agentic** for conversational, context-aware generation.
3. Select **Manual** for manual, stateless prompt-based generation.
4. Select **Exploration** to generate multiple variations from a single idea and quickly compare different directions.
Switching modes does not reset your project or canvas:
* Existing images remain unchanged.
* You can explore ideas in Agentic mode, then switch to Manual mode to fine-tune details.
* You can move between modes freely as your workflow changes.
###
[](https://www.recraft.ai/docs/recraft-studio/image-generation/generation-modes#return-to-the-old-interface-optional)
Return to the old interface (optional)
If you re-enable the **Old interface** toggle, the new interface is disabled and Agentic mode is no longer available.
[](https://www.recraft.ai/docs/recraft-studio/image-generation/generation-modes#when-to-use-each-mode)
When to use each mode
--------------------------------------------------------------------------------------------------------------------------------
| Mode | Best for | Behavior |
| --- | --- | --- |
| **Agentic** | Exploration, iteration, guidance | Context-aware, conversational, may suggest or adjust settings |
| **Manual** | Precision, speed, manual control | Stateless, prompt-only, fully explicit |
| **Exploration** | Inspiration, comparison, discovery | Multiple variations, diverse outputs |
All modes work within the same canvas and support Recraft Studio’s full set of image generation and editing tools.
[Selecting a style](https://www.recraft.ai/docs/recraft-studio/image-generation/selecting-a-style)
[Agentic mode](https://www.recraft.ai/docs/recraft-studio/image-generation/agentic-mode)
⌘I
Assistant
Responses are generated using AI and may contain mistakes.
---
# Generating multiple images - Recraft
> Documentation Index
> -------------------
>
> Fetch the complete documentation index at: [/docs/llms.txt](https://www.recraft.ai/docs/llms.txt)
>
> Use this file to discover all available pages before exploring further.
[Skip to main content](https://www.recraft.ai/docs/recraft-studio/image-generation/generating-multiple-images#content-area)
[](https://www.recraft.ai/docs/recraft-studio/image-generation/generating-multiple-images#images-per-generation)
Images per generation
------------------------------------------------------------------------------------------------------------------------------------------
You can generate between 1 and 4 images per prompt by wihthin the image number selector in the prompt panel. This is useful for exploring multiple variations at once without needing to re-enter your prompt. The selected number of images will appear side by side on the canvas after generation.
[](https://www.recraft.ai/docs/recraft-studio/image-generation/generating-multiple-images#image-sets)
Image sets
--------------------------------------------------------------------------------------------------------------------
Image sets enable you to generate six visuals at once, each from a different prompt, while keeping them stylistically consistent. Use image sets to generate images with multiple prompts at once using shared settings like style, palette, aspect ratio, etc. This feature is particularly useful when working with icons, illustrations, or batch assets for UI, marketing, or product design. **How to create an image set**:
1. Right-click on the **Canvas**, then choose **Image set** from the toolbar.
2. Enter up to **six individual prompts**, each describing one image (e.g., “Sun icon”, “Moon icon”, etc.).
3. Select a style from the curated library or your saved/custom styles. You can also adjust the image settings (avoid text and negative prompt) colors.
4. Set the artistic level and aspect ratio as needed.
5. Click **Generate** in the Image set prompt panel to generate the full set.
Once the set is generated, you can refine individual results by clicking on any image in the set and updating its prompt or parameters. This regenerates only the selected image while leaving the rest of the set unchanged.
[Artistic levels](https://www.recraft.ai/docs/recraft-studio/image-generation/artistic-levels)
[Adding text to an image](https://www.recraft.ai/docs/recraft-studio/image-generation/working-with-text-and-prompts/adding-text-to-an-image)
⌘I
Assistant
Responses are generated using AI and may contain mistakes.
---
# Selecting a style - Recraft
> Documentation Index
> -------------------
>
> Fetch the complete documentation index at: [/docs/llms.txt](https://www.recraft.ai/docs/llms.txt)
>
> Use this file to discover all available pages before exploring further.
[Skip to main content](https://www.recraft.ai/docs/recraft-studio/image-generation/selecting-a-style#content-area)
By default, images you generate are created by top-ranked Recraft’s V3 model. If you want to generate an image in a different style, click the **Style** button in the prompt panel to open the Style library. You will see two primary style libraries:
* The **Curated** tab contains styles categorized by style type: Photorealism, Illustration, Vector art, Vector icon, Graphic design, Vector logo, and Other styles.
* The **AI Generated** tab contains an “infinite” collection of AI-generated styles
Select and set your style, then click **Generate button** to see the results. For more about styles, go to [Styles overview](https://www.recraft.ai/docs/recraft-studio/styles/overview)
.
[How to generate a logo](https://www.recraft.ai/docs/recraft-studio/image-generation/how-to-generate-a-logo)
[Generation modes](https://www.recraft.ai/docs/recraft-studio/image-generation/generation-modes)
⌘I
Assistant
Responses are generated using AI and may contain mistakes.
---
# Prompt panel - Recraft
> Documentation Index
> -------------------
>
> Fetch the complete documentation index at: [/docs/llms.txt](https://www.recraft.ai/docs/llms.txt)
>
> Use this file to discover all available pages before exploring further.
[Skip to main content](https://www.recraft.ai/docs/recraft-studio/image-generation/prompt-panel#content-area)
The prompt panel is where image generation and natural language editing begin in Recraft Studio. It provides access to generation modes, models, styles, and settings, and adapts based on whether you are creating new content or editing an existing selection.
[](https://www.recraft.ai/docs/recraft-studio/image-generation/prompt-panel#what-the-prompt-panel-controls)
What the prompt panel controls
----------------------------------------------------------------------------------------------------------------------------------------------
The prompt panel handles all prompt-driven actions, including:
* generating new images, frames, mockups, and image sets
* editing selected images using natural language
* selecting models, styles, and generation modes
* configuring generation parameters such as aspect ratio and number of images
It does not manage layout, selection, or object-specific actions such as alignment, arrangement, or export. Those are handled on the [canvas](https://www.recraft.ai/docs/recraft-studio/work-area/canvas)
and in the [context panel](https://www.recraft.ai/docs/recraft-studio/image-generation/context-panel)
.
[](https://www.recraft.ai/docs/recraft-studio/image-generation/prompt-panel#prompt-input-and-controls)
Prompt input and controls
------------------------------------------------------------------------------------------------------------------------------------
The prompt panel includes controls for configuring how images are generated or edited:
* **Prompt field**: Enter natural language descriptions or instructions
* **Generation mode**: Choose how prompts are interpreted (for example, Agentic or Manual)
* **Model selection**: Select the model used for generation or editing
* **Style selection**: Apply visual styles to generation
* **Aspect ratio**: Control image dimensions
* **Images per generation**: Generate multiple outputs at once
Some controls are available only in specific modes or when editing an existing selection.
[](https://www.recraft.ai/docs/recraft-studio/image-generation/prompt-panel#prompt-panel-states)
Prompt panel states
------------------------------------------------------------------------------------------------------------------------
The prompt panel changes behavior based on selection state. **No selection** When nothing is selected, the prompt panel is in generation mode. You can:
* enter a prompt to generate new images
* choose a model and style
* set aspect ratio and number of images
* start new generations
This is the default state for creating new content. **Single object selected** When a single image or object is selected, the prompt panel switches to editing mode. You can:
* modify the prompt associated with the selected image
* apply natural language edits or refinements
* regenerate variations based on the current selection
This state is used for iterating on existing images rather than creating new ones. **Multiple objects selected** When multiple images are selected, the prompt panel switches to **reference mode**. In this state:
* the selected images are treated as **reference images** for a new generation
* any prompt you enter is interpreted in relation to the selected images
* the next generation creates a new image informed by those references, rather than editing them directly
This state is used to generate new content guided by visual examples on the canvas.
[](https://www.recraft.ai/docs/recraft-studio/image-generation/prompt-panel#docking-and-placement)
Docking and placement
----------------------------------------------------------------------------------------------------------------------------
The prompt panel can be toggled between different positions depending on your workflow:
* docked at the bottom of the canvas
* docked to the side of the workspace using the prompt panel toggle
Docking affects layout only. All prompt panel functionality remains the same regardless of position.
[](https://www.recraft.ai/docs/recraft-studio/image-generation/prompt-panel#faq)
FAQ
----------------------------------------------------------------------------------------
Can I see the prompts used for images on the canvas? Yes, you can view the prompt and other generation details for any image you’ve created or added to your project. When you select an image on the canvas, the Context panel will show properties including the prompt used to generate it, along with model, style, aspect ratio, and other settings.
[External models](https://www.recraft.ai/docs/recraft-studio/image-generation/external-models)
[Context panel](https://www.recraft.ai/docs/recraft-studio/image-generation/context-panel)
⌘I
Assistant
Responses are generated using AI and may contain mistakes.
---
# Exploration Mode - Recraft
> Documentation Index
> -------------------
>
> Fetch the complete documentation index at: [/docs/llms.txt](https://www.recraft.ai/docs/llms.txt)
>
> Use this file to discover all available pages before exploring further.
[Skip to main content](https://www.recraft.ai/docs/recraft-studio/image-generation/exploration-mode#content-area)
Explore first, refine later: a new way to generate images When people first start working with generative image models, they often assume that the key to good results is writing the perfect prompt. It’s easy to fall into the habit of carefully constructing long descriptions, adding more keywords, and tweaking the text again and again in search of the right output. In practice, creative work rarely begins with precision. Most design processes start with exploration — trying different directions and gradually refining the ideas that feel promising. The process is visual, iterative, and often unpredictable. Exploration Mode in Recraft V4 is designed around that reality. Instead of requiring a perfectly engineered prompt before anything can happen, it allows you to start with a simple idea and explore visual directions first.
[](https://www.recraft.ai/docs/recraft-studio/image-generation/exploration-mode#starting-with-a-simple-prompt)
**Starting With a Simple Prompt**
----------------------------------------------------------------------------------------------------------------------------------------------------
In Exploration Mode, the process begins with something intentionally minimal. Rather than describing every detail of an image, you can start with a short prompt that simply defines a direction.
For example:
* Typography poster
* Playful 3D mascot
* Minimal serif logo
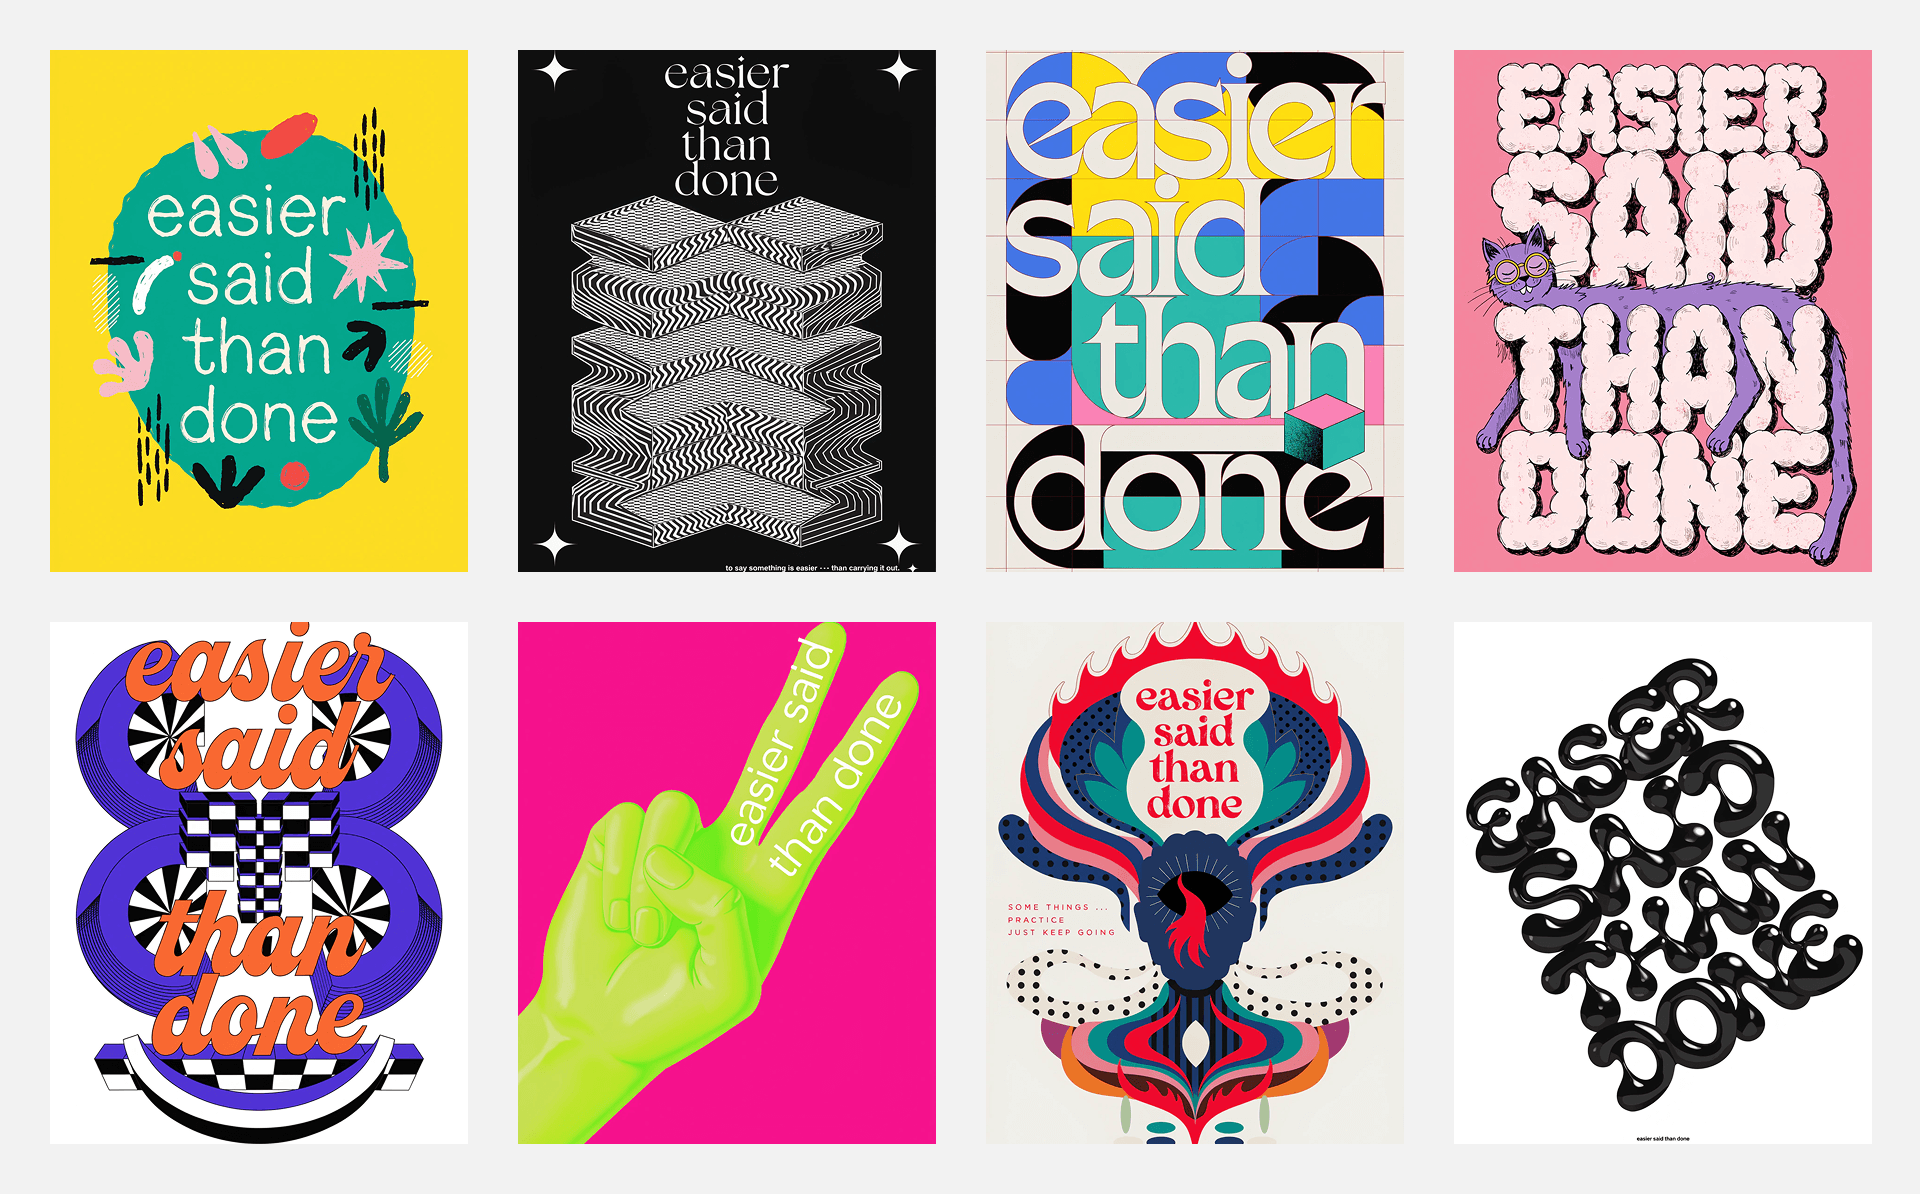
Once you click **Generate**, the system produces eight different visual interpretations of the prompt. Each result explores a different combination of composition, structure, lighting, and visual style.
At this stage, the goal is not to produce a finished design. Instead, the system provides a quick overview of possible visual directions so that you can see which ideas feel worth developing further.
[](https://www.recraft.ai/docs/recraft-studio/image-generation/exploration-mode#seeing-multiple-directions-at-once)
**Seeing Multiple Directions at Once**
---------------------------------------------------------------------------------------------------------------------------------------------------------------
Consider a simple prompt such as **“Stylized illustration of a dog on a clean single-color background.”**
Rather than generating a single result, Exploration Mode produces eight distinct variations that explore different ways the concept might be expressed. Exploration mode gives V4 more freedom in interpretation. This allows the model to be more creative and give unique and diverse results that may otherwise be impossible to create with regular prompting. This sometimes comes at the cost of slightly less consistent anatomy or prompt adherence at first steps.
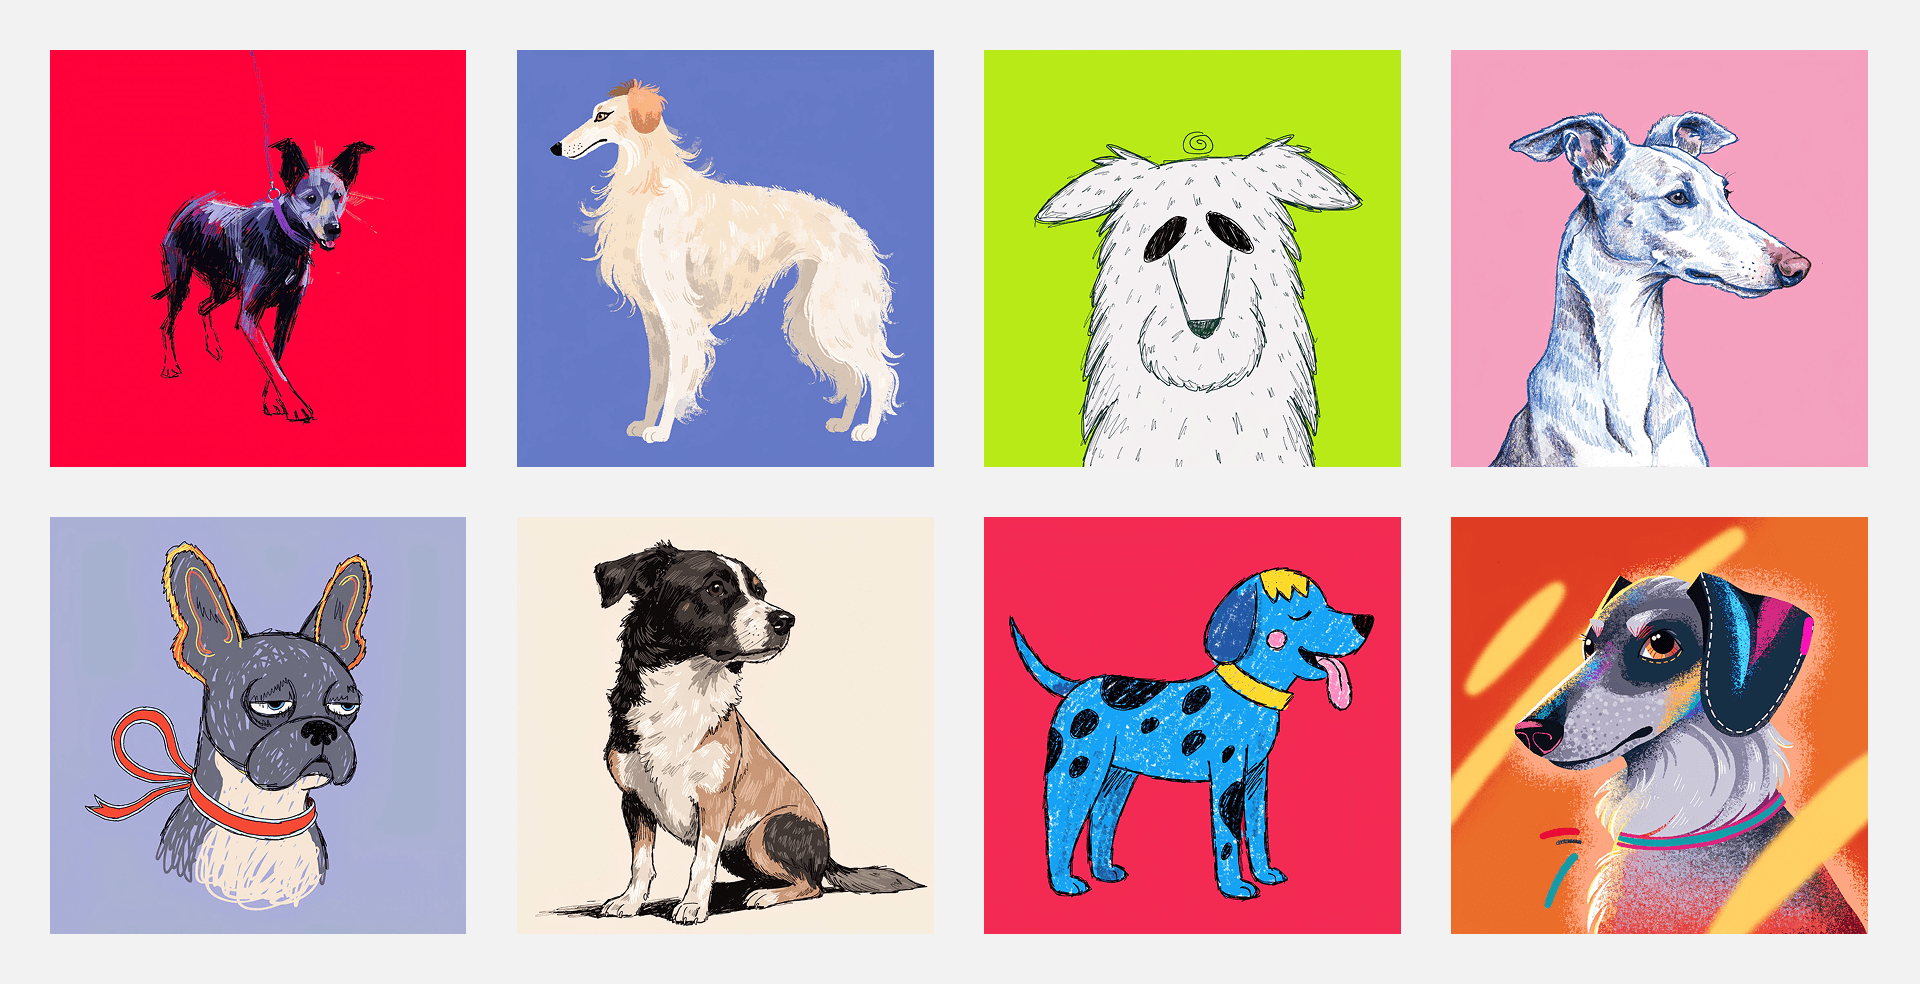
[](https://www.recraft.ai/docs/recraft-studio/image-generation/exploration-mode#from-exploration-to-refinement)
**From Exploration to Refinement**
--------------------------------------------------------------------------------------------------------------------------------------------------------
Once the initial set of images appears, the next step is to select the result that feels closest to your intention. At this point the workflow naturally shifts from exploration to refinement. Instead of rewriting prompts or starting again, you can continue building on the image that already captures the core of the idea.
From here, the system allows you to generate new variations based on that selected image.****
[](https://www.recraft.ai/docs/recraft-studio/image-generation/exploration-mode#refining-with-similarity-levels)
**Refining With Similarity Levels**
---------------------------------------------------------------------------------------------------------------------------------------------------------
To make this process more controllable, Exploration Mode introduces five similarity levels. These levels determine how closely new results should follow the image you selected. Each level provides a different balance between creative exploration and precision, allowing you to refine ideas gradually without losing the visual direction you discovered.****
* **A little bit similar** — this level maintains only a loose connection to the original image. It is useful when you want to push the concept in a new direction while still keeping a hint of the initial idea.****
* **Moderately similar** — at this level the overall subject or composition remains recognizable, but stylistic changes become more noticeable.
* **Quite similar** — this level maintains strong visual continuity. The composition, subject, and overall mood remain consistent, while smaller refinements appear in lighting, styling, or structure.****
* **Very similar** — here the results stay very close to the original image. Only minor changes occur in texture, detail, or micro-composition.****
* **Extremely similar** — this level produces near-duplicate variations and is best used for final refinements such as adjusting subtle shape details, reflections, or alignment.
Instead of rewriting the prompt repeatedly to force a specific outcome, you simply select the direction that feels most promising and continue developing it. This shift— from describing ideas in text to reacting to visual results — makes the creative process feel both faster and more intuitive.
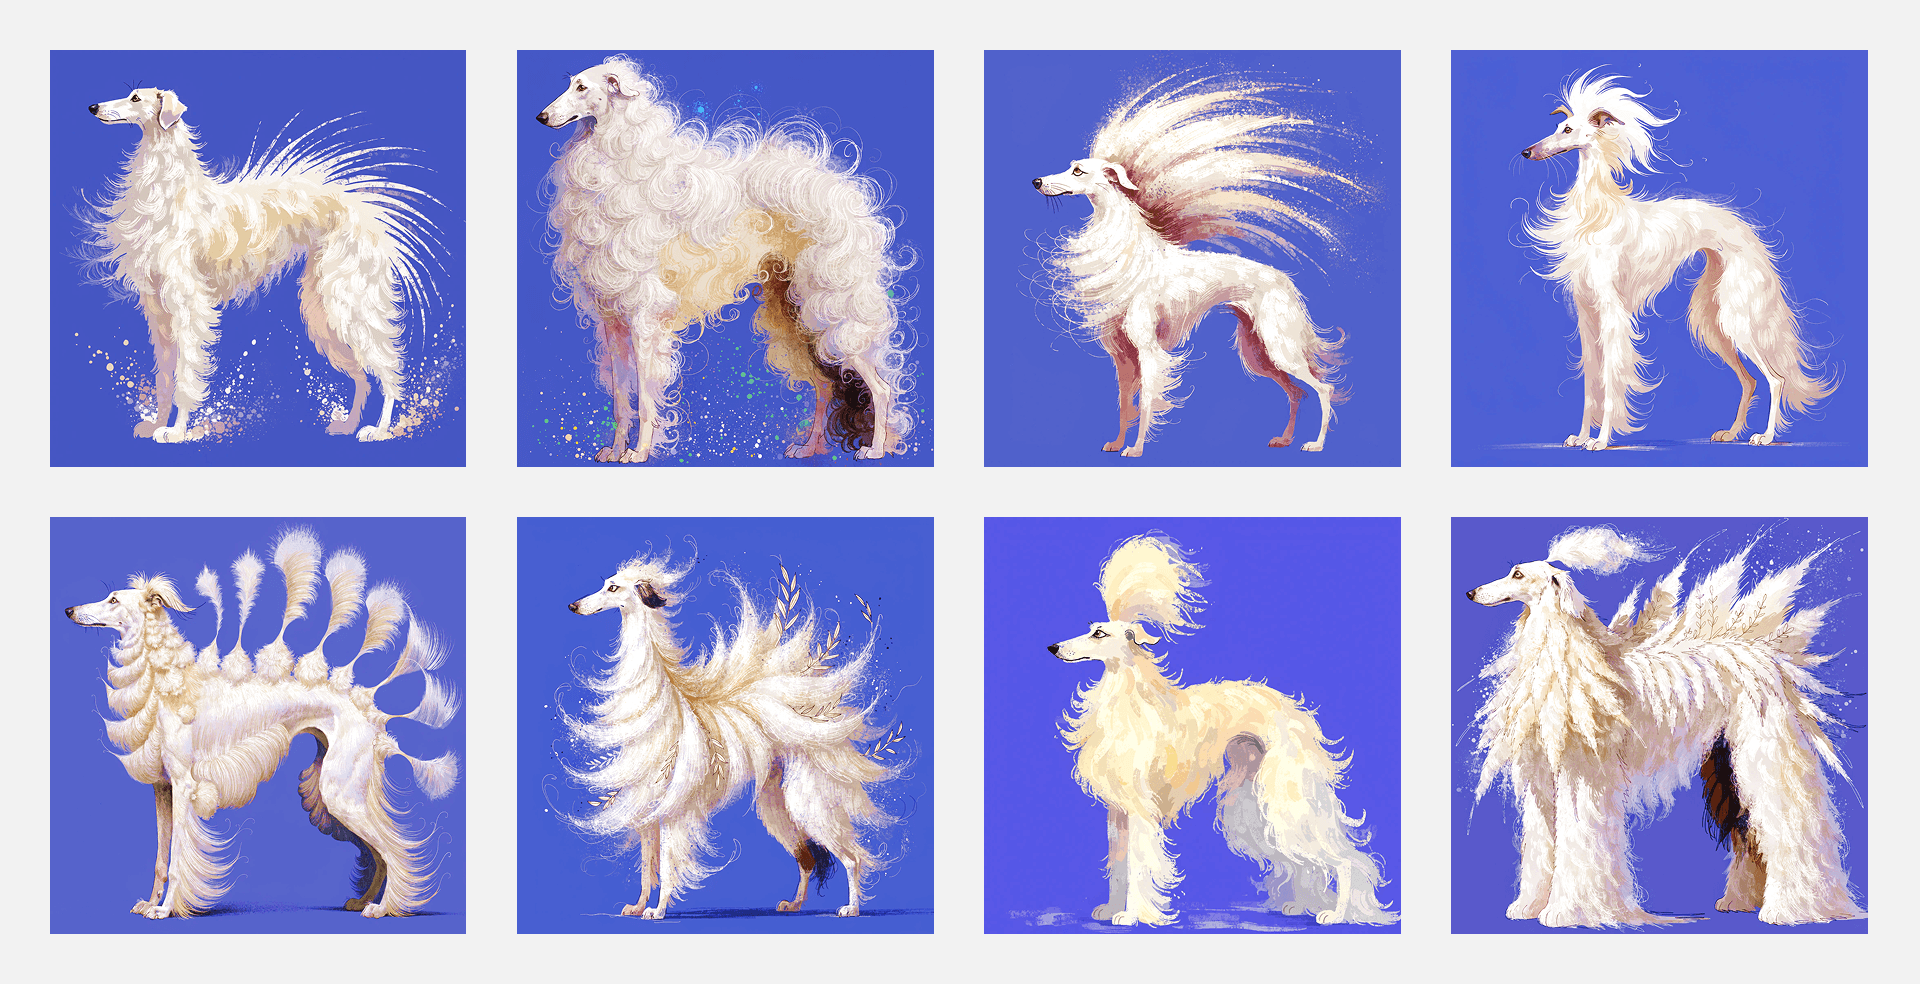
[](https://www.recraft.ai/docs/recraft-studio/image-generation/exploration-mode#where-exploration-mode-works-best)
**Where Exploration Mode Works Best**
------------------------------------------------------------------------------------------------------------------------------------------------------------
Exploration Mode is particularly useful in situations where the goal is not to produce a final image immediately, but to explore visual possibilities quickly.
* **Concept development** — quickly testing multiple visual directions before committing to one.
* **Brand exploration** — generating variations of mascots, visual styles, or graphic motifs.
* **Poster and layout ideas** — experimenting with composition and typography before refining the design.
* **Campaign visuals** — exploring stylistic directions for marketing assets.
* **Creative discovery** — finding unexpected visual approaches that might not emerge from a carefully written prompt.
In these contexts, the ability to generate multiple interpretations of a simple idea significantly accelerates the early creative phase.****
[](https://www.recraft.ai/docs/recraft-studio/image-generation/exploration-mode#designing-through-exploration)
**Designing Through Exploration**
-----------------------------------------------------------------------------------------------------------------------------------------------------
With exploration mode there is no need to perfectly describe the final image from the beginning, it supports a workflow that feels closer to real creative practice: exploring directions, reacting to visual ideas, and gradually refining what works. Prompts remain simple, images evolve visually, and design decisions emerge through iteration. Most ideas do not start fully formed. They develop through exploration. Exploration Mode is built to support exactly that process.
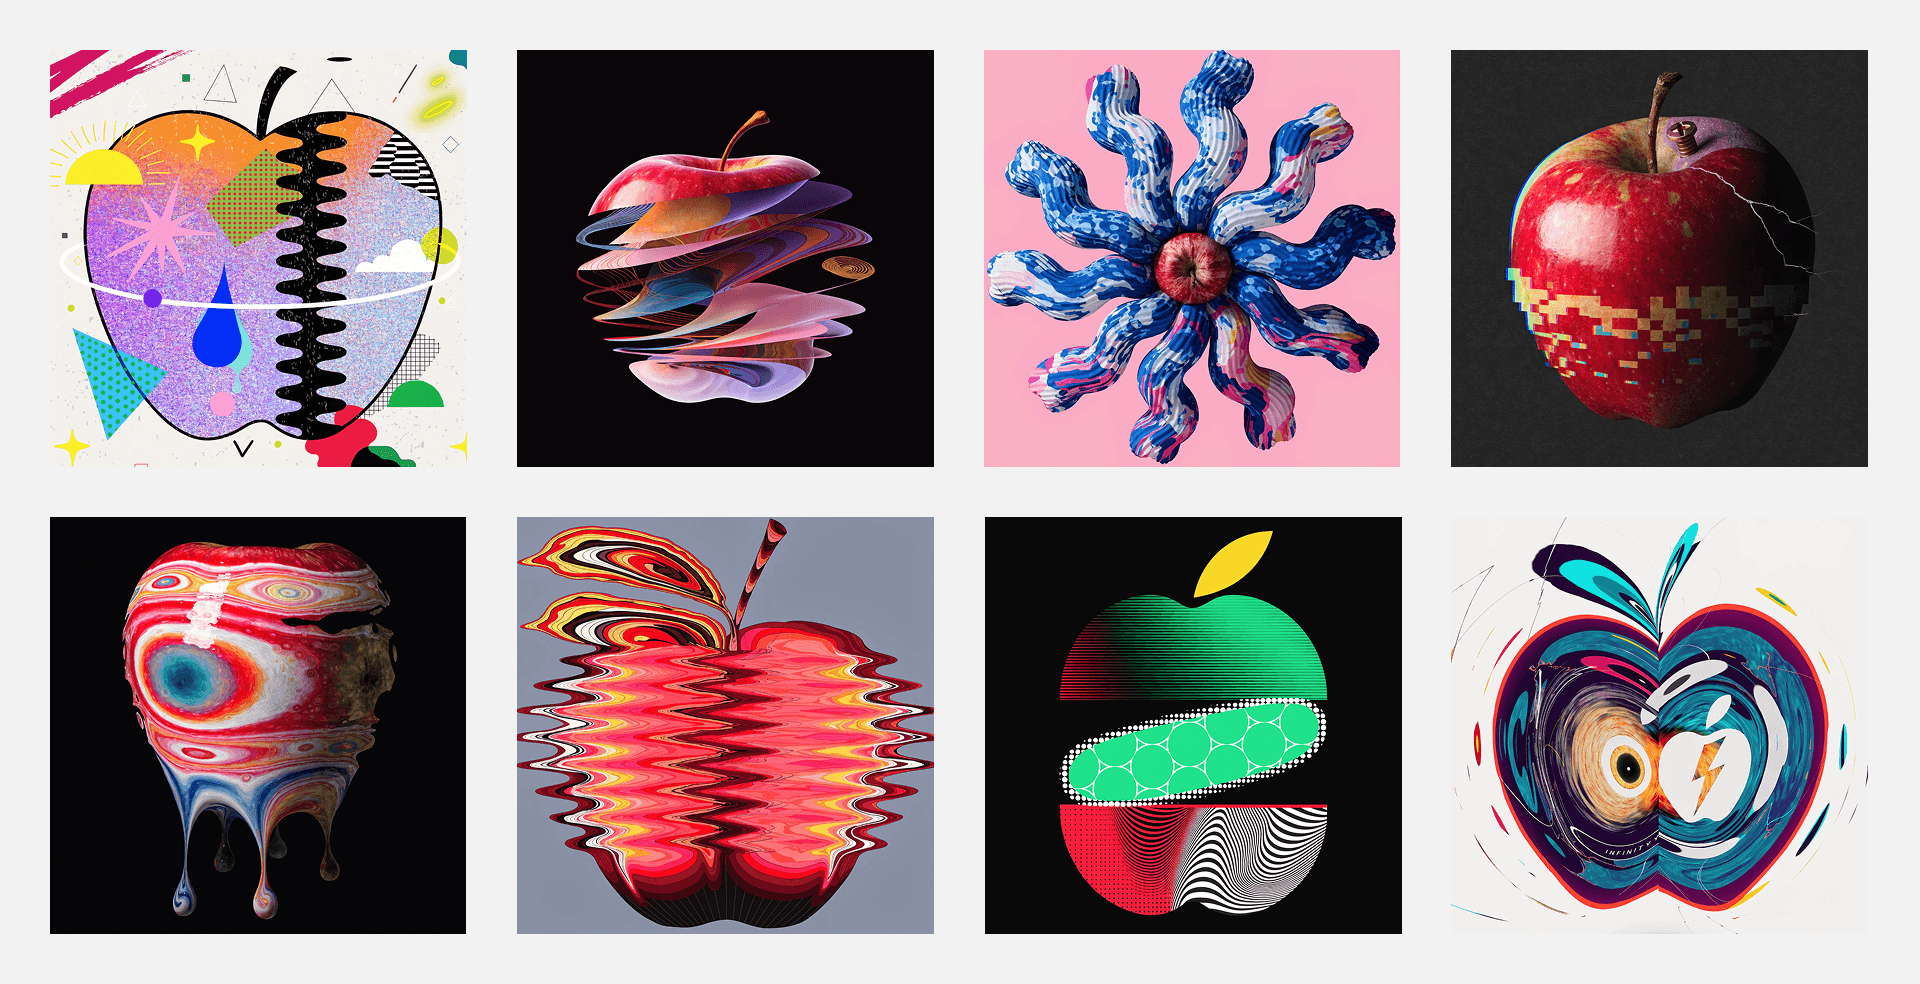
[Agentic mode](https://www.recraft.ai/docs/recraft-studio/image-generation/agentic-mode)
[External models](https://www.recraft.ai/docs/recraft-studio/image-generation/external-models)
⌘I
Assistant
Responses are generated using AI and may contain mistakes.
---
# External models - Recraft
> Documentation Index
> -------------------
>
> Fetch the complete documentation index at: [/docs/llms.txt](https://www.recraft.ai/docs/llms.txt)
>
> Use this file to discover all available pages before exploring further.
[Skip to main content](https://www.recraft.ai/docs/recraft-studio/image-generation/external-models#content-area)
External models let you utilize top AI models directly in Recraft Studio, so you can generate and edit images without switching tools.
| Model | Creator | Description | Time | Credits |
| --- | --- | --- | --- | --- |
| Flux 2 Max | Black Forest Labs | Maximum consistency for complex, multi-image workflows | 20s | 18 |
| Flux 2 Dev | Black Forest Labs | Open-weight model for fast experimentation and pipelines | 6s | 3 |
| Flux 2 Pro | Black Forest Labs | Production-grade realism with strong prompt alignment | 10s | 10 |
| Flux 2 Flex | Black Forest Labs | Configurable quality, speed, and typography control | 20s | 13 |
| Flux 1 Dev | Black Forest Labs | Developer-focused version for experimentation | 9s | 7 |
| Flux 1.1 Pro | Black Forest Labs | Refined Flux model with high-fidelity rendering | 6s | 8 |
| Flux 1 Kontext Pro\* | Black Forest Labs | Context-aware Flux variant preserving semantic alignment in scenes | 7s | 8 |
| Flux 1 Kontext Max\* | Black Forest Labs | Advanced Kontext version with enhanced resolution and cinematic detail | 12s | 15 |
| GTP Image 1.5 Low\* | OpenAI | Fast, lightweight layout-aware image generation | 15s | 2 |
| GTP Image 1.5 Medium\* | OpenAI | Balanced quality and consistency for general use | 25s | 5 |
| GTP Image 1.5 High\* | OpenAI | High-detail images with precise layout control | 50s | 24 |
| GPT Image 1 Low\* | OpenAI | Lightweight GPT-4o variant for text-to-image tasks, multi image editing | 15s | 2 |
| GPT Image 1 Medium\* | OpenAI | Balanced GPT-4o variant with improved detail and realism, multi image editing | 35s | 8 |
| GPT Image High\* | OpenAI | High-quality GPT-4o setting delivering photorealistic outputs, multi image editing | 60s | 30 |
| HiDream I1 Dev | HiDream AI | Experimental diffusion model optimized for artistic compositions | 12s | 6 |
| Ideogram V3 Turbo | Ideogram AI | Fast inference mode optimized for speed | 9s | 6 |
| Ideogram V3 Default | Ideogram AI | Standard setting balancing speed and quality | 12s | 11 |
| Ideogram V3 Quality | Ideogram AI | Highest-fidelity Ideogram variant | 12s | 17 |
| Imagen 4 | Google DeepMind | Advanced Imagen with higher realism | 8s | 8 |
| Imagen 4 Ultra | Google DeepMind | Top-tier Imagen for ultra-photorealistic rendering | 10s | 13 |
| Nano Banana\* | Google Gemini | Standard-resolution outputs, reliable generation, and foundational editing. | 12s | 7 |
| Nano Banana Pro\* | Google Gemini | Faster generation, higher fidelity, accurate multilingual text, and advanced creative controls | 15s | 32 |
| Nano Banana Pro 4K\* | Google Gemini | High-resolution variant delivering sharper detail and 4K-grade image outputs. | 30s | 63 |
| Seedream V4.5\* | ByteDance | Structured, reference-driven high-fidelity image generation | 30s | 8 |
| Seedream V4\* | ByteDance | Next-gen diffusion model delivering vivid colors, fine detail, and artistic realism | 20s | 7 |
| Qwen-Image\* | Alibaba | Multimodal model built for high-fidelity image generation and text–image alignment | 7s | 4 |
| Z-Image Turbo | Alibaba | Ultra-fast photorealism with strong bilingual (English/Chinese) text rendering and solid prompt adherence | 3 | 1 |
\*Used for [editing images with natural language](https://www.recraft.ai/docs/recraft-studio/image-editing/editing-images-with-natural-language)
within Recraft.
[](https://www.recraft.ai/docs/recraft-studio/image-generation/external-models#faq)
**FAQ**
-----------------------------------------------------------------------------------------------
**Why do different models have different credit prices?** Different models have different credit prices because each model has unique capabilities and API costs. More advanced or higher-quality models require more credits per use. For example, Nano Banana Pro 4K costs more credits than basic raster generation. The credit cost reflects the model’s complexity and external API pricing. You can find more details about how credits work [here](https://www.recraft.ai/docs/plans-and-billing/credits)
.
[Exploration Mode](https://www.recraft.ai/docs/recraft-studio/image-generation/exploration-mode)
[Prompt panel](https://www.recraft.ai/docs/recraft-studio/image-generation/prompt-panel)
⌘I
Assistant
Responses are generated using AI and may contain mistakes.
---
# Using custom fonts - Recraft
> Documentation Index
> -------------------
>
> Fetch the complete documentation index at: [/docs/llms.txt](https://www.recraft.ai/docs/llms.txt)
>
> Use this file to discover all available pages before exploring further.
[Skip to main content](https://www.recraft.ai/docs/recraft-studio/image-generation/working-with-text-and-prompts/using-custom-fonts#content-area)
You can upload your own font files and use them inside Recraft when adding text. Custom fonts are particularly useful for brand typography, logo refinement, packaging mockups, marketing visuals, and consistent presentation design.
[](https://www.recraft.ai/docs/recraft-studio/image-generation/working-with-text-and-prompts/using-custom-fonts#how-to-upload-a-custom-font)
How to upload a custom font
----------------------------------------------------------------------------------------------------------------------------------------------------------------------------
1. Select the **Text** tool.
2. Go to the Context panel on the right, locate **Typeface** and click the **upload icon**.
3. Select your font file (`.woff`, `.woff2`, `.ttf`, or `.otf`).
4. The font will appear in your font list.
5. Apply it to any text layer.
[](https://www.recraft.ai/docs/recraft-studio/image-generation/working-with-text-and-prompts/using-custom-fonts#important-notes)
Important notes
----------------------------------------------------------------------------------------------------------------------------------------------------
* Uploaded fonts are available within your workspace.
* If a font file does not include certain character sets (for example, Cyrillic characters), those characters will not render correctly.
* Ensure the font file contains all required glyphs for your language and use case.
[Adding text to an image](https://www.recraft.ai/docs/recraft-studio/image-generation/working-with-text-and-prompts/adding-text-to-an-image)
[Negative prompts](https://www.recraft.ai/docs/recraft-studio/image-generation/working-with-text-and-prompts/negative-prompts)
⌘I
Assistant
Responses are generated using AI and may contain mistakes.
---
# Negative prompts - Recraft
> Documentation Index
> -------------------
>
> Fetch the complete documentation index at: [/docs/llms.txt](https://www.recraft.ai/docs/llms.txt)
>
> Use this file to discover all available pages before exploring further.
[Skip to main content](https://www.recraft.ai/docs/recraft-studio/image-generation/working-with-text-and-prompts/negative-prompts#content-area)
Negative prompts help guide the AI by specifying what you don’t want to appear in the image. This gives you more control over the outcome, especially when avoiding unwanted objects, styles, or features. **How to use negative prompts**:
1. Select your image on the canvas and click the **settings button** in the prompt panel.
2. In the **Negative prompt** field, enter the elements or concepts you want to exclude from the image.
3. Optionally, you can disable text generation in your output by toggling the **Avoid text in image** switch to **Yes**.
4. Generate your image as usual. Recraft will attempt to avoid the elements you specified.
Tip: avoid double negation in negative prompts. For example, to exclude apples from an image, write `"apples"` in the negative prompt, not `"no apples"`. Using “no” can confuse the model and lead to the opposite effect.
[Using custom fonts](https://www.recraft.ai/docs/recraft-studio/image-generation/working-with-text-and-prompts/using-custom-fonts)
[Extract prompt](https://www.recraft.ai/docs/recraft-studio/image-generation/working-with-text-and-prompts/extract-prompt)
⌘I
Assistant
Responses are generated using AI and may contain mistakes.
---
# Adding text to an image - Recraft
> Documentation Index
> -------------------
>
> Fetch the complete documentation index at: [/docs/llms.txt](https://www.recraft.ai/docs/llms.txt)
>
> Use this file to discover all available pages before exploring further.
[Skip to main content](https://www.recraft.ai/docs/recraft-studio/image-generation/working-with-text-and-prompts/adding-text-to-an-image#content-area)
Recraft Studio lets you add and manipulate text directly on the canvas, either as part of your layout or as input for generation. Text can be layered manually over any image, used within a **Frame** to guide generation of images with text, or incorporated into prompts for image generation.
[](https://www.recraft.ai/docs/recraft-studio/image-generation/working-with-text-and-prompts/adding-text-to-an-image#typing-text-into-the-prompt)
Typing text into the prompt
---------------------------------------------------------------------------------------------------------------------------------------------------------------------------------
In Recraft Studio, you can generate text as part of an image by simply including it in the prompt. This is useful when you want the text to appear stylized within a design, such as a logo, sign, label, or poster, rather than adding it manually afterward. You can write prompts that include both a visual description and the desired text, or prompts that only describe the text itself. **Examples:**
* `"A coffee shop logo with the words 'Java Joint'"`
* `"The phrase 'Open super late' in neon sign style"`
* `"Tote bag design with the words 'Support your local bookworm'"`
Recraft Studio’s models will interpret the text prompt and incorporate it directly into the image, styled to match the overall look. You can increase accuracy by placing the text in quotation marks, which helps the model recognize it as literal text rather than a text description. This method is best suited for cases where the text should feel embedded in the visual design rather than overlaid.
[](https://www.recraft.ai/docs/recraft-studio/image-generation/working-with-text-and-prompts/adding-text-to-an-image#adding-text-manually)
Adding text manually
-------------------------------------------------------------------------------------------------------------------------------------------------------------------
Manual text allows font selection from Google Fonts, color, size, line height, and letter spacing adjustments. This is best used for static overlays (e.g., captions, annotations, headlines) where you want full manual control. How to manually add text:
1. On the canvas, select the **text tool** from the left toolbar.
2. A blank cursor appears. Click anywhere on the canvas and start typing.
3. Use the **text context panel** to adjust typeface, font size, weight, line height, letter spacing, color, and alignment as needed.
4. Use the bounding box controls to resize, rotate, or reposition the text as needed.
5. You can combine text with other visuals, including images, mockups, or frames.
[](https://www.recraft.ai/docs/recraft-studio/image-generation/working-with-text-and-prompts/adding-text-to-an-image#using-text-in-a-frame-for-ai-layout-generation)
Using text in a frame for AI layout generation
-----------------------------------------------------------------------------------------------------------------------------------------------------------------------------------------------------------------------
For more advanced compositional control:
1. Add your image to the canvas.
2. Create a **Frame** and place the image and any text elements inside it.
3. Select the frame, then write a prompt (e.g., “Design a layout using the image and title text”).
4. Click **Recraft Frame**.
Recraft Studio will use both the visual and text elements as input, generating a new composition with the text integrated according to the chosen style. This is useful for designing social media graphics, posters, or promotional layouts where you want AI assistance with composition and visual harmony. **Notes and limitations**
* You can include multiple text elements within a Frame to simulate layout or multi-line designs.
* Recraft Studio uses the position of text boxes in a Frame as layout suggestions. During generation, text may be repositioned or restyled based on the selected style.
* Text added via a Frame becomes part of the generated image and cannot be edited afterward.
* For vector images, any text included will be preserved in the exported SVG file.
* Recraft V3 supports generating images with text, but does not handle very small text reliably. If text appears distorted or contains typos, try increasing its size.
* Recraft V2 does not support image generation with text. Using this model may result in text rendering errors or misspellings.
* Recraft V3 supports text generation within the following supported characters: ’!’, ’”’, ’#’, ’$’, ’%’, ’&’, ’\\”, ’(’, ’)’, ’\*’, ’+’, ’,’, ’-’, ’.’, ’/’,‘0’, ‘1’, ‘2’, ‘3’, ‘4’, ‘5’, ‘6’, ‘7’, ‘8’, ‘9’,’:’, ’<’, ’>’, ’?’, ’@’,‘A’, ‘B’, ‘C’, ‘D’, ‘E’, ‘F’, ‘G’, ‘H’, ‘I’, ‘J’, ‘K’, ‘L’, ‘M’, ‘N’, ‘O’, ‘P’, ‘Q’, ‘R’,‘S’, ‘T’, ‘U’, ‘V’, ‘W’, ‘X’, ‘Y’, ‘Z’,’\_’, '', ‘Ø’, ‘Đ’, ‘Ħ’, ‘Ł’, ‘Ŋ’, ‘Ŧ’, ‘Α’, ‘Β’, ‘Ε’, ‘Ζ’, ‘Η’, ‘Ι’, ‘Κ’, ‘Μ’, ‘Ν’, ‘Ο’, ‘Ρ’, ‘Τ’,‘Υ’, ‘Χ’, ‘І’, ‘А’, ‘В’, ‘Е’, ‘К’, ‘М’, ‘Н’, ‘О’, ‘Р’, ‘С’, ‘Т’, ‘У’, ‘Х’,‘ß’, ‘ẞ’.
Notes:
* Characters in different cases (like “B” and “b”) are treated as the same symbol.
* Characters that appear identical are different characters with minute variations.
* Characters not listed in this character set will not render.
[Generating multiple images](https://www.recraft.ai/docs/recraft-studio/image-generation/generating-multiple-images)
[Using custom fonts](https://www.recraft.ai/docs/recraft-studio/image-generation/working-with-text-and-prompts/using-custom-fonts)
⌘I
Assistant
Responses are generated using AI and may contain mistakes.
---
# Extract prompt - Recraft
> Documentation Index
> -------------------
>
> Fetch the complete documentation index at: [/docs/llms.txt](https://www.recraft.ai/docs/llms.txt)
>
> Use this file to discover all available pages before exploring further.
[Skip to main content](https://www.recraft.ai/docs/recraft-studio/image-generation/working-with-text-and-prompts/extract-prompt#content-area)
**Extract prompt** lets you generate a descriptive text prompt from any image, whether it was made in Recraft Studio or uploaded from elsewhere. The tool analyzes the visual content and returns a detailed description of what it “sees,” including aspects like subject, composition, technique, and style. This is especially useful when you want to:
* Understand how to describe an existing image in prompt form
* Recreate or iterate on a similar image
* Explore stylistic attributes for reference or learning
* Reuse successful results in new contexts
* Refine previous generations without starting from scratch
* Analyze how a particular outcome or style was achieved
Unlike reusing a generation’s original prompt, **Extract prompt** works as an AI interpretation. It does not recover the exact text that was originally used to generate the image.
####
[](https://www.recraft.ai/docs/recraft-studio/image-generation/working-with-text-and-prompts/extract-prompt#how-to-use-extract-prompt)
How to use Extract prompt
1. Upload an image from your computer or select one on your canvas.
2. Click **Extract prompt** in the context panel.
3. Recraft will analyze the image and display a text description summarizing its content and visual style.
4. You can edit this description or use it directly as a new prompt for generation.
_Tip:_ Extract prompt works best with clear, well-defined visuals (illustrations, product photos, icons, etc.). The richer the image detail, the more specific and useful the extracted prompt will be.
[Negative prompts](https://www.recraft.ai/docs/recraft-studio/image-generation/working-with-text-and-prompts/negative-prompts)
[How To Generate A Video](https://www.recraft.ai/docs/recraft-studio/video-generation/how-to-generate-a-video)
⌘I
Assistant
Responses are generated using AI and may contain mistakes.
---
# Video Prompts - Recraft
> Documentation Index
> -------------------
>
> Fetch the complete documentation index at: [/docs/llms.txt](https://www.recraft.ai/docs/llms.txt)
>
> Use this file to discover all available pages before exploring further.
[Skip to main content](https://www.recraft.ai/docs/recraft-studio/video-generation/video-prompts#content-area)
[](https://www.recraft.ai/docs/recraft-studio/video-generation/video-prompts#the-ultimate-cheat-sheet)
The Ultimate Cheat Sheet
===================================================================================================================================
Your go-to prompt library for Recraft’s image-to-video tools. Every prompt is universal — it works with any image on your canvas. Just click the copy button on any code block and paste it into Recraft. Every prompt on this page works directly inside Recraft’s canvas Select any image, open the video tool, paste a prompt, and watch it come to life. **👉 [Open Recraft Studio →](https://www.recraft.ai/)
**
[](https://www.recraft.ai/docs/recraft-studio/video-generation/video-prompts#-camera-movement)
📸 Camera Movement
---------------------------------------------------------------------------------------------------------------------
.gif?s=b5af67ffc4be25babceea5e19cf0e7c4)
**Smooth zoom-in — cinematic feel**
Slow cinematic dolly-in toward the subject
**360° orbit — products, characters, objects**
Camera slowly orbits around the subject in a smooth arc
**Gentle approach with blurred background**
Slow push-in with shallow depth of field
**Pull back to reveal the full scene**
Camera pulls back slowly to reveal the full scene
**Horizontal follow shot**
Steady tracking shot following the subject from left to right
**Upward lift — reveals environment**
Smooth crane shot rising upward to reveal the surroundings
**Handheld feel — like real footage**
Subtle handheld camera movement, natural and organic
**Bottom-up angle — makes anything look powerful**
Low-angle shot slowly tilting upward
[](https://www.recraft.ai/docs/recraft-studio/video-generation/video-prompts#-atmosphere-&-environment)
🌊 Atmosphere & Environment
---------------------------------------------------------------------------------------------------------------------------------------
**Subtle wind — hair, fabric, leaves react**
Gentle breeze moves through the scene, elements sway softly
**Warm moving light — mood enhancer**
Soft golden hour light shifts across the scene
**Soft rain atmosphere**
Rain begins to fall gently, droplets visible in the air
**Slow snowfall with accumulation**
Snow falls slowly through the frame, accumulating on surfaces
**Fog creeps in — mysterious mood**
Fog rolls in slowly, partially obscuring the background
**Floating particles — dreamy feel**
Leaves and particles drift through the air in soft light
**Water motion with reflections**
Water surface ripples gently, reflecting the light
**Living sky — background movement**
Clouds drift slowly across the sky in the background
[](https://www.recraft.ai/docs/recraft-studio/video-generation/video-prompts#-people-&-portraits)
👤 People & Portraits
---------------------------------------------------------------------------------------------------------------------------
###
[](https://www.recraft.ai/docs/recraft-studio/video-generation/video-prompts#emotions)
Emotions
**Warm authentic smile**
The person smiles warmly, eyes light up, natural and genuine
**Natural laugh with body movement**
The person laughs naturally, shoulders shake, body reacts with joy
**Surprise reaction**
The person looks surprised, eyebrows raise, mouth opens slightly
**Confident half-smile**
Subtle confident smirk, one side of the mouth lifts slightly
**Neutral to happy transition**
Expression shifts from neutral to a slow genuine smile
**Calm meditative mood**
The person closes their eyes slowly, peaceful, serene expression
**Playful wink**
The person winks playfully at the camera, slight head tilt
**Deep thought — focused gaze**
The person frowns slightly, thinking deeply, focused intense gaze
###
[](https://www.recraft.ai/docs/recraft-studio/video-generation/video-prompts#body-&-head)
Body & Head
**Classic head turn to camera**
The person turns their head slowly toward the camera
**Micro-movements — brings photos to life**
Subtle facial movement, the person blinks and breathes naturally
**Confident walk in slo-mo**
The person walks forward confidently in slow motion
**Eyes lifting to camera — magnetic**
Close-up of the face, eyes shift focus from down to camera
**Head tilt — curiosity**
The person tilts their head slightly to the side, curious look
**Lean-in — creates engagement**
The person leans forward slightly toward the camera
**Look away + return — cinematic beat**
The person looks away slowly, then turns back to camera
###
[](https://www.recraft.ai/docs/recraft-studio/video-generation/video-prompts#hand-gestures)
Hand Gestures
**Inviting hand — pulls viewer in**
The person reaches out their hand toward the camera, inviting gesture
**Friendly wave**
The person raises their hand and waves slowly at the camera
**Subtle face touch — editorial feel**
The person touches their face gently, fingers brush across the chin
**Hair touch — fashion/lifestyle**
The person runs their fingers through their hair slowly
**Arms crossed — confidence**
The person crosses their arms slowly, confident stance
**Object showcase — presentation**
The person holds up an object toward the camera, presenting it
**Hand on heart — emotional**
The person puts their hand over their heart, emotional gesture
###
[](https://www.recraft.ai/docs/recraft-studio/video-generation/video-prompts#portrait-+-camera-combos)
Portrait + Camera Combos
**Zoom-in + smile + blur**
Slow dolly-in toward the face, the person smiles warmly, shallow depth of field
**Orbit + confident pose**
Camera orbits slowly around the person, confident pose, cinematic lighting
**Close-up + emotion shift**
Close-up push-in, eyes shift to camera, expression changes from neutral to smile
**Low angle + power look**
Low-angle shot tilting up, the person looks down at camera with a smirk
**Handheld follow + walking**
Handheld camera follows the person walking, natural body movement, cinematic
**Crane up + look up + drama**
Slow crane shot rising, the person looks up at the camera, dramatic lighting
**Behind + turn around + surprise**
Tracking shot from behind, person turns around toward camera, surprised expression
[](https://www.recraft.ai/docs/recraft-studio/video-generation/video-prompts#-product-&-object-scenes)
🛍️ Product & Object Scenes
--------------------------------------------------------------------------------------------------------------------------------------
**Classic product spin**
The object rotates slowly on a reflective surface
**Human interaction with product**
A hand reaches in and picks up the object
**Orbit with studio light sweep**
Camera circles the object with dramatic studio lighting
**Satisfying product drop**
The object drops onto the surface with a soft bounce
**Epic liquid splash — cosmetics, drinks**
Liquid splashes around the object in slow motion
**Unboxing moment**
Packaging opens to reveal the object inside
**Texture reveal — luxury feel**
Light sweeps across the object, highlighting texture and material
[](https://www.recraft.ai/docs/recraft-studio/video-generation/video-prompts#-logo-animation)
🎨 Logo Animation
-------------------------------------------------------------------------------------------------------------------
###
[](https://www.recraft.ai/docs/recraft-studio/video-generation/video-prompts#reveal)
Reveal
**Assembly from fragments**
The logo assembles piece by piece from scattered fragments, smooth animation
**Classic fade-in from black**
The logo fades in slowly from darkness, soft light gradually illuminates it
**Drop + bounce — energetic**
The logo drops into frame from above with a satisfying impact, subtle bounce
**Particle convergence — magical**
The logo materializes from glowing particles that converge to the center
**Fast zoom reveal — punchy**
Camera pushes in fast toward the logo, motion blur, snaps into focus
###
[](https://www.recraft.ai/docs/recraft-studio/video-generation/video-prompts#loops)
Loops
**Breathing pulse — website hero**
The logo pulses gently with a soft glow, rhythmic breathing motion, seamless loop
**Light shimmer — elegant**
Light reflects and moves slowly across the logo surface, subtle shimmer, loopable
**Floating effect — ambient**
The logo floats gently with subtle up and down motion, seamless loop
**Particle orbit — tech/creative**
Particles orbit slowly around the logo in a circle, ambient glow, loopable
###
[](https://www.recraft.ai/docs/recraft-studio/video-generation/video-prompts#texture-&-environment)
Texture & Environment
**Water distortion**
The logo is submerged in water, ripples move across the surface distorting it
**Fire edges — intense mood**
Fire burns around the edges of the logo, flames flicker, dark background
**Smoke + drama**
Smoke swirls around the logo slowly, moody atmosphere, dramatic backlight
**Ice break — powerful reveal**
The logo is frozen in ice, cracks form slowly, ice breaks away revealing it
###
[](https://www.recraft.ai/docs/recraft-studio/video-generation/video-prompts#digital-&-tech)
Digital & Tech
**Glitch + restore**
The logo glitches and distorts digitally, then snaps back to perfect form
**Neon trace — night aesthetic**
Neon light traces the outline of the logo, glow intensifies, dark background
**Hologram — futuristic**
Holographic projection of the logo rotates slowly, chromatic aberration
[](https://www.recraft.ai/docs/recraft-studio/video-generation/video-prompts#-effects-&-stylization)
✨ Effects & Stylization
--------------------------------------------------------------------------------------------------------------------------------
**Photo-to-cinema transformation**
The scene transitions from photo to cinematic film look
**Rising light particles — magical**
Particles of light float upward from the subject
**Parallax — instant depth**
The image comes alive with subtle parallax depth movement
**Quick glitch — attention grabber**
Glitch effect distorts the image briefly, then stabilizes
**Color transition — before/after feel**
Color grade shifts from desaturated to warm vibrant tones
**God rays — dramatic reveal**
Dramatic light rays break through, illuminating the subject
**Bokeh — dreamy background**
Bokeh lights appear in the background, pulsing softly
**Environment morph — scene transition**
The scene morphs and transforms into a different environment
[](https://www.recraft.ai/docs/recraft-studio/video-generation/video-prompts#-cinematic-moods)
🎥 Cinematic Moods
---------------------------------------------------------------------------------------------------------------------
**Full cinematic package**
Slow motion, anamorphic lens flare, cinematic color grade
**Dark & moody — drama**
Dark moody atmosphere, shadows shift across the subject
**Light & dreamy — lifestyle**
Bright and airy, soft overexposed highlights, dreamy feel
**Cyberpunk / night city**
Neon lights flicker and reflect off wet surfaces
**Film look — retro nostalgia**
Vintage film grain and slight color shift, nostalgic mood
**Epic scale — landscapes, architecture**
Epic wide shot energy, dramatic scale and atmosphere
[](https://www.recraft.ai/docs/recraft-studio/video-generation/video-prompts#-ready-to-use-%E2%80%94-copy-&-paste)
🚀 Ready to Use — Copy & Paste
-----------------------------------------------------------------------------------------------------------------------------------------------------
###
[](https://www.recraft.ai/docs/recraft-studio/video-generation/video-prompts#-high-energy)
🔥 High Energy
**Action shot — maximum impact**
The subject moves with high energy, fast dynamic motion, camera shakes slightly, cinematic slow motion
**Explosion from center — product reveals**
Explosive burst of motion, elements scatter outward from the center, dramatic lighting, slow motion
**Wind blast — everything reacts**
Strong wind blasts through the scene, everything reacts, particles fly, intense atmosphere
**Rush toward camera — scroll stopper**
The subject rushes toward the camera at full speed, motion blur, shallow depth of field
**Spinning orbit — trailer energy**
Rapid camera spin around the subject, motion trails, dynamic energy, high contrast lighting
**Water explosion — epic product shot**
Water explodes around the subject in slow motion, droplets suspended in air, dramatic backlight
**Glass shatter — dramatic reveal**
The scene shatters like glass, fragments fly toward camera, intense dramatic reveal
###
[](https://www.recraft.ai/docs/recraft-studio/video-generation/video-prompts#-subtle-&-realistic)
🪶 Subtle & Realistic
**Bring any photo to life**
Very subtle natural movement, gentle breathing motion, soft light shifts, photorealistic, still atmosphere
**Soft lifestyle animation**
Slight gentle breeze, elements shift softly, ambient light, calm and natural
**Atmospheric mood piece**
Soft ambient motion, light flickers gently, dust particles float in the air, cinematic stillness
**Portrait animation**
The person breathes naturally, subtle eye movement, lifelike micro-expressions, photorealistic
**Cozy scenes — food, interiors**
Steam rises slowly, warm light shifts gently across the scene, cozy calm atmosphere
**Universal B-roll**
Smooth slow camera push-in, everything else stays almost still, shallow depth of field
**Warm ambient scene**
Candle flame flickers softly, warm light dances on surrounding surfaces, still and quiet mood
[](https://www.recraft.ai/docs/recraft-studio/video-generation/video-prompts#-combo-prompts-%E2%80%94-multi-layer)
🧩 Combo Prompts — Multi-Layer
-----------------------------------------------------------------------------------------------------------------------------------------------------
**Cinematic Push-In — universal cinematic shot**
Slow cinematic dolly-in toward the subject, soft light shifts across the scene, shallow depth of field, smooth and steady, slow motion
**Dramatic Orbit — products, people, objects**
Camera slowly orbits around the subject in a smooth arc, dramatic lighting sweeps across the surface, particles of light float upward, steady movement
**Quiet Atmosphere — moodboards, stories**
Fog rolls in slowly, soft ambient light flickers gently, dust particles drift through the air, very subtle natural movement, cinematic stillness
**Explosive Reveal — first seconds of a video**
Explosive burst of motion, elements scatter outward from the center, rapid camera spin, motion trails, high contrast dramatic lighting, slow motion
**Soft Bring-to-Life — makes any image breathe**
Very subtle ambient motion, soft light shifts slowly across the scene, gentle particles drift in the air, smooth slow camera push-in, calm atmosphere
**Dark Cinematic — scale and drama**
Low-angle shot slowly tilting upward, dark moody atmosphere, shadows shift across the subject, anamorphic lens flare, vintage film grain
[](https://www.recraft.ai/docs/recraft-studio/video-generation/video-prompts#-motion-intensity-scale)
📏 Motion Intensity Scale
-----------------------------------------------------------------------------------------------------------------------------------
> Add these keywords to any prompt to control movement.
**Level 1 — Almost Still**
very subtle, barely visible, almost still, micro-movement, photorealistic stillness
For: living covers, moodboards, gentle stories **Level 2 — Soft Motion**
gentle, soft, slow, slight, calm, natural, ambient
For: portraits, lifestyle, B-roll **Level 3 — Moderate**
smooth motion, steady movement, cinematic, flowing, moderate
For: product videos, tutorials, standard content **Level 4 — High Energy**
dynamic, fast, energetic, dramatic, intense, powerful
For: hooks, reveals, teasers **Level 5 — Maximum**
explosive, extreme, chaotic, rapid, shatter, impact, blast
For: wow moments, effects, first seconds
[](https://www.recraft.ai/docs/recraft-studio/video-generation/video-prompts#-modifiers-%E2%80%94-add-to-any-prompt)
🔧 Modifiers — Add to Any Prompt
---------------------------------------------------------------------------------------------------------------------------------------------------------
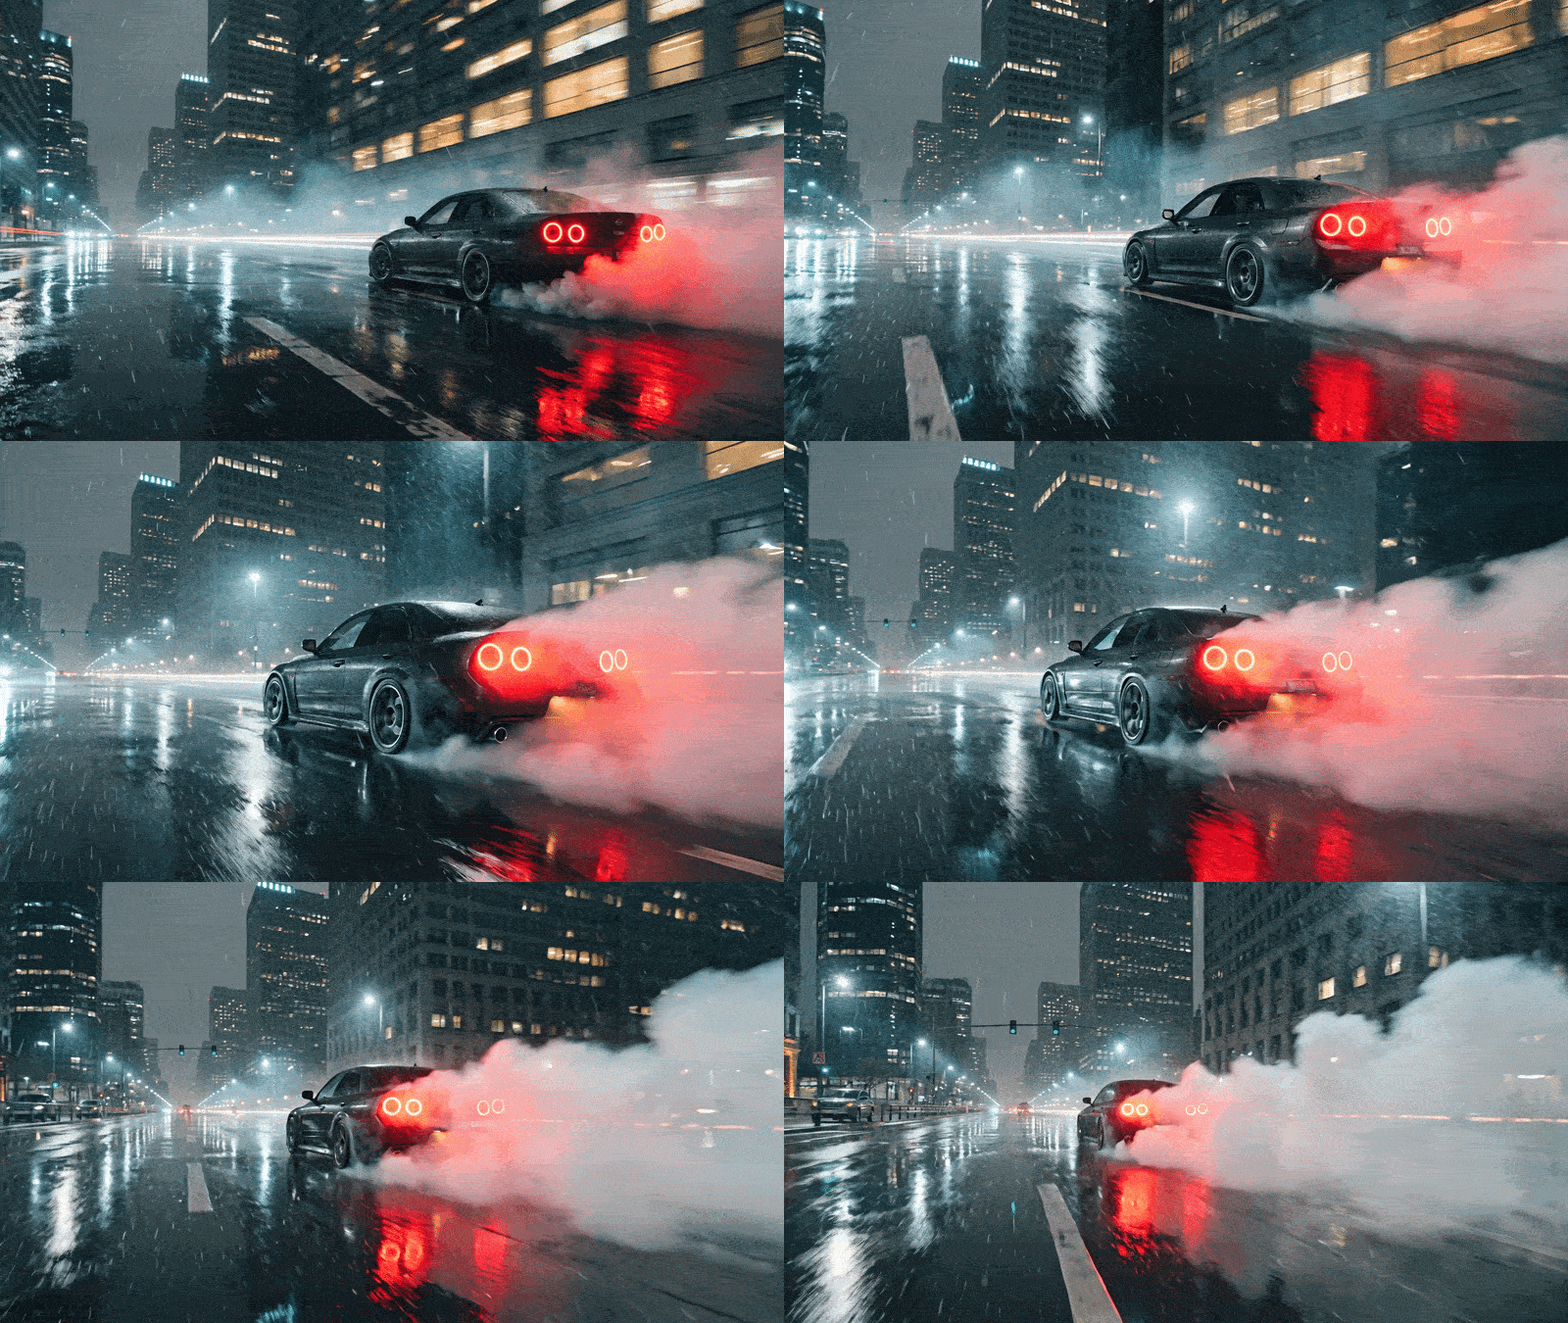
**Slow everything down, more detail**
slow motion
**Remove jitter, cleaner motion**
smooth and steady movement
**Blurred background, subject focus**
shallow depth of field
**Dramatic light with contrast**
cinematic lighting
**Push for higher quality**
4K, high detail
**Realistic physics**
natural and realistic motion
**Less movement = fewer artifacts**
subtle and minimal movement
**Perfect loop with no visible cut**
loopable, seamless loop
[](https://www.recraft.ai/docs/recraft-studio/video-generation/video-prompts#-what-not-to-do)
⛔ What NOT to Do
------------------------------------------------------------------------------------------------------------------
**❌ Don’t write essays** — 1–2 sentences max. Longer prompts confuse the model. **❌ Don’t stack actions** — “Person walks, turns, picks up cup, sits” = bad. One action per prompt. **❌ Don’t describe what’s already visible** — The model sees your image. Describe what should _change_. **❌ Don’t contradict yourself** — “Slow calm + explosive motion” = the model doesn’t know what to pick. **❌ Don’t be vague** — “Make it cinematic” = nothing. “Slow dolly-in, shallow depth of field” = works.
[](https://www.recraft.ai/docs/recraft-studio/video-generation/video-prompts#-pro-tips)
💡 Pro Tips
-------------------------------------------------------------------------------------------------------
1. **Simpler = better.** 1–3 sentences max.
2. **One prompt = one action.** Generate multiple clips instead of stacking.
3. **Describe the change, not the scene.** The model already sees your image.
4. **Modifiers go at the end**, not the beginning.
5. **Combine categories:** camera + atmosphere + modifier = strongest results.
6. **Start subtle, then scale up.** Level 2 first, push to 4 if needed.
[](https://www.recraft.ai/docs/recraft-studio/video-generation/video-prompts#-try-these-prompts-inside-recraft-studio)
🚀 Try These Prompts Inside Recraft Studio
=====================================================================================================================================================================
Stop scrolling. Start creating. Every prompt on this page works directly inside Recraft’s canvas — select any image, open the video tool, paste a prompt, and watch it come to life.
[How To Generate A Video](https://www.recraft.ai/docs/recraft-studio/video-generation/how-to-generate-a-video)
[Editing images with natural language](https://www.recraft.ai/docs/recraft-studio/image-editing/editing-images-with-natural-language)
⌘I
Assistant
Responses are generated using AI and may contain mistakes.
---
# Context panel - Recraft
> Documentation Index
> -------------------
>
> Fetch the complete documentation index at: [/docs/llms.txt](https://www.recraft.ai/docs/llms.txt)
>
> Use this file to discover all available pages before exploring further.
[Skip to main content](https://www.recraft.ai/docs/recraft-studio/image-generation/context-panel#content-area)
The context panel surfaces actions and properties for the current selection on the [canvas](https://www.recraft.ai/docs/recraft-studio/work-area/canvas)
. It changes dynamically based on what is selected and provides a focused place to inspect, modify, and act on one or more objects. The context panel is selection-driven. It appears only when at least one object is selected on the canvas and updates automatically as the selection changes.
[](https://www.recraft.ai/docs/recraft-studio/image-generation/context-panel#what-the-context-panel-is-responsible-for)
What the context panel is responsible for
---------------------------------------------------------------------------------------------------------------------------------------------------------------------
The context panel handles object-specific and batch actions, including:
* displaying properties for the current selection, such as dimensions and metadata
* exposing actions that apply to the selected object or objects
* enabling batch operations when multiple objects are selected
* providing access to export and arrangement controls
It does not create new content or interpret natural language instructions. Those actions are handled by the [prompt panel](https://www.recraft.ai/docs/recraft-studio/image-generation/prompt-panel)
.
[](https://www.recraft.ai/docs/recraft-studio/image-generation/context-panel#context-panel-states)
Context panel states
---------------------------------------------------------------------------------------------------------------------------
The context panel adapts based on selection state and object type. Available actions vary depending on whether a single object or multiple objects are selected, and on the types of objects in the selection. **Single object selected** When a single image or object is selected, the context panel shows properties and actions specific to that object. This may include:
* object dimensions (width and height in pixels)
* prompt and generation-related metadata (when applicable)
* object-specific actions such as export, background removal, vectorization, or upscaling
This state is used for inspecting and acting on individual elements. **Multiple objects selected** When multiple objects are selected, the context panel switches to batch actions. The set of available actions depends on the types of objects selected. For standard images, batch actions may include:
* running the same prompts across all selected images
* background removal
* vectorization
* crisp or creative upscaling
* merging layers
* exporting selected images
For other object types, such as mockups, fewer batch actions may be available. In these cases, the context panel typically includes:
* merge layers
* arrange
* export
In all multi-selection cases, an **Arrange** control is available. This control allows you to group and rearrange selected objects along a horizontal or vertical plane.
###
[](https://www.recraft.ai/docs/recraft-studio/image-generation/context-panel#actions-for-a-single-selected-object)
Actions for a single selected object
When a single image or object is selected, the context panel may include the following actions:
* **Reuse in a new image**: Use the selected image’s prompt and generation settings as a starting point for creating a new image.
* **Generate Remix**: Create multiple variations of the selected image while preserving its overall structure. View [Remix](https://www.recraft.ai/docs/recraft-studio/image-editing/remix)
.
* **Remove background**: Automatically remove the background from the selected image. View [Remove background](https://www.recraft.ai/docs/recraft-studio/image-editing/background-tools#remove-background)
.
* **Change background**: Replace the background using natural language instructions. View [Change background](https://www.recraft.ai/docs/recraft-studio/image-editing/background-tools#change-background)
.
* **Edit area**: Apply natural language editing to a specific region of the image. View [Edit area](https://www.recraft.ai/docs/recraft-studio/image-editing/manual-editing-tools#edit-area)
.
* **Extract prompt**: Retrieve the prompt and settings used to generate the image for reuse or refinement. View [Extract prompt](https://www.recraft.ai/docs/recraft-studio/image-generation/working-with-text-and-prompts/extract-prompt)
.
* **Use in mockup**: Place the selected image into a mockup for product or scene visualization. View [Mockups](https://www.recraft.ai/docs/recraft-studio/mockups/how-to-create-a-mockup)
.
* **Vectorize**: Convert the selected raster image into an editable vector format. View [Vectorizing](https://www.recraft.ai/docs/recraft-studio/format-conversions-and-scaling/vectorizing)
.
* **Crisp upscale**: Increase image resolution while preserving structure and detail. View [Upscaling](https://www.recraft.ai/docs/recraft-studio/image-editing/format-conversions-and-scaling/upscaling)
.
* **Creative upscale**: Increase image resolution while enhancing details and textures. View [Upscaling](https://www.recraft.ai/docs/recraft-studio/format-conversions-and-scaling/upscaling)
.
* **Adjust colors**: Modify the color palette of the selected image. View [Color palettes](https://www.recraft.ai/docs/recraft-studio/color-palettes/using-color-palettes-in-generation)
.
* **Export**: Export the selected object in supported formats. View [How to export an image](https://www.recraft.ai/docs/recraft-studio/exporting-and-sharing/how-to-export-an-image)
.
###
[](https://www.recraft.ai/docs/recraft-studio/image-generation/context-panel#actions-for-multiple-selected-objects)
Actions for multiple selected objects
When multiple objects are selected, the context panel provides batch actions, including:
* **Align**: Align selected objects to an edge (left, right, top, bottom, center).
* **Arrange**: Adjust the relative ordering of selected objects as a group.
* **Merge objects**: Combine selected objects into a single image.
* **Export**: Export all selected objects together. View [How to export an image](https://www.recraft.ai/docs/recraft-studio/exporting-and-sharing/how-to-export-an-image)
.
[Prompt panel](https://www.recraft.ai/docs/recraft-studio/image-generation/prompt-panel)
[Aspect ratios](https://www.recraft.ai/docs/recraft-studio/image-generation/aspect-ratios)
⌘I
Assistant
Responses are generated using AI and may contain mistakes.
---
# Unknown
\# Recraft ## Docs - \[Appendix\](https://www.recraft.ai/docs/api-reference/appendix.md) - \[Endpoints\](https://www.recraft.ai/docs/api-reference/endpoints.md) - \[Examples\](https://www.recraft.ai/docs/api-reference/examples.md) - \[Getting started\](https://www.recraft.ai/docs/api-reference/getting-started.md) - \[Pricing\](https://www.recraft.ai/docs/api-reference/pricing.md) - \[Styles\](https://www.recraft.ai/docs/api-reference/styles.md) - \[Swagger\](https://www.recraft.ai/docs/api-reference/swagger.md) - \[Character consistency\](https://www.recraft.ai/docs/best-practices/character-consistency.md) - \[Prompting and image generation\](https://www.recraft.ai/docs/best-practices/prompting-and-image-generation.md) - \[Introduction\](https://www.recraft.ai/docs/index.md): Welcome to one of the world's top ranked AI image tools for designers. - \[Getting started\](https://www.recraft.ai/docs/mcp-reference/getting-started.md) - \[Local MCP Server\](https://www.recraft.ai/docs/mcp-reference/local-server.md) - \[Remote MCP server\](https://www.recraft.ai/docs/mcp-reference/remote-server.md): Connect to Recraft's hosted MCP server without any local installation - \[Tools\](https://www.recraft.ai/docs/mcp-reference/tools.md) - \[Mobile Apps\](https://www.recraft.ai/docs/mobile-apps.md) - \[Billing and invoices\](https://www.recraft.ai/docs/plans-and-billing/billing.md) - \[Commercial rights and ownership\](https://www.recraft.ai/docs/plans-and-billing/commercial-rights-and-ownership.md) - \[Credits\](https://www.recraft.ai/docs/plans-and-billing/credits.md) - \[Deleting an account\](https://www.recraft.ai/docs/plans-and-billing/deleting-an-account.md) - \[Free plan\](https://www.recraft.ai/docs/plans-and-billing/free-plan.md) - \[Paid plans\](https://www.recraft.ai/docs/plans-and-billing/paid-plans.md) - \[Upgrading and downgrading a plan\](https://www.recraft.ai/docs/plans-and-billing/upgrading-and-downgrading-a-plan.md) - \[Attributes\](https://www.recraft.ai/docs/prompt-engineering-guide/artistic-principles/attributes.md) - \[Medium\](https://www.recraft.ai/docs/prompt-engineering-guide/artistic-principles/medium.md) - \[Style\](https://www.recraft.ai/docs/prompt-engineering-guide/artistic-principles/style.md) - \[Vibe\](https://www.recraft.ai/docs/prompt-engineering-guide/artistic-principles/vibe.md) - \[Closing notes\](https://www.recraft.ai/docs/prompt-engineering-guide/closing-notes.md) - \[Composition\](https://www.recraft.ai/docs/prompt-engineering-guide/core-principles/composition.md) - \[Context\](https://www.recraft.ai/docs/prompt-engineering-guide/core-principles/context.md) - \[Subject\](https://www.recraft.ai/docs/prompt-engineering-guide/core-principles/subject.md) - \[Level of detail\](https://www.recraft.ai/docs/prompt-engineering-guide/depth-and-control/level-of-detail.md) - \[Prompting for image generation\](https://www.recraft.ai/docs/prompt-engineering-guide/introduction.md) - \[Universal prompt template\](https://www.recraft.ai/docs/prompt-engineering-guide/prompt-templates/universal.md) - \[Prompting with Recraft V4\](https://www.recraft.ai/docs/prompt-engineering-guide/prompting-with-recraft-v4.md) - \[Graphic design\](https://www.recraft.ai/docs/prompt-engineering-guide/visual-formats/graphic-design.md) - \[Illustration\](https://www.recraft.ai/docs/prompt-engineering-guide/visual-formats/illustration.md) - \[Logos and icons\](https://www.recraft.ai/docs/prompt-engineering-guide/visual-formats/logos-and-icons.md) - \[Photorealism\](https://www.recraft.ai/docs/prompt-engineering-guide/visual-formats/photorealism.md) - \[Vector art\](https://www.recraft.ai/docs/prompt-engineering-guide/visual-formats/vector-art.md) - \[Choosing a model\](https://www.recraft.ai/docs/recraft-models/choosing-a-model.md) - \[External Models in Recraft\](https://www.recraft.ai/docs/recraft-models/external-models.md) - \[Recraft V2\](https://www.recraft.ai/docs/recraft-models/recraft-V2.md) - \[Recraft V3\](https://www.recraft.ai/docs/recraft-models/recraft-V3.md) - \[Recraft V4\](https://www.recraft.ai/docs/recraft-models/recraft-V4.md) - \[Recraft V4.1\](https://www.recraft.ai/docs/recraft-models/recraft-v4-1.md) - \[Recraft Plugins\](https://www.recraft.ai/docs/recraft-plugins.md) - \[How to create a color palette\](https://www.recraft.ai/docs/recraft-studio/color-palettes/how-to-create-a-color-palette.md) - \[Recoloring existing images\](https://www.recraft.ai/docs/recraft-studio/color-palettes/recoloring-existing-images.md) - \[Using color palettes in generation\](https://www.recraft.ai/docs/recraft-studio/color-palettes/using-color-palettes-in-generation.md) - \[How to export an image\](https://www.recraft.ai/docs/recraft-studio/exporting-and-sharing/how-to-export-an-image.md) - \[How to share a project\](https://www.recraft.ai/docs/recraft-studio/exporting-and-sharing/how-to-share-a-project.md) - \[How to share an image\](https://www.recraft.ai/docs/recraft-studio/exporting-and-sharing/how-to-share-an-image.md) - \[Upscaling\](https://www.recraft.ai/docs/recraft-studio/format-conversions-and-scaling/upscaling.md) - \[Vectorizing\](https://www.recraft.ai/docs/recraft-studio/format-conversions-and-scaling/vectorizing.md) - \[Inpainting\](https://www.recraft.ai/docs/recraft-studio/frames/inpainting.md) - \[Introduction to frames\](https://www.recraft.ai/docs/recraft-studio/frames/introduction-to-frames.md) - \[Outpainting\](https://www.recraft.ai/docs/recraft-studio/frames/outpainting.md) - \[History\](https://www.recraft.ai/docs/recraft-studio/history.md) - \[Background tools\](https://www.recraft.ai/docs/recraft-studio/image-editing/background-tools.md) - \[Editing images with natural language\](https://www.recraft.ai/docs/recraft-studio/image-editing/editing-images-with-natural-language.md) - \[How to crop an image\](https://www.recraft.ai/docs/recraft-studio/image-editing/how-to-crop-an-image.md) - \[Manual editing tools\](https://www.recraft.ai/docs/recraft-studio/image-editing/manual-editing-tools.md) - \[Raster effects\](https://www.recraft.ai/docs/recraft-studio/image-editing/raster-effects.md) - \[Remix\](https://www.recraft.ai/docs/recraft-studio/image-editing/remix.md) - \[Agentic mode\](https://www.recraft.ai/docs/recraft-studio/image-generation/agentic-mode.md) - \[Artistic levels\](https://www.recraft.ai/docs/recraft-studio/image-generation/artistic-levels.md) - \[Aspect ratios\](https://www.recraft.ai/docs/recraft-studio/image-generation/aspect-ratios.md) - \[Context panel\](https://www.recraft.ai/docs/recraft-studio/image-generation/context-panel.md) - \[Exploration Mode\](https://www.recraft.ai/docs/recraft-studio/image-generation/exploration-mode.md) - \[External models\](https://www.recraft.ai/docs/recraft-studio/image-generation/external-models.md) - \[Generating multiple images\](https://www.recraft.ai/docs/recraft-studio/image-generation/generating-multiple-images.md) - \[Generation modes\](https://www.recraft.ai/docs/recraft-studio/image-generation/generation-modes.md) - \[How to generate a logo\](https://www.recraft.ai/docs/recraft-studio/image-generation/how-to-generate-a-logo.md) - \[How to generate an image\](https://www.recraft.ai/docs/recraft-studio/image-generation/how-to-generate-an-image.md) - \[Prompt panel\](https://www.recraft.ai/docs/recraft-studio/image-generation/prompt-panel.md) - \[Selecting a style\](https://www.recraft.ai/docs/recraft-studio/image-generation/selecting-a-style.md) - \[Adding text to an image\](https://www.recraft.ai/docs/recraft-studio/image-generation/working-with-text-and-prompts/adding-text-to-an-image.md) - \[Extract prompt\](https://www.recraft.ai/docs/recraft-studio/image-generation/working-with-text-and-prompts/extract-prompt.md) - \[Negative prompts\](https://www.recraft.ai/docs/recraft-studio/image-generation/working-with-text-and-prompts/negative-prompts.md) - \[Using custom fonts\](https://www.recraft.ai/docs/recraft-studio/image-generation/working-with-text-and-prompts/using-custom-fonts.md) - \[About importing\](https://www.recraft.ai/docs/recraft-studio/importing/about-importing.md) - \[How to import an image\](https://www.recraft.ai/docs/recraft-studio/importing/how-to-import-an-image.md) - \[Size limits and supported formats of imported images\](https://www.recraft.ai/docs/recraft-studio/importing/size-limits-and-supported-formats.md) - \[Interface language\](https://www.recraft.ai/docs/recraft-studio/interface-language.md) - \[Interface overview\](https://www.recraft.ai/docs/recraft-studio/interface-overview.md) - \[Community\](https://www.recraft.ai/docs/recraft-studio/libraries/community.md) - \[Favorites\](https://www.recraft.ai/docs/recraft-studio/libraries/favorites.md) - \[Applying your design to the mockup\](https://www.recraft.ai/docs/recraft-studio/mockups/applying-your-design-to-a-mockup.md) - \[How to create a mockup\](https://www.recraft.ai/docs/recraft-studio/mockups/how-to-create-a-mockup.md) - \[Overview\](https://www.recraft.ai/docs/recraft-studio/overview.md): Recraft Studio is a creative platform powered by top frontier image models, including Recraft, Nano Banana, and others. - \[Quick start\](https://www.recraft.ai/docs/recraft-studio/quick-start.md) - \[Curated styles\](https://www.recraft.ai/docs/recraft-studio/styles/curated-styles.md) - \[How to create a custom style\](https://www.recraft.ai/docs/recraft-studio/styles/custom-styles/how-to-create-a-custom-style.md) - \[How to delete a custom style\](https://www.recraft.ai/docs/recraft-studio/styles/custom-styles/how-to-delete-a-custom-style.md) - \[How to edit a custom style\](https://www.recraft.ai/docs/recraft-studio/styles/custom-styles/how-to-edit-a-custom-style.md) - \[Overview\](https://www.recraft.ai/docs/recraft-studio/styles/overview.md) - \[Seamless patterns\](https://www.recraft.ai/docs/recraft-studio/styles/seamless-patterns.md) - \[Sharing a style\](https://www.recraft.ai/docs/recraft-studio/styles/sharing-a-style.md) - \[Templates\](https://www.recraft.ai/docs/recraft-studio/templates.md) - \[How To Generate A Video\](https://www.recraft.ai/docs/recraft-studio/video-generation/how-to-generate-a-video.md) - \[Video Prompts\](https://www.recraft.ai/docs/recraft-studio/video-generation/video-prompts.md) - \[Canvas\](https://www.recraft.ai/docs/recraft-studio/work-area/canvas.md) - \[Canvas tools\](https://www.recraft.ai/docs/recraft-studio/work-area/canvas-tools.md) - \[Keyboard shortcuts\](https://www.recraft.ai/docs/recraft-studio/work-area/keyboard-shortcuts.md) - \[Projects\](https://www.recraft.ai/docs/recraft-studio/work-area/projects.md) - \[Selection tools\](https://www.recraft.ai/docs/recraft-studio/work-area/selection-tools.md) - \[FAQ\](https://www.recraft.ai/docs/support-and-faq/FAQ.md) - \[Contacting support\](https://www.recraft.ai/docs/support-and-faq/contact-support.md) - \[Recraft on Discord\](https://www.recraft.ai/docs/support-and-faq/recraft-on-discord.md) - \[Reporting bugs\](https://www.recraft.ai/docs/support-and-faq/reporting-bugs.md) - \[Requesting a feature\](https://www.recraft.ai/docs/support-and-faq/requesting-a-feature.md) - \[Security and compliance\](https://www.recraft.ai/docs/support-and-faq/security-and-compliance.md) - \[Teams overview\](https://www.recraft.ai/docs/teams/teams-overview.md) - \[Teams workspace admin page\](https://www.recraft.ai/docs/teams/teams-workspace-admin.md) - \[Compliance and certifications\](https://www.recraft.ai/docs/trust-and-security/compliance-and-certifications.md) - \[Data protection and privacy\](https://www.recraft.ai/docs/trust-and-security/data-protection-and-privacy.md) - \[Data use and model training\](https://www.recraft.ai/docs/trust-and-security/data-use-and-model-training.md) - \[Legal and policy documents\](https://www.recraft.ai/docs/trust-and-security/legal-and-policy-documents.md) - \[Ownership\](https://www.recraft.ai/docs/trust-and-security/ownership.md) - \[Security\](https://www.recraft.ai/docs/trust-and-security/security.md)
---
# Introduction - Recraft
> Documentation Index
> -------------------
>
> Fetch the complete documentation index at: [/docs/llms.txt](https://www.recraft.ai/docs/llms.txt)
>
> Use this file to discover all available pages before exploring further.
[Skip to main content](https://www.recraft.ai/docs/index#content-area)
[](https://www.recraft.ai/docs/index#getting-started)
Getting started
-------------------------------------------------------------------------
Generate your first image with Recraft.
Create an image
---------------
Follow these simple steps to create an image.
[](https://www.recraft.ai/docs/index#explore-recraft%E2%80%99s-tools-and-features)
Explore Recraft’s tools and features
---------------------------------------------------------------------------------------------------------------------------
Design something amazing.
Editing
-------
Get better results with Recraft’s powerful editing features.
Styles
------
Apply a curated style or learn how to create your own to stay on-brand.
Mockups
-------
Create realisitc product mockups in minutes.
Colors and palettes
-------------------
Set up your own color swatches and palettes.
[](https://www.recraft.ai/docs/index#learn-about-plans-ownership-and-getting-help)
Learn about plans, ownership, and getting help
-------------------------------------------------------------------------------------------------------------------------------------
Everything you need for a meaningful experience.
Paid plans
----------
Learn what’s included with our paid plans.
Ownership and copyright
-----------------------
Understand your commercial rights and copyright for generated content.
Get help
--------
Contact support, report a bug, and request a feature.
FAQ
---
View most frequently asked questions.
[](https://www.recraft.ai/docs/index#lookign-for-inspiration)
Lookign for inspiration?
------------------------------------------------------------------------------------------
See exceptional AI-generated visuals
------------------------------------
Browse our community gallery to see what’s possible with Recraft.
[Recraft V4.1](https://www.recraft.ai/docs/recraft-models/recraft-v4-1)
⌘I
Assistant
Responses are generated using AI and may contain mistakes.
---